Alright!! =] Finally made some headway. I've been a bit anxious about rushing any one part of getting this engine installed before I finished certain necessary steps, but now I think I'm finally rolling with this. Of course I had to dress this Allison up a little nicer. I couldn't help myself. I knew I'd never get every single hose and tube in place at such a tiny scale (especially my first time attempting this) but after I found a beautifully pictured walkaround book on the P-40B/C...I just had to follow through. And I took a play out of lawdog's playbook and pulled my light box out to film with so these pictures come out better. But first I wanted share one trick I come up with for working this tiny. Obviously, some of the detail will be unseen...like origin and insertion points. So here's a photo of what I did when two or more lines were going to the same general location. The origin gets doubled over which helps to make a tab to anchor it down and allows you to accomplish more with less mess.
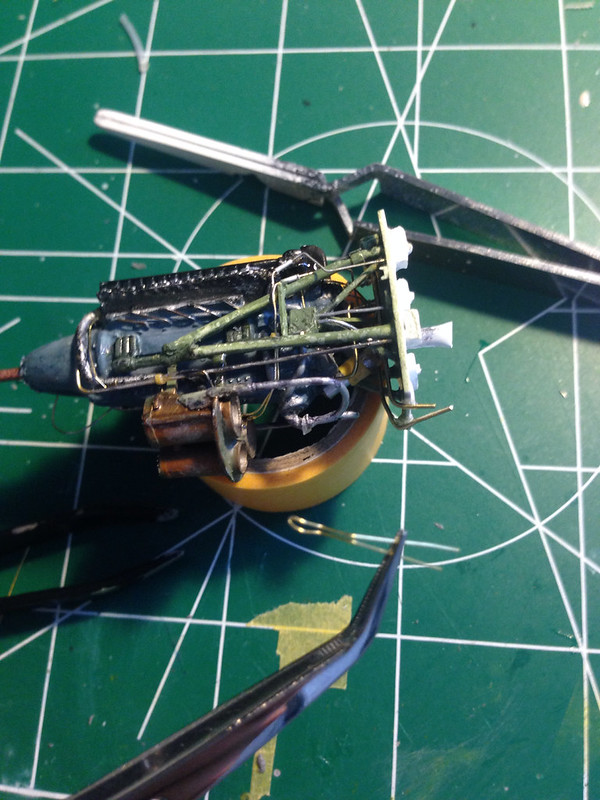 image by brittvallot, on Flickr
The other trick I used which I can't find a picture of now...was when two lines were next to each other running virtually parallel, I would make a similar tab as outlined above, but here I would hook it onto the the part already in place. Kind of like threading a needle but instead you're just dropping it onto (the "eye" is just a hook). This helps all this fiddly stuff to be a bit more sturdy. Hope some finds that useful.
Here's the Allison V-1710-33:
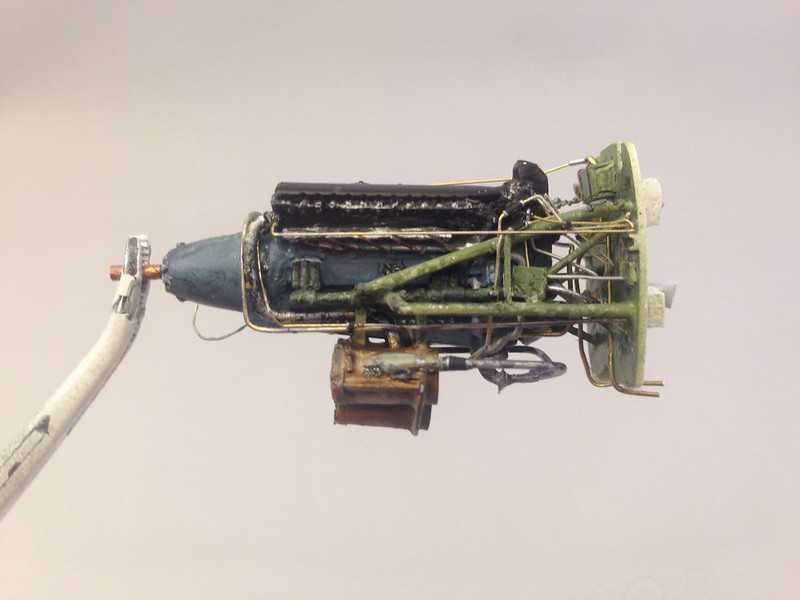 image by brittvallot, on Flickr
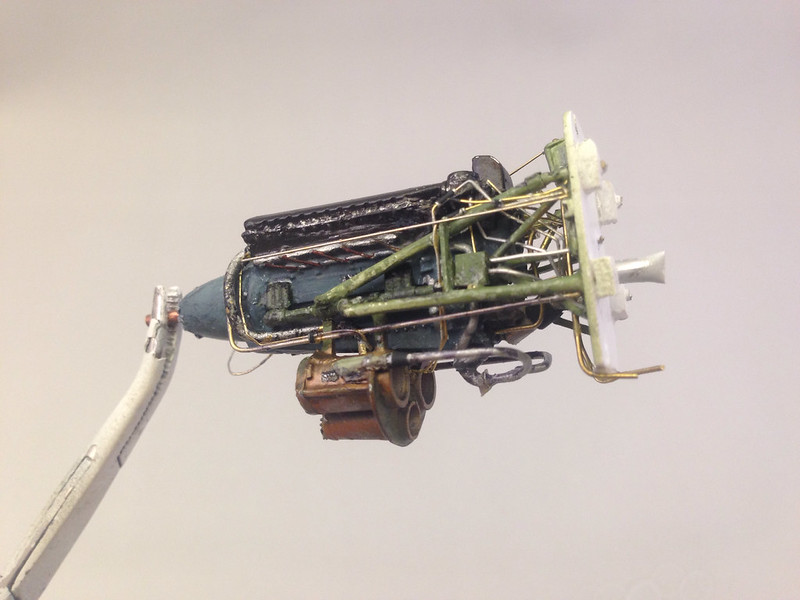 image by brittvallot, on Flickr
Here's a view of the coolant expansion tank/line and the linkage for the carb.
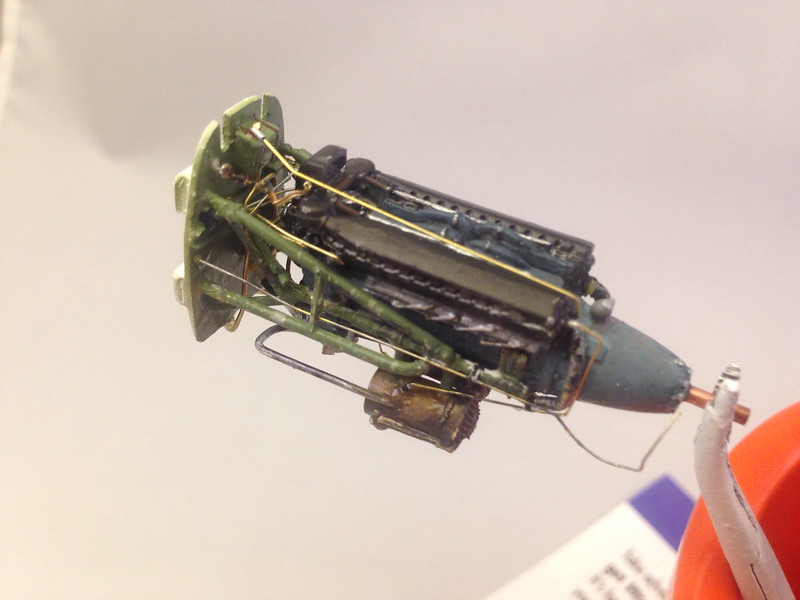 image by brittvallot, on Flickr
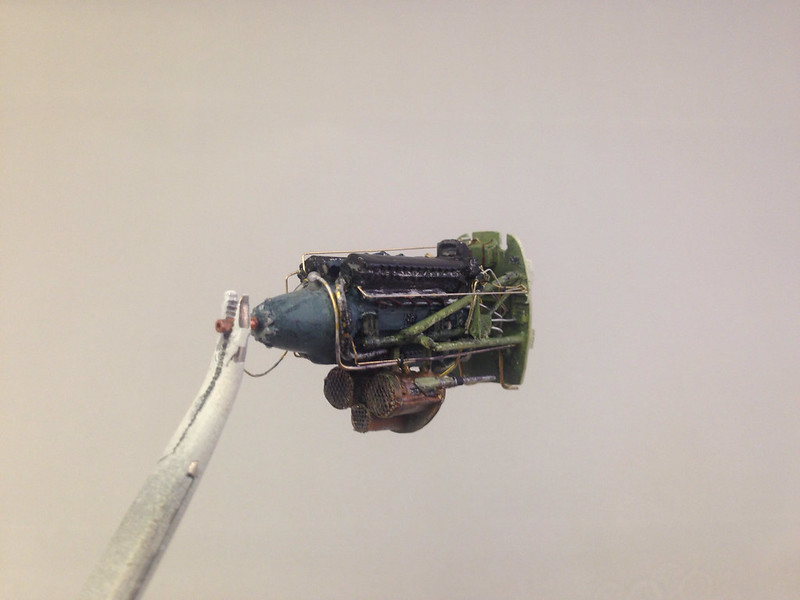 image by brittvallot, on Flickr
I touched up the paint here and there as needed. Weathered a bit more...and painted in some placards. I'm pretty happy with it. =]
When they say measure twice, cut once...holy sh!t my father would be so happy. =] Talk about a tight fit!! Had to be very careful placing this old girl in there as I have some of the fuselage already glued together. There is absolutely no play left in this engine area. Which I suppose is actually a good thing...everything should be snug and in it's place which makes me glad I triple checked the fitting every time I added a new major component to this Allison. So here it is:
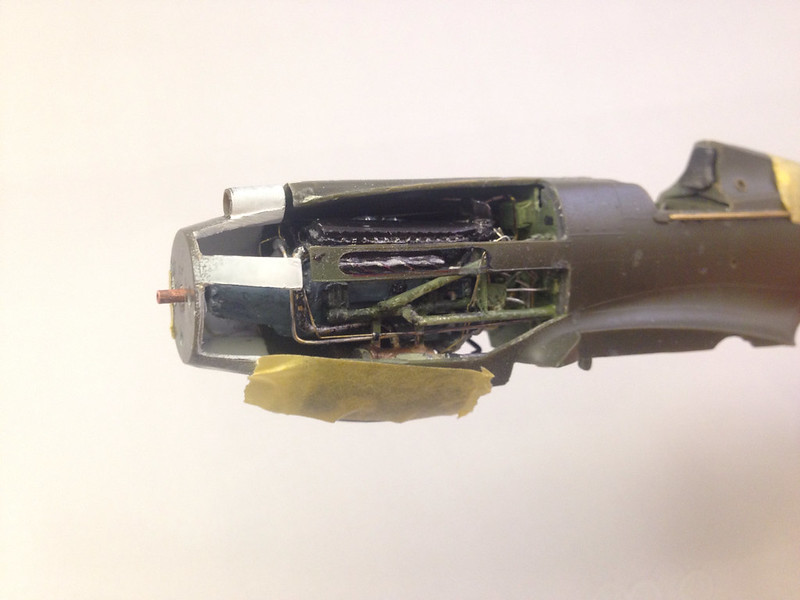 image by brittvallot, on Flickr
url=https://flic.kr/p/om1Eiu]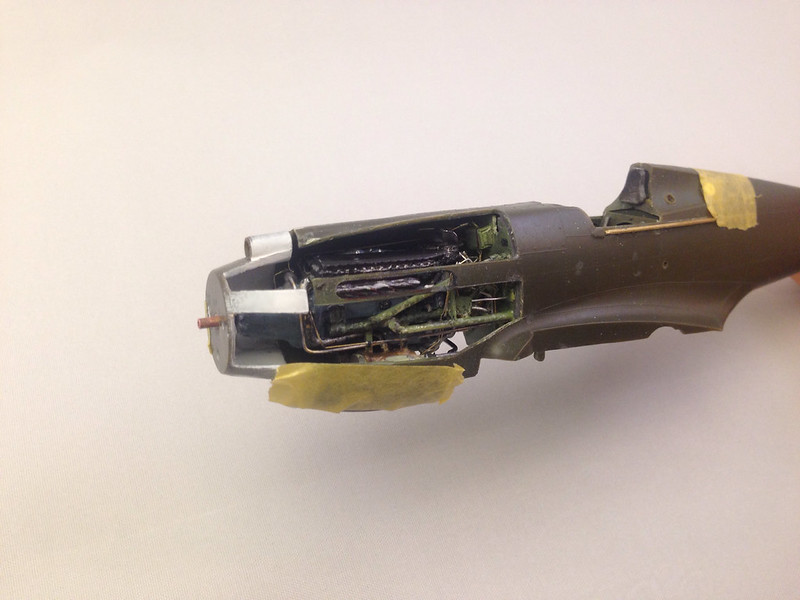 [/url]image by brittvallot, on Flickr
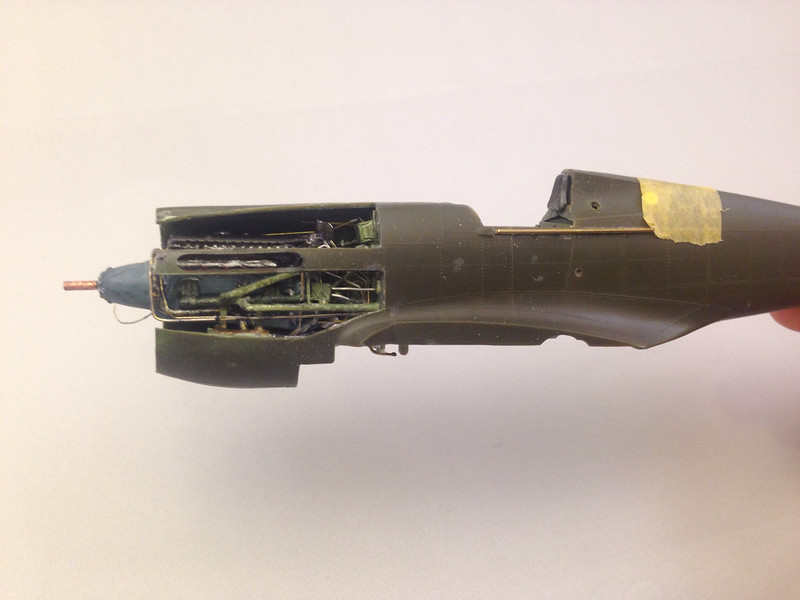 image by brittvallot, on Flickr
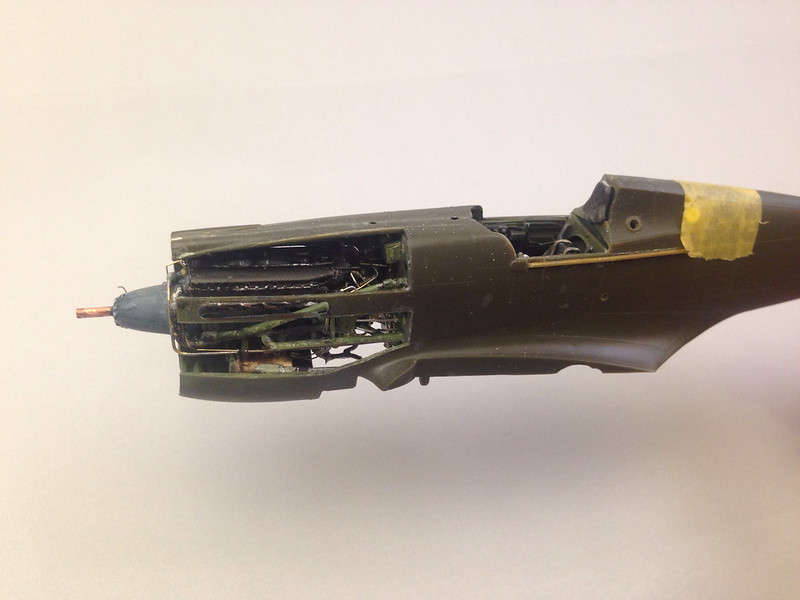 image by brittvallot, on Flickr
So that's that for now. I have the Dzus railing to put on next, the intake scoops, misc trimmings, and then solve the magnet problem, and then I can move on to fitting the wings to the fuselage. =]
Comments and suggests are always welcome. =]