SEARCH FINESCALE.COM

Enter keywords or a search phrase below:

Tamiya 1/48 BF109E-4 (Joachim Müncheberg) Diorama In Progress

5629 views
23 replies
1 rating 2 rating 3 rating 4 rating 5 rating
  • Member since
    May 2014
Tamiya 1/48 BF109E-4 (Joachim Müncheberg) Diorama In Progress
Posted by SubarooMike on Saturday, May 23, 2015 12:48 PM

Hello everyone!  

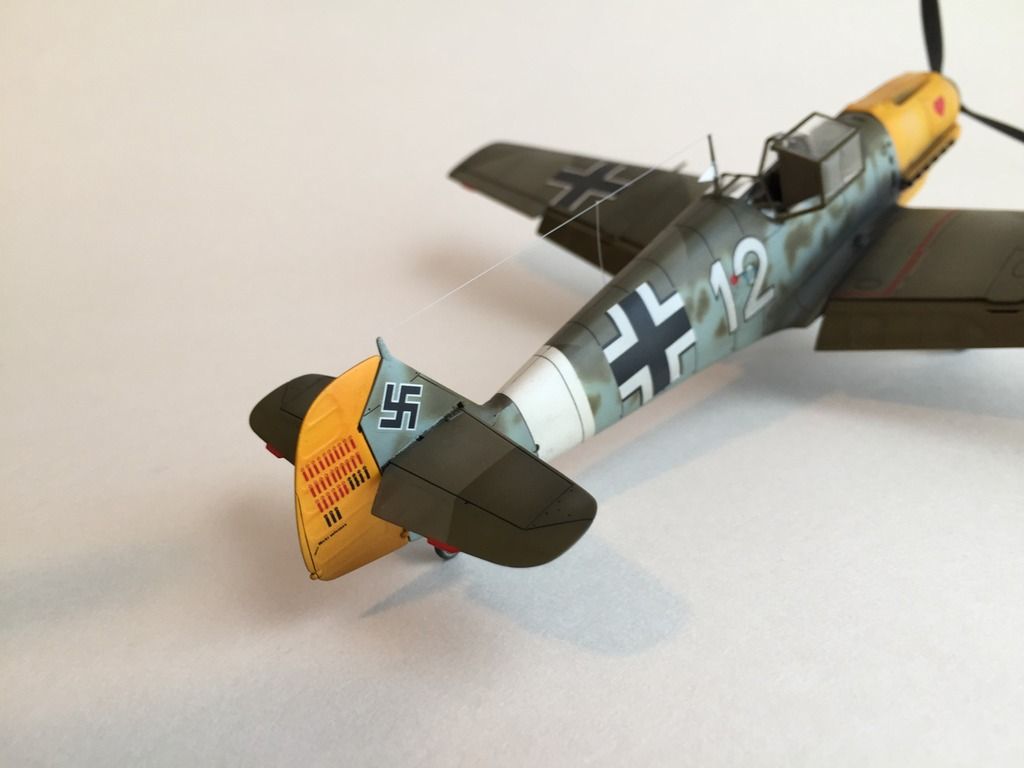
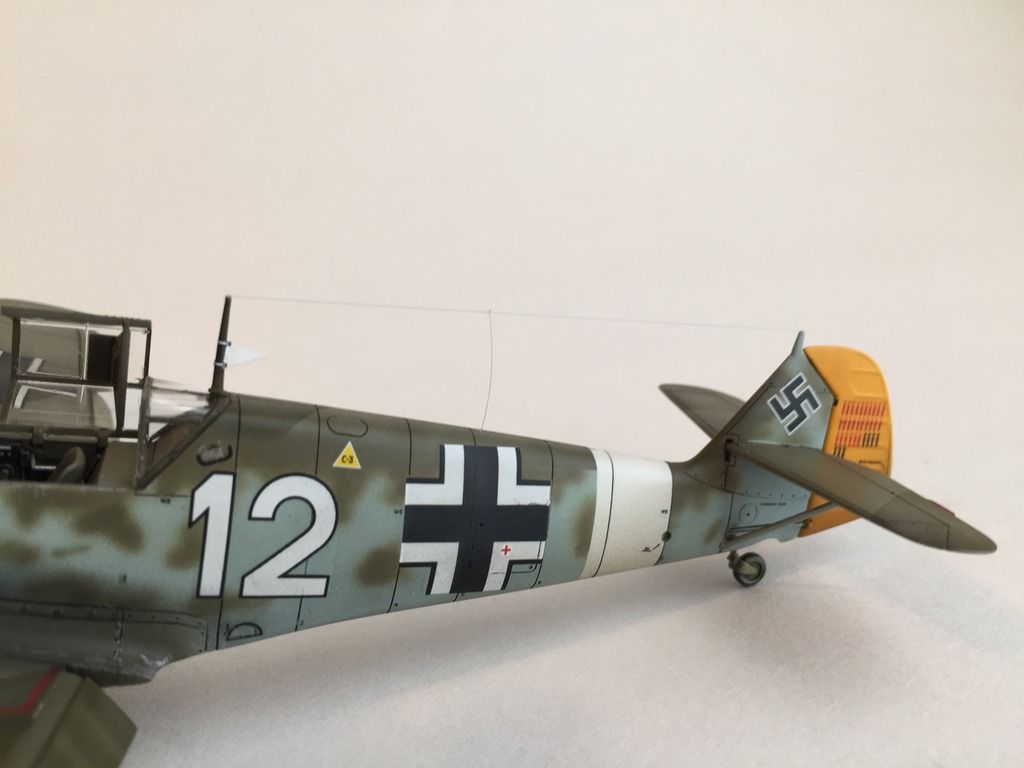
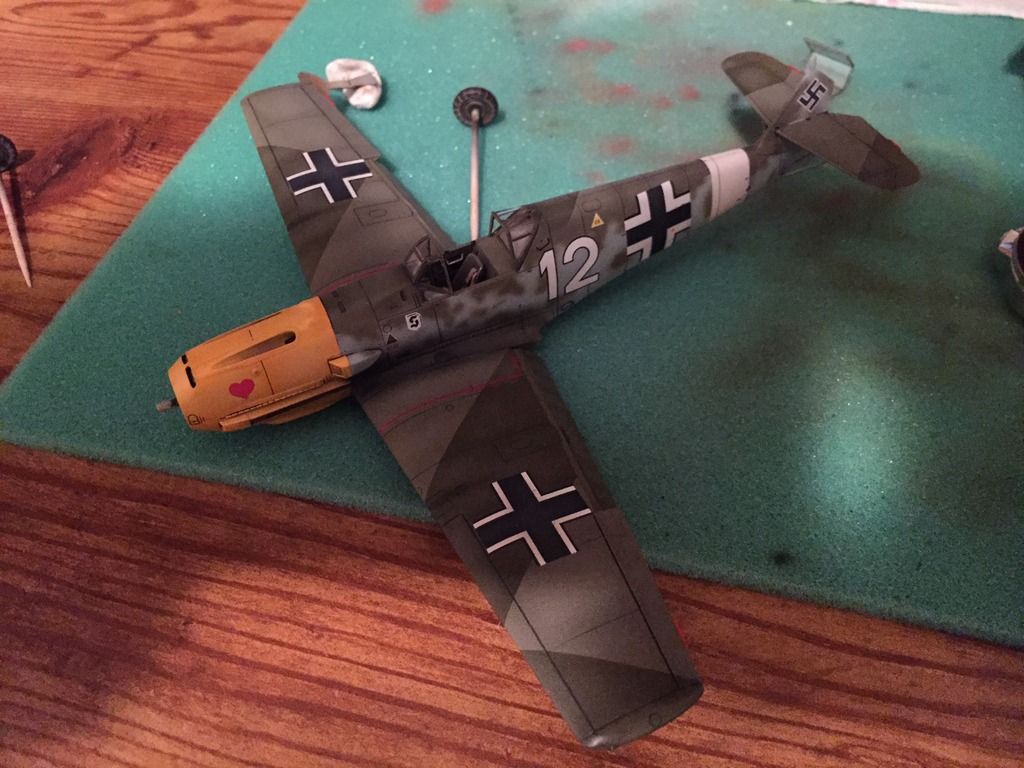
        For years I never share my R/C builds or plastic builds on any forums; but I figured it's time to start -- now at my ripe old age of 24!  When I started this diorama build, I did not have intent on posting it, so I don't really have any WIP pictures of the 109.  I will have WIP pictures of the Kubelwagen and the diorama base itself. 

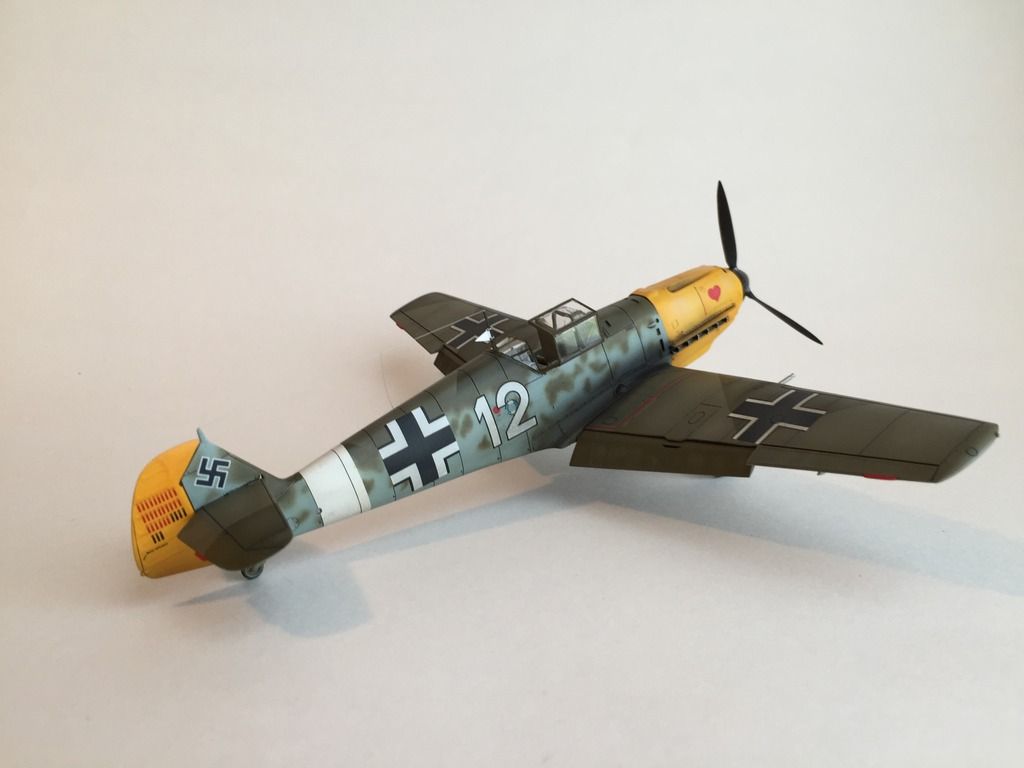
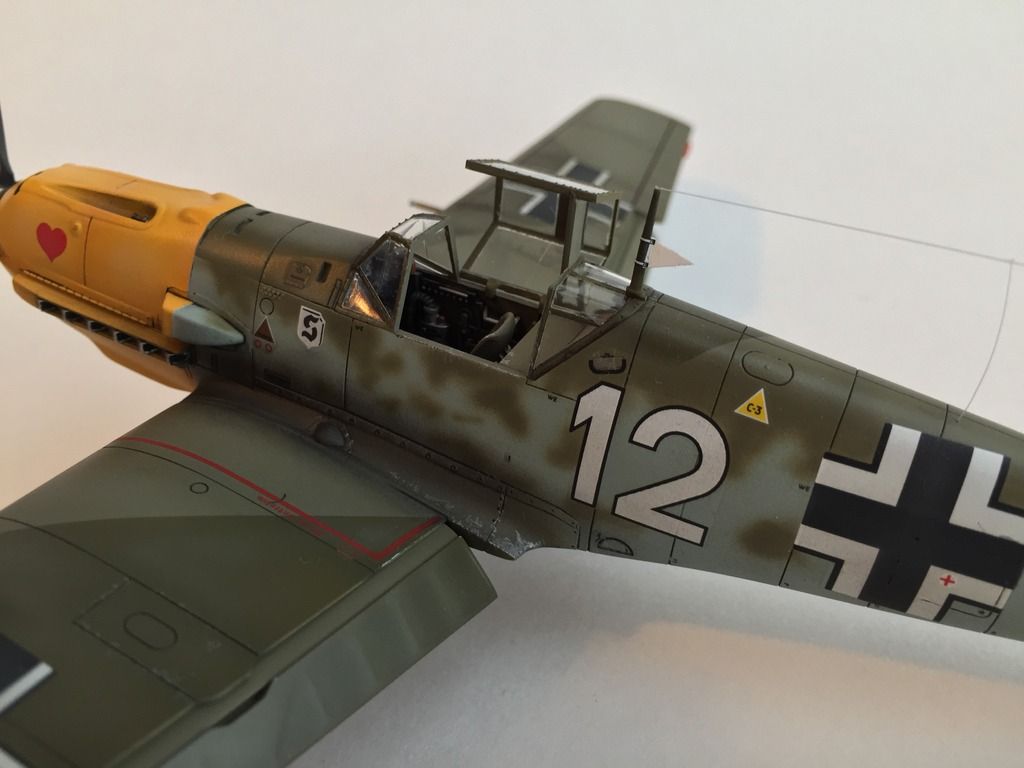
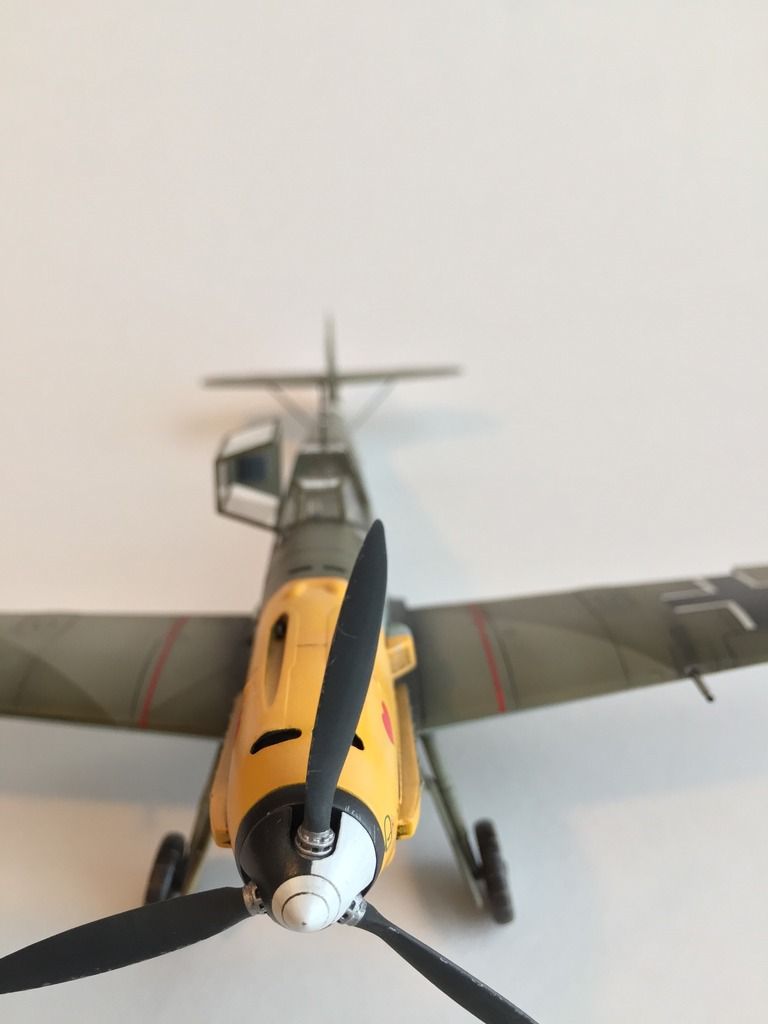
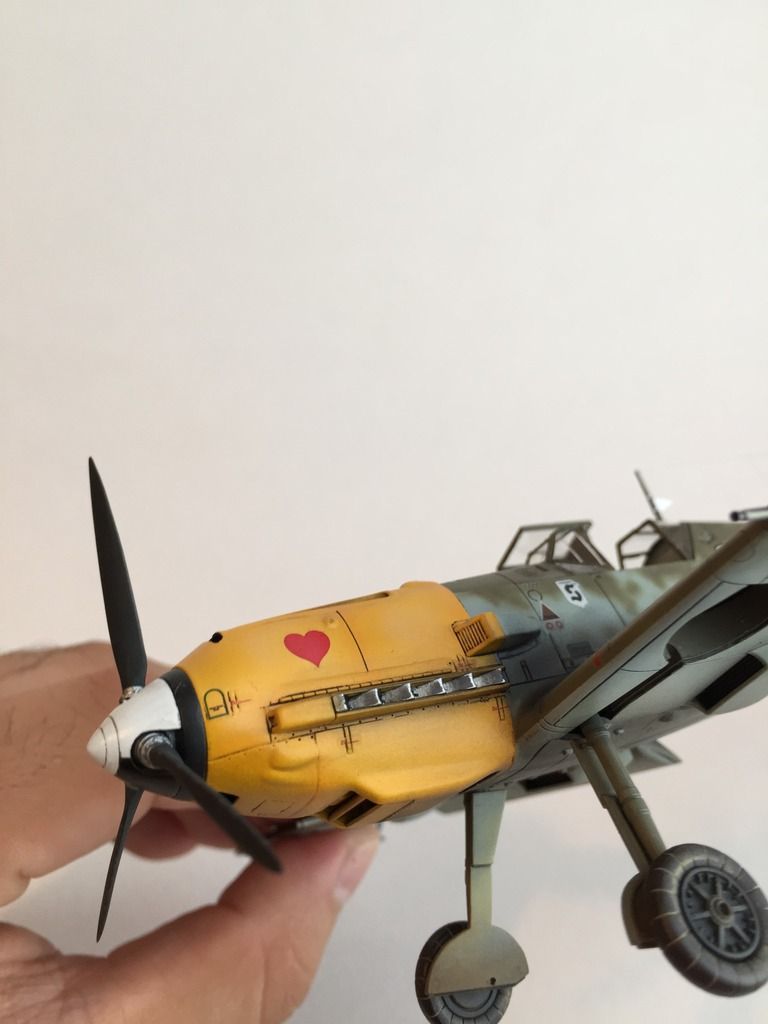
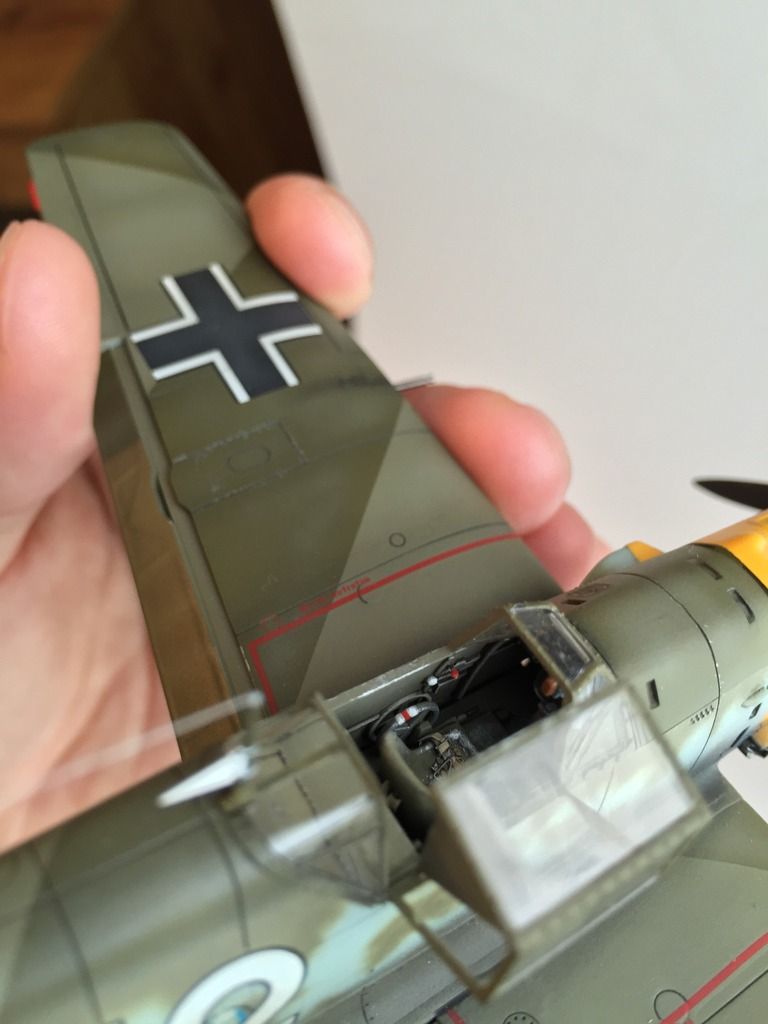
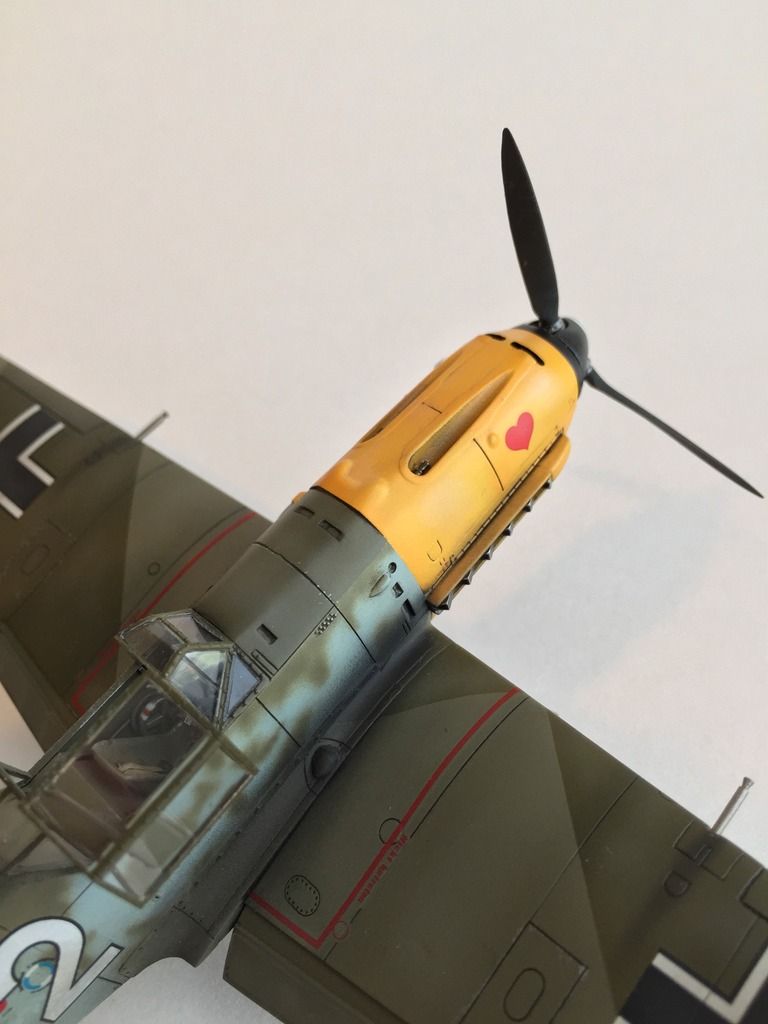
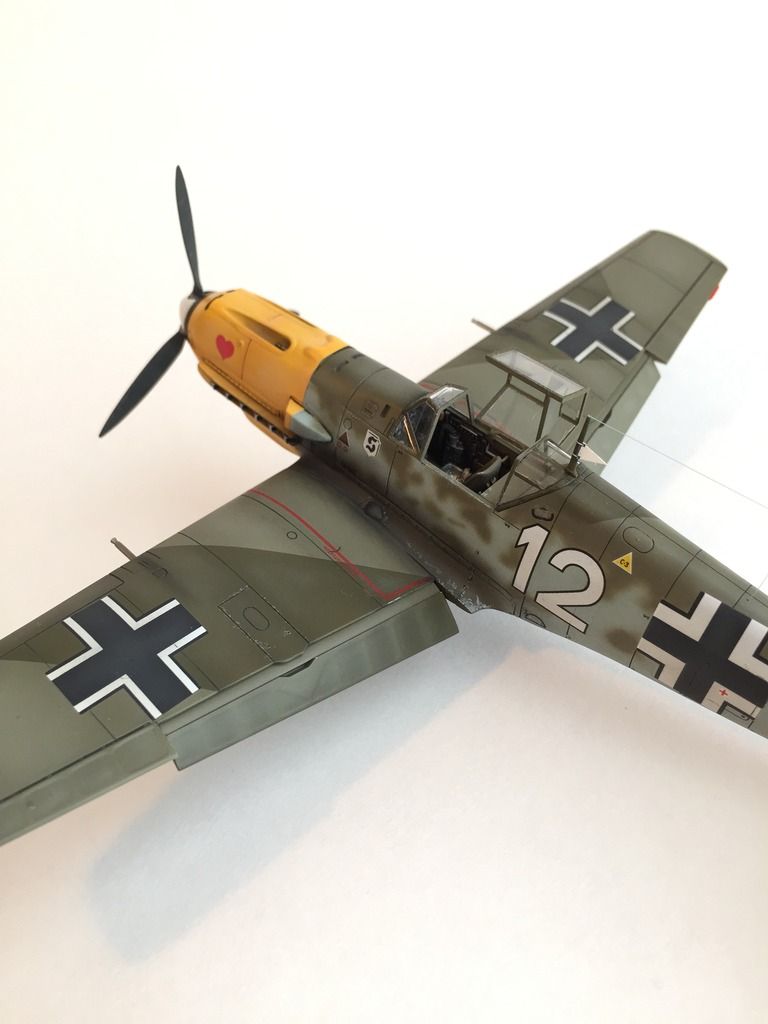
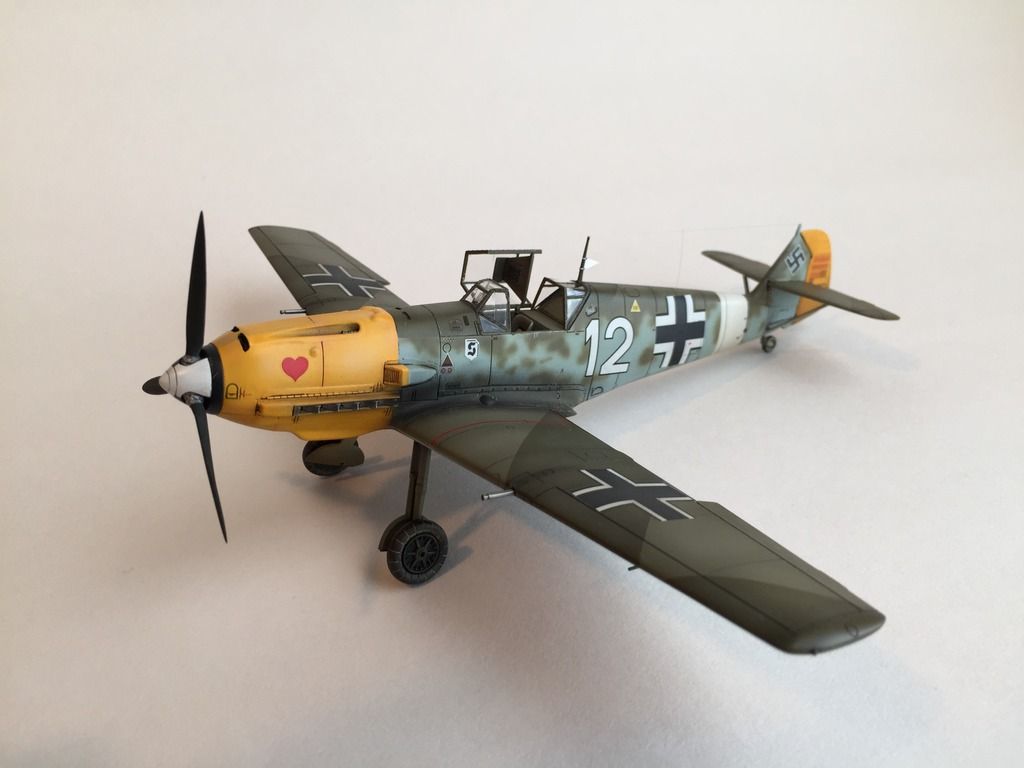
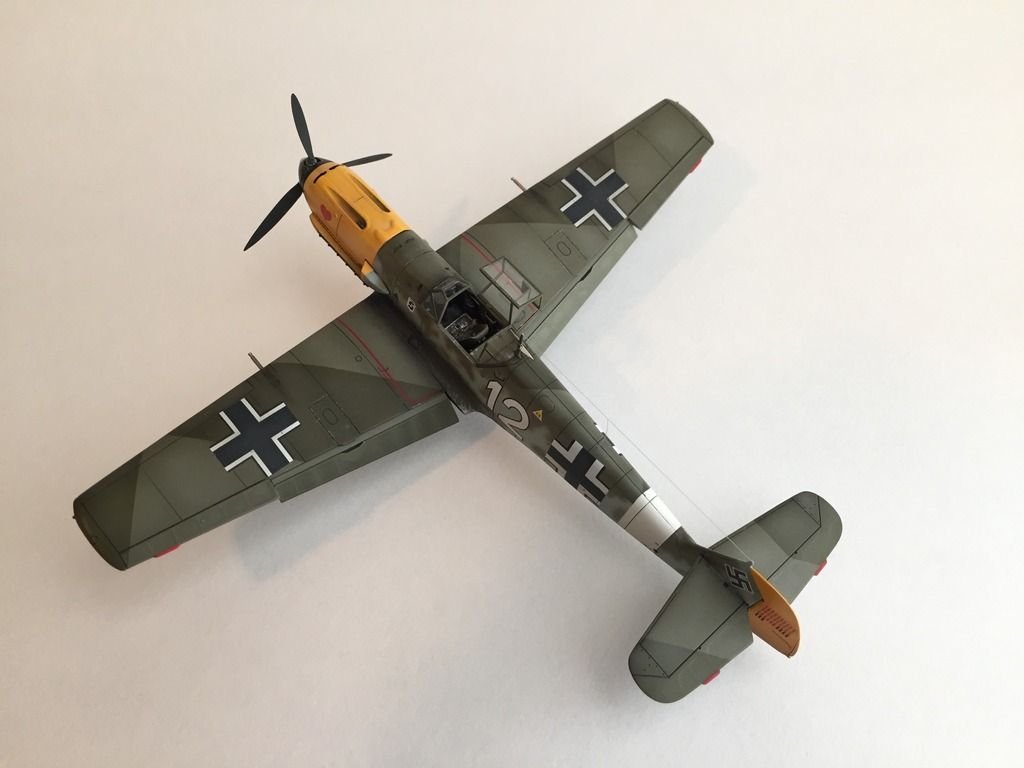
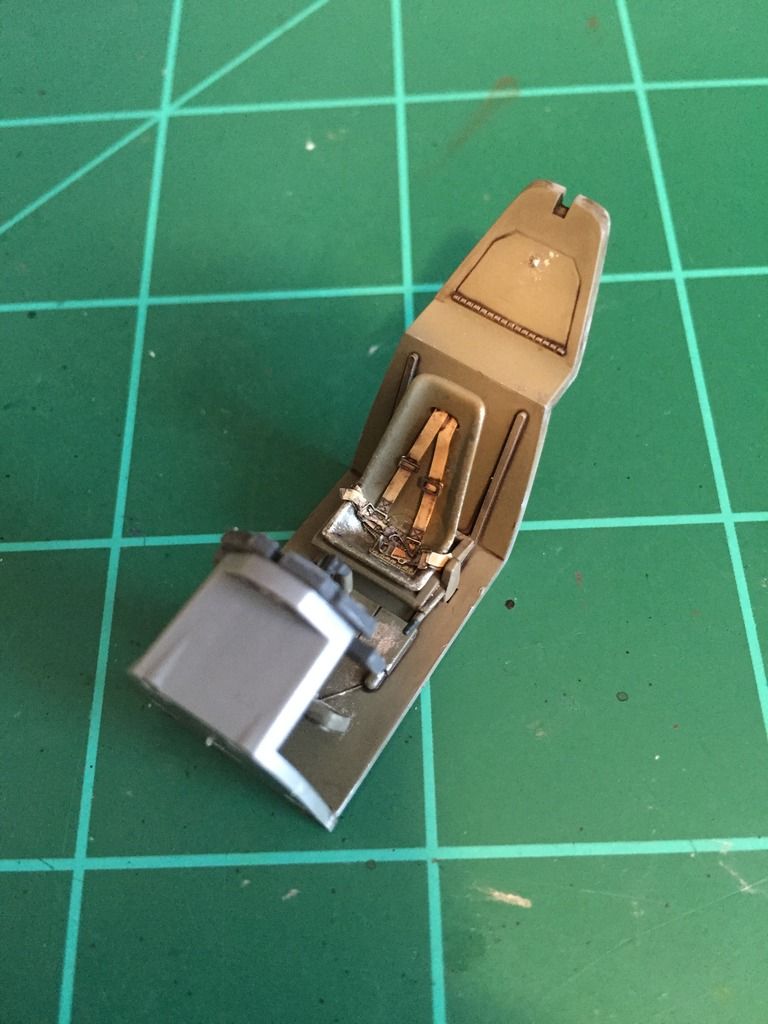
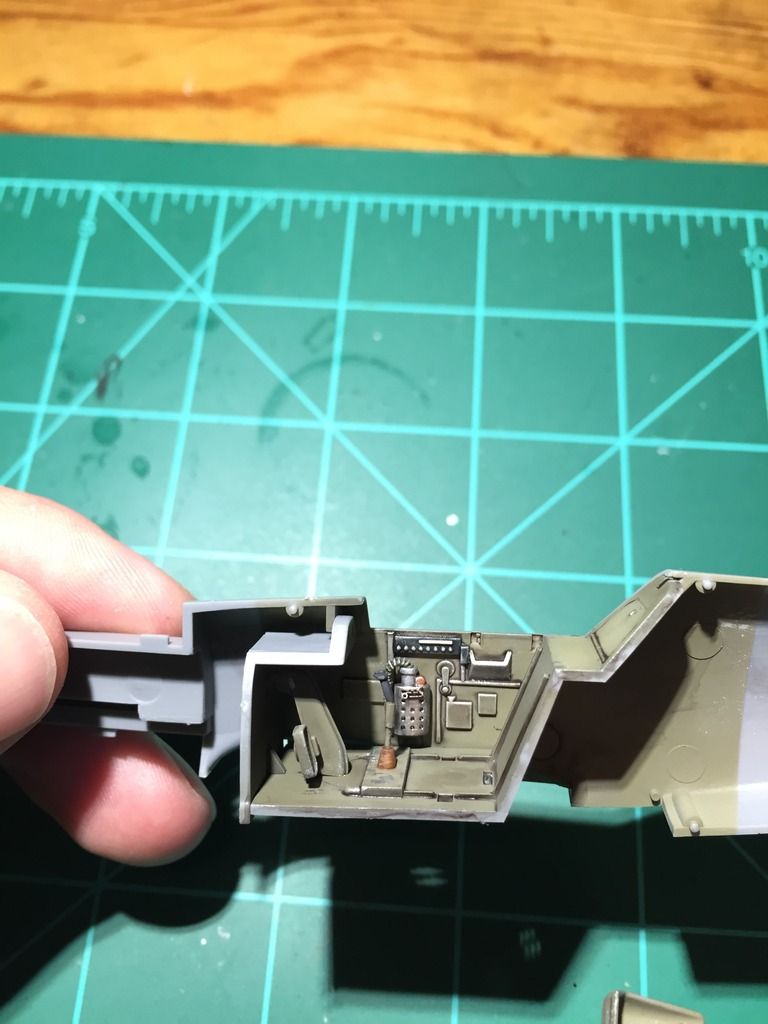
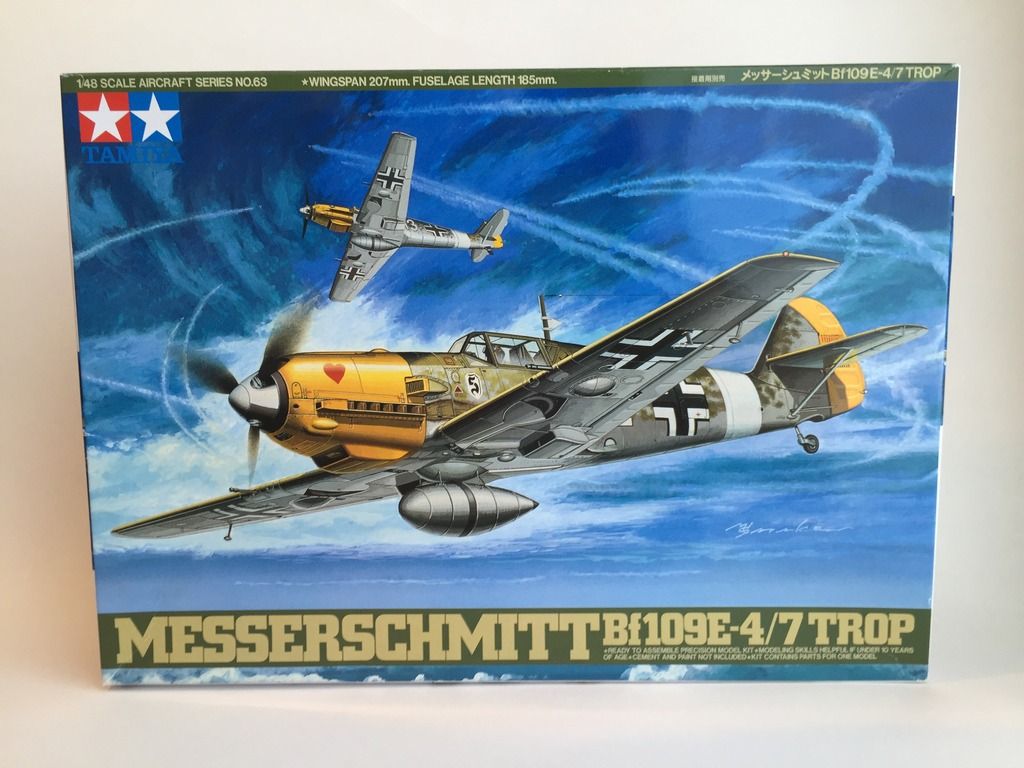
        One of my favorite aces of WW2 is Joachim Müncheberg, so luckily I did not have to purchase any aftermarket decals when choosing this kit.Yes, the Tamiya decals worked just fine!   Excellent kit and the aircraft I wanted to represent -- win, win.  The 109 is built straight from the box with the exception of a few interior Eduard placards, and Eduard photo etch harnesses. The harnesses came form Eduards 49002 set "Seatbelts Luftwaffe WWII Fighters". 

Here is a link to Joachims Wiki page! http://en.wikipedia.org/wiki/Joachim_M%C3%BCncheberg

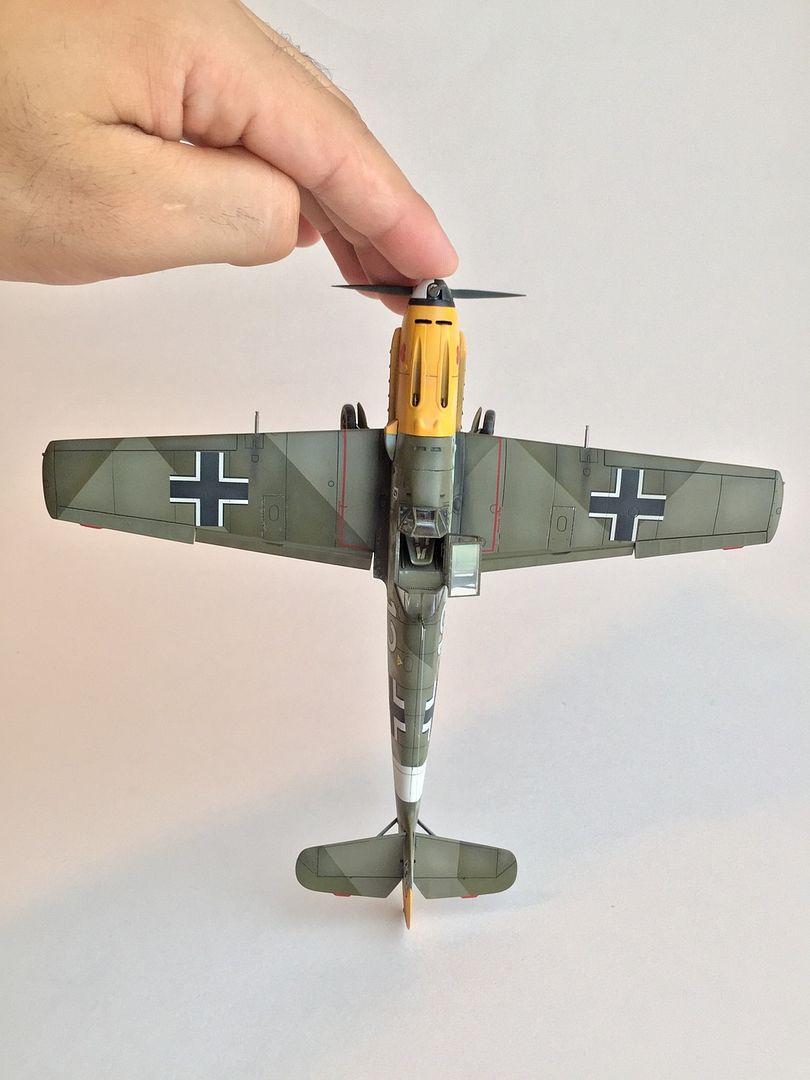
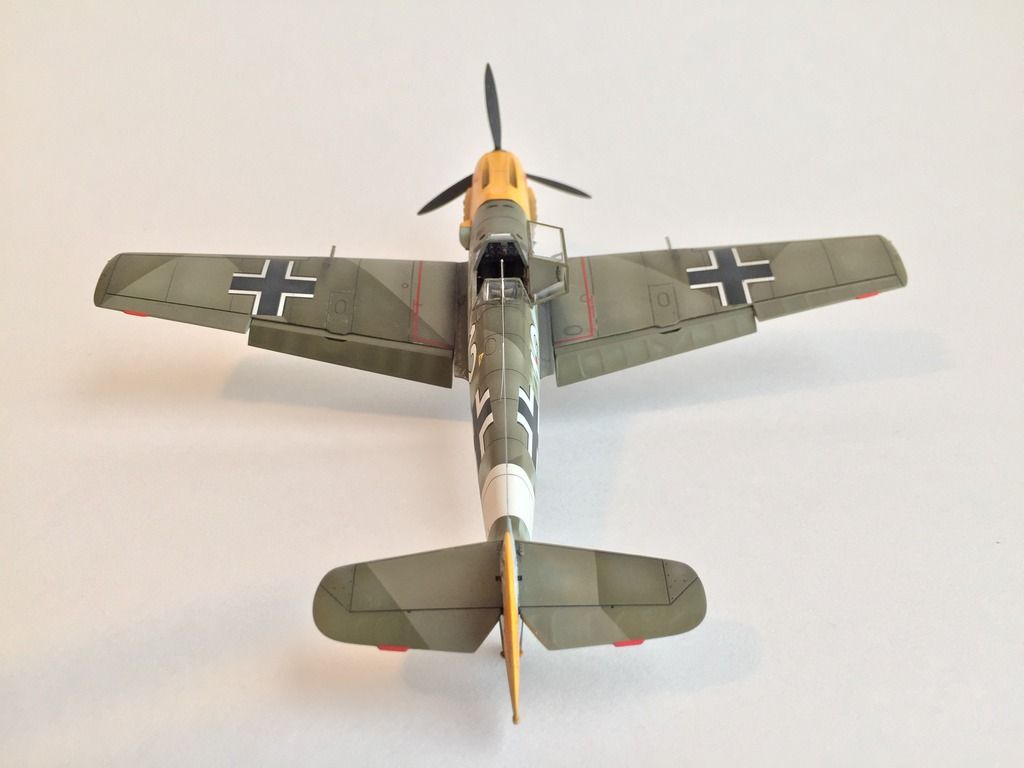
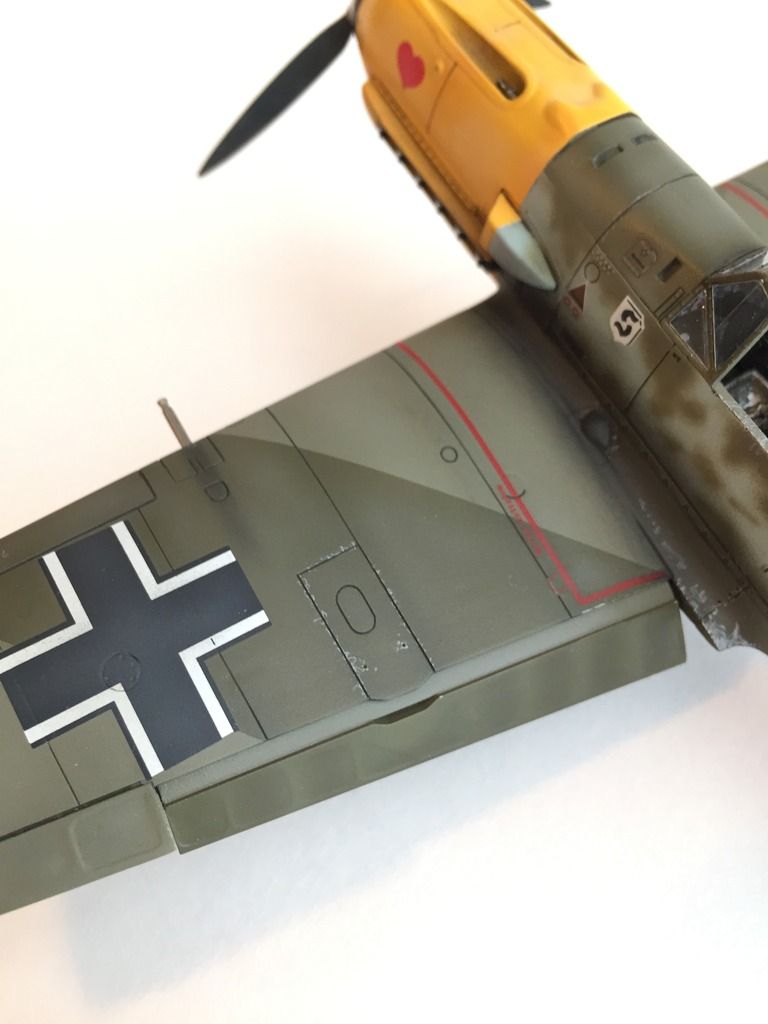
     I modeled mine with the flaps down BUT the LE slats retracted.  I read a few places that sometimes ground crew would close the slats by hand after landing to keep dust and such from collection and causing a malfunction. I also came across a picture of the ground crew doing so. 

        I only made three modifications to the kit itself. Obviously this is an earlier 109, so the shoulder harnesses came through the top of the seat. Tamiyas seat is solid, so I did have to cut out oval for the harnesses to pass through.  This was easily taken care of by drilling the proper sized whole side-by-side, then using a fresh #11 to cut out the center.   The second modification being an oxygen hose made from wrapping a super-small diameter wire (not sure of diameter) around another piece of the wire. The final modification was scribing top and bottom seam lines on the fuselage. Oh, yes -- I did add antenna wire as well. But that's a given!    I did not weight the tires because it will be sitting in non-manicured grass. So it will hide the bottom of the wheels.  EDIT: I still have a little work to do on detailing the antenna wire and I still have to make the exhaust stacks a little more sooty. 

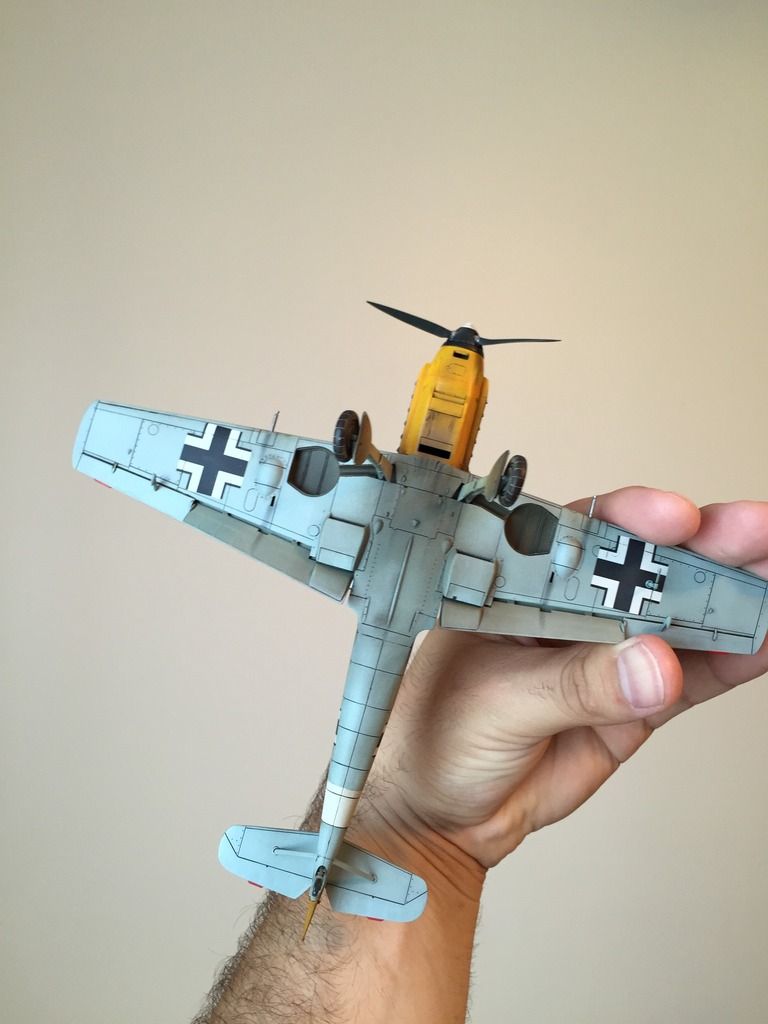
        Though not picked up by the camera, I did dust of the arframe,wheels, and tires quite a bit. Most of the weathering was done with a light amount of color modulation, pigments,and a light amount of chipping.

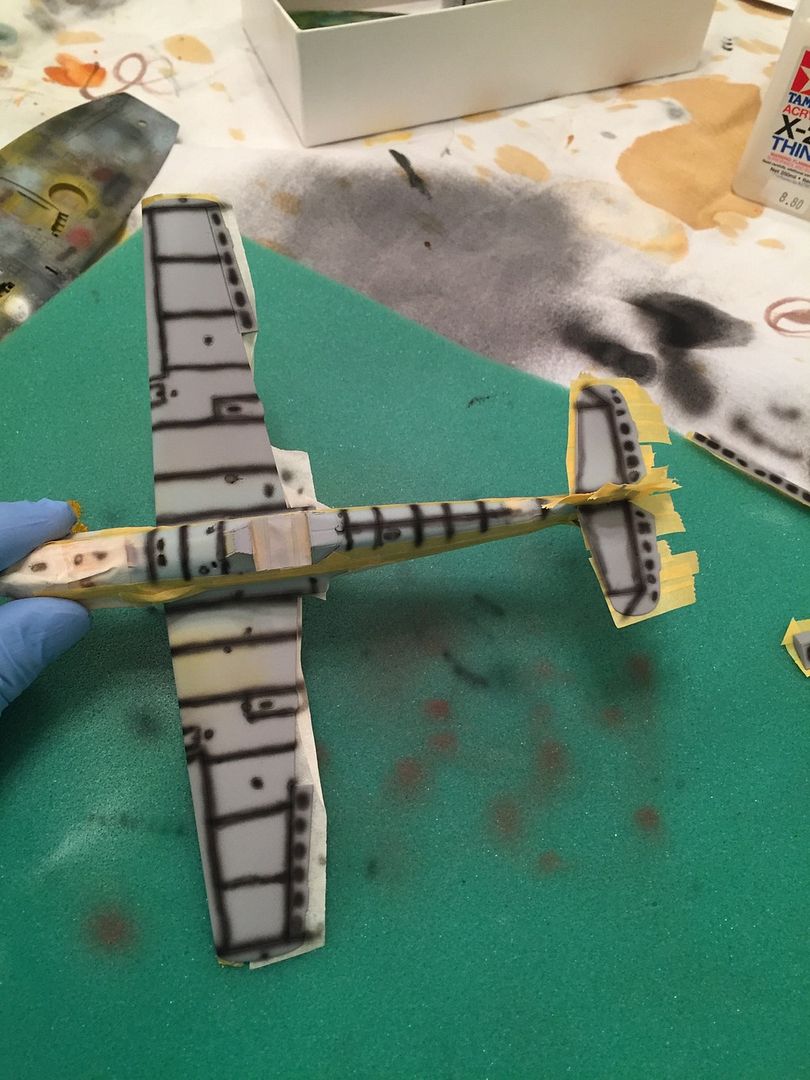
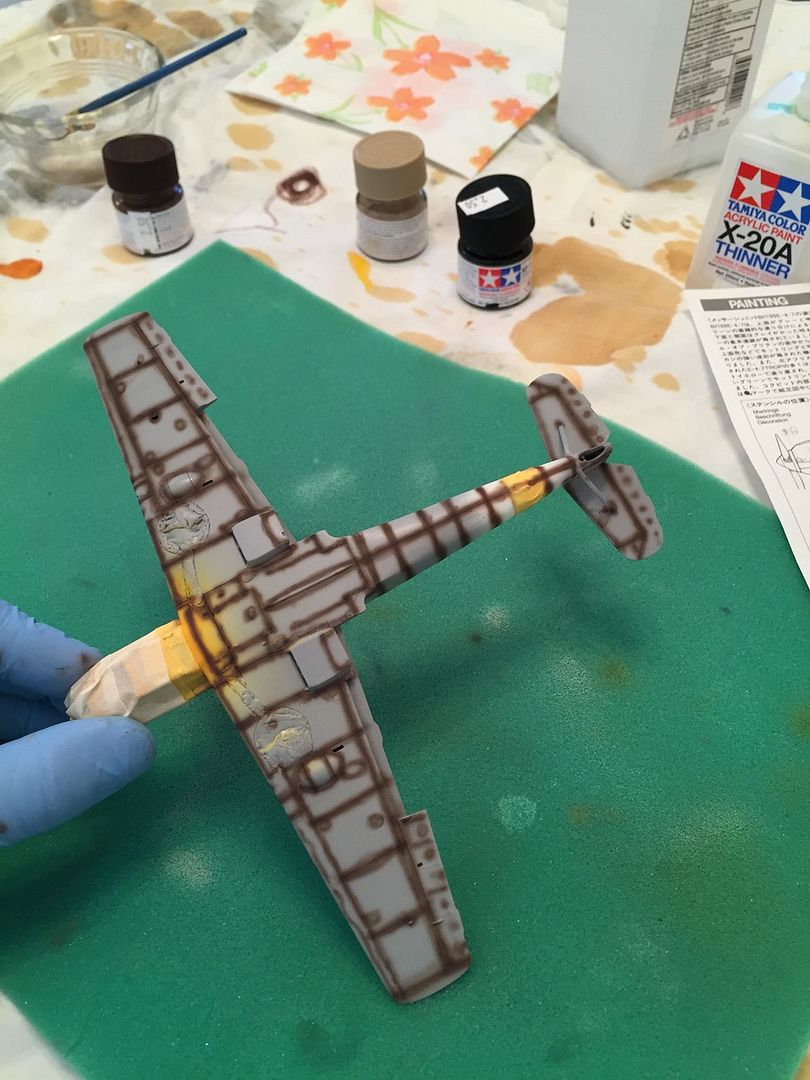
   The topside of the model got a light airbrush of Flory wash.  I went a bit heavier with airbrushing the wash at the bottom and build up layers. The underside came out OKAY, but I did have a small tragedy  that involved me removing the airbrushed wash from the bottom and restarting -- thus leaving the weathering on the underside a bit -- uneven.  Be that as it may, i'm more or less happy with the end result. 

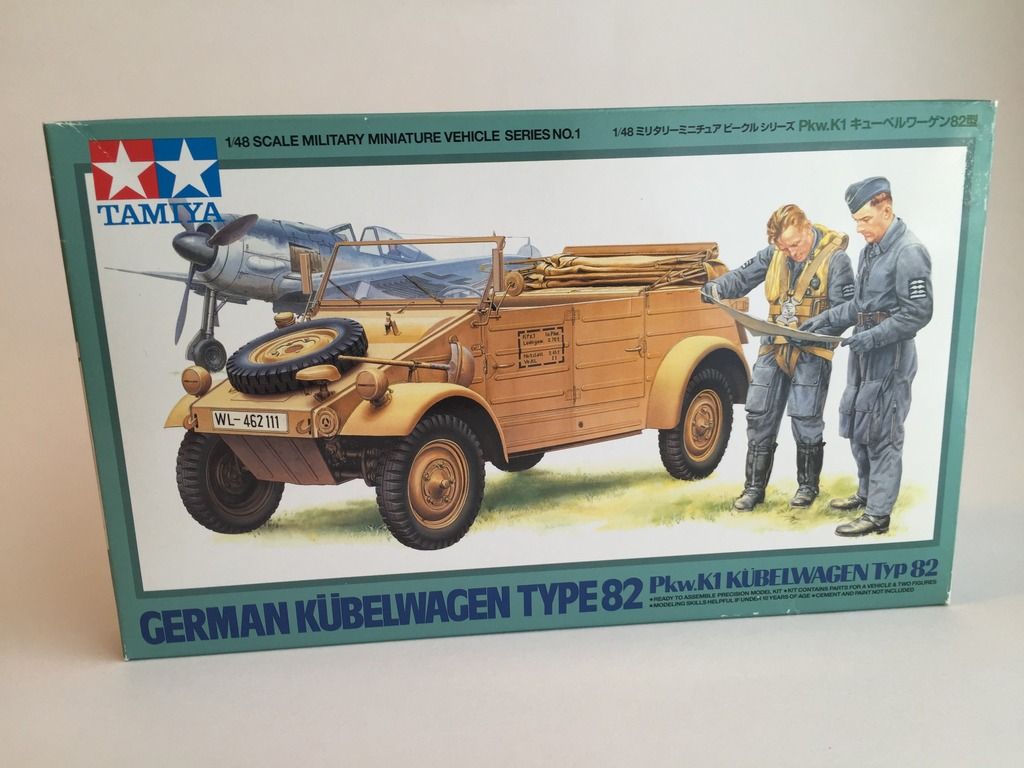
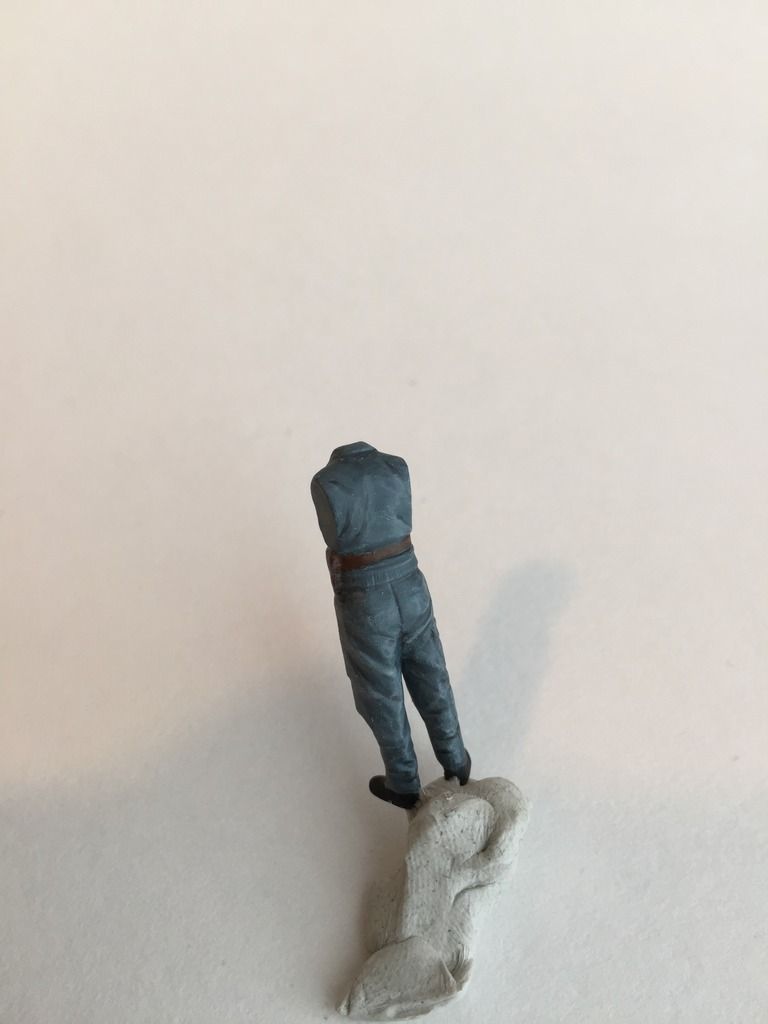
       The diorama will be simple.  It will feature a nice, stained base with longer, untrimmed grass. The 109. And the Kubelwagen. The pilot and driver will be standing next to each other reviewing a map as per the way Tamiya molded them.  The pilot figure (Joachim) is wearing a late-war flight suit that I doubt Joachim truly wore. But my goal is not to spend a lot of money, so instead of going after-market for the pilot, I will use what is supplied. 

      I TRIED to keep this short, so before it gets longer, i'll stop here!  If you have any questions, please askCool        It may not be the best work but hopefully Joachim, though long gone, will be proud. 
  • Member since
    March 2013
Posted by patrick206 on Saturday, May 23, 2015 3:35 PM

Very well done, Mike, super nice finish and detailing. Looking forward to the diorama finish. Thanks for the post and photos.

Patrick

  • Member since
    September 2003
  • From: AandF in the Badger State
Posted by checkmateking02 on Saturday, May 23, 2015 4:15 PM

Beautiful work!


  • Member since
    December 2003
  • From: Charleston, SC
Posted by sanderson_91 on Sunday, May 24, 2015 8:54 AM

Very nice!!  Can't wait to see more Mike!  Thanks for sharing!

Steve


  • Member since
    February 2011
Posted by knox on Sunday, May 24, 2015 8:59 AM

 That is a really nice build.  Looking forward to seeing the rest .                     knox

  • Member since
    May 2014
Posted by SubarooMike on Sunday, May 24, 2015 5:09 PM

Thanks alot, gents!  I appreciate you taking the time to view my picsCool

  • Member since
    February 2012
  • From: Olmsted Township, Ohio
Posted by lawdog114 on Monday, May 25, 2015 12:37 AM

Stunning Emil Mike.  If interested, stay tuned for a tutorial on how I do my bases.  Perhaps you could try it here.  Thanks for sharing..

Joe

 "Can you fly this plane and land it?...Surely you can't be serious....I am serious, and don't call me Shirley"


  • Member since
    January 2015
Posted by BrandonD on Monday, May 25, 2015 2:00 AM

Holy crap that's a nice Emil! I love those yellow-nosed JG26 109s. Very nice job, and I'm looking forward to seeing more.

-BD-

  • Member since
    December 2006
  • From: Phoenix, AZ
Posted by Fly-n-hi on Monday, May 25, 2015 9:40 AM

Great work!  I have this one in my stash.  I'll definitely use this as guide!

  • Member since
    September 2014
Posted by U2 Milo on Monday, May 25, 2015 6:36 PM

Very tidy work, Sub. Mike!  You say you airbrushed the wash?  Looks great in the pics.  

Really like the way your cockpit equipment pops out, too.

Thanks for sharing!

  • Member since
    May 2014
Posted by SubarooMike on Monday, May 25, 2015 8:52 PM

U2 Milo

Very tidy work, Sub. Mike!  You say you airbrushed the wash?  Looks great in the pics.  

Really like the way your cockpit equipment pops out, too.

Thanks for sharing!

Thank you!  I used the wash by brushing it on, then wiping it off (for the panel lines).  Then I airbrushed it on the bottom surfaces and lower half of the fuselage.  Works amazingly!

  • Member since
    February 2007
  • From: Brunswick, Ohio
Posted by Buckeye on Tuesday, May 26, 2015 11:27 AM

Very nice build!  Love your subtle weathering. Yes

Mike

  • Member since
    August 2009
  • From: MOAB, UTAH
Posted by JOE RIX on Tuesday, May 26, 2015 12:44 PM

Outstanding 109 Mike. Gorgeous paint work and weathering. Thank You for sharing your build with us.

"Not only do I not know what's going on, I wouldn't know what to do about it if I did". George Carlin

  • Member since
    May 2014
Posted by SubarooMike on Tuesday, May 26, 2015 8:50 PM

Thank you everyone! I truly appreciate your replys.  She just just a joy to build!

  • Member since
    November 2008
  • From: Central Florida
Posted by plasticjunkie on Tuesday, May 26, 2015 9:23 PM

Great paint on the Emil. This will make a very interesting display.

 GIFMaker.org_jy_Ayj_O


Too many models to build, not enough time in a lifetime!!

  • Member since
    September 2013
Posted by blackdog62 on Wednesday, May 27, 2015 8:47 AM

Hello just wanted say that is quite fine build of a 109. looking forward to seeing other builds by you.

and welcome to the forums.

  • Member since
    May 2014
Posted by SubarooMike on Thursday, May 28, 2015 4:05 PM

Thank you!

  • Member since
    May 2014
Posted by SubarooMike on Monday, July 20, 2015 10:49 PM

UPDATE! :

 There has been NO progress LOL!         Once the warm weather hit, my attention turned to flying full-scale and R/C.   I am DYING to get some bench time in with my plastics, but when it's summer, I just cant stay inside!   Once I feel the cool breeze of fall, ill be back at the bench!  Well -- now that I think about it -- I did get some airbrush time in on my H-13 a few weeks back.  I do not normally build helis, but I cant resist an H-13Cool

  • Member since
    March 2015
  • From: Streetsboro, Ohio
Posted by Toshi on Tuesday, July 21, 2015 4:09 AM

LOL!  Still, a man got to do what a mans got to do!  The 109 looks fantastic, I'm looking forward to the final product even if it's in fall.  I'll be waiting.

Toshi

P.S.  I'd like to see your FULL SCALE/RC.

On The Bench: Revell 1/48 B-25 Mitchell


Married to the most caring, loving, understanding, and beautiful wife in the world.  Mrs. Toshi


  • Member since
    June 2014
Posted by BrandonK on Tuesday, July 21, 2015 9:13 AM

That is really an excellent 109. I have that one in my stash. Hopefully, I can approach that level of quality with mine. You have set the bar quite high my friend!! Bow Down

BK

On the bench:

A lot !! And I mean A LOT!!

2024 Kits on deck / in process / completed   

                         14 / 5 / 2  

                              Tongue Tied

  • Member since
    August 2013
Posted by Jay Jay on Tuesday, July 21, 2015 12:40 PM

You have a great eye for color Mike.   Your 109 is super realistic to me . Nice and subtile on the weathering but enough to be very convincing.  Thanks to your post I'm learning the " less is more "  concept.


 I'm finally retired. Now time I got, money I don't.

  • Member since
    January 2015
  • From: Tumwater, WA.
Posted by M. Brindos on Tuesday, July 21, 2015 7:34 PM

That is super clean and very precise work. IMPRESSIVE work Mike. Can't wait to see more of this!

- Mike Brindos "Lost Boy"

  • Member since
    May 2014
Posted by SubarooMike on Wednesday, July 22, 2015 9:13 PM

Thank you for the kind words, gentleman!   I am normally modest towards my finish pieces, but this is one I am truly proud of. Obviously it's not perfect, but I am extremely happy with itCool

  • Member since
    May 2014
Posted by SubarooMike on Wednesday, July 22, 2015 9:31 PM

Thank you, Toshi! 

          Currently (we  I.E my dad, normally have a few at any given time) we just have a 1964 172.  overhauled prop, new paint, new interior, new radios, overhauled instruments,Garmin 430, engine analyzer, low time engine, vortex generators, flap-gap seals, Horton (I think) wing tips, inertial  lock harnesses, LED landing and taxi lights, and much more.   That's me wavving to the camera departing Massey Aerodrome.  When Massey has an event, they take pictures of you departing.  The 0-300 is no powerhouse, but strong and smoother then any 4 cylinder!  Starts on the second blade like clockwork. 

          As for RC, I don't have too many pics/videos on me.  I fly mostly scale, but have also been flying 3D and precision aerobatics since I was 14.  This is me (last summer) hovvering my AJ Slick. It's fun tapping her rudder on the deck! Big Smile

EDIT: found these pictures on my photobucket of my Champ


Click on pics to view videos! 

Tapping the rudder here! 

Here is my mini EPP Sukohi 

JOIN OUR COMMUNITY!

Our community is FREE to join. To participate you must either login or register for an account.

SEARCH FORUMS
FREE NEWSLETTER
By signing up you may also receive reader surveys and occasional special offers. We do not sell, rent or trade our email lists. View our Privacy Policy.