SEARCH FINESCALE.COM

Enter keywords or a search phrase below:

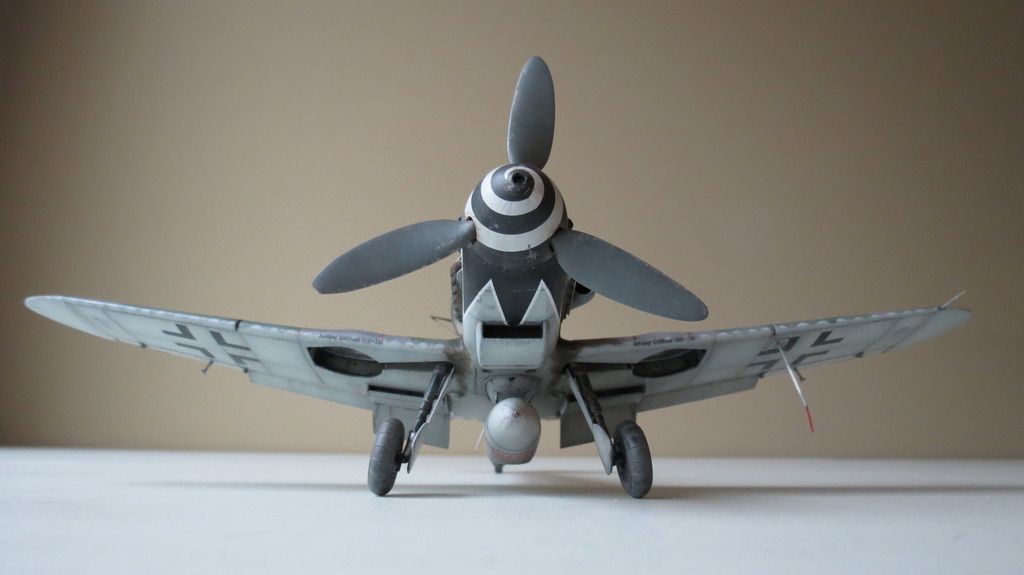
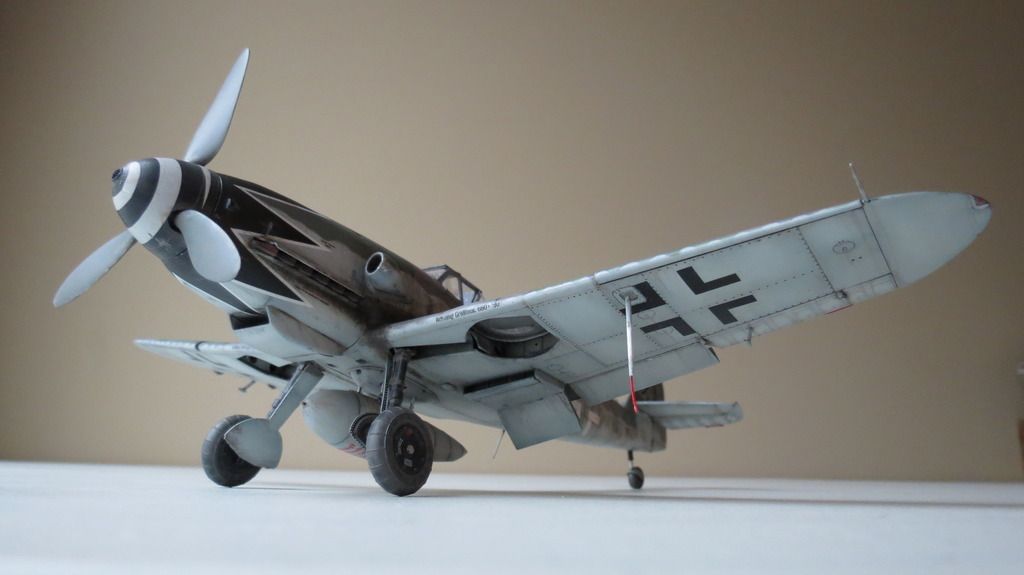
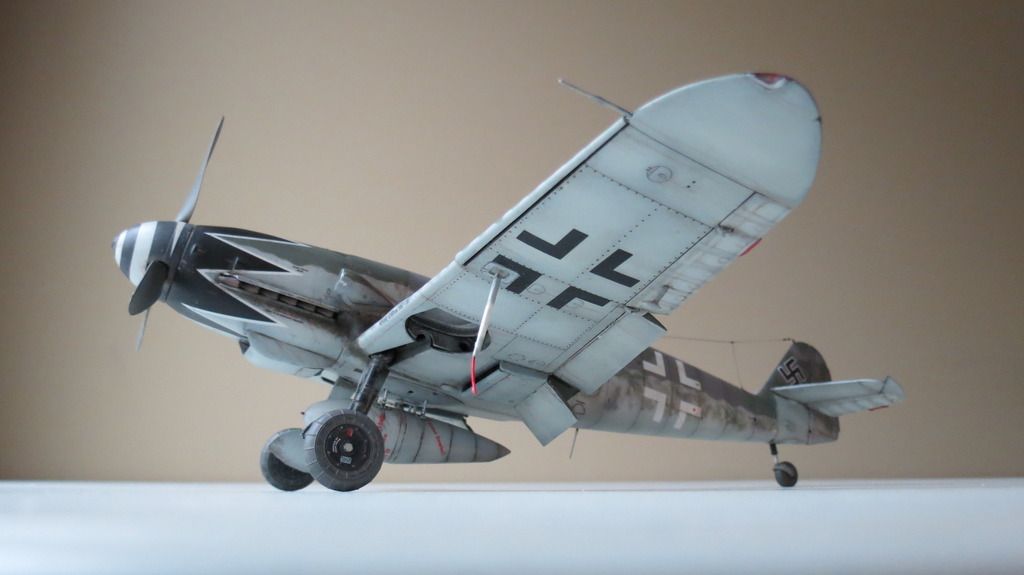
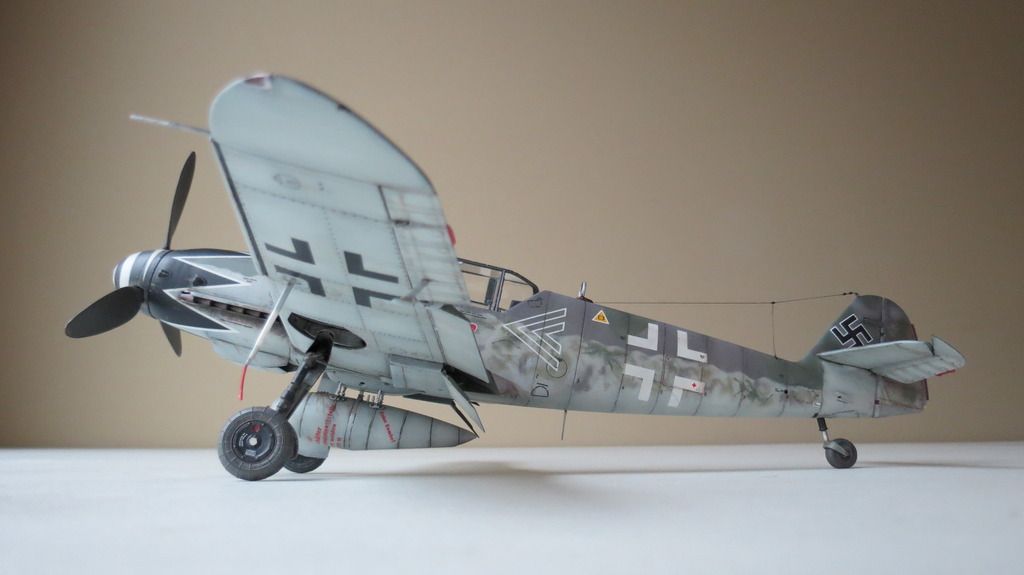
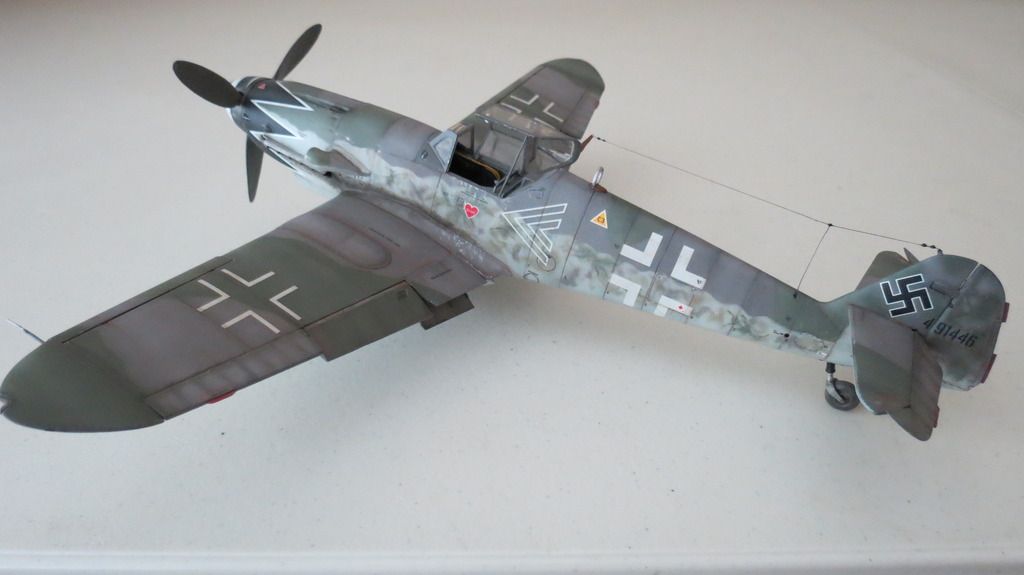
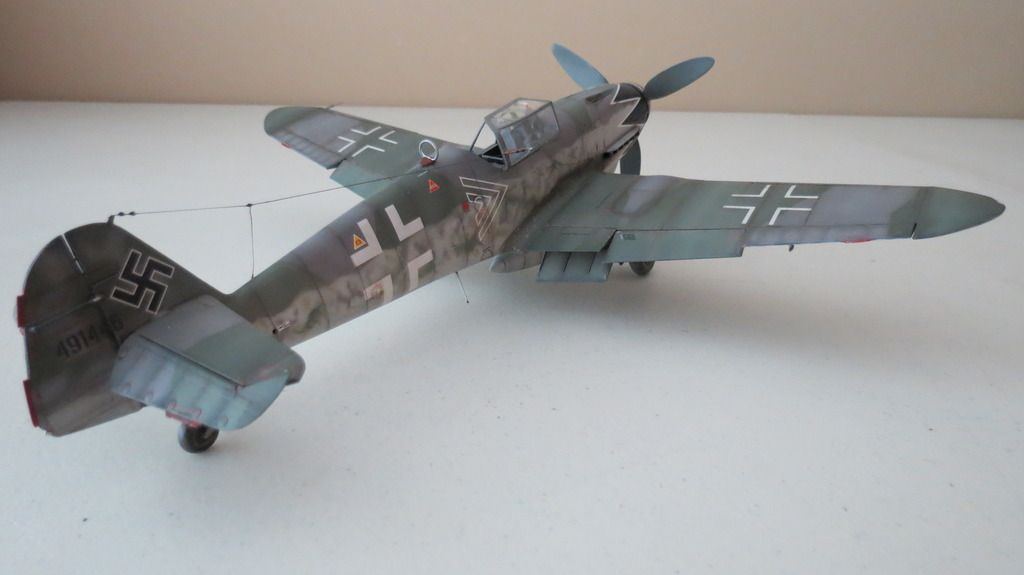
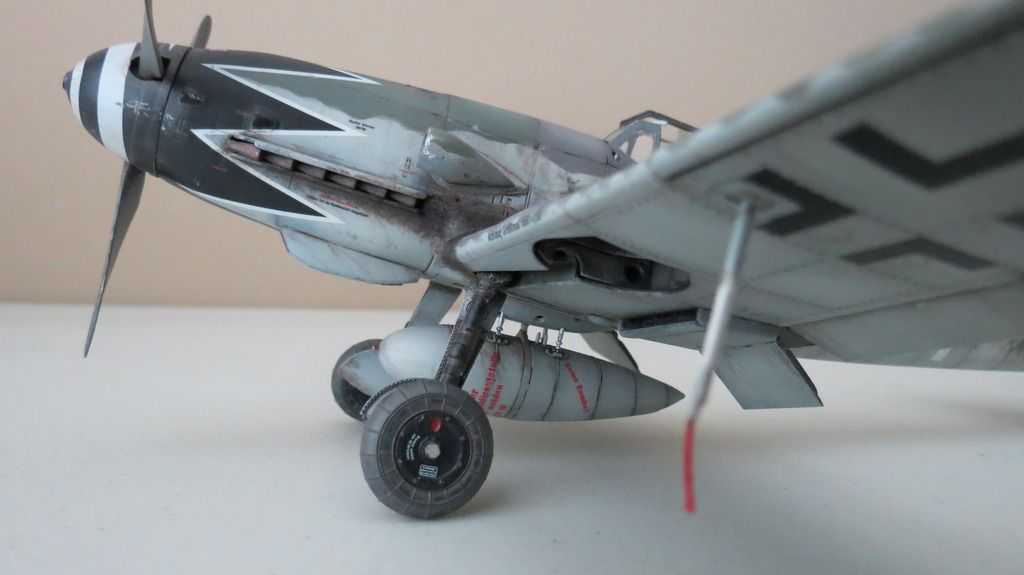
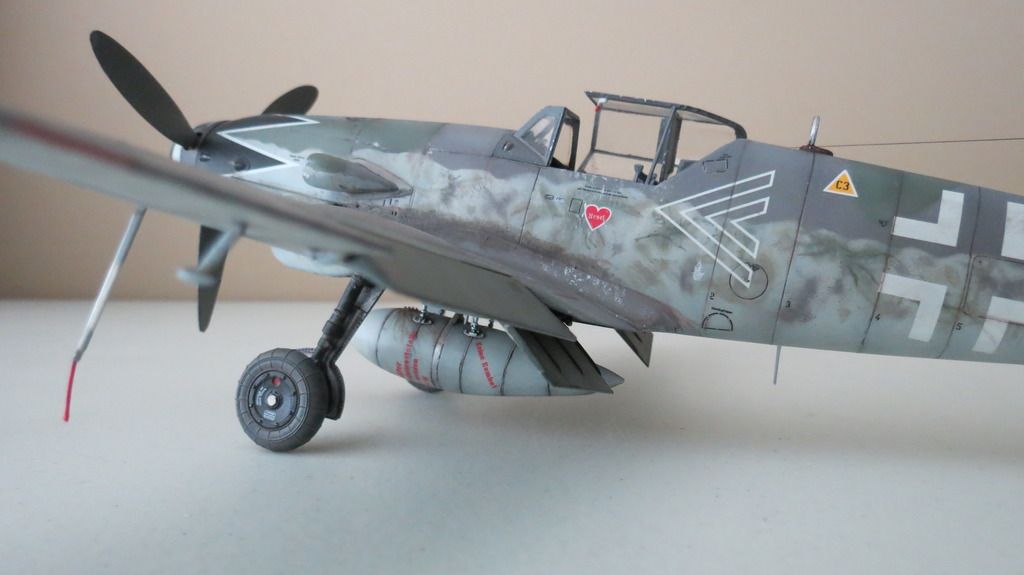
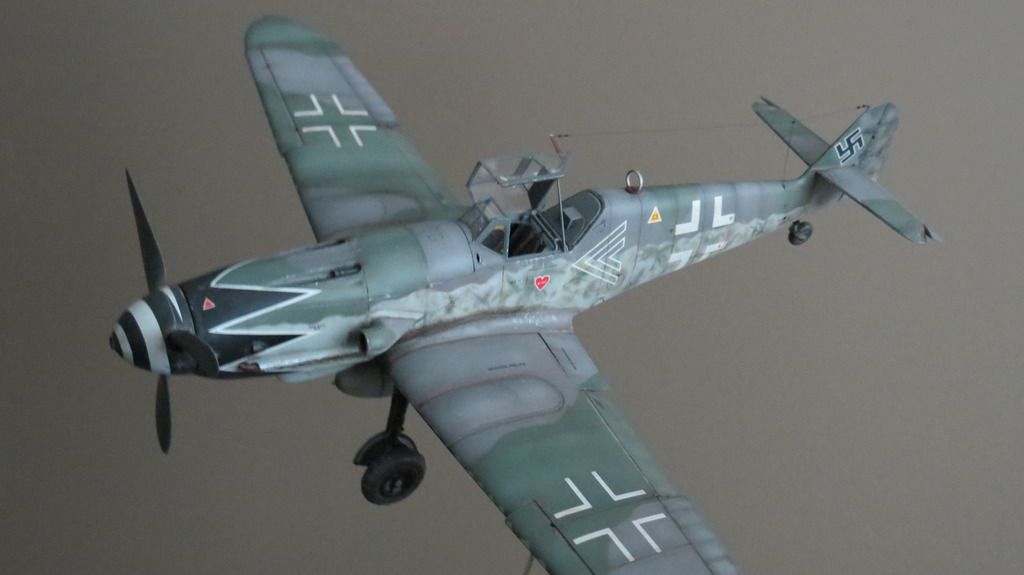
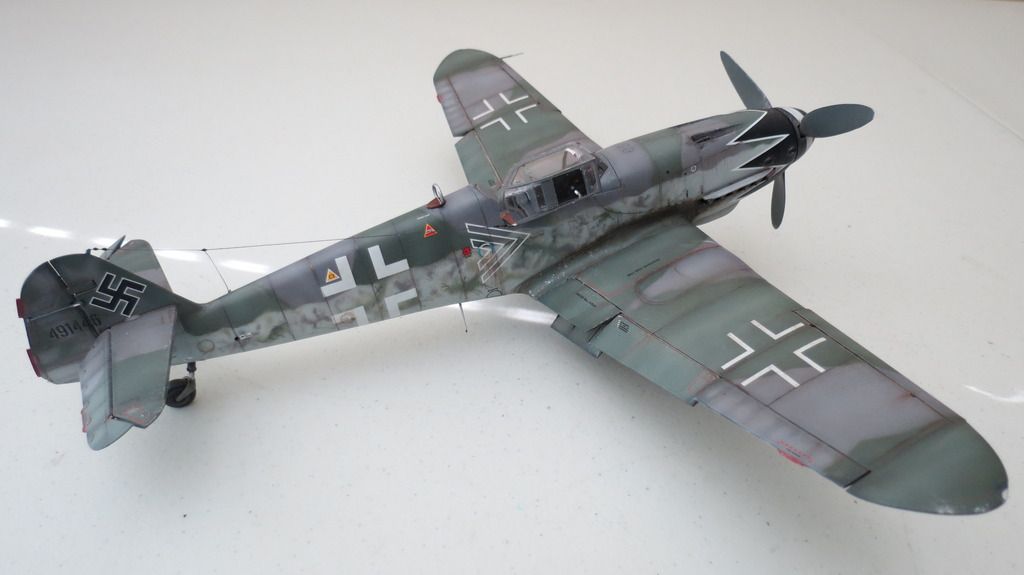
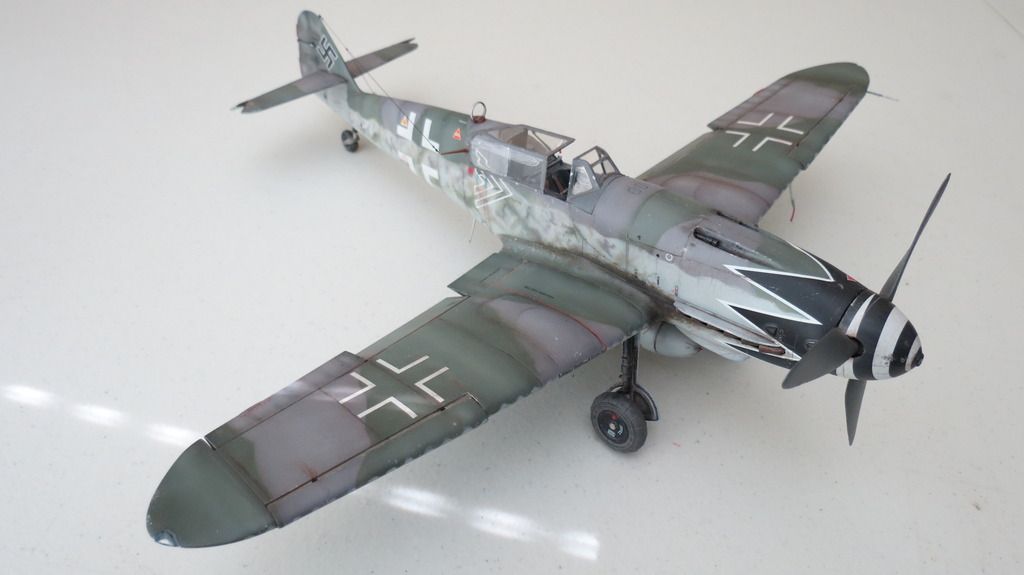
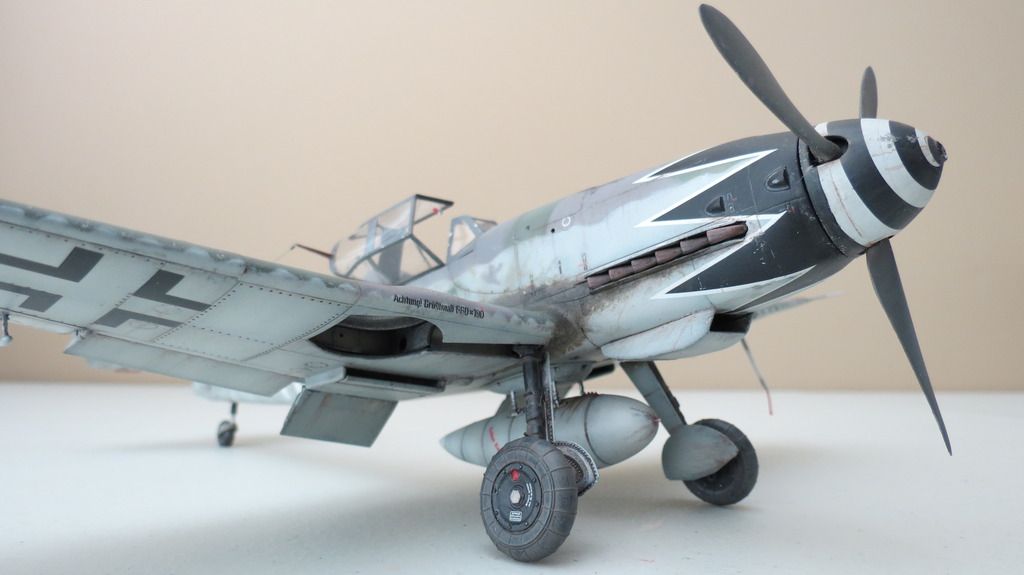
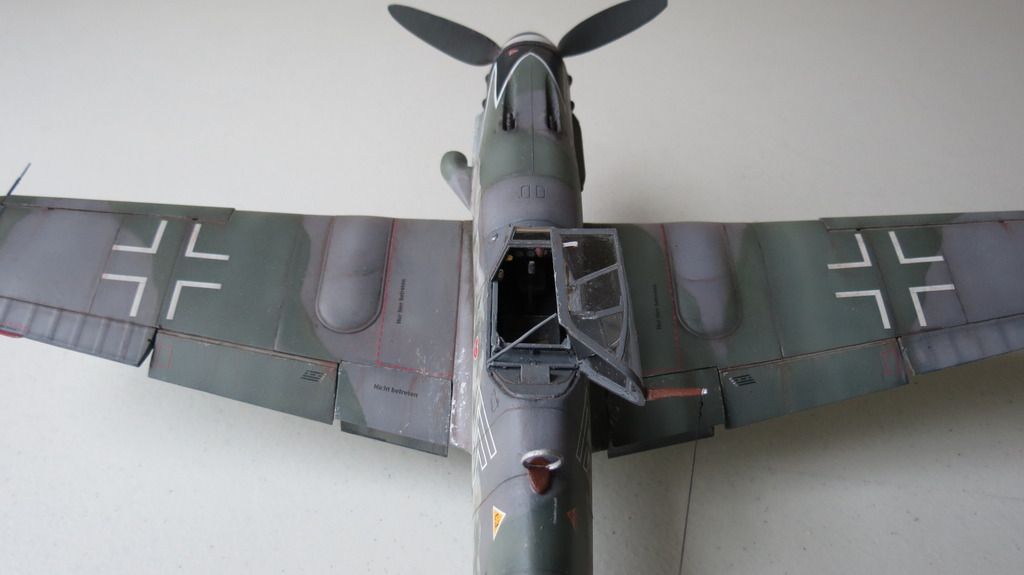
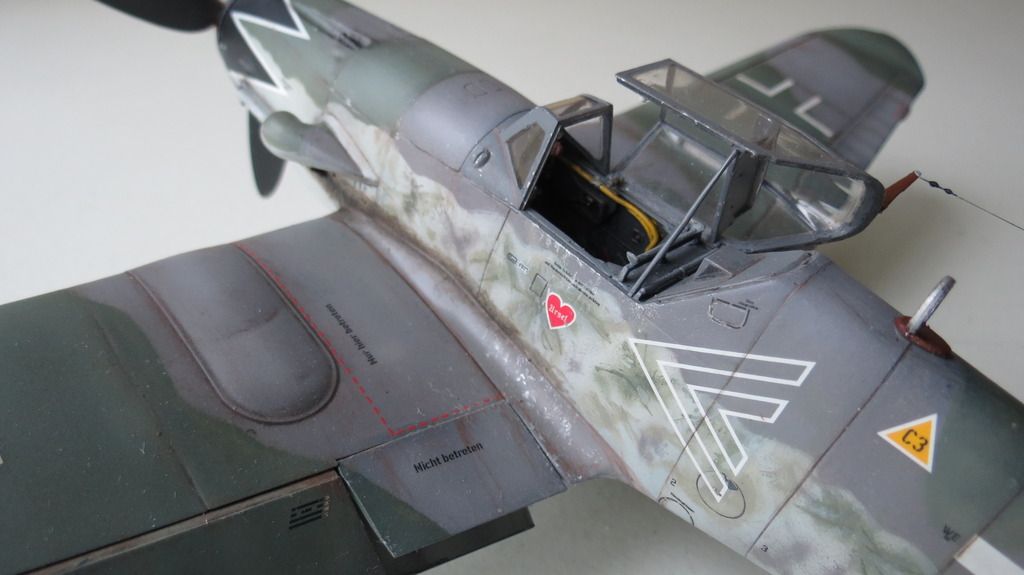
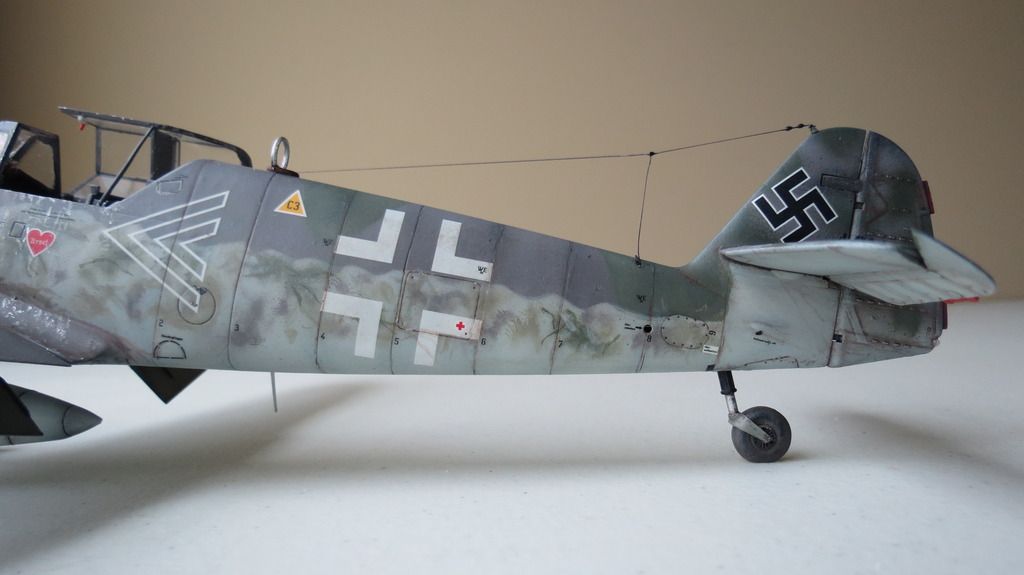
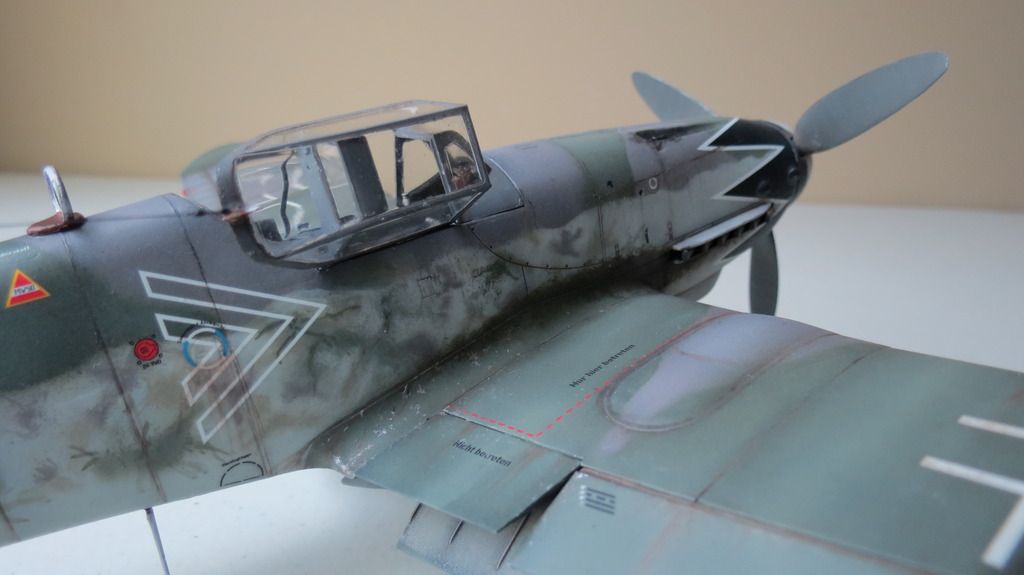
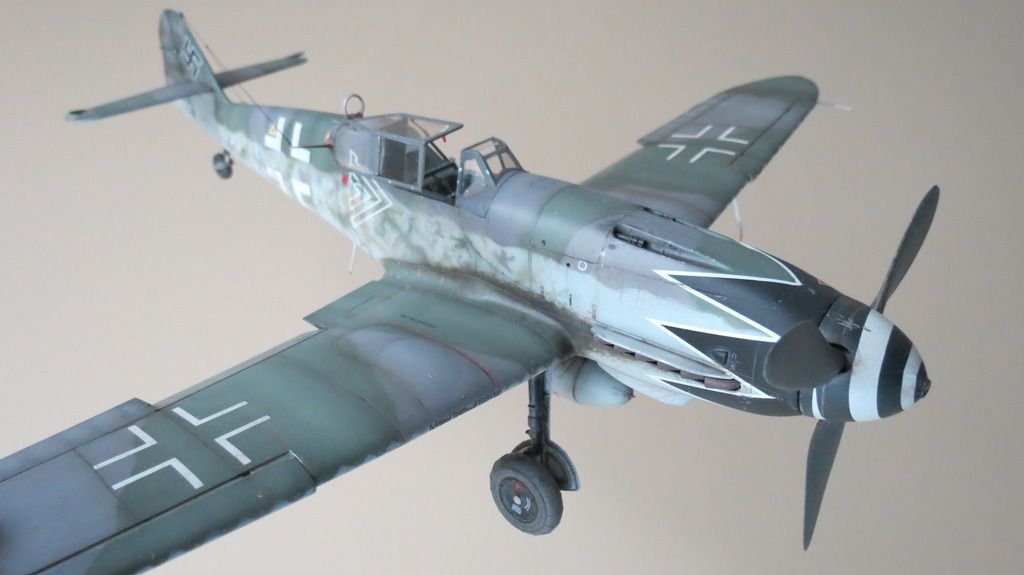
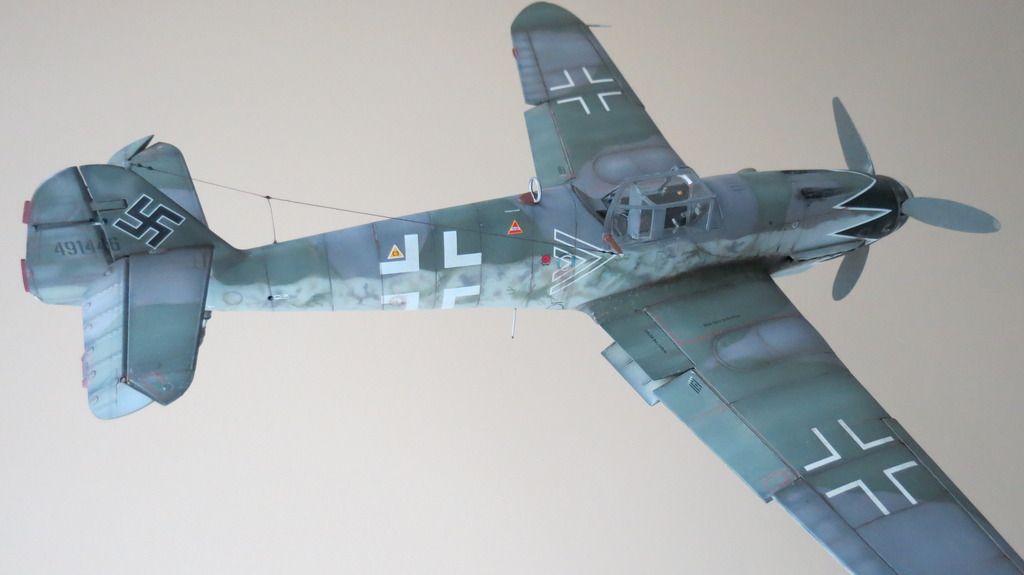
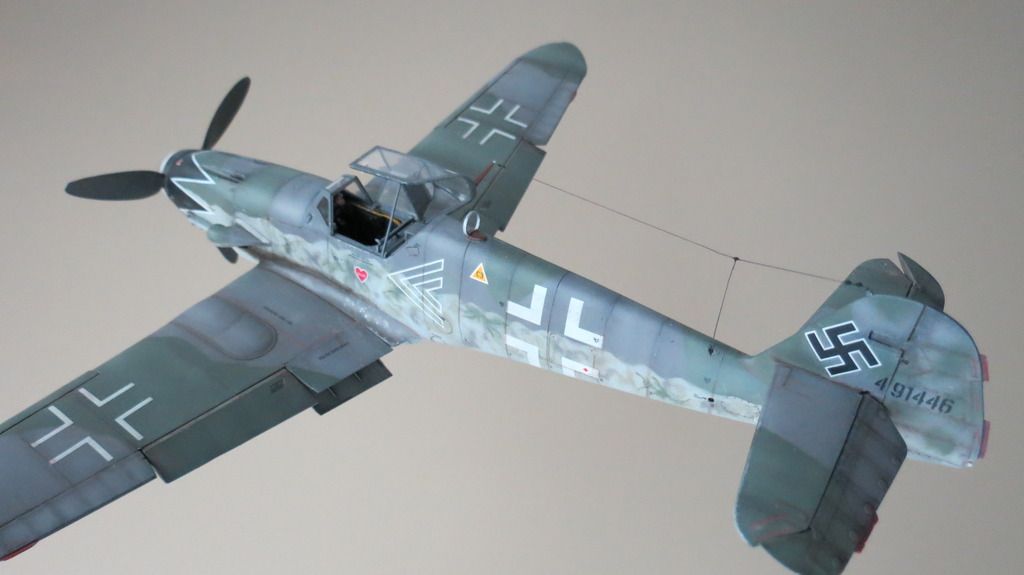
Revell 1/32 Messerschmitt BF109G-10 "Erla" as flown by Erich "Bubi" Hartmann

7866 views
52 replies
1 rating 2 rating 3 rating 4 rating 5 rating
  • Member since
    April 2015
  • From: New Hampshire, USA
Posted by UKguyInUSA on Tuesday, March 8, 2016 9:38 AM

bvallot

Wow.  What a hefty set of updates here.  Great stuff UKguy. =]  Your painting and weathering are really working well here. Makes me hungry for some german fighter planes to do.

Thanks for taking us with you one this one.


Thanks BV, much appreciated!


Cheers Smile

Martin

  • Member since
    April 2015
  • From: New Hampshire, USA
Posted by UKguyInUSA on Tuesday, March 8, 2016 9:37 AM

BrandonK

Super job, you really made that kit come to life. Very very nicely done, Sir.  YesYes


Thanks Brandon, greatly appreciated!


Cheers Smile

Martin

  • Member since
    March 2003
  • From: Rain USA, Vancouver WA
Posted by tigerman on Saturday, January 23, 2016 11:41 PM

Gorgeous work.

   http://i7.photobucket.com/albums/y269/wing_nut_5o/PANZERJAGERGB.jpg

 Eric 

  • Member since
    April 2015
  • From: New Hampshire, USA
Posted by UKguyInUSA on Saturday, January 23, 2016 7:58 PM

mustang1989

Man there aint a thing wrong with that build there Martin!!! You've got yourself a showstopper right there. Great work!!! Beautiful paint, weathering and detail!!


Thanks for your kind comment, Mustang, greatly appreciated!


Sorry for my extremely late response!!


Cheers Smile

Martin

  • Member since
    April 2015
  • From: New Hampshire, USA
Posted by UKguyInUSA on Saturday, January 23, 2016 7:57 PM

RobGroot4

Very nice, particularly the weathering!

Groot


Thank You Groot, greatly appreciated!


Cheers Smile

Martin

  • Member since
    December 2002
  • From: Bury St Edmunds, Suffolk, England
Posted by Bish on Friday, July 17, 2015 1:34 AM

That's absolutely gorgeous. Love the mottling and a really nice finish overall.

I do have a few of the Revell32nd kit, though I am still to build anything in this scale. I've been trying to get hold of that Ar 196, but it seems rather hard to find at the minute.

I am a Norfolk man and i glory in being so


On the bench: Airfix 1/72nd Harrier GR.3/Fujimi 1/72nd Ju 87D-3

  • Member since
    April 2015
  • From: New Hampshire, USA
Posted by UKguyInUSA on Thursday, July 16, 2015 8:50 PM

Thanks Patrick, greatly appreciated!

Cheers,

Martin : )

  • Member since
    February 2003
  • From: Rothesay, NB Canada
Posted by VanceCrozier on Tuesday, July 14, 2015 12:19 PM

THAT is a lot of plastic - looking good!

On the bench: Airfix 1/72 Wildcat; Airfix 1/72 Vampire T11; Airfix 1/72 Fouga Magister

  • Member since
    June 2013
Posted by bvallot on Tuesday, July 14, 2015 10:55 AM

Wow.  What a hefty set of updates here.  Great stuff UKguy. =]  Your painting and weathering are really working well here. Makes me hungry for some german fighter planes to do.

Thanks for taking us with you one this one.

On the bench:  

Tamiya F4U-1  Kenneth Walsh


  • Member since
    June 2014
Posted by BrandonK on Tuesday, July 14, 2015 8:54 AM

Super job, you really made that kit come to life. Very very nicely done, Sir.  YesYes

On the bench:

A lot !! And I mean A LOT!!

2024 Kits on deck / in process / completed   

                         14 / 5 / 2  

                              Tongue Tied

  • Member since
    March 2012
  • From: Corpus Christi, Tx
Posted by mustang1989 on Tuesday, July 14, 2015 4:05 AM

Man there aint a thing wrong with that build there Martin!!! You've got yourself a showstopper right there. Great work!!! Beautiful paint, weathering and detail!!


 Forum | Modelers Social Club Forum (proboards.com) 

  • Member since
    June 2013
Posted by RobGroot4 on Monday, July 13, 2015 5:17 PM

Very nice, particularly the weathering!

Groot

"Firing flares while dumping fuel may ruin your day" SH-60B NATOPS

  • Member since
    March 2013
Posted by patrick206 on Monday, July 13, 2015 1:30 PM

WOWZZA, she's a beaut for certain. What a fine build and a terrific in progress series of post's, thank you so much. Please keep 'em coming.

Patrick

  • Member since
    April 2015
  • From: New Hampshire, USA
Posted by UKguyInUSA on Monday, July 13, 2015 12:28 PM
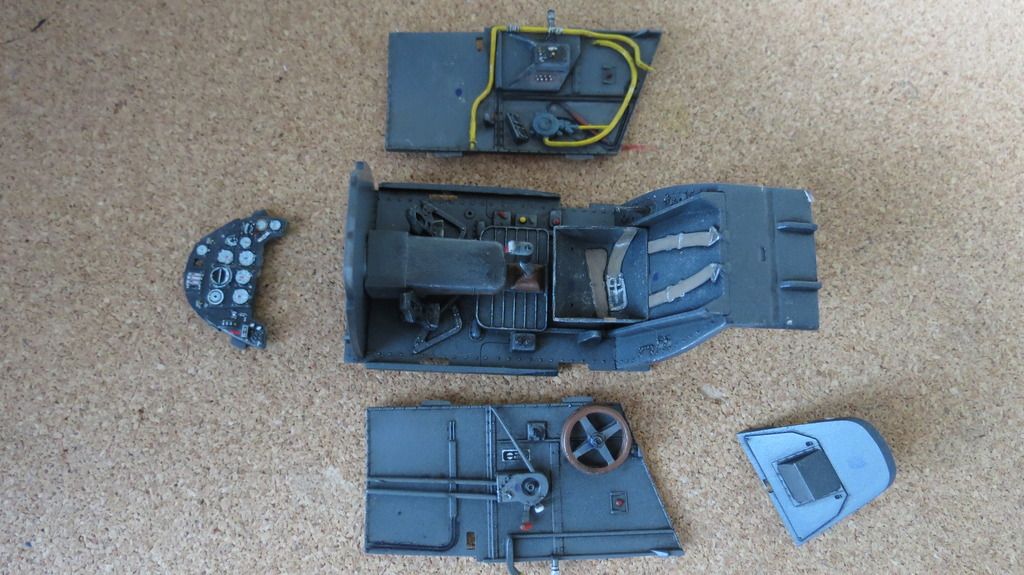
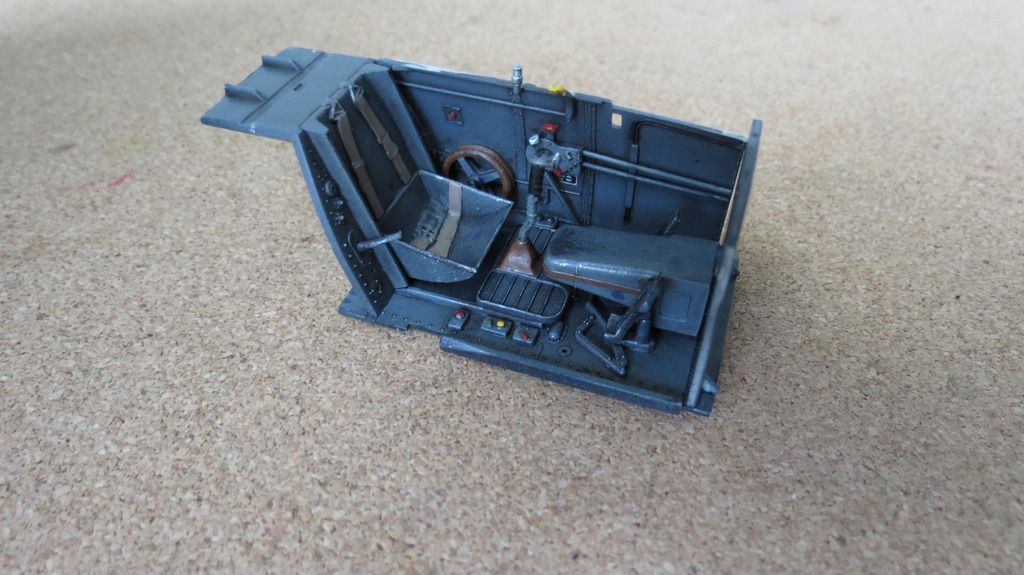
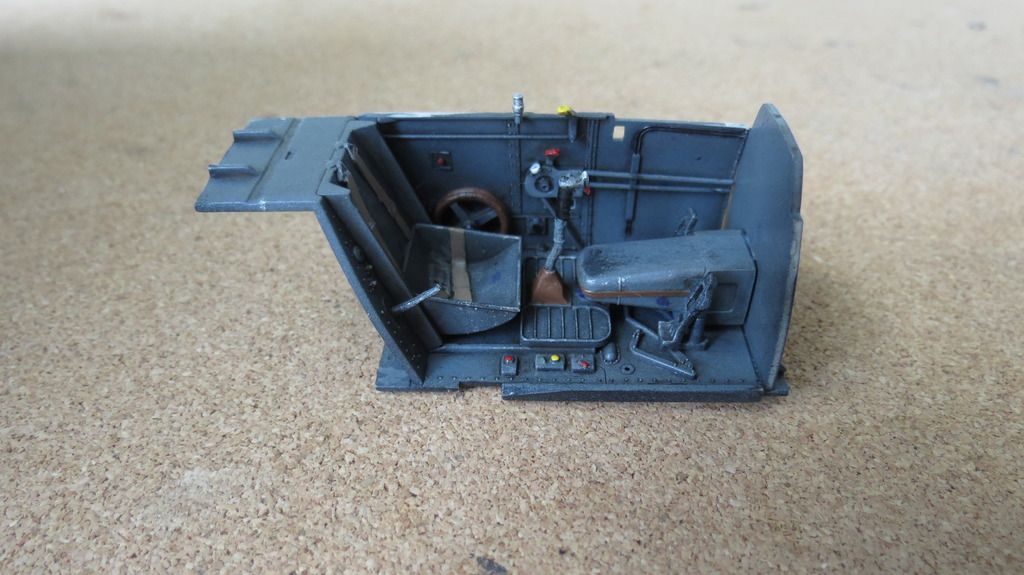
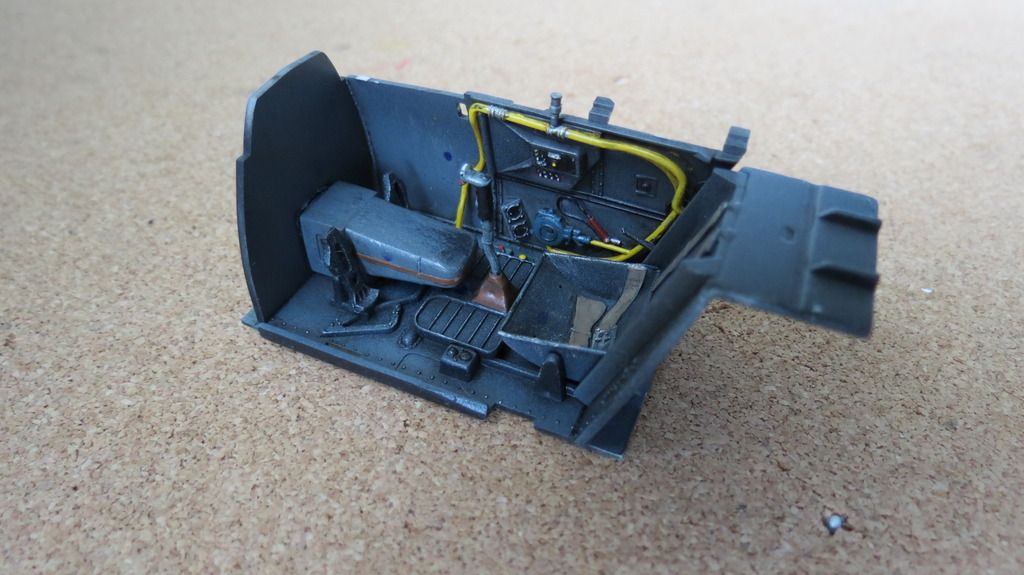
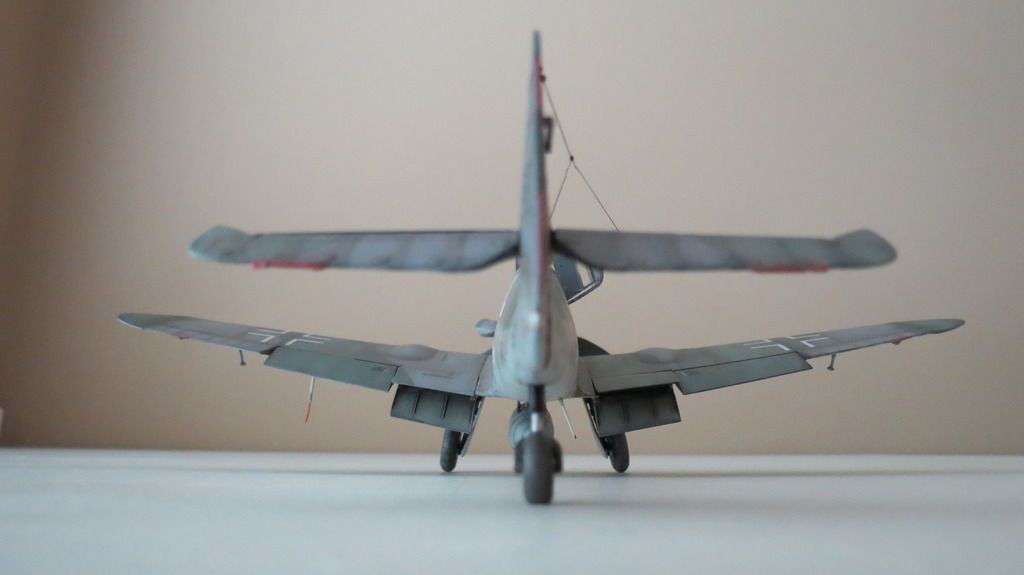
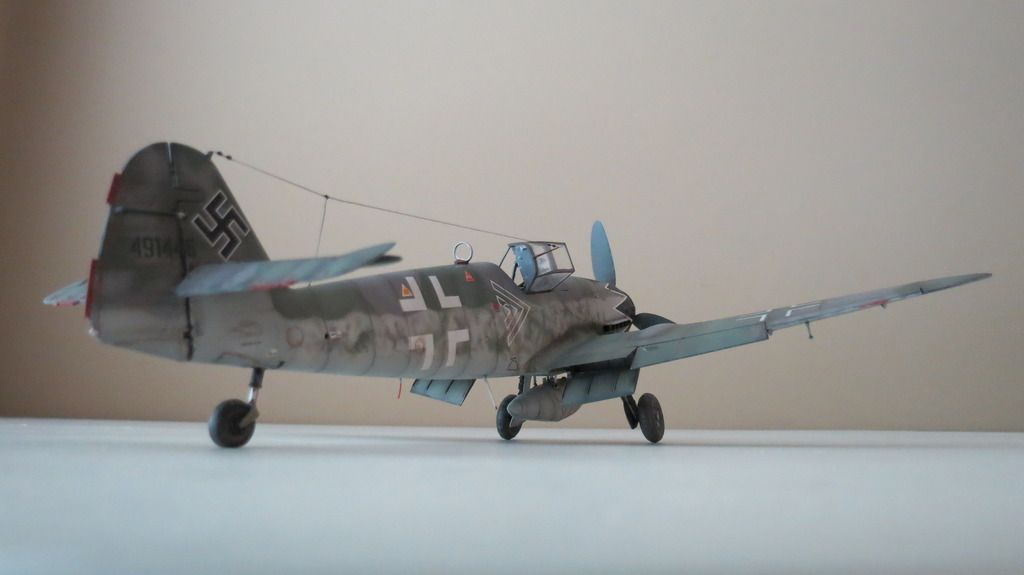
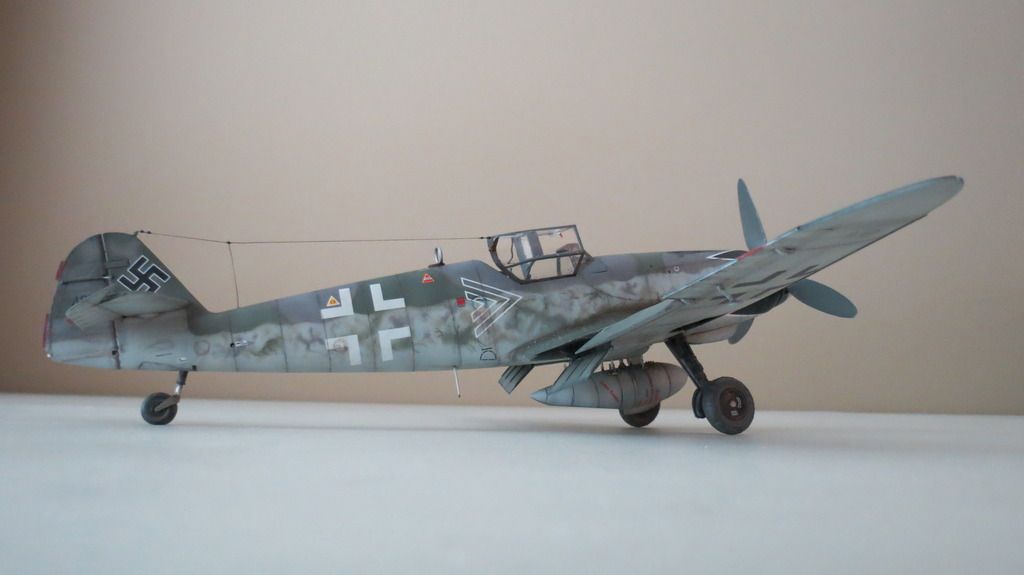
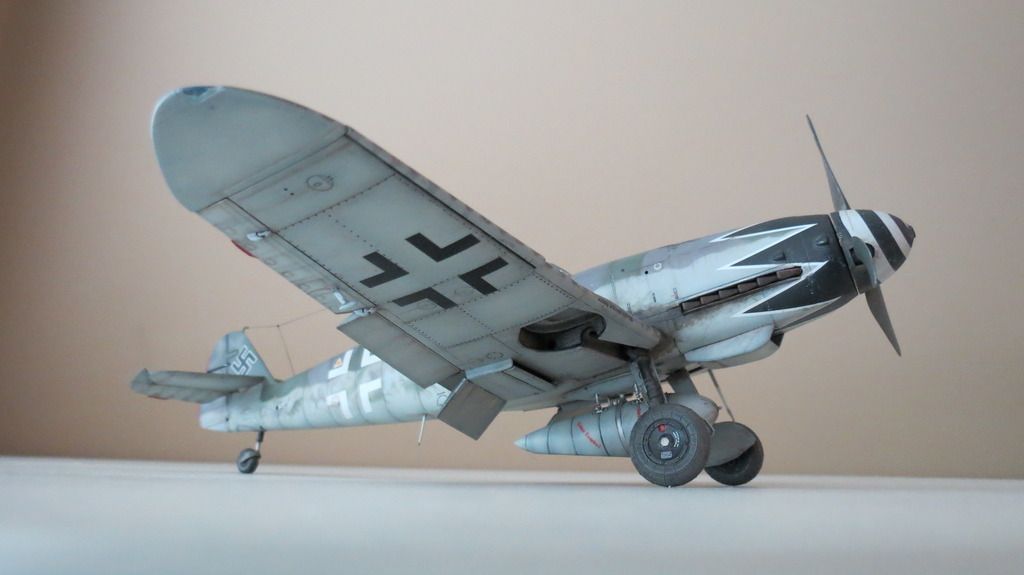
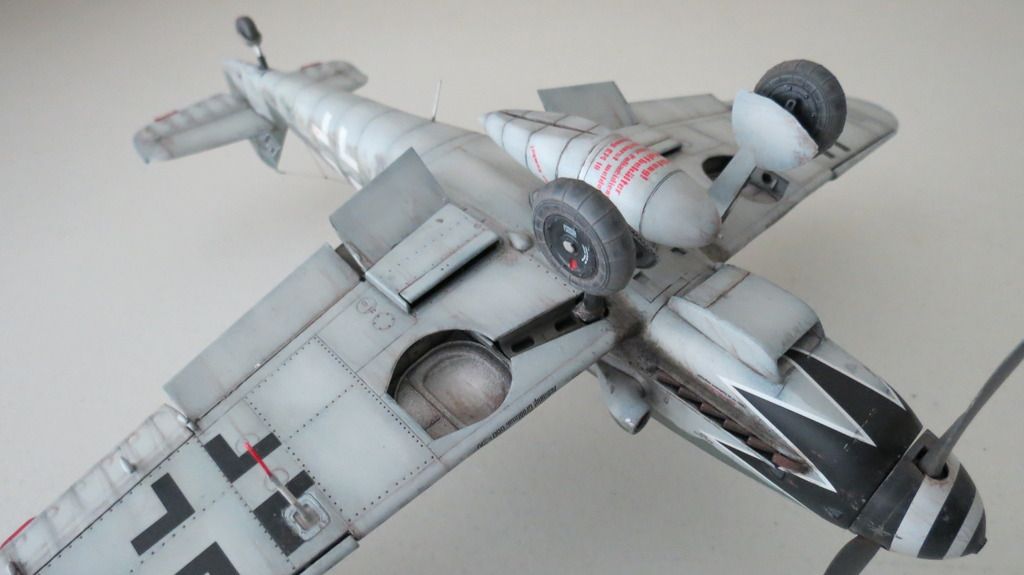
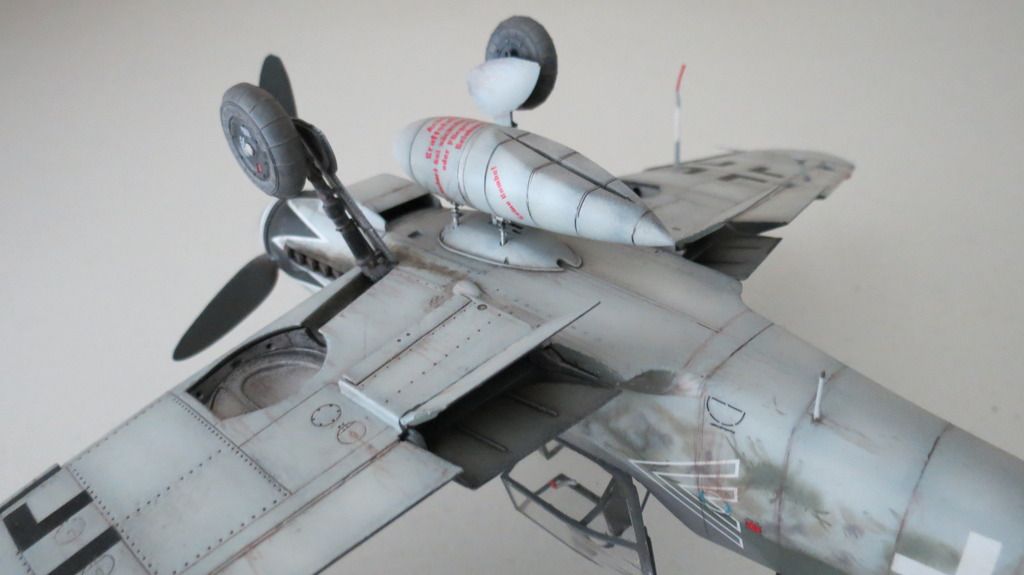
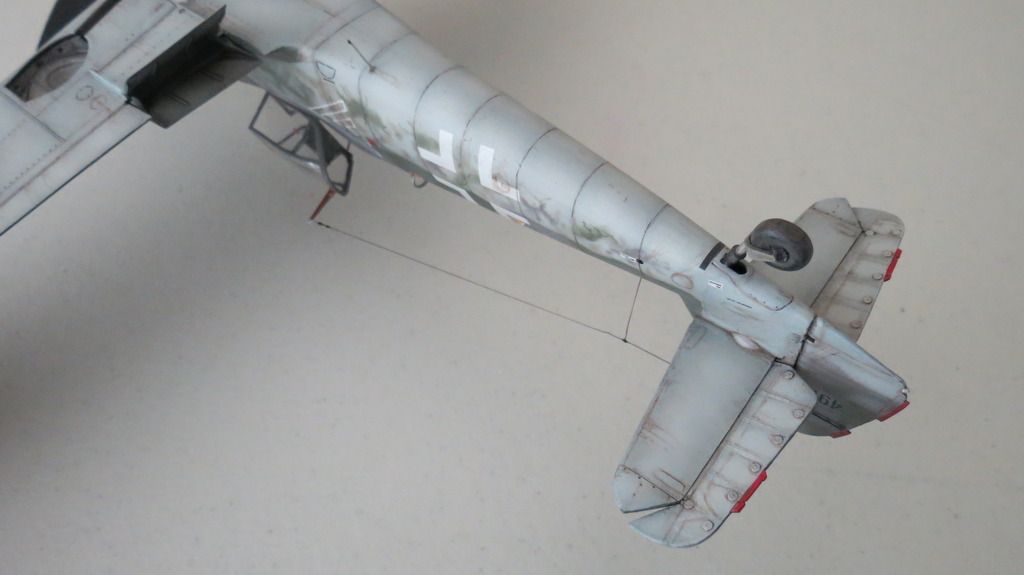
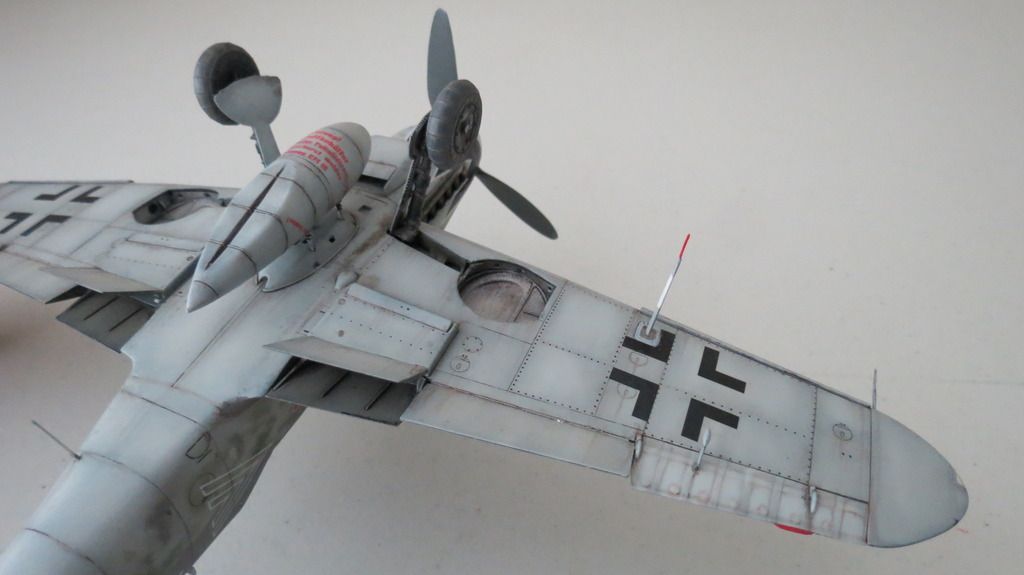
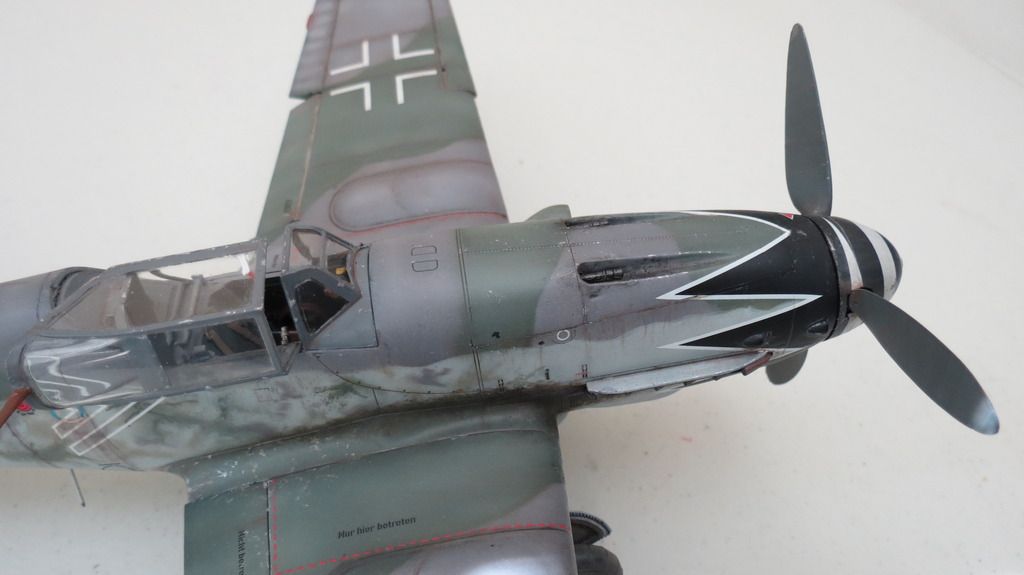
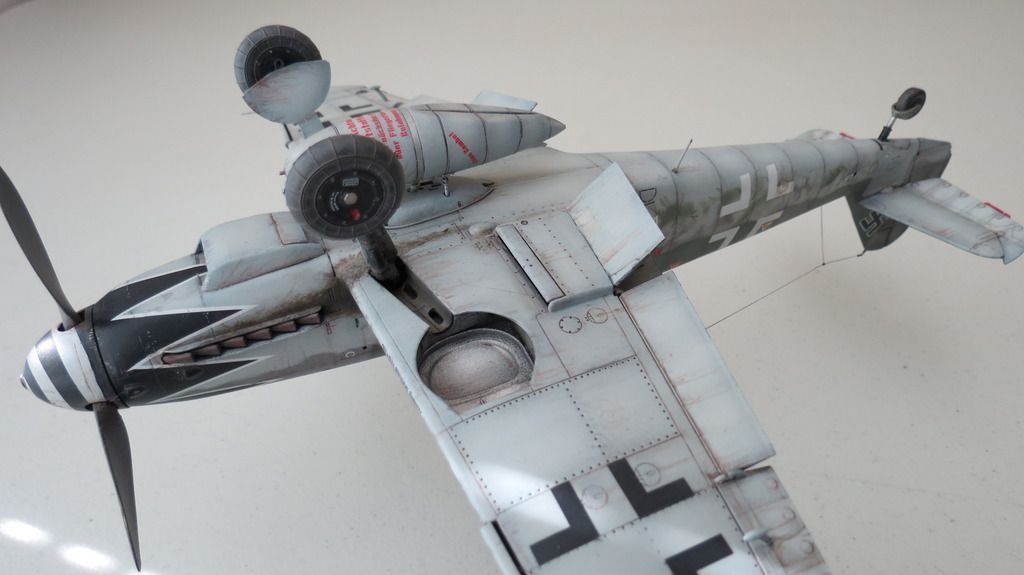
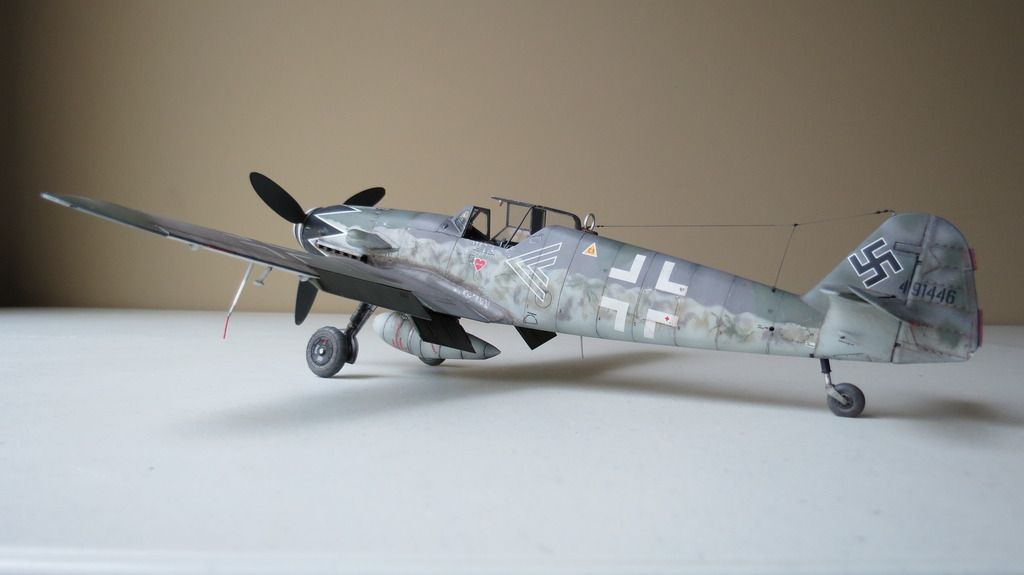
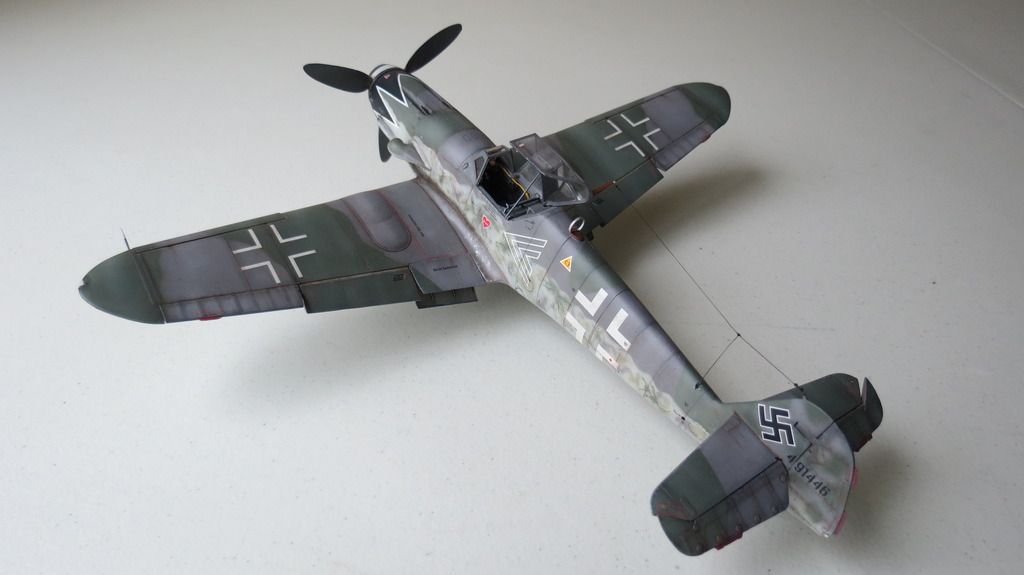
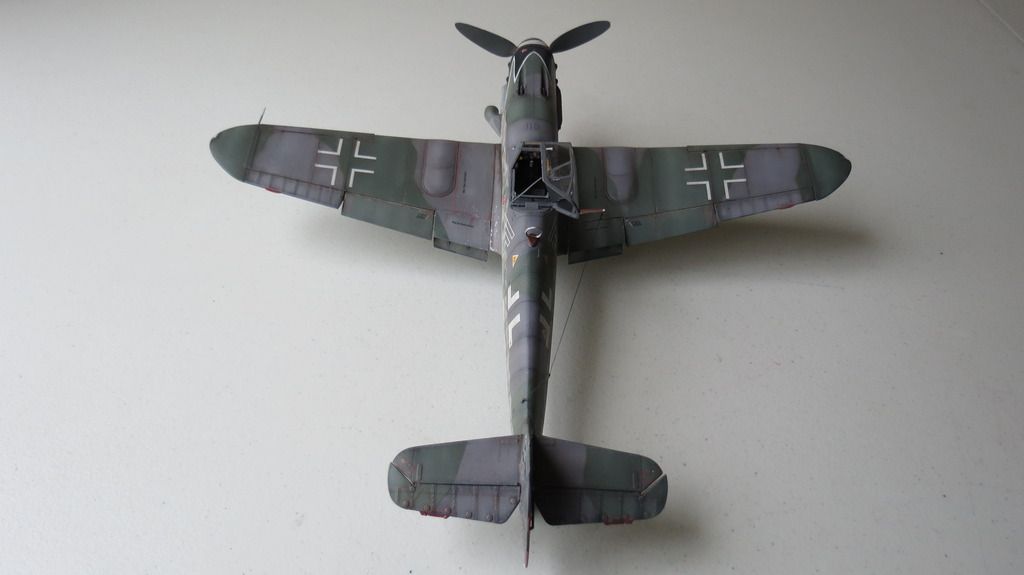
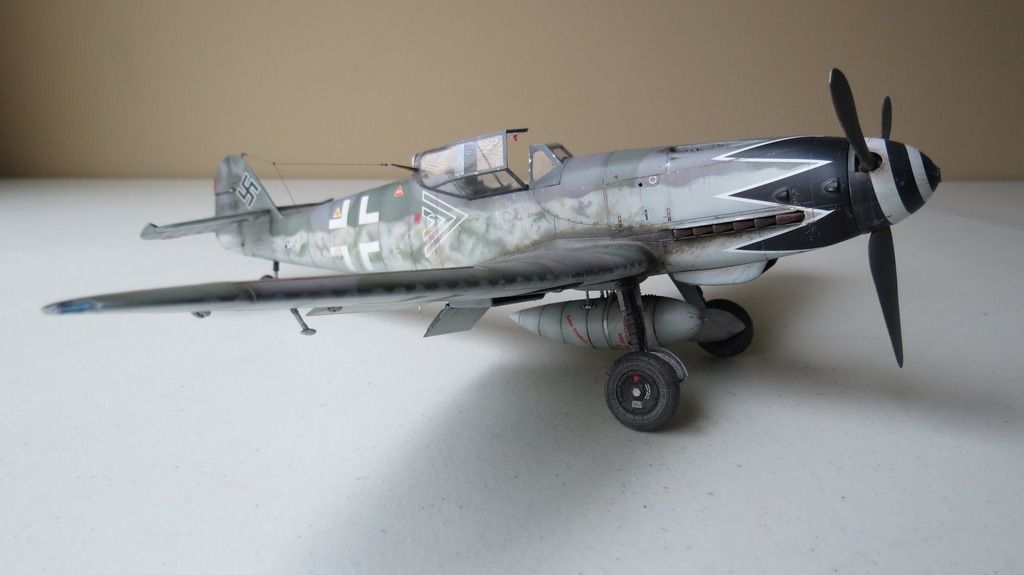
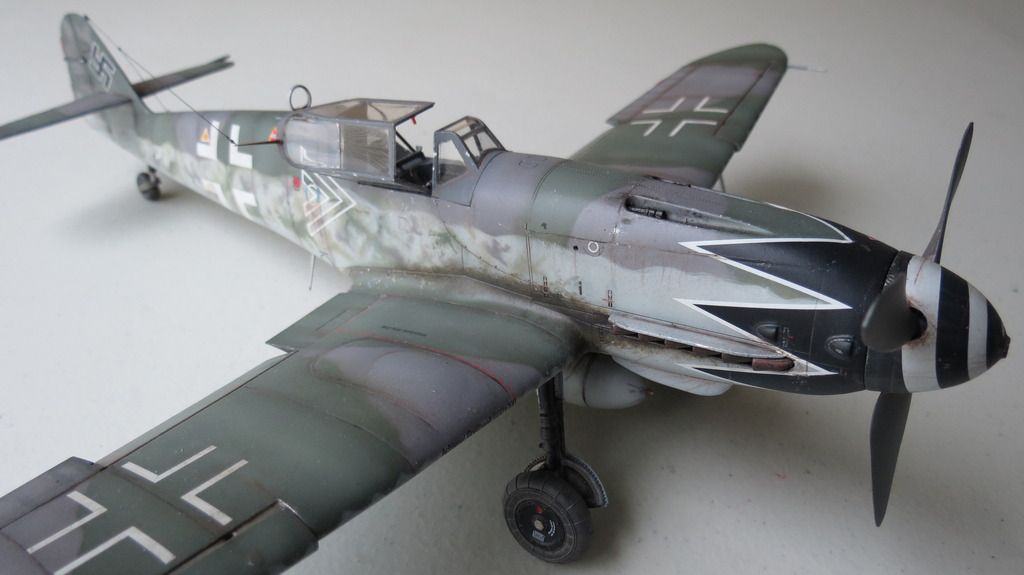
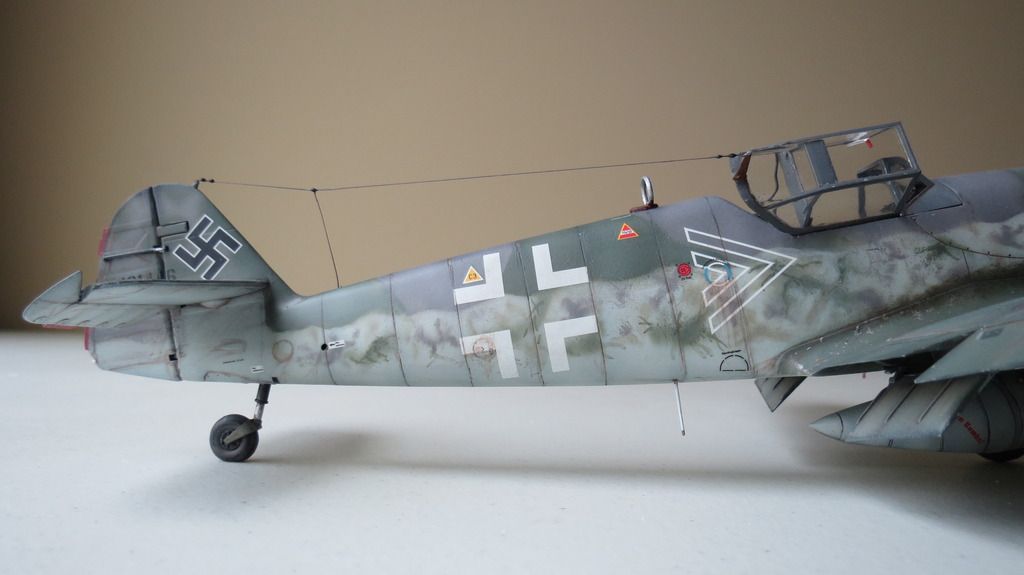
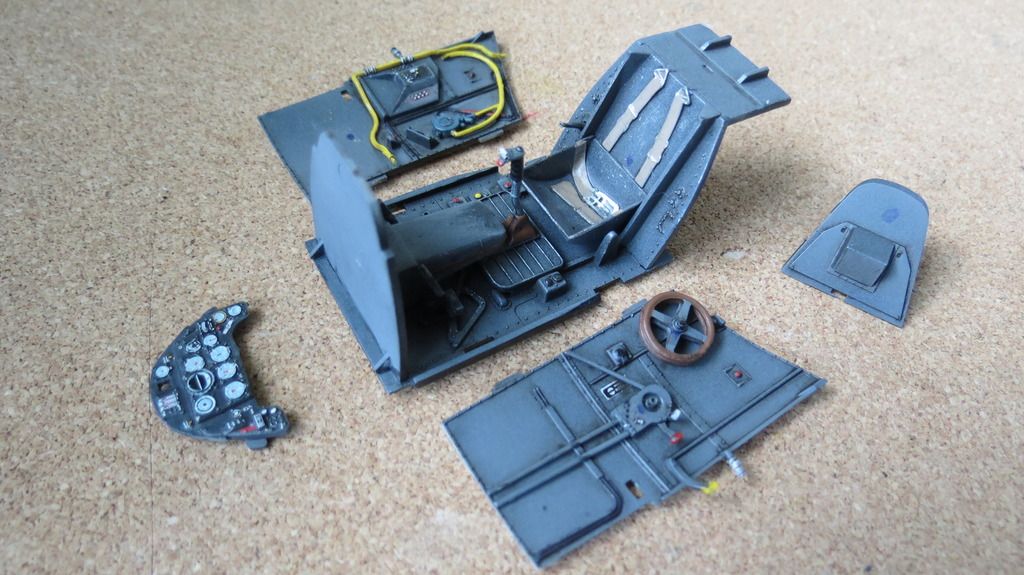
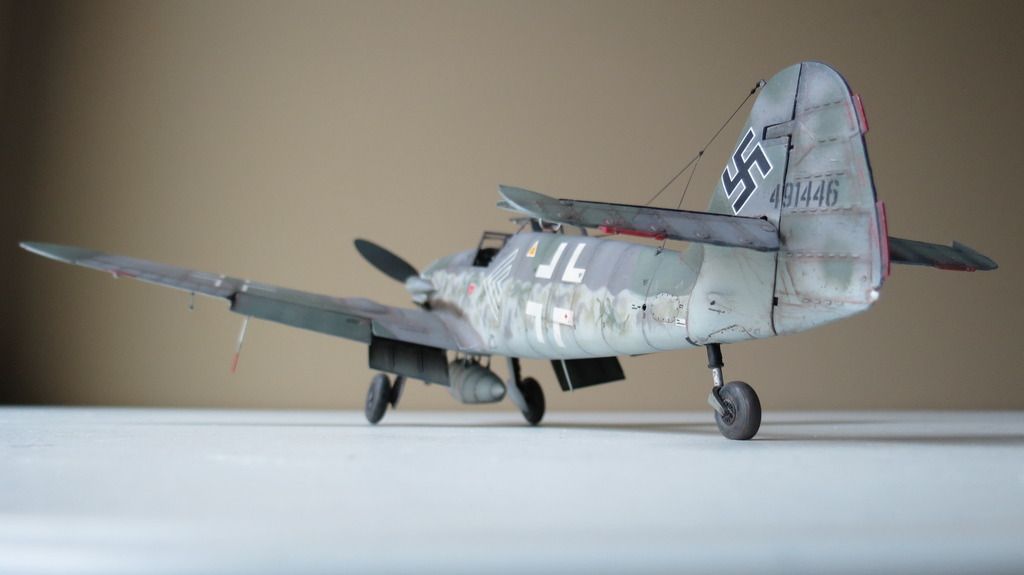
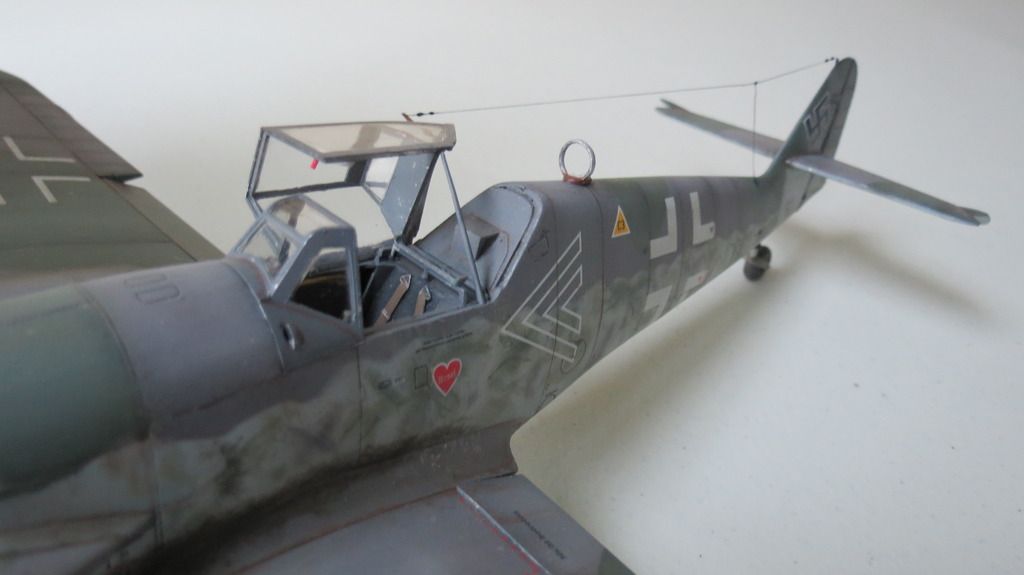
Revell 1/32 Messerschmitt BF109G-10 "Erla" "Final Reveal" There are two options available with this model and I chose to do the version as flown by Ace of Aces Luftwaffe Pilot Erich "Bubi" Hartmann who was credited with the highest number of aerial victories ever recorded- 352! This is another great newly tooled 1/32 scale kit from Revell of Germany (GmbH); very nice crisp clean moldings with great details including recessed panel lines, rivets, a great cockpit, undercarriage, movable flaps, elevators, ailerons and rudder! The decals are cartograf and go down very nicely indeed. My only issues with this kit are: 1) For this size kit, I was expecting it to come with a detailed Daimler Benz DB605 engine, but it doesn't. That would have been another nice addition to this kit to be able to have the engine cowlings hinged open to show off the engine, which then allows further options for after-market maintenance men, or "black-men" as they were known due to wearing all black overalls, to be posed working on the engine. 2) The main undercarriage have a sloppy fit between the axle lugs and their locations within the wheel-wells. This could be improved with simple modification in the mold tooling to increase the geometry of the lugs so they are a nice slide fit/tighter fit within their location points. I had to super-glue mine in position one at a time and hold their position until the fast acting super-glue had set solid. Super-glue is highly recommended for ensuring that the main undercarriage is fixed solidly. 3) The assembly instructions have some incorrectly numbered parts ie the part numbers in the instructions do not match the part numbers on the sprues. 4) The kit has some alternative parts, such as three versions of rudder and two styles of vertical stabilizer, but, they're are no references indicating which one of the optional versions to use with the two different options of aircraft that can be modeled. So, again, this forces you to do research to find out from available images which versions look correct for the particular plane you build. 5) The painting instructions have color call-outs that are mixed around on the orthographic views; which could confuse a younger modeler that doesn't bother to research and check where the grey/green and grey violet camo colors go. ie, you could easily end up having the green camo airbrushed/painted where it should be grauviolet and vice-versa. 6) The two upper camo color call outs are for RLM 74 Graugrun and RLM 83 Lichtgrun over RLM 76 Lichtblau, In my opinion and following research, the RLM 83 Lichtgrau is incorrect and should be replaced with RLM 75 Grauviolet, which is what I did. 7) As with the part numbering and color call out references, some decals are incorrectly referenced, too. My conclusion is this kits instruction/assembly booklet missed the quality control checks during manufacture/production and hence the issues pointed out above. But, that said, I still believe it to be a great value for money kit that is engineered very well with some great details. I paid $22.50 for this kit and it is available on line from Hobbylinc.com and Scalehobbyist.com for $23.95, that's about 16.00 quid for our British friends. Anyway, with that out of the way, let's move onto the "Final Reveal" photos, and forgive me, there are alot of them?!! I hope you enjoy the photos as much as I enjoyed this build!                                           Well, there she is! My conclusion to this build is that this is a great value for money kit that is well engineered, goes together great and offers some great details and options. I paid $22.50 for this kit, and it is available from Hobbylinc.com and Scalehobbyist.com for $23.95; that's about 16.00 quid for our British friends. If you've been thinking about buying/building this kit, you won't be disappointed, I really enjoyed building her. I'd give this kit 4.5 stars out of 5 or 9 out of 10, based on my points mentioned above. Thanks to everyone that has followed this build both on here and on my YouTube channel, and, for leaving encouraging comments, greatly appreciated! :) In the meantime, if you'd like to watch my "YouTube "Final Reveal" video for this build, then here is the link to that: https://youtu.be/_q-AcPsBLTU Until the next build, happy modeling and have fun! Cheers, Martin :)
  • Member since
    March 2012
  • From: Corpus Christi, Tx
Posted by mustang1989 on Friday, July 10, 2015 5:53 PM

Daaayuum!!!


 Forum | Modelers Social Club Forum (proboards.com) 

  • Member since
    September 2011
Posted by fightnjoe on Friday, July 10, 2015 5:33 PM

Beautiful my friend.  Absolutely beautiful.

Joe

Veterans,

Thank You For Your Sacrifices,

Never To Be Forgotten

Where you can find me:

Workbench on FaceBook  Google Plus  YouTube

  • Member since
    May 2013
  • From: Indiana, USA
Posted by Greg on Friday, July 10, 2015 3:56 PM

Outstanding, Martin. YesYesYes

Fine craftsmanship, and an excellent WIP thread.

  • Member since
    April 2015
  • From: New Hampshire, USA
Posted by UKguyInUSA on Friday, July 10, 2015 2:43 PM
Revell 1/32 Messerschmitt BF109G-10 "Erla" as flown by Erich "Bubi" Hartmann "Build Update #4" So, one of my favorite times of the build had arrived- decaling and weathering! I started off by airbrushing a gloss clear coat over the plane, drop tank, wheels, propeller and flaps and allowed that to dry overnight. The following morning, I prepared my bench for decaling:    I started by applying the upper wing decals first, followed by the underside decals, the fuselage nose decal, the spinner, the fuselage sides and lastly, the drop tank:      The decals completed except for the wheel decals:  I was informed by a fellow modeler that the wheels should be black and that Revell had screwed up with their call-out for aluminum, and so I corrected them with Tamiya XF-1 Flat Black:   The decals were then sealed in with a gloss clear coat which was allowed to dry overnight, prior to starting the weathering stage:  I began my weathering by applying some subtle "chipping" using Tamiya XF-16 Aluminum:      After the "chipping" was applied, I moved onto applying a filter. I mixed a small amount of black and white oil paints, thinned down with odorless mineral spirits to a watery consistency. This produced a light grey color that I brushed all over the plane and the unassembled parts:    I allowed that to dry for around 30 minutes, then using Q-Tips/Cotton Buds, I gently removed the excess leaving a thin film over the surfaces. I removed the filter in the direction of air-flow:  I let the filter dry for a few more hours whilst taking lunch, catching up with modelers videos, builds, comments etc and watching the latest news on CNN....it's a hard life...and then, I mixed a dark wash with black oil paint and mineral spirits and brushed it all over panel lines, rivets and raised features to highlight them. Again, I allowed this to dry for around 30 minutes and then rubbed the excess off gently in the direction of air-flow with Q-Tips/Cotton Buds:     Again, I let this dry for a few hours before moving onto my next weathering stage- applying a reddish/brown wash for fuel and oil stains and water/dirt streaks. I used Humbrol 113 thinned down about 90% with Tamiya thinners:            I allowed that to dry for a few hours then sealed the weathering in with the final finishing matte/flat clear coat:  It was now time for the "Final Assembly"! I started off by fitting the flaps:  Next was the wheel assemblies:   Using Model Masters acrylic washes and some pencil/graphite dust created by scraping the end of a 6B pencil with my scalpel blade, I applied the exhaust stains onto either side of the fuselage:   I then fitted the gun-sight in place followed by the front wind-shield:   Next, I fitted the wing-tip light lenses, but before gluing them into their locations, I painted the rear side surfaces with red for the port-side and blue for the starboard side:   I now moved onto fitting the wheels onto their axles, but before I did that, I needed to apply the decals onto them and then seal them with a flat clear coat. They were glued onto the axles using super-glue as were the axles into their locations. The location of the axles into the wheel bays isn't a very good design and the fits are sloppy, and therefore, using super-glue and holding the axle in the required position until the glue sets is recommended. It only took 20-30 secs for the glue to set solid and provide a rigid structure:    Next, I fitted the 4 hard points onto the drop tank for locating into the underside of the fuselage and then glued the drop tank into place:   I then moved onto to fitting the rear wheel, the rudder actuator/cylinder and the aileron counter-balance weights:     Next, I glued the portside underwing aerial, the circular antenna onto the upper fuselage and then the pitot tube:    I then worked on the canopy, by fitting the internal handle and then the aerial mast on top of the back edge:   Using a piece of sprue I stretched it out using a candle flame, then cut a 11mm length to use as the fuel tank overflow pipe. I then cut a section to use as the canopy support strut for when the canopy is in the open position:    Lastly, I carved a small piece of sprue to create a antenna cable fixing point on front of the vertical stabilizer:  I then painted these parts that were fabricated from sprue, then finished the plane off by adding the antenna cables using EZ-Line. To see the build complete, you'll have to wait for the "Final Reveal" upload, but in the meantime, if you'd like to see my YouTube "Build Update#4" video, here is the link: https://youtu.be/99i1tthwE8g Thanks to everyone that has followed this thread and left comments, it is greatly appreciated! :) Have a great weekend and happy modeling! Cheers, Martin
  • Member since
    April 2015
  • From: New Hampshire, USA
Posted by UKguyInUSA on Friday, July 10, 2015 1:43 PM

Thanks Greg, greatly appreciated! The speed of the build is accelerated by the well engineered parts that literally fall together without the need for any filler. It's another excellent newly tooled 1/32 scale kit from Revell and my second one that I have built to date. I plan to build their 1/32 scale, newly tooled last year, Supermarine Spitfire Mk.IIa that I will be building as a commemoration for the 75th Anniversary of the "Battle of Britain" which began today in 1940 and ended on October 31st 1940.

Have a great weekend!

Cheers,

Martin : )

  • Member since
    April 2015
  • From: New Hampshire, USA
Posted by UKguyInUSA on Friday, July 10, 2015 1:39 PM

Thanks Bob, greatly appreciated! You won't be disappointed with the kit, it goes together very well, but just watch out for some misleading and incorrect assembly/paint and decal instructions. Also, the undercarriage location design is very loose, a poor design that I recommend you use super-glue on the wheel struts and hold them in place at the correct position until the CA glue sets solid, which took about 30 seconds to do.

Cheers,

Martin : )

  • Member since
    April 2015
  • From: New Hampshire, USA
Posted by UKguyInUSA on Friday, July 10, 2015 1:36 PM

Thanks Bish, greatly appreciated! Yes, this is my second Revell 1/32 build, my first was their Arado AR196A-3 which was a fabulously well engineered kit with tons of details that fell together! After this build is complete, I will be starting my third Revell 1/32 model- the Supermarine Spitfire Mk.IIa that I will be building for the 75th Anniversary of the Battle of Britain group build which begins today (when the Battle began) and ends on October 31st, when the Battle Ended. I also be building a Eduard 1/32 Messerschmitt BF109E-3 for that GB, too.

Have a great weekend!

Cheers,

Martin : )

  • Member since
    April 2015
  • From: New Hampshire, USA
Posted by UKguyInUSA on Friday, July 10, 2015 1:33 PM

Thanks Huey, greatly appreciated mate! :)

  • Member since
    April 2015
  • From: New Hampshire, USA
Posted by UKguyInUSA on Thursday, July 9, 2015 1:18 PM

Thanks Jay Jay, greatly appreciated and your welcome for the detailed W.I.P. I enjoy doing them and making my "Build Update" and "Final Reveal" videos on YouTube.

I'd love a job with FSM....any job related to modeling would be awesome!

I'd like to work for a model manufacturing company; I'm a Plastics/Mechanical Engineer by profession working in the injection molding industry for 33 yrs now....I'd love to be involved with the Engineering/Sales/Project Management/New Product Development and Introduction with someone like Revell....As the Director of Engineering for a medical device manufacturing company, it would make a refreshing change and something that I'd really love to do!

Cheers,

Martin : )

  • Member since
    April 2015
  • From: New Hampshire, USA
Posted by UKguyInUSA on Thursday, July 9, 2015 1:11 PM

Thanks Joe, much appreciated! Revell have produced some great 1/32 scale kits recently. This is my second one that I'm building, my first was the Arado AR196A-3. After this one, I'll be building their 1/32 Supermarine Spitfire Mk.IIa. I want to buy the new Fw.190, too!

Cheers,

Martin : )

  • Member since
    April 2015
  • From: New Hampshire, USA
Posted by UKguyInUSA on Thursday, July 9, 2015 1:08 PM

Thanks Brandon, greatly appreciated! : ) I just completed my decaling and weathering and just have my final assembly left to do now. Should be wrapped up by tomorrow!

Cheers,

Martin : )

  • Member since
    April 2015
  • From: New Hampshire, USA
Posted by UKguyInUSA on Thursday, July 9, 2015 1:06 PM

Thanks Rob, greatly appreciated! : ) The kit cost me $23.95, great value for money for the size and the details it has. I just have my final assembly left to do now, just completed my decaling and weathering. Should be wrapped up and ready for my "Final Reveal" by tomorrow night.

Cheers,

Martin : )

  • Member since
    April 2015
  • From: New Hampshire, USA
Posted by UKguyInUSA on Thursday, July 9, 2015 1:02 PM

Thanks Rooster, much appreciated! : )

  • Member since
    June 2014
Posted by BrandonK on Sunday, July 5, 2015 1:09 PM

You are making amazingly rapid progress on this kit. Nice work, Sir!!

On the bench:

A lot !! And I mean A LOT!!

2024 Kits on deck / in process / completed   

                         14 / 5 / 2  

                              Tongue Tied

  • Member since
    May 2013
  • From: Indiana, USA
Posted by Greg on Sunday, July 5, 2015 12:39 PM

Excellent work and and excellent WIP thread.

Thanks for sharing, and my you are a fast builder, Martin. But your speed is in no way compromising the quality of build, as it looks first class all the way.

JOIN OUR COMMUNITY!

Our community is FREE to join. To participate you must either login or register for an account.

SEARCH FORUMS
FREE NEWSLETTER
By signing up you may also receive reader surveys and occasional special offers. We do not sell, rent or trade our email lists. View our Privacy Policy.