- Member since
April 2015
- From: Detroit, MURDER CITY
|
1/48 Revell/Monogram PBY Catalina
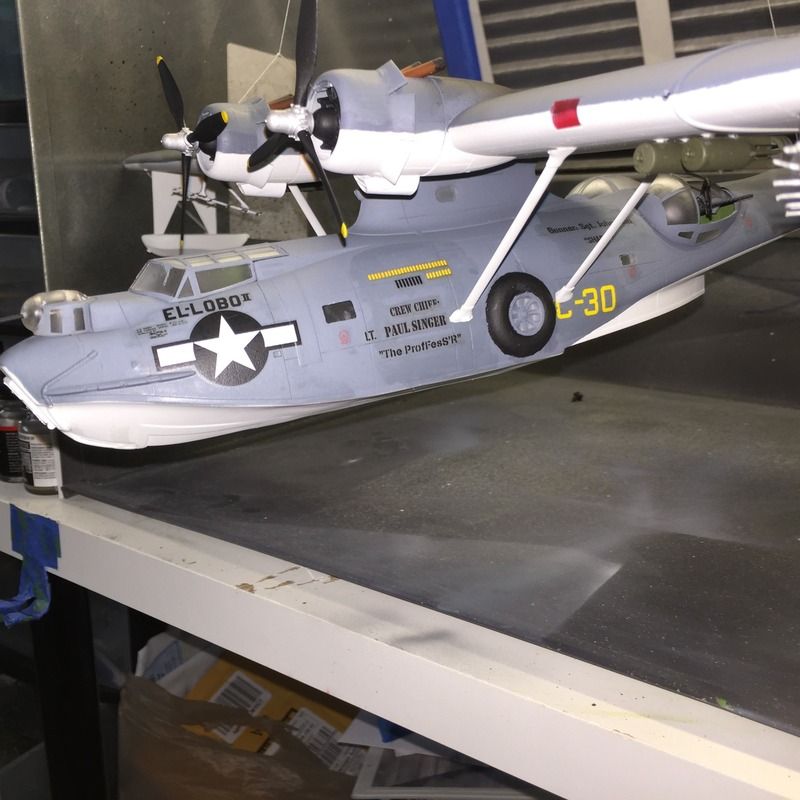
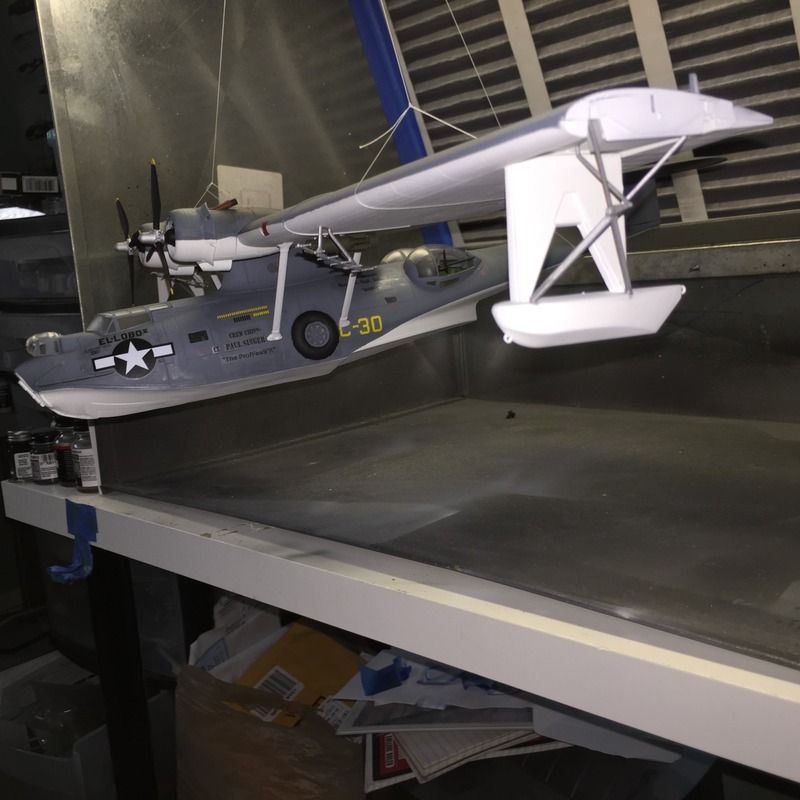
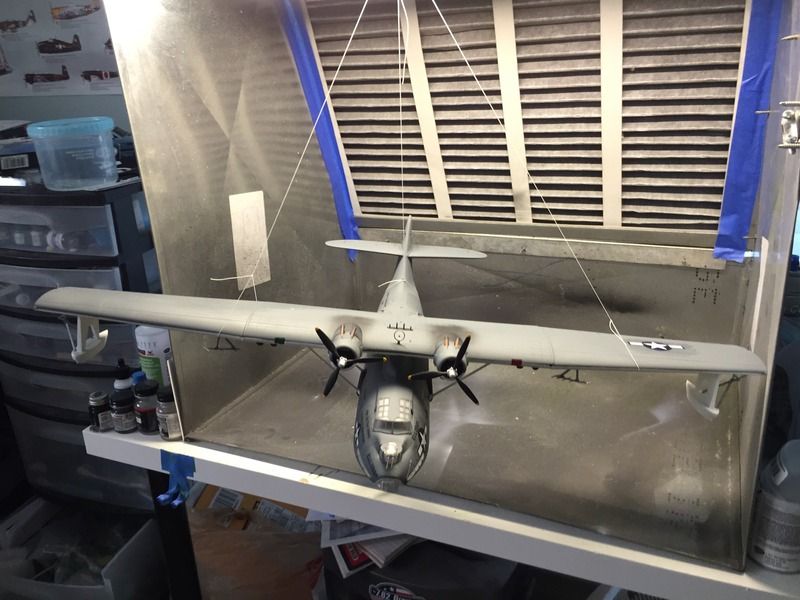
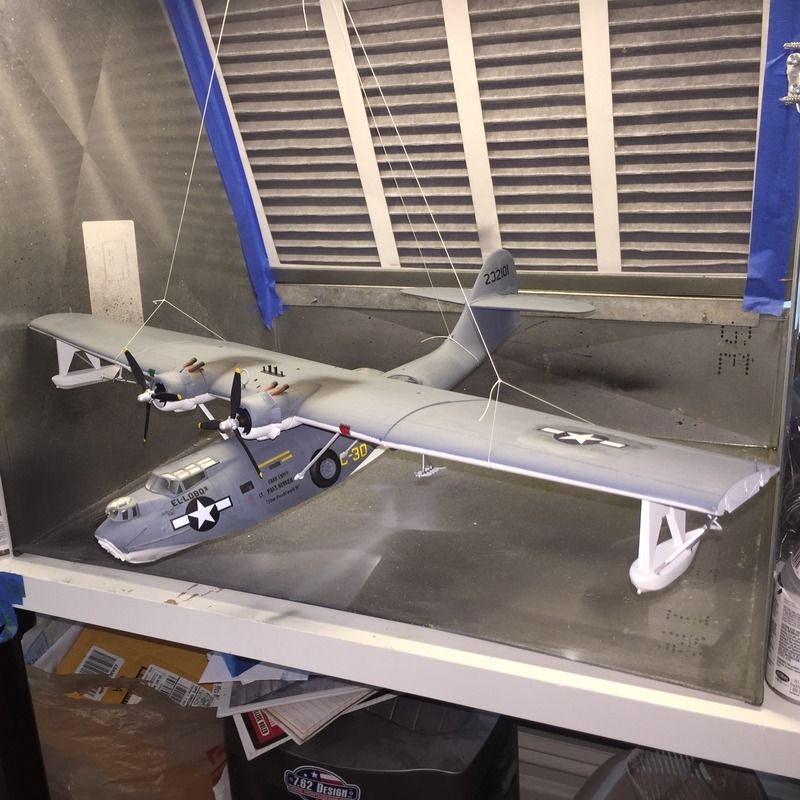
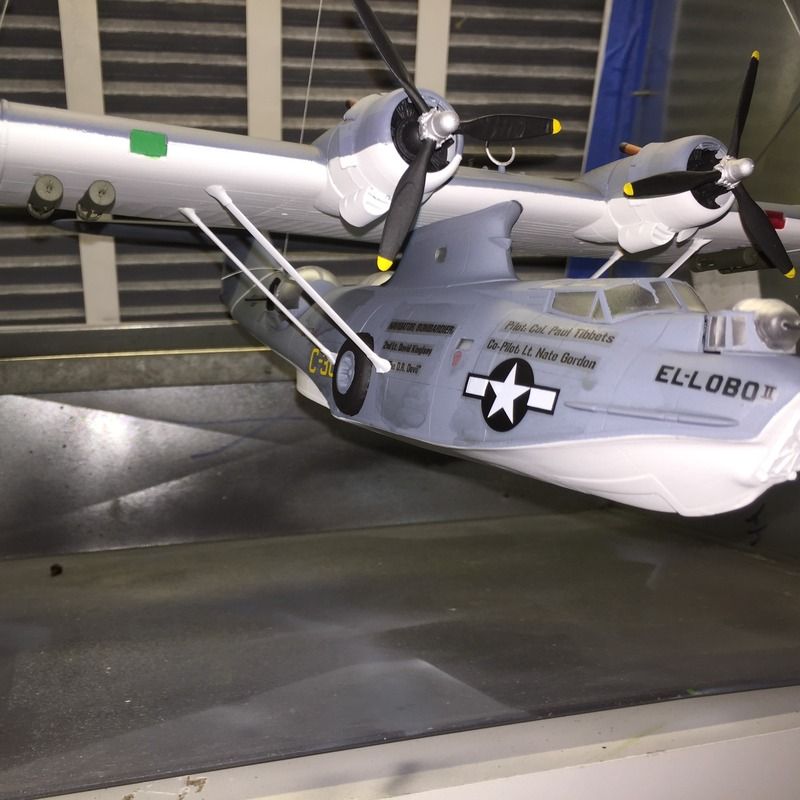
I am finishing up this 1/48 PBY Catalina, a revell-monogram, it is actually a PBy-10A or something of that sort, but I built it as a gift for a dear friend whose father served in the south pacific on a sub-hunter. This is only the third plane I have built since I was about ten years old, and I am learning all sorts of new techniques. Please take it easy one me. I am just learning to use the airbrush as well. I also took a swing at making some decals, with my friend's father's name on them, Crew Chief Paul singer. The pics are not all that great, as I just hung it in my paint booth, without any white sheet or anything behind it. It was also my first attempt at "weathering" around the exhausts, and that got to be overkill real fast, so it appears to be running quite rich! There were MANY "firsts" on this build. All-in all, it was a pretty crappy kit IMO. The fuselage halfs fit together like CRAP. The bottom part, where the "boat hull" part is at, was severely warped, and had to be cut-out, patched in, and required extensive putty. (another first, my use of putty) But I discovered Deluxe materials "perfect plastic putty", and that stuff rocks!!! I initially used loads of squadron green putty, but the final coats were PPP... MUCH better! My new airbrush broke, so I had to buy another one. (another long story) This was my first time using "EZ-Masks", purchased out of Canada, They really worked great, especially on the bubble-blisters in the back of the plane, those would be a nightmare to mask. This was my first time using "future", see that story below. I also moved twice during the build, and lost several windows I had to remake, along with the landing lights. (I realize the colored lights in their place are incorrect) This was my first time using DULLCOAT, which I learned does not "dull" very well over Future, when it is only used for the decal areas. (again, see below) I also learned it will make your windows quite foggy, that they need to be masked. I cobbled decals together from a B-17 kit, and a P-51 kit, along with some home-made versions. (another first) Other than the pilot and crew-chief, I used all MOH or Victoria's Cross recipients for the crew.
I tried Aaron Skinner's method of applying Decals over future that is still wet, then overcoating, with mixed results. On the wings, where I brushed it on (only where decals were to be placed) and let it dry, and THEN placed the decals, and re-coated, they turned out GREAT. Where I brushed on the future, put on the decals while still wet, and re-coated over the top, I had mixed results, some air-bubbles and decals not fully applied or "stuck" down in all places.
Just brushing the future on where the decals go, brushing future over the top, and then dullcoating over the decals DOES NOT kill the gloss. If you use future over or under your decals only where the decals go, IMO you MUST re-coat the entire model with future after applying decals (better yet, before) otherwise the decal areas or any other spot where future was applied sticks out like purple polka-dots, as some noted above. Just my (first) experience working with future for decals...
Again, not the best pics, and the model could have turned out better, but there were a whole slew of 'firsts' and a lot was learned. Now that my airbrush is fixed, I plan to re-coat the plane in future, (to get the decal areas to blend) then re-coat it in dullcoat, before I give it to my friend as a surprise gift. I think he will like it regardless. Much was learned.
Rudy
|