SEARCH FINESCALE.COM

Enter keywords or a search phrase below:

Revell A-10 1:48 WIP

2043 views
23 replies
1 rating 2 rating 3 rating 4 rating 5 rating
  • Member since
    September 2015
Revell A-10 1:48 WIP
Posted by Air2AirJoe on Thursday, October 1, 2015 9:05 AM

Howdy folks.  I'm working on my very first build and i thought i'd share some pics of how things are coming along, and share some of my hurdles with Andy.

Here's the kit and my tools/equipt:
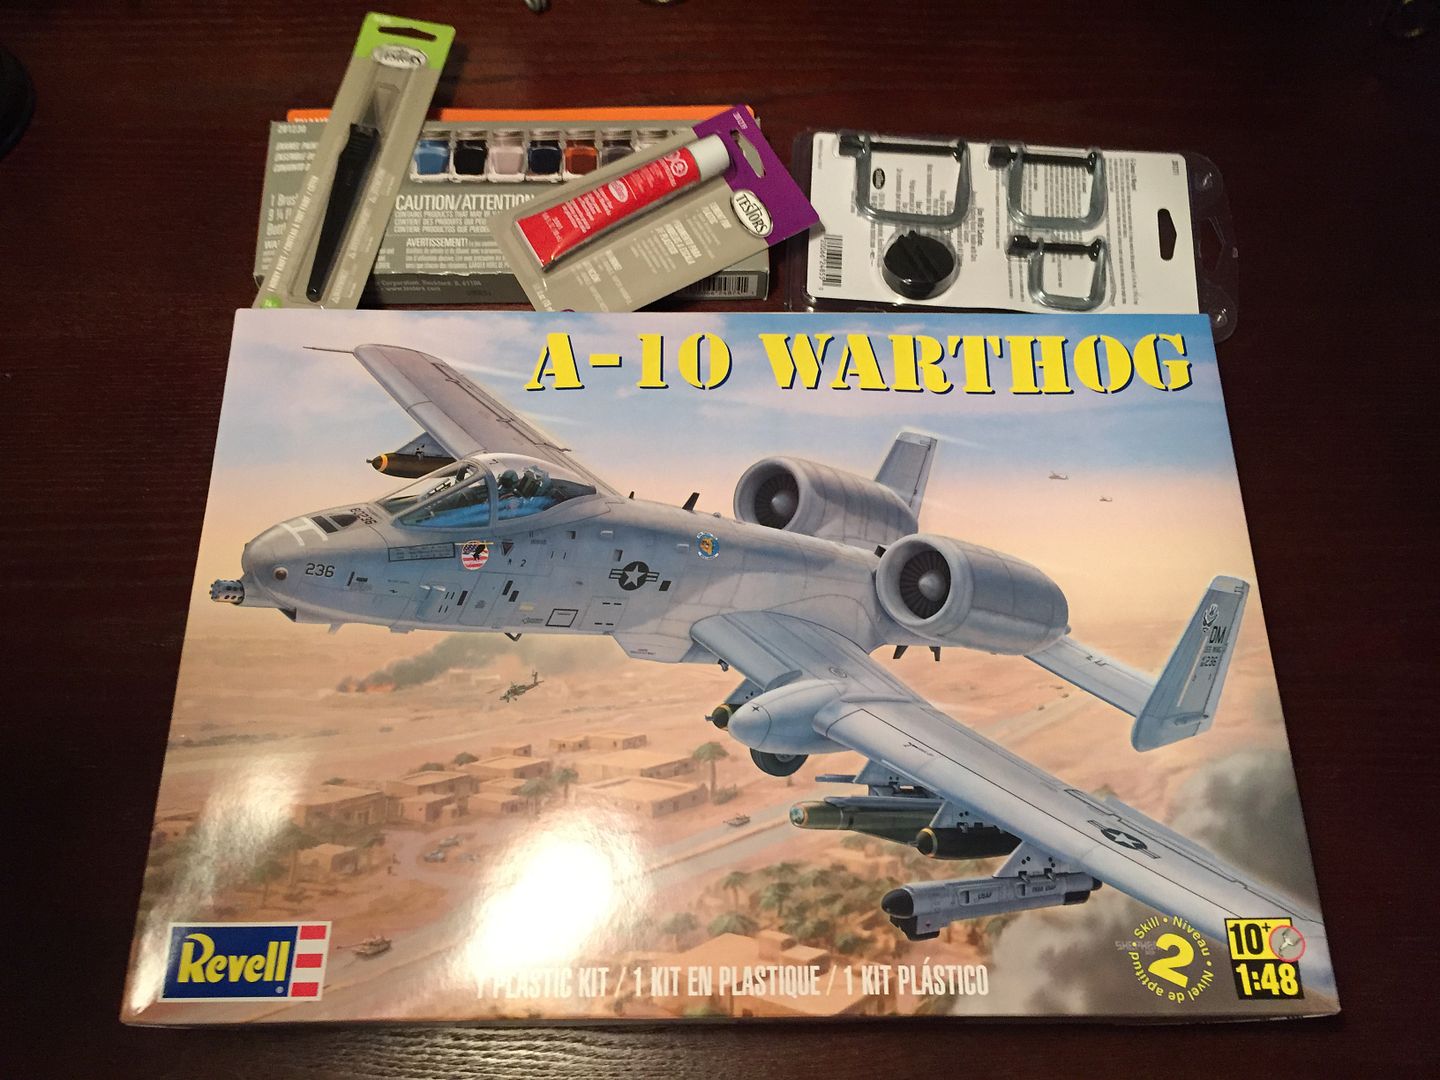
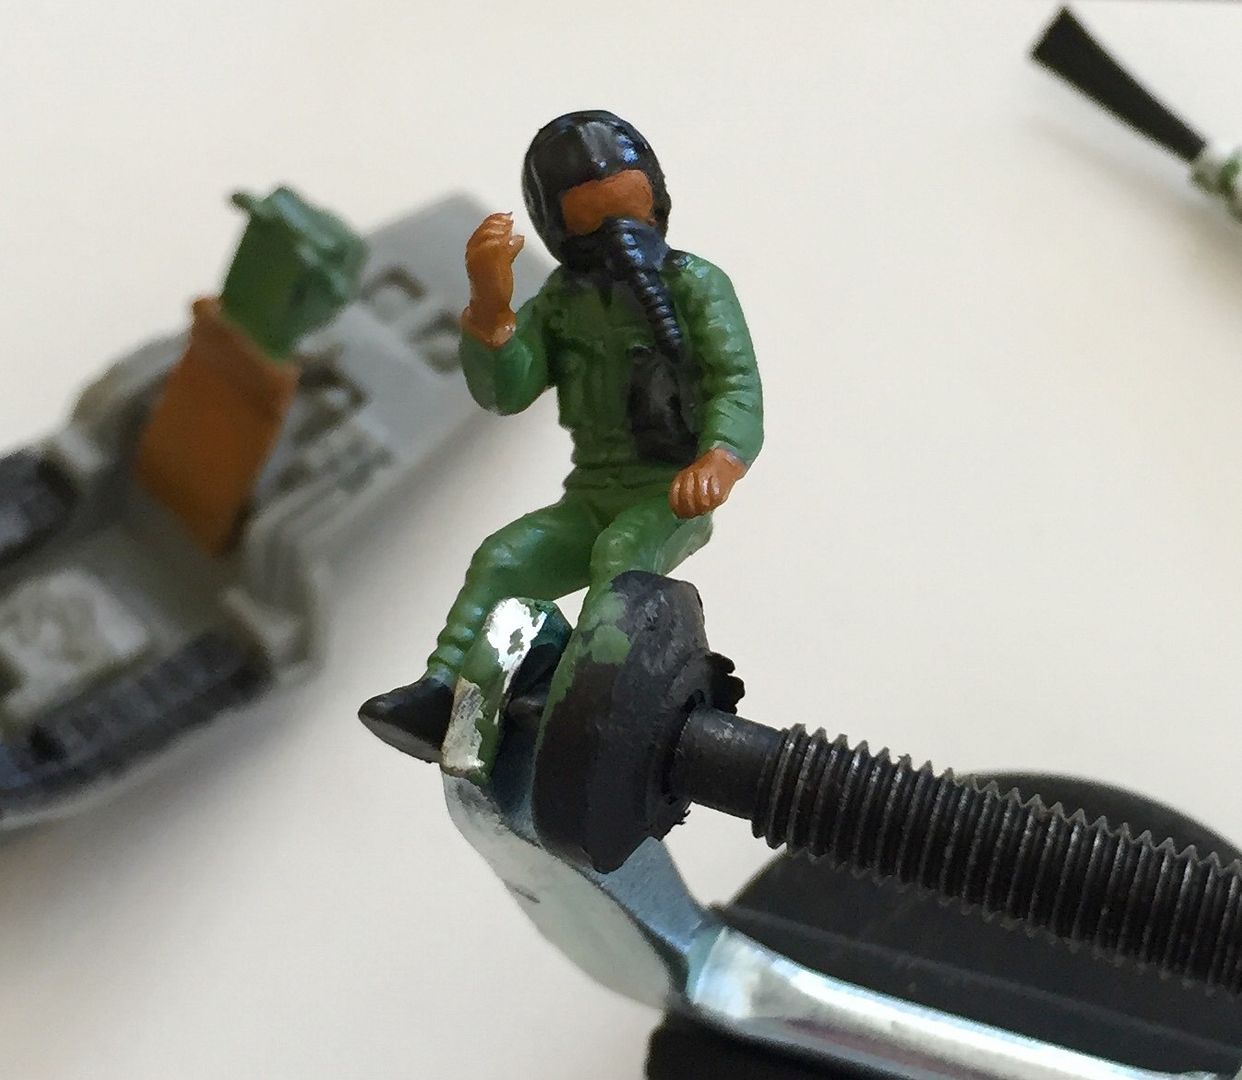
As soon as i opened the box and saw all the tiny parts i knew i was in trouble haha.  Oh well, i wanted a challenge thats why i decided to BUILD a model instead of just buy a replica A-10.  In hindsight i wish i'd flipped through the instructions FIRST and taken it all in, but i got right into building the cockpit and painting the pilot.  I have shakey hands but i think the pilot came out ok considering. Thanks for suggesting the clamps Patrick, that helped out a lot with the painting.
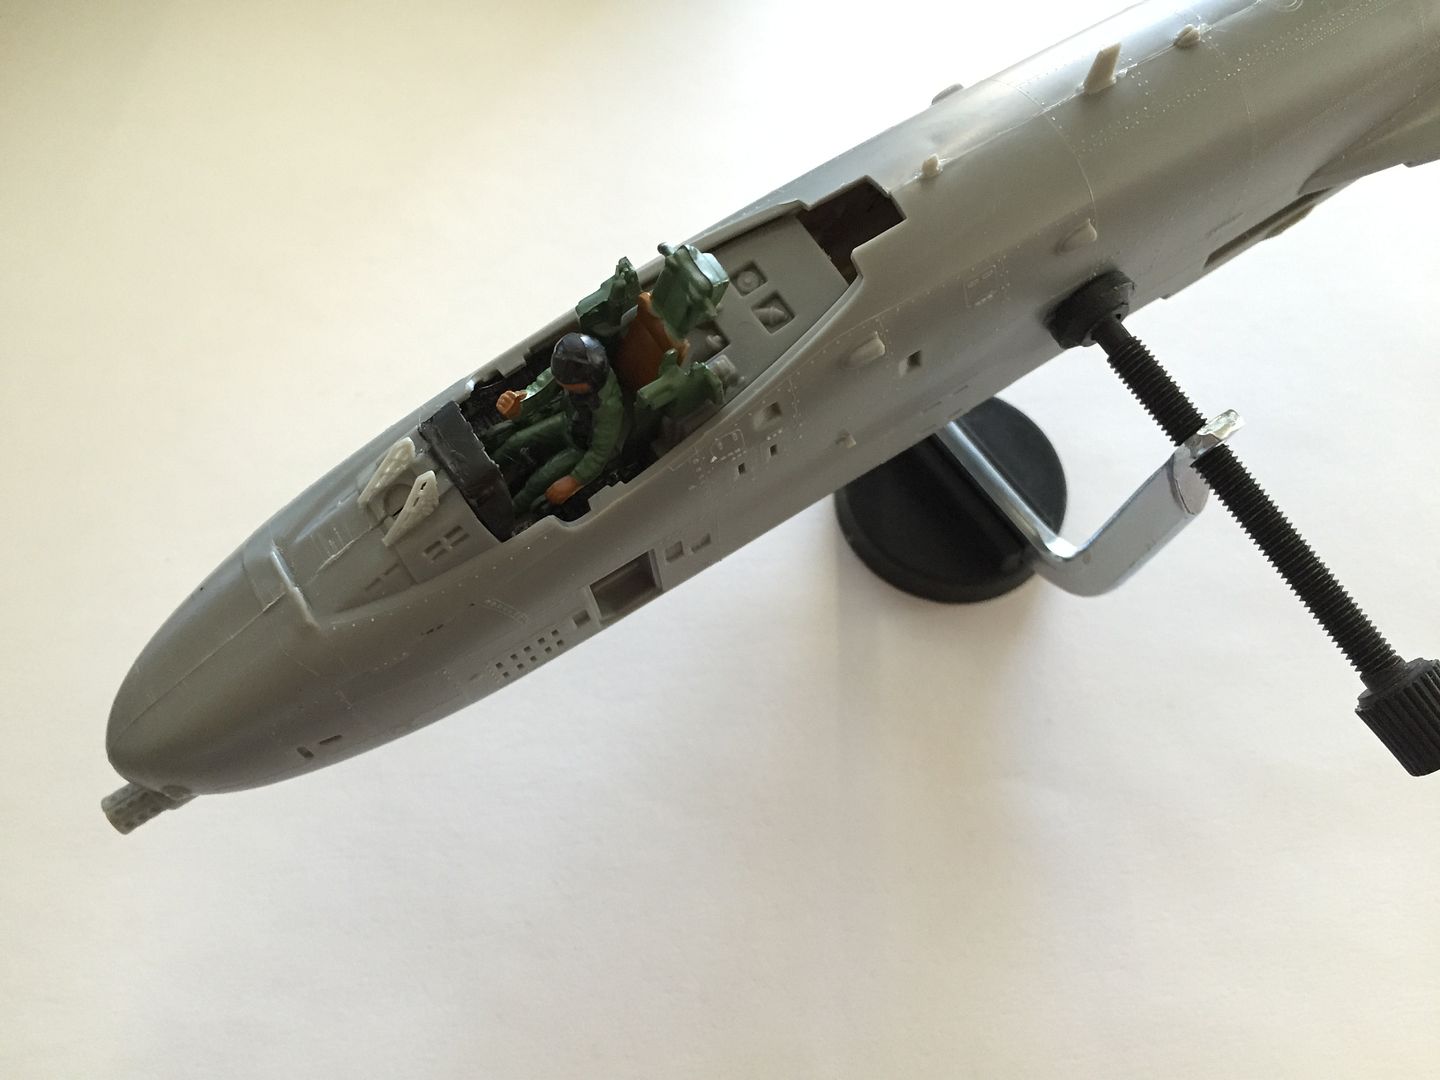
My first real problem came when it was time to glue the two main halves of the jet together with the cockpit inside. I couldnt quite tell exactly where the cockpit should be situated, but i got it mostly correct... i think
 

I noticed in the instructions that there was a side note that said something to the effect that,  "A weight must be placed inside the nose to weigh down the front end for proper balance..."    Ok, but it failed to say how much weight. I thought about gluing a penny or something in there but decided to just skip that part and figure something out when i was done.  Apparently in the real A-10 THIS is what serves as that weight:

In hindsight a penny would not have done the trick!  (More on this at the end, Andy!)

So on i march... after my daughters go to sleep each night i do a bit of cementing, sanding and painting.  Loving every minute. 

I did notice that some of the fits aren't perfect.  My main complaint is that the engines don't fit well in the space provided on the fuselage.  There was too big of a gap. I had to in-fill with cement and it just didnt go together well. Im sure to most people who look at it, it won't be noticeable but if one of you guys was examining it, you'd definitely notice. I did my best and moved on...

Another issue was the landing gear for the front wheel goes into place early on and you have this delicate piece sticking down for most of the build, which means you can't just lay the plane flat on a table, etc.  I don't have a good clamp set so i was constantly having to set the plane up in various improvised positions when gluing on the wings, tail and so forth:
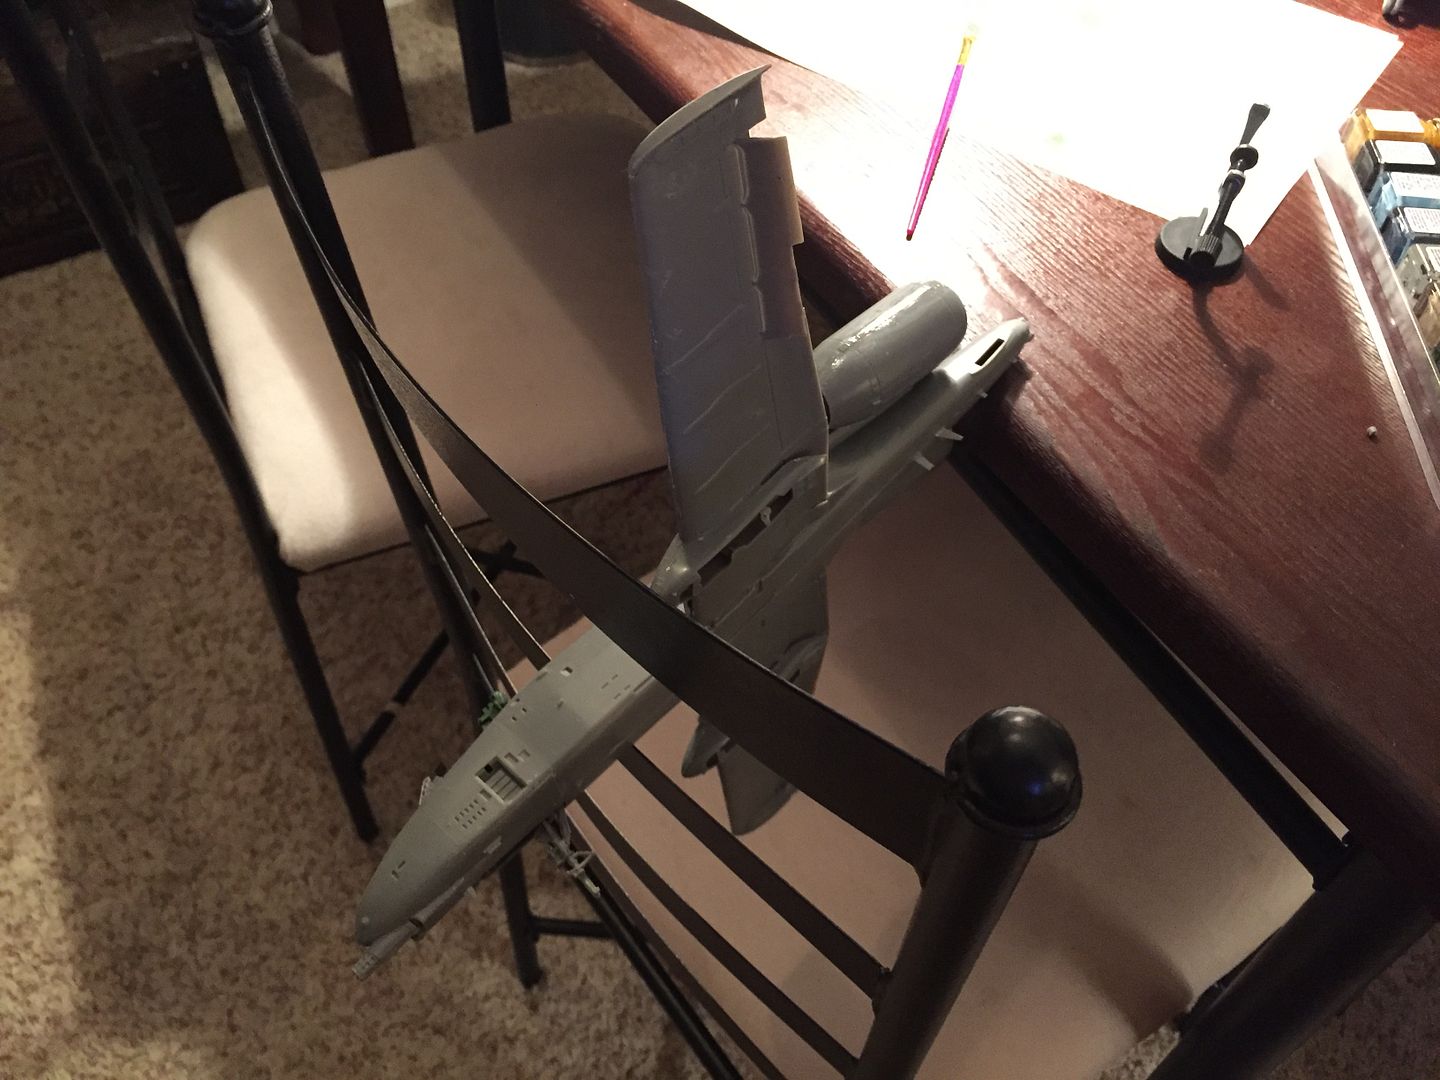
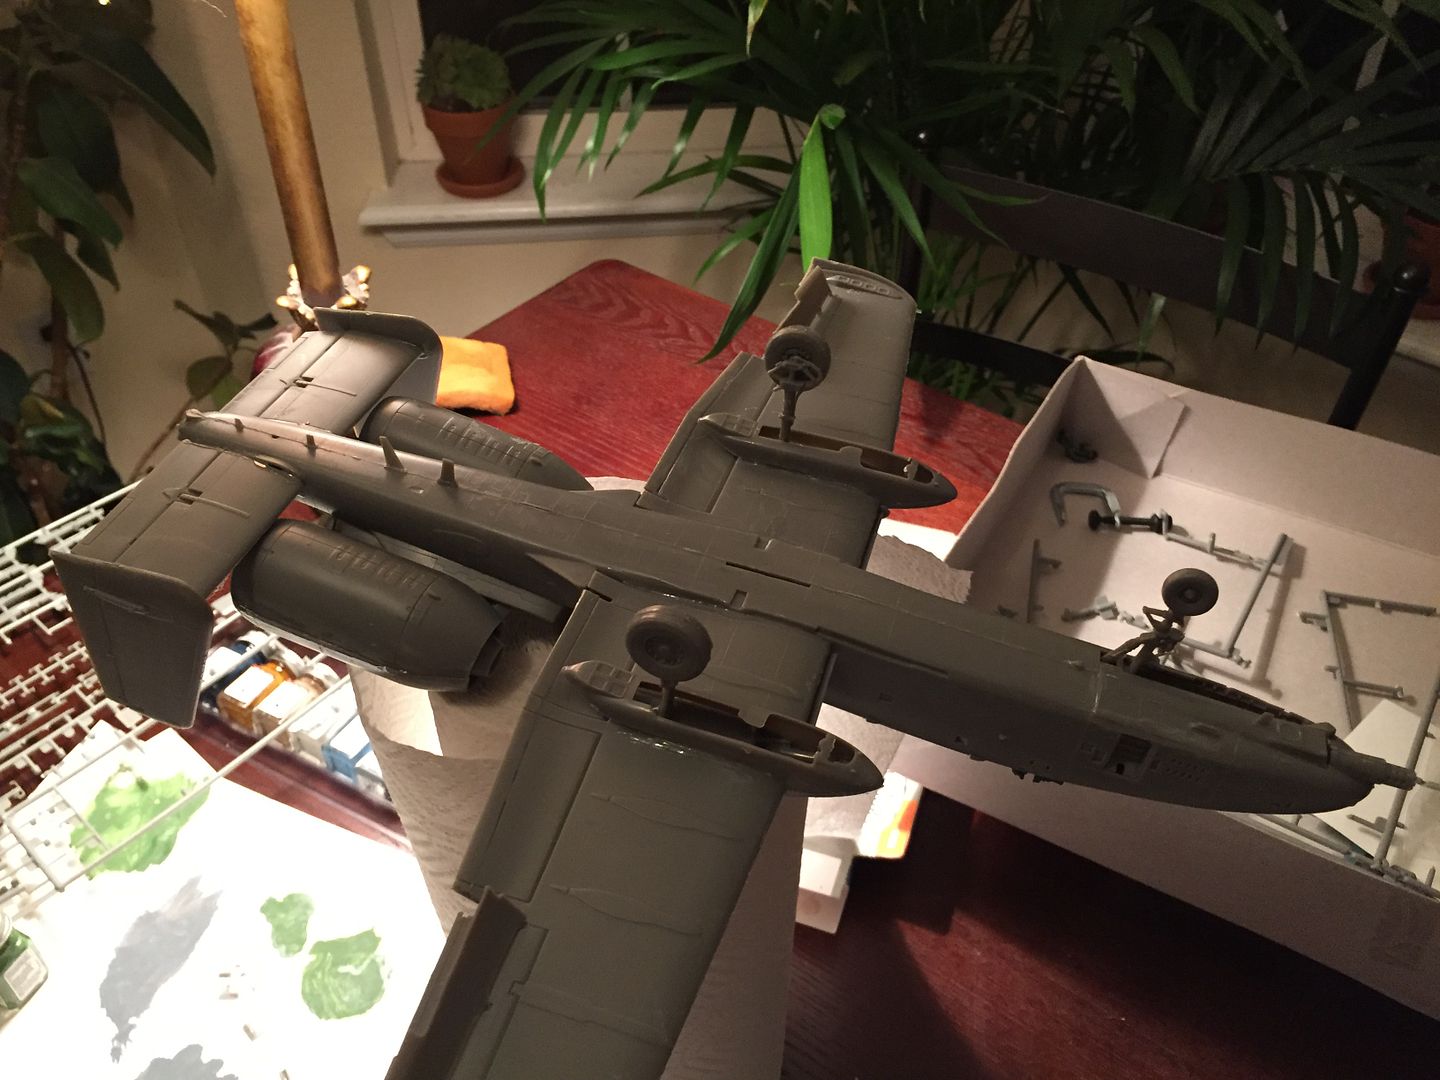
 

Hey it's starting to take shape!  Fumbling towards completion...

After getting the rest of the landing gear in place and putting the tires on, I see why the need for the weight:
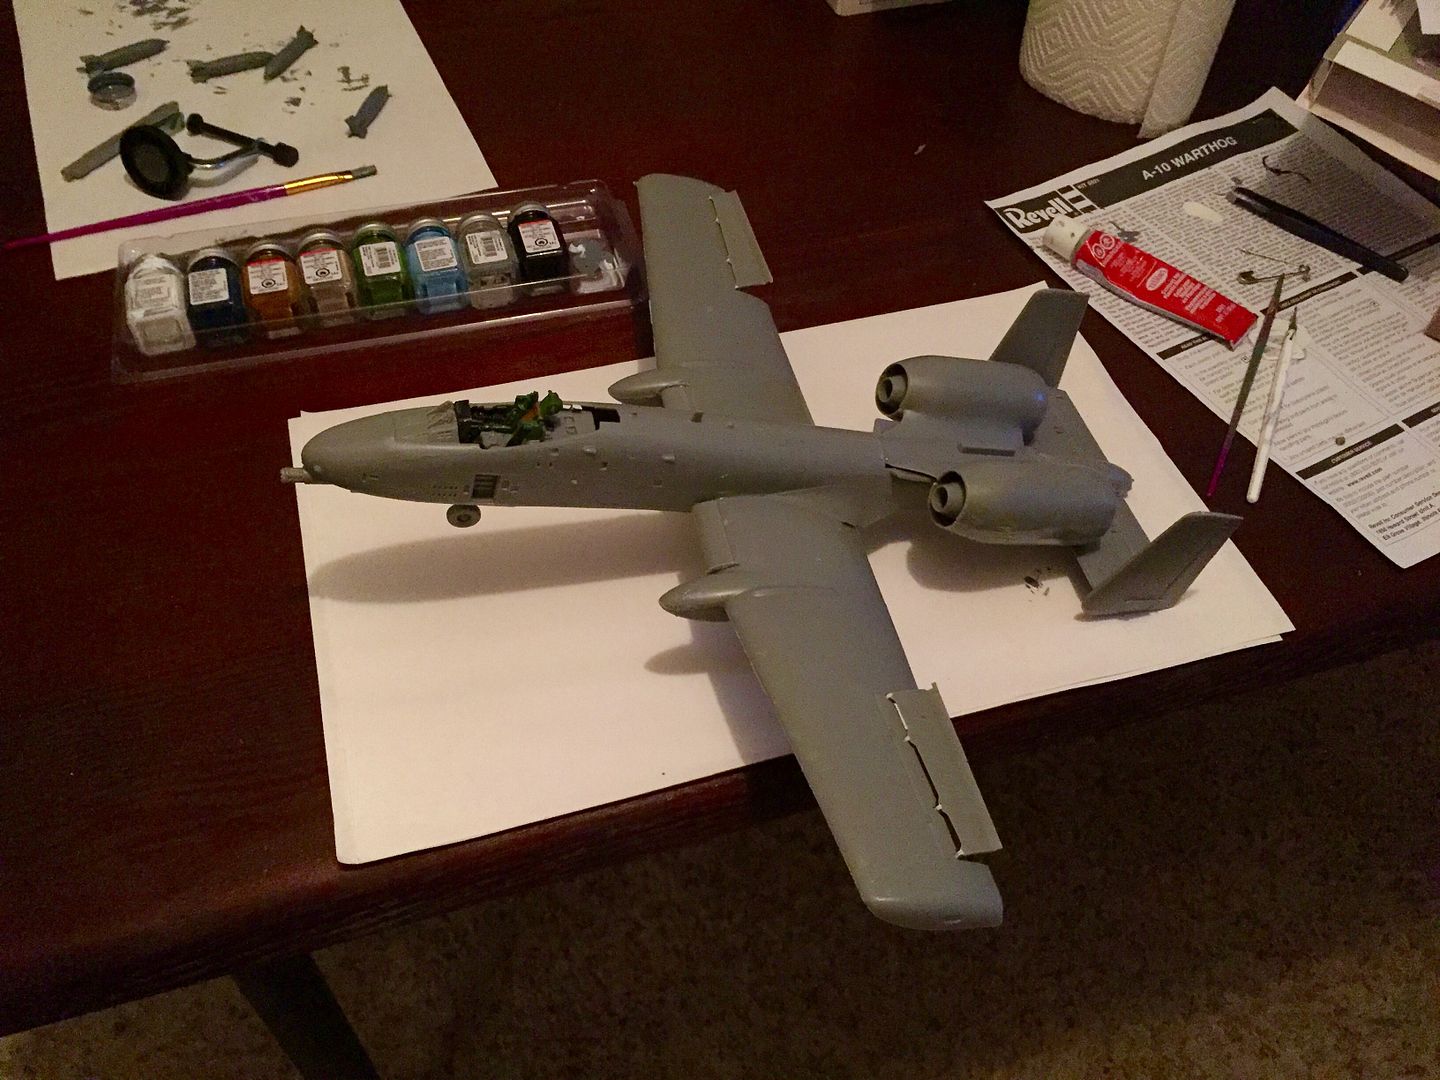
Well crap!  That thing is off kilter HARD!  I was shocked how hard i had to push down on the nose for it to put the front wheel on the ground.   Since Andy said he was about to start this model i decided to see just how much weight one would need to put into the nose when glueing the fuselage together for it to sit with the front tire on the ground.   I don't have weights around here for that so I had to improvise.  Knowing that a nickle weighs 5grams, I started taping together nickles and placing them on the nose:
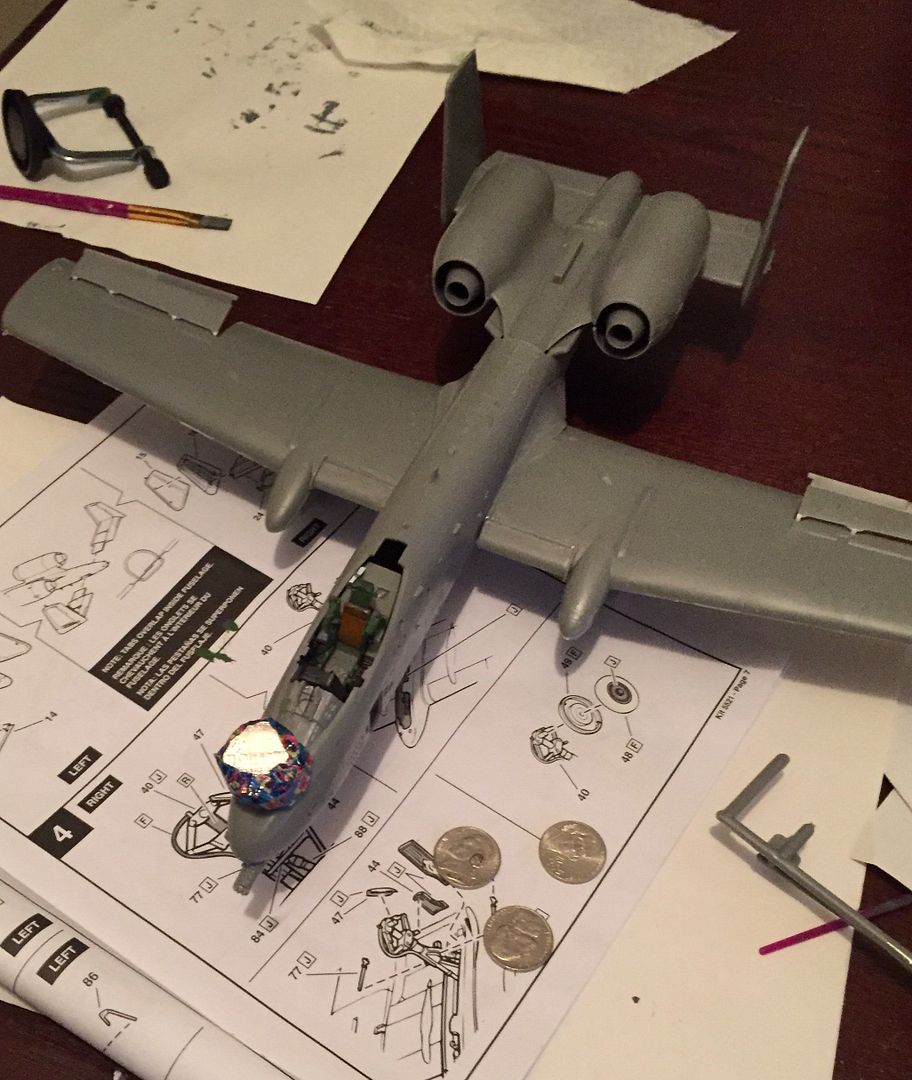
In doing so i found that it takes a minimum of 30 grams of weight in the nose for it to be properly balanced.  Now Andy, there could be slight differences in the way the rear landing gear is situated which could affect that number, but that's what i came up with. I hope that helps and if i were going to do this again I'd tape together 7-8 nickles (just to be sure) and secure them in the nose when glueing the fuselage togther.

I've still got to put a few small pieces on the landing gear, but i was thinking i actually might remove the landing gear and tires altogether because i want the model to be of the jet in flight.  I just think it looks cooler that way, and i might suspend it from the ceiling or craft some sort of "stand" to mount it on so it looks like it's flying. 

From here i mostly just need to paint this thing and attach the ordinance and I should be done.  I'm pretty sure it'll look like an 8 yr old did this, but i'll still be stoked when it's complete.  I LOVE A-10s and i can't wait to put this in my office and admire it.  Ive already learned a lot from this first build and i think i'll put an airbrush on my christmas wish list along with some other fighter jet kits.   Fun stuff!  

THanks to everyone for looking and for all the many many posts with advice and words of encouragement.  You guys have all been so helpful and I really sincerely appreciate all the help so far!

Best,

Joe

"Forgive me, I'm clueless"


  • Member since
    November 2010
  • From: Florida-West Central
Posted by Eagle90 on Thursday, October 1, 2015 9:20 AM

Joe, you have the best WIP posts ever!  Can't wait to see you in a Group Build!

I think you are doing a great job!  That hog looks great!  Figures are difficult and yours looks great!  As for the landing gear...remember, the instructions are more like guidelines!  Wink  You can keep the gear off until near the end of the build.  Lots of people do that with the landing gear, antennas, props, ordanance, etc..  Ahh, the weight problem!  LOL!  I have forgotten to do that more than once.  One thing I do (and this is just my 2 cents worth), is buy those small fishing weights.  They fit in small spaces, can be bent or smushed into shape, and a little super glue will hold them into place.  Another tip, if you use superglue on a build, and it is near the canopy, make sure you give the glue plenty of time to "air out".  The fumes from superglue really mess with clear parts!  Indifferent  Anyway, just a few things I thought of.  Hopefully it helps.

Eagle90

P.S.  Are you really using the Testors tube glue!?  Surprise  Tamiya Extra Thin Cement.....it will rock your world!  Wink


  • Member since
    September 2012
Posted by GMorrison on Thursday, October 1, 2015 9:40 AM

You'll never get a VW in there now. You can just add a prop at the back, little short piece of sprue.

Yes chuck the tube cement. And don't try to fill gaps with glue, you get a "glue bomb".

I like Bondo, the red car stuff. It comes in a toothpaste sized tube for about $ 6.00 or so and lasts a while. Dries quick, paints well. maybe a little soft, but easy to sand.

 Modeling is an excuse to buy books.


  • Member since
    September 2015
Posted by Air2AirJoe on Thursday, October 1, 2015 9:42 AM

Thanks my man!  I'm learning.  It's funny i was actually thinking about fishing weights last night... they make pyramid shaped ones that would work perfectly.  I'll have to dig those out of the closet.

The fumes from the glue mess with the clear parts? I never would have seen that coming, thanks! 

Tamiya Extra Thin Cement - got it!  I'll swing by Hobby Lobby on my way home and blow past the f-22 kit like it wasn't even there haha.

Also, group build? Is that what it sounds like?  People get together and build a single kit together?  Not sure that's up my alley, but i'd love to watch someone who really knows what theyre doing and who has good equipment do one of these. That would be awesome.

Thanks Eagle!

"Forgive me, I'm clueless"


  • Member since
    September 2015
Posted by Air2AirJoe on Thursday, October 1, 2015 9:43 AM

GMorrison

You'll never get a VW in there now. You can just add a prop at the back, little short piece of sprue.

Yes chuck the tube cement. And don't try to fill gaps with glue, you get a "glue bomb".

I like Bondo, the red car stuff. It comes in a toothpaste sized tube for about $ 6.00 or so and lasts a while. Dries quick, paints well. maybe a little soft, but easy to sand.

Excellent suggestions, thank you!  PS - i didn't need to look up what "sprue" is haha.

"Forgive me, I'm clueless"


  • Member since
    November 2010
  • From: Florida-West Central
Posted by Eagle90 on Thursday, October 1, 2015 10:03 AM

Heck, we are all learning!  1 month, 100 years, we are always learning something.

Yeap, those would work too.  They come in all kids of shapes and sizes.  A variety is a good idea.

Oh yeah, the superglue will make the clear parts fog up!  Very bad!  So when I use superglue to place the weights, let it air out for a couple of days!  Sometimes, dipping your clear parts in Future Acrylic Floor stuff or what ever they are calling it now will help prevent any superglue fume accidents, but not always.

Having many different glues is a good idea.  Tamiya Extra Thin is my go to, but I also have Tamiya Thin, Testors Clear parts glue (watered down Elmer's glue basically), Testors tube glue (good for vinyl tracks), superglue, Tenax7R, and a variety of other thin welding type glues.  You won't be sorry you tried the Tamiya glue.  You will be surprised and it will help increase you building time!  You'll see!

Group Builds are when someone comes up with a theme, like 1945 GB, Duck Hunters GB, Night Fighter GB...and it is endless.  Look in on the GB posts.  Lots of them going on all the time.  And you are correct!  They are a super resource for techniques, someone may be building a kit you have and you can get the lowdown on it before you start building it.  Just a really good resource for anything modeling...and a great way to get to know the other modelers better!

Sorry it got long winded.  Hope this helps.

Eagle90


  • Member since
    July 2014
Posted by modelcrazy on Thursday, October 1, 2015 10:28 AM

Air2AirJoe
Also, group build? Is that what it sounds like?  People get together and build a single kit together?

No, not exactly. It's were someone, like Eagle said, gets an idea and feels it out on the forums. I am hosting 3 right now, so take the Boeing Build for instance, you come up with anything Boeing related IE the F15 Eagle or B-17 or 747 or B-52 etc. You build your own kit and others will build there’s. It's just a way to join in a mutual support group instead of feeling like you’re on your own. In the Boeing Build, there are guys who have/are building airliners, X planes, modern jets, helicopters and bombers.
Buy the way, one source of nose weight is lead shot. You can get that from most sporting goods stores for reloading shotgun shells. They conform to whatever you are placing them it.

Nice looking build you have going. My first build at age 5 was a total mess. I used so much of that tube glue that the wings (a Cessna Skymaster) just melted and drooped onto the table.
I think your better at painting pilots than I am. I usualy just leave them out because I stink at figures.


Steve

Steve

Building a kit from your stash is like cutting a head off a Hydra, two more take it's place.


http://www.spamodeler.com/forum/

  • Member since
    September 2015
Posted by Air2AirJoe on Thursday, October 1, 2015 10:43 AM

Thanks Bobby!  I can see how having a lot of options at your disposal would be a good thing.  Never would have guessed about the fogging from the fumes, thanks for the tip... there's one possible mistake i can avert instead of learning the hard way and trying to correct.

Steve, thanks for the explanation on the group builds.  I was picturing a few guys hanging out in someones basement, smoking cigars and complaining about how their wives put them on an allowance because they were spending too much money on models.  That's a fun idea and i'll participate when the right category rolls around someday.  I clicked on the link to your boeing group build and WOW.  I can't get over how good you guys are.  I can't even pick a favorite from those, theyre all so nice.

cheers and thanks for the compliments on my A-10.  you must have been so disappointed as a kid with that Cessna, but clearly it didn't discourage you too much. glad you kept at it! thanks for the chuckle

"Forgive me, I'm clueless"


  • Member since
    March 2015
  • From: Streetsboro, Ohio
Posted by Toshi on Thursday, October 1, 2015 12:35 PM

Nice try on your first build.  I can't add anything else as far as tips are concerned.  Most of the forum members has touched based on this build for you already.  Great job, keep moving forward and as you go forward just keep adding each tip you learned to every build and before you know it, you'll be building some awesome kits.

Toshi

On The Bench: Revell 1/48 B-25 Mitchell


Married to the most caring, loving, understanding, and beautiful wife in the world.  Mrs. Toshi


  • Member since
    December 2002
  • From: Bury St Edmunds, Suffolk, England
Posted by Bish on Thursday, October 1, 2015 1:33 PM
I think you are off to a damn good start here. And most importantly, you are learning some good lessons. Quite often, the instructions will tell you how much weight, other times they won't. But I avoid that issue by securing my builds to a base. And even the best fitting kits have a few small gaps that will need filling. Filler and CA glue will be your friends here. personally I use Squadron white filer, but there are many others. But the thing I like most is your approach and your sense of fun. Is very easy for the problems to get you down, even for those who have built models for years. Its nice to see you just getting on with it and ticking them off as lessons for the next time.

I am a Norfolk man and i glory in being so


On the bench: Airfix 1/72nd Harrier GR.3/Fujimi 1/72nd Ju 87D-3

  • Member since
    August 2015
Posted by Cat Daddy on Thursday, October 1, 2015 2:22 PM

Superglue will also glue your fingers together if you're not careful. Trust me on that. No need to get details.

Tamiya Super Thin Glue is great stuff. The fumes are powerful though, so be sure to have adequate ventilation.

  • Member since
    May 2009
  • From: Poland
Posted by Pawel on Thursday, October 1, 2015 3:28 PM

Air2AirJoe - please don't take this as a negative comment, but you've got the engines put on backwards - you might want to correct this before going on - the longer you wait the tougher it will be. If you decide to leave them on I can tell you out of personal experience, that you probably will regret it later. If you decide to fix it, you will have to remove the parts already glued - this sometimes needs use of force, diverse cutting techniques and stuff like that - sorry. But you get to test your glueing for strength here. after fixing it you'll notice there's far less filling to do and the amount of nose weight will also be less. Good luck with your build and have a nice day

Paweł

All comments and critique welcomed. Thanks for your honest opinions!

www.vietnam.net.pl

  • Member since
    September 2015
Posted by Air2AirJoe on Thursday, October 1, 2015 3:33 PM

Pawel

Air2AirJoe - please don't take this as a negative comment, but you've got the engines put on backwards - you might want to correct this before going on - the longer you wait the tougher it will be. If you decide to leave them on I can tell you out of personal experience, that you probably will regret it later. If you decide to fix it, you will have to remove the parts already glued - this sometimes needs use of force, diverse cutting techniques and stuff like that - sorry. But you get to test your glueing for strength here. after fixing it you'll notice there's far less filling to do and the amount of nose weight will also be less. Good luck with your build and have a nice day

Paweł


Embarrassed  Oh my lord.... that is embarrassing!  No of course i dont take that as a negative comment, i cant thank you enough! That might explain why it wasn't fitting correctly.  Im so glad you told me that. Looking at it, its SO obvious i dont know how i did that.  Doing my work late at night while fighting off the urge to sleep probably doesnt help.  Alrighty, i know what i'll be doing right when i get home. Now i get to experiment with removing cement.

"Forgive me, I'm clueless"


  • Member since
    July 2014
Posted by modelcrazy on Thursday, October 1, 2015 3:56 PM

Well, now you get to discover another use for an Xact knife. Not that that has ever happend to me.

Steve

Building a kit from your stash is like cutting a head off a Hydra, two more take it's place.


http://www.spamodeler.com/forum/

  • Member since
    December 2002
  • From: Bury St Edmunds, Suffolk, England
Posted by Bish on Thursday, October 1, 2015 4:10 PM
Well spotted pawel, seems the rets of us missed it as well.

I am a Norfolk man and i glory in being so


On the bench: Airfix 1/72nd Harrier GR.3/Fujimi 1/72nd Ju 87D-3

  • Member since
    May 2009
  • From: Poland
Posted by Pawel on Thursday, October 1, 2015 4:12 PM

Well, well, ain't I a rivet counter? :D:D

Have a nice day

Paweł

All comments and critique welcomed. Thanks for your honest opinions!

www.vietnam.net.pl

  • Member since
    February 2003
Posted by Jim Barton on Thursday, October 1, 2015 5:30 PM

I've always loved the A-10 myself!

"Whaddya mean 'Who's flying the plane?!' Nobody's flying the plane!"

  • Member since
    June 2014
Posted by BrandonK on Thursday, October 1, 2015 8:37 PM

Yup, this is a great place to learn and feel motivated by others. You will learn tons and your skills will soar faster than you can imagine. Nice job on your first kit. And, we all make mistakes along the way, that's why we come here, so others can make us feel not so bad about it. You are not alone. Thanks for sharing.

BK

On the bench:

A lot !! And I mean A LOT!!

2024 Kits on deck / in process / completed   

                         14 / 5 / 2  

                              Tongue Tied

  • Member since
    November 2010
  • From: Florida-West Central
Posted by Eagle90 on Friday, October 2, 2015 5:30 AM

Pawel, great find!  Like Bish said, we all missed it!  Embarrassed

Joe, no need to be embaressed!  We have all done something like this.  I've had Bish correct my armor builds.  We always get a good laugh from my novice armor mistakes.  And that's all you need to do ....laugh it off and press on.  Hey we're all human...well, except for Bish, but that's a different story!  You're doing a great job and I must reiterate what others have said, your writting skills are super!  I can't wait to see an article in FSM from you!

Bobby


  • Member since
    September 2014
Posted by rooster513 on Friday, October 2, 2015 7:15 AM

Great start Joe! I really appreciate the heads up on the weight. Seeing this come together really makes me want to get started on my A-10. So far all I have is the cockpit parts cut out and cleaned up. Hopefully I can get some work in on it this weekend. I'll also watch out for positioning the cockpit. Looks like you got it pretty good! As the other guys said, Tamiya Thin paint will change your world! It's funny how "small" things like that can really make a difference in builds. Really coming along, can't wait to see some paint on itYes Thanks for sharing and the heads upBig Smile

-Andy

  • Member since
    September 2015
Posted by Air2AirJoe on Friday, October 2, 2015 8:05 AM

Thanks guys it's all good! Still not sure how I didnt realize that at the time but I'm glad pawel caught it when he did. So yeah, now I know how strong my cement is(n't). It was no trouble to gently pull it loose and flip it around, and wouldn't ya know... it fits MUCH better that way. Got a rough coat of gray on her and I'm prepping the cockpit parts too. Oh, and I pulled off the landing gear Confused. I might put it back on but right now it's so much easier to handle and set down.  

Thanks for the tamiya thin paint suggestion too I'll grab some this weekend!

aaaand thanks for the compliments on the writing too. Doing an article for the magazine sounds fun... In a couple years when I'm qualified to speak on a topic :)

cheers guys 

"Forgive me, I'm clueless"


  • Member since
    April 2015
  • From: New Hampshire, USA
Posted by UKguyInUSA on Friday, October 2, 2015 8:52 AM
Looks great so far! Look forward to seeing her with some clothes on now! :)
  • Member since
    January 2013
Posted by BlackSheepTwoOneFour on Friday, October 2, 2015 9:44 AM

Don't use pennies, dimes, etc... for weights. Look no further than fishing weights. They're cheap by the dozen and comes in a variety of weights.

  • Member since
    January 2013
Posted by BlackSheepTwoOneFour on Friday, October 2, 2015 9:52 AM

From what I'm seeing, you got the whole bird assembled? It would have been a whole lot easier if you painted the wheel wells, gear doors, landing gears, etc... first. But, don't glue them onto the model until last. Otherwise, your landing gears will break off - I can guarantee you that. There are ways to mask off the insides of wheel wells - poster tack comes to mind, even silly putty or plain old tissues. Once the bird is completely painted, you can remove them.

I see you didn't prime as well. Priming makes paint adhere better. I completely understand your excitement in getting your first kit done. Patience is what you need to learn. Go slow, make sure everything fits and assembled correct. Read the instructions carefully.

Other than that, you're doing fine.

JOIN OUR COMMUNITY!

Our community is FREE to join. To participate you must either login or register for an account.

SEARCH FORUMS
FREE NEWSLETTER
By signing up you may also receive reader surveys and occasional special offers. We do not sell, rent or trade our email lists. View our Privacy Policy.