SEARCH FINESCALE.COM

Enter keywords or a search phrase below:

1/48 Hasegawa Henschel HS 129 B-2 (FINISHED)

7510 views
34 replies
1 rating 2 rating 3 rating 4 rating 5 rating
  • Member since
    February 2012
  • From: Olmsted Township, Ohio
1/48 Hasegawa Henschel HS 129 B-2 (FINISHED)
Posted by lawdog114 on Monday, November 2, 2015 9:53 PM

After two Great Wall kits, I decided I needed something easy.  Here's the Henshel HS 129 tank buster.  For all intents and purposes its the grandfather to the A-10 as it served the same function.  Fly slow carry a big gun. Unfortunately there isn't much made for this kit.  I'll make due with an old mediocre Eduard PE set, some pieces from another average Verlinden set, and True Details tires. 

There is not much to the tiny cockpit of the HS 129.  Its basically an armored seat with two guns on each side.  Heck, most of the engine instruments are on the side of the cowls because there wasn't room on the dash....weird.  I cherry-picked the PE fret (as I probably will with all of the AM stuff) and used the seat, the seat belts, rudder pedals and the IP.  The IP had acetate dials but isn't very detailed, common with Eduard's early stuff.  I made the best of it with a drybrush and wash.   


....but not worries.....I might as well have left the PE instrument panel in bare plastic because it gets buried so far into the nose you can't see it.   

I have the fuselage together and wings glued.  A test fit of the wing roots and I don't forsee any problems.  Not bad for a night's work.  Gee....the thing almost builds itself.  Lets see how them engine nacelles fit

Joe


 "Can you fly this plane and land it?...Surely you can't be serious....I am serious, and don't call me Shirley"


  • Member since
    June 2014
Posted by BrandonK on Monday, November 2, 2015 10:20 PM

This is too cool. I was eyeballing this very kit earlier today. Looking forward to watching it come together.

BK

On the bench:

A lot !! And I mean A LOT!!

2024 Kits on deck / in process / completed   

                         14 / 5 / 2  

                              Tongue Tied

  • Member since
    November 2008
  • From: Far Northern CA
Posted by mrmike on Monday, November 2, 2015 10:52 PM

As usual, a beautiful cockpit! My B-2 shelf queen was back on the bench today for some scribing, mostly fuse seams and wing roots, The wing root problems were in hindsight my own fault. The kit itself has nice detail and fit; I do remember some issues around the nacelles but they were minor and I'm sure you'll sort them out.

Looking forward to seeing what you do with the pugnacious little bugger!

mike


  • Member since
    March 2013
Posted by patrick206 on Monday, November 2, 2015 11:38 PM

Joe, - I always liked that particular A/C, very business like and purposeful in design. Looking fwd to seeing it as work continues.

Patrick

  • Member since
    October 2015
Posted by GazzaS on Monday, November 2, 2015 11:56 PM

Great woek thus far!  Can't wait to see more.


Gary

  • Member since
    November 2003
  • From: Naples, FL
Posted by tempestjohnny on Tuesday, November 3, 2015 6:03 AM
Joe. Nice start as usual. I built a B-1 last year. Great kit. You are right about the cockpit. Really can't see much in there.


  • Member since
    November 2003
  • From: Naples, FL
Posted by tempestjohnny on Tuesday, November 3, 2015 6:05 AM

Here is the one I did.  It's the one with the minigun pack


  • Member since
    February 2012
  • From: Olmsted Township, Ohio
Posted by lawdog114 on Wednesday, November 11, 2015 9:27 PM

Thanks all.  Johnny, I hope mine turns out half that nice.  Well done.  I'm in for an update. This build is just flying by and I have made quite a bit of progress.  What a breeze of a kit.  I have since got the airframe together.  Other than the fit of the nose, which I had to sand re-scribe and replace rivets, I had no real issues.  Furthermore, I think they gave me the wrong nose as the B-2 I was building apparently had two holes and a dimple on it.  I decided not to mess with it anymore.     

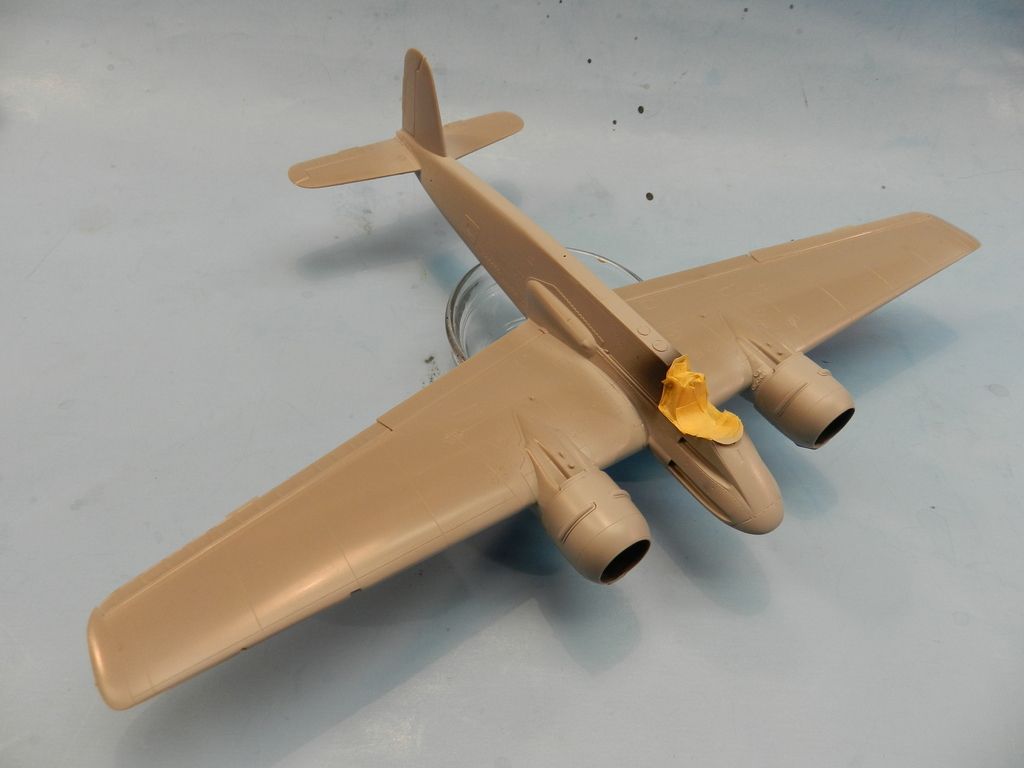
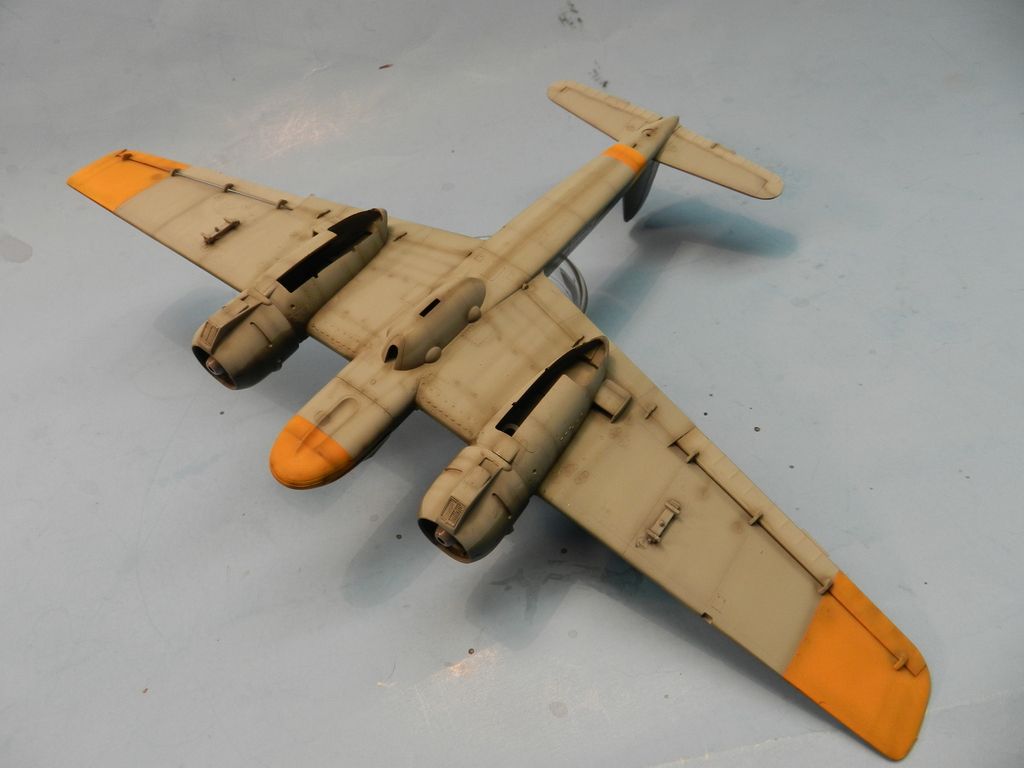
I'm building the SG 9 mount of Rudolph Heinz Ruffer, a Knight's Cross recipient with 80 tank kills.  It will have carry the usual 70/71 over 65 with RLM 04 on the nose, lower wing tips, and fuse band.  This plane would have the Mk. 101 Motorcannon as opposed to the 103.  After a preshade, I added XF-3 Flat Yellow cut with a bit of XF-7 Flat Red.  I have no rhyme or reason for it, it just looks better to my eye.   

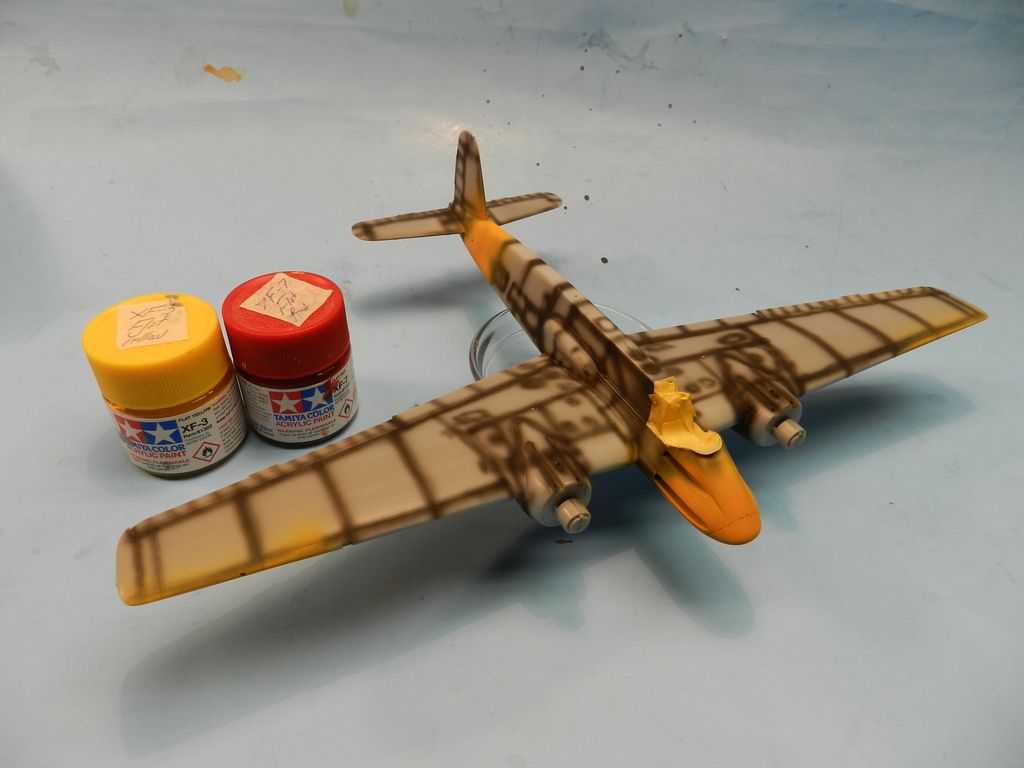
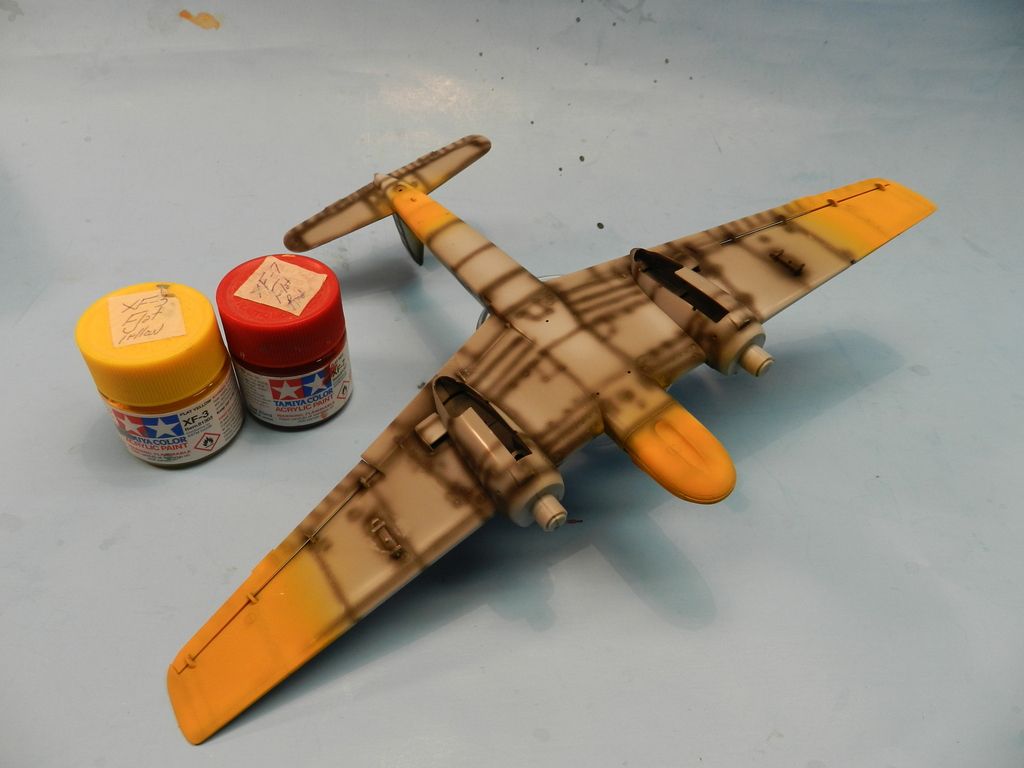
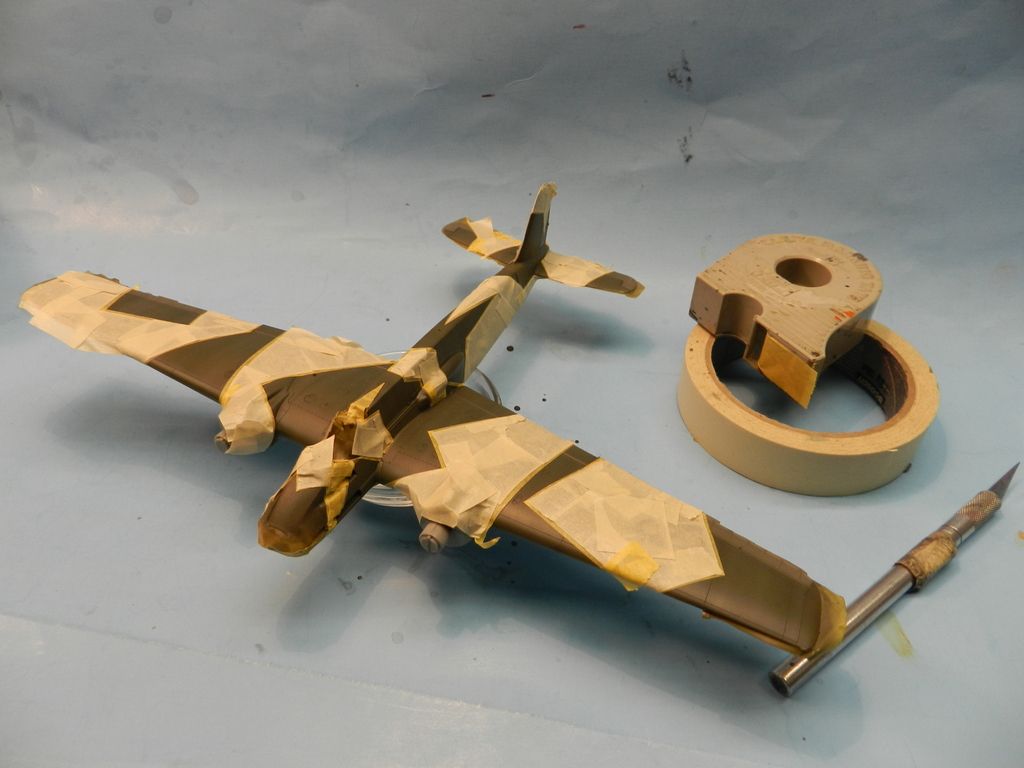
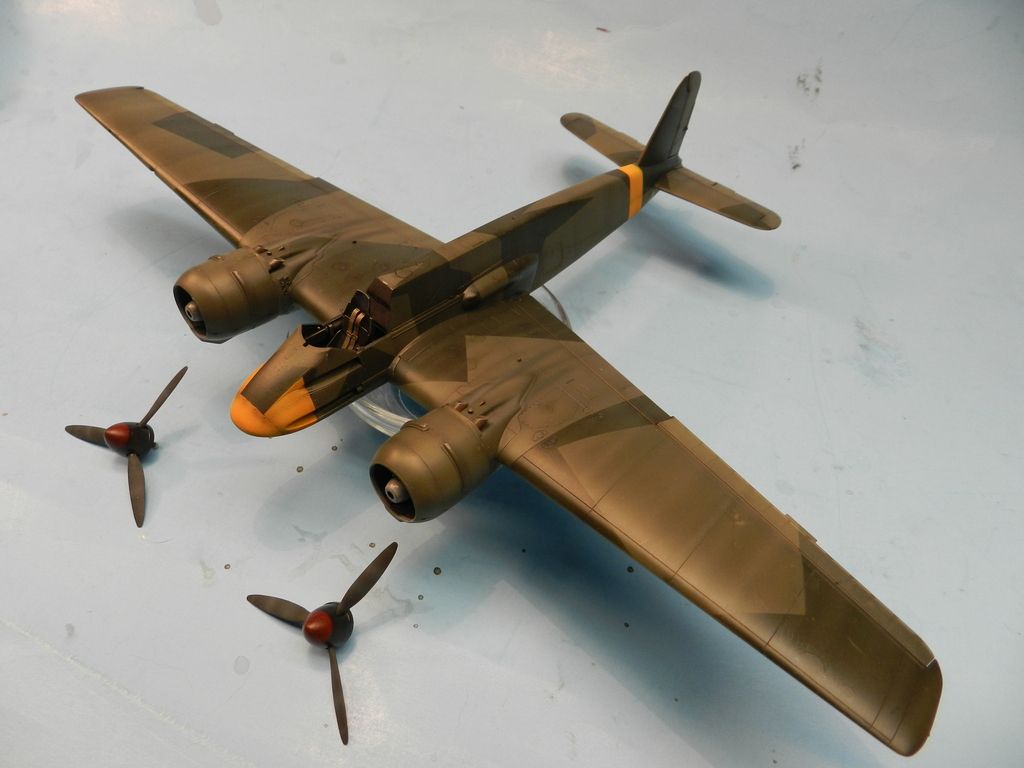
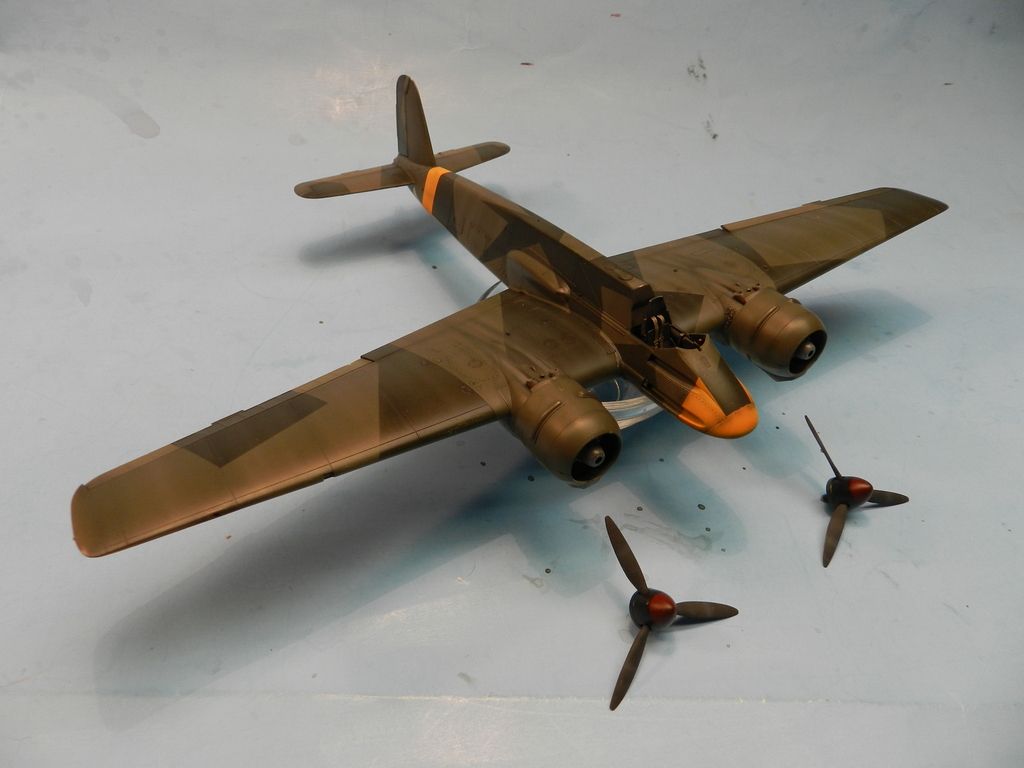
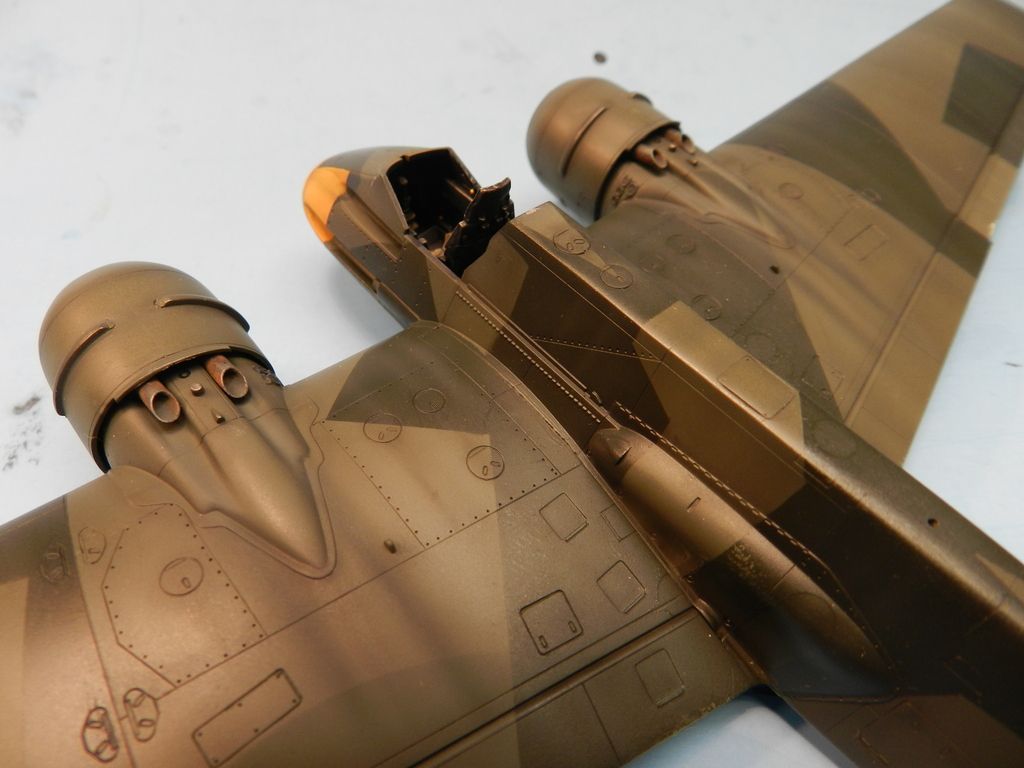
The yellow was taped off and I started on the scheme. I sprayed the lowers with own my mix of RLM 65, being half XF-23 Light Blue and XF-02 Flat white (my camera was dead...no pic). Gunze RLM 71 was then used on the upper surface.  I added a touch of XF-57 Buff to the paint and added condensation streaks then lightened the control surfaces as well.  Once dry, I began the arduous task of taping off the splinter pattern for the RLM 70.  At least Hasegawa was nice enough to show you the starboard pattern as well, so you don't have to guess.  I did the outline in Tamiya tape (expensive) and filled it in with regular masking (cheap).  Looks like s@#t don't it? 

I used Gunze RLM 70 the same XF-57 to added the streaks.  Gunze takes a while to dry so I turned my attention to other things, such as the double Gnome-Rhone radials (French engines on a German aircraft...now I've seen everything).  These things are tiny compared to PW 2800.  With all that armor this turkey must have been like flying a Beechcraft.  I did a quick assembly with an engine in the cowl then the prop hub and I discovered that not much will be seen once completed.  I decided to give them a nice paint job and forego any wiring which won't be seen anyways.  I painted up the props and hubs too.

I then spent about a hour getting the prominent exhaust pipes right.  I didn't particularly like the kit parts, so I used the Verlinden examples.  These were sort of thick, so I had to sand the fronts under the cowl down a bit.  The rest of the time was spent getting the staining right.  At low pressure up close, I started with thinned XF-69 NATO Black. I then added XF-57 Buff over it, concentrated close to the pipe.  I'm pleased with how it turned out.....fairly subtle. 

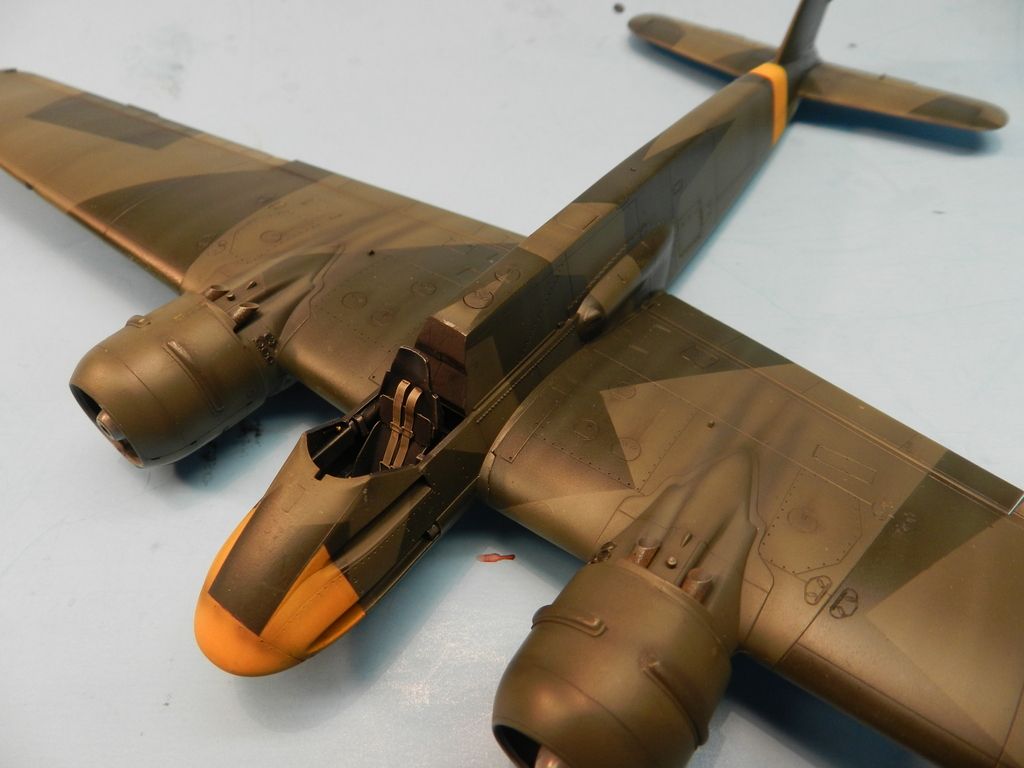
Of course after I got done congratulating myself in not overdoing the effect, I realized I might have used the wrong pipes for this particular version...doh!.  None the less, I'm still pleased with how they turned out and the other straight pipe was poorly done anyways. 

Decals soon....

Joe


 "Can you fly this plane and land it?...Surely you can't be serious....I am serious, and don't call me Shirley"


  • Member since
    March 2015
  • From: Streetsboro, Ohio
Posted by Toshi on Wednesday, November 11, 2015 9:55 PM

Oh, WOW, that's a beauty!  I love the weathering especially the camo.

Toshi

On The Bench: Revell 1/48 B-25 Mitchell


Married to the most caring, loving, understanding, and beautiful wife in the world.  Mrs. Toshi


  • Member since
    August 2013
Posted by Jay Jay on Thursday, November 12, 2015 8:55 AM

Fantastic work as usual LD.  Somehow i missed your tutorial on the streaking technique.  Could you point me in the right direction as I need to learn how you do this?


 I'm finally retired. Now time I got, money I don't.

  • Member since
    June 2014
Posted by BrandonK on Thursday, November 12, 2015 9:02 AM

That is a beauty for certain. I like the red spinners as well, kinda different. Very nice looking build.
BK

On the bench:

A lot !! And I mean A LOT!!

2024 Kits on deck / in process / completed   

                         14 / 5 / 2  

                              Tongue Tied

  • Member since
    December 2002
  • From: Bury St Edmunds, Suffolk, England
Posted by Bish on Thursday, November 12, 2015 1:40 PM
Seem to have missed this one. Another great looking build Joe and nice to see you doing one of these.

I am a Norfolk man and i glory in being so


On the bench: Airfix 1/72nd Harrier GR.3/Fujimi 1/72nd Ju 87D-3

  • Member since
    December 2002
  • From: NYC, USA
Posted by waikong on Monday, November 16, 2015 11:52 PM

Nice! That is a beautiful paint job.

My website: http://waihobbies.wkhc.net


  • Member since
    April 2005
  • From: Piscataway, NJ!
Posted by wing_nut on Tuesday, November 17, 2015 7:41 AM
Glad I found this. It would have been shame to go through life without seeing that paint job. Nice!

Marc  

  • Member since
    September 2003
  • From: Northern hemisphere - most of the time-
Posted by blkhwkmatt on Tuesday, November 17, 2015 6:44 PM

Great work as usual Lawdog.  Really impressed with how your paint job came out.

Keep up the good work!!

<Matt

Quidquid latine dictum sit, altum videtur!!! - Anything said in Latin sounds profound!


  • Member since
    August 2015
  • From: the redlands Fl
Posted by crown r n7 on Tuesday, November 17, 2015 7:52 PM
That camouflage is beautifully done very nice work


 Nick.

  • Member since
    August 2009
  • From: Borlando Fla home of the rat
Posted by TREYZX10R on Tuesday, November 17, 2015 10:31 PM

crown r n7
That camouflage is beautifully done very nice work
 

Agree thats some very effective ab work,great job on the preshade and color modulation. 

  • Member since
    December 2002
  • From: Northern California
Posted by jeaton01 on Wednesday, November 18, 2015 11:14 AM

Really nice, Joe.  But if it flies like a Beechcraft it must really scoot!

John

To see build logs for my models:  http://goldeneramodel.com/mymodels/mymodels.html


  • Member since
    February 2012
  • From: Olmsted Township, Ohio
Posted by lawdog114 on Friday, November 20, 2015 10:20 PM

Thanks everyone. Your all very kind. 

Jay Jay, I've never actually done a tutorial on the streaking, just described it in various threads.  It's a matter of lightening the base color then dialing down the pressure and getting in close. Then just go with the windstream across the wing surface from front to back really quick like.  It takes practice and subtle looks best. You want it to be just noticeable. 

Well, I'm done with this one, its the B-2 variant with the slower firing MK 101 Motorkannon in the SG9 markings of Rudolph-Heinz Ruffer on the Russian front in early 1943.  Ruffer would score 80 tank kills before being KIA after being bounced by VVS fighters in July of 1944. 

The kit was excellent and needs very little.  I added True Details wheels and some PE in the cockpit, particularly the seat, the belts and the IP.  The decals were Superscale.  The complex spinner two toned stripe pattern scared me, but I managed to get the red and black separation line right where the white stripe decals needed to be.  I'm pleased with how they turned out.  My example came with a smooth nose, void of the holes and bumps seen on many B-2 airframes.  I have no idea why Hasegawa always has to do this.  Just give us all options k???  Ruffer's markings were one of the kit options, so this makes no sense.  I decided to live with it instead of butchering up the front end. 

Thanks for following....


 "Can you fly this plane and land it?...Surely you can't be serious....I am serious, and don't call me Shirley"


  • Member since
    June 2014
Posted by BrandonK on Friday, November 20, 2015 11:16 PM

Wow Joe, what a super cool looking build. I really like how this came out. Nicely done Sir!

BK

On the bench:

A lot !! And I mean A LOT!!

2024 Kits on deck / in process / completed   

                         14 / 5 / 2  

                              Tongue Tied

  • Member since
    December 2002
  • From: Bury St Edmunds, Suffolk, England
Posted by Bish on Saturday, November 21, 2015 12:45 AM
Another corker Joe. Great finish and nice to see one of these aircraft.

I am a Norfolk man and i glory in being so


On the bench: Airfix 1/72nd Harrier GR.3/Fujimi 1/72nd Ju 87D-3

  • Member since
    January 2015
Posted by BrandonD on Saturday, November 21, 2015 1:02 AM

Joe - that is just stellar. And the work on the pipes - I stared at those for a good 30 seconds just marveling at how real they look. I'm going to have to give your streaking a try, as I really love the effect.

-BD-

  • Member since
    February 2012
  • From: Olmsted Township, Ohio
Posted by lawdog114 on Saturday, November 21, 2015 1:52 AM
Thanks guys. Too bad I don't get to keep it as It's on its way Massachusetts...lol. Brandon, thanks! The exhausts are XF-64 Red Brown drybrushed with Floqul Bright Silver. The trick is to cut the red brown with 91% Isoprophyl which allows a dusty appearance. For the streaking, it took me a while to get it right to my eye. It just takes practice. For greens, I add XF-57 Buff and blues XF-2 Flat White. Depends on what effect I'm going for. Joe

 "Can you fly this plane and land it?...Surely you can't be serious....I am serious, and don't call me Shirley"


  • Member since
    November 2003
  • From: Naples, FL
Posted by tempestjohnny on Saturday, November 21, 2015 5:12 AM

Wow Joe another beauty. Your airbrush work is amazing. Really like the subtleties of your weathering. John


P.S.  it would be great if the package was accidentally diverted a little south to Connecticut Whistling


  • Member since
    April 2005
  • From: Piscataway, NJ!
Posted by wing_nut on Saturday, November 21, 2015 6:32 AM
Am I the only one not seeing the pics? Just a bunch of little squares.

Marc  

  • Member since
    December 2002
  • From: Bury St Edmunds, Suffolk, England
Posted by Bish on Saturday, November 21, 2015 7:02 AM
Marc, I get that now and again. Sometimes its broken links but others it can just be temporary and I have no idea why it happens. I can see them at the moment.

I am a Norfolk man and i glory in being so


On the bench: Airfix 1/72nd Harrier GR.3/Fujimi 1/72nd Ju 87D-3

  • Member since
    March 2013
Posted by patrick206 on Saturday, November 21, 2015 12:59 PM

Hey, Joe -

Another beauty, so well done. 

A question, please. When you're finished spraying for the day, what do you clean your airbrush with. I'm using primarily Tamiya, just a little Vallejo, have been cleaning only with name brand lacquer thinner from the paint store, namely DuPont. In fact I find LT to be the best all around cleaner, either acrylic or enamel.

I'm reading that some guys swear by Windex or windshield washer fluid, but I also read that those products can be hard on the brass metal of the AB body. With the quality of your finishes it seems you must take very good care of your AB, just wondering what your maintenance preference might be. Thanks in advance.

Patrick 

  • Member since
    February 2014
  • From: Michigan
Posted by silentbob33 on Saturday, November 21, 2015 3:43 PM
Great job Joe! I hadn't heard of this aircraft before and now I want one. Very cool.

On my bench: Academy 1/35 UH-60L Black Hawk

  • Member since
    April 2005
  • From: Piscataway, NJ!
Posted by wing_nut on Saturday, November 21, 2015 3:45 PM
OK got 'me and oh boy that's nice. H

Marc  

  • Member since
    September 2003
  • From: Northern hemisphere - most of the time-
Posted by blkhwkmatt on Saturday, November 21, 2015 10:55 PM

Joe,

Another great looking finish! Thanks for sharing. 

<Matt

Quidquid latine dictum sit, altum videtur!!! - Anything said in Latin sounds profound!


JOIN OUR COMMUNITY!

Our community is FREE to join. To participate you must either login or register for an account.

SEARCH FORUMS
FREE NEWSLETTER
By signing up you may also receive reader surveys and occasional special offers. We do not sell, rent or trade our email lists. View our Privacy Policy.