SEARCH FINESCALE.COM

Enter keywords or a search phrase below:

1:48 Revell Dornier Do217E-4 Completed

1820 views
22 replies
1 rating 2 rating 3 rating 4 rating 5 rating
  • Member since
    April 2013
  • From: Eleva, Wisconsin
1:48 Revell Dornier Do217E-4 Completed
Posted by Greatmaker on Saturday, December 26, 2015 2:51 PM

I am reluctant to post pics of this beast as compared to most planes posted here it's amateurish at best. However I wanted to share some of my experiences in it's construction. First off is the wings.  I have done a great deal of internet search on the construction of this plane and most talk about the wings.  The top wing is in two sections one of which is part of the fuselage.  The lower wing is in one piece. On this one I'm glad I didn'f follow directions. I says your supposed to glue the lower wing on first then place the top.  I test fitted it like that and had about a 1/4" gap on the upper wings.  I what I've read, people have had great trouble closing this gap.  It's too wide for just putty as it collapses in, so these poor souls had to try and place multiple internal spars to reinforce the wing.  Also this apparently leads to problems fitting the engines.  As for me I glued the top wing sections together and has no problem with the fit.  Another tip would be to leave the wheel struts on the sprue when you cement the fender and support on.  The struts are very fragile and bend easily which makes getting the fender into position hard.  After I mucked up the first one. I left the second one on the sprue and it worked much better. Last tip. I'm usually a paint the canopies off the plane kinda guy (I always fear I'm gonna get primer in the inside of the canopy and have no way to fix it.  Even with extensive prefitting I had trouble getting  the canopies to fit on this one after they were painted. I'm very thankful that I bought the masks for this one.


cnq
  • Member since
    March 2013
Posted by cnq on Saturday, December 26, 2015 4:33 PM

Very nice & clean build. I like it.

  • Member since
    November 2015
Posted by The Migrant on Saturday, December 26, 2015 4:41 PM

Amateurish, seriously? Looks like a well executed, clean build to me. Nice work on the canopy framing.

Mike G

Western Canada

  • Member since
    December 2002
  • From: Bury St Edmunds, Suffolk, England
Posted by Bish on Saturday, December 26, 2015 4:51 PM
I think your being hard on yourself, that's a nice looking build and good work on the splinter scheme.

I am a Norfolk man and i glory in being so


On the bench: Airfix 1/72nd Harrier GR.3/Fujimi 1/72nd Ju 87D-3

  • Member since
    June 2014
Posted by BrandonK on Saturday, December 26, 2015 5:19 PM

Well done !! It looks great.

BK

On the bench:

A lot !! And I mean A LOT!!

2024 Kits on deck / in process / completed   

                         14 / 5 / 2  

                              Tongue Tied

  • Member since
    November 2003
  • From: Naples, FL
Posted by tempestjohnny on Saturday, December 26, 2015 6:08 PM
Very well done. I have this in the stash and hope it comes out amateurish like yours.


  • Member since
    April 2013
  • From: Eleva, Wisconsin
Posted by Greatmaker on Saturday, December 26, 2015 7:11 PM

Thanks guys for your kind words, but after following this forum and seeing what truely can be done.  I still have a lot to learn and a long way to go. Oh I forgot, unless you plan on modifying the engines I wouldn't spend a lot of time painted them. They are covered by the cooling fans. I would have liked to do a nice wash on the panel lines but I always have trouble with the wash sticking everywhere. I use model master acrylics and I have tried oil washes on top of just the acrylic paint as well as over testors dullcoat. It seems to stick everywhere and I can't remove it so I have ended up repainting these areas. Any ideas?  Thank you


  • Member since
    April 2015
Posted by Mopar Madness on Saturday, December 26, 2015 8:21 PM

Nice splinter camo.  Well executed.

Chad

God, Family, Models...

At the plate: 1/48 Airfix Bf109 & 1/35 Tamiya Famo

On deck: Who knows!

  • Member since
    August 2014
  • From: Willamette Valley, Oregon
Posted by goldhammer on Saturday, December 26, 2015 8:48 PM

Dullcote will have a slightly rough texture to it, and the washes will bite and be impossible to remove from where you don't want them.  Try your washes and weathering over glosscote when you do the decaling, then when happy, use the dullcote as a final to seal everything.


Nice clean build.

  • Member since
    April 2013
  • From: Eleva, Wisconsin
Posted by Greatmaker on Sunday, December 27, 2015 9:27 AM

Thank you I will give it a try on my next build. I use turpenoid and Winsor and Newton oil paints for the wash


  • Member since
    March 2015
  • From: Streetsboro, Ohio
Posted by Toshi on Sunday, December 27, 2015 9:39 AM

You did a fantastic job on this build!

Toshi

On The Bench: Revell 1/48 B-25 Mitchell


Married to the most caring, loving, understanding, and beautiful wife in the world.  Mrs. Toshi


  • Member since
    February 2007
  • From: Brunswick, Ohio
Posted by Buckeye on Sunday, December 27, 2015 9:59 AM

Very nice paint job and I like the subtle exhaust stains.  Nice build.

Mike


  • Member since
    August 2013
Posted by Jay Jay on Sunday, December 27, 2015 10:51 AM

Your Dornier isn't amatuerish at all, a very nice clean build as a matter of fact. i can't see any glue blobs or seam lines anywhere.

Yes as has been  said, you have to apply a gloss coat, ( I use future or Testor's Gloss laquer ) before you do a wash, then seal the wash with your dullcoat, it's pretty easy to do and there's lots of info on Youtube to guide you..Happy Modeling.


 I'm finally retired. Now time I got, money I don't.

  • Member since
    April 2013
  • From: Eleva, Wisconsin
Posted by Greatmaker on Sunday, December 27, 2015 12:37 PM

When you guys were talking about the splinter camo. It got me thinking of one i did last month.  When all was said and done I used about a grapefruit size ball of tape on a 1:48 model. In the 52 planes I have built this holds the record for tape


cnq
  • Member since
    March 2013
Posted by cnq on Sunday, December 27, 2015 1:46 PM

very very nice Arado. I'm currently building one too, Dragon 1/72 Arado 234.

You did excellent job on sprinter camo.

  • Member since
    March 2013
Posted by patrick206 on Sunday, December 27, 2015 2:44 PM

Very nicely done, nothing amateurish going on with that one.

Patrick

  • Member since
    February 2012
  • From: Olmsted Township, Ohio
Posted by lawdog114 on Monday, December 28, 2015 7:42 PM
Looks fine to me....Thanks for sharing...

 "Can you fly this plane and land it?...Surely you can't be serious....I am serious, and don't call me Shirley"


  • Member since
    March 2009
  • From: Yorkville, IL
Posted by wolfhammer1 on Monday, December 28, 2015 9:40 PM

I'll chime in also.  Very nice, clean build and thanks for the info on the assembly challenges, which it looks like you met and succeeded against.  Didn't see anything amateurish about the build at all.  Great job on the splinter scheme.  As a suggestion, you could try pre-shading the panel lines instead of using a wash.  I'm in the midst of trying that on an A-36, but I've seen it turn out really nice doing it that way.  The trick would seem to be a really light touch on the airbrush as you put on the final color so you don't cover up the shaded lines.  Good luck with your future projects, and I look forward to seeing more great builds like this one.  Thanks again.

John

  • Member since
    June 2010
Posted by 5-high on Monday, December 28, 2015 10:15 PM

Amateurish. ..my eye !..great job ..nice splinter job on the dornier. Keep up the good work. .5-high Yes

  • Member since
    November 2011
Posted by Newtothis on Monday, December 28, 2015 10:36 PM

Looks very clean and nice to me.  I do weathering on my planes because I can't get them that clean Stick out tongue

  • Member since
    January 2015
Posted by BrandonD on Tuesday, December 29, 2015 2:22 AM

First of all, I don't think that's amateurish at all, and I really like seeing it - I don't know that I've seen one of those built before. I think you did a great job.

Second, I know what you mean. I joined this forum almost a year ago and was hesitant to post my builds for the same reason, but I was able to learn a lot on here, and I feel like posting pics has really helped me strive to get outside my comfort zone, which is where I have experienced growth in my modeling.

Please keep building, and please keep sharing. This forum has made my return to scale modeling much more pleasurable than it otherwise would have been.

Cheers!

-BD-

  • Member since
    January 2015
Posted by BrandonD on Tuesday, December 29, 2015 2:27 AM

Just saw the question about washes. I use Flory washes, and as others said, it definitely needs to go down over a gloss coat for that crisp panel line wash. This is where I was on a build last night:
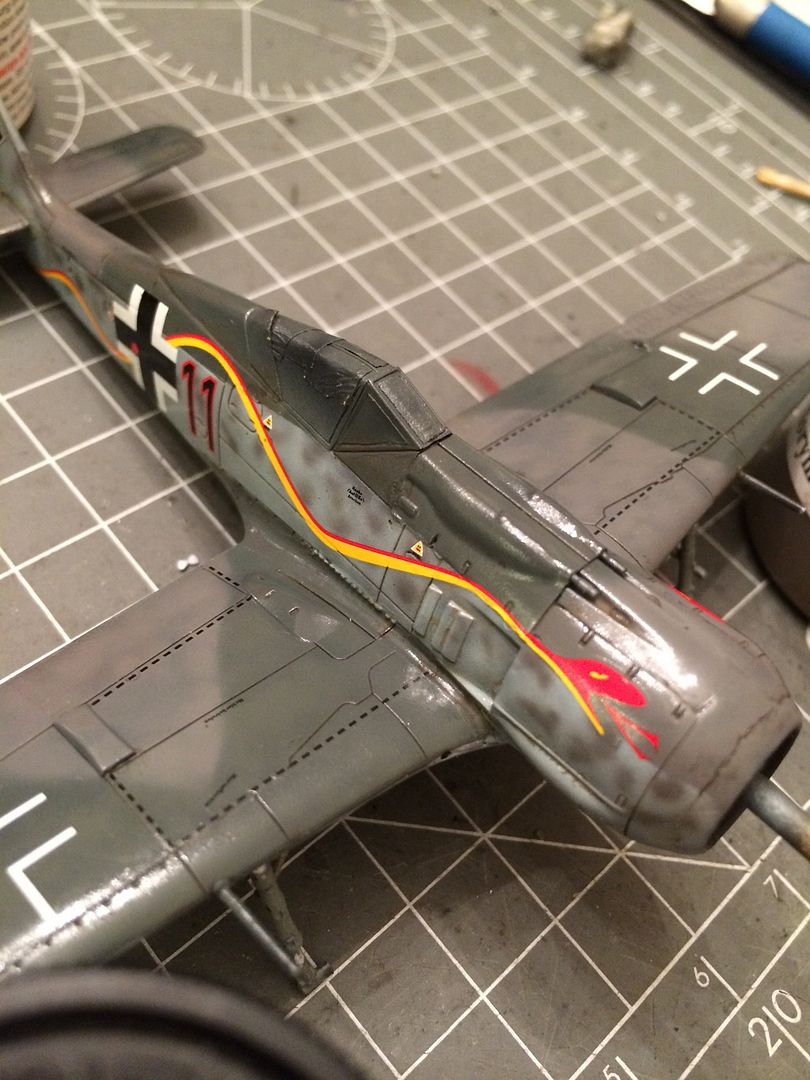
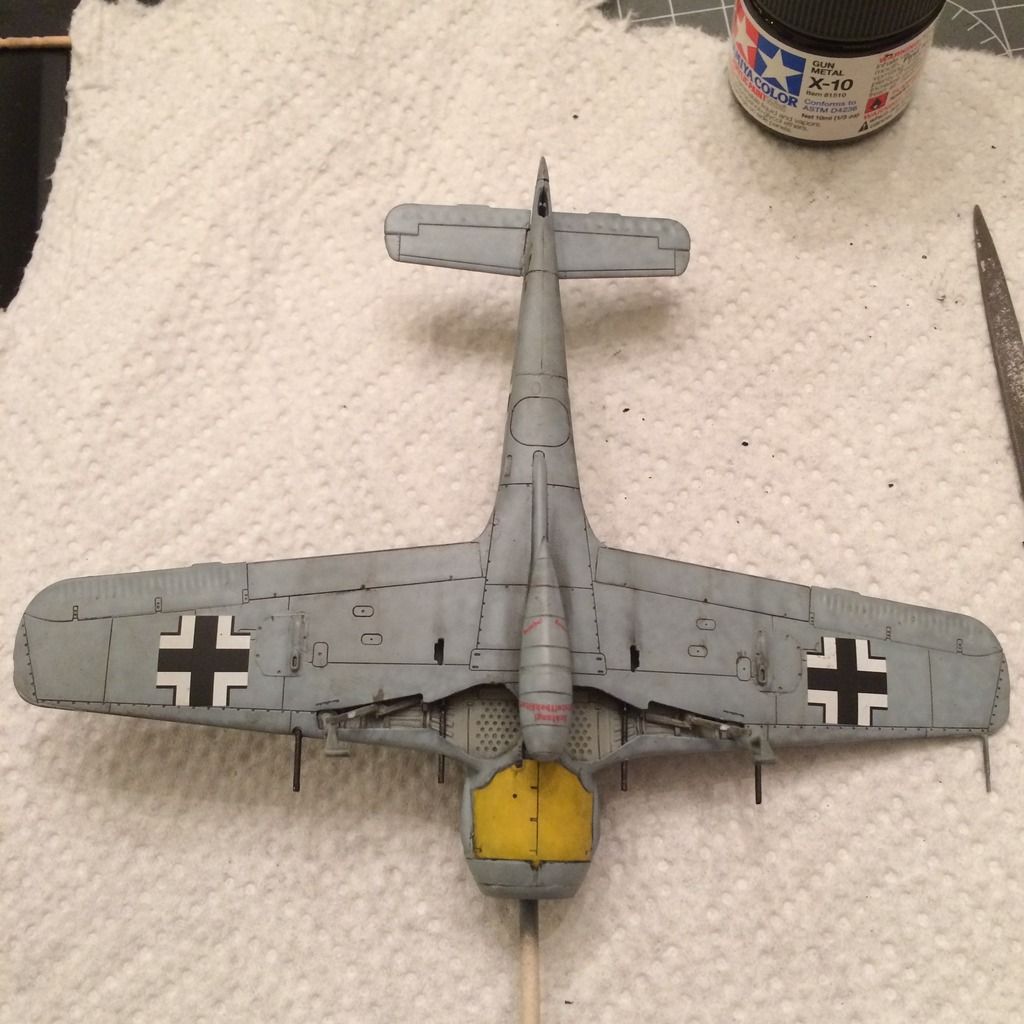
After that, spray the dull coat down, and you can use washes to make weathering effects if you like. I experimented a bit this evening with washes over the dull coat, and I like how its affecting the model by giving it subtle variation. You can see it most on the underside here (the starboard wing aft of the landing gear).
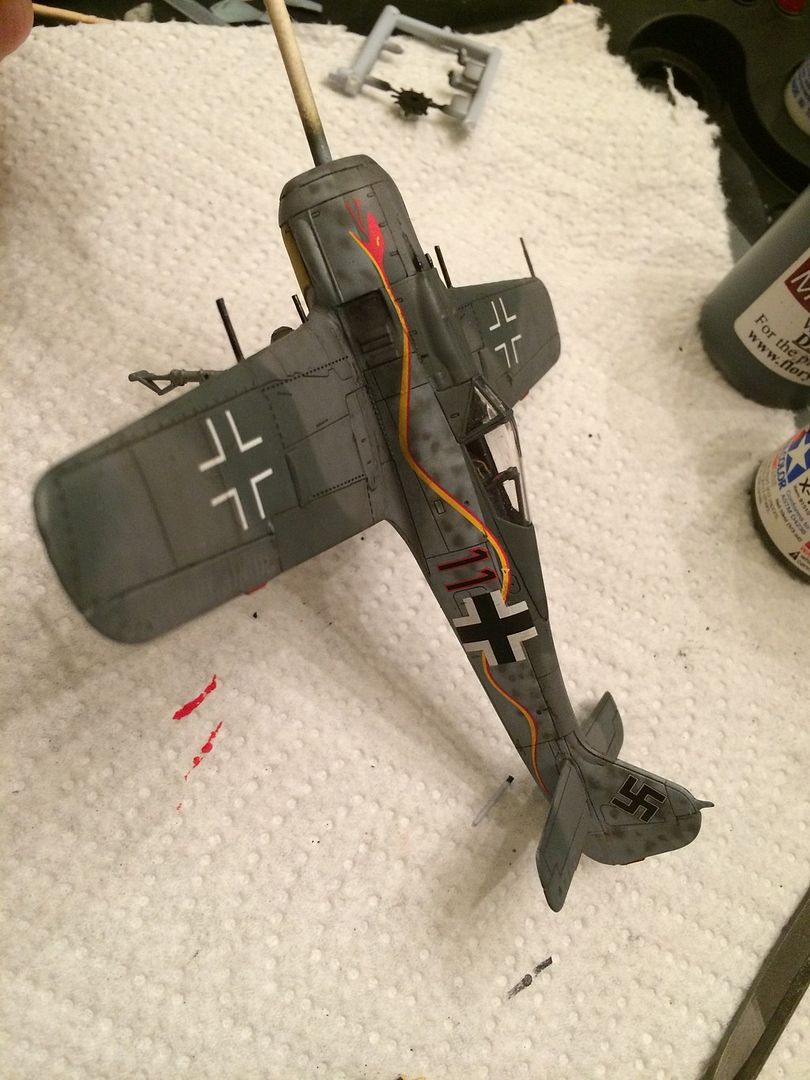
Here's a quick shot of the topside with the dullcoat down and some exhaust streaking applied (pastel chalk ground up and applied with a pointed Q-tip).
I don't mean to hijack your post, so hopefully this helps :)

  • Member since
    April 2013
  • From: Eleva, Wisconsin
Posted by Greatmaker on Tuesday, December 29, 2015 10:21 AM

Thanks for sharing. That looks amazing!.  I've tried testors glosscoat in the past, but I either get it too light or way too heavy. I've even tried decanting and using the airbrush to apply.  I've also applied future with an airbrush, as well as, testors airbrush acrylic clear coat and it never seems to create a nice glossy finish like you have.  I have tried preshading but I worry the primer color bleeds through too much so I end up completely covering it. My motto for my builds...."They look a lot better from a distance"Big Smile


JOIN OUR COMMUNITY!

Our community is FREE to join. To participate you must either login or register for an account.

SEARCH FORUMS
FREE NEWSLETTER
By signing up you may also receive reader surveys and occasional special offers. We do not sell, rent or trade our email lists. View our Privacy Policy.