SEARCH FINESCALE.COM

Enter keywords or a search phrase below:

FINISHED -- Revell 1:48 scale B-24D (NMF) Part two of my B17, B24 and B29 trilogy.

3294 views
14 replies
1 rating 2 rating 3 rating 4 rating 5 rating
  • Member since
    March 2015
  • From: Close to Chicago
Posted by JohnnyK on Thursday, March 17, 2016 9:48 AM

Unfortunetly, I am out of room for my airplanes and cars. I'll need to find someplace else to display my models. 

Your comments and questions are always welcome.

  • Member since
    February 2012
  • From: Olmsted Township, Ohio
Posted by lawdog114 on Thursday, March 17, 2016 2:36 AM
Very well done. Thanks for share. I hope you have alot of room.

 "Can you fly this plane and land it?...Surely you can't be serious....I am serious, and don't call me Shirley"


  • Member since
    January 2003
Posted by Darren Roberts on Tuesday, March 15, 2016 6:24 PM

NOICE!!!!!!!!!!!!!!!!

  • Member since
    March 2015
  • From: Close to Chicago
Posted by JohnnyK on Tuesday, March 15, 2016 4:02 PM

Greatmaker

Amazing work! Love the detail and weathering. I am current working on the B-17.  Just when I think I'm happy with it I see something someone else has done and think "What a great idea. I need to do that." Canopy masks have been a blessing I finished painting the ball turret last night.  I thought I had done a good job on the seams until....primer hit it.  Plus there was a hole in it as well.  Patched with elmers glue and repainted but the ball turret support is so tight I don't think it wall allow the ball to move when its together.  One thing I do know after this it's back to fighters for awhile.Big Smile  


Make sure that you post picyures of your B17. I wpould like to see what you did. I agree with you regarding going back to fighters. The big bombers take a lot of time and energy. My next build is the Revell P47N with Bare-Metal foil for the NMF. This will be the first time that I will be using metal foil as a final finish. After that is complete I will be going back to model cars for a while.

Your comments and questions are always welcome.

  • Member since
    April 2013
  • From: Eleva, Wisconsin
Posted by Greatmaker on Tuesday, March 15, 2016 12:54 PM

Amazing work! Love the detail and weathering. I am current working on the B-17.  Just when I think I'm happy with it I see something someone else has done and think "What a great idea. I need to do that." Canopy masks have been a blessing I finished painting the ball turret last night.  I thought I had done a good job on the seams until....primer hit it.  Plus there was a hole in it as well.  Patched with elmers glue and repainted but the ball turret support is so tight I don't think it wall allow the ball to move when its together.  One thing I do know after this it's back to fighters for awhile.Big Smile  


  • Member since
    March 2015
  • From: Close to Chicago
Posted by JohnnyK on Saturday, March 12, 2016 11:26 PM

Gamera

The B-24 looks awesome, I love how you did the NM effects. And the B-17 ain't half bad either!

Looking forward to the B-29, and then you can always add an Avro Lancaster. Wink


I tried to make the B17 look as dirty and weathered as possible. The B17 is painted with four colors of Tamiya rattle cans. The bottom is Dove Grey. The middle and top is Olive Drab with thin layers of Dark Earth and Tan applied as an overcoat to the top. Weathering is a combination of "The Detailer Black and Rust", Vallejo Earth and Tan, Tamiya Smoke and a mixture of black and Dark Umber artist paint. A few of the panels have no weathering to indicate recently repaired panels. There are some panles on the bottom that are covered in Bare Metal Foil to indicate repaired panels that have not yet been painted. One of the bomb bay doors is covered in Bare Metal Foil. I really enjoyed painting the B17 more than the B24.


Your comments and questions are always welcome.

  • Member since
    March 2015
  • From: Close to Chicago
Posted by JohnnyK on Saturday, March 12, 2016 11:06 PM

Hi,

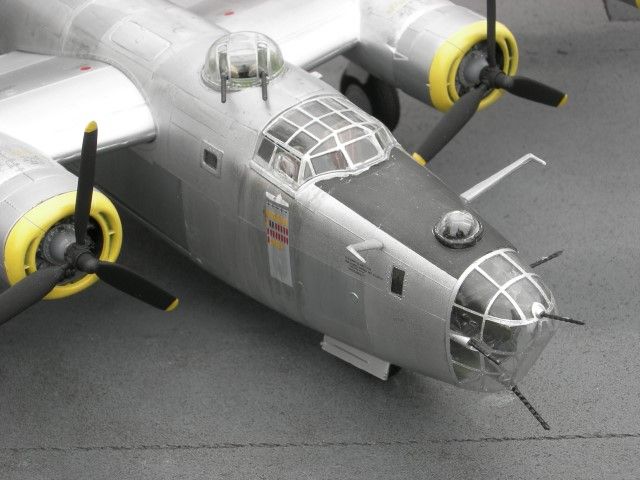
There are two things that you need for your B17. One is resin tires/wheels because the kit tires are not very good. Second and most important, you need Eduard masks for the cockpit and other clear parts. I don't care how steady your hands are, it is not possible to paint the aluminum frames on the cockpit and turret parts. Following are examples of the masks on the B24 nose:


It would be impossible to paint the frames by hand. Just remember to mask the back side of the clear parts with masking tape.

Your comments and questions are always welcome.

  • Member since
    November 2009
  • From: SW Virginia
Posted by Gamera on Saturday, March 12, 2016 8:07 PM

The B-24 looks awesome, I love how you did the NM effects. And the B-17 ain't half bad either!

Looking forward to the B-29, and then you can always add an Avro Lancaster. Wink

"I dream in fire but work in clay." -Arthur Machen


  • Member since
    May 2006
  • From: Chapin, South Carolina
Posted by Shipwreck on Saturday, March 12, 2016 6:46 PM
You did a great job on both of those birds, Johnny. You are going to add the B-29; I hope you have a lot of real estate available!

On the Bench:

Revell 1/96 USS Constitution - rigging

Revell 1/48 B-1B Lancer Prep and research

Trumpeter 1/350 USS Hornet CV-8 Prep and research


  • Member since
    March 2015
  • From: Streetsboro, Ohio
Posted by Toshi on Saturday, March 12, 2016 6:23 PM

crown r n7

Awesome job on both planes


Thely both look absolutely fantastic.  A job well done.

Toshi

On The Bench: Revell 1/48 B-25 Mitchell


Married to the most caring, loving, understanding, and beautiful wife in the world.  Mrs. Toshi


  • Member since
    August 2015
  • From: the redlands Fl
Posted by crown r n7 on Saturday, March 12, 2016 6:15 PM

Awesome job on both planes


 Nick.

  • Member since
    February 2016
  • From: Dublin.Ireland
Posted by brosallman on Saturday, March 12, 2016 5:56 PM

Amazing job! Love the B17. I am myself working on a Revell 1:48 B17. It will be my first kit! Its a dificult one for a beginer maybe but really enjoying it.

On the Bench:  Revell 1:48 B17 Flying Fortress

  • Member since
    June 2014
Posted by BrandonK on Saturday, March 12, 2016 4:24 PM

Super nice work. They both look great.

BK

On the bench:

A lot !! And I mean A LOT!!

2024 Kits on deck / in process / completed   

                         14 / 5 / 2  

                              Tongue Tied

  • Member since
    August 2009
  • From: Borlando Fla home of the rat
Posted by TREYZX10R on Saturday, March 12, 2016 2:15 PM

Excellent looking Bombers. Very nicely done!

  • Member since
    March 2015
  • From: Close to Chicago
FINISHED -- Revell 1:48 scale B-24D (NMF) Part two of my B17, B24 and B29 trilogy.
Posted by JohnnyK on Saturday, March 12, 2016 1:54 PM


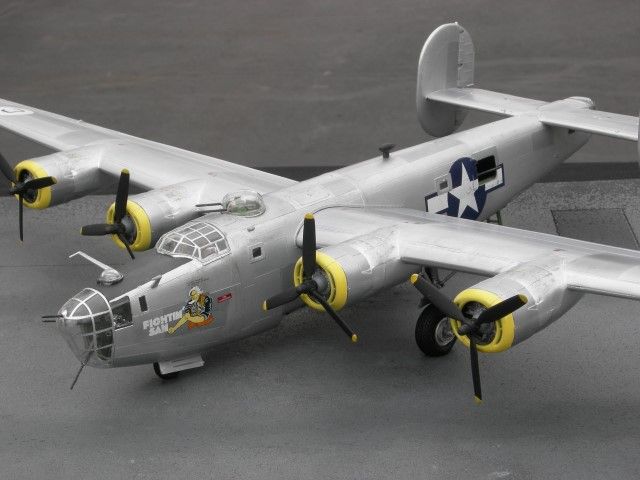
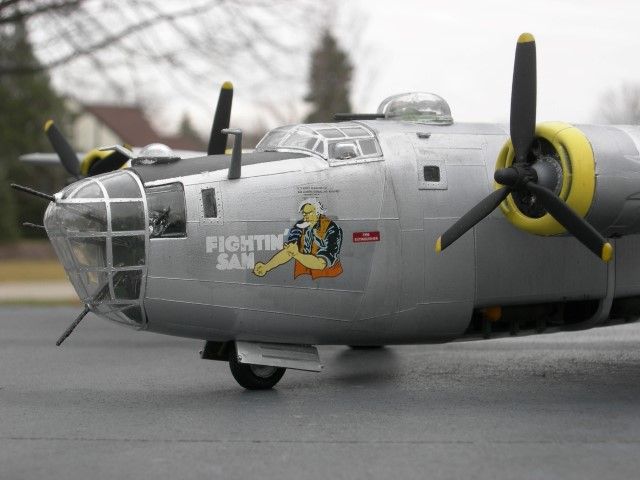
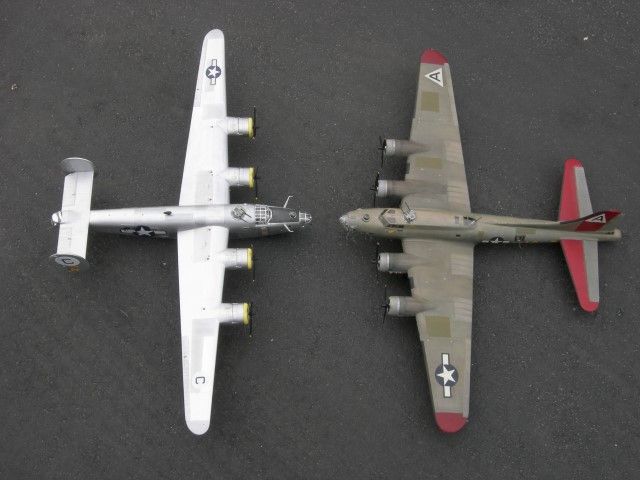
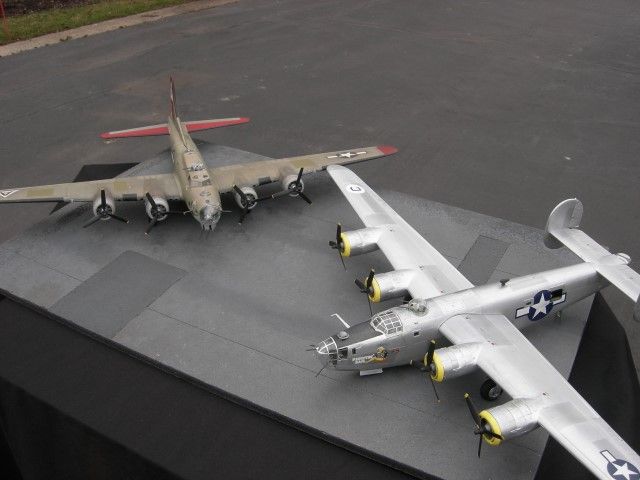
Last year I decided to build America’s three heavy weight bombers of WWII. Since I wanted the builds to be 1/48 scale, I chose Revell’s  B17, B24 and B29. These are older kits from the Monogram era. They have raised panel lines and are decently detailed. Last year I finished the B17 http://cs.finescale.com/fsm/modeling_subjects/f/2/t/169251.aspx . It is a weathered, war weary rendition of the airplane.


This week I finished the B24.
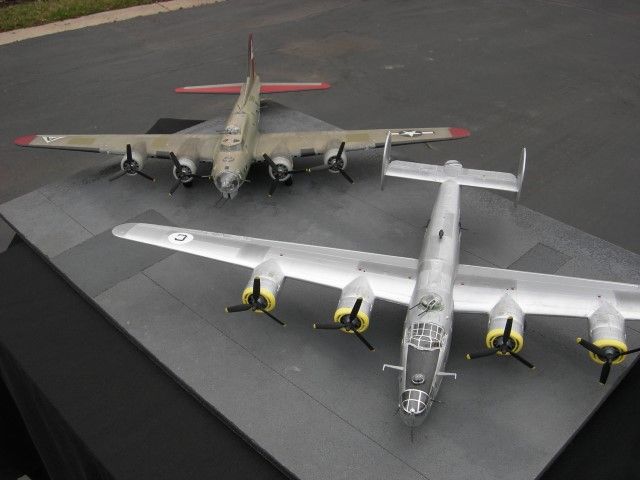
 

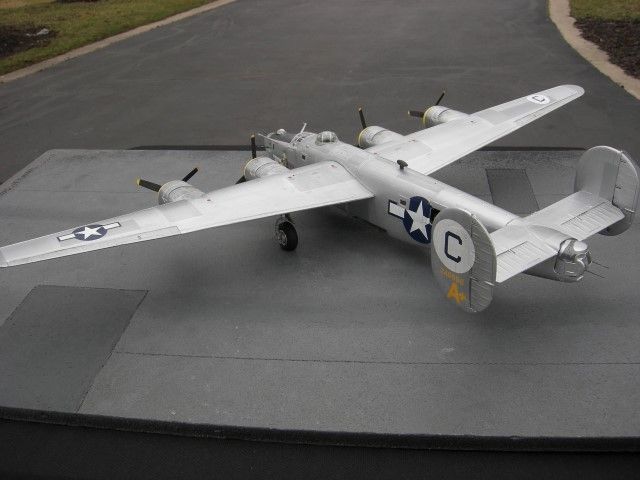
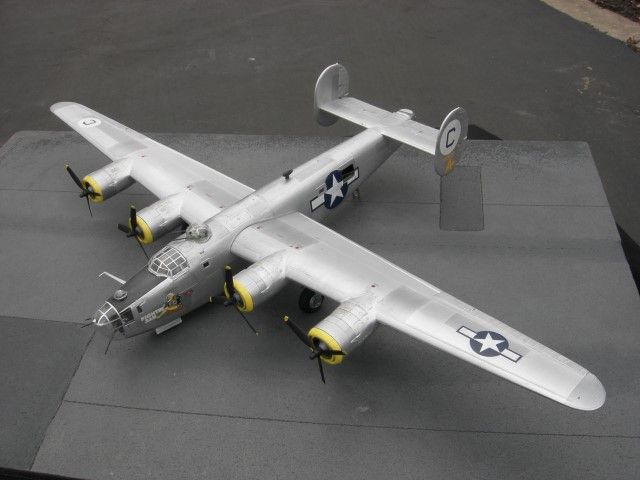
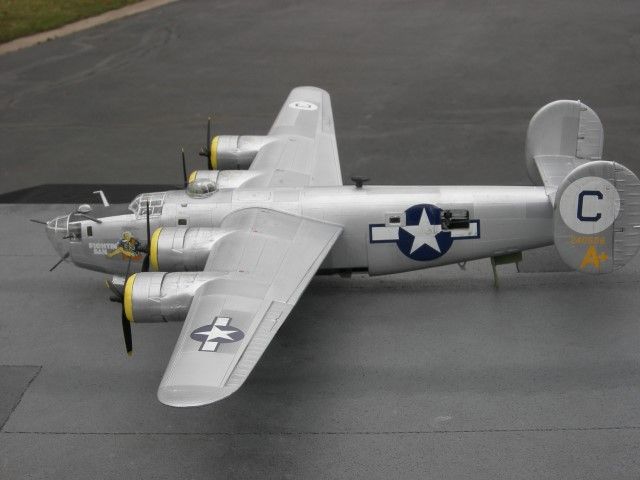
The B24D in a lightly weathered natural metal finish.  Except for the tires, the build would be straight out of the box. I chose not to make the same mistakes that I made when building the B17. When I built the B17 I purchased a bunch of after-market resin detailing kits. I spent hours and hours painting an adding the resin details. Guess what? Ninety percent of the resin details were not visible after the kit was finished. I did not repeat this when building the B24.


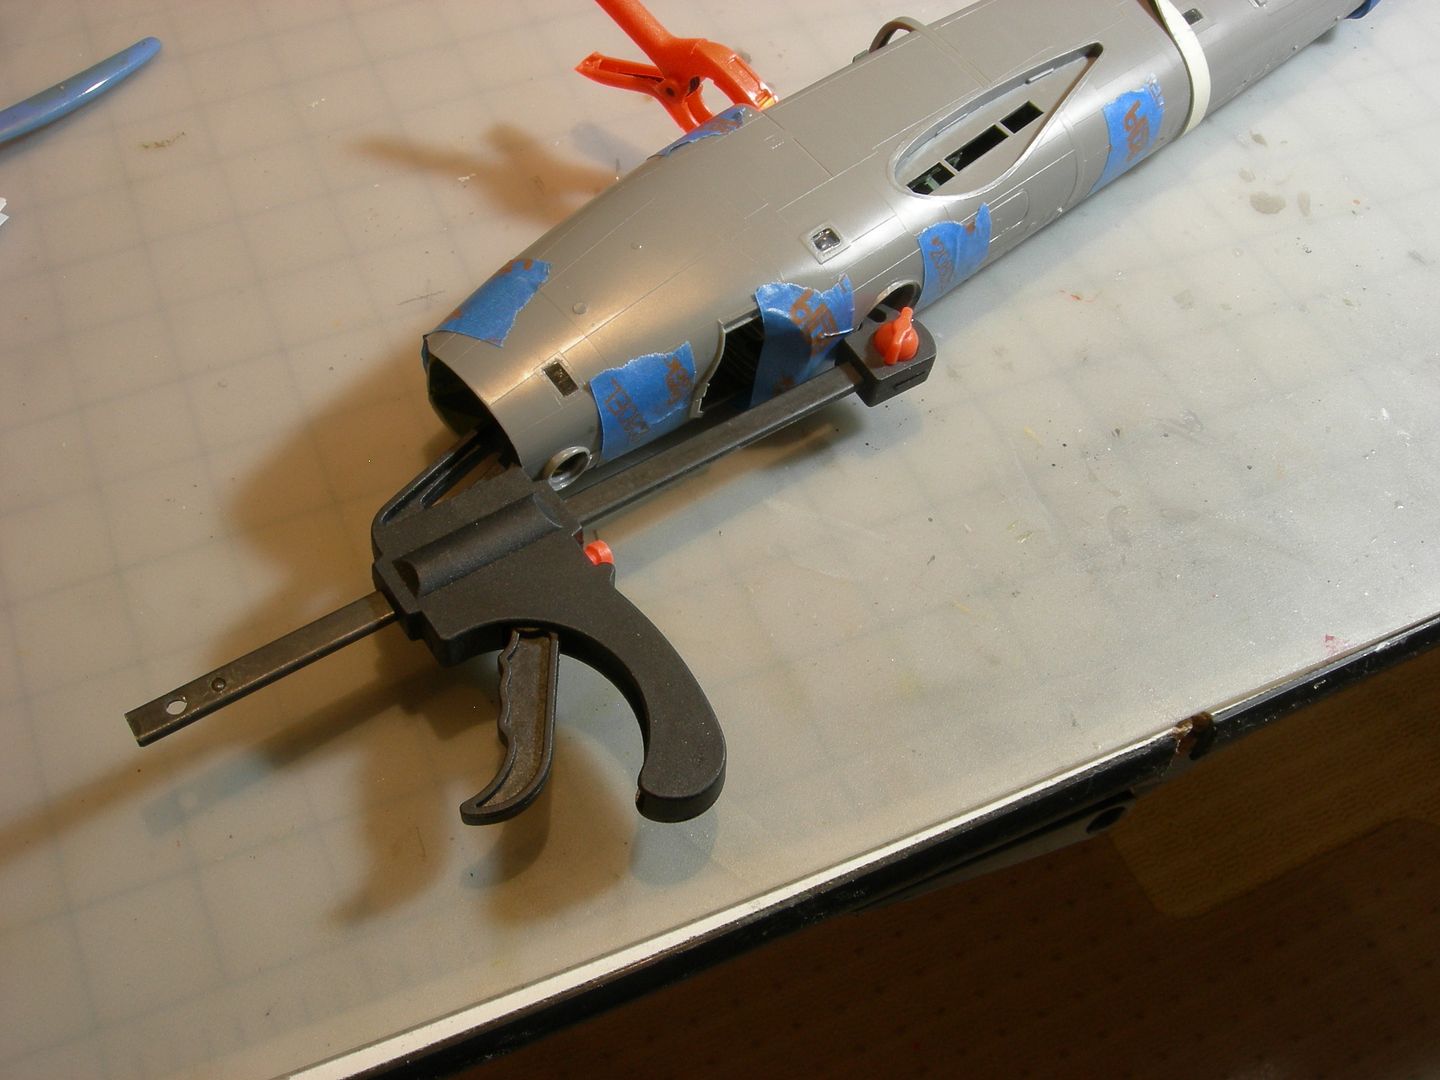
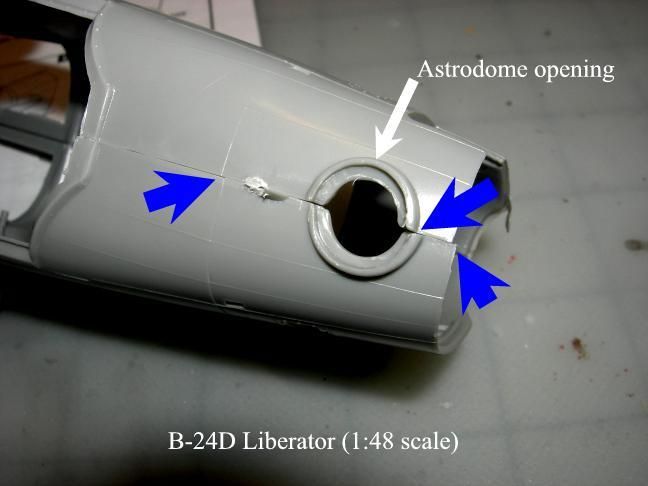
There is one huge problem with this kit. The locating pin at the front of the fuselage is in the wrong location. This causes the two halves of the astrodome’s frame to be misaligned. I resolved this by removing the locating pin and using clamps to align the two fuselage halves. Another issue is that the instructions indicate that the propellers are to be installed early on. This is not feasible because they would be easily broken during the  remainder of the build process. I added them at the very end of the kit.


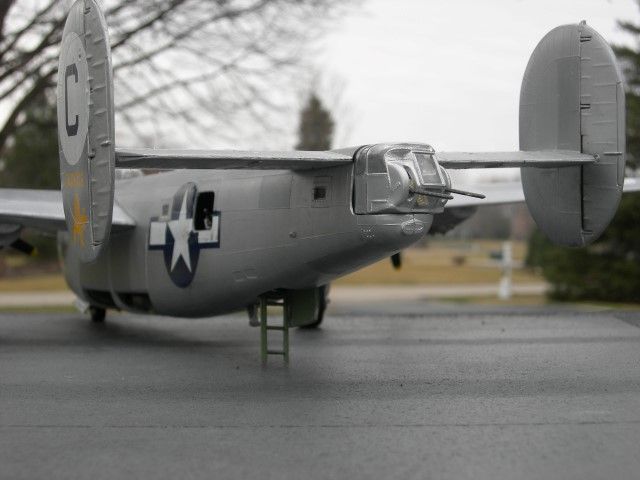
This plane has a tricycle landing gear; however, the finished kit is very tail heavy. Initially I tried to install lead weights into the front of the plane to prevent tail-sitting, but there is not enough room for the large amount of weight. So I decided to go with Revell’s solution which is to use the “crew’s ladder” to support the tail. Unfortunately the ladder is too weak to support the weight of the plane’s tail, so I glued it to the door of the crew’s access opening.
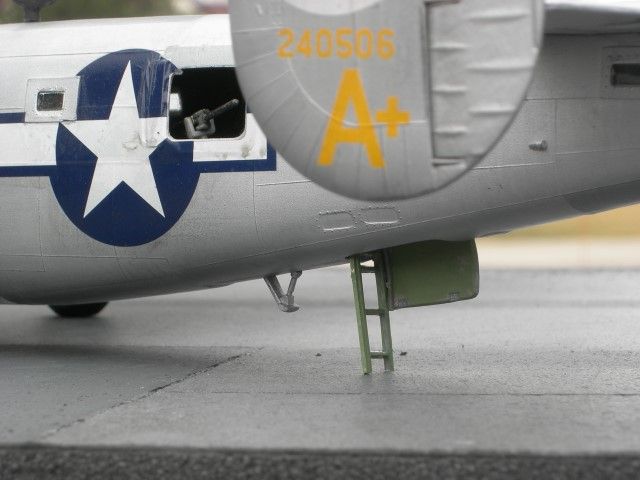
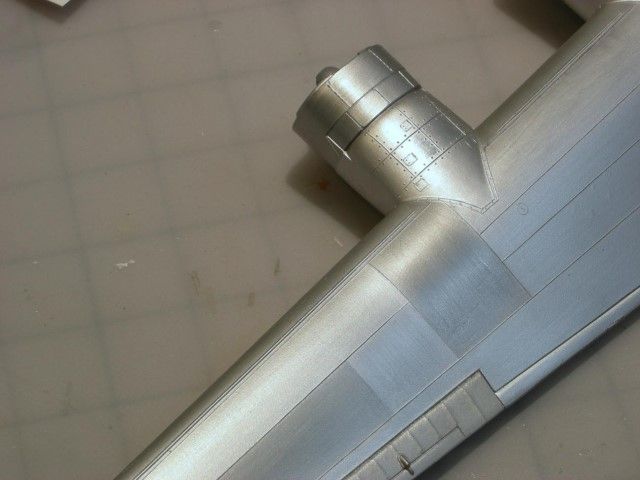
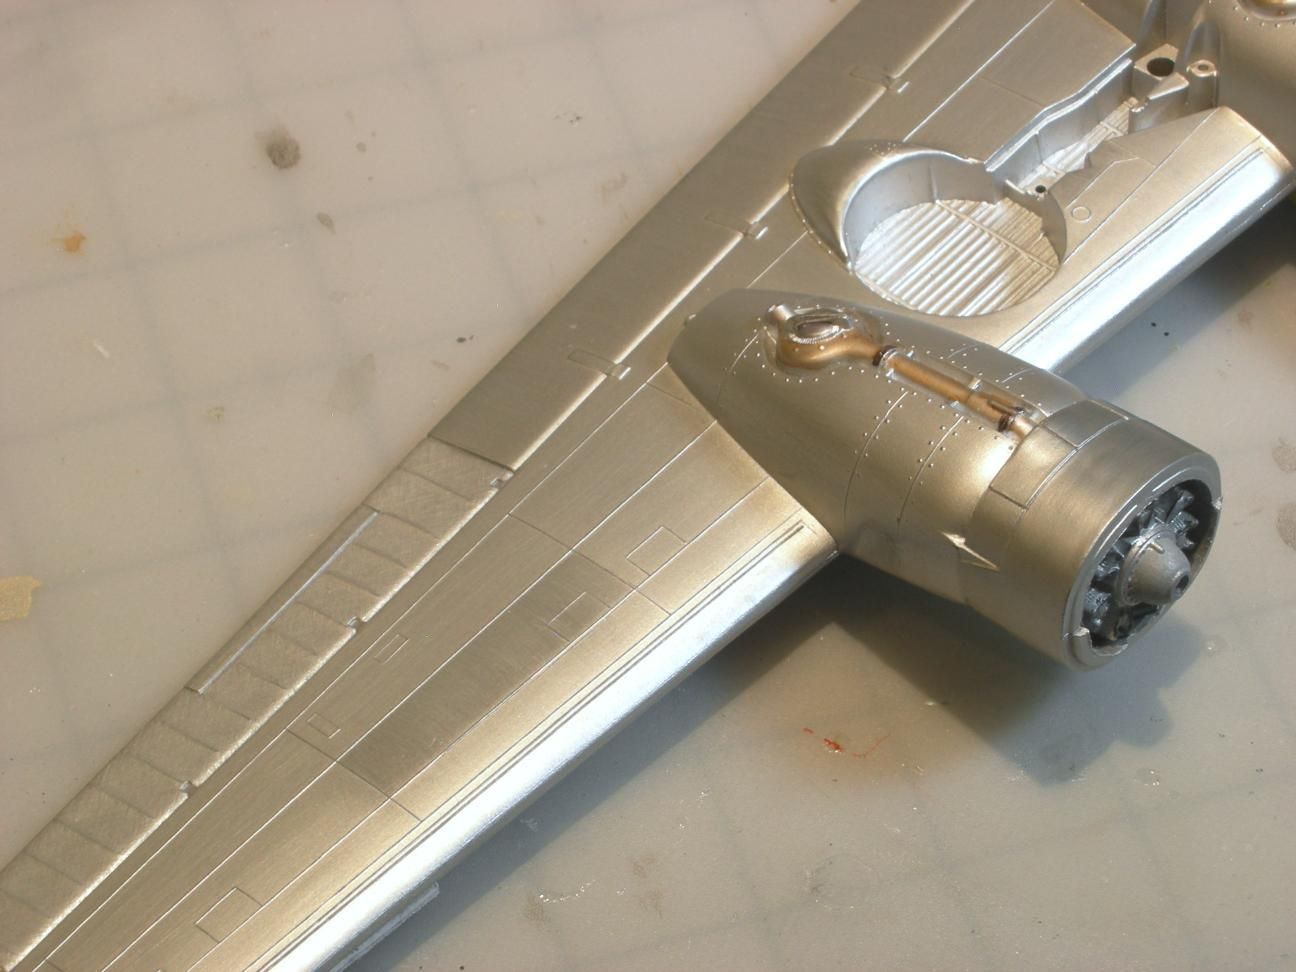
The plane is painted with Model Master Metallizer rattle can pant. I used two colors, Aluminum Plate and Stainless Steel. First I painted the kit in Flat black. After that dried I applied three coats of Auminum Plate. When that was dry I burnished it with a paper blending stick. I then masked the kit and applied Stainless Steel in certain fuselage panels.
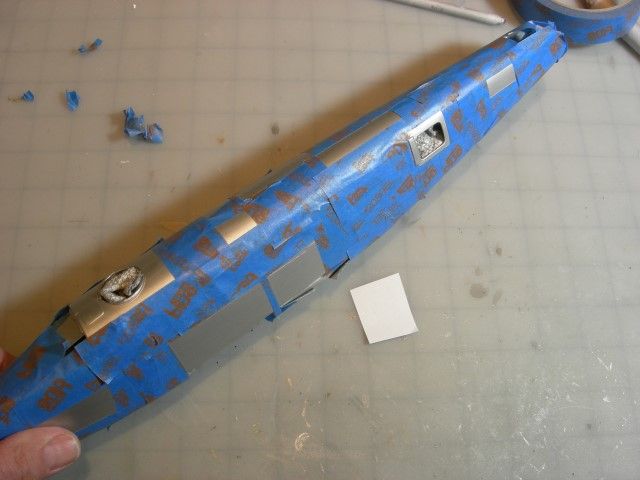
I burnished those panels and removed the tape. I then rubbed the paint with 0000 steel wool to give the paint an "aluminum grain". After burnishing, the Metallizer paint is very durable.


Following are photos of the final build. The plane is lightly weathered with Tamyia acrylic Smoke and Testor's Black Wash. It is important to dip the brush in water prior to dipping it into the wash. Otherwise the wash is impossible to wipe off. After the Summer I'll build the B29. That will be a good winter project.


Your comments and questions are always welcome.

JOIN OUR COMMUNITY!

Our community is FREE to join. To participate you must either login or register for an account.

SEARCH FORUMS
FREE NEWSLETTER
By signing up you may also receive reader surveys and occasional special offers. We do not sell, rent or trade our email lists. View our Privacy Policy.