SEARCH FINESCALE.COM

Enter keywords or a search phrase below:

Hobby Boss F4F-4 Wildcat Complete

5137 views
17 replies
1 rating 2 rating 3 rating 4 rating 5 rating
  • Member since
    January 2015
  • From: Katy, TX
Hobby Boss F4F-4 Wildcat Complete
Posted by Aggieman on Friday, October 7, 2016 11:36 AM

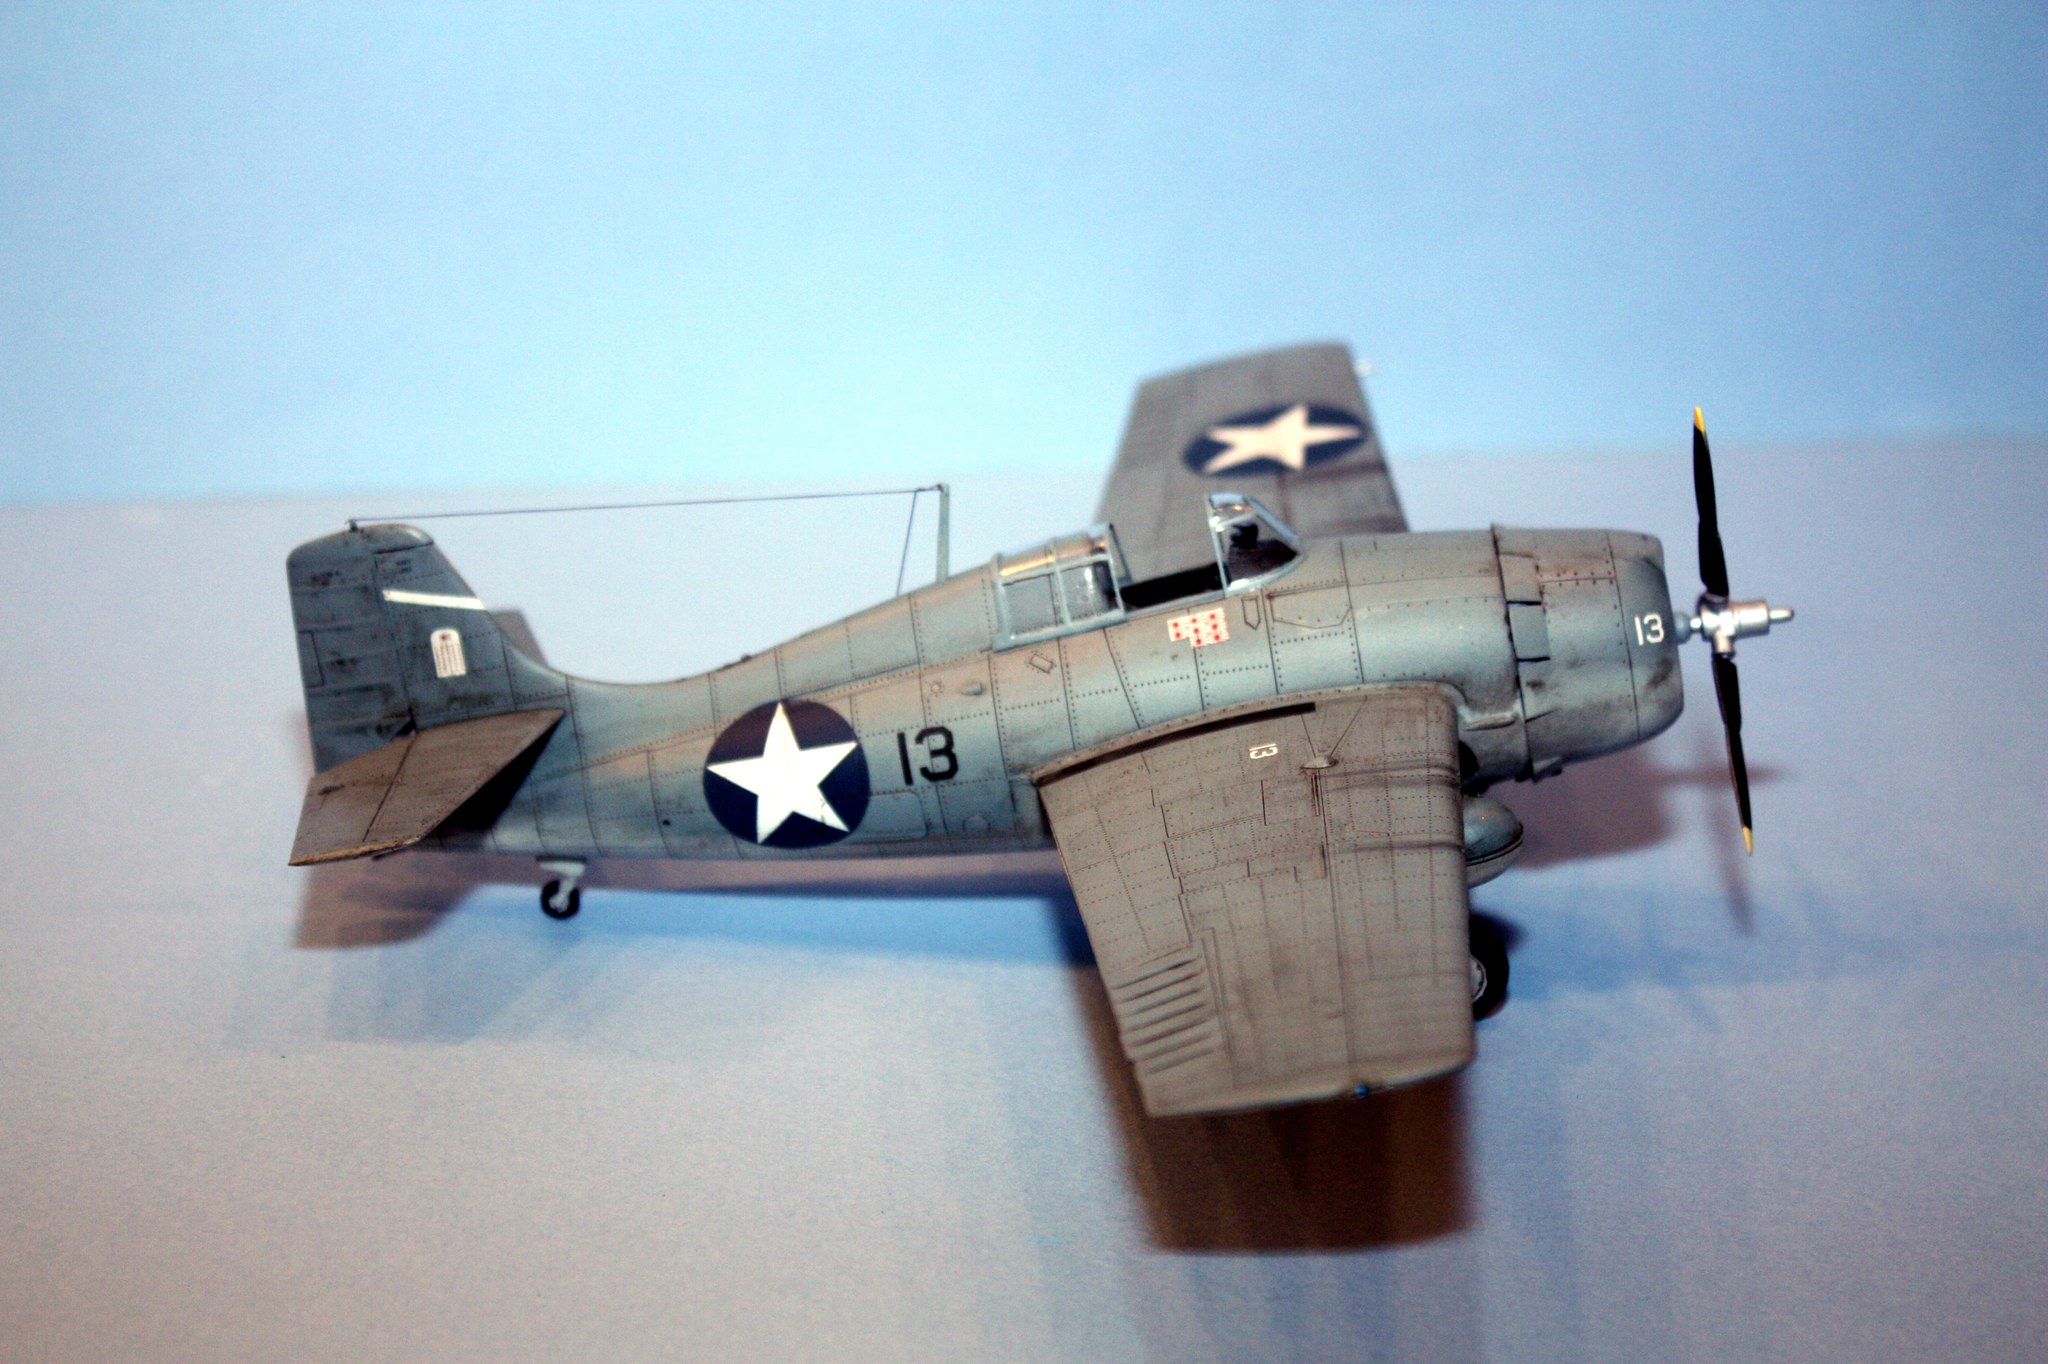
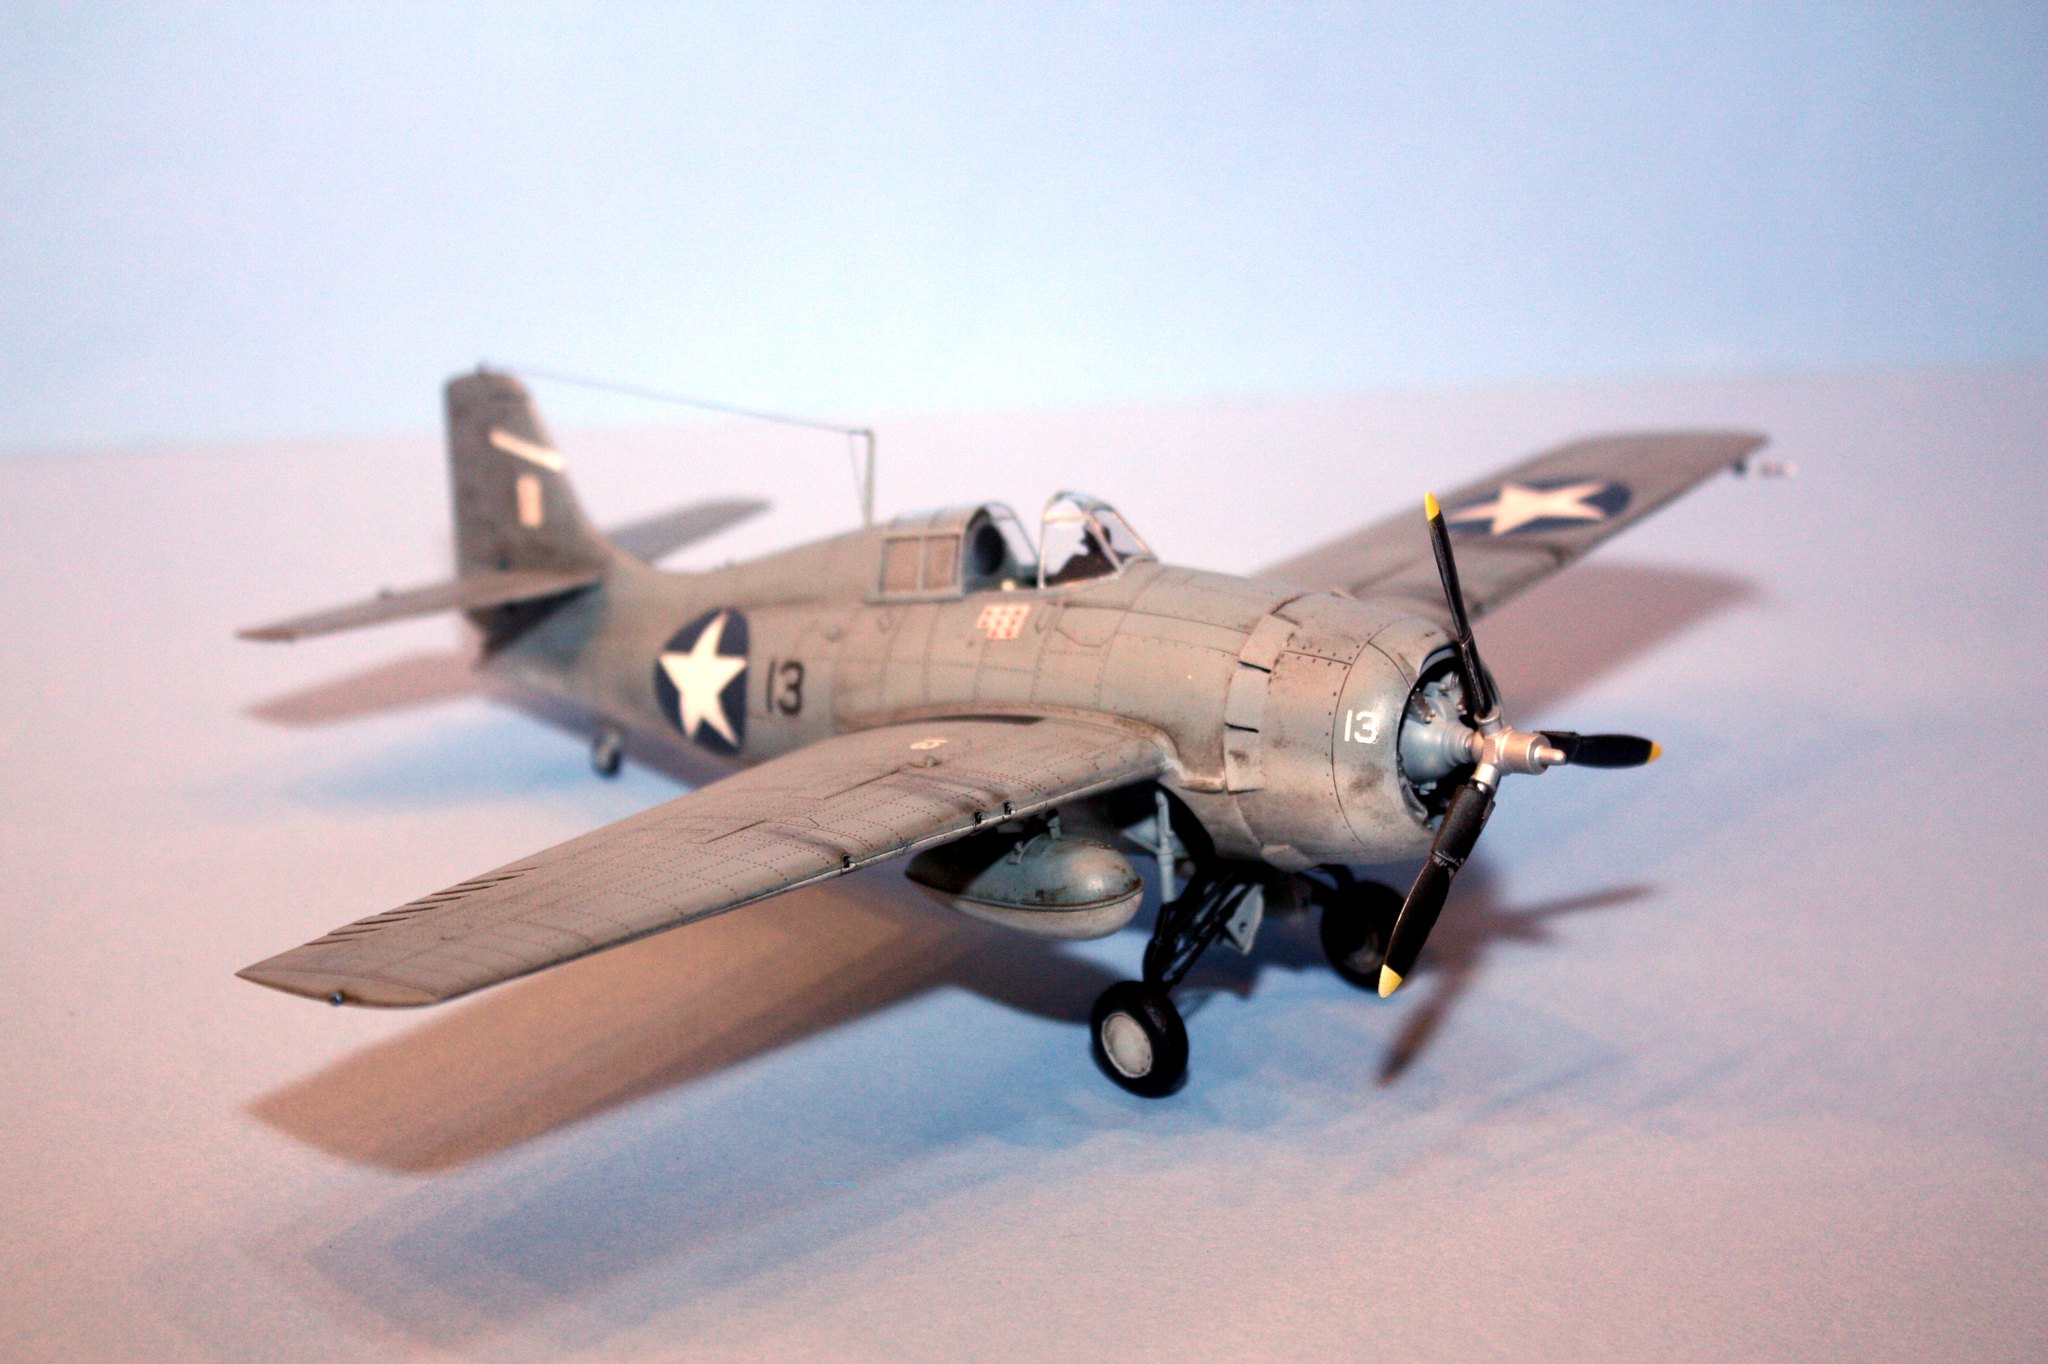
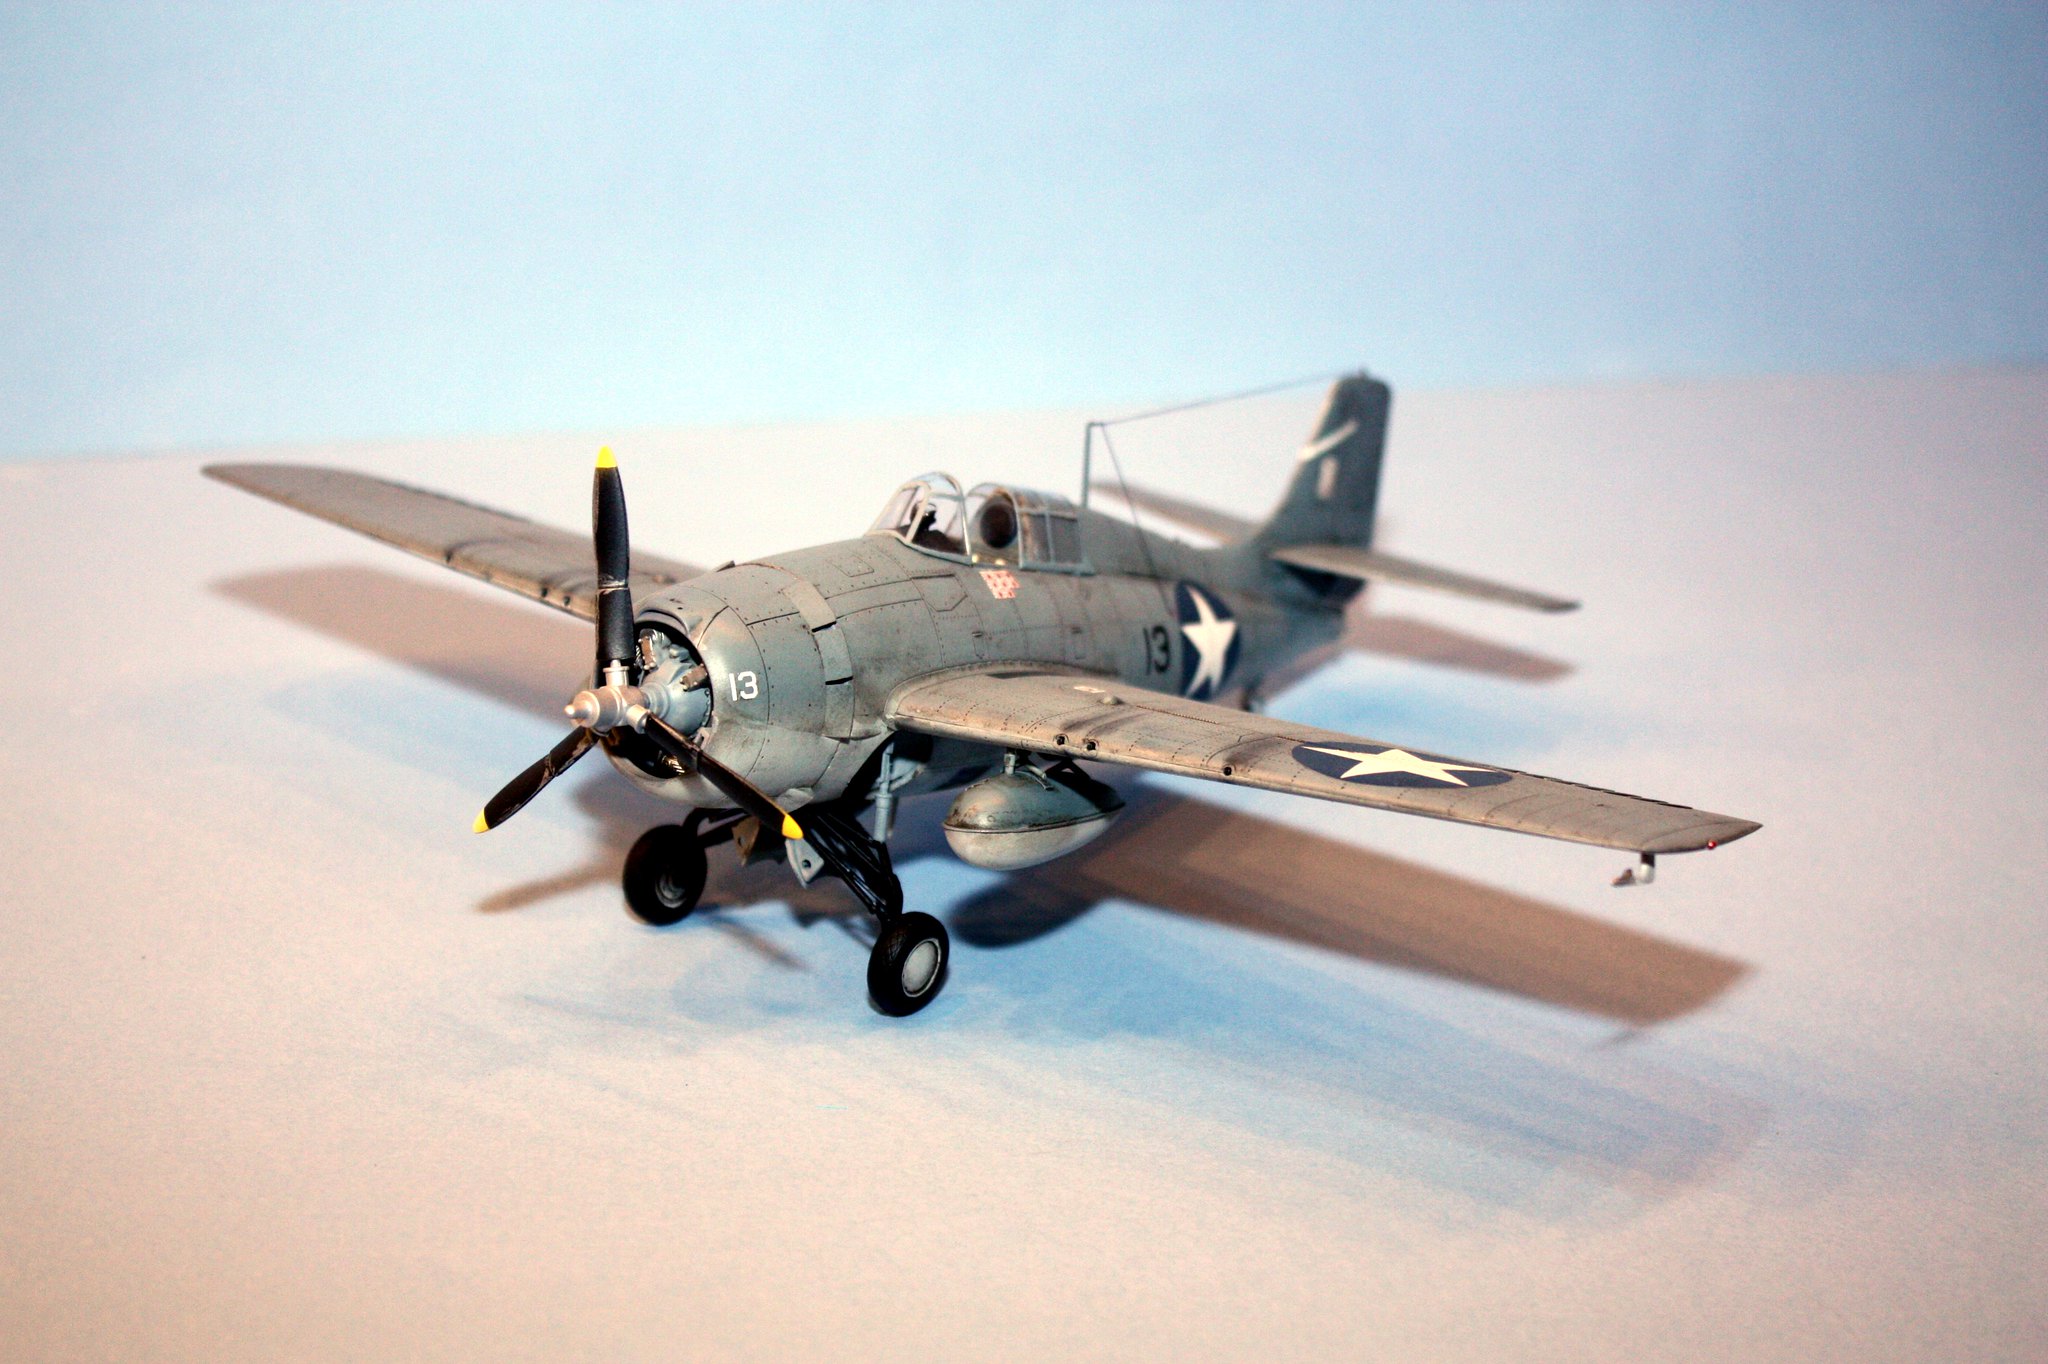
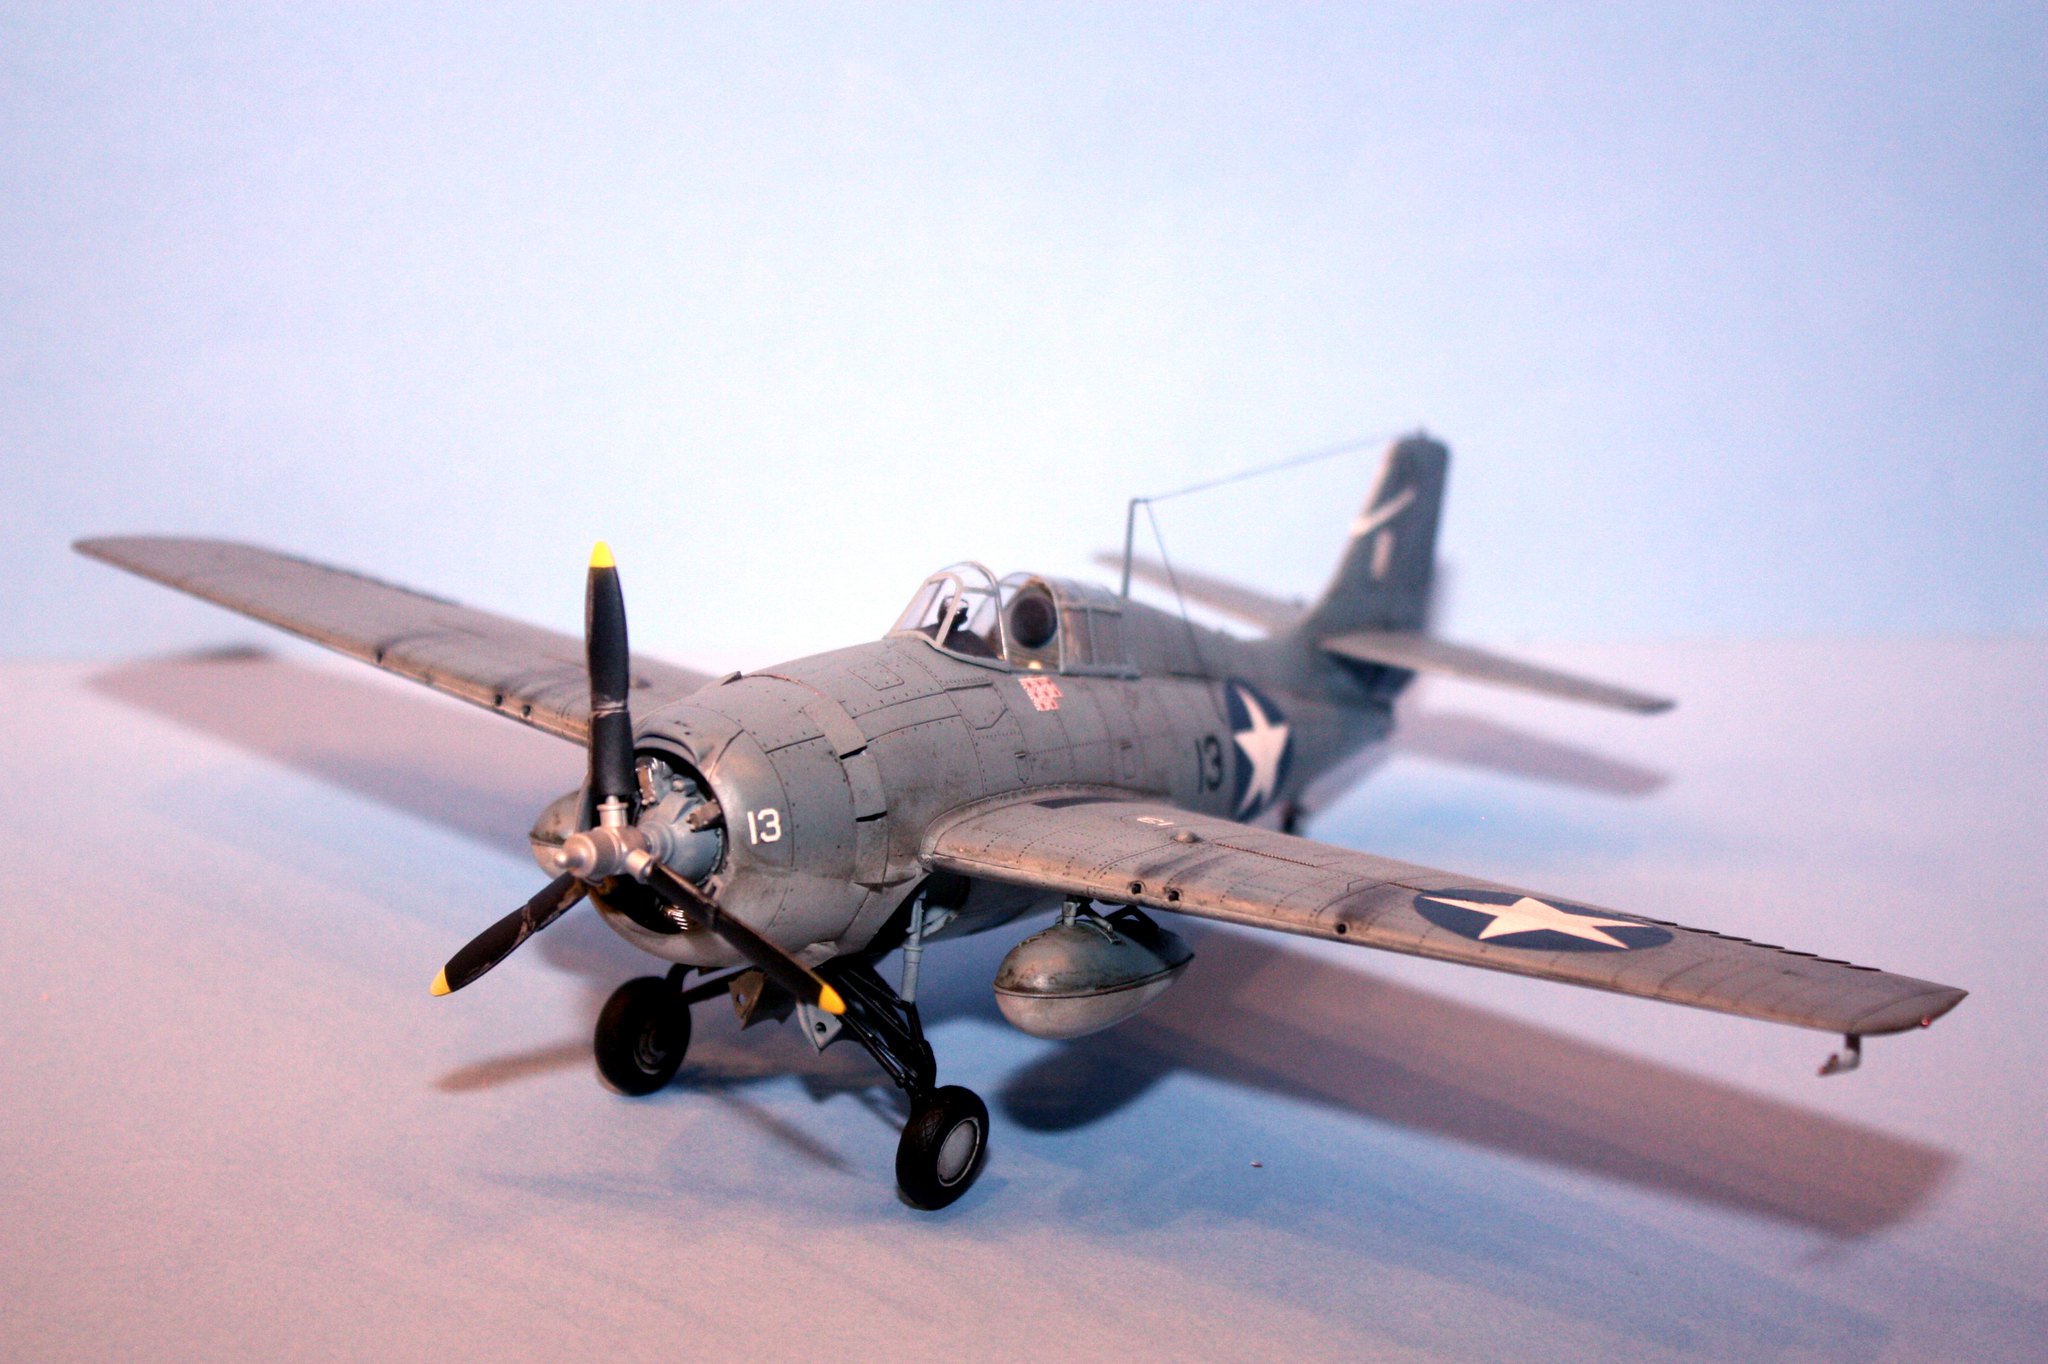
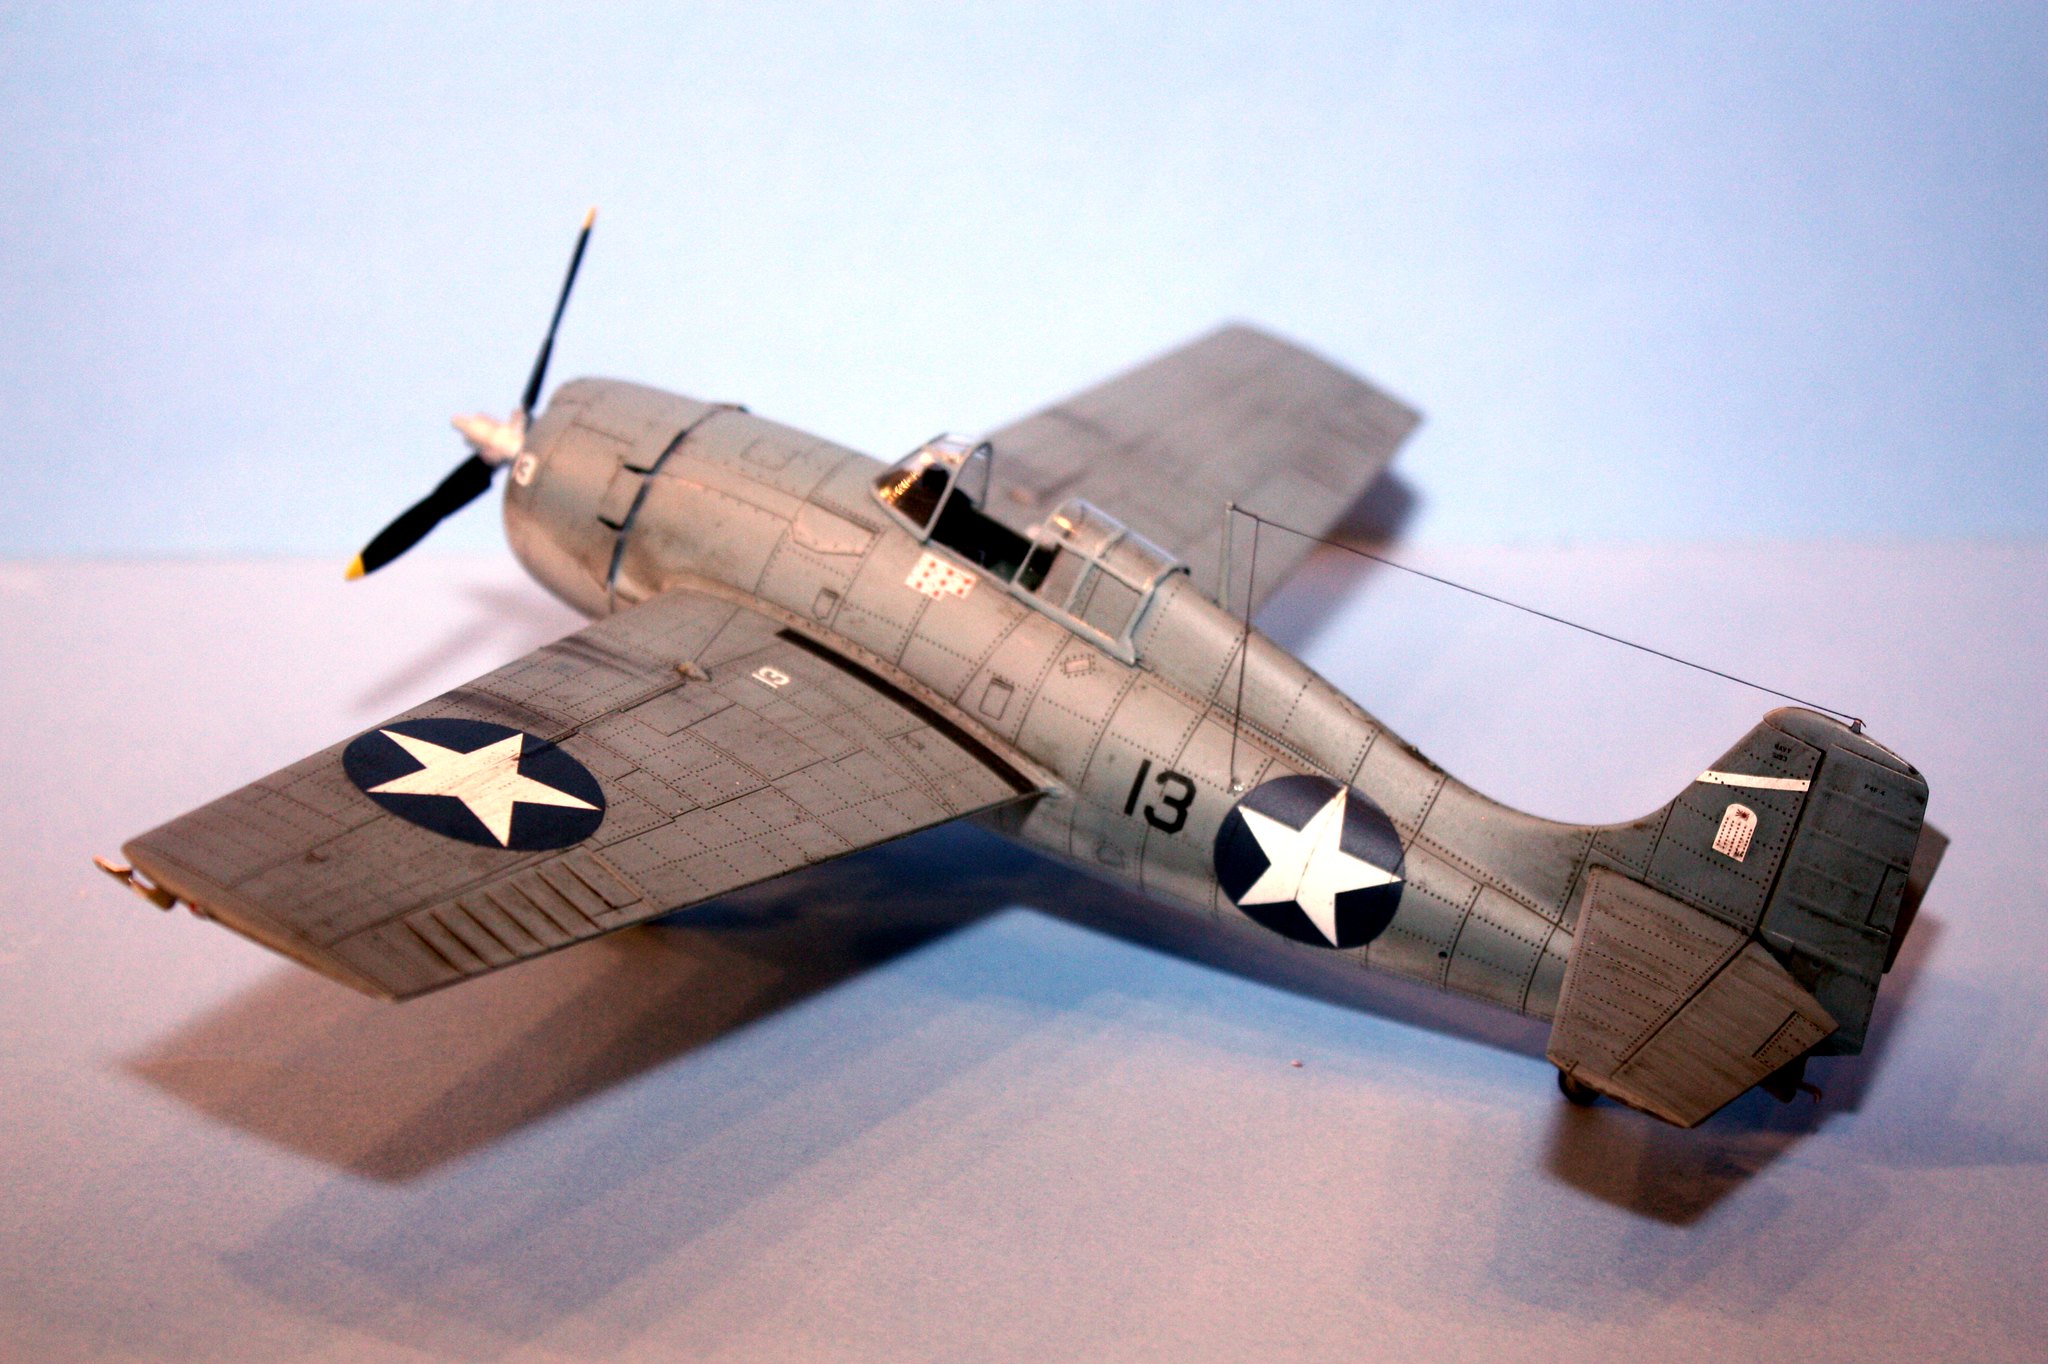
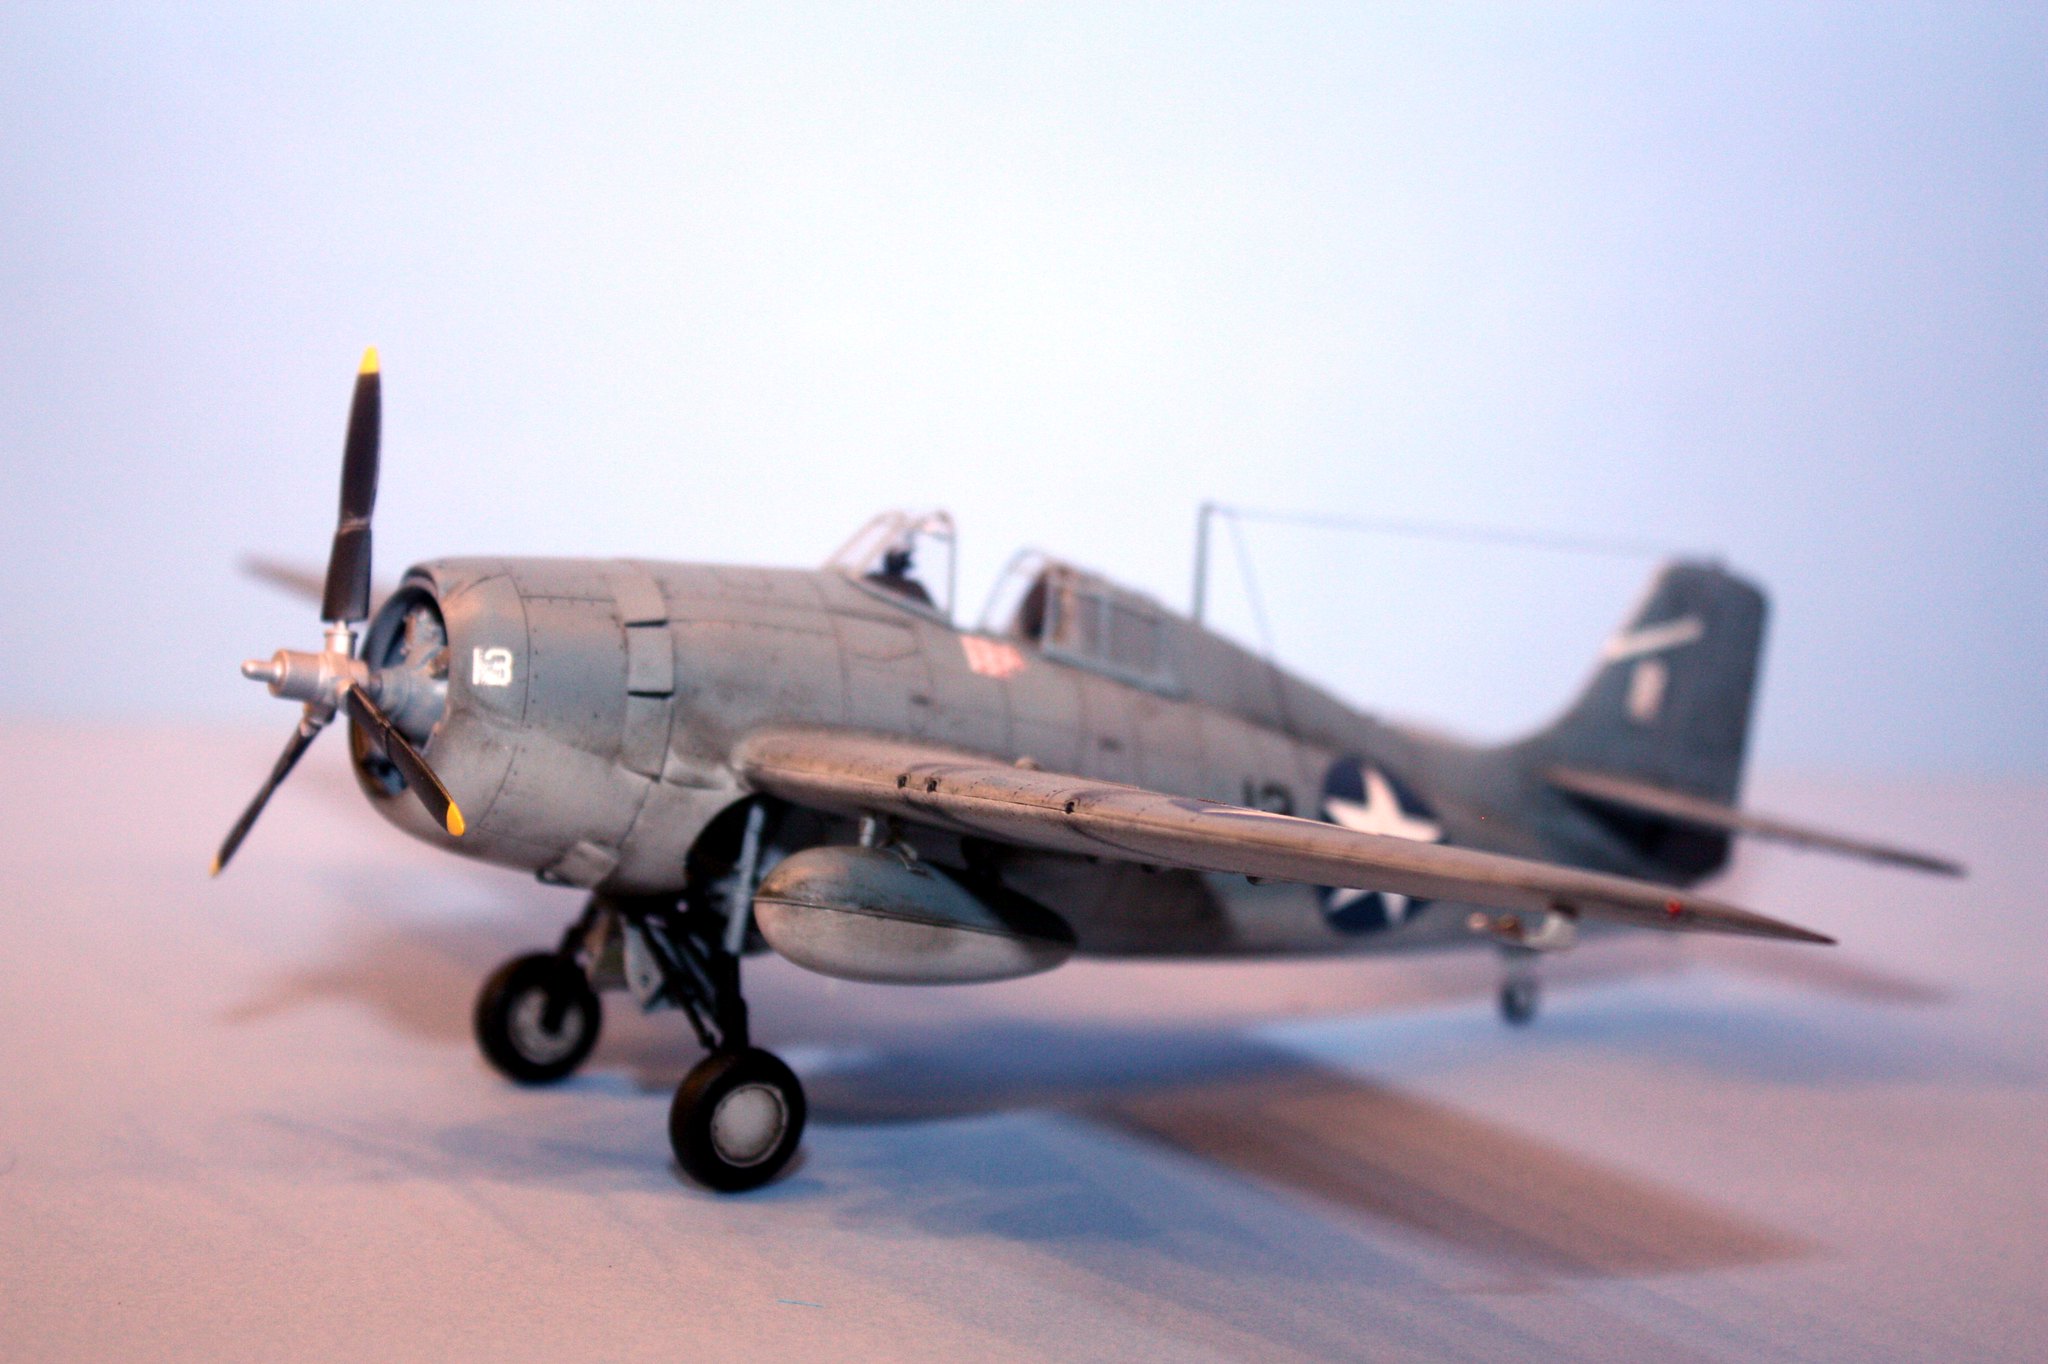
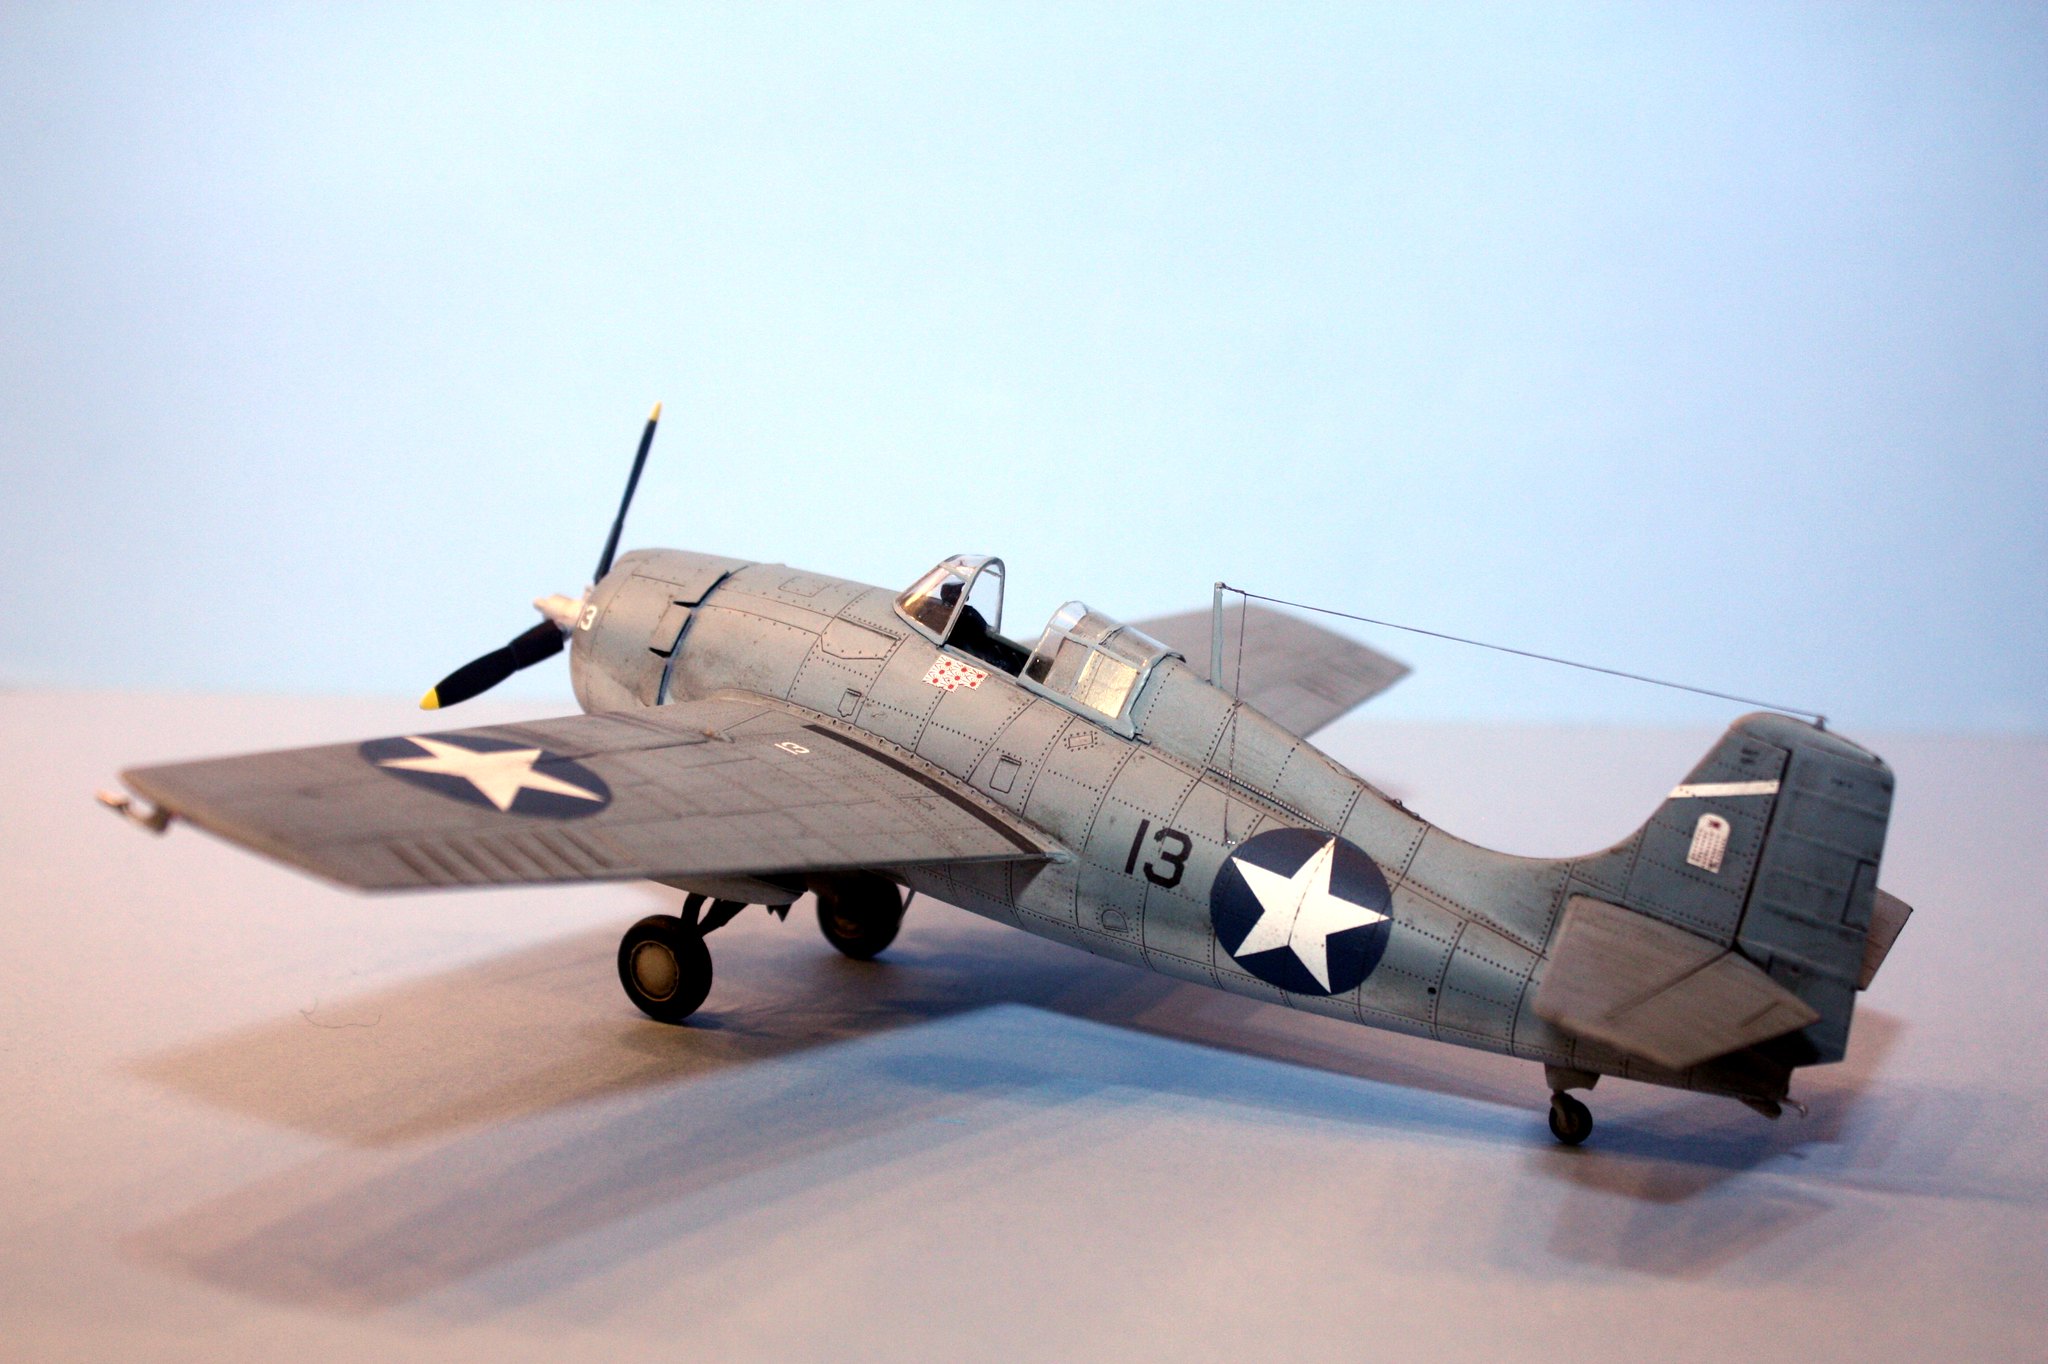
This is the second of four Wildcat kits that I have completed today.  

Outside of a couple of the "Easy Assembly" kits I built several years ago with my daughter, this is my first 48th scale Hobby Boss kit (if my recollection is correct).  I do have several other Hobby Boss kits in my stash but this one is the first to actually build.

So what do I think?  

Well, the kit is generally speaking very well engineered and goes together well.  Notice that I said "generally speaking".  That means that I found some issues with this kit that I did not like much at all.  The least of these is the rivet detail.  Grumman aircraft typically had a bunch of rivets that were not recessed, but the Hobby Boss kit recesses just about everything.  Not exactly accurate but not a big deal at the end of the day.  

Next, the wing joins are tiny stubs that don't seem sufficient to hold the wings to the fuselage.  Once I got the wings attached and had let them sit overnight, I was decaling and one of the wings snapped right off.  Perhaps not enough glue, but I could not seem to get enough glue (I use Tamiya liquid cement) to properly adhere.  I ended up using CA to get that wing to stay put.

The biggest gripe I have about the kit is the 2-piece canopy/windscreen.  If you want to close up the canopy, you will discover that the canopy does not sit anywhere near the same height as the windscreen, and there is nothing that I could do to mitigate that issue.  I even took the old Monogram kit's canopy, which is a 1-piece affair, and cut the windscreen from that one to see if I could mix-and-match those parts.  That didn't work. The canopy piece is also too thick to sit properly in the open position.  So I opted for a Squadron canopy.  Even that was problematic, as the Squadron windscreen did not sit properly in its attachment point.  I finally decided to use the kit's windscreen with the Squadron canopy posed in the open position.

Paints are Vallejo acrylic US Navy blue gray and Model Master Acryl light gray over dark gray Stynylrez primer.  Interior - cockpit is Humbrol bronze green while the wheel well is Model Master medium gray. Dirtied up with a good coating of Flory dark dirt wash, various Tamiya weathering compounds and a silver Prismacolor pencil.

The scheme represents an August 1942 Wildcat belonging to USN VF-6 aboard the USS Enterprise.  This particular bird was -13 as piloted by Machinist Mate Donald E. Runyon (BuNo 5193) who during the Guadalcanal campaign in August 1942 scored 8 kills in this Wildcat.

On to the photographs.

The cockpit under construction.  I used Eduard fabric adhesive belts for this build with the kit's seat.

The lower half of the forward fuselage.  Having built the Tamiya kit once before and also right now, I can see why the Hobby Boss kit is as it is.  The Tamiya kit has a similar underside but it includes the lower wing.  If Hobby Boss copied that, they could get slapped with copyright infringement, I would think (although not certain how the law works in the countries that they HQ in).  Even so, Hobby Boss includes some wheel well and engine detailing that is not in the Tamiya kit.

Fit of the lower half to the upper was problematic.  One cannot simply attach the upper halves then put the lower half in place; you will end up with mis-alignments and gaps.  I ended up attaching the lower half to one side of the upper, massaged everything into alignment while the glue set, then once that was done, did the same thing with the other upper half.  Took a while and a good bit of patience to hold these parts while the glue set but I think the effort was worth it.

The engine is ok out of the box but it could use some ignition wiring.  Which I completely overlooked until now.  Crying

Flory dark dirt wash.

The landing gear apparatus.  With the Wildcat, any kit manufacturer is likely to have issues with this thing.  It is a fragile piece.  The kit instructions are not crystal clear on how part of it goes together.  I think that after about an hour studying my various references, I got it put together correctly.  Then getting this part installed into the wheel well is an entirely new set of struggles.  I had to conduct a small bit of surgery to the piece that mounts it between each side of the wheel well to get the part that covers it (the bulb on the underside that includes the catapult connector) to lay down properly.

The tires after some Flory.

Here are the various shots of the canopy and windscreen that show the problem I had with this.  The first picture is the complete kit parts. The second picture displays how the kit canopy sits unacceptably upon the spine of the 'Cat.  The third picture shows the Squadron canopy sitting properly in the open position.  The fourth photo shows the Squadron canopy combined with the kit windscreen.

The canopy and windscreen painted and awaiting installation.  Due to the flimsiness of the vacuform canopy, I hand-painted the frames.  I did the exterior portions of the frame with a flat-tipped brush and a steady hand, and the internal portions of the frames with a sharpened toothpick and an even steadier hand.  I'm not sure I was totally successful on it but to the naked eye it looks decent.

Finally, the drop tanks after a coat of Flory.

The final reveal.
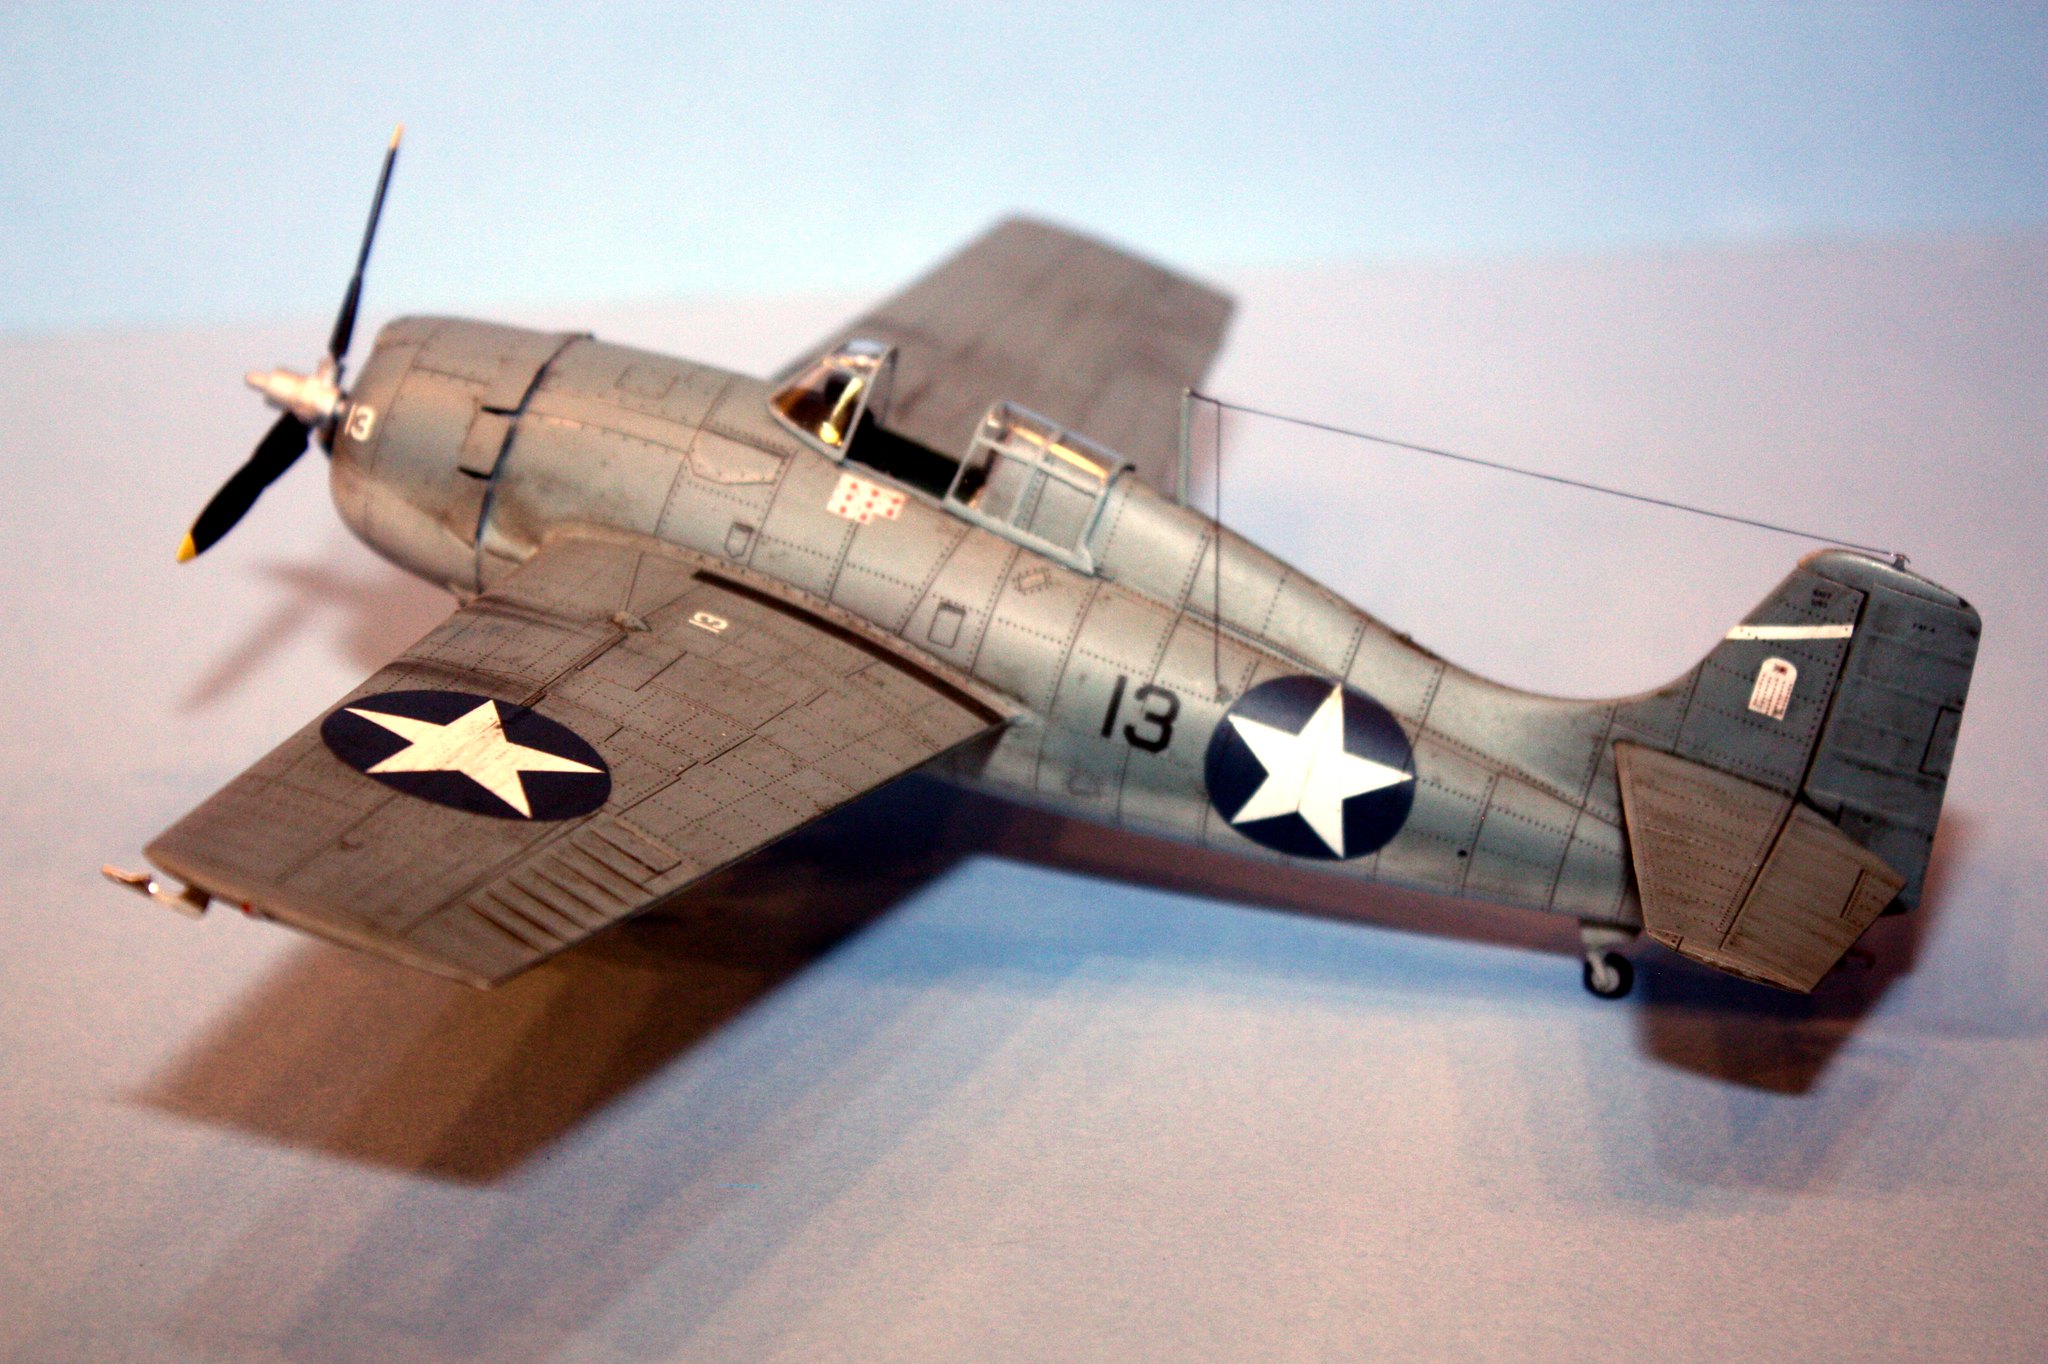
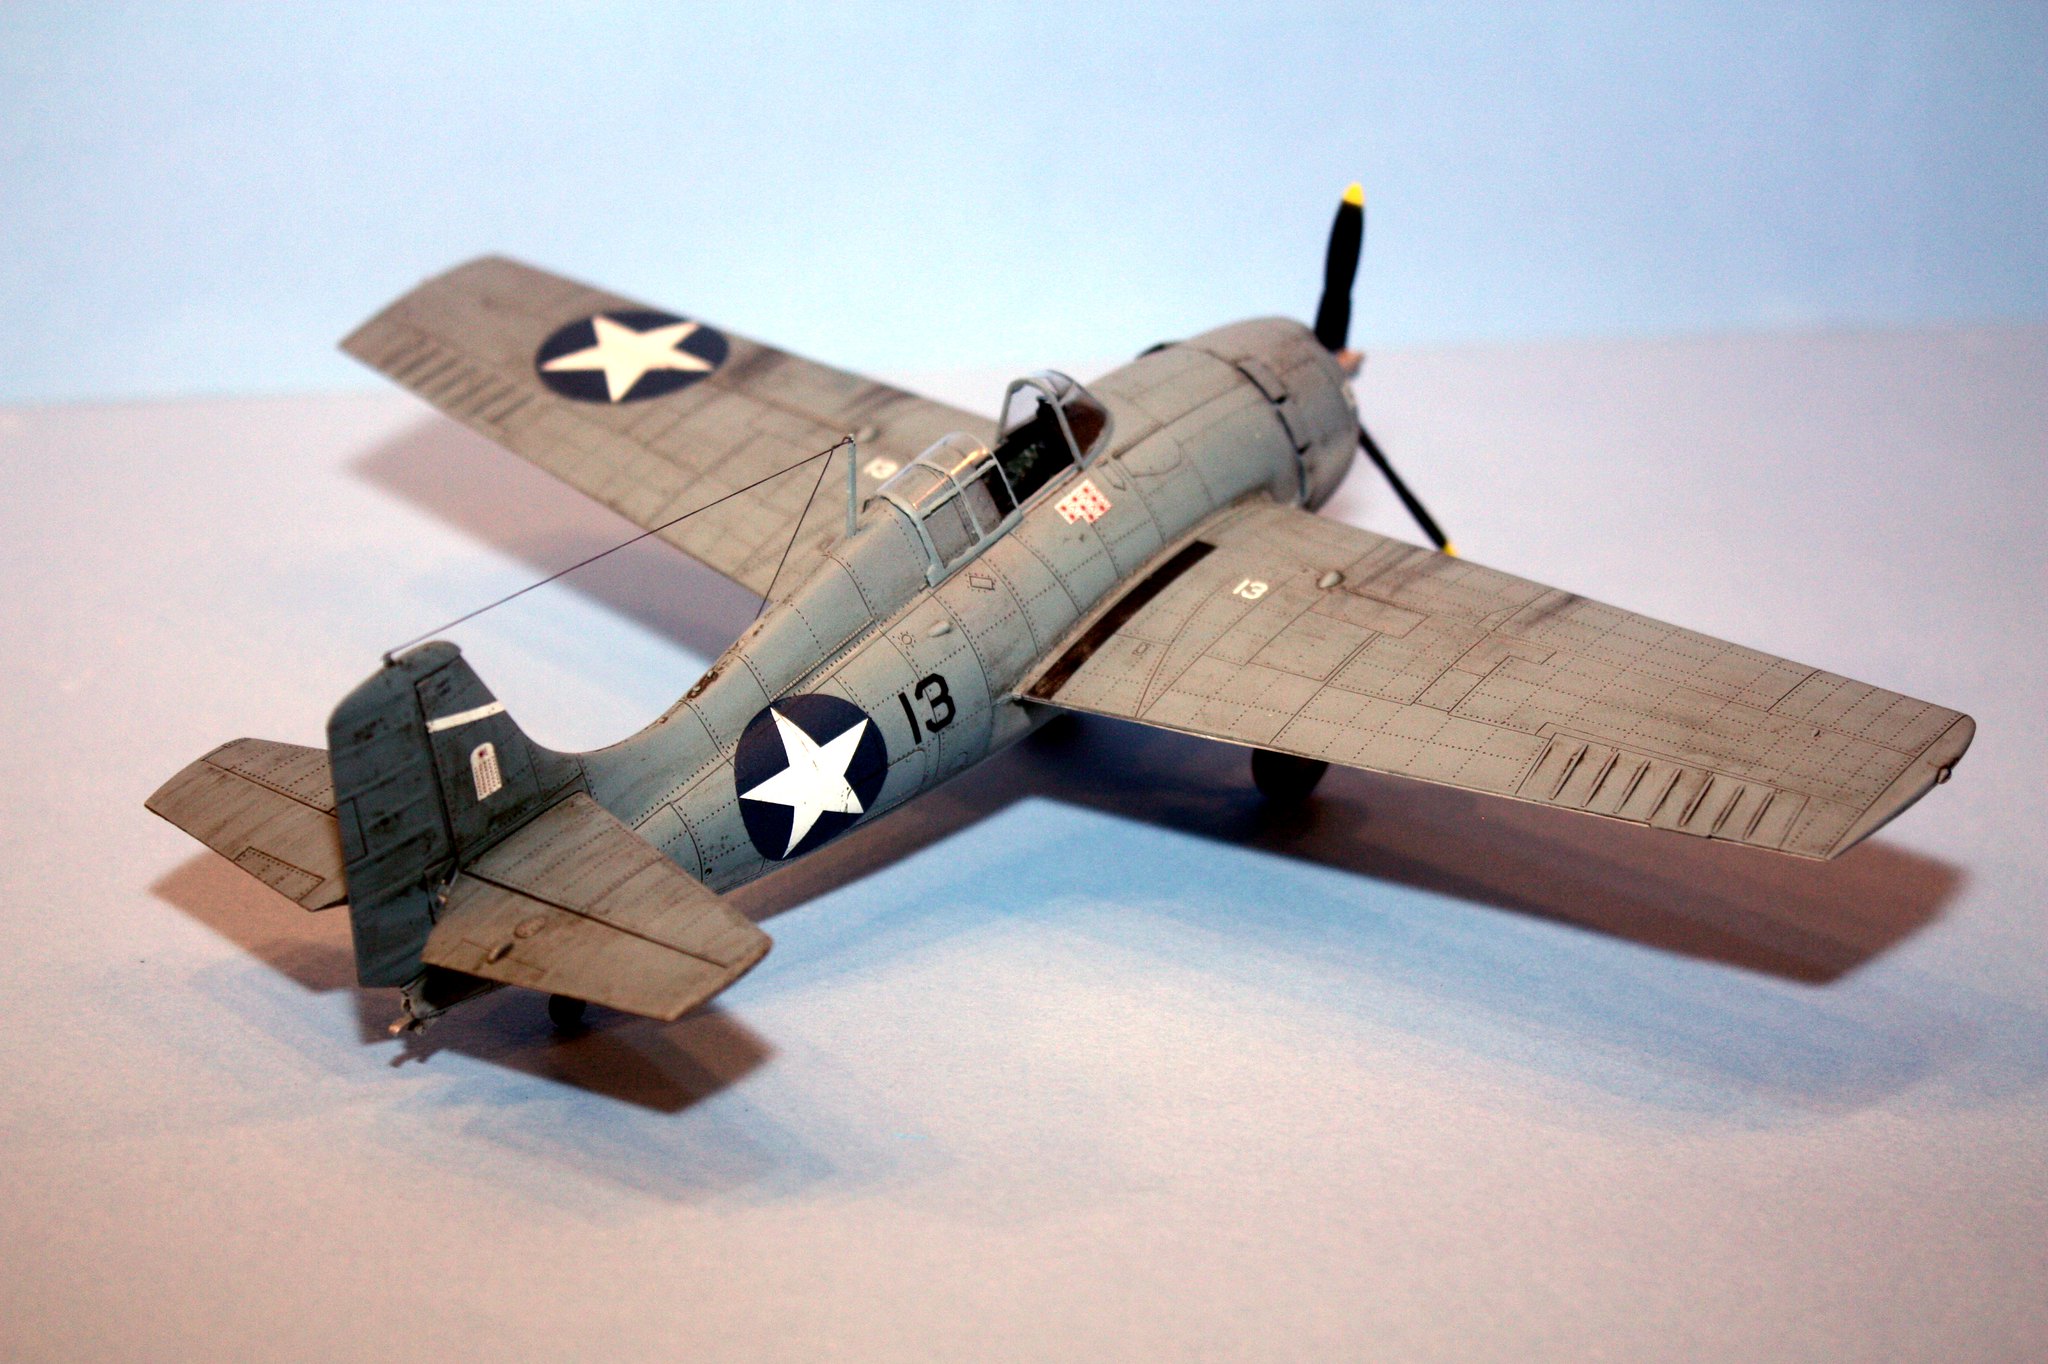
Lot of photos but I know everyone likes to see a lot.  I still have to finish the Tamiya and the 1/32nd Revell.  Given that I have a trip to Aggieland in the morning to watch my Aggies defeat, er, take on the Tennessee Volunteers, I don't expect to get any bench time this weekend.

Regarding Hobby Boss, I think I did a good job with a kit that has a lot of great features but also had some real knuckle-headed problems. Off the top of my head, I know I have an A7 Corsair II, a F-105D Thunderchief, a Bv141 (German reconn oddity) and an F-80C in my stash.  I hope those go together as well without having the issues that the Wildcat has (and I actually would like to add the Hobby Boss FM-2 Wildcat to my stash).

  • Member since
    April 2013
  • From: Eleva, Wisconsin
Posted by Greatmaker on Friday, October 7, 2016 11:41 AM

Beautiful wildcat!  You must have a VERY steady hand as the canopy looks fantastic. Thank you for sharing your build


  • Member since
    September 2006
  • From: Bethlehem PA
Posted by the Baron on Friday, October 7, 2016 11:51 AM

Great finish!

I'm certain that HB copied the Tamiya kit, with sufficient modifications, and additional details, as you noted.  I have both, and I compared the sprues, and they're pretty close.

Comparing the sprues also answered my question on why HB chose to use that tub for the lower forward fuselage.  I found the fit a little fiddly, requiring some filler to hide the seams.

I had trouble assembling the engine, too.  The parts were keyed, but I found the keys and slots didn't align.  I sanded the keys off and just butted the sections to one another.

But the kit has nice detail, so you get a decent model, out of the box.

Enough of my opinion of the kit!  I really like your finish and weathering.  Well done!

The bigger the government, the smaller the citizen.


  • Member since
    May 2006
  • From: Chapin, South Carolina
Posted by Shipwreck on Friday, October 7, 2016 12:30 PM

Aggieman, you did a great job on that wildcat. It looks nicely used! I have a Tamiya version that I need to build as a USS Horrnet flight wing.

On the Bench:

Revell 1/96 USS Constitution - rigging

Revell 1/48 B-1B Lancer Prep and research

Trumpeter 1/350 USS Hornet CV-8 Prep and research


  • Member since
    March 2015
  • From: Streetsboro, Ohio
Posted by Toshi on Friday, October 7, 2016 2:37 PM

With the issues you encountered, you really did a fantastic job with the Wildcat.  I love the weathering you did!

Toshi

On The Bench: Revell 1/48 B-25 Mitchell


Married to the most caring, loving, understanding, and beautiful wife in the world.  Mrs. Toshi


  • Member since
    December 2002
  • From: Northern California
Posted by jeaton01 on Friday, October 7, 2016 10:50 PM

Very nice looking model, the work was worth it.

John

To see build logs for my models:  http://goldeneramodel.com/mymodels/mymodels.html


  • Member since
    December 2010
  • From: Salem, Oregon
Posted by 1943Mike on Friday, October 7, 2016 11:53 PM

It looks fine to me. I think you did a brilliant job on the painting/weathering as others have already said.

I also appreciate the photos to accompany your explanation of the poor fit of the canopy when trying to fit it closed.

Mike

"Le temps est un grand maître, mais malheureusement, il tue tous ses élèves."

Hector Berlioz

  • Member since
    December 2002
  • From: Oak Harbor, WA
Posted by Kolja94 on Saturday, October 8, 2016 12:44 AM
Looks marvelous!

Karl

  • Member since
    February 2012
  • From: Olmsted Township, Ohio
Posted by lawdog114 on Saturday, October 8, 2016 3:18 AM
Great model and the review is well done and appreciated. I'm still amazed these companies can't get the canopy fit issue right. Eduard did on their Hellcat. I do like that the cowl flaps are open, which isn't a kit option on the Tamiya version. Thanks for sharing.

 "Can you fly this plane and land it?...Surely you can't be serious....I am serious, and don't call me Shirley"


  • Member since
    January 2015
  • From: Katy, TX
Posted by Aggieman on Monday, October 10, 2016 7:18 AM

Greatmaker

Beautiful wildcat!  You must have a VERY steady hand as the canopy looks fantastic. Thank you for sharing your build


Thanks for your kind words Greatmaker.

  • Member since
    January 2015
  • From: Katy, TX
Posted by Aggieman on Monday, October 10, 2016 7:20 AM

the Baron

Great finish!

I'm certain that HB copied the Tamiya kit, with sufficient modifications, and additional details, as you noted.  I have both, and I compared the sprues, and they're pretty close.

Comparing the sprues also answered my question on why HB chose to use that tub for the lower forward fuselage.  I found the fit a little fiddly, requiring some filler to hide the seams.

I had trouble assembling the engine, too.  The parts were keyed, but I found the keys and slots didn't align.  I sanded the keys off and just butted the sections to one another.

But the kit has nice detail, so you get a decent model, out of the box.

Enough of my opinion of the kit!  I really like your finish and weathering.  Well done!


Thanks for your kind words, Baron.  I agree that HB likely copied Tamiya as much as they could get away with.  I don't recall having any similar issues with the engine as you describe, but I did have that problem getting the wing to stay in place.  I liked the kit for the most part, but the Tamiya is the superior kit.

  • Member since
    January 2015
  • From: Katy, TX
Posted by Aggieman on Monday, October 10, 2016 7:22 AM

Shipwreck

Aggieman, you did a great job on that wildcat. It looks nicely used! I have a Tamiya version that I need to build as a USS Horrnet flight wing.


Thank you for your kind words Shipwreck!  You should enjoy the Tamiya kit - it will just about put itself together.

  • Member since
    January 2015
  • From: Katy, TX
Posted by Aggieman on Monday, October 10, 2016 7:22 AM

Toshi

With the issues you encountered, you really did a fantastic job with the Wildcat.  I love the weathering you did!

Toshi


Thanks for your kind words, Toshi!

  • Member since
    January 2015
  • From: Katy, TX
Posted by Aggieman on Monday, October 10, 2016 7:23 AM

jeaton01

Very nice looking model, the work was worth it.


Thank you for your kind words, John!  

  • Member since
    January 2015
  • From: Katy, TX
Posted by Aggieman on Monday, October 10, 2016 7:24 AM

1943Mike

It looks fine to me. I think you did a brilliant job on the painting/weathering as others have already said.

I also appreciate the photos to accompany your explanation of the poor fit of the canopy when trying to fit it closed.


Thank you for your kind words, Mike!  I thought by including those pictures I might save someone from a nasty surprise if they are planning to build this kit.  There is no way around it; this requires an aftermarket canopy.

  • Member since
    January 2015
  • From: Katy, TX
Posted by Aggieman on Monday, October 10, 2016 7:25 AM

Kolja94
Looks marvelous!
 

Thank you for your kind words, Kolja!

  • Member since
    January 2015
  • From: Katy, TX
Posted by Aggieman on Monday, October 10, 2016 7:27 AM

lawdog114
Great model and the review is well done and appreciated. I'm still amazed these companies can't get the canopy fit issue right. Eduard did on their Hellcat. I do like that the cowl flaps are open, which isn't a kit option on the Tamiya version. Thanks for sharing.
 

Thanks for your kind words, Lawdog!

I agree regarding the canopies.  Seems like a pretty simple thing.  So are you saying a similar issue exists in the Eduard Hellcat?  I have that kit in my stash but have not yet inspected the quality of the parts.

  • Member since
    November 2003
  • From: Naples, FL
Posted by tempestjohnny on Monday, October 10, 2016 7:38 AM
Wow. That is really nice. The weathering and fading really make the finish.


JOIN OUR COMMUNITY!

Our community is FREE to join. To participate you must either login or register for an account.

SEARCH FORUMS
FREE NEWSLETTER
By signing up you may also receive reader surveys and occasional special offers. We do not sell, rent or trade our email lists. View our Privacy Policy.