SEARCH FINESCALE.COM

Enter keywords or a search phrase below:

Completed: 1/48 Hobbycraft French Hawk 75

4608 views
28 replies
1 rating 2 rating 3 rating 4 rating 5 rating
  • Member since
    January 2015
Posted by BrandonD on Friday, January 27, 2017 3:33 PM

stikpusher


BrandonD

Thanks, everyone! I love French aircraft, and I fnd this scheme more interesting than what our P-36s wore in wartime.

As for Hobbycraft's 109s, I have built their Avia S-199 and their Buchon in 1/48, and they're solid kits. A little lacking in some details (gear bays are blank plastic and the cockpit can use a little bit of help) but othewise nice kits that fit well. Their S-199 was the first kit I airbrushed, so I have a soft spot for them.

-BD-


Well our P-36s wore two schemes on December 7th- OD 41 over Neutral Gray 43, or NMF. Take your pick. Yes the French camo scheme is more visually interesting. Especially once you add squadron markings.

I have built the Hobbycraft 109K and the 109E-3. Like this P-36 they build up decent OOB, but with some help can really shine. And again, some versions, such as the post war types mentioned above, or the pre war B/C/D versions are again the only game in town in 1/48 injection plastic. For the price, you certainly can't go wrong.


Yeah - I guess after my P-40B and a P-40E in the works, I'm burned out on OD/NG schemes, and same goes for NMF at the moment. I think I built four in partial or full NMF last year, haha.

As for the postwar birds, especially the S-199, Hobbycraft is the only game in 1/48 at the moment, but I am certain Eduard (a Czech company) will release an S-199 based on its new-tool Bf-109G series. If it's a Profipack, that's going to be $40ish, but if it's a Weekend Edition, more like $20ish. I wonder about the Buchon, though, since it's a new fuselage tool for something that is somewhat obscure.

Then again, they did the Fokker DVII Mag version, so who knows?

-BD-

  • Member since
    July 2004
  • From: Sonora Desert
Posted by stikpusher on Friday, January 27, 2017 3:26 PM

BrandonD

Thanks, everyone! I love French aircraft, and I fnd this scheme more interesting than what our P-36s wore in wartime.

As for Hobbycraft's 109s, I have built their Avia S-199 and their Buchon in 1/48, and they're solid kits. A little lacking in some details (gear bays are blank plastic and the cockpit can use a little bit of help) but othewise nice kits that fit well. Their S-199 was the first kit I airbrushed, so I have a soft spot for them.

-BD-


Well our P-36s wore two schemes on December 7th- OD 41 over Neutral Gray 43, or NMF. Take your pick. Yes the French camo scheme is more visually interesting. Especially once you add squadron markings.

I have built the Hobbycraft 109K and the 109E-3. Like this P-36 they build up decent OOB, but with some help can really shine. And again, some versions, such as the post war types mentioned above, or the pre war B/C/D versions are again the only game in town in 1/48 injection plastic. For the price, you certainly can't go wrong.


F is for FIRE, That burns down the whole town!

U is for URANIUM... BOMBS!

N is for NO SURVIVORS...

       - Plankton

LSM


  • Member since
    January 2015
Posted by BrandonD on Friday, January 27, 2017 1:12 PM

Thanks, everyone! I love French aircraft, and I fnd this scheme more interesting than what our P-36s wore in wartime.

As for Hobbycraft's 109s, I have built their Avia S-199 and their Buchon in 1/48, and they're solid kits. A little lacking in some details (gear bays are blank plastic and the cockpit can use a little bit of help) but othewise nice kits that fit well. Their S-199 was the first kit I airbrushed, so I have a soft spot for them.

-BD-

  • Member since
    May 2013
  • From: From the Mit, but live in Mason, O high ho
Posted by hogfanfs on Friday, January 27, 2017 9:19 AM

BD,

I really like how you did the weathering! Great job!

 Bruce


 On the bench:  1/48 Eduard MiG-21MF

                        1/35 Takom Merkava Mk.I


  • Member since
    November 2003
  • From: Naples, FL
Posted by tempestjohnny on Friday, January 27, 2017 9:16 AM
Really nice build BD. The French colors will definitely stand out in the display


  • Member since
    January 2015
  • From: Tumwater, WA.
Posted by M. Brindos on Thursday, January 26, 2017 10:46 PM

I think it's beautiful. :)


- Mike Brindos "Lost Boy"

  • Member since
    March 2015
  • From: Streetsboro, Ohio
Posted by Toshi on Thursday, January 26, 2017 3:56 PM

This is a fantastic build and a very unique one at that.  I love the colors, the fixes, and the unique paint scheme.

Toshi

On The Bench: Revell 1/48 B-25 Mitchell


Married to the most caring, loving, understanding, and beautiful wife in the world.  Mrs. Toshi


  • Member since
    June 2013
Posted by bvallot on Thursday, January 26, 2017 3:17 PM

Sweet looking Hawk there BD! =] Happy to see one in French colors. Also happy to see the problem solving at work. Nice fix. =]

On the bench:  

Tamiya F4U-1  Kenneth Walsh


  • Member since
    April 2015
Posted by Mopar Madness on Thursday, January 26, 2017 1:17 PM

Nicely done!   I guess I'll take the plunge and try my limited skills at one of their 109's! 

Chad

God, Family, Models...

At the plate: 1/48 Airfix Bf109 & 1/35 Tamiya Famo

On deck: Who knows!

  • Member since
    July 2004
  • From: Sonora Desert
Posted by stikpusher on Thursday, January 26, 2017 12:20 PM

Yes A very nice finish indeed! Another fine example of what can be built out of the Hobbycraft kits. Toast


F is for FIRE, That burns down the whole town!

U is for URANIUM... BOMBS!

N is for NO SURVIVORS...

       - Plankton

LSM


  • Member since
    January 2015
  • From: Katy, TX
Posted by Aggieman on Wednesday, January 25, 2017 9:43 PM

Nice work on your Hawk. I like the scheme and your weathering.

  • Member since
    January 2015
Posted by BrandonD on Wednesday, January 25, 2017 9:20 PM

Ok, it's wrapped!

This is of course the 1/48 Hobbycraft French Hawk 75. It's outof the box except for the seat, which is a resin one I had lying around.

Colors are:

Tamiya Flat Brown
Model Master French Dark Blue Gray
Model Master French Khaki (the green on the topside)
Model Master French Light Blue Gray

The tricolor on the tail is Model Master Intermediate Blue, Insignia White and Insignia Red.

I used some Vallejo pigments, streaking effects and engine oil for weathering, along with Vallejo chipping fluid for the wing root (not the biggest fan, but it works when you get it spraying right). I also used oil dot filtering with some artists' oils and some ground up pastel chalks.

Thanks for following along. I hope you like it.

-BD-

  • Member since
    January 2015
Posted by BrandonD on Wednesday, January 25, 2017 1:32 PM

Ok, I have some updates, and I plan on finishing this one tonight (fingers crossed).

But this is a story of problems. First, when I went to install the prop, I realized the engine sits too deep in the colwing, and the prop hits either thecowling or the cowl machine guns. It should sit at least 2mm farther forward.

So as I lay in bed a couple nights ago thinking about that, I just got up, walked to the bench and broke the cowling off, then ripped off the engine. Because I keep telling myself all mistakes are worth fixing to have a final product I can enjoy.

So it looked like that.

Yesterday, I went home at lunch and laminated two pieces of 1mm Evergreen, then drilled a hole the same diameter as the one on the kit, lined them up and installed the engine.

Last night, I glued on the cowling, and didn't have any damage to the paint.

But then I went to add an enamel filter to a panel aft of the cowl flaps for some tonal variation, and it reagitated the Vallejo Chipping Medium I had previously applied (through an enamel paint, two acrylic gloss coats and an acrylic flat coat. Grr.)

So now I have to fix this today.

But I did get the landing gear all assembled, wing guns and pitot tube mounted and the aerial mast installed. So in abouthalf an hour I will hit the panel (I've already sanded it smooth) with some paint, then hopefully finish the weathering tonight with some exhaust stains and spattering on the underside, and maybe some chipping via colored pencil.

-BD-

  • Member since
    January 2015
Posted by BrandonD on Wednesday, January 25, 2017 1:23 PM

Thanks, stikpusher!

-BD-

  • Member since
    July 2004
  • From: Sonora Desert
Posted by stikpusher on Wednesday, January 18, 2017 8:43 PM

YesLooking very sharp! 


F is for FIRE, That burns down the whole town!

U is for URANIUM... BOMBS!

N is for NO SURVIVORS...

       - Plankton

LSM


  • Member since
    January 2015
Posted by BrandonD on Wednesday, January 18, 2017 3:23 PM

Just a small update – decals and panel line wash are on. These are the kit decals. I had an old Eduard sheet withthe same markings, but it was clearly done before Eduard made the amazing decals they do today. The oranges were too washed out, and it was a dull surface tothe decals, and they cracked easily.

-BD-

  • Member since
    January 2015
Posted by BrandonD on Wednesday, January 18, 2017 3:21 PM

Thanks, all!

  • Member since
    June 2013
Posted by bvallot on Tuesday, January 17, 2017 3:02 PM

Love Hawks Brandon! =] Love 'em. Happily following along as well.

On the bench:  

Tamiya F4U-1  Kenneth Walsh


  • Member since
    September 2013
Posted by blackdog62 on Tuesday, January 17, 2017 12:20 PM

That going along nicely.

From what I have read when the British came up against the fw-190 for the first time they reported fighting captured French hawks.

  • Member since
    January 2012
  • From: Barrie, Ontario
Posted by Cdn Colin on Tuesday, January 17, 2017 7:12 AM

Looking very nice.

I have the Blitz Hawk waiting in the wings, and plan to do the Vichy colours.  I may follow your example and use my Ultracast P-40 seat, or save it for a Monogram P-40.

I build 1/48 scale WW2 fighters.

Have fun.

  • Member since
    November 2003
  • From: Naples, FL
Posted by tempestjohnny on Tuesday, January 17, 2017 6:00 AM
Really cool subject. Definitely different from the norm.


  • Member since
    February 2012
  • From: Olmsted Township, Ohio
Posted by lawdog114 on Tuesday, January 17, 2017 12:02 AM
Thanks for bringing it over here Brandon. Great subject.

 "Can you fly this plane and land it?...Surely you can't be serious....I am serious, and don't call me Shirley"


  • Member since
    March 2015
  • From: Streetsboro, Ohio
Posted by Toshi on Monday, January 16, 2017 7:45 PM

This is really looking great!

Toshi

On The Bench: Revell 1/48 B-25 Mitchell


Married to the most caring, loving, understanding, and beautiful wife in the world.  Mrs. Toshi


  • Member since
    January 2015
Posted by BrandonD on Monday, January 16, 2017 6:48 PM

Ok, here we go. This kit mostly fits well, but the rear wheel insert was kind of a chore, and the molded-on landing gear doors in the open position made it impossible to fix the inevitable seam, which of course doesn't fall on a panel line.

So, out came the razor saw and off went the doors. I glued it in, then had to work up the seam before I could proceed.
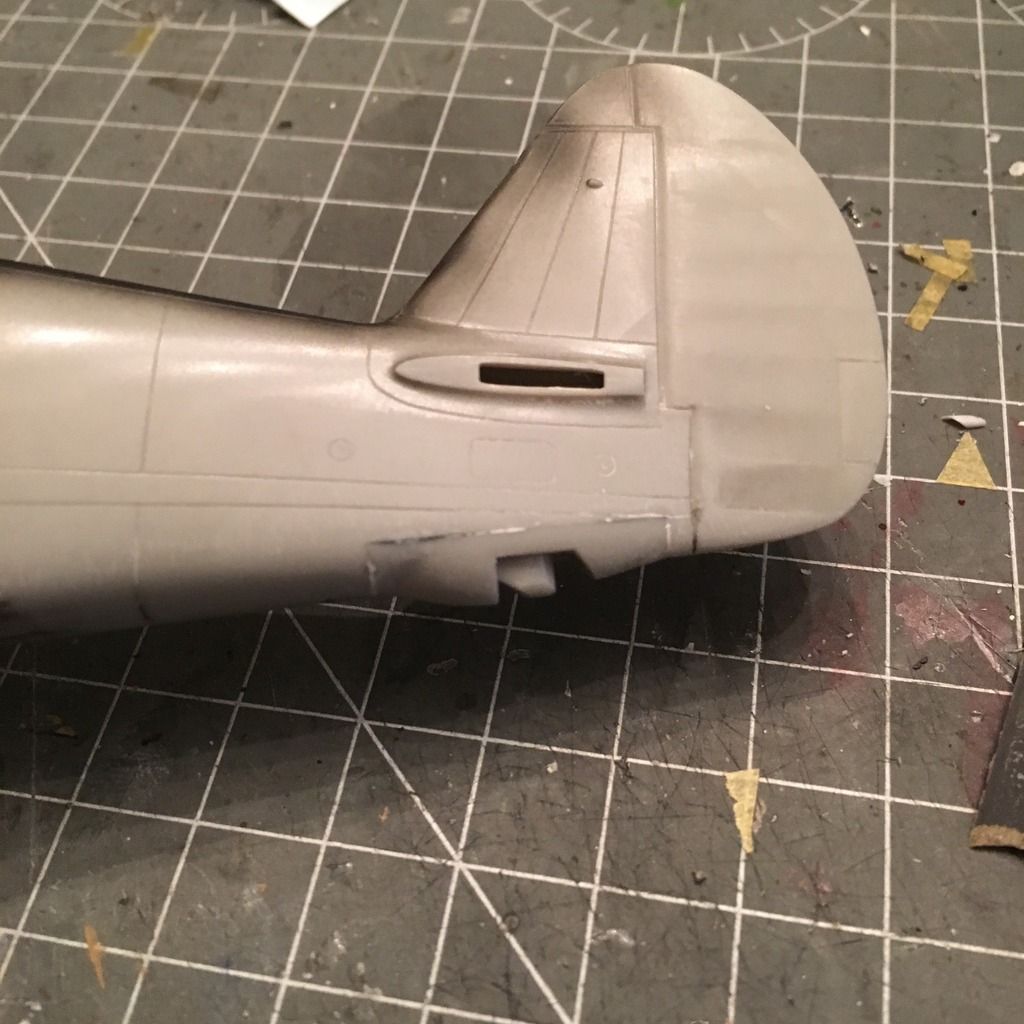
Once I got the seam right, I gave the rudder a light gray base for easier coverage of the tricolor stripes.
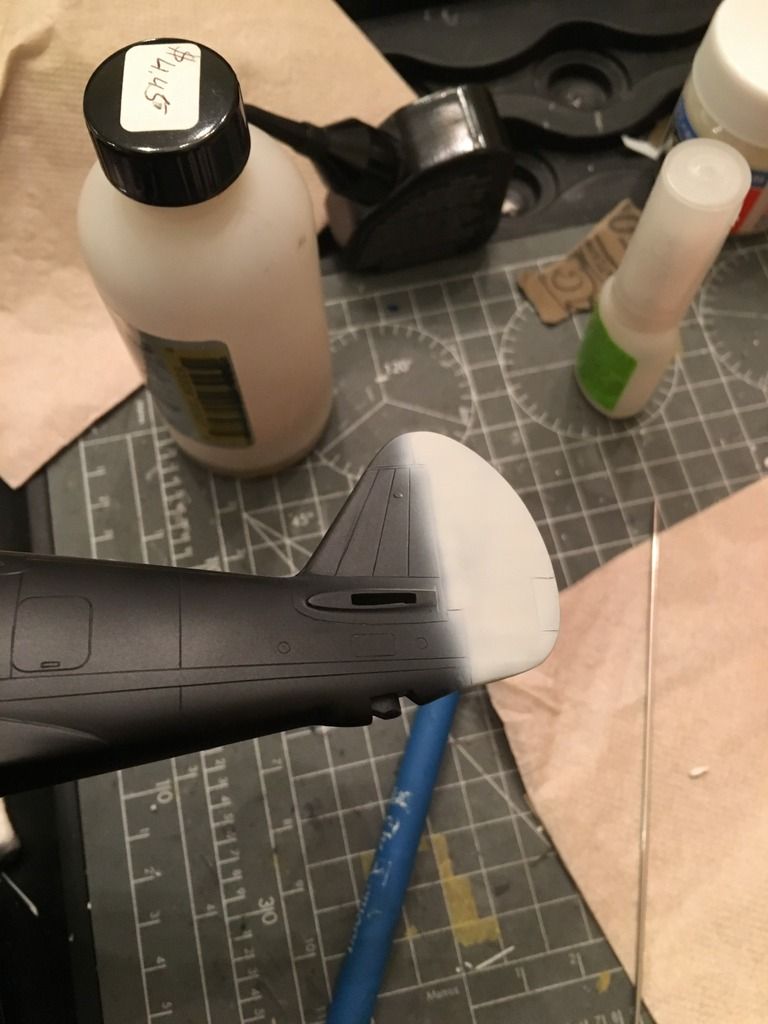
For the stripes, I used Model Master Intermediate Blue, Insignia White and Insignia Red. Nothing special here, and this pic is pretty bad for color representation.
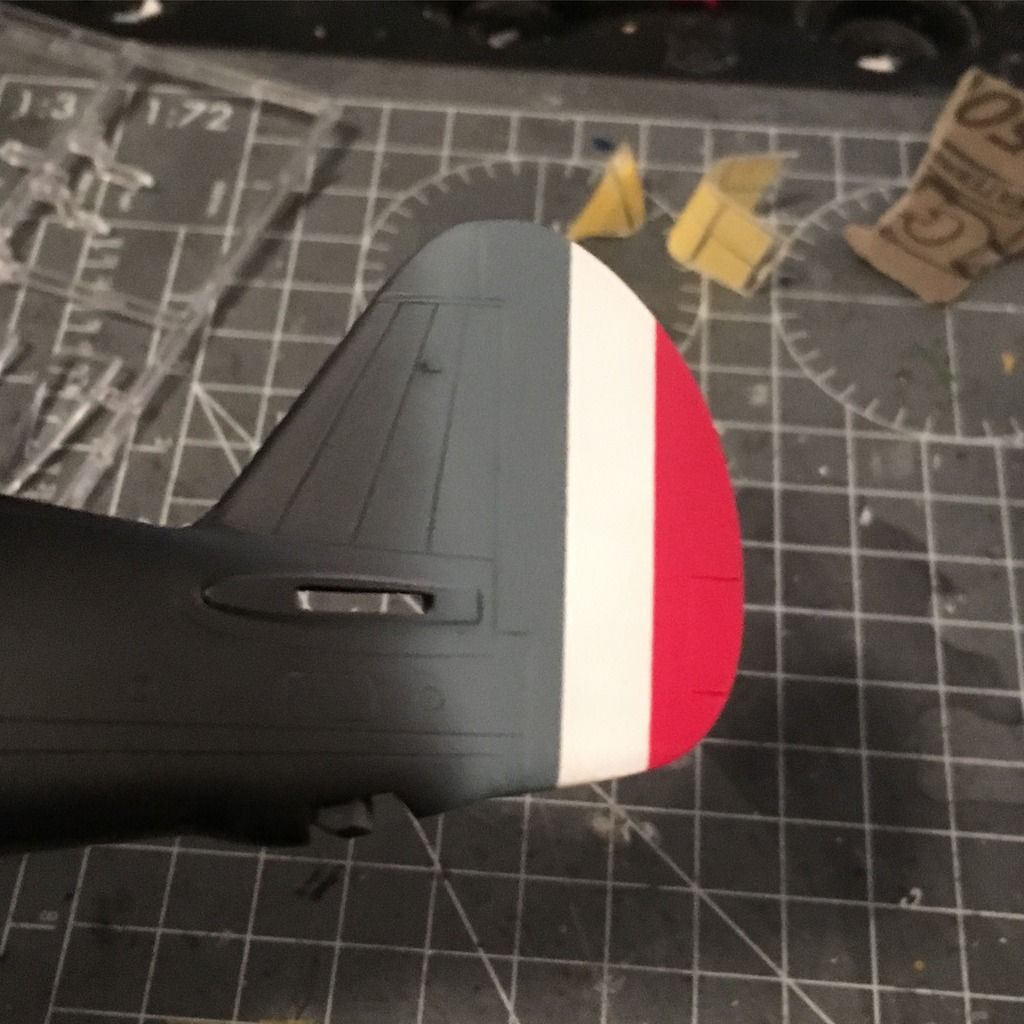
With that masked, the horizontal stabilizers went on, and then I slid the cowling into place (you can mount the engine before attaching the cowling, which I did).

I also added the Ultracast (or maybe it's True Details) seat once the cockpit was in and fuselage halves together.
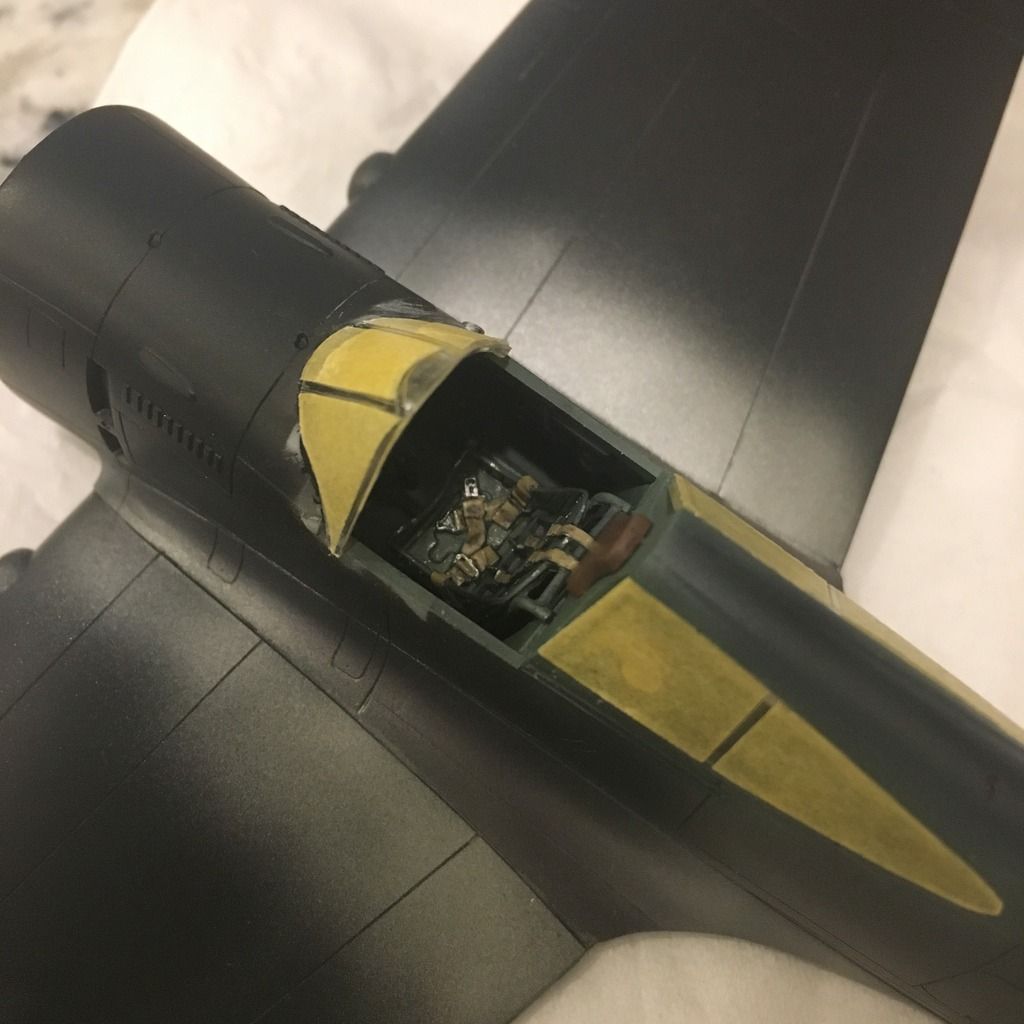
The canopy shouldn't have vertical framework up front, but the spare I have from my Airfix P-40 is about 2mm too narrow, and I just don't care that much.
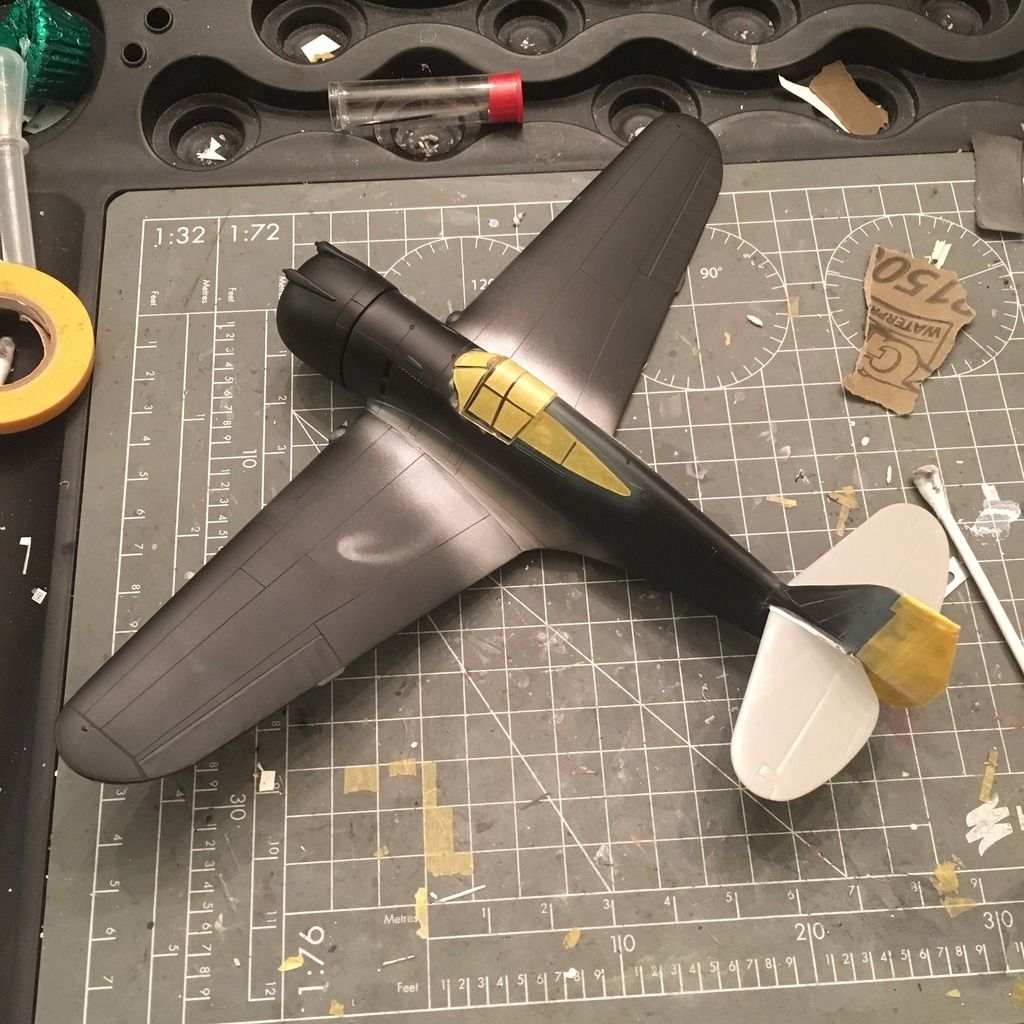
Next up, it was time to paint.

I went with Model Master colors for all but the brown on the topside, which was straight Tamiya Brown.
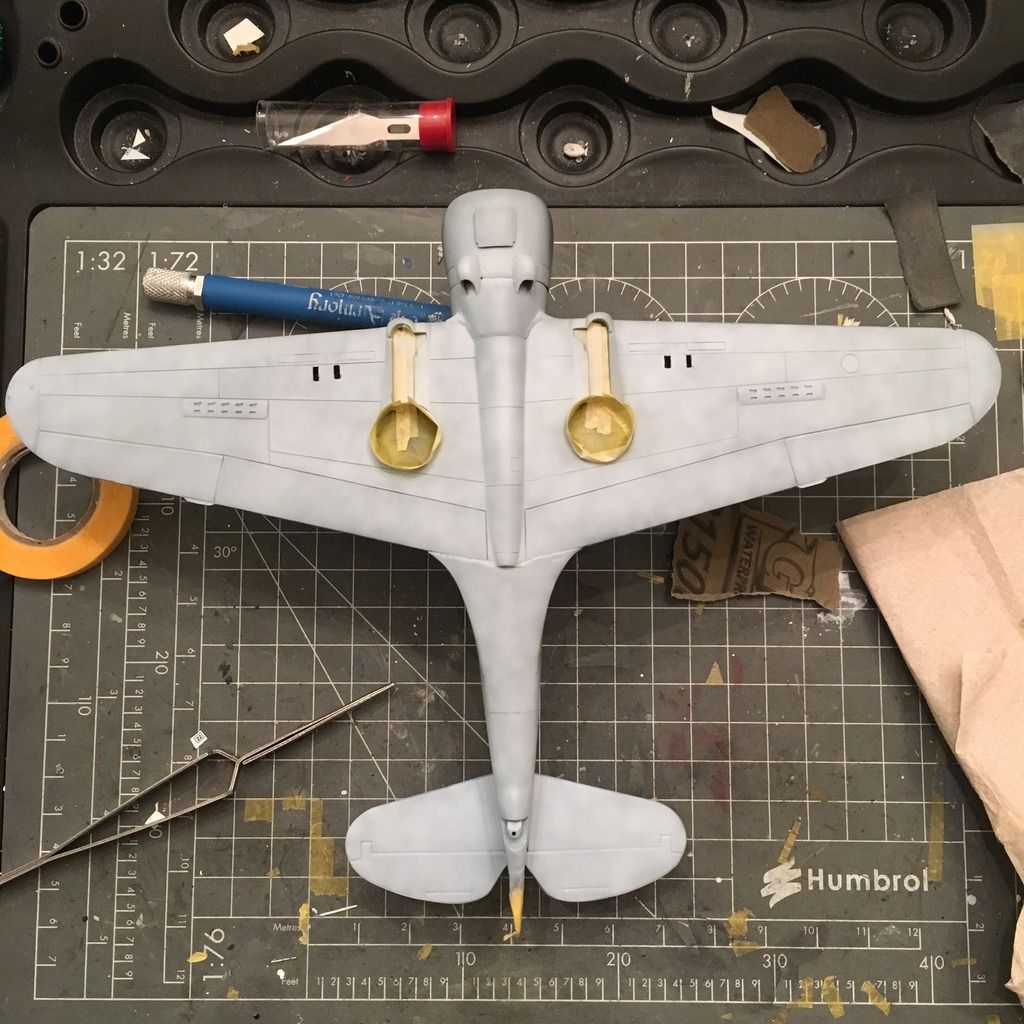
Light Blue Grey takes care of the Gris Bleu Clair for the bottom, sprayed over Mr. Surfacing Finisher 1500 Black.

On the topside, I decided to use Vallejo Chipping Medium. Much like I've found with Vallejo model color, this is awful to airbrush. Thinned with distilled water, it beaded up on the surface and left a texture about like a basketball. So I wet a rag and wiped it off.

My next attempt was to thin it with Windex to break the surface tension, which worked, and it layed flat after I misted it with Windex and let it sit a while. (end result is this works, but is way too much effort for me to use in the future. I'd rather just add "chipping" with paint after the fact).

Once the chipping medium had dried, I went ahead and sprayed the topside colors freehand. I'm not overly thrilled with the paint depth, but will use oils, washes and filters to break it up.
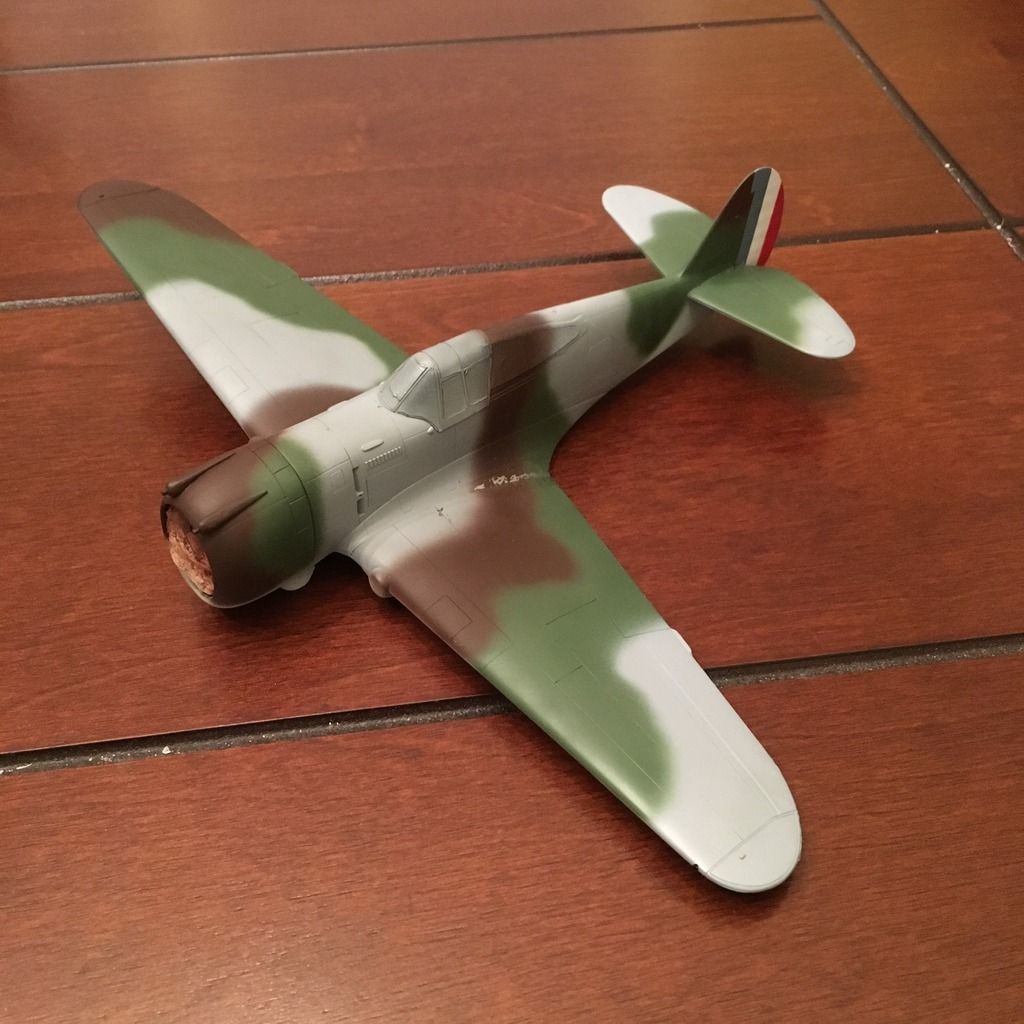
I chipped off paint at the wing root with a toothpick, proving that it does work with enamels, which is good, I suppose. I did not wet it prior to chipping as I was afraid I'd have a gummy mess on my hands.

At this point, I have clear coated it and will be putting decals on it this evening.

-BD-

  • Member since
    March 2015
  • From: Streetsboro, Ohio
Posted by Toshi on Thursday, January 5, 2017 4:22 AM

I will be following this unique build!

On The Bench: Revell 1/48 B-25 Mitchell


Married to the most caring, loving, understanding, and beautiful wife in the world.  Mrs. Toshi


  • Member since
    January 2015
  • From: Tumwater, WA.
Posted by M. Brindos on Wednesday, January 4, 2017 9:02 PM

edit: double dang posted already.  :/

sorry.

- Mike Brindos "Lost Boy"

  • Member since
    January 2015
  • From: Tumwater, WA.
Posted by M. Brindos on Wednesday, January 4, 2017 8:22 PM

Following with enthusiasm.  :D


- Mike Brindos "Lost Boy"

  • Member since
    January 2015
Posted by BrandonD on Wednesday, January 4, 2017 3:01 PM

This is the 1/48 Tamiya D.520 I built a few years ago, and the Hawk will wear a similar scheme.

-BD-

  • Member since
    January 2015
Completed: 1/48 Hobbycraft French Hawk 75
Posted by BrandonD on Wednesday, January 4, 2017 2:55 PM

This one is what I'm building for the New Year's Resolution Group Build, but I thought I'd post it here, too.

Anyone who knows me knows I'm a huge Francophile, so I have always wanted to build one of the French Hawk 75s made by Curtiss.

I picked up the Hobbycraft kit a while back, and while I knew it would be super basic, it's nearly good enough for a closed canopy kit on its own (I hope).

I decided to help it out a bit with an Ultracast seat I had left over from my Airfix P-40B build.

Research shows there is a lot of argument over the interior colors of these things, but I felt confident enough in painting it a light green shade (actually Model Master RLM 61 in this case), since I read the French painted them when they arrived in many cases.

I know Wolfpack makes a resin pit for this one, but it didn't look like enough of an upgrade to warrant the cost.

I picked out some of the details in random paint colors and then gave it The Detailer wash before a flat coat. I'm fighting the urge to go crazy detailing the engine, because it would really warrant a replacement, and I just want this one to be a quick build.

The fuselage halves are currently together and everything is drying, and I also put the cowl halves together, which means I'll need to cant the engine to fit it in, but this shouldn't be a problem.

This one will be painted in the standard French camo scheme of the time, which I think looks pretty nice. I'll likely be using Model Master paints, but may use the Tamiya mixes I used on my Dewoitine D.520

-BD-

JOIN OUR COMMUNITY!

Our community is FREE to join. To participate you must either login or register for an account.

SEARCH FORUMS
FREE NEWSLETTER
By signing up you may also receive reader surveys and occasional special offers. We do not sell, rent or trade our email lists. View our Privacy Policy.