SEARCH FINESCALE.COM

Enter keywords or a search phrase below:

Eduard 1/48 Bf109 G5 (FINISHED)

5904 views
48 replies
1 rating 2 rating 3 rating 4 rating 5 rating
  • Member since
    September 2014
Eduard 1/48 Bf109 G5 (FINISHED)
Posted by rooster513 on Friday, January 6, 2017 11:51 AM

Hello all, hope everyone is doing well! Here is my latest project, Eduards 1/48 Bf109 G5 (from what I understand basically their G6 with a few steps changed).
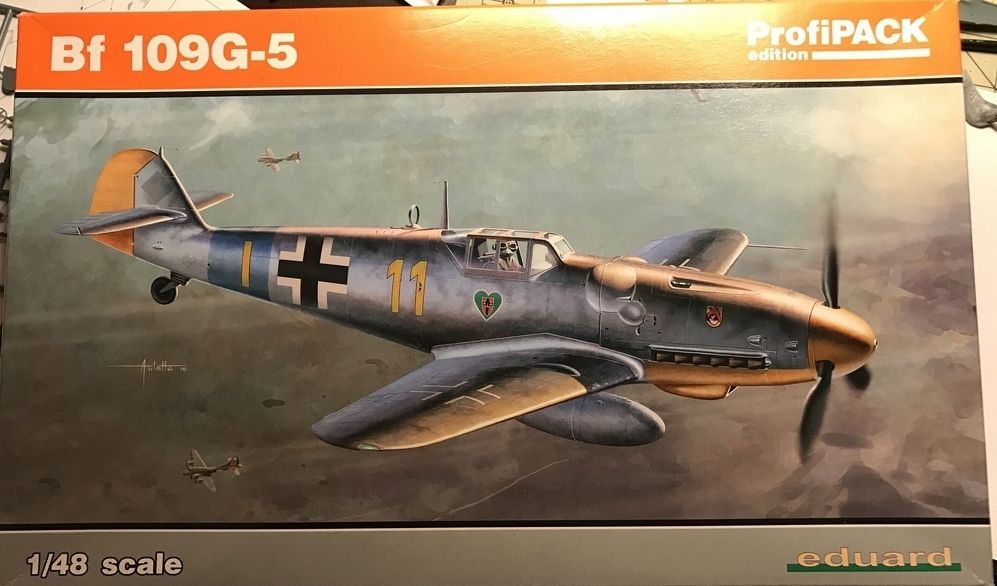
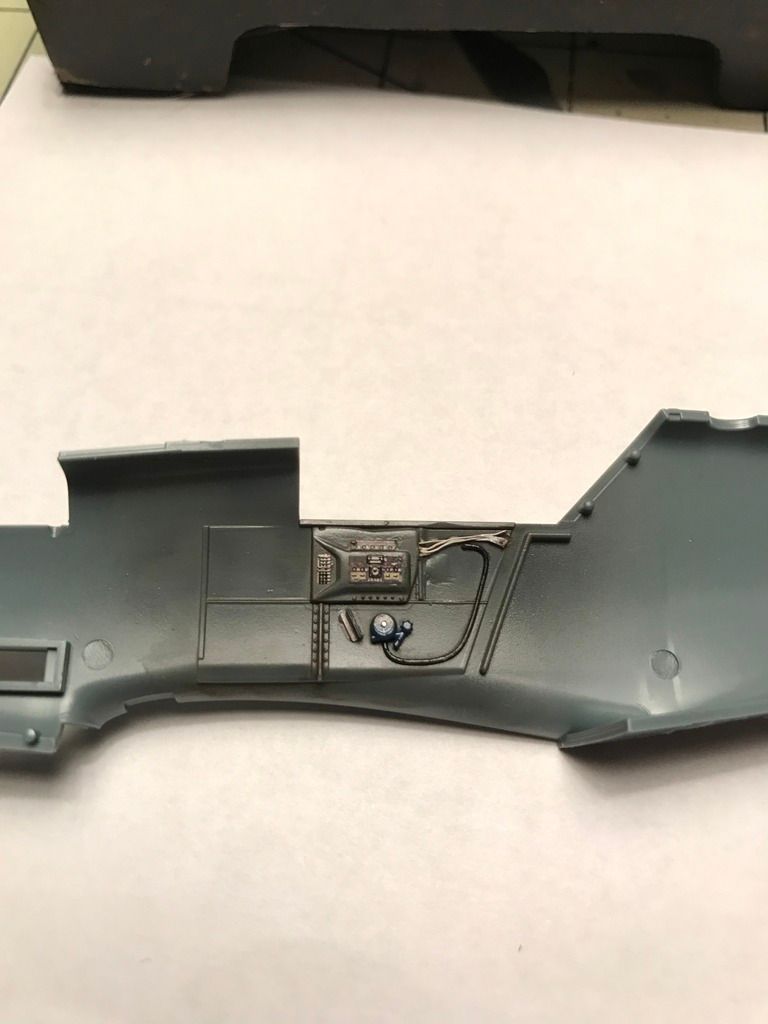
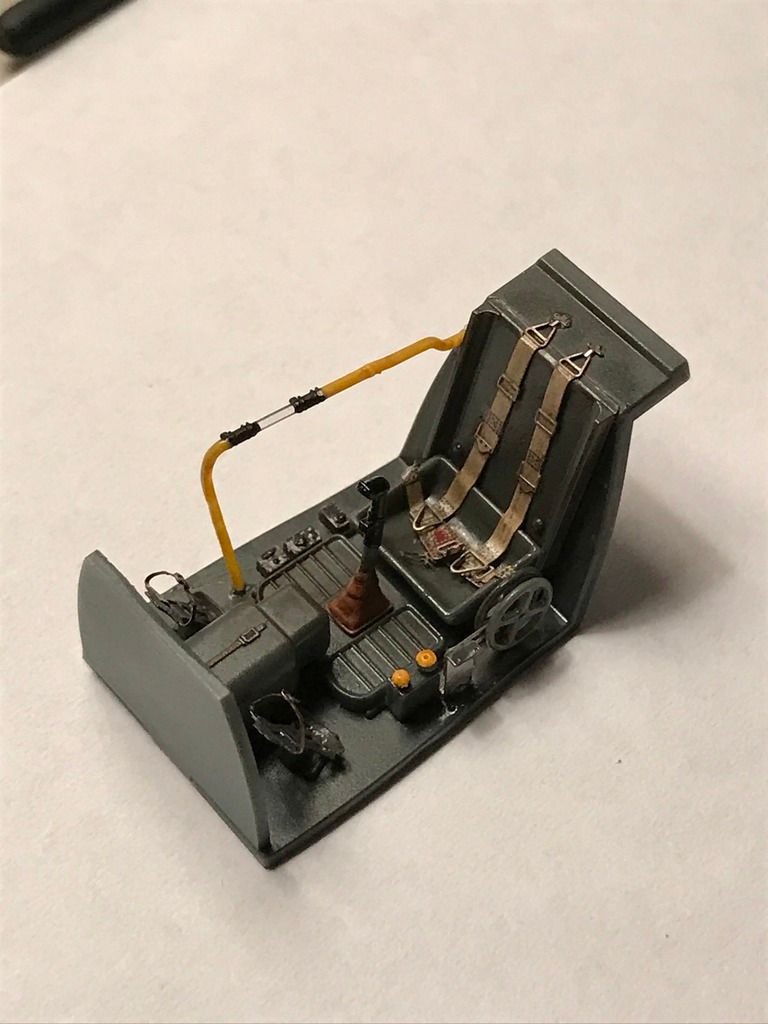
I've built their Spitfire Mk IX and really enjoyed it. I love the Profipack offerings from Eduard and so far this one is no different. The cockpit builds up really easy and ends up looking very nice with all the PE. Only knock I will give it is the PE rudder petals look a little too large to my eye vs the plastic parts and pics I've seen, but they look really nice and will be buried so deep that probably won't even see themSmile I've built up the cockpit and gave it a raw umber oil wash, all that's left is a flat coat and a little dry brushing and I'll be closing her up. So enough talk and on to pics...
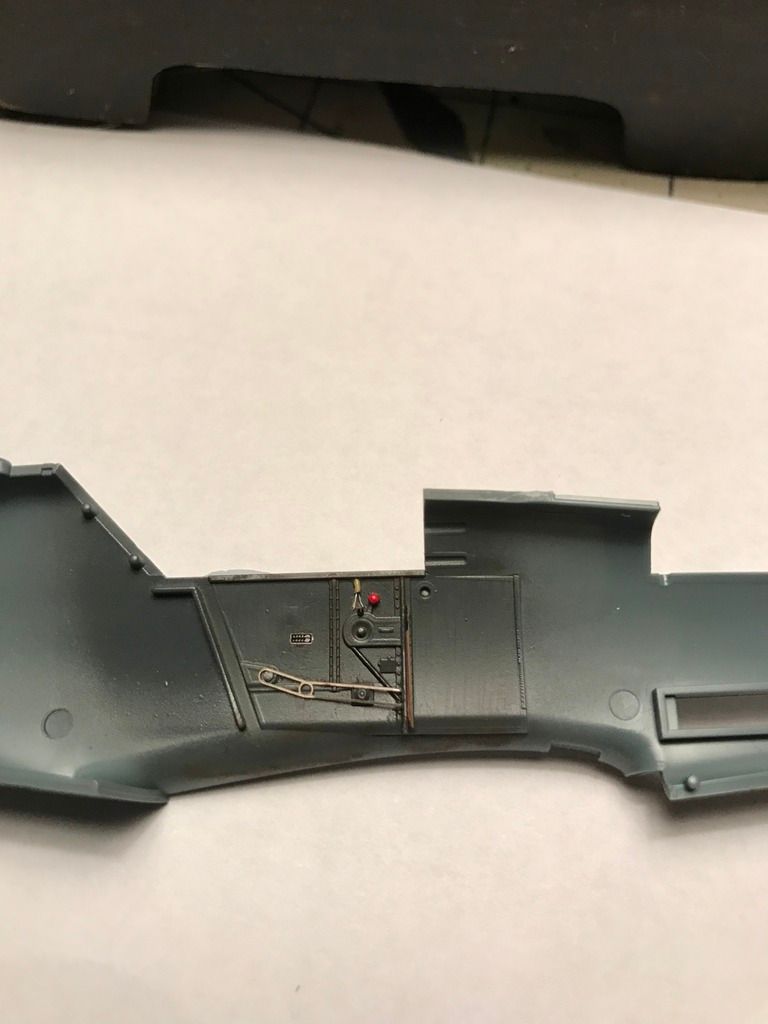
 

This is really the only "scratchbuilding" I did in the pit - I added a little copper wire and painted it white.

And here is everything together and the IP which is nicely done in PE and I just put a few drops of Future to simulate the glass over the gages.
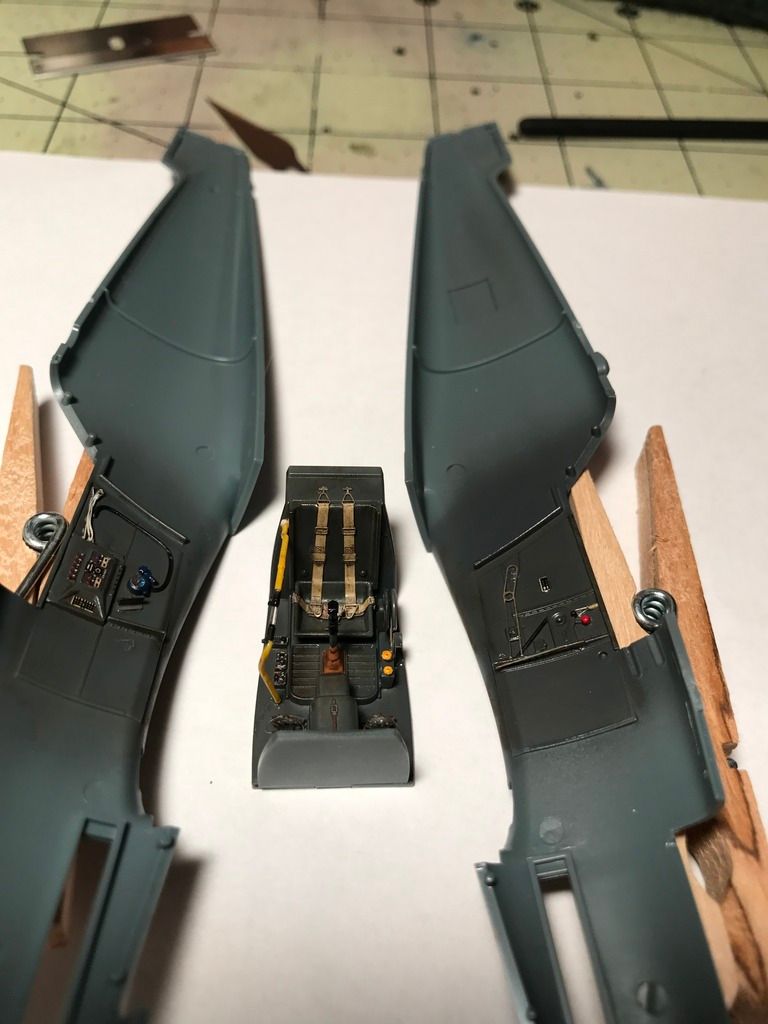
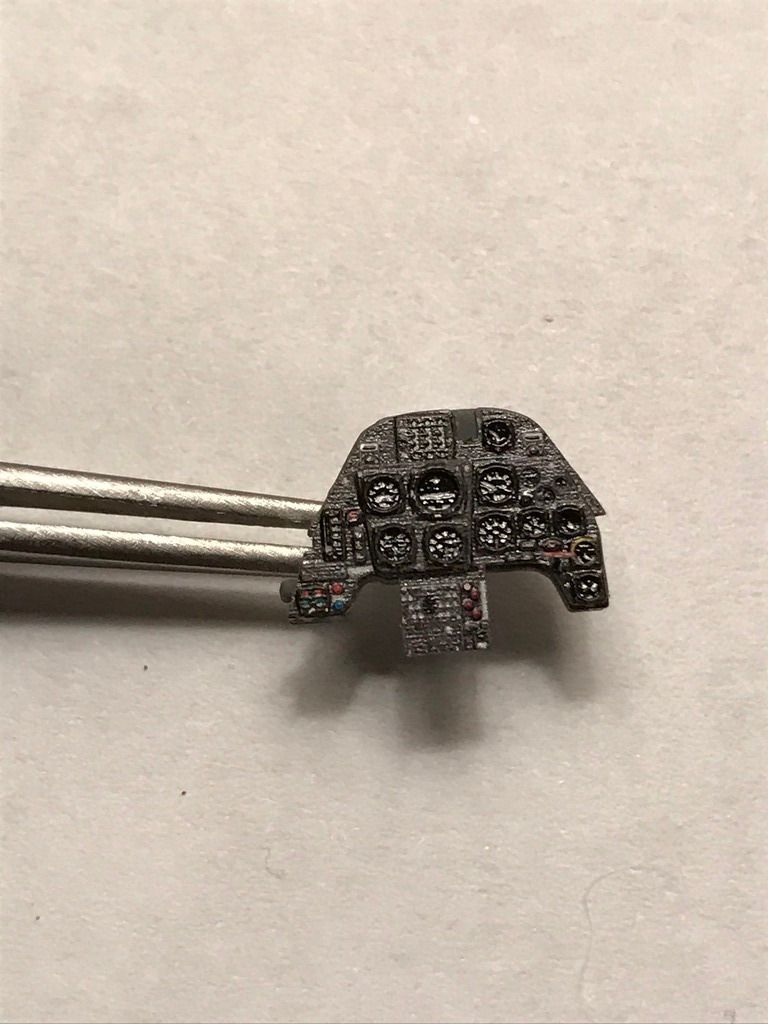
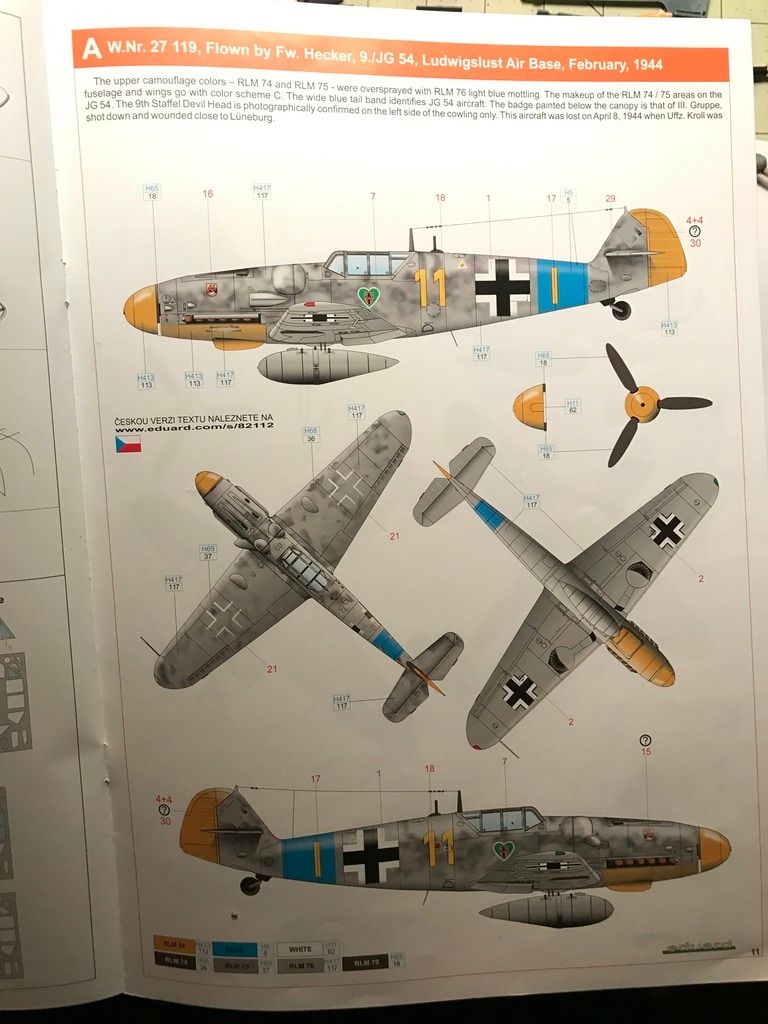
And here are the markings I plan to do...
 

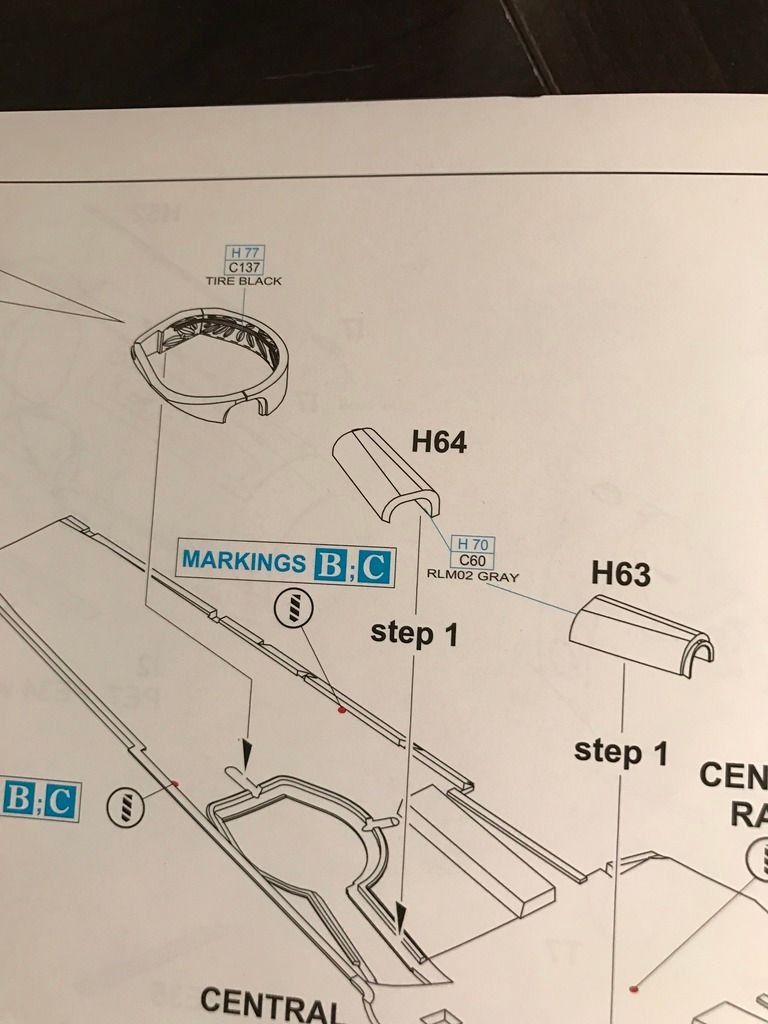
I've started assembly of the wing halves and have a quick question for you 109 experts. I know that the wheel well had a leather covering but did it go all the way around the wheel well and what was the color? As you can see in the instructions it calls for "Tire Black" but it seems like a brown color would be more apporiate but I'm not sure.
Thanks for looking and as always comments and critques are appreciated!Big Smile


-Andy

  • Member since
    September 2014
Posted by rooster513 on Saturday, January 7, 2017 12:07 PM

Got a flat coat on the pit and will hopefully be gluing the halves together today. 

-Andy

  • Member since
    March 2013
Posted by patrick206 on Saturday, January 7, 2017 1:08 PM

Lookin' mighty fine so far, the seat belts and harness are great. Your attention to details really is paying off. I'll be following this one, thanks for the post and photos.

Patrick

  • Member since
    September 2013
Posted by blackdog62 on Saturday, January 7, 2017 2:50 PM

That's a clean build.

From what I have in my books all though no a g5 shows a light tan/off white canvas  iner wheel covers that are zipperd in around the upper corners.

  • Member since
    December 2002
  • From: Bury St Edmunds, Suffolk, England
Posted by Bish on Saturday, January 7, 2017 4:17 PM

Nice start, some lovely work on that pit. Don't often see a G-5 built. Looking forward to more of this.

I am a Norfolk man and i glory in being so


On the bench: Airfix 1/72nd Harrier GR.3/Fujimi 1/72nd Ju 87D-3

  • Member since
    September 2014
Posted by rooster513 on Saturday, January 7, 2017 9:12 PM

Thanks Patrick, blackdog, and bish!

-Andy

  • Member since
    March 2015
  • From: Streetsboro, Ohio
Posted by Toshi on Saturday, January 7, 2017 11:00 PM

Fantastic attention to detail!

Toshi

On The Bench: Revell 1/48 B-25 Mitchell


Married to the most caring, loving, understanding, and beautiful wife in the world.  Mrs. Toshi


  • Member since
    November 2016
Posted by StephenL on Monday, January 9, 2017 10:38 PM

That looks fantastic. Nice work.


200 kits was my limit...

  • Member since
    February 2012
  • From: Olmsted Township, Ohio
Posted by lawdog114 on Thursday, January 12, 2017 6:26 AM
Beautiful cockpit. Your gonna love this kit.

 "Can you fly this plane and land it?...Surely you can't be serious....I am serious, and don't call me Shirley"


  • Member since
    September 2014
Posted by rooster513 on Sunday, January 15, 2017 1:30 PM

Thanks guys! I've got a quick update here. Construction is a real joy on this kit. So far no seam filling to speak of. I do have a quick question about what the color of the flap and slat edges should be? Should it be rlm02 like the inside of the radiators? I've attached a couple pics pointing out the area in questionBig Smile


-Andy

  • Member since
    January 2009
  • From: hamburg michigan
Posted by fermis on Sunday, January 15, 2017 1:50 PM

Real nice. Great kits, these 109's are!

..and yes...RLM02 in those flap/slat areas.

  • Member since
    September 2014
Posted by rooster513 on Sunday, January 15, 2017 7:07 PM

Awesome, thanks fermis!

-Andy

  • Member since
    September 2014
Posted by rooster513 on Wednesday, January 25, 2017 6:37 AM

Ok I've got a quick update here. Construction is complete and I've started with paint. First to go down was the RLM04 which I used MM enamel for. The MM went down pretty good, I haven't really used enamels much in the past but so far I like the way the spray and level themselves out some. I will be doing this one with an open canopy, I've put it on now for masking purposes. So far I'm really enjoying this one! On to the pics...sorry for the poor quality but I shot them really quick with my phone and the lighting wasn't the best.


-Andy

  • Member since
    December 2002
  • From: Bury St Edmunds, Suffolk, England
Posted by Bish on Wednesday, January 25, 2017 6:45 AM

Nice job on the yellow, not an easy colour to do.

I am a Norfolk man and i glory in being so


On the bench: Airfix 1/72nd Harrier GR.3/Fujimi 1/72nd Ju 87D-3

  • Member since
    April 2015
Posted by Mopar Madness on Wednesday, January 25, 2017 7:07 AM

Nice looking 109!

Chad

God, Family, Models...

At the plate: 1/48 Airfix Bf109 & 1/35 Tamiya Famo

On deck: Who knows!

  • Member since
    September 2014
Posted by rooster513 on Thursday, January 26, 2017 10:47 AM

Thanks Bish and MM!

-Andy

  • Member since
    April 2006
  • From: ON, Canada
Posted by jgeratic on Thursday, January 26, 2017 11:23 AM

Looking good, and as far as I know RLM02 is the likely interior colour for the parts in question.  Also, good call in laying down the yellow painted markings first - less tape used to mask off when painting the aircraft afterwards.

regards,

Jack

  • Member since
    January 2015
Posted by BrandonD on Friday, January 27, 2017 1:16 PM

Nice work so far. I'm watching this one with interest. Love these new Eduard kits.

-BD-

  • Member since
    September 2014
Posted by rooster513 on Tuesday, January 31, 2017 8:53 AM

 So I’ve got the fuselage band painted and the RLM 76 laid down but I have a quick question. The painting instructions contradict themselves a little from what I can see. In the top view it looks like the wing root should be the same color as the wing tops but in the side view it shows it as being RLM 76. I’ve looked online at other builds and it seems like people have done it both ways. So my question is, is there a standard on which color the wing root should be painted. I posted a pic of the area in question for some clarification. I appreciate any help!

And a quick pic of the blue fuselage band. Custom mix of enamel paints I had on hand.


-Andy

  • Member since
    April 2006
  • From: ON, Canada
Posted by jgeratic on Tuesday, January 31, 2017 10:11 AM

For the wing root, I'd suggest googling some period photos of the unit you are portraying, if not the pilot itself. 

I think you might find there is even a third option, painting the area in question a flat black due to exhaust staining.

This next one is of a different unit, but it clearly shows the wing root was purposely painted a darker colour (black?):

regards,

Jack

  • Member since
    September 2014
Posted by rooster513 on Tuesday, January 31, 2017 10:42 AM

Thanks for the feedback Jack. So far I haven't been able to find a picture of Hecker's plane and any period photos I've seen it's tough to tell which it is (for me at least). It may be due partly to exhaust staining changing the color of that area too.

-Andy

  • Member since
    April 2006
  • From: ON, Canada
Posted by jgeratic on Tuesday, January 31, 2017 12:29 PM

Right, I just viewed Eduard's pdf instruction sheet, and they are indicating the whole upper scheme (the splinter pattern) was mottled with the underside colour.  So I would just go with the factory finish scheme applied per usual - upper colours up to and including the wing roots, then mottle your RLM 76 over that.  For the final touch, add the heavy exhaust staining.

regards,

Jack

  • Member since
    September 2014
Posted by rooster513 on Tuesday, January 31, 2017 12:34 PM

Yeah I was thinking the same thing as far as going over it with exhaust staining and then it wouldn't matter much what's under it. Thanks for helping me out Jack, I really appreciate it!!

-Andy

  • Member since
    February 2012
  • From: Olmsted Township, Ohio
Posted by lawdog114 on Saturday, February 4, 2017 2:33 AM
Looking good Andy. Personally,without photo evidence, I'd use the exhaust staining method as those were notoriously dirty in that area.

 "Can you fly this plane and land it?...Surely you can't be serious....I am serious, and don't call me Shirley"


  • Member since
    September 2014
Posted by rooster513 on Friday, March 3, 2017 10:16 AM

Well it's been awhile since I've done an update but I have been busy with this one. First I shot the RLM75 and then masked with Taimiya tap the jagged scheme and shot the RLM74 (both MM enamel).

Then I did the topside mottling of RLM76...

As it sits now I have most of the weathering done and just need to add a flat coat and this one should be all done!

Comments and critiques welcome! Thanks for looking!


-Andy

  • Member since
    June 2014
Posted by BrandonK on Friday, March 3, 2017 10:23 AM

Your paint in looking superb. Very nice work on this kit.

BK

On the bench:

A lot !! And I mean A LOT!!

2024 Kits on deck / in process / completed   

                         14 / 5 / 2  

                              Tongue Tied

  • Member since
    September 2014
Posted by rooster513 on Friday, March 3, 2017 6:48 PM

BrandonK

Your paint in looking superb. Very nice work on this kit.

BK


Thanks BK! The kits been a real pleasure to build

-Andy

  • Member since
    February 2012
  • From: Olmsted Township, Ohio
Posted by lawdog114 on Friday, March 3, 2017 7:58 PM
Stunning Andy. What did you use to cut out the jagged camo? It looks very convincing.

 "Can you fly this plane and land it?...Surely you can't be serious....I am serious, and don't call me Shirley"


  • Member since
    September 2014
Posted by rooster513 on Friday, March 3, 2017 9:09 PM

lawdog114
Stunning Andy. What did you use to cut out the jagged camo? It looks very convincing.
 

Thanks Joe! For the camp I just cut little "steps" in the tamiya tape with an exacto knife and layed it at angle I needed. I'm not as happy with how the scalloping on the leading edges came out. Next time I'll use you're hole punch method.

-Andy

  • Member since
    November 2003
  • From: Naples, FL
Posted by tempestjohnny on Friday, March 3, 2017 10:28 PM
This is looking really good. One can never have too many 109's


JOIN OUR COMMUNITY!

Our community is FREE to join. To participate you must either login or register for an account.

SEARCH FORUMS
FREE NEWSLETTER
By signing up you may also receive reader surveys and occasional special offers. We do not sell, rent or trade our email lists. View our Privacy Policy.