SEARCH FINESCALE.COM

Enter keywords or a search phrase below:

Tamiya 1/48 F4F-4 Wildcat WIP

2281 views
25 replies
1 rating 2 rating 3 rating 4 rating 5 rating
  • Member since
    September 2014
Tamiya 1/48 F4F-4 Wildcat WIP
Posted by rooster513 on Tuesday, June 5, 2018 8:47 AM

Thought I'd share with everyone where I am on my latest project. Real life has limited the amount of bench time I've been able to get but I've managed to make some progress on Tamiya's Wildcat. I started with the cockpit which is pretty nicely detailed out of the box. I did decide to cut a lot of the floor away and add a couple of braces to more closely represent the real thing. Next I turned my attention to the seat which is rather thick and lacks any real detail. I sanded down the edges and added some stryene and brass sheet to busy it up some.


Painted up in my mix for bronze green. Not sure it's very close to the real thing but I'll go with it. Seatbelts are from and Eduard USN steel set.


I wish Tamiya supplied IP decals like they do with the P-47 for this kit but I just drybrushed the dials with some white and added a drop of Future for glass. Won't be able to see it much once it's all closed up anyway.


Should be getting it all closed up soon. I'll be using MRP paints for the first time on this one so I'm looking forward to that! I've also got so masks for the insignia. Thanks for looking!

-Andy

  • Member since
    June 2014
Posted by BrandonK on Tuesday, June 5, 2018 9:07 AM

That pit work inlcuding the seat makes a huge difference. And, if you hadn't said anything I would have sworn those gauges were decals. Well done!!

BK

On the bench:

A lot !! And I mean A LOT!!

2024 Kits on deck / in process / completed   

                         14 / 5 / 2  

                              Tongue Tied

  • Member since
    September 2014
Posted by rooster513 on Tuesday, June 5, 2018 3:29 PM

Thanks BK I appreciate it!

-Andy

  • Member since
    June 2017
Posted by Chemteacher on Tuesday, June 5, 2018 6:02 PM
Wow! That’s an awesome job.

On the bench: Revell-USS Arizona; Airfix P-51D in 1/72

  • Member since
    July 2016
  • From: NYC
Posted by Johnny1000 on Tuesday, June 5, 2018 6:53 PM

That's looking really good. Looking forward to seeing this come together. 

-J

  • Member since
    August 2012
  • From: Parker City, IN.
Posted by Rambo on Tuesday, June 5, 2018 7:24 PM
That pit is looking great! for the belts being Eduard they look very good I find it hard to get them to drape over the seat well

Clint

  • Member since
    March 2015
  • From: Close to Chicago
Posted by JohnnyK on Tuesday, June 5, 2018 8:46 PM

Man, that cockpit is fantastic. Those belts are the boss!!!!

Your comments and questions are always welcome.

  • Member since
    February 2012
  • From: Olmsted Township, Ohio
Posted by lawdog114 on Wednesday, June 6, 2018 12:09 AM
Nice!....I hear ya on the real life stuff. I'm in the same boat. For IP dials, get yourself some Airscale decals. They work great on Tamiya kits.

 "Can you fly this plane and land it?...Surely you can't be serious....I am serious, and don't call me Shirley"


  • Member since
    March 2015
  • From: Streetsboro, Ohio
Posted by Toshi on Wednesday, June 6, 2018 12:30 AM

Your office is coming together just fine!

Your friend, Toshi

On The Bench: Revell 1/48 B-25 Mitchell


Married to the most caring, loving, understanding, and beautiful wife in the world.  Mrs. Toshi


  • Member since
    September 2014
Posted by rooster513 on Wednesday, June 6, 2018 6:43 AM

 Thanks for following along guys, it's much appreciated!

Rambo - I typically have the same problem with PE seatbelts not draping properly and I usually get paint chipping off them where I do a tight bend but these steel belts behaved really nice.

Joe - I've seen you use those IP dials a lot and have been wanting to get a set of them. They always look so good on your builds.

-Andy

  • Member since
    June 2013
Posted by bvallot on Saturday, June 23, 2018 3:57 PM

Rooster, that’s a clean looking office space. Way to get rid of the clutter! I like your moves. =] 

On the bench:  

Tamiya F4U-1  Kenneth Walsh


  • Member since
    September 2014
Posted by rooster513 on Sunday, June 24, 2018 6:00 AM

Thanks Britt! I used your great -3 conversion you did a while back as a guide. I tried so many time to get a decent fuel tank to put under there but couldn't get a good one hahaha. If mine turns out half as good as yours I'll be happy!

-Andy

  • Member since
    June 2013
Posted by bvallot on Sunday, June 24, 2018 12:53 PM

Small fish. No worries. It’s hardly a thing of notice. You have to really be looking to know it’s there.

You seem to be off to a great start! I’m excited to watch where this goes. 

=]

On the bench:  

Tamiya F4U-1  Kenneth Walsh


  • Member since
    September 2014
Posted by rooster513 on Friday, July 6, 2018 7:23 AM

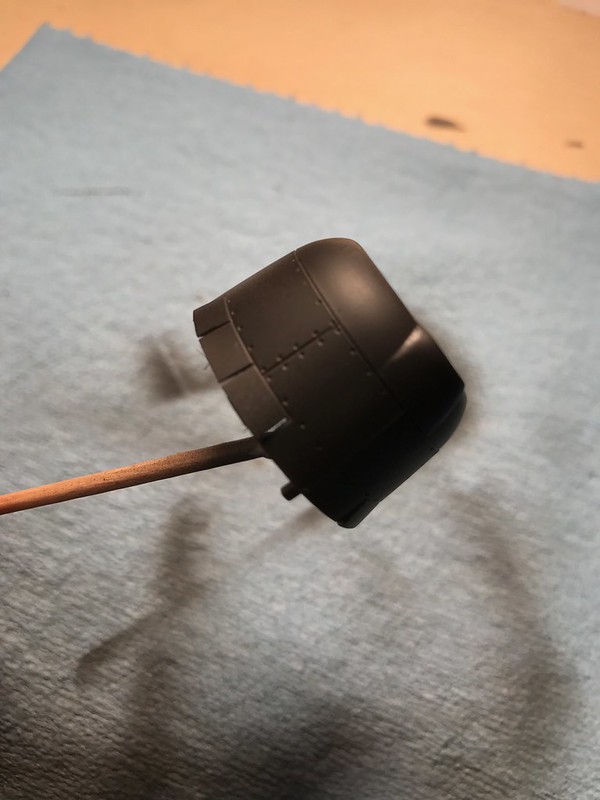
Thanks everyone! Alright so I've been plugging away at this one while also working on my BF109 and I've made some good progress. All the major assembly went pretty smoothly thanks to Tamiya and soon I was spraying the black primer in preparation for the main colors. 


I also opened up the cowl flaps with a razor saw..
A quick picture of the Maketar masks that I'm using for the roundels. I wanted to use these as I wasn't looking forward to trying to get the Tamiya decals to settle around all those curves and rivets.

Here's the first coat of MRP Blue Grey. I may go back and add some more shading with different blues and then put down the final coat of Blue Grey.

Thanks for looking!

-Andy

  • Member since
    June 2014
Posted by BrandonK on Friday, July 6, 2018 9:05 AM

Looking very nice. The paint is gonna give it a nice weathered appearance, just like we would expect. Excellent work.

BK

On the bench:

A lot !! And I mean A LOT!!

2024 Kits on deck / in process / completed   

                         14 / 5 / 2  

                              Tongue Tied

  • Member since
    March 2015
  • From: Streetsboro, Ohio
Posted by Toshi on Friday, July 6, 2018 11:34 AM

Great looking color scheme.  Nice touch on the weathering.

Your friend, Toshi

On The Bench: Revell 1/48 B-25 Mitchell


Married to the most caring, loving, understanding, and beautiful wife in the world.  Mrs. Toshi


  • Member since
    September 2014
Posted by rooster513 on Friday, July 6, 2018 1:50 PM

Thanks for the kind words Brandon and Toshi!

-Andy

  • Member since
    September 2014
Posted by rooster513 on Monday, July 9, 2018 8:28 AM

Was able to get the Blue Grey finished up over the weekend. I just sprayed a thinned mix over the already mottled surface and then post shaded with a little Tamiya Nato Black around the wing walk areas and the gun access doors. I also pulled off the masks to see how the insignia came out. I'm pretty happy with the results though the blue came out a little darker then I would have liked. I'll have to adjust the mix for the next time.

-Andy

  • Member since
    December 2002
  • From: Northern California
Posted by jeaton01 on Monday, July 9, 2018 10:58 AM

Nice!

John

To see build logs for my models:  http://goldeneramodel.com/mymodels/mymodels.html


  • Member since
    September 2014
Posted by rooster513 on Monday, July 9, 2018 2:58 PM

Thanks John!

-Andy

  • Member since
    September 2014
Posted by rooster513 on Friday, July 13, 2018 8:01 AM

Got the underside all painted up with MRP Light Grey and removed the Maketar masks. Pretty happy with how they turned out!

-Andy

  • Member since
    September 2016
  • From: Albany, New York
Posted by ManCityFan on Friday, July 13, 2018 8:13 AM

The masked insignia looks fantastic!  Your paint technique looks pretty good as well.

Thanks for posting. 

Dwayne or Dman or just D.  All comments are welcome on my builds. 

  • Member since
    June 2014
Posted by BrandonK on Friday, July 13, 2018 9:56 AM

I have to say that the paint looks great. The mottling turned out awesome and those insignias are crisp. Well done.

BK

On the bench:

A lot !! And I mean A LOT!!

2024 Kits on deck / in process / completed   

                         14 / 5 / 2  

                              Tongue Tied

  • Member since
    September 2014
Posted by rooster513 on Monday, July 16, 2018 8:08 AM

Thanks Dwayne and Brandon! Little more work done on the Wildcat. I replaced the molded wing guns with some brass tubing. I think they look much better...


Moving on to weathering and the few decals I need to put on soon!

-Andy

  • Member since
    February 2012
  • From: Olmsted Township, Ohio
Posted by lawdog114 on Monday, July 16, 2018 7:47 PM
Nice! Although I'm not personally fond of the black base technique, You certainly have mastered it. Nice work on the insignias too. I recently got a bad Montex batch where it left adhesive residue behind, but I think that was an isolated incident and I will continue to use them.

 "Can you fly this plane and land it?...Surely you can't be serious....I am serious, and don't call me Shirley"


  • Member since
    September 2014
Posted by rooster513 on Tuesday, July 17, 2018 10:51 AM

Thanks Joe, I appreciate the kind words! Yeah I'm happy with how the insignia came out and think it made a big difference on this particular kit as I don't know how well I would have gotten a decal to conform to all those raised rivets.

-Andy

JOIN OUR COMMUNITY!

Our community is FREE to join. To participate you must either login or register for an account.

SEARCH FORUMS
FREE NEWSLETTER
By signing up you may also receive reader surveys and occasional special offers. We do not sell, rent or trade our email lists. View our Privacy Policy.