SEARCH FINESCALE.COM

Enter keywords or a search phrase below:

Accurate Miniatures 1/48 Yak-1 (on skis)

2723 views
12 replies
1 rating 2 rating 3 rating 4 rating 5 rating
  • Member since
    January 2015
  • From: Katy, TX
Accurate Miniatures 1/48 Yak-1 (on skis)
Posted by Aggieman on Tuesday, June 2, 2020 1:07 PM

We have some Russians in here!

Admittedly, I've never been that familiar with many of the aircraft comprising the VVS. This is largely due to the lack of discussion on the Soviet Union's contributions to WWII in school history class and, going way back to my maternal grandmother's house, where she had a set of encyclopedias that contained, in the A volume for aircraft, a glossy two-page drawing of various WWII aircraft by country, and showed just a couple of airplanes for the Russians.

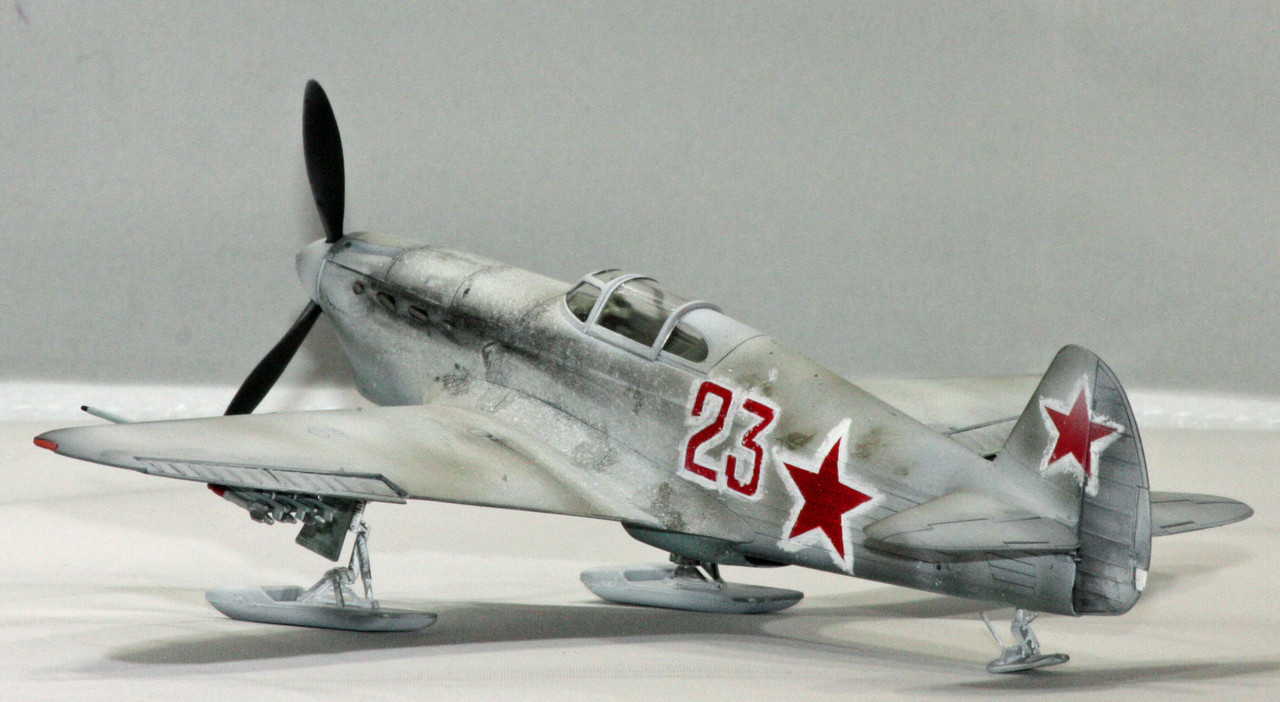
Here is Accurate Miniatures' Yak-1.  
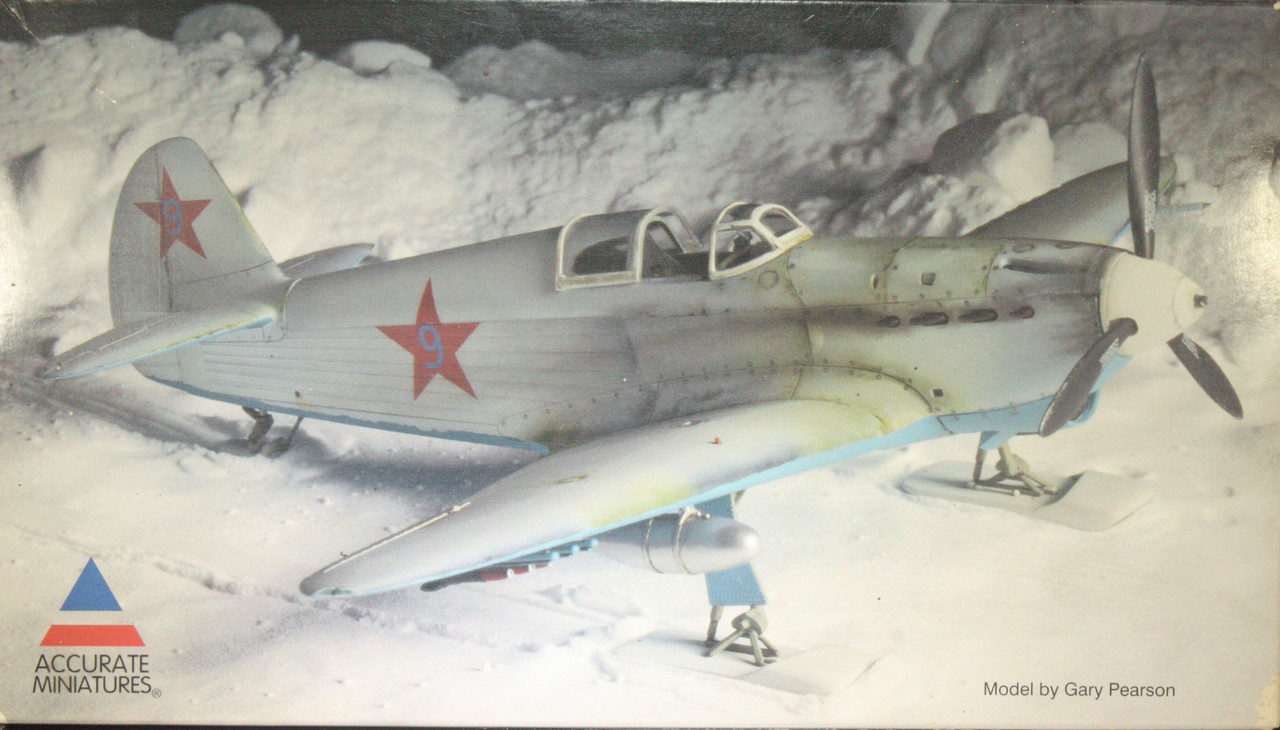
I picked this one up a few years back from Sprue Brothers when they were having an inventory reduction sale.  I liked the idea of the skis.  The kit was geared toward the skis edition, but it did contain all the parts for conventional landing gear.

So the kit is fairly typical of Accurate Miniatures kits; I say that as one that has built their Avenger, Mitchell, Vindicator, and Sturmovik kits.  But unlike those, this one has some finicky stuff to build, notably the cockpit and the skis.  The cockpit is fragile once built, and is slotted into the already assembled fuselage from the wing opening.  As it happened, I didn't get it set in the correct position, which I only discovered when attempting to fit the rear canopy over the seat bulkhead, which sat too high.  I was able to push it down to allow the canopy to clear the bulkhead, but in inspecting the underside, I noticed a significant gap inside the oil cooler, meaning I still didn't get the cockpit structure correctly positioned.  By the time I noticed this, it was far too late to do anything about it, but one really has to be looking into the oil cooler to see the issue.

The skis were also fragile.  I had some difficultly getting them aligned, and one of them didn't even want to stay in position.  I had to develop some patience to let them set once I had them in a position that looked accurate enough.

Paint.  I considered purchasing a paint set for Russian aircraft, but given that I have only 3 in my stash with no real plans to get any additional Soviet subjects, I opted to use what I had on hand.  The Yak was often painted in dark green + black on the top and light blue on the underside.  I initially planned to use some Italian colors I have - a Polly Scale dark olive green, Polly Scale light gray blue, and Tamiya NATO black.  The light gray turned out to favor the gray rather than the blue, which is what photos I found indicated the underside should be.  I ended up using Vallejo RLM 76 light blue in a somewhat ironic move, given that the RLM color is a Luftwaffe color.

The white was initially going to be heavily thinned Tamiya white, but at one point I recalled the white Stynylrez primer comes out of the bottle pretty thin.  I went with that and sprayed at a lower PSI than normal, I think it was about 12 PSI, in light coats to allow some of the underlying color to either show through or be easy to reveal with sanding.  I was only partially successful at this.  The wing's leading edges are what I was going for for other areas of the Yak, but I was unable to sand enough of the white away with concern of removing the underlying colors as well.

Weathering is ground pastels to replicate the exhaust stains, and Flory wash everywhere else.  Aside from the instrument panel, I did not use any of the kit decals. I instead used the Montex Mask set for the Yak to do the red stars and the 23.  I used a flat brush to stipple white around those markings (I believe the Russians would paint their markings over a hastily painted on white background, but stand to be corrected on that).

I built this one alongside the Accurate Miniatures Sturmovik, which I will post shortly. My next build will stay in the VVS with Zvezda's Pe-2 in 1/48.

  • Member since
    April 2003
  • From: USA
Posted by keavdog on Wednesday, June 3, 2020 3:53 AM

Nice job  - the winter camo isn't easy to do and you did a great job.

Thanks,

John

  • Member since
    August 2013
Posted by Jay Jay on Wednesday, June 3, 2020 7:02 AM

I love how that winter camo came out. Cool idea using Stynylrez to achieve it Yes


 I'm finally retired. Now time I got, money I don't.

  • Member since
    November 2008
  • From: Central Florida
Posted by plasticjunkie on Wednesday, June 3, 2020 8:26 AM

Yea the paint and weathered look  are super cool looking.Beer

 GIFMaker.org_jy_Ayj_O


Too many models to build, not enough time in a lifetime!!

  • Member since
    June 2017
Posted by UnwaryPaladin on Wednesday, June 3, 2020 9:59 AM

Turned out great! You nailed the winter camo and I really like how the markings turned out.

Joe

  • Member since
    June 2014
Posted by BrandonK on Wednesday, June 3, 2020 11:48 AM

Turned out great. I too have this kit from SB. They are still selling these without the box real cheap. It looks wonderful. Great work.

BK

On the bench:

A lot !! And I mean A LOT!!

2024 Kits on deck / in process / completed   

                         14 / 5 / 2  

                              Tongue Tied

  • Member since
    February 2012
  • From: Olmsted Township, Ohio
Posted by lawdog114 on Wednesday, June 3, 2020 7:50 PM

Outstanding work.  Winter wash came out fantastic. 

 "Can you fly this plane and land it?...Surely you can't be serious....I am serious, and don't call me Shirley"


  • Member since
    January 2015
  • From: Katy, TX
Posted by Aggieman on Thursday, June 4, 2020 10:52 AM

keavdog

Nice job  - the winter camo isn't easy to do and you did a great job.


Thanks!

I thought it would be a relatively easy paint job, but no, not easy at all. 

  • Member since
    January 2015
  • From: Katy, TX
Posted by Aggieman on Thursday, June 4, 2020 10:53 AM

Jay Jay

I love how that winter camo came out. Cool idea using Stynylrez to achieve it Yes


Thanks!  The Stynylrez idea was one borne of laziness, I just didn't want to thin the Tamiya white paint when I already had some really thin primer.

  • Member since
    January 2015
  • From: Katy, TX
Posted by Aggieman on Thursday, June 4, 2020 10:53 AM

plasticjunkie

Yea the paint and weathered look  are super cool looking.Beer


Thanks!

  • Member since
    January 2015
  • From: Katy, TX
Posted by Aggieman on Thursday, June 4, 2020 10:54 AM

UnwaryPaladin

Turned out great! You nailed the winter camo and I really like how the markings turned out.

Joe


Thanks Joe!

  • Member since
    January 2015
  • From: Katy, TX
Posted by Aggieman on Thursday, June 4, 2020 10:55 AM

BrandonK

Turned out great. I too have this kit from SB. They are still selling these without the box real cheap. It looks wonderful. Great work.

BK


Thanks Brandon!

  • Member since
    January 2015
  • From: Katy, TX
Posted by Aggieman on Thursday, June 4, 2020 10:56 AM

lawdog114

Outstanding work.  Winter wash came out fantastic. 


Thanks lawdog!

JOIN OUR COMMUNITY!

Our community is FREE to join. To participate you must either login or register for an account.

SEARCH FORUMS
FREE NEWSLETTER
By signing up you may also receive reader surveys and occasional special offers. We do not sell, rent or trade our email lists. View our Privacy Policy.