SEARCH FINESCALE.COM

Enter keywords or a search phrase below:

MPM 1/72nd bf 109G-12 Completed

2044 views
14 replies
1 rating 2 rating 3 rating 4 rating 5 rating
  • Member since
    December 2002
  • From: Bury St Edmunds, Suffolk, England
Posted by Bish on Monday, February 15, 2021 8:51 AM

Thanks PJ. I wanted it open anyway, but closed it was a pretty bad fit so it worked out handy.

I am a Norfolk man and i glory in being so


On the bench: Airfix 1/72nd Harrier GR.3/Fujimi 1/72nd Ju 87D-3

  • Member since
    November 2008
  • From: Central Florida
Posted by plasticjunkie on Monday, February 15, 2021 8:19 AM

Those vac canopies are a pita to slice open but like you said, worth the effort to show details and the mood of the vignette. Great job on the model, figures and base.  Beer

 GIFMaker.org_jy_Ayj_O


Too many models to build, not enough time in a lifetime!!

  • Member since
    December 2002
  • From: Bury St Edmunds, Suffolk, England
Posted by Bish on Monday, February 15, 2021 6:28 AM

Thanks guys.

TJ, now you mention it, i know what you mean.

The canopy is a little iffy in places, i had to use liquid mask which i am not a fan of, but it passable.

I am a Norfolk man and i glory in being so


On the bench: Airfix 1/72nd Harrier GR.3/Fujimi 1/72nd Ju 87D-3

  • Member since
    August 2015
  • From: the redlands Fl
Posted by crown r n7 on Sunday, February 14, 2021 4:22 PM

yes well done and the canopy in 1/72 wow.


 Nick.

  • Member since
    November 2003
  • From: Naples, FL
Posted by tempestjohnny on Sunday, February 14, 2021 3:56 PM
So different with the 2 canopies. Kind of has the feel of a 2 seat car that has been stretched


  • Member since
    December 2002
  • From: Northern California
Posted by jeaton01 on Sunday, February 14, 2021 1:23 PM

Fine job, Martin.  That canopy does not look like it was an easy thing to put in place.


John

To see build logs for my models:  http://goldeneramodel.com/mymodels/mymodels.html


  • Member since
    December 2002
  • From: Bury St Edmunds, Suffolk, England
Posted by Bish on Sunday, February 14, 2021 12:30 PM

Time to wrap this up. The aircraft was finished earlier in the week. Just a light flory wash and some exhaust stains. The final parts were then added. The canopy is not to brilliant, i struggle to cut canopies, and vac ones more so. Fit isn't brilliant but close enough.

Then spent the week doing the figures and some chocks and got it all on the base.

Thanks for looking, all comments welcome as always.

I am a Norfolk man and i glory in being so


On the bench: Airfix 1/72nd Harrier GR.3/Fujimi 1/72nd Ju 87D-3

  • Member since
    December 2002
  • From: Bury St Edmunds, Suffolk, England
Posted by Bish on Monday, February 1, 2021 3:02 PM

The 109 is painted up, all with Xtracolor.

Then the decals. these went on well, i was surprised.

Hopefully i'll have this done by the end of the week.

I am a Norfolk man and i glory in being so


On the bench: Airfix 1/72nd Harrier GR.3/Fujimi 1/72nd Ju 87D-3

  • Member since
    December 2002
  • From: Bury St Edmunds, Suffolk, England
Posted by Bish on Monday, January 18, 2021 4:04 AM

Thanks guys.

It is a bit rough, but i think if you want the subject, then it can be worth the effort, and its not been to much of a struggle.

Chad, i don't like doing it either. Vac canopies are so soft i do find them tricky. But i just much prefer open canopies as it usually fits the diorama.

I am a Norfolk man and i glory in being so


On the bench: Airfix 1/72nd Harrier GR.3/Fujimi 1/72nd Ju 87D-3

  • Member since
    April 2015
Posted by Mopar Madness on Sunday, January 17, 2021 6:49 PM

I just don't think I'm brave enough to try to cut open a plastic canopy no less a vacuform canopy! She's really coming along though.

Chad

God, Family, Models...

At the plate: 1/48 Airfix Bf109 & 1/35 Tamiya Famo

On deck: Who knows!

  • Member since
    January 2015
  • From: Tumwater, WA.
Posted by M. Brindos on Sunday, January 17, 2021 5:34 PM

Looks like a rather rough kit, Bish. I can't wait to see how you whip her into shape from this point. 

The pit looks great. I'm astonished to see how soft the molding detail is however. Looks challenging, and I love a challenge like this myself. 

You've got my attention for sure.

- Mike Brindos "Lost Boy"

  • Member since
    December 2002
  • From: Bury St Edmunds, Suffolk, England
Posted by Bish on Sunday, January 17, 2021 7:42 AM

The 109 is now ready for primer and paint. I cut the canopy open, a bit rough, i still have not mastered cutting open canopies, especially vac form ones.


I am a Norfolk man and i glory in being so


On the bench: Airfix 1/72nd Harrier GR.3/Fujimi 1/72nd Ju 87D-3

  • Member since
    December 2002
  • From: Bury St Edmunds, Suffolk, England
Posted by Bish on Sunday, January 10, 2021 1:26 PM

Thanks Chad, i've had this about 7 years, hence why i can't recall if it had the instructions with it or not.

I know there are other, more recent kits of the G-12 in this scale around, AZ Model has a couple.

I am a Norfolk man and i glory in being so


On the bench: Airfix 1/72nd Harrier GR.3/Fujimi 1/72nd Ju 87D-3

  • Member since
    April 2015
Posted by Mopar Madness on Sunday, January 10, 2021 1:13 PM

This one's becoming pretty hard to find. Can't wait to see the final result!

Chad

God, Family, Models...

At the plate: 1/48 Airfix Bf109 & 1/35 Tamiya Famo

On deck: Who knows!

  • Member since
    December 2002
  • From: Bury St Edmunds, Suffolk, England
MPM 1/72nd bf 109G-12 Completed
Posted by Bish on Sunday, January 10, 2021 12:21 PM

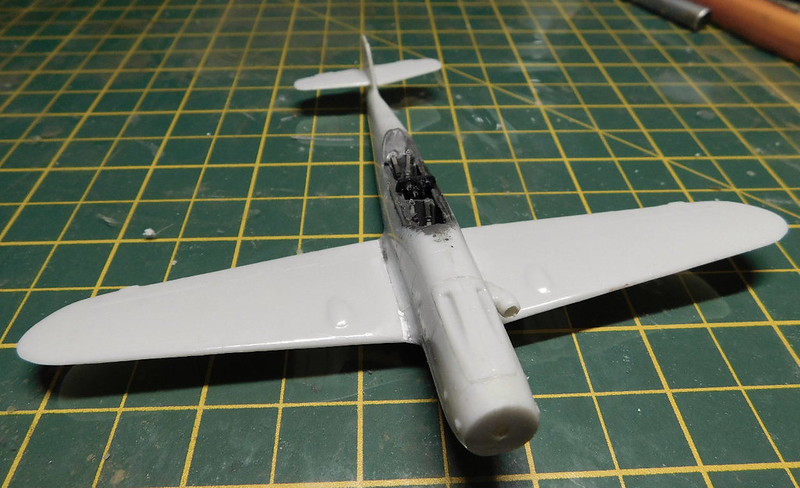
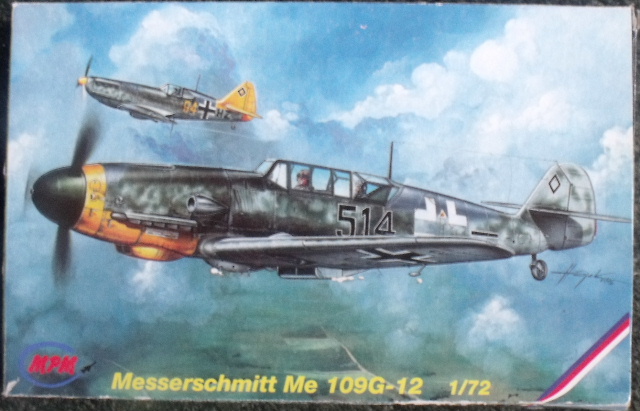
first of 2 i have starte on in the new year. This is the upgrade option and so comes with resin parts. One problem i have is that i don't have the instructions and none are posted online. But i've built enough 72nd 109's to know where the basics are.
The pit is resin with some PE parts, all painte and weathered before going together.

The fuselage had alredy been put together before i bought it, but the pit went in easy enough after a touch of sanding. The wings are one piece and fitted rather well compared to other MPM aircraft i've built.

The rear instrument panel was higher, triangle in shape. But i did think it odd as it would abscure the instructors view. I found a 48th build on line useing a conversion set and that showed the IP well, and seeme dto better match what little i could make out on photo's. So i cut the top portion off.

So far not a bad kit, typical short run with no inserion tabs, but generally fits nice.

I've since primed and painted the RLM 02 areas underneath.

I am a Norfolk man and i glory in being so

 

On the bench: Airfix 1/72nd Harrier GR.3/Fujimi 1/72nd Ju 87D-3

JOIN OUR COMMUNITY!

Our community is FREE to join. To participate you must either login or register for an account.

SEARCH FORUMS
FREE NEWSLETTER
By signing up you may also receive reader surveys and occasional special offers. We do not sell, rent or trade our email lists. View our Privacy Policy.