SEARCH FINESCALE.COM

Enter keywords or a search phrase below:

Huckbein- AmTech's sweet little birdie, she's done!

9263 views
44 replies
1 rating 2 rating 3 rating 4 rating 5 rating
  • Member since
    March 2007
  • From: Carmel, CA
Posted by bondoman on Wednesday, September 12, 2007 1:10 AM
INCREDIBLE!!!
  • Member since
    December 2002
  • From: Whidbey Island, Washington
Posted by chukw on Tuesday, September 11, 2007 11:34 PM

Hey, Lucien- you just aren't looking hard enough! Wink [;)]  Seroiusly- praise from an accomplished and hard-working guy like you is praise indeed- cheers!

 Luftwoller- thanks- and sometimes even things like crazy decals can be fun.  That was the goal of this whole build- mission accomplished!  The icing on the cake is that it's currently in the big glass case at The Miltary Shop in Long Beach, CA- an honor, for sure. Make a Toast [#toast]

  • Member since
    February 2007
  • From: Bournemouth UK
Posted by Luftwoller on Monday, September 10, 2007 10:50 AM

Sign - Ditto [#ditto] Bow [bow]

Cant get over that nose decal, looks sprayed. Top job fella.

...Guy

..'Your an embarrassment to the human genus, makes me ashamed to call myself Homo'.
  • Member since
    June 2003
  • From: A Computer in Adrian, (SE) Michigan.
Posted by Lucien Harpress on Sunday, September 9, 2007 8:47 PM

Awww, it's just so cute!  Big Smile [:D]  Big Smile [:D]


But seriously, awesome job.  The Ta 183 isn't one of my favorite Luft 46 aircraft, but then again, I don't like ANYTHING in the "jet engine with wings attached" line.  But you my friend, your work is simply commendable.  I simply can't find anything wrong with it!  (And you know I'm looking, too!  Evil [}:)])  Really nice.  It's good to see a project this nice finished.  

Thanks for sharing! 

That which does not kill you makes you stranger...
-The Joker
  • Member since
    December 2002
  • From: Whidbey Island, Washington
Posted by chukw on Sunday, September 9, 2007 8:16 PM
This angle gives a good view of the "long" stance of the gear.  No nose weight necessary!

The canopy floor is clearly evident- even the DF loop!


I broke down and tried brushing on pastels for the first time- check out those tan streaks on the wings.  Easy, and the pigment really sits well on the matte finish. 


Thanks for following this odyssey- it's been a fun build, and I can highly recommend the kit.  Tamiya has released it with their kettenkrad as a set- give it a try!

Now, it's off to super-detail that Promodeller/Accurate Miniatures SBC2-4.  I think I'll make it a -4E, and better check to see if the 1.5 degree fin offset is molded in- better get the razor saw out...   Propeller [8-]
  • Member since
    December 2002
  • From: Whidbey Island, Washington
Posted by chukw on Sunday, September 9, 2007 8:15 PM
Fine solder brake lines

Cutting Edge tinted resin was used for the nav lights.


It casts a nice shadow!
  • Member since
    December 2002
  • From: Whidbey Island, Washington
Posted by chukw on Sunday, September 9, 2007 8:14 PM

You guys are the best!   I'm blushin' from all this kindness.  Thanks a million!

Well, she's done.   I took her out to the driveway to snap some pics.  Sat her on a a blank comics page- 4-ply bristol board on top of a rotating stool, and went to it. I sensed impending disaster- a puff of wind blew up the board- the model flew back- and I managed to catch it!    :o  Only the rudder was dislodged, so after a quick repair I resumed shutterbugging- this time with the plane on a wooden shelf board.  Guess you could call it a plank stand! 


I added a torque link to the nose gear from styrene- and there's the simple FOD cover- styrene as well with bent wire handles.

  • Member since
    December 2002
  • From: NYC, USA
Posted by waikong on Sunday, September 9, 2007 2:20 PM
I've been waiting for you finish this for over a year! Every post I learn something. That canopy detailing came out really nice - makes me what to buy another one just to add some of details you put in!
  • Member since
    February 2007
  • From: Bournemouth UK
Posted by Luftwoller on Sunday, September 9, 2007 6:17 AM

Wow. Posts like this dont come up very often. Your photos and attention to detail are sublime. Your use of filters on an aircraft have spoken for themselves with an excellently weathered craft. You have gone above and beyond, to give a quality Step by step, which many modellers, myself included find priceless.

You really should submit this post to FSM to post in their features slot.

I know the term 'Excellent' gets bandied about a fair bit in this forum but this model deserves it.

Congrats on a fantastic model. Bow [bow]

...Guy

..'Your an embarrassment to the human genus, makes me ashamed to call myself Homo'.
  • Member since
    July 2004
  • From: Northern KY
Posted by mucker on Saturday, September 8, 2007 9:06 PM
Outstanding work, Chukw!

  • Member since
    September 2003
  • From: South Central Wisconsin
Posted by Daywalker on Saturday, September 8, 2007 9:02 PM
Wow, you make it look so easy! Bow [bow]

Frank 


  • Member since
    December 2002
  • From: Whidbey Island, Washington
Posted by chukw on Saturday, September 8, 2007 8:56 PM

RDXpress- Thanks! Ihope you're enjoying your build.  I have no idea which gear doors are more in keeping with the historical facts as they stand- sorry!

waikong:  I cheated past the shallow opening with a quick FODcover- cheers! Tongue [:P]

Okay, she's just about done.  It was one of those "D'oh!" moments when I realized I had been totally ignoring the canopy up until now!   I got down to it- cut out and separated the Squadron/Falcon vacuform.  No worries there, but when I placed the rear dome on the model there was no where to rest it!  It basically fell down on the fuselage spine, so I knew some structure needed to be cooked up.  Out came some vintage 1970's squadron styrene, some recently-purchased Evergreen strips and a spare DF loop from an Eduard Me109 set- viola!

I glued it to the Future-dipped canopy with a few spots of CYA, followed by a bead of Testors Canopy Cement.

FW 190's had a rather robust rollover bar built into the windscreen framing, so I thought that might look cool here as well.  

To hold the front of the sliding portion to the frame I used a couple of PE sway braces from the True Details generic set- perfect!

I repeated the painting and weathering process for the assembly.  I masked the frames inside and out- easy and effective on such a simple example.  


A few dabs of touch-up paint and she's done- stay tuned, and cheers!

  • Member since
    December 2002
  • From: NYC, USA
Posted by waikong on Monday, August 13, 2007 9:44 PM
Great paint job, the blending of the camo is really well done. The dented fuel tank is a real nice touch. The only thing that I didn't like about this kit was that I wished they made the air intake deeper so that it can be at least given the impression of going into an engine. You are really taking it to the next level by painting those german crosses, creat pictures to show how you've done it too.
  • Member since
    May 2003
Posted by rdxpress on Monday, August 13, 2007 11:12 AM
  I've been following  your progress and since I build 1/72nd I have started the inferior PM models kit. It lacks detail BUT looks good in outline. After doing some research I have noticed that the main gear doors on the Amtech kit are rectanular while the PM kit has them with an angle which bears true from all the research SO... whats up and which is right? Anyone with an answer(No guesses please!). Thanks for any answers and......Good Hunting, G.W.
  • Member since
    December 2002
  • From: Whidbey Island, Washington
Posted by chukw on Sunday, August 12, 2007 4:56 PM

Thanks, guys!  The technique is easy, fun and fast.  Here's a fringe benefit from having a q-tip loaded with "dirty thinner" from wiping off the panel wash excess- using a tapping motion, add some dirt to the traffic areas of the wing.  You can build this up with a couple of consecutive applications.  More variety on you base coat.  


She'll be getting a flat coat today- on the paintchipping! 

  • Member since
    September 2003
  • From: South Central Wisconsin
Posted by Daywalker on Saturday, August 11, 2007 11:03 PM

Awesome detail work!  Love your photos and explanation of the weathering, really helps to have a visual!

Frank 


  • Member since
    February 2003
  • From: A Spartan in the Wolverine State
Posted by rjkplasticmod on Saturday, August 11, 2007 9:27 PM

Excellent work Thumbs Up [tup].  The painting/weathering is first rate.

Regards,  Rick

RICK At My Age, I've Seen It All, Done It All, But I Don't Remember It All...
  • Member since
    January 2003
  • From: 40 klicks east of the Gateway
Posted by yardbird78 on Saturday, August 11, 2007 9:10 PM

That is some beautiful work on the little bird.  Your detailed description of the weathering is really neat and helpful.

Darwin, O.F.  Alien [alien]

 ,,

The B-52 and me, we have grown old, gray and overweight together.

  • Member since
    August 2007
Posted by ben1227 on Saturday, August 11, 2007 9:08 PM
Nice work on an interesting subject! :D What is your stand that the 183 is sitting in? I'm gonna get one of those!
.:On the Bench:. Tamiya 1/72 M6A1-K
  • Member since
    December 2002
  • From: Whidbey Island, Washington
Posted by chukw on Saturday, August 11, 2007 8:45 PM
Thanks, blackcollar!

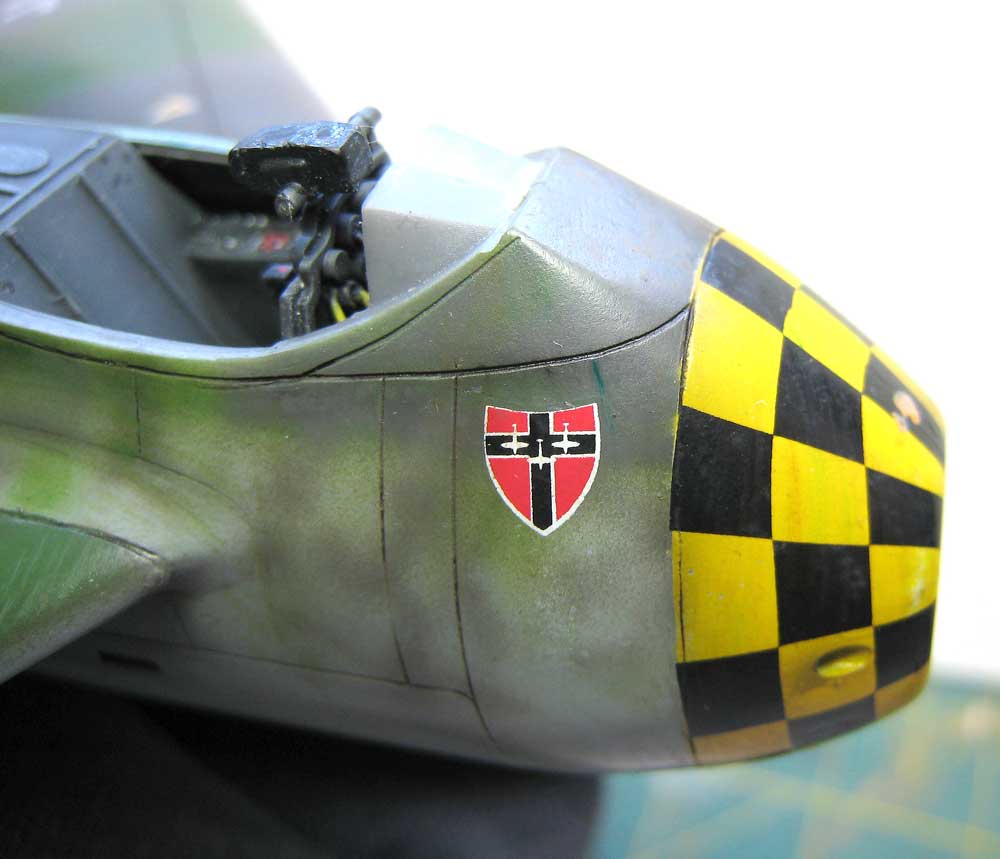
I've had a chance to do a bit more work on this sweet little jet:  I applied a quick oil wash of black burnt sienna to all of the panel lines.  

I wipe the excess wash away with a q-tip dampened with Humbrol thinners, drawing the color along the slipstream.


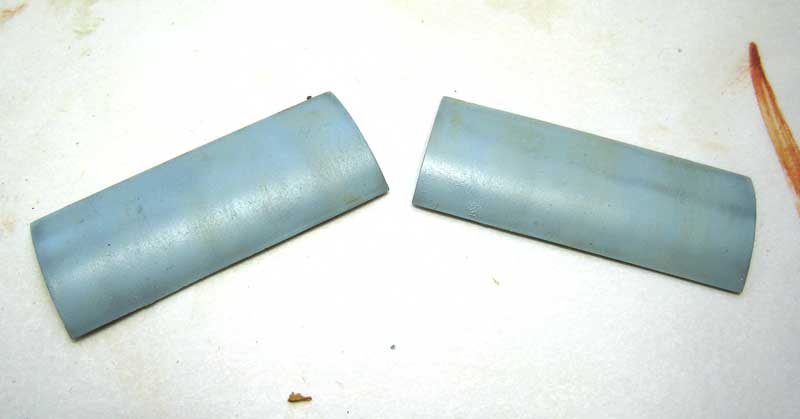
Now on to the filters.  There's no better way to break up the uniform nature of the model's colors, imparting a greater sense of scale and dirtyness.  Dabs of oil piant, straight from the tube, are spotted here and ther long the fuse and rudder- don't forget the gear doors!


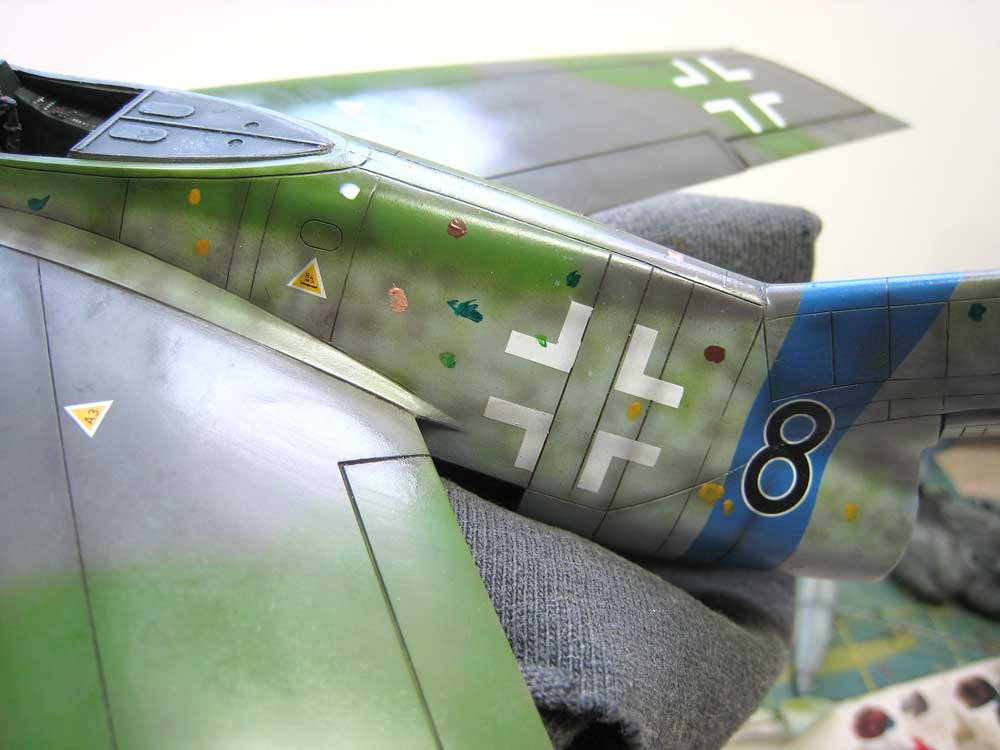
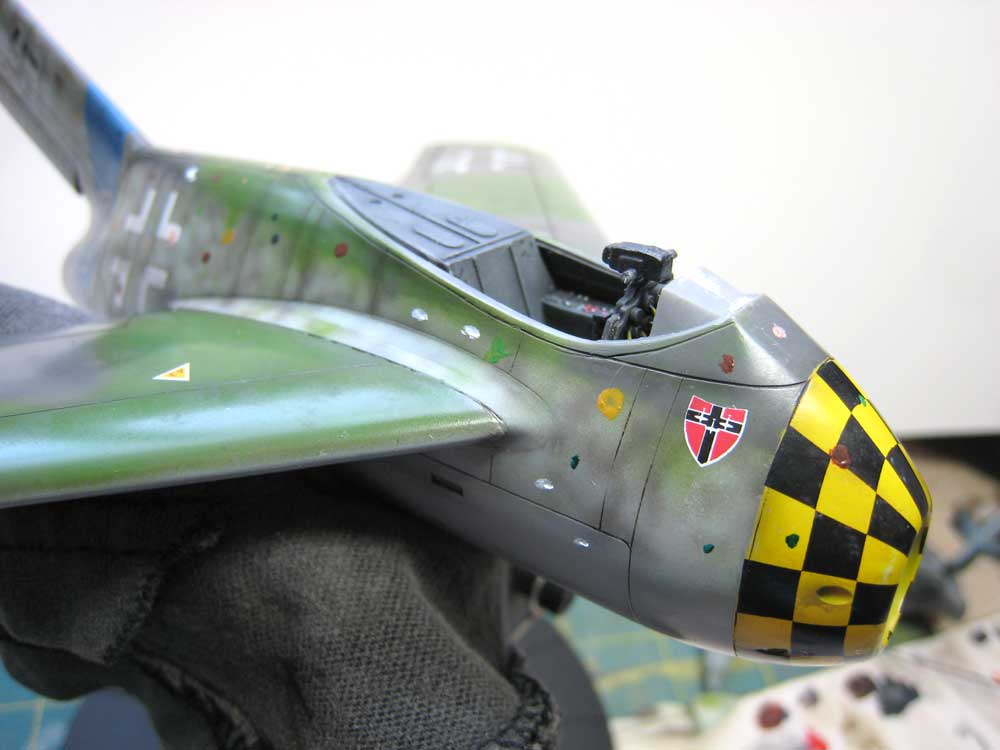
Take wide brush, again merely moistened with thinner and work the dabs of paint out over the surface of the model.  The ideea is not to make a wash, but a thin film of paint to modify the base coat.  Clena your brush often, so as to keep the effect from becoming a monochrome.


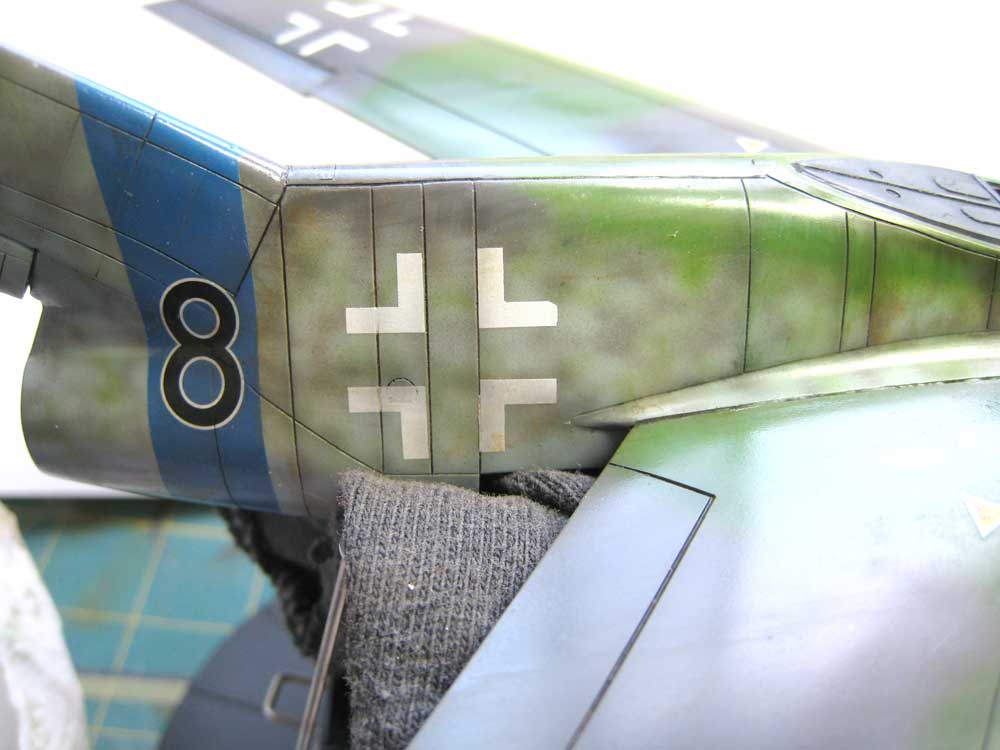
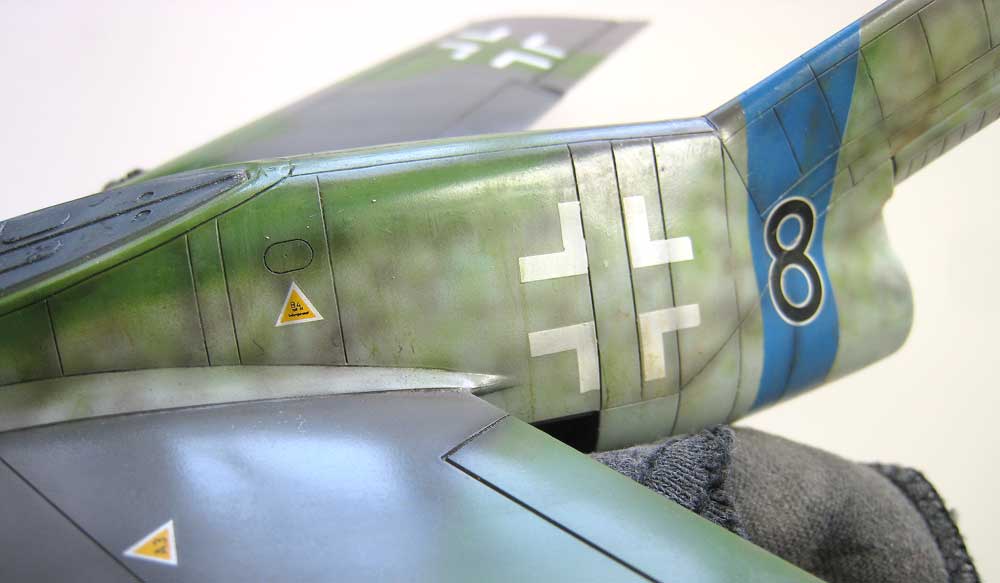
On the fuselage and its components, draw the film of paint down in vertical strokes.


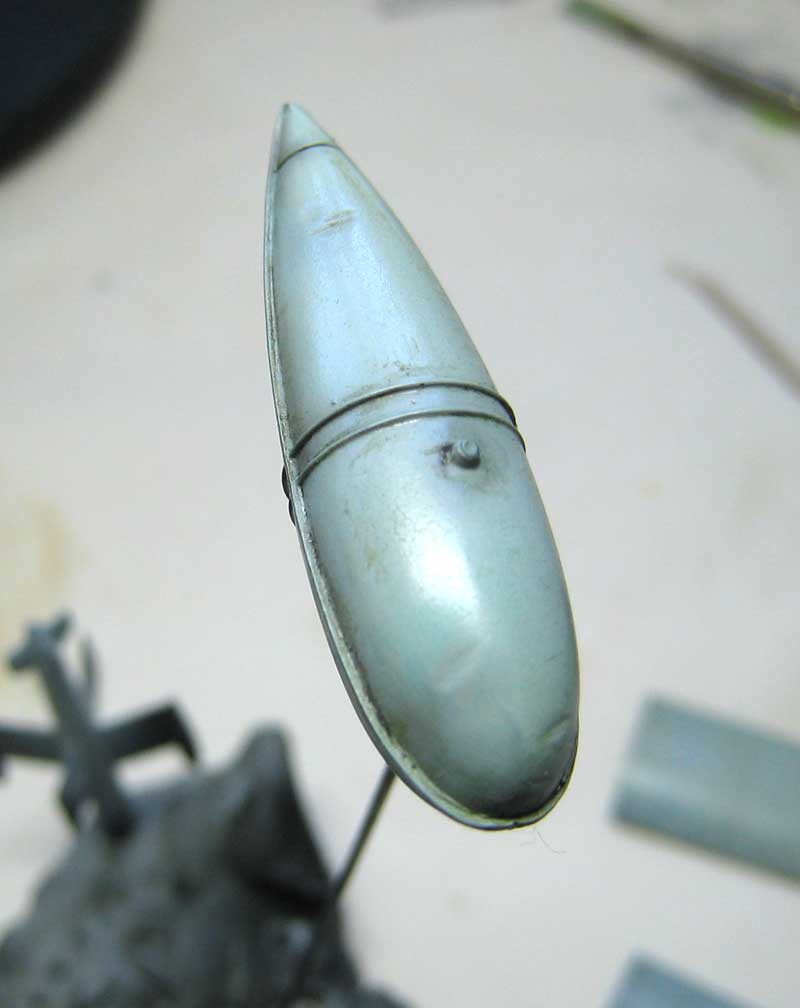
The tailcone was painted black, the given a thinned coat of bright silver.  Bands of transparent brown, blue and yellow were sprayed in rings to simulate the effects of jet blast.
  • Member since
    December 2002
  • From: Whidbey Island, Washington
Posted by chukw on Sunday, August 5, 2007 7:48 PM
I did some subtle post-shading and took off the masking. 


The two-part swastika decals were a bear to fit after I'd trimmed away most of the clear film.


The kit main gear doors fit so well they acted as perfect masks- held on a blob of blue-tack each.  


Here's a captivating bit of modern sculpture....  Bits and pieces!


On to more weathering!
  • Member since
    December 2002
  • From: Whidbey Island, Washington
Posted by chukw on Sunday, July 22, 2007 12:24 PM
Back in gear! I put her aside while I built my B-25H for review on Modeling Madness. I decided to go all-out with the decals- this is just for fun, right? I also decided to try a bunch of new things- like really cutting away all the clear film on a decal. Here's how crazy people do it: I used Microset and Microsol, followed by a hit of Solvaset to get the decal down into the panel lines. That gooey look is just a little damage to the Future coat and will disappear after another coat. For the lower wing crosses I thought I'd try cutting my own masks. A quick spray... ...and viola! Air Superiority Grey, 1946 style! Here's an overall shot- all are kit decals (very nice) except for the 8's. These were from the Tamiya FW190 A-8/R2 kit. I was worried thate checkers would be difficult, but when on quite easily. They really "snuggled down" under the Solvaset- but shrunk a bit in the process. nothing I can't touch up easily... Next: weathering begins! Stay tuned... 
  • Member since
    October 2003
  • From: Everett, WA
Posted by gwaihir on Wednesday, January 17, 2007 11:49 AM

Looks really nice. I really like the weathering you have done.

Leon

Click the banner to see my builds.
  • Member since
    December 2002
  • From: Whidbey Island, Washington
Posted by chukw on Wednesday, January 17, 2007 10:22 AM
Hey, darson- what are FOD covers for, anyway?   I'll make a nice little styrene cover with a grab handle, paint it red and hopefully find an appropriate stencil for it.  Problem solved!
  • Member since
    February 2003
  • From: Melbourne, Australia
Posted by darson on Tuesday, January 16, 2007 5:38 AM

That's some awesome work there, please post some more pics when you have them.

Also, when I built this kit a couple of years ago the one thing that disappointed me was the air intake (or lack thereof) in the nose.  Sorry if I missed this in your post but how are you going to deal with it?

Cheers 

  • Member since
    December 2002
  • From: Whidbey Island, Washington
Posted by chukw on Monday, January 15, 2007 11:29 PM
Thanks, guys- I'll keep you posted on the build.  She's got her coat of Future and will cure for the week.  I had a small area of alligatoring in the RLM 76 on the bottom of the stabilizer- I'll have to patch that over, cure, Future, cure... patience- the modeler's virtue!  I'll work up the landing gear and wheels as all that's going on-paint the missiles as well!  
  • Member since
    December 2002
  • From: A secret workshop somewhere in England
Posted by TANGO 1 on Sunday, January 14, 2007 4:30 PM
Very impressive! Thats just superb work you have done on the ''pit. This is looking like a winner to me. Thanks for sharing this one with us.
Regards, Darren. C.A.G. FAA/USNFAW GB
  • Member since
    February 2003
  • From: Sandusky Ohio, USA
Posted by Swanny on Sunday, January 14, 2007 2:39 PM
That's looking nice!
  • Member since
    December 2002
  • From: Whidbey Island, Washington
Posted by chukw on Sunday, January 14, 2007 2:30 PM

Progress! Assembly went well, and I got the basic camo laid down in an afternoon. The camo colors are the old PollyS range with the eagle on the bottle. New PollyS airbrush thinner caused an amusing chemical reaction with the paint, resulting in an expanded. clotty mass gunking up the airbrush. Yuck [yuck] Tamiya thinner worked perfectly, allowing for a nice, smooth application. Since it's a Focke Wulf, I'm painting it much like an FW 190 with a late war 76/75/83 scheme. I haven't done mottling in twenty years! I've got a tip for my fellow airbrushers who are sick of paint building up on the needle: apply a little Rain-X. Rain-X id the US brand name for a silicone windshield treatment that makes rain roll right off the glass, and darned if it doesn't make paint roll right off the needle! I applied the grauviolet mottle with an untreated needle and had to constantly unscrew the tip and clean it with a damp cotton swab. I pulled the needle and added a tiny bit of Rain-X, wiped it dry and reassembled to apply the 83 lichtgrun. There was a marked improvement, and no ill effects with the paint. You'll want to try this one- trust me!

Here's a shot of the rudder- I scribed some new inspection panels here and there to try out my new Mission Models scribers. I can report that they worked beautifully. Another tip- I shaved off the raised ridges around newly-scribed lines with an old-fashioned double-edged razor- the blue-steel kind- snapped in two down the middle. This allowed for a lot less sanding and rescribing. The flexibity of the blade allows it to conform to curved surfaces without digging into the model. A yellow beak (Tamiya Flat Yellow)seemed appropriate, although black might be better for a raven... I opted for only two external stores racks. The mottling was applied with very thin paint sprayed at low pressure with an Iwata Custom Micron B. The Defence of the Reich ID bad was masked off and sprayed with Tamiya Flat Blue, lightened a bit with white. Next comes weathering- this bird will have seen some action by the time I'm through it! I'll probably give it a coat of Future later this afternoon to protect the finish so far. Stay tuned!

JOIN OUR COMMUNITY!

Our community is FREE to join. To participate you must either login or register for an account.

SEARCH FORUMS
FREE NEWSLETTER
By signing up you may also receive reader surveys and occasional special offers. We do not sell, rent or trade our email lists. View our Privacy Policy.