SEARCH FINESCALE.COM

Enter keywords or a search phrase below:

1/72 Spruce Goose Build Thread (More wing work)

22256 views
63 replies
1 rating 2 rating 3 rating 4 rating 5 rating
  • Member since
    June 2003
  • From: A Computer in Adrian, (SE) Michigan.
1/72 Spruce Goose Build Thread (More wing work)
Posted by Lucien Harpress on Wednesday, March 28, 2007 10:12 AM

Well, after God knows how long of having millions of topics bouncing around this site about one single build, I finally broke down and decided to consolidate them all into one thread that I could constantly update as progress was made.  I apologize in advance to all dial-up users.

For those who have no idea what I'm talking about, this is my build of a VERY rare 1/72 Vacuform Spruce Goose wired with spinning props.  Here's a look back on what's accomplished so far:

From now on, this is where all new updates will be posted. 

As a futher note, I'm consolidated a bunch of my photos into one folder on my photobucket account.  As a result, a number of the really old pictures of this build may not work anymore.  It won't affect anything in this thread, just the really old ones that nobody looks at anyway.  And if you REALLY want to see something that you remember and isn't there anymore, just let me know and I'll get the new link to it.

Also, the pics are large for a very special reason.  Although to find out what that reason IS, you'll just have to wait until I'm finished!  Big Smile [:D]  Thanks for the look-see, and comments, as always, are welcome.

That which does not kill you makes you stranger...
-The Joker
  • Member since
    November 2004
  • From: Columbia Gorge
Posted by brain44 on Wednesday, March 28, 2007 10:20 AM

Great idea, Mike!  I know a lot of us have been following this build closely - pretty soon, you can have your own version of Evergreen Air Museum at home!  Cool [8D]

Brian  Cowboy [C):-)]

"I won't be wronged, I won't be insulted, and I won't be laid a hand on. I don't do these things to other people and I expect the same from them." John Bernard Books (The Shootist)
  • Member since
    June 2003
  • From: A Computer in Adrian, (SE) Michigan.
Posted by Lucien Harpress on Sunday, April 8, 2007 8:25 PM

Another update for the thread-

Small, but progress, nonetheless.  I've glued one side of the wings together, removed the aileron, and boxed in the resulting gap.  Next up- the flap.

That which does not kill you makes you stranger...
-The Joker
  • Member since
    June 2003
  • From: A Computer in Adrian, (SE) Michigan.
Posted by Lucien Harpress on Sunday, April 15, 2007 1:48 PM

Another update, but no pics unfortunately.

Looking at this model just sitting on my bedroom floor, I came to a sad conclusion.  Up until this point, I had planned on leaving the planing hull alone in terms of correcting the rounded edges.  But when I noticed ALL the other things that I'd fixed, I realized that if I DIDN'T do anything, it would stick out like a sore thumb.  Therefore, I've decided to break down, buy some angle stock from my LHS, and crack out ANOTHER tube of putty.


(sigh).....


Sometimes I wonder.....

What this means for everyone else out there is that this build is going to take THAT much longer.  Sorry!

Ah, well.  Back to work... 

That which does not kill you makes you stranger...
-The Joker
  • Member since
    June 2003
  • From: A Computer in Adrian, (SE) Michigan.
Posted by Lucien Harpress on Sunday, May 27, 2007 9:49 PM

A multi-part update, with photos this time!

Apart from various other projects, I HAVE been working on my Goose, also.  Here's what I got to bring y'all up to speed:
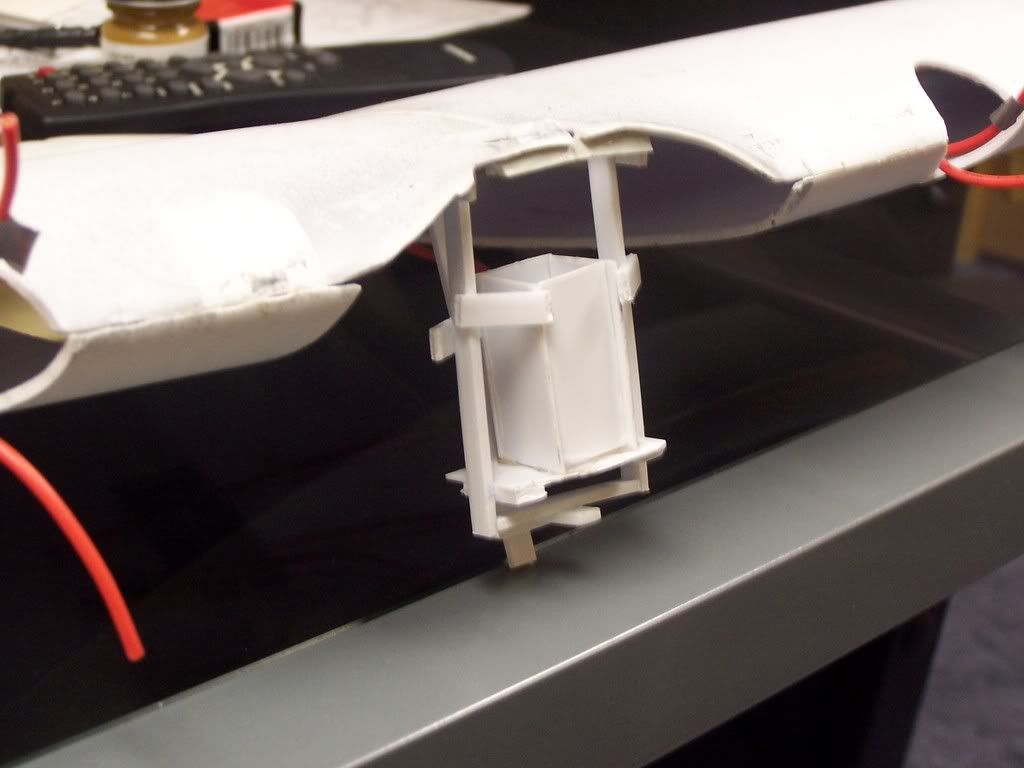
This monstrosity is the finished battery box.  The battery will slip in vertically, and connect to a terminal at the top (which I still need to add) and the bottom.  I learned that the only way to get the battery OUT once it's dead is to use needle nosed pliers.  Oh, well.
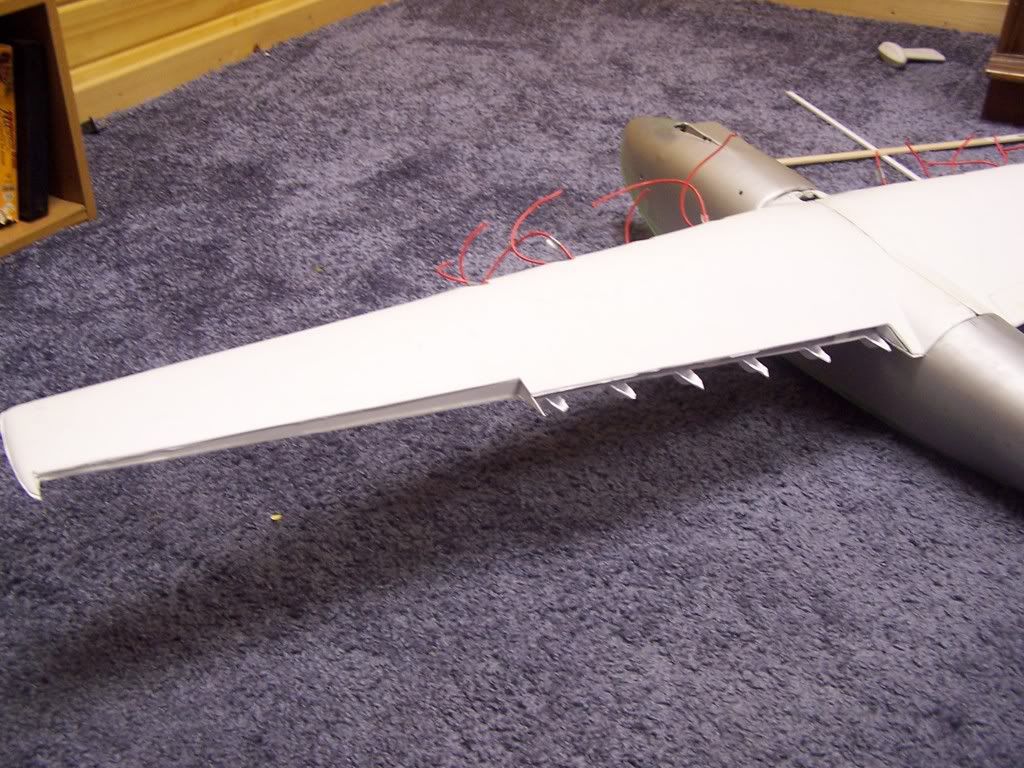
One aileron and flap are gone.  As you can see, I still need to clean up the flap actuator housings (those spiky things on the underside) with a dremel or something.

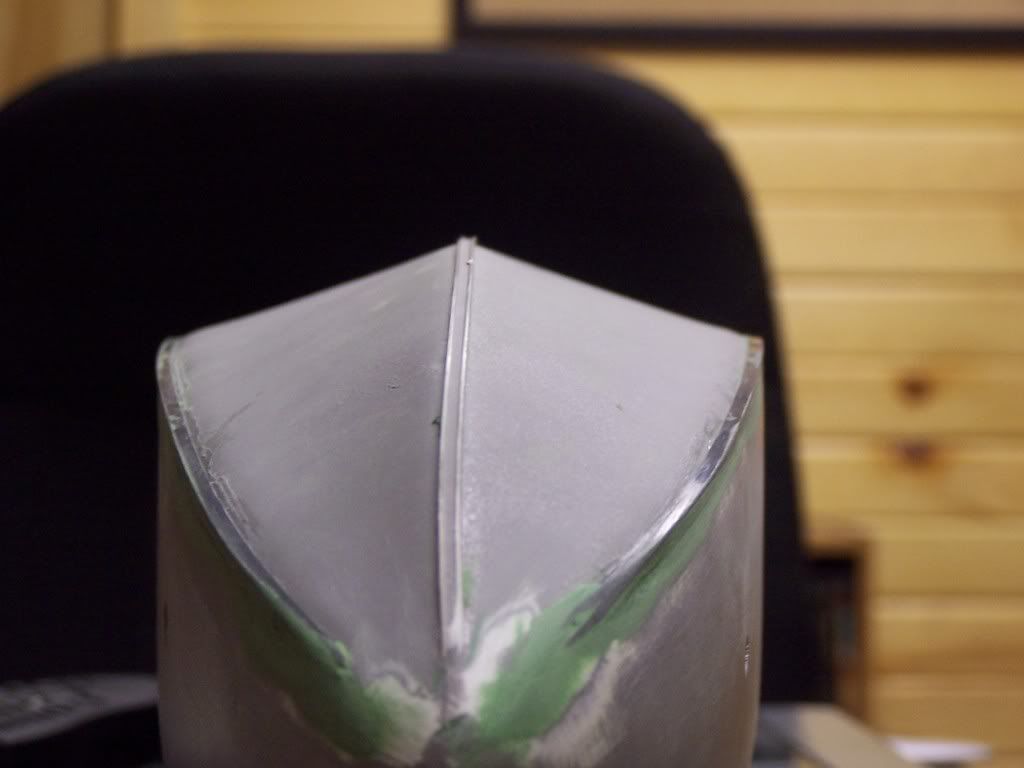
My next update actually makes me feel rather good.  For a long time the curved edges of the planing hull has ticked me off.   These should be rather angular.  I debated just leaving them alone, but finally got the motivation to fix this.  It was a rather simple fix involving some small angle stock and, yes, LOTS of putty.

Here's the before:
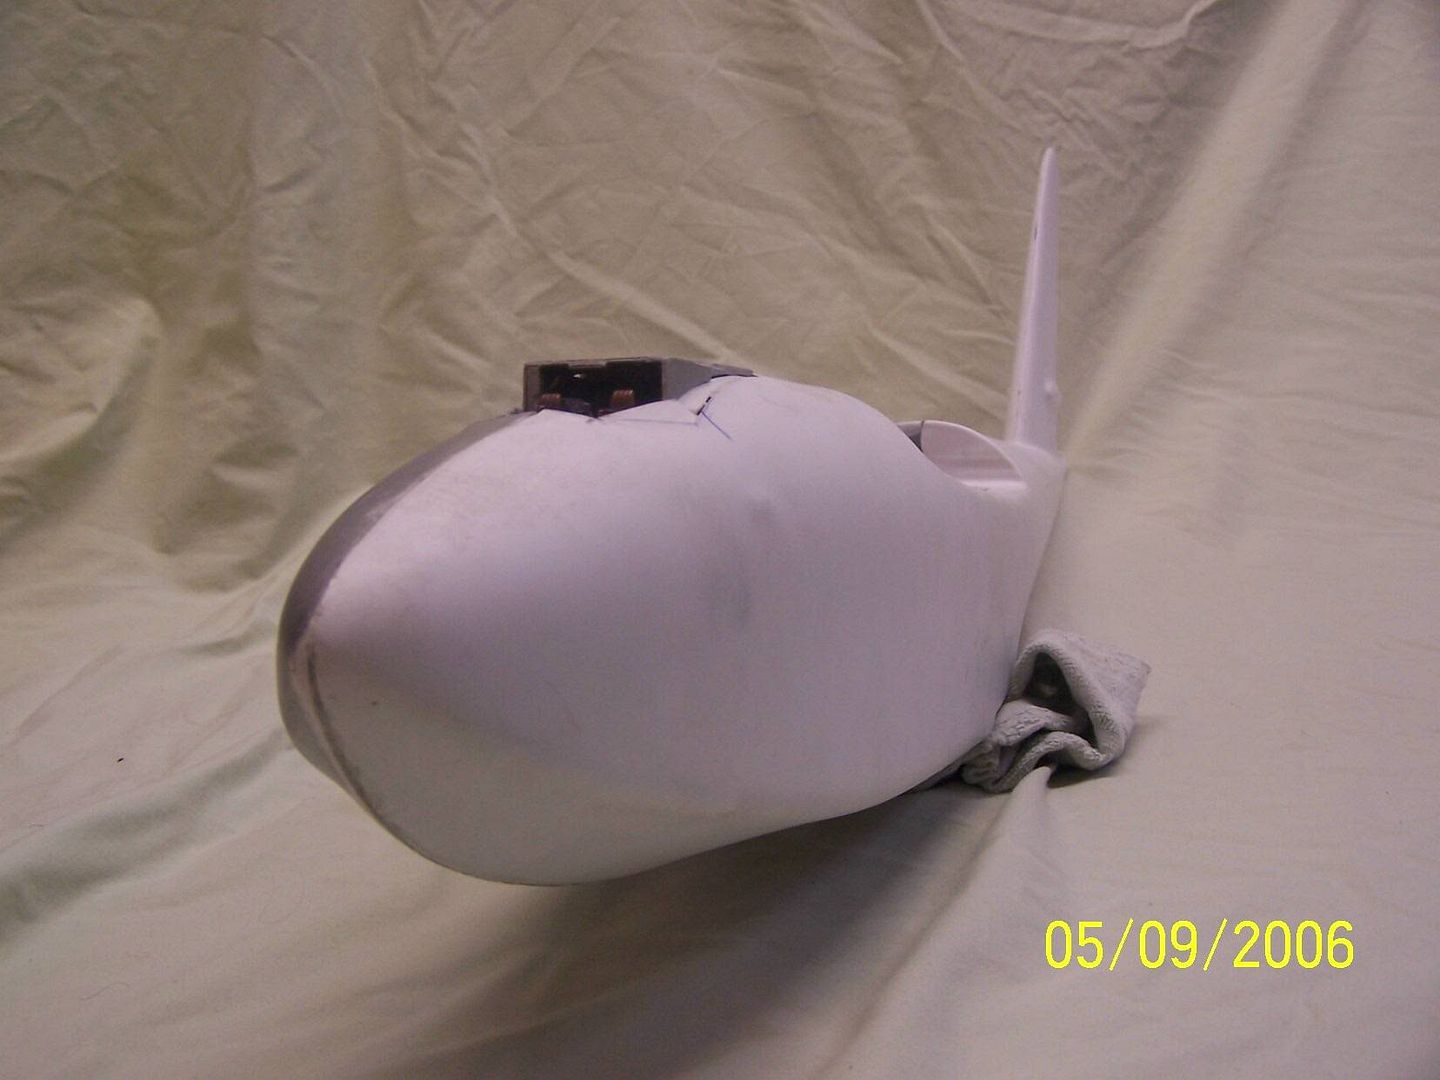
(Notice rounded bottom edges)

And now:
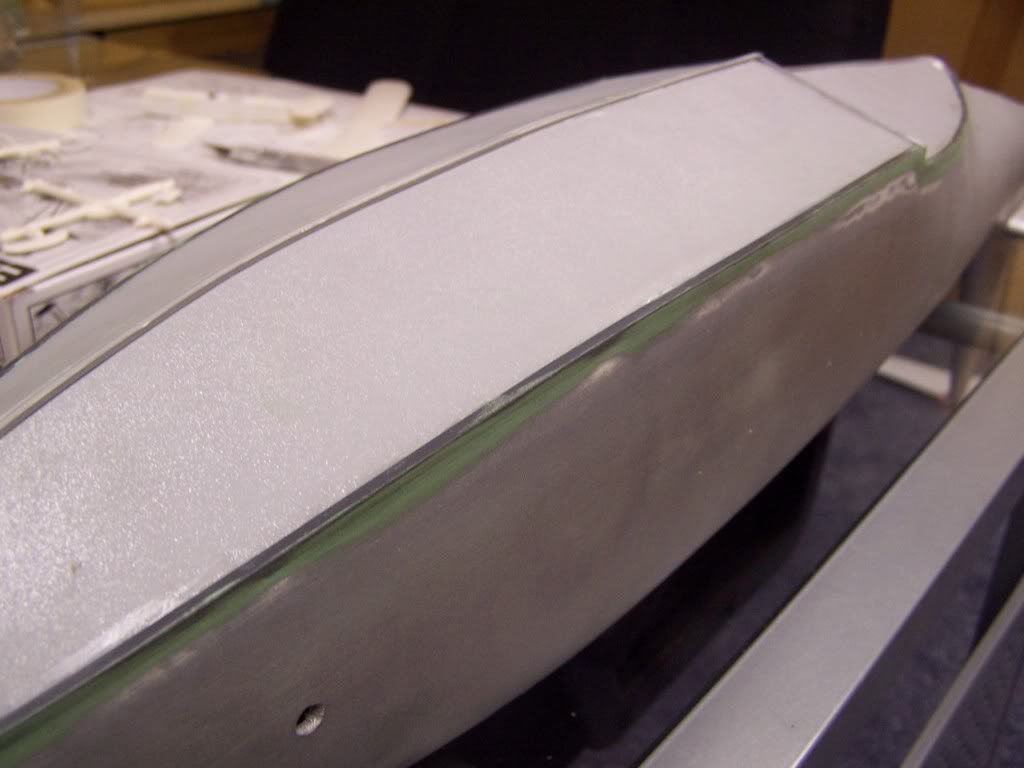
I still have a bit of work to do (UNDERSTATEMENT!!!!), but you get the idea.

.. 

Hey! Progress!  Woo hoo!  The nex hurdle for me is cleaning up the wing joints.  I'm going to wait to get some epoxy putty so I can resculpt the wingtips.  The bottom wing is about a quarter inch longer than the top, and it leaves a shelf at the tips (---I__).  Bad drawing, I know.  Either way, it'll require some major work.

But hey- at least I'm doing something, right?  Stay tuned for more! 

That which does not kill you makes you stranger...
-The Joker
  • Member since
    November 2004
  • From: Columbia Gorge
Posted by brain44 on Monday, May 28, 2007 10:03 AM

Now I am getting really excited to see the finished a/c, Mike!  I have followed your progress from day one, and I applaud you and your modeling skills! Bow [bow] This build is a winner in anyone's book!  If you decide to enter it in contests, it'll be a Blue Ribbon winner for sure! Keep the updates coming and thanks (once again) for sharing with us mere mortal builders!  Cool [8D]

Brian  Cowboy [C):-)]

"I won't be wronged, I won't be insulted, and I won't be laid a hand on. I don't do these things to other people and I expect the same from them." John Bernard Books (The Shootist)
  • Member since
    January 2003
  • From: 40 klicks east of the Gateway
Posted by yardbird78 on Monday, May 28, 2007 10:16 PM

You are certainly making great progress on the Goose.  Keep the updates coming.

Darwin, O.F.  Alien [alien]

 ,,

The B-52 and me, we have grown old, gray and overweight together.

  • Member since
    June 2003
  • From: A Computer in Adrian, (SE) Michigan.
Posted by Lucien Harpress on Friday, July 6, 2007 10:41 PM

Here I go again, dredging this thread up from obscurity to add a few more tidbits of my eternal struggle to build this monster of a kit and get it looking at LEAST half-way decent.

Today our focus is on the motors.  The original Goose used eight Pratt and Whitney R-4360s, a 28 cylinder 4300 horsepower engine.  It was the largest production piston engine ever built, and was used in many large post-war aircraft, like the B-36.  Despite this enormous amount of power, however, the Goose was still underpowered.  Howard Hughes actually designed it around the much larger, 36 cylinder 7500 hp Lycoming R-7755, which unfortuantely never reached the stage of mass production.

As for MY rendition of these engines, I went a bit smaller (but still pretty big)- take a look.

(Astute observers will notice I only have seven engine nacelles completed.  This is because I managed to break off one of the leads on my last electric motor, rendering it useless.  I'll have to order more before I go on.)

Now, these might not seem that big.  But compare them to two other pieces of equipment:

The large nacelle is from the Goose.  The smaller nacelle is a BWM 801, a standard German 18 cylinder radial and the one used on the Fw 190.  The airplane is another of my "in-progress" builds, a Bf 109, something I'm sure EVERYONE has.  Now, the 109 was not a large aircraft by any means.  But compare it to the Goose nacelle, and that should tell you something.

That's it for now.  Next up should be some work on the ailerons (my first attempt was a bust), hopefully rather soon.

Thanks for looking! 


That which does not kill you makes you stranger...
-The Joker
  • Member since
    November 2003
  • From: Virginia
Posted by JoeRugby on Friday, July 6, 2007 11:01 PM
Wow...amazing, simply amazing.  I like the scale/size comparison.  How did the vac-former work out?
Check out the WW I Special Interest Group @ http://swannysmodels.com/yabb/YaBB.pl?board=WW1SIG
  • Member since
    June 2003
  • From: A Computer in Adrian, (SE) Michigan.
Posted by Lucien Harpress on Friday, July 6, 2007 11:04 PM

I haven't tried it, yet.  Next time I order some putty from Squadron (really, REALLY soon!) I'll add some clear plastic to the order so I actually have something to VAC-FORM with!

I'll let you know as SOON as I get something! 

That which does not kill you makes you stranger...
-The Joker
  • Member since
    September 2003
  • From: South Central Wisconsin
Posted by Daywalker on Saturday, July 7, 2007 11:56 AM

Absolutely outstanding!  Mike, glad to see someone is keeping the putty manufacturers in business, especially in this age of shake-n-bake kits! 

Keep the progress posts coming, a lot of people are watching you on this one!

Frank 


  • Member since
    December 2005
  • From: Germany
Posted by jeff on Sunday, July 8, 2007 3:29 AM

Now THATS an incredible model!  You're really going to have something to be proud of there!

"Congratulations, gentlemen! You're everything we've come to expect from years of government training." Zed (Men in Black) [IMG]
  • Member since
    January 2003
  • From: 40 klicks east of the Gateway
Posted by yardbird78 on Sunday, July 8, 2007 11:16 AM
 Lucien Harpress wrote:

The large nacelle is from the Goose.  The smaller nacelle is a BWM 801, a standard German 18 cylinder radial and the one used on the Fw 190.  The airplane is another of my "in-progress" builds, a Bf 109, something I'm sure EVERYONE has.  Now, the 109 was not a large aircraft by any means.  But compare it to the Goose nacelle, and that should tell you something.

Thanks for looking! 

Are you trying to say that the Goose model is LARGE?????????????  ROFLMAO

Darwin, O.F.  [aien] 


 ,,

The B-52 and me, we have grown old, gray and overweight together.

  • Member since
    February 2007
  • From: Bournemouth UK
Posted by Luftwoller on Sunday, July 8, 2007 12:08 PM

Awesome Mike, Simply awesome. Cant wait to see this one wired up. Remember to tether the beast when you 1st fire up the motors cos that thing is going to try to get airborne. Itl also blow everything in your workshop all over the place. lol.

...Guy

..'Your an embarrassment to the human genus, makes me ashamed to call myself Homo'.
  • Member since
    December 2006
  • From: Scottsdale AZ
Posted by spaltro3 on Friday, July 13, 2007 1:34 PM
Was that a cottage manufacturer kit ( Combat Models maybe ) or did you scratchbuild from plans? If scratchbuilt I would be interested in where you found the plans. I'd like to do one someday after I clear the 1/72 747 off my to do list...
  • Member since
    June 2003
  • From: A Computer in Adrian, (SE) Michigan.
Posted by Lucien Harpress on Friday, July 13, 2007 3:00 PM

It was a (VERY) limited run cottage vacuform by Heavykits.  He only made 25 of them, which he sold (rather quickly) on Ebay.  The only other guy I know who has one is bwr1 on this site, and he's in the middle of a few other REALLY large projects, so he's nowhere near starting it (I think).

Heavykits has recently sold the molds on Ebay, and I have no idea is the buyer plans to use them to make more.

As for plans, a few only came out very recently.  People were trying to charge royalties on them and all that...  in any case, here's all I can give you in the way of those:

http://www.seawings.co.uk/sprucegooseplangal.htm

I guarentee these are all the plans you are going to find, short of contacting the Evergreen Aviation Museum itself. 

That which does not kill you makes you stranger...
-The Joker
  • Member since
    June 2003
  • From: A Computer in Adrian, (SE) Michigan.
Posted by Lucien Harpress on Sunday, July 15, 2007 8:15 PM

Sigh...

I realized why it's taking me so long to get this thing finished.  Every time I end up fixing one of the kit's deficiencies, I find two or three more things that need fixing!!

My latest "discovery"?  The flap housings.  You know, those huge things that stick out of the bottom of the wing by the flaps?  Yeah.  I was GOING to work around them when I add the flaps, but once I tried, I made a sad realization- it would be eaiser just to take 'em off and make new ones.

So I did.

I'll probably have to carve a new master out of balsa (not hard), vacuform it with my nifty little vac-table, and then cast a bunch of copies in resin.

A pain in the butt?  Oh yes.  

But with this kit, what else is new?   Dead [xx(]


---

Just for reference, here's all the stuff I've replaced on this kit:

-Elevators

-Rudder

-Flight deck roof

-Ailerons

-Flaps

-Nacelle mounts

-Hull edges

-Flap acutator housings 

Notice two things- first, these are not things I added- these are things I replaced.  Cut out, sanded down, scratchbuilt, and faired back into the whole.  Second, these are not small details.  These are major, intrigal parts of the airframe as a whole.  I haven't even gotten to adding details yet!

Oh, boy....    I need a nap...

That which does not kill you makes you stranger...
-The Joker
  • Member since
    June 2003
  • From: A Computer in Adrian, (SE) Michigan.
Posted by Lucien Harpress on Wednesday, July 25, 2007 10:25 PM

Okay, another small update for everybody.  I've began work on one aileron:

It's the same story as the rudder and elevators- thin basswood to hold the pattern, thicker balsa to form the leading edge, and balsa strips to represent the ribs.  This will all be coated in glue-laden tissue paper later, and then attached to the model.

I also have one of the flaps attached; I just need to fair it into the wing a bit better on the bottom.  Then I need to carve a master for the actuator housings underneith, and vac-form me about eight of them. 

That which does not kill you makes you stranger...
-The Joker
  • Member since
    April 2005
  • From: Piscataway, NJ!
Posted by wing_nut on Thursday, July 26, 2007 6:08 AM

Ah back to the goose... all is right in the world and balance has been brought back to the universe.Wink [;)]

The aileron reminds me of my days building RC... kinda miss gluing up the wood airframes sometimes.  And that one looks like it is about the same size as one on an RC ship.

Marc  

  • Member since
    September 2003
  • From: South Central Wisconsin
Posted by Daywalker on Thursday, July 26, 2007 7:52 AM
 wing_nut wrote:

The aileron reminds me of my days building RC... kinda miss gluing up the wood airframes sometimes.  And that one looks like it is about the same size as one on an RC ship.

Sign - Ditto [#ditto] I was thinking the same thing!  Looks like you've got yourself one heck of a project on your hands.  The Goose is gonna be a head turner for sure!Thumbs Up [tup]

Frank 


  • Member since
    February 2007
  • From: Bournemouth UK
Posted by Luftwoller on Thursday, July 26, 2007 11:03 AM

Hey Wingnut, I reckon you could do a 1/144 Goose and it would fit in one of those nacelles. lol.

Great work though.

...Guy

..'Your an embarrassment to the human genus, makes me ashamed to call myself Homo'.
  • Member since
    June 2003
  • From: A Computer in Adrian, (SE) Michigan.
Posted by Lucien Harpress on Friday, August 10, 2007 2:10 PM

Hey!  Guess what?  I have ANOTHER UPDATE!!!

I got the one aileron all covered up with tissue paper and mounted to the wing.  After long last, this one wing has a trailing edge again!

This photo does, however, showcase one of my Goose's dirty little secrets.  Let's just say I use this type of paper for its structural integrity and NOT the pattern....


(Sigh).  Say what you will....

(Although let me tell you, the stuff works great!  Big Smile [:D]

That which does not kill you makes you stranger...
-The Joker
  • Member since
    February 2005
  • From: Cleveland, OH
Posted by RadMax8 on Friday, August 10, 2007 3:25 PM

Wow, Mike. That's precious. I wonder what your bedroom walls look like...

Just joking. I'm glad to see some progress on the Goose. We're just that much closer to seeing her in all her glory. Mike I bet you're beginning to have nightmares about paint. You might as well start saving up for the 10 gallons of industrial primer it'll takeWink [;)]

  • Member since
    June 2004
  • From: Tucson
Posted by cardshark_14 on Friday, October 26, 2007 1:32 PM
Mike, this is truly impressive...I'm looking forward to see it finished, if we live that long Wink [;)] Quick question for you...what is the aircraft in the first picture on the first page? It looks like it is made of parts of a Bv 222, parts of an Fw 200, and the tail section of a lancaster or halifax...What gives? Is it a Ta 400?
Never trust anyone who refuses to drink domestic beer, laugh at the Three Stooges, or crank Back In Black.
  • Member since
    June 2003
  • From: A Computer in Adrian, (SE) Michigan.
Posted by Lucien Harpress on Friday, October 26, 2007 3:16 PM

THAT little monstrosity was my attempt to build a Ju 390 out of the parts that were left over from my Ju 290Z.  Too late did I realize I'd made too many major mistakes, and the finished model would have looked like ka-ka anyway.  So, I "junked" it.  Pun intended.

A Ta 400, eh... maybe for another day!

And I promise, I WILL get working on my Goose again!  Soon!  There's just the flap actuator housings to make (vac) and the starboard aileron and flap, and then I can MAYBE get the wings attached to the fuselage! 

That which does not kill you makes you stranger...
-The Joker
  • Member since
    June 2004
  • From: Tucson
Posted by cardshark_14 on Friday, October 26, 2007 11:04 PM
Well, it looked good in the picture...especially that paint scheme...that is wild!  Is that something you came up with or was it actually used on something?  
Never trust anyone who refuses to drink domestic beer, laugh at the Three Stooges, or crank Back In Black.
  • Member since
    June 2003
  • From: A Computer in Adrian, (SE) Michigan.
Posted by Lucien Harpress on Saturday, October 27, 2007 7:50 AM

The paint scheme was the remnant of my original build.  Check it out HERE.

As for the Ju 390, it WAS a real aircraft.  It was a stretched Ju 290 built in keeping with the German philosophy of wringing as much performace out of an airframe while keeping parts commonality high between versions.  Two were built, with the V2 rumored to have flown within 12 miles of New York City, although this claim is disputed.

In that photo, the details aren't shown that made me junk it.  The nose is too short (with no way to fix it), the fuselage has a distinct kink in it that I noticed too late, and the seams are so bad that a model I would've been happy with was impossible.  I will eventually build another one, but that's is in the far-off distant future.

Thanks for your interest in the subject! 

That which does not kill you makes you stranger...
-The Joker
  • Member since
    June 2004
  • From: Tucson
Posted by cardshark_14 on Monday, October 29, 2007 4:43 AM
Mike, that looks great!  I absolutely love that paint scheme...still...Big Smile [:D]  I had heard about the Ju 390, but the paint scheme is what's new to me.  What reference did you find it in?  I'm looking at building a Ta 183 Nachtjager, and that looks like the perfect camo for it.  If it's your design, I'll find something else, but if that was actually used, that'd be awesome.  Oh, and your Spruce Goose looks great, no matter what your wallpaper is. Smile [:)]  Hopefully you don't Focke it up...Wink [;)]
Never trust anyone who refuses to drink domestic beer, laugh at the Three Stooges, or crank Back In Black.
  • Member since
    June 2003
  • From: A Computer in Adrian, (SE) Michigan.
Posted by Lucien Harpress on Monday, October 29, 2007 9:00 AM

The design was based off this one here:

http://modelingmadness.com/reviews/axis/luft/bioll111.htm

The idea was for a low level night ocean camo scheme.  The undersides were black, and the "wave mirror" on the upper surfaces was meant to mimic the reflection of the moonlight on the waves.  Definitely one of the neatest designs I'VE ever seen.

Go ahead and use it!  I'll look forward to seeing your Ta 183 all gussied up in it.

And yes, I'll try not to "Focke" it up.  Very nice. Big Smile [:D]  

That which does not kill you makes you stranger...
-The Joker
  • Member since
    May 2007
  • From: Seattle
Posted by PeeweeBiggs on Monday, October 29, 2007 9:11 PM

When the Goose is complete and placed onto a stand could you, or would you, run those 8 engines in reverse? You would have one awesome room fan if you did it.


Peewee

Free worldwide shipping www.pacifictrading.hk
JOIN OUR COMMUNITY!

Our community is FREE to join. To participate you must either login or register for an account.

SEARCH FORUMS
FREE NEWSLETTER
By signing up you may also receive reader surveys and occasional special offers. We do not sell, rent or trade our email lists. View our Privacy Policy.