SEARCH FINESCALE.COM

Enter keywords or a search phrase below:

60th Anniversary Korean War Group Build- extended for the duration

764411 views
3335 replies
1 rating 2 rating 3 rating 4 rating 5 rating
  • Member since
    December 2010
  • From: Yangju, Gyeonggi-Do, Korea
Posted by the_draken on Saturday, December 15, 2012 5:43 PM

OOPS!  Nevermind, found the cowls...

Just being a moron.

________________________________________________________________________________

Andy Hill (the_draken) landrew.hill(at)live.com <*> ASE Master Auto Tech, Imaca certified.  >^.^<

PADI OWSI Certified, BA Poli Sci (NDSU), BS Secondary ED-Social Studies MSUM (Sigma *** Laude)

  • Member since
    November 2009
  • From: SW Virginia
Posted by Gamera on Saturday, December 15, 2012 6:34 PM

Good to hear it, I've misplaced way too many parts myself.

Sharp looking F-89! Love those two colour wing tanks.

"I dream in fire but work in clay." -Arthur Machen


  • Member since
    December 2010
  • From: Yangju, Gyeonggi-Do, Korea
Posted by the_draken on Monday, December 17, 2012 11:42 PM

Working on the vac-form Globemaster II.

I'll be building the interior, possibly having the elevator down.  I've got plenty of strip styrene for interior bracing and what not.  Lotsa sheet styrene for the floors and other things.  I'm going to be doing a B version which has less flap actuators than the A.  The early a/c had eight actuators per wing, the later a/c had five.  The actuators are really flimsy little things and I'd feel a lot more comfortable if they were solid.  So, here's the question:

Is there something that I can fill them with (entirely filled) that won't craze or destroy the plastic, but yet will set very hard?

I'm thinking of maybe a two part epoxy?  Along the lines of JB Weld (common in auto parts and hardware stores).  I've used JB stick (a two part clay type substance) but it's exothermic and would warp the thin styrene as it hardens.

Any suggestions guys?Big Smile

________________________________________________________________________________

Andy Hill (the_draken) landrew.hill(at)live.com <*> ASE Master Auto Tech, Imaca certified.  >^.^<

PADI OWSI Certified, BA Poli Sci (NDSU), BS Secondary ED-Social Studies MSUM (Sigma *** Laude)

  • Member since
    July 2004
  • From: Sonora Desert
Posted by stikpusher on Tuesday, December 18, 2012 1:57 AM

How about some gel super glue?


F is for FIRE, That burns down the whole town!

U is for URANIUM... BOMBS!

N is for NO SURVIVORS...

       - Plankton

LSM


  • Member since
    November 2009
  • From: SW Virginia
Posted by Gamera on Tuesday, December 18, 2012 8:52 AM

I'd think either epoxy or superglue would work, never used either for filling so I really don't know much about heat build-up. Maybe try a small test part you're not going to use first?

"I dream in fire but work in clay." -Arthur Machen


  • Member since
    July 2004
  • From: Sonora Desert
Posted by stikpusher on Tuesday, December 18, 2012 2:20 PM

I don think superglue puts off any heat while curing. (It never feels hot on my fingers when I manage to get that stuff on them...) Only those fogging fumes.


F is for FIRE, That burns down the whole town!

U is for URANIUM... BOMBS!

N is for NO SURVIVORS...

       - Plankton

LSM


  • Member since
    November 2009
  • From: SW Virginia
Posted by Gamera on Tuesday, December 18, 2012 7:03 PM

Well, just got the final items to finish the M40, just need the time to get the work done now! 

And Masterbox announced this set of figures, not  totally accurate, the boots and puttees are from a early to mid WW2 uniform rather than the late WW2/Korea. Still changing the boots ought to be easier than modifying a set of Dragon infantrymen like I'd intended:

Link to Dragon USA site

"I dream in fire but work in clay." -Arthur Machen


  • Member since
    September 2003
  • From: Australia
Posted by Helo H-34 on Monday, December 31, 2012 3:39 AM

Hi everyone ;

I should apologies for my prolonged absence from the Forum pages . Sadly my father past away in November and everything has been a bit of a struggle since .

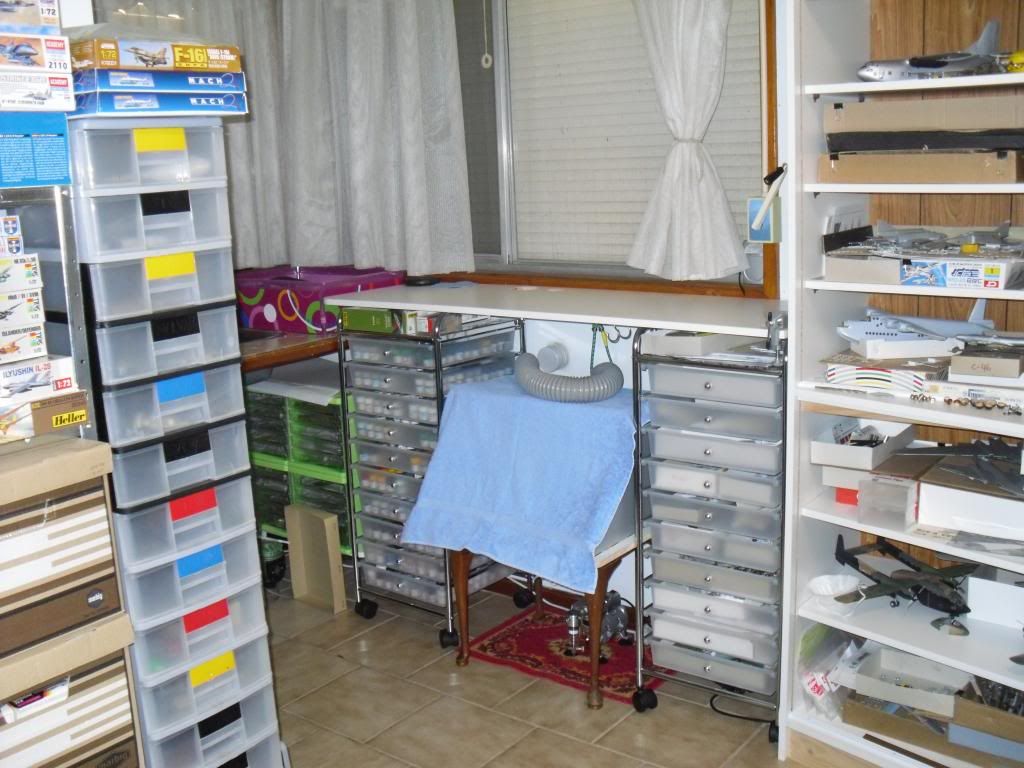
I haven't done any type of scale modelling for over two months but hopfully I can back into the groove before too long . This past week I decided to make some changes to my hobby work area by moving the three large display cabinets downstairs and have the spraybooth upstairs . This seemed to be a better arrangement to have both the construction / buiding area and airbrushing in the same section and certainly saves from endless trips up and down the stairs .

Here's a pic of the sprayboth when not in use sitting on a small stool/table under the bench

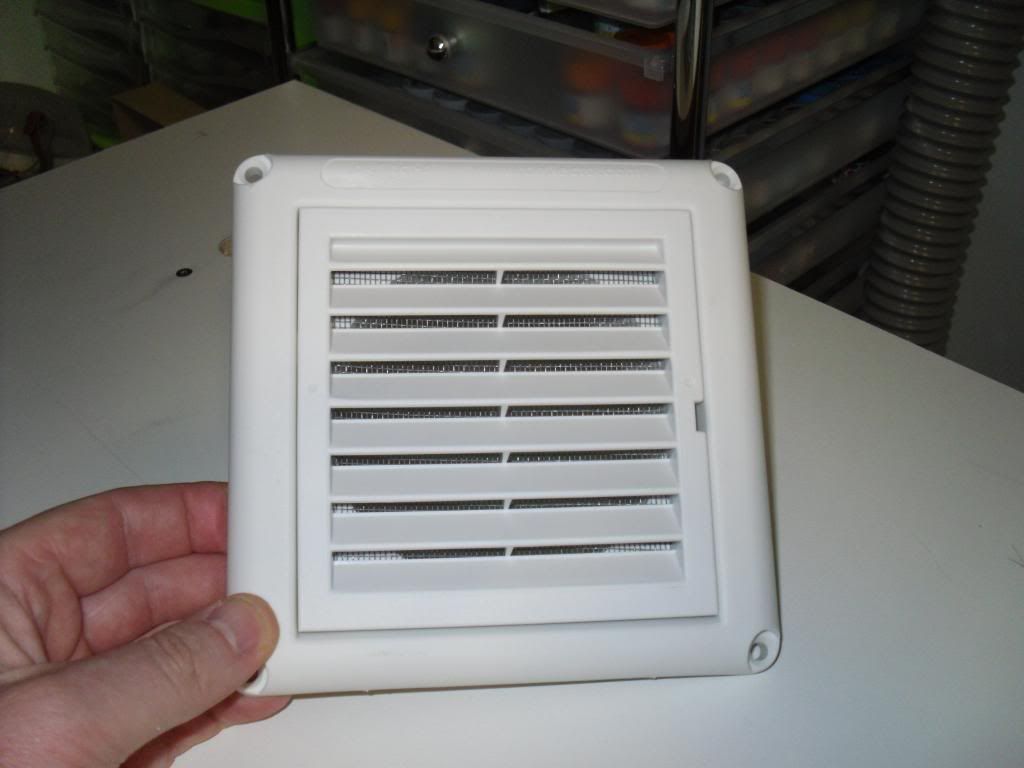
Instead of having the exhaust hose sticking out the window through a hole cut through the flyscreen , I went to the local hardware store and bought a vent with some internal mesh fitted

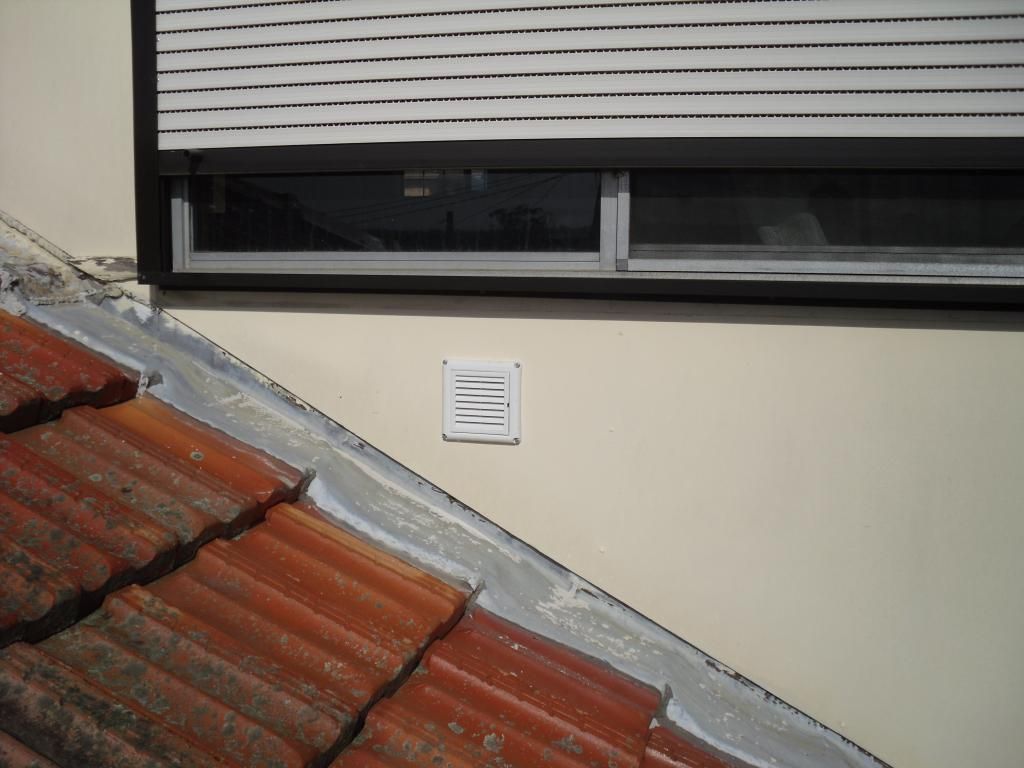
 I then set up the extension ladder , carefully climbed up onto the downstairs roof and drilled out to fit the vent through the wall

The spraybooth then sits up on top of the bench , ready for airbrushing .

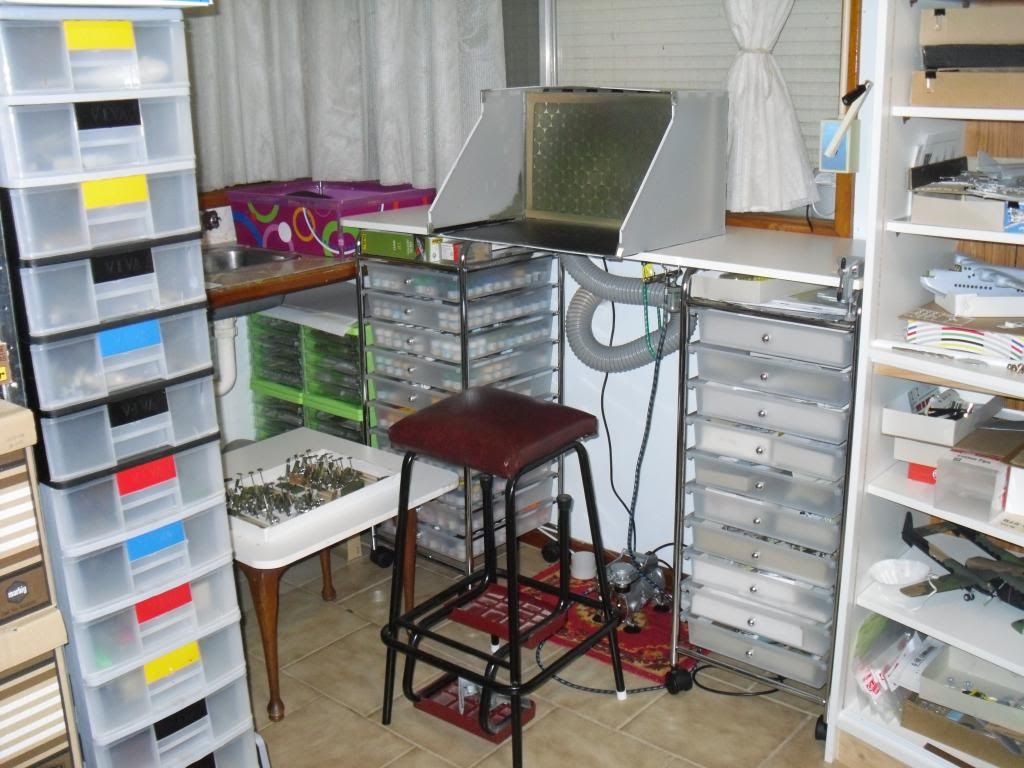
This next pic shows the exhaust hose coming down through the hole cut in the bench along with the power cable and you can see the cap that fits over the pipe that extends through the wall to keep out the draft when the spraybooth is not in use

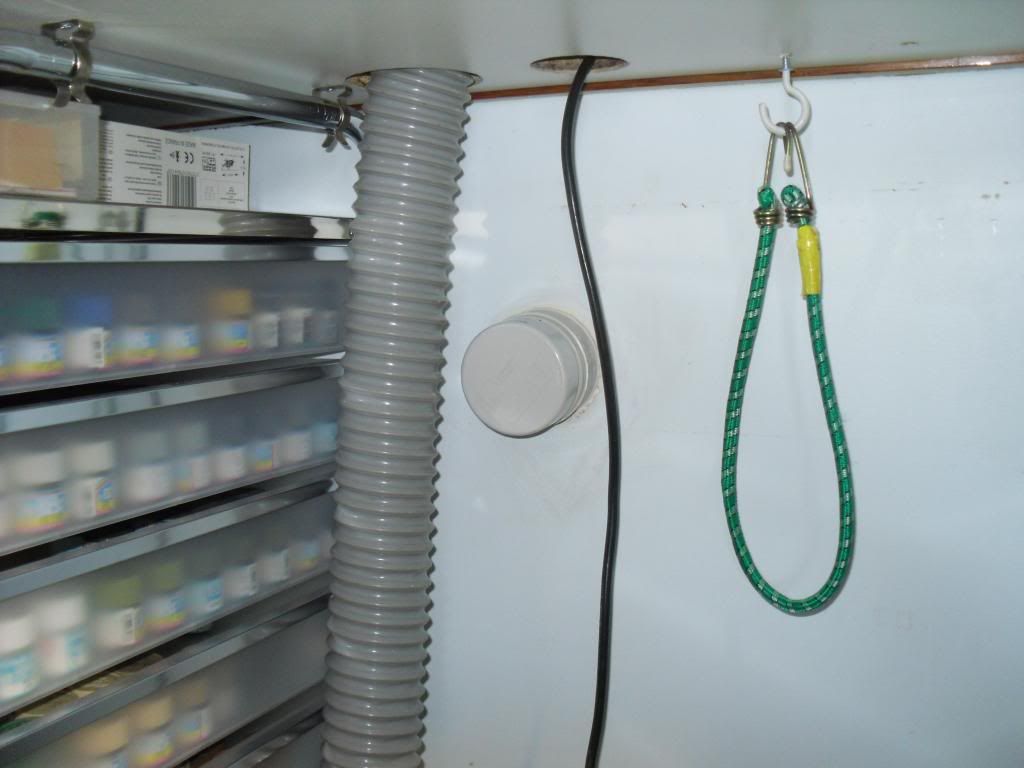
The table that the spraybooth sits on when not in use also doubles as a work area to place items on that are ready for airbrushing .

So that's what I've this past week , I should mention that I successfully moved 250 finished model kits with only a extenal wing fuel tank coming off a USMC AV-8A Harrier , the tail skid popped of the AJ-2 Savage and one main rotor blade fell off an IDF Blackhawk . Only three minor breakages from several hundred trips up and down the stairs . I had to unscrew and unbolt all three dispaly cabinets carry the pieces downstairs and put them back together . All up a successfull project but it took a full week to do ...Wink

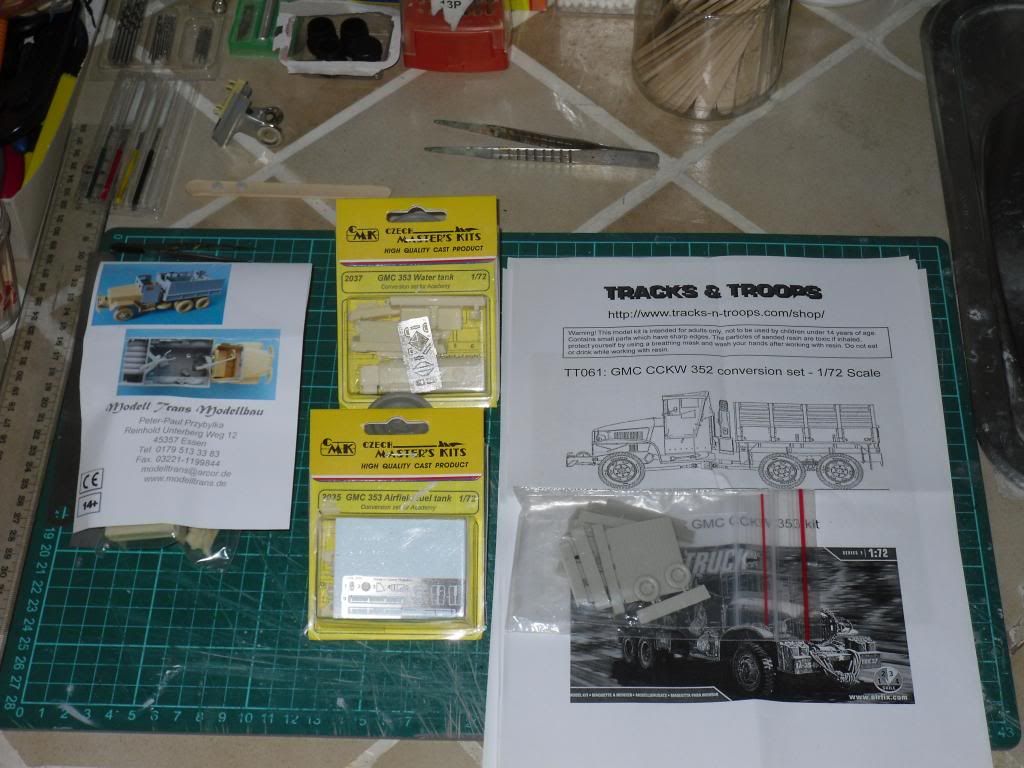
For Christmas I got some more resin accessorys for my GMC Duece and a half trucks , a Tracks and troops 352 "short wheel bae" conversion , CMK's 353 Water tanker and airfield refueler all for the airfix GMC truck kits and an M35 Gun truck conversion for the academy 2.5 Ton truck

Anyway I hope everyone had a great Christmas ; Mom , my brother and myself had a nice Christmas lunch here at home and we lit a small candle and put in dads place at the table , so I guess here was there in spirit too .

All the best for the New Year .

John .


  • Member since
    November 2009
  • From: SW Virginia
Posted by Gamera on Monday, December 31, 2012 7:54 AM

John: I'm sorry to hear about your dad, I was talking with some friends that one of the worst parts of getting older is losing people you thought would be around forever when you were younger.

Nice hobby room there, my modeling stuff is upstairs and my airbrush and compressor are in the basement so it seems like I have to run up and down the stairs about fifty times to get anything done. Good exercise I suppose but really annoying.

"I dream in fire but work in clay." -Arthur Machen


  • Member since
    July 2004
  • From: Sonora Desert
Posted by stikpusher on Monday, December 31, 2012 2:56 PM

Helo, my condolences for your loss. I know the feeling all too well over the past year and a half. The loss effects everyone in the your family quite profoundly.

But the time away from the bench has obviously been put to good use by you. That is a very impressive work area you have set up now. And that sounds pretty good to have only dinged three kits during the move. My move last year resulted in a total loss on a kit or two, and more than three damaged builds.

We will still be here when your model building *** returns and your ready to share your work again here.


F is for FIRE, That burns down the whole town!

U is for URANIUM... BOMBS!

N is for NO SURVIVORS...

       - Plankton

LSM


  • Member since
    April 2005
  • From: Australia
Posted by taxtp on Monday, December 31, 2012 8:40 PM

Hi John,

My thoughts are with you too, it's a hard thing to go through and I still think of my dad a lot although it was a long time ago now.

Great work area, put my closet of modelling to shame. I like the quality of your modifications too.

I really look forward to seeing your builds on these pages again.

Happy New Year to all, make it a good one.

Cheers

Tony

I'm just taking it one GB at a time.

  • Member since
    December 2010
  • From: Yangju, Gyeonggi-Do, Korea
Posted by the_draken on Friday, January 18, 2013 9:41 PM

Long time no see, folks!

I'm still haphazardly working on the C-124 kit.  It's a bugger!  I'm still planning on building the interior and doing a bit of detailing there.  Which is crazy considering how "that looks about right" I'm going about doing the rest of the kit.  Anyway, here's where I'm at:

The little holes in the window areas are pilot holes for using a larger drill.  They're too big for a pin vise bit, so I'm going to buy a new drill and use my regular drill motor in a stand on super low speed.  Then I'll just use the Testors' clear plastic adhesive and window maker (can't get Micro-Krystal Kleer) to make a tuckus load of windows!

The engine cowlings are together and painted, the nacelles are together and sanded.  I'm going to put the wings together before I completely finish the nacelles and try to mess with the engines/cowlings/props.  The props themselves are also painted, I've got the front wheels together and painted, and I want to get the upper deck created before working on the cockpit.  I had a REALLY cool plan to build the main deck by using thin balsa wood on a sheet of styrene.  But I can't find a decent adhesive.  I've given a shot at Elmer's white glue and that made the styrene warp!  And it didn't hold anyway.  I'm going to try a THICKER balsa veneer on a THICKER styrene sheet and see what happens.  I'm hoping to have it completed in time for a contest in April.  Fat chance, but everyone's allowed their pipe dreams.  Big Smile

Hope you guys are having fun!

In my personal life, I'm starting to get a bit better re: chronic fatigue that seems to have hit me starting back in about July or so.  Still don't know what it is, but I have some good days and bad.  I've also gotten my foot looked at and fixed (I've had a hole in it from ripping the callus off during taekwando practice about a year and a half ago) ande now I'm going to college taking classes and a couple of phys-ed electives.  Including taekwando, WITH the doctor's permission!

So, I hope everyone's doing well!

________________________________________________________________________________

Andy Hill (the_draken) landrew.hill(at)live.com <*> ASE Master Auto Tech, Imaca certified.  >^.^<

PADI OWSI Certified, BA Poli Sci (NDSU), BS Secondary ED-Social Studies MSUM (Sigma *** Laude)

  • Member since
    November 2009
  • From: SW Virginia
Posted by Gamera on Friday, January 18, 2013 9:58 PM

Draken Andy: It's good to talk to you again and glad to hear things are getting somewhat better. Nice looking C-124- is it 1/72 or 1/144? Big friggin' plane in any scale.

I've been working on the tread links on the M40 for the past two weeks or so. Each tread has four friggin' parts and I think it's about 70 links per side...Dead

"I dream in fire but work in clay." -Arthur Machen


  • Member since
    December 2010
  • From: Yangju, Gyeonggi-Do, Korea
Posted by the_draken on Friday, January 18, 2013 10:49 PM

Gamera

Nice looking C-124- is it 1/72 or 1/144? Big friggin' plane in any scale.

I only build in God's Own Scale of 1/72...  Cool

________________________________________________________________________________

Andy Hill (the_draken) landrew.hill(at)live.com <*> ASE Master Auto Tech, Imaca certified.  >^.^<

PADI OWSI Certified, BA Poli Sci (NDSU), BS Secondary ED-Social Studies MSUM (Sigma *** Laude)

  • Member since
    November 2009
  • From: SW Virginia
Posted by Gamera on Friday, January 18, 2013 11:45 PM

Ahhh, just noticed the glue tube in the first photo, does give a sense to how big the thing really is.

"I dream in fire but work in clay." -Arthur Machen


  • Member since
    September 2003
  • From: Australia
Posted by Helo H-34 on Saturday, January 19, 2013 12:17 AM

Hi Andy and Cliff , good to hear from both you guy's .

Clifff , good luck with all those links on the M40 tracks .

Andy , you probably already have some reference material for your C-124 build , here's some pic's from my C-124 Globemaster book by Earl Berlin

John .

  • Member since
    September 2003
  • From: Australia
Posted by Helo H-34 on Saturday, January 19, 2013 12:21 AM

Some more C-124 pics

  • Member since
    September 2003
  • From: Australia
Posted by Helo H-34 on Saturday, January 19, 2013 12:23 AM

One more pic

John .


  • Member since
    December 2010
  • From: Yangju, Gyeonggi-Do, Korea
Posted by the_draken on Saturday, January 19, 2013 12:43 AM

SUH-HUWEEEEEEEET!  I don't have a single one of those pictures!  I was just going off of stuff I had found off of the net.  The best picture I'd found was here:

http://amcmuseum.org/exhibits_and_planes/c-124.php

I'm going to model the cargo deck like the one shown in this set.  And I greatly thank you for the pics you've put up, I didn't relish going through all of my old print photos to try and find my pics of the cargo elevator!

YesCool

________________________________________________________________________________

Andy Hill (the_draken) landrew.hill(at)live.com <*> ASE Master Auto Tech, Imaca certified.  >^.^<

PADI OWSI Certified, BA Poli Sci (NDSU), BS Secondary ED-Social Studies MSUM (Sigma *** Laude)

  • Member since
    July 2004
  • From: Sonora Desert
Posted by stikpusher on Saturday, January 19, 2013 2:59 AM

All right! Some activity here! I was getting ready to give this thread a bump up this weekend. Great to see you Draken and Helo!

One note on the C-124 photos, that is a M24 Chaffee tank, not any of the M46/47/48/60 Patton series tanks.


F is for FIRE, That burns down the whole town!

U is for URANIUM... BOMBS!

N is for NO SURVIVORS...

       - Plankton

LSM


  • Member since
    September 2003
  • From: Australia
Posted by Helo H-34 on Monday, January 21, 2013 4:45 AM

Nice correction on the M24 Chaffee Tank Stikpusher ...Wink

I have three helicopter builds on-going on the bench along with a newly started RAF Jaguar jet but I might have enough room left for a 1/72 SC-47D Air Rescue Skytrain .

I bought these decals from a seller on ebay and they arrived in the mail today

initially I bought them for a Golden Knights C-47 build but I also spotted the Air Rescue Service and United States Air Force lettering on the decal sheet which should suit a Korean War SC-47D version

I'm not sure about the " ARS DET 6 " markings for the Korean War , the few reference pic's I have show a slightly different squadron markings

The SC-47 in the bottom pic posted above shows a "ARS IRS FLT.C" markings which are similar to what Academy have in their 1/72 SB -17 kit . I have two SB-17's in the stash , so I guess I could easierly swap the microscale decal for the academy one .

In any case , I think I can make room for Italeri's C-47 kit on the bench and also seeing that a couple of my helicopter interiors and the RAF Jaguar wheel wells are interior green , I'll mix enough paint to do the interior of the SC-47 as well

Ironicly the C-47 kit came with RAAF (Royal Australian Air Force) markings from the 1950's but sadly the red lettering is quite different to what I have seen in my reference books of Aussie C-47 in the Korean War but I'll save those for something else . Also the red boarded Stars and Bars on the microscale SC-47 sheet will have to be replaced as well .

So it's a SC-47 to start of 2013 for the final 6 month tour of duty

John


  • Member since
    November 2009
  • From: SW Virginia
Posted by Gamera on Monday, January 21, 2013 7:40 AM

Awesome John, it's good to see you back at the bench!

"I dream in fire but work in clay." -Arthur Machen


  • Member since
    September 2003
  • From: Australia
Posted by Helo H-34 on Tuesday, February 5, 2013 4:57 PM

I've only managed to spray some interior green to the C-47 interior pieces so far , my progress has been quite slow .

While looking around ebay this morning I stumbled across a 1/72 Academy CH-47D ROK Chinook , which is a re-box of the italeri kit .

There's an in-box review of the kit on scalerotors and a link

http://mmzone.co.kr/mda/docview.php?id=304

It appears that Academy have re-boxed the Italeri MH-47E SOA Chinook , which I have in the stash

Anyway , I bought the Academy/Italeri ROK Chinook this morning off ebay , it will probably take up to two weeks to arrive , so I might as well work on my italeri kit and cut the sponsons off and fit the larger ones , by the time I get the chinook together the Academy should arrive and I can get the paint -camouflage instructions  . (just a bit of kit swapping seeing their both identical kits)

I'm assuming the ROK CH-47D would suit the modern era theme of the Korean War GB ?

John .


  • Member since
    July 2004
  • From: Sonora Desert
Posted by stikpusher on Tuesday, February 5, 2013 6:49 PM

Yes, the CH-47 i n current ROK markings would be a great addition here. I look foward to seeing it here.

As for me, my family and I just moved across town here, so we are in the process of setteling in to our new home. While my work bench was successfully moved, it is behind stacks of stuff, so I do not forsee myself getting back to any work there for about a week or so...


F is for FIRE, That burns down the whole town!

U is for URANIUM... BOMBS!

N is for NO SURVIVORS...

       - Plankton

LSM


  • Member since
    November 2009
  • From: SW Virginia
Posted by Gamera on Tuesday, February 5, 2013 6:53 PM

John: Looks pretty cool, long time since I built a chopper.

SP: Ah, hadn't seen you for awhile, thought maybe you were taking a little break. Good luck with the move. Whatta PITA - it seems to take forever to get everything set back up the way you want it.

I finally got those goshawful five part per link T80 tracks done for the M40. I want to try some colour modulation and such so I'm kinda stuck on doing it on the M40 or something smaller and simpler first.

"I dream in fire but work in clay." -Arthur Machen


  • Member since
    July 2004
  • From: Sonora Desert
Posted by stikpusher on Tuesday, February 5, 2013 8:00 PM

I have had my hands full with this move over the past couple weeks... starting to downshift finally. I need to figure out my next KW start that I can complete before July. I would really like to do the old Dragon M46, but those dang tracks are a PITA. Or maybe the Dragon M4A3 Howitzer/Flamethrower... not that those tracks are any easier...


F is for FIRE, That burns down the whole town!

U is for URANIUM... BOMBS!

N is for NO SURVIVORS...

       - Plankton

LSM


  • Member since
    September 2003
  • From: Australia
Posted by Helo H-34 on Tuesday, February 5, 2013 11:50 PM

I'm glad to hear the house move went okay Stik .

I cut the sponsons off the fuselage halves ;

There's a very small gap at the front near the cabin door , only because I filed the top edge cutout square;

Anyway the major "plastic surgery" is done , I'm just wondering about the interior colour . Do most modern Chinooks have 'night vision capability' , I'm thinking the cockpit floor and front fuselage interior might be flat black with the cabin section dark gull gray ?

John .

  • Member since
    July 2004
  • From: Sonora Desert
Posted by stikpusher on Wednesday, February 6, 2013 12:59 AM

I cant answer for ROK, but on current US Chinooks the troop compartment is gray and the cockpit is black


F is for FIRE, That burns down the whole town!

U is for URANIUM... BOMBS!

N is for NO SURVIVORS...

       - Plankton

LSM


  • Member since
    September 2003
  • From: Australia
Posted by Helo H-34 on Sunday, February 10, 2013 10:38 PM

I started some interior painting on the ROK Chinook

I think italeri made a mistake with the placement of the cabin windows , they suggest fitting them from the inside of the fuselage

I'm sure the fit from the outside of the fuselage

I checked Airfix's Chinook instructions and they show the windows fitting from the outside

Anyway , my interest has returned to finishing off the series of GMC 353 trucks I started a while back

It will take a while to mask the wheel hubs with blu-tack so I can airbrush the tyres flat black/rubber

Lot's to do .

John .


  • Member since
    November 2009
  • From: SW Virginia
Posted by Gamera on Sunday, February 10, 2013 11:46 PM

Nice John! That's a pile of wheels there!

"I dream in fire but work in clay." -Arthur Machen


JOIN OUR COMMUNITY!

Our community is FREE to join. To participate you must either login or register for an account.

SEARCH FORUMS
FREE NEWSLETTER
By signing up you may also receive reader surveys and occasional special offers. We do not sell, rent or trade our email lists. View our Privacy Policy.