SEARCH FINESCALE.COM

Enter keywords or a search phrase below:

StuG. Group Build. 1/1/2011- 6/30/2011

35728 views
177 replies
1 rating 2 rating 3 rating 4 rating 5 rating
  • Member since
    September 2007
  • From: Relocating
Posted by Mobious on Sunday, January 30, 2011 8:05 AM

 Monty, Progress is looking goodYes Like the cut away fender and the figie on top. Looking forward to seeing updates!

 Tiger, Wow, nearing the finish. The added stowage looks cool. Looking forward to seeing weathering updates!


"It's a problem of applied physics" Roy Brown

  • Member since
    September 2009
  • From: Rugby, England
Posted by Hinksy on Sunday, January 30, 2011 9:16 AM

Hi Dale,

I'm DEFINATELY in - I'm a big fan of the StuG III & IV's and have just picked up my second one.

My first was the old Dragon Wittman StuG III Ausf A and I've just bought the Tamiya StuG III Ausf B as it's a superb looking kit with aluminium barrel supplied and some nice PE with a detailed interior too! Not a standard Tamiya kit!

I'll be building OOB (hopefully) with only a bit of stowage added as extra. The kit does only come supplied with one piece vinyl tracks so I'm going to try them and see how they look. I can imagine that they won't look great so in that event it will be Friul or Modelkasten time!

I'm looking at a used and abused dusty build on which I want to try some new methods which was the main reason I bought this kit in the first place.

I'm currently completing my WIP Tamiya JSU-152 which is very nearly there so I'll give you a start date of 12th January. 

Kind regards,

Ben Toast

On the Bench - Dragon Pz. IV Ausf. G (L.A.H.) Yes

Your image is loading...


  • Member since
    December 2009
  • From: Memphis<Tenn.
Posted by Monty Watts on Wednesday, February 2, 2011 12:31 PM

Hi Guys                Got alittle color on it..............

     Monty

  • Member since
    August 2008
  • From: S.W. Missouri
Posted by Pvt Mutt on Wednesday, February 2, 2011 4:08 PM

It's takin on that look Monty.Yes

Tony leeSmile

Shoot Low Boys They're Ridin Ponys

  • Member since
    September 2008
  • From: Minneapolis MN
Posted by BigSmitty on Wednesday, February 2, 2011 4:19 PM

Hinsky,

That's the build I'm going to be doing as well, the new release Tamiya IIIB.  It's a REALLY nice kit, had it for a while.  I bought it after building the 1/48th IIIB which was a dream to build.  Wouldn't be surprised if they used those molds as the basis for the 1/35th version. Haven't started on it yet, as I'm just finishing up an extremely busy month at work, but have some down time scheduled to get friendly with my Stuggy...


Matt - IPMS #46275

"Build what ya love and love what ya build..."

Build Logs, Rants and Humor


  • Member since
    December 2009
  • From: Memphis<Tenn.
Posted by Monty Watts on Thursday, February 3, 2011 12:17 PM

Hi Guys...........Heres a few more pic's.....still got alot to do......


Monty

  • Member since
    August 2008
  • From: S.W. Missouri
Posted by Pvt Mutt on Thursday, February 3, 2011 3:13 PM

Hey I see you hung your bike on the back so when you get to the camp grounds you can run to the Quick Stop and get a loaf of bread and beer.Beer

Lookin Good Dude

Tony LeeSmile

Shoot Low Boys They're Ridin Ponys

  • Member since
    January 2011
  • From: Springfield, MA
Posted by TigerEP1 on Friday, February 4, 2011 3:54 AM

Monty that bike addition is fantastic! shes coming along nicely!


So heres my minor update, finally got that damn wheel on..lol and started rusting the sides back etc. Lots more to do but wanted to show something.


On the bench:

1/35th Tamiya Willi's MB


  • Member since
    December 2009
  • From: Memphis<Tenn.
Posted by Monty Watts on Friday, February 4, 2011 5:50 AM

Thanks Tiger.............Are you going to put side plates on yours?  Looking good...........Monty

  • Member since
    January 2011
  • From: Springfield, MA
Posted by TigerEP1 on Friday, February 4, 2011 6:14 AM

Thanks Monty!

The kit did not supply any side armor, just the mountings which i find very odd. If i can find a good reference I may attempt to scratch build some.

On the bench:

1/35th Tamiya Willi's MB


  • Member since
    September 2009
  • From: Rugby, England
Posted by Hinksy on Friday, February 4, 2011 6:46 AM

Hey buddy,

She does look like a really good kit and I had no idea that there was any sort of interior detail so you can imagine my surprise on opening the box.

I'm putting the finishing touches to my current WIP JSU-152 this weekend and I'll be starting this StuG III next weekend. I do love my StuGs and any German SPG really but the squat little 'thugs of the battlefield' really do build up very well.

I'm thinking that an aftermarket set of tracks will be needed as the vinyl tracks supplied just won't be up to the job (imo).

ATVB

Ben Big Smile

On the Bench - Dragon Pz. IV Ausf. G (L.A.H.) Yes

Your image is loading...


  • Member since
    January 2011
  • From: Springfield, MA
Posted by TigerEP1 on Sunday, February 6, 2011 3:23 PM

Well i wanted to get some better pics and i think i did. Still tons more to do but will be slow over the next 3 days due to work. Oh and i added .... A BUCKET!

lol


On the bench:

1/35th Tamiya Willi's MB


  • Member since
    February 2007
Posted by Slightly Altered on Sunday, February 6, 2011 8:01 PM

These are really looking great guys!!!!!

There should be another one starting up fairly soon here, just have to get a couple things done at the shop the next couple weeks... Busy as can be still Wink


Dale

  • Member since
    December 2009
  • From: Memphis<Tenn.
Posted by Monty Watts on Tuesday, February 8, 2011 10:27 AM

Well am finished with my stug.....enjoy


monty

  • Member since
    September 2008
  • From: Minneapolis MN
Posted by BigSmitty on Tuesday, February 8, 2011 11:20 AM


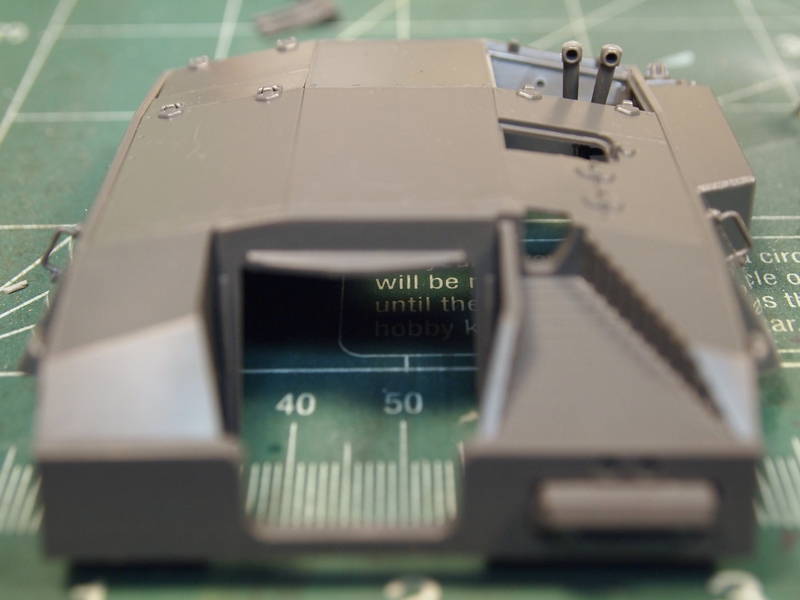
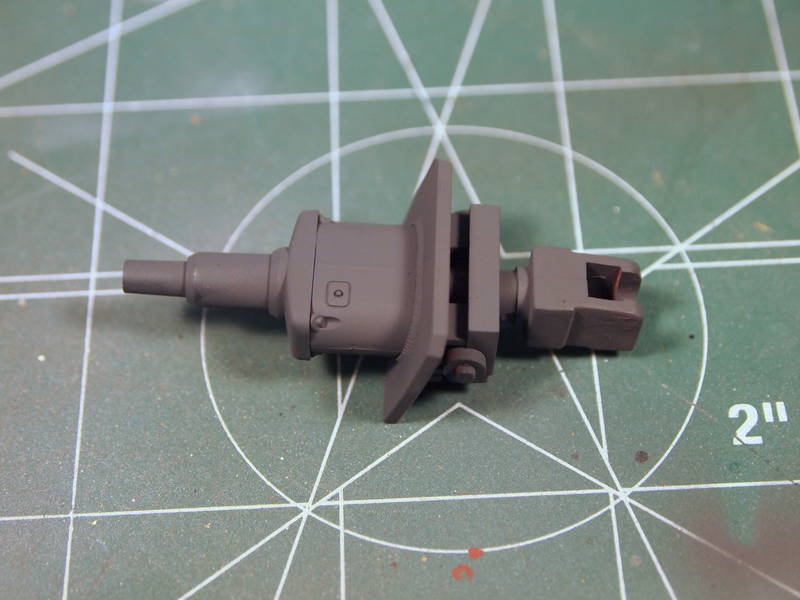
Well, I actually got time over the past few days to start up on my Tamiya StuG IIIB with the teeny weenie aluminum barrel and all five PE pieces.  I know, I'm such a rebel.  Anyways, the kit is typical Tamiya, although there is an issue with the periscopes' mounting location.  The instructions would have you thread it through an open hatch that it can't possibly fit in, but they have a correction on their USA website showing where it should be.  Actually it's a no brainer, as there is only ONE hatch it can properly fit through. 

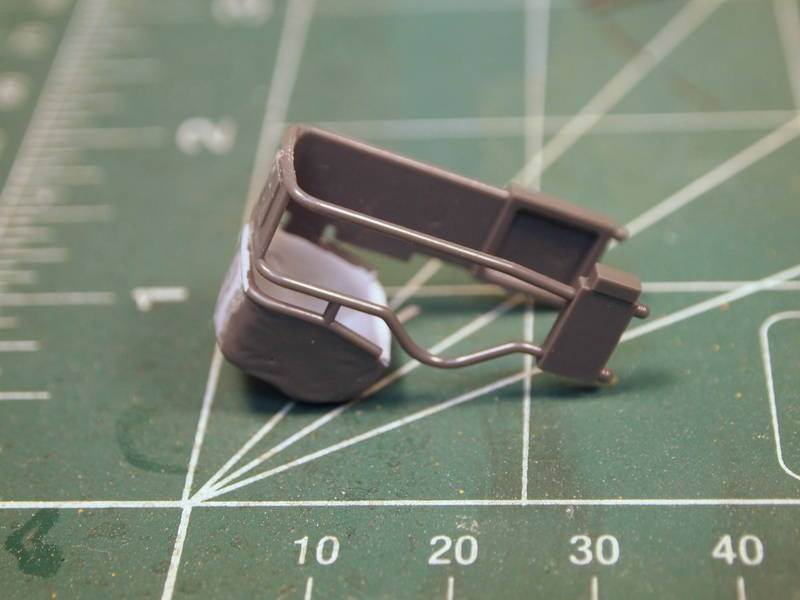
Another thing to watch out for if anybody is building this.  Sprue "E" is actually attached to Sprue "A" as there are two of them.  Sprue "E" contains the correct movable suspension parts, not the ones on Sprue "A". 

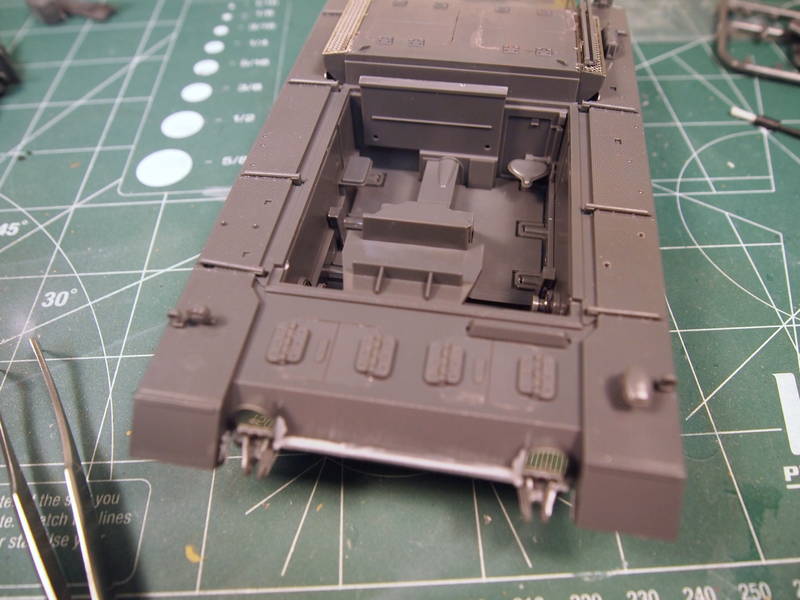
Enough about that, pretty basic build, no major gaps, but I did have to squeeze the front half of the lower hull to mate up with the upper hull, maybe a tiny bit of warp, but I've had the kit for six years in various temps through three moves, so could be all on me.

On to the photos:

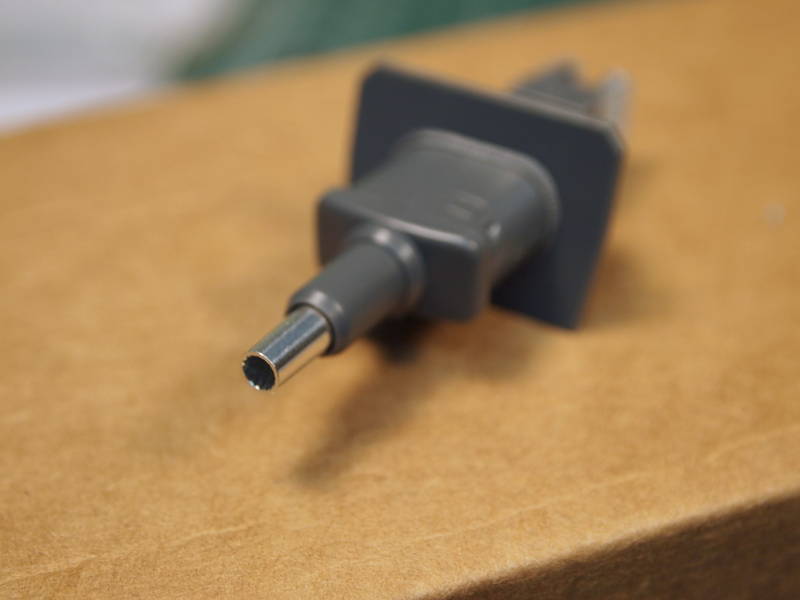
For those of you who like free things to help with your modeling, I present the "Velveeta Cheese Mini Parts Holder":

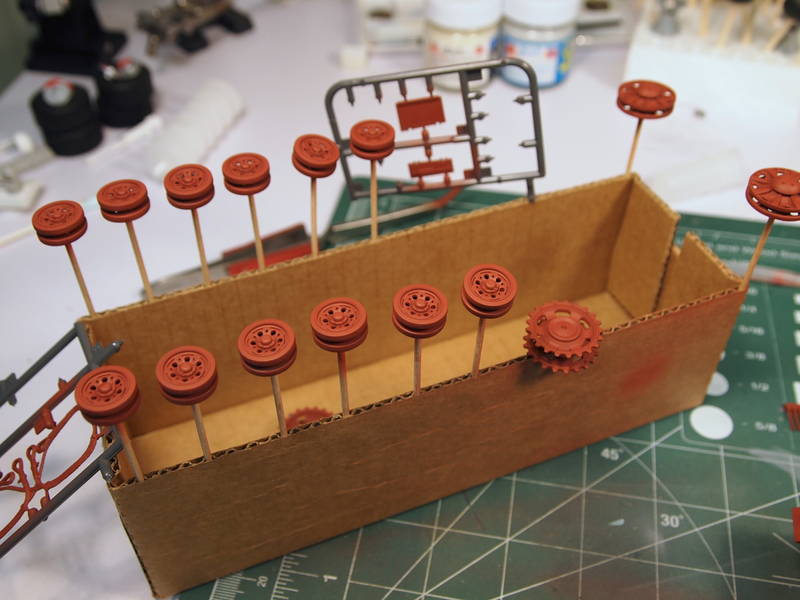
Tried to use liquid masking film on the interior to show some wear, but I think it's a bit overdone.  I used a toothpick on some smaller foot traffic area to show through the Panzer Interior Buff in some other areas more effectively.

Still have quite a bit left to do.  Road wheels, sprockets and idlers need painting, haven't started on the tracks yet, and looking for a couple of misc items to throw on the back as it looks too empty.  Also waiting on some Hornet replacement heads to show up for our fearless commander.  The Tamiya kit head looks horrible.

Matt - IPMS #46275

"Build what ya love and love what ya build..."

Build Logs, Rants and Humor


  • Member since
    February 2007
Posted by Slightly Altered on Tuesday, February 8, 2011 7:46 PM

Great looking build Monty!!! Everything you've done works together to make it a stunner bud. Really like the chipping too Wink Looks well used.    Please grab your badge my friend, and thank you for being a part of the Group Build. Hope to have ya join in again on another one.

Terrific work going on BigSmitty.  Yours is another one I've been wanting to get ahold of, so you've got my full attention.


Dale


  • Member since
    December 2009
  • From: Memphis<Tenn.
Posted by Monty Watts on Tuesday, February 8, 2011 11:11 PM

Hi Dale,,,,Thank you...I enjoyed it...and you can count on me to join the next build.....Monty

  • Member since
    December 2009
  • From: Memphis<Tenn.
Posted by Monty Watts on Wednesday, February 9, 2011 5:51 AM

Hi Dale.....How I do get the badge......sorry to have bothered you...........Monty

  • Member since
    February 2007
Posted by Slightly Altered on Wednesday, February 9, 2011 6:28 AM

PM incoming Monty  Big Smile

  • Member since
    December 2009
  • From: Memphis<Tenn.
Posted by Monty Watts on Wednesday, February 9, 2011 7:18 AM

I think I got it.........Monty

  • Member since
    May 2005
  • From: Dublin Rep Of Ireland
Posted by terry35 on Wednesday, February 9, 2011 5:41 PM

Hi Dale,

I would love the opportuinity to join in on this build, I know I'm late but its a great subject and reading through is brilliant.

Now as for the finish date, i can try my very best to complete on time but I could need an over run, If this is not possible I can fully understand, as I'm late and its your build.

The kit I'm propossing to build is  the following Dragon kit,

As you can see it's a limited one from Dragon EXPO '07 Europe. It's the Stug commanded by George Bose.

I would propose to try a hairspray technique for the Whitewash camo.

Anyway if you want to contact my I can be reached at the following.

terry35@gmail.com

THanks for taking the time to read my post,

Regards,

Terry.

  • Member since
    December 2009
Posted by ww2psycho on Wednesday, February 9, 2011 5:53 PM

I posted this in the 8th AF GB as well. Unfortunatly my mine is already shifting to paintball this summer and loosing interest in model building until next fall/winter. I'm not saying I'm 100% out, the only time i'll have to work on any models is weekends if there isnt any overtime, and every 3rd week since I wont be on 3rd shift. I can hopefully get it done before the end date, I got a lot of construction done and would hate to quit now. Time will tell.

btw, everyones stug looks amazing!

  • Member since
    September 2008
  • From: Minneapolis MN
Posted by BigSmitty on Thursday, February 10, 2011 12:10 AM

Getting closer to the finish line with my IIIB.  Here are some photos of "Big Brother, Little Brother" or my current 1/35 build and the 1/48 Tamiya StuG IIIB I did a couple of years ago for a Weekend GB here on FSM:


On to Big Brother now...  I got everything basecoated either Panzer Interior Buff or German Grey yesterday.  This morning before I left for work, I gloss coated with Future, so I could let it cure during the day.  Pioneer tools, jack block, tool box and jack were added after decaling and painted separate, with the exception of the tool clasps and the tool box, which will be painted a thinned German Grey before a second sealing coat of Future and I can start the weathering. 

I found an interesting mix for the wood handles.  I took three drops of Vallejo Model Color Leather Brown and one drop of Vallejo Model Color Wood (which is a translucent yellow) and came out with a pretty realistic faded wood color for the tool handles. 

The tracks are the kit vinyl rubber band tracks.  They have been brushed with Vallejo "Oily Steel" with a drop or two of the Vallejo Black Wash mixed in.  For kit rubber band tracks, I think they turned out pretty well.  Guess we'll see how well they hold up after the washes and rust applications are done.

I also found a Floquil color at my LHS this afternoon called "Tarnished Black" that is a dead ringer for Testors enamel "Rubber".  Used it on the cleaning rod cover instead of the Tamiya Flat Black as called out in the painting instructions.  Just a couple of cool little nuggets, I guess.  On with the WIP photos!


Thanks for looking.  I may end up with some extra StuG crew figures if I go back and pick up the MiniArt set over at the LHS.  They had them "red stickered" on clearance for $7.00.


Matt - IPMS #46275

"Build what ya love and love what ya build..."

Build Logs, Rants and Humor


  • Member since
    September 2009
  • From: Rugby, England
Posted by Hinksy on Saturday, February 12, 2011 10:08 AM

Good afternoon Gentlemen!

This is only my second ever GB so I'm really looking forwards to it!

After the success of my Russian JSU-152 I've set the bar high (for myself) on this Stug III - along with the Marder III's it's my favourite of the German SPG's.

It's the same kit as BigSmitty's above which he has done a BRILLIANT job on so far Yes Obviously it does have an interior which I will be fitting and painting but only very basically as it's going to be buttoned up and no part of the interior will be visible.  The single Periscope at the front will be visable but that's it. The gun assembly looks very good so I'm going to build that up and paint and detail that part of the build just for practice really.

I'm going to use markings for Vehicle No.3, 1st Kompanie, 192nd StuGAbt (Assault Gun Battalion), Poland, June '41. I may yet use the red skull which indicates second company.


It's should be a nice simple build as it looks like a typical Tamiya kit! I'm going to try some more 'advanced' methods of weathering and may pick a couple of guy's brains for some assistance (if they don't mind)!

I'm builing OOB as it comes with some PE and an turned Aluminium barrel (I'l probably have to use Friuls or MK's though as it comes only with one piece Vinyl tracks - YUCK imo).

I'm going to start now so update later!

ATVB & thanks for hosting this GB, Dale Yes

Ben Toast

On the Bench - Dragon Pz. IV Ausf. G (L.A.H.) Yes

Your image is loading...


  • Member since
    September 2009
  • From: Rugby, England
Posted by Hinksy on Saturday, February 12, 2011 10:21 AM

Hey guys,

BigSmitty has just informed me of a small flaw with the kit! I was going to have the single periscope in use but apparently that's not possible so I think I'll have the build with the main hatch open and the twin periscope in use.

That means I'm now really going to town on the interior as it will be very visible. It's not a massively detailed interior but it will do the job!

BTW: Can anyone recommend a good 'Off White' Colour for the interior please? Either Tamiya or Vallejo?

Thanks for the heads up Smitty - that saved me a headache!

Off to work on the StuG now!

ATVB

Ben Toast

On the Bench - Dragon Pz. IV Ausf. G (L.A.H.) Yes

Your image is loading...


  • Member since
    September 2009
  • From: Rugby, England
Posted by Hinksy on Saturday, February 12, 2011 1:08 PM

Hi guys,

A nice start but nothing worth showing in a photograph! I'll make the real progress tomorrow - at the minute all the suspension arms are on as it the rear vent and exhaust panel.

One thing that I just could not get to work was the 'working suspension'. It's a bit like the Tamiya Pershing in that small lengths of wire with a loop at each end are fixed into place and allow the wheels to move up and down when pressure is applied and removed to the tank. Only the front and back road wheels are 'sprung' like this - the others are supposed to push in behind a section that sits flush with the inner tub walls. This section is supposed to stop the suspension arms dropping out so you don't need to glue them in place thus allowing the arms to move.

Two arms on one side and three on the other just wouldn't stay put no matter what I did? In the end I decided to glue the arms in a fixed position - I'm not going to play with this model or put it on a diorana so no problem.

WIP update tomorrow,

ATVB

Ben Toast

On the Bench - Dragon Pz. IV Ausf. G (L.A.H.) Yes

Your image is loading...


  • Member since
    March 2003
  • From: Rain USA, Vancouver WA
Posted by tigerman on Saturday, February 12, 2011 1:28 PM

Gentlemen, supurb building so far. 

Monty, is that the Eduard PE or Cavalier zimmerit? It's so hard to find waffle zimmerit.

Excellent.Yes

   http://i7.photobucket.com/albums/y269/wing_nut_5o/PANZERJAGERGB.jpg

 Eric 

  • Member since
    December 2009
  • From: Memphis<Tenn.
Posted by Monty Watts on Saturday, February 12, 2011 2:19 PM

  Hi guy,   it was molded that way.........''Monty

  • Member since
    March 2003
  • From: Rain USA, Vancouver WA
Posted by tigerman on Saturday, February 12, 2011 3:32 PM

Cool, thanks Monty.

   http://i7.photobucket.com/albums/y269/wing_nut_5o/PANZERJAGERGB.jpg

 Eric 

  • Member since
    September 2008
  • From: Minneapolis MN
Posted by BigSmitty on Saturday, February 12, 2011 4:35 PM

So I was down at the Rochester MN IPMS show today, and someone had that StuG with the waffle Zimm as a "built for sale" kit.  He has built the Tamiya IIIB, the IIIG from Dragon and this one.  He said the 10.5cm StuG with the waffle Zimm was the best of the lot.  Great.  Now I gotta go get THAT one.  Also picked up Monogram's StuG IV in 1/72 for $5 on a table.  Figured what the heck right?

Matt - IPMS #46275

"Build what ya love and love what ya build..."

Build Logs, Rants and Humor


JOIN OUR COMMUNITY!

Our community is FREE to join. To participate you must either login or register for an account.

SEARCH FORUMS
FREE NEWSLETTER
By signing up you may also receive reader surveys and occasional special offers. We do not sell, rent or trade our email lists. View our Privacy Policy.