SEARCH FINESCALE.COM

Enter keywords or a search phrase below:

Nose Art Group Build

18210 views
53 replies
1 rating 2 rating 3 rating 4 rating 5 rating
  • Member since
    July 2004
  • From: Sonora Desert
Posted by stikpusher on Thursday, August 30, 2012 4:55 PM

Thank you DJ. Hit me with a PM if you have any questions on anything.


F is for FIRE, That burns down the whole town!

U is for URANIUM... BOMBS!

N is for NO SURVIVORS...

       - Plankton

LSM


  • Member since
    July 2012
Posted by DJinFlorida on Thursday, August 30, 2012 3:20 PM

Very nice looking plane.  I enjoy watching all of your builds.  I am learning a lot just from your WIPs.

-DJ

On the bench: 1/48 Avenger, 1/72 P40B
On daughter's bench: 1/72 ID4 Attacker
On wife's bench: 1/48 P40B
In the stash:  1/48 P-51D Mustang , 1/72 F4F-4 Wildcat, 1/48 Huey Hog

  • Member since
    July 2004
  • From: Sonora Desert
Posted by stikpusher on Thursday, August 30, 2012 3:09 PM

Pretty Penny is all done. But it appears that this GB is quite dead...Dead

so I will post pics of the nose art here and drive on


F is for FIRE, That burns down the whole town!

U is for URANIUM... BOMBS!

N is for NO SURVIVORS...

       - Plankton

LSM


  • Member since
    July 2004
  • From: Sonora Desert
Posted by stikpusher on Wednesday, August 29, 2012 12:47 AM

Well, "Pretty Penny" is getting dirty now... Wink

Today I applied a Burnt Umber wash on all panel lines...


F is for FIRE, That burns down the whole town!

U is for URANIUM... BOMBS!

N is for NO SURVIVORS...

       - Plankton

LSM


  • Member since
    July 2004
  • From: Sonora Desert
Posted by stikpusher on Saturday, August 11, 2012 2:44 PM

A few better shots of the stenciling and a shot of the other side's nose art... (after all this is the "nose art" GB)

Wink


F is for FIRE, That burns down the whole town!

U is for URANIUM... BOMBS!

N is for NO SURVIVORS...

       - Plankton

LSM


  • Member since
    July 2004
  • From: Sonora Desert
Posted by stikpusher on Thursday, August 9, 2012 11:55 PM

Today I applied the rest of the stencils. Most of the pics I tried to take did not come out well, focusing instead on areas that were not what I wanted and not on the stencils...Black Eye

and a better shot of the nose art..


F is for FIRE, That burns down the whole town!

U is for URANIUM... BOMBS!

N is for NO SURVIVORS...

       - Plankton

LSM


  • Member since
    July 2004
  • From: Sonora Desert
Posted by stikpusher on Wednesday, August 8, 2012 12:42 PM

Thanks Tony. Technically this one is Aluminum Lacquer and not true NMF, so I am not too worried about the overall smoothness. And once all my weathering is done it should look the part. But I have never had a problem airbrushing on Future. The pebbly is usually from the thinness of the coat conforming to the flat paint beneath. I just put on more to reduce or remove that.Wink I used it on my last NMF build for the first time, a F-84E Thunderjet, and it came out really nice!


F is for FIRE, That burns down the whole town!

U is for URANIUM... BOMBS!

N is for NO SURVIVORS...

       - Plankton

LSM


  • Member since
    April 2005
  • From: Australia
Posted by taxtp on Wednesday, August 8, 2012 3:56 AM

I'd be happy to have a Hun like that on the shelf Stik. Well done, it must be close. I've never had much luck spraying Future for some reason, always seems to be a bit pebbly. It brushes out really well, but I wouldn't attempt it on a NMF aircraft.

Cheers

Tony

I'm just taking it one GB at a time.

  • Member since
    July 2004
  • From: Sonora Desert
Posted by stikpusher on Wednesday, August 8, 2012 2:48 AM

This morning I airbrushed on a coat of Future and this evening after it dried I applied most of the decals including the nose art. I used an older Super Scale set and the kit decals for National Insignia, USAF, etc. The kit decals were less than co operative at times...


F is for FIRE, That burns down the whole town!

U is for URANIUM... BOMBS!

N is for NO SURVIVORS...

       - Plankton

LSM


  • Member since
    July 2004
  • From: Sonora Desert
Posted by stikpusher on Monday, August 6, 2012 4:52 PM

First up was an overall coat of Tamiya Flat Aluminum

next was Tamiya Gold Titanium on the rear fuselage around the engine

and then Tamiya Silver Titanium on selected areas of the rear and Model Master Jet Exhaust around the Afterburner

Then I painted Flat Black and Aircraft Gray needed on a few antenna areas

and finally I painted the 20mm cannon trough panels MM Oiled Steel

The Squadron Tail Markings Testors square bottle Green

Touch up on the tail skid and emergency landing arrestor hook

And the overall build at this point-

Once the paint has dried and cured overnight tonite, I will airbrush on a coat of Future tomorrow. Hopefully by the afternoon I can begin to apply the decals.


F is for FIRE, That burns down the whole town!

U is for URANIUM... BOMBS!

N is for NO SURVIVORS...

       - Plankton

LSM


  • Member since
    July 2004
  • From: Sonora Desert
Posted by stikpusher on Monday, August 6, 2012 4:31 PM

Well just in case anybody is still here, and since I did join up and the finish date is not here yet...

my work so far...

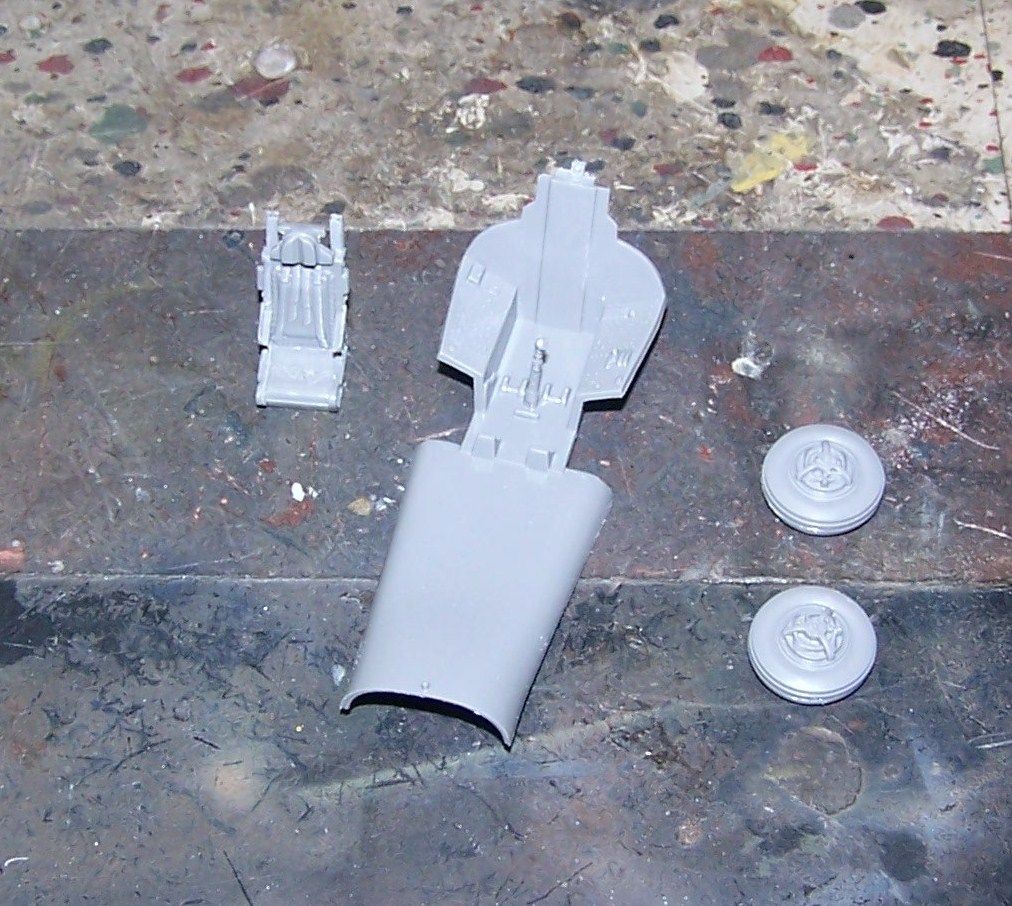
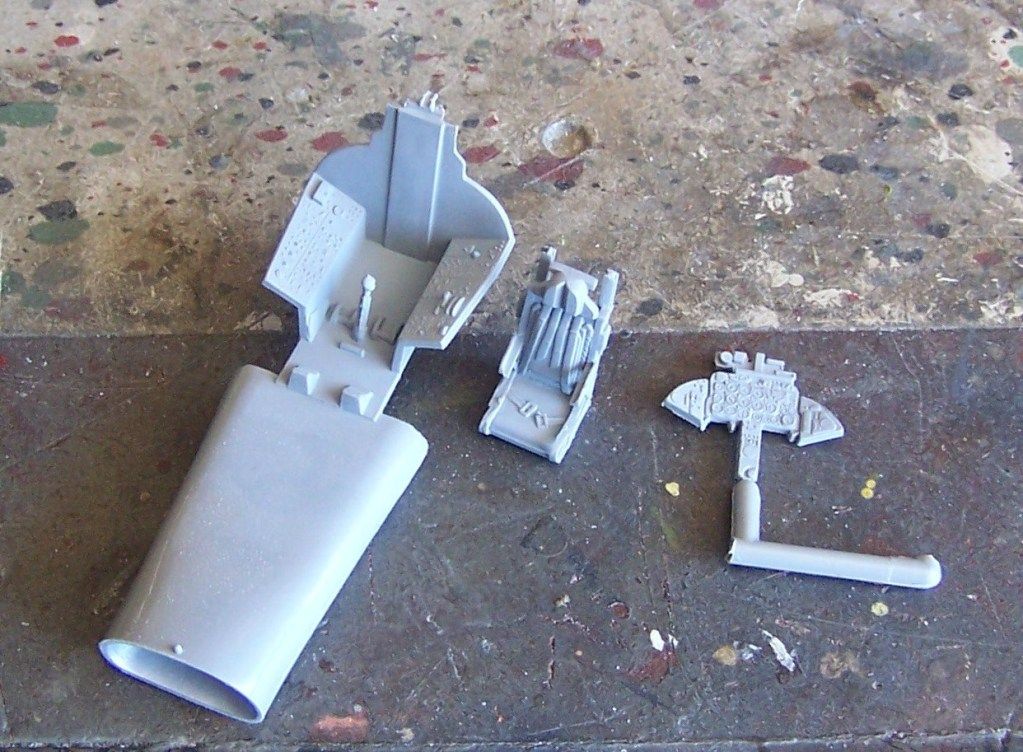
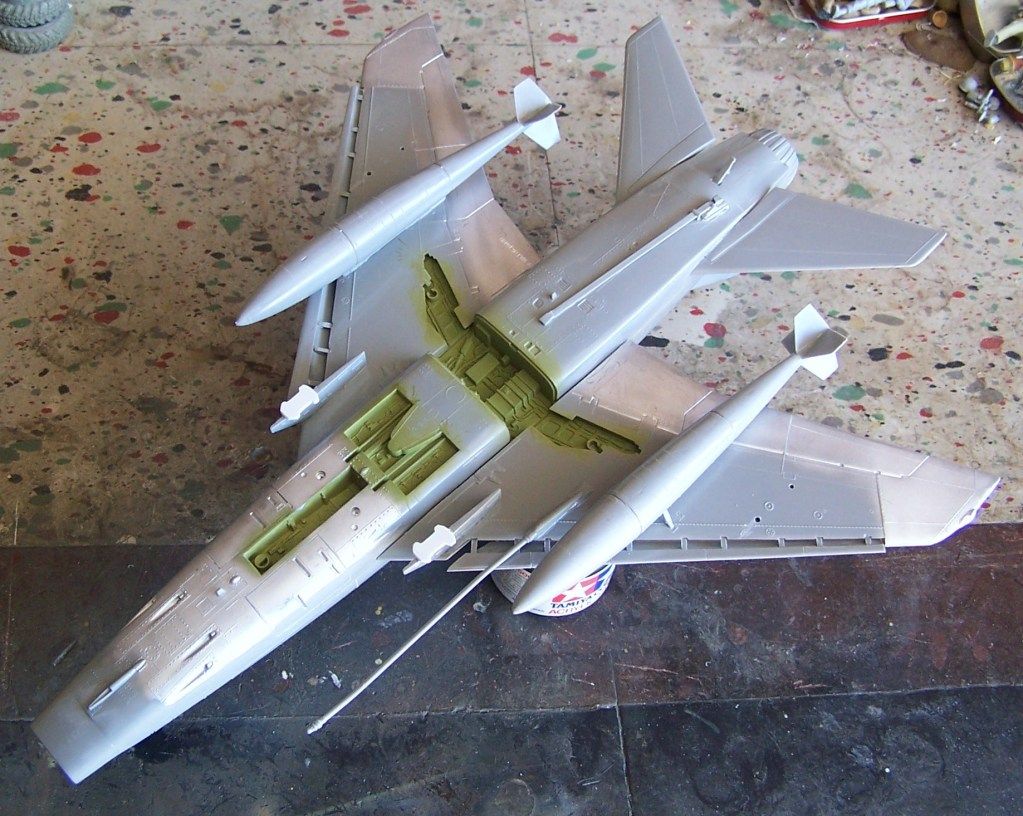
first up, I built everything that I could which did not need initial painting, wings,cockpit, fuel tanks, etc...

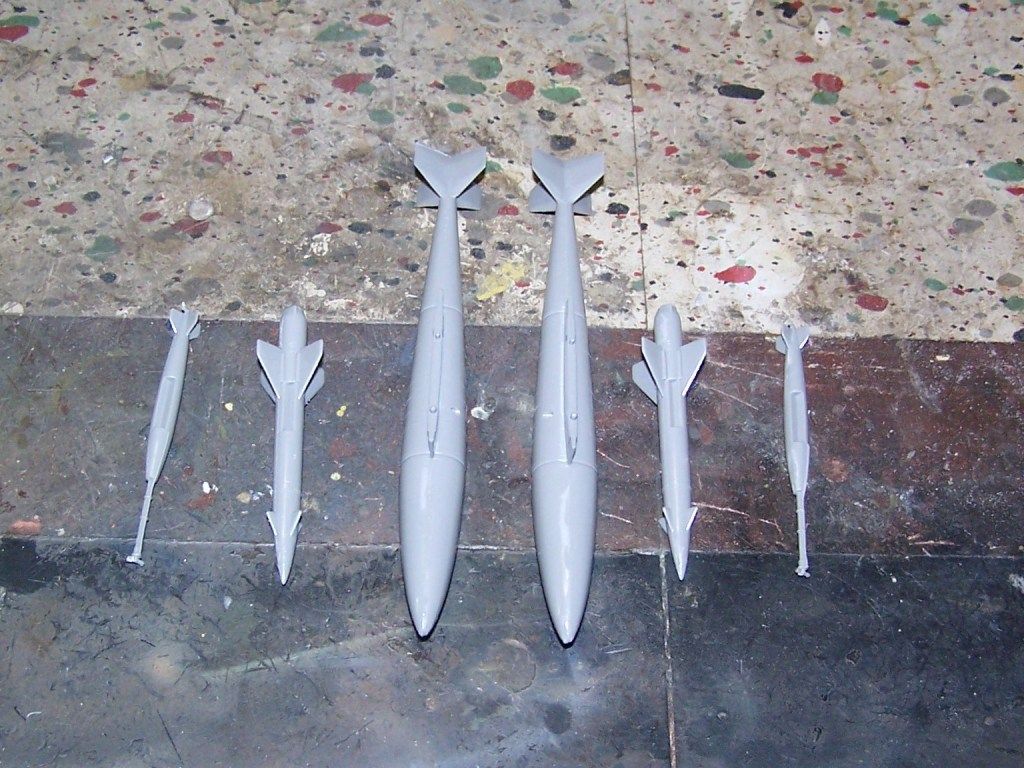
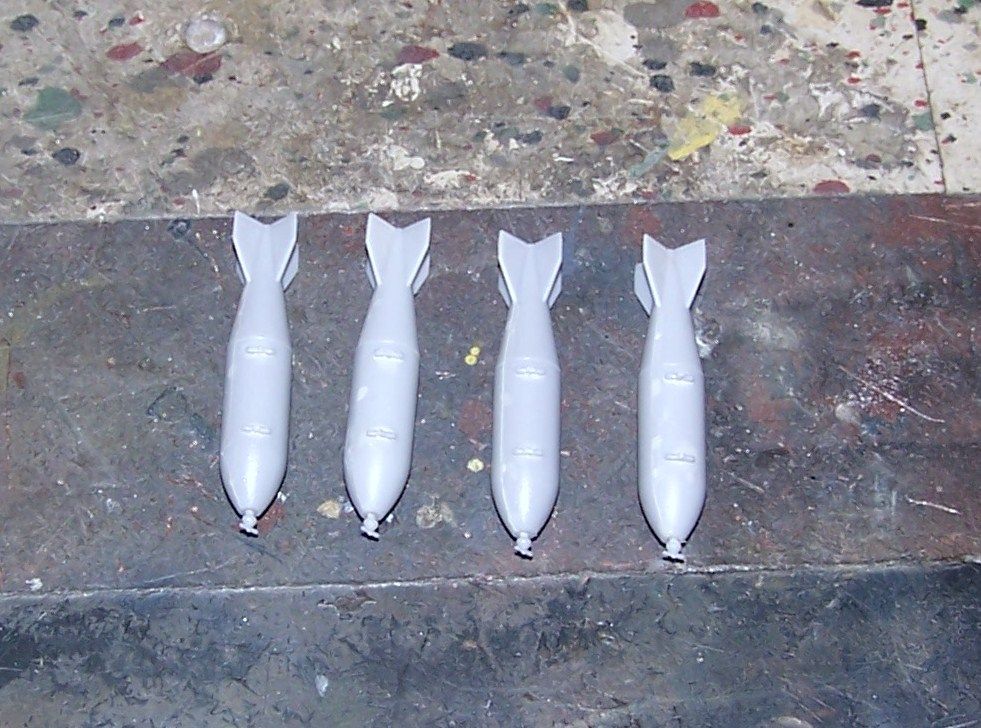
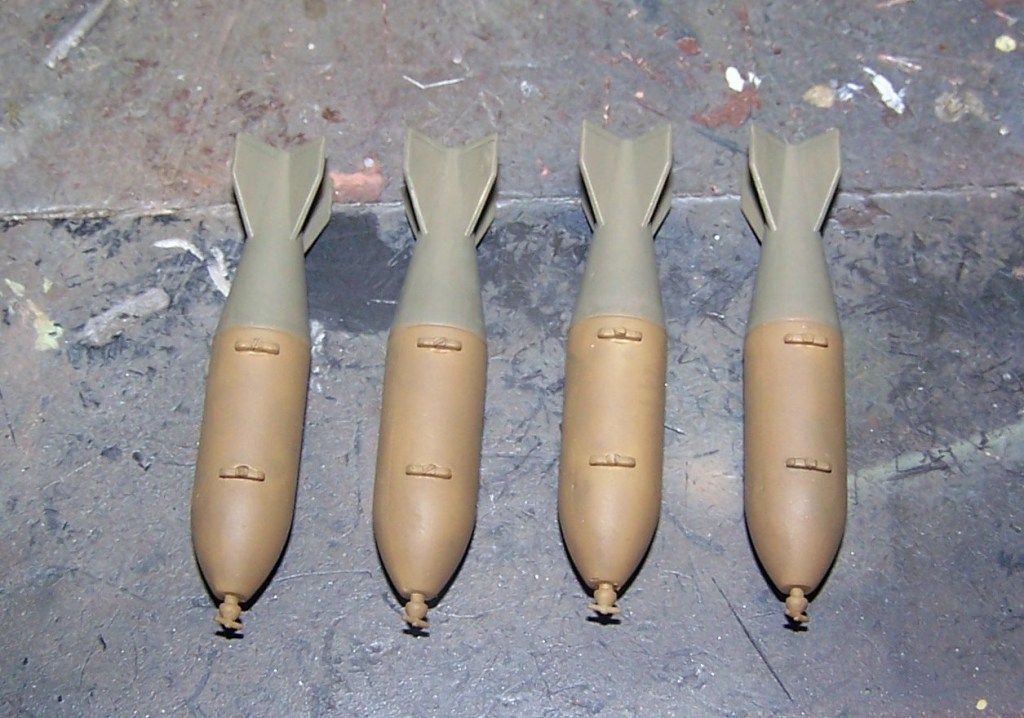
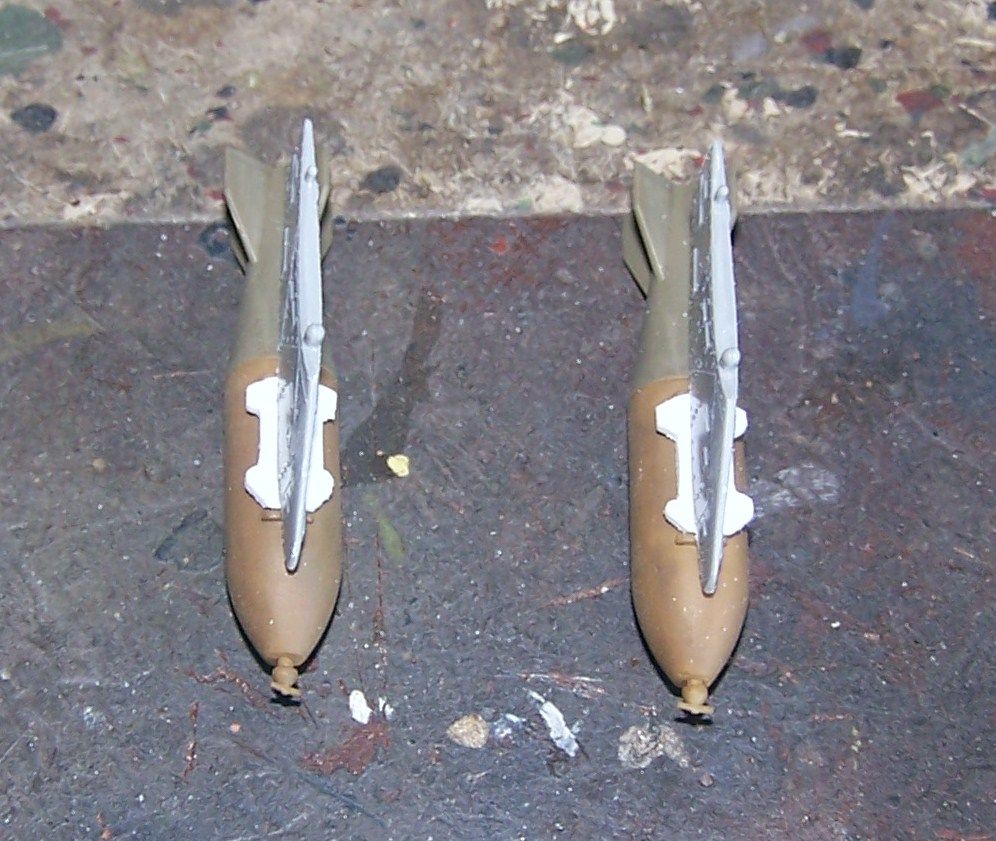
and I added some M117 750 lb bombs from some HobbycraftA-4s since I do not want to use the ordinance supplied with the kit

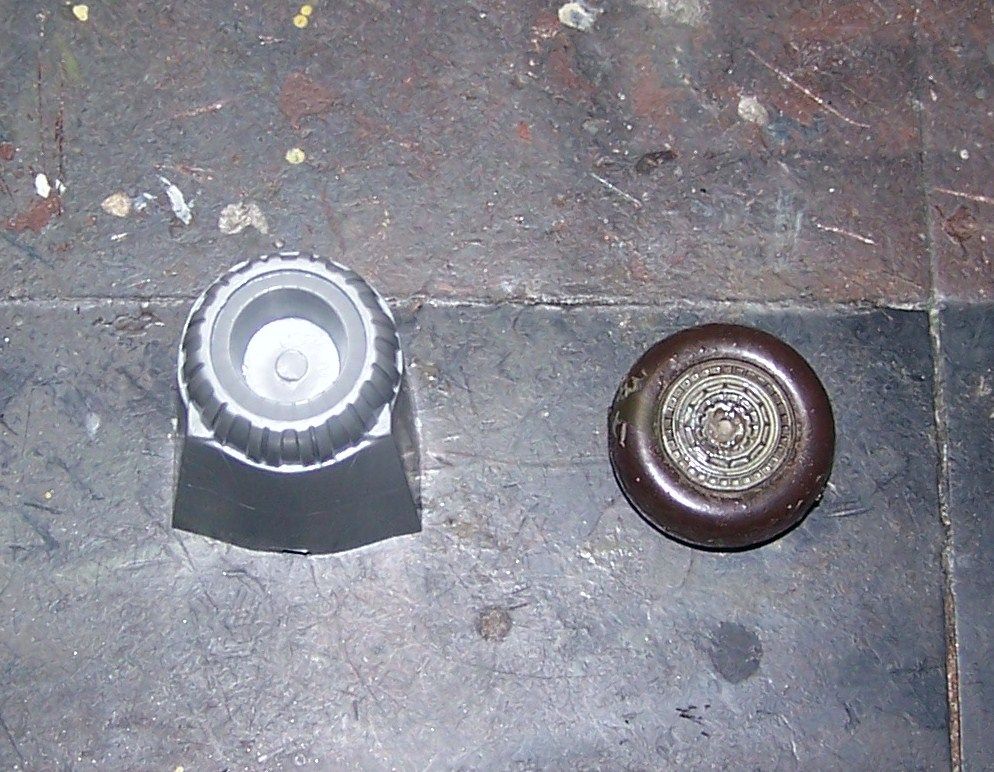
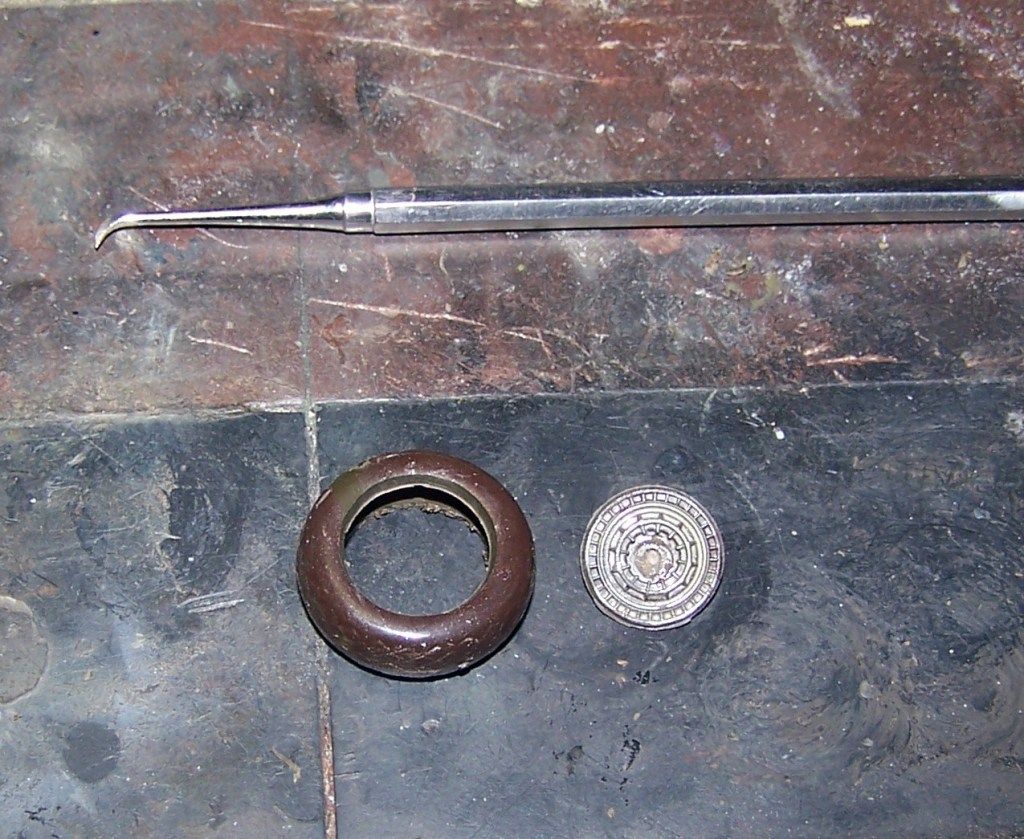
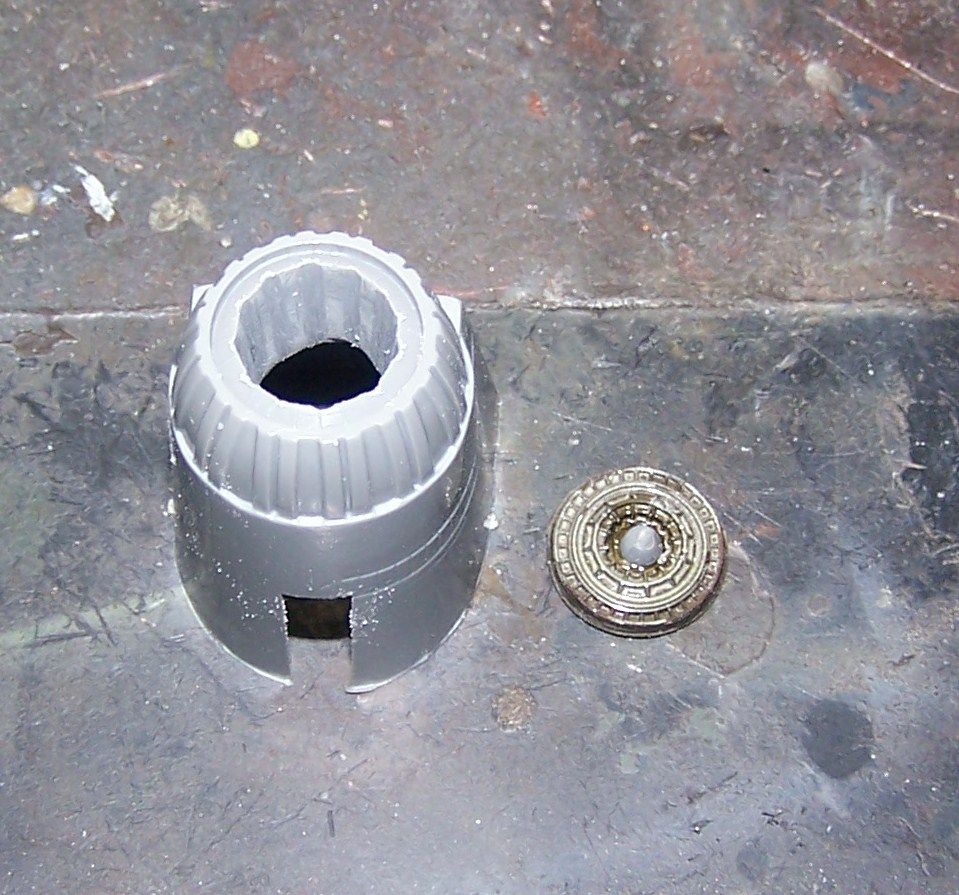
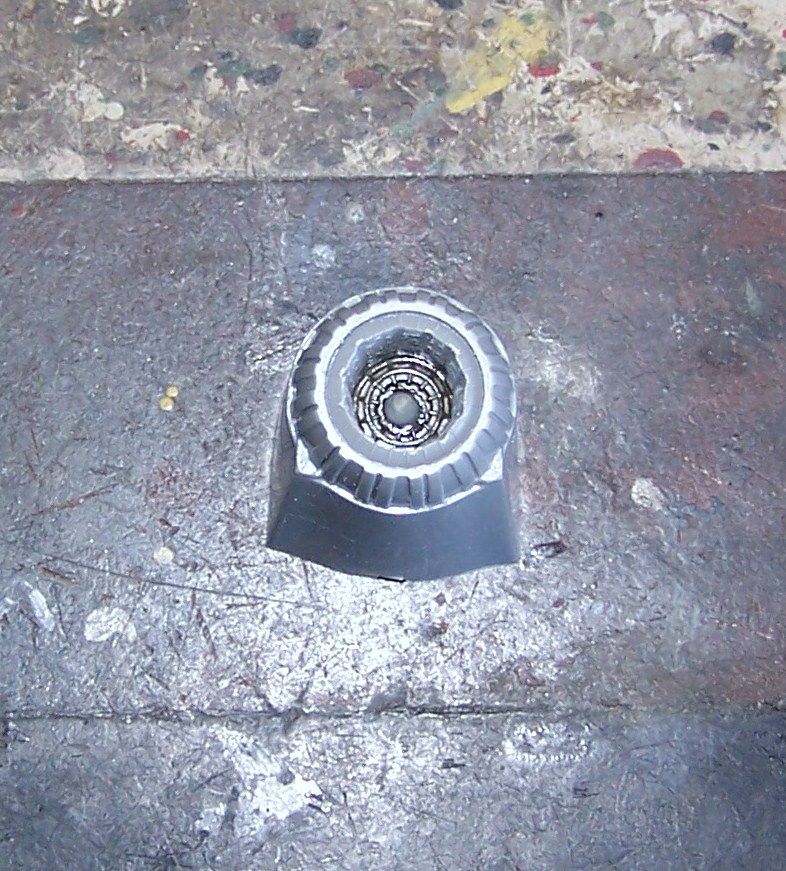
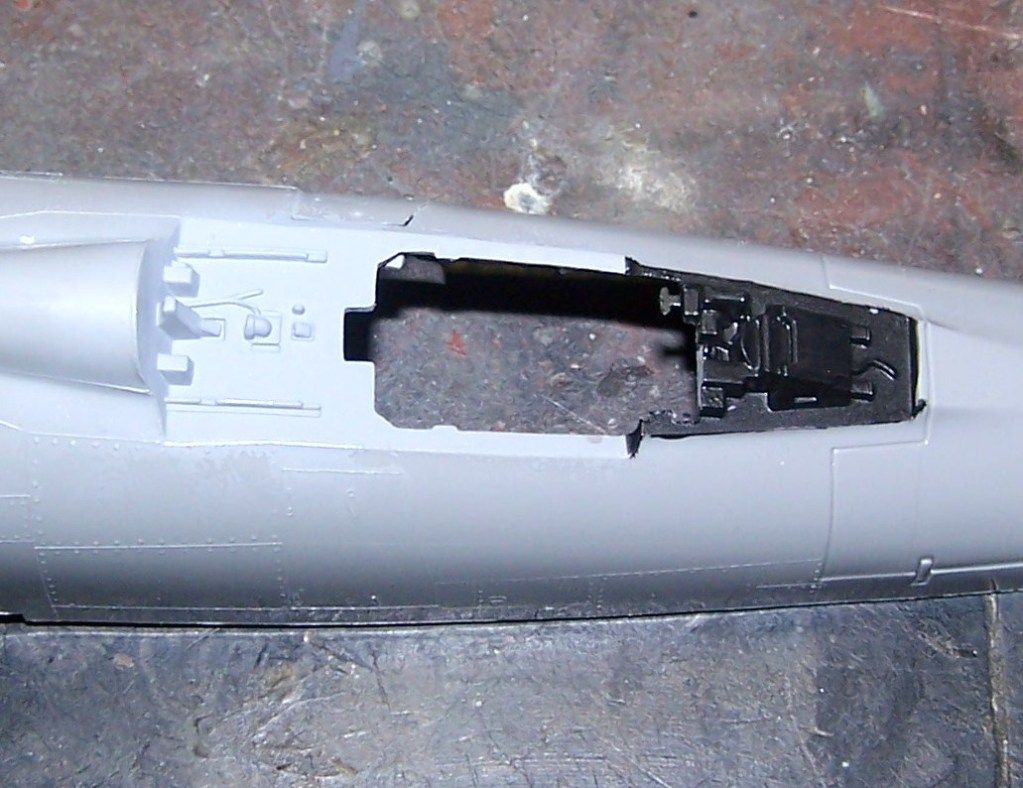
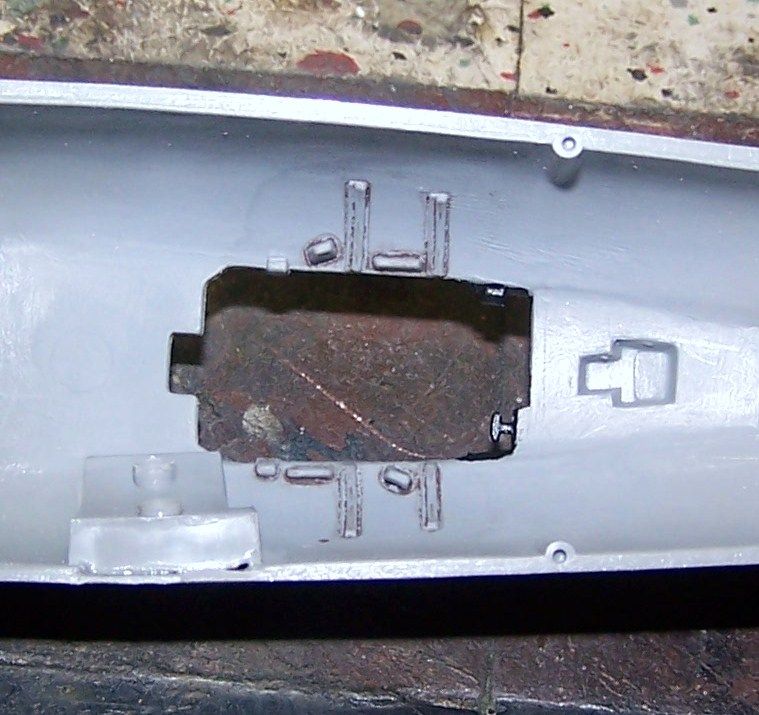
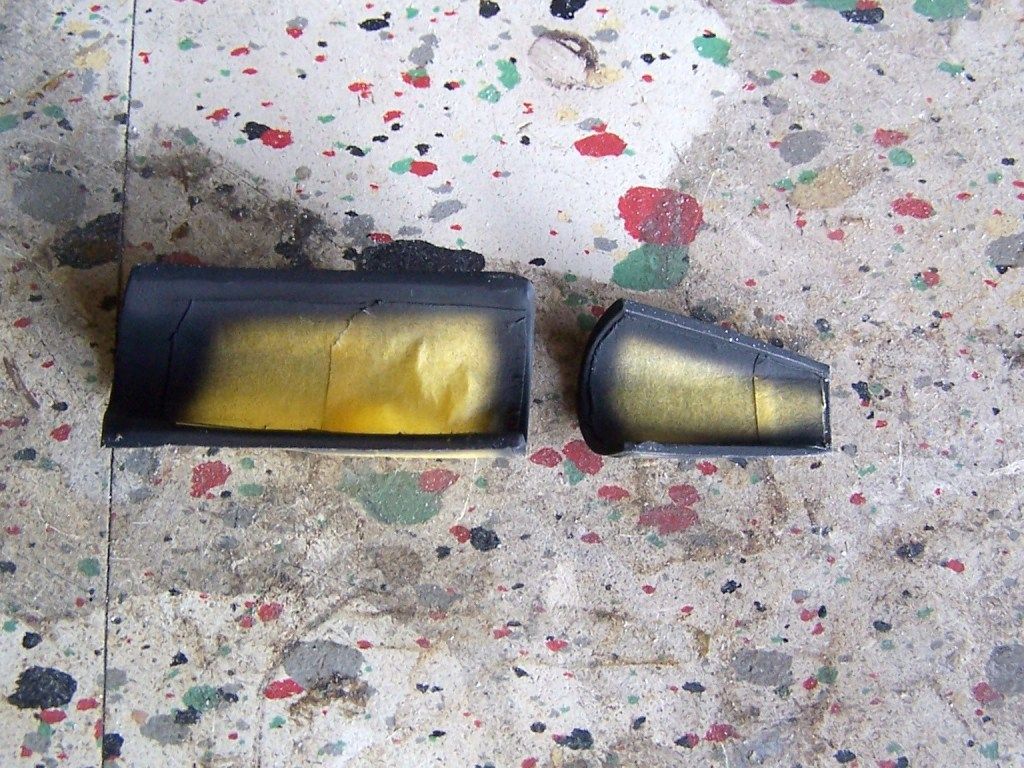
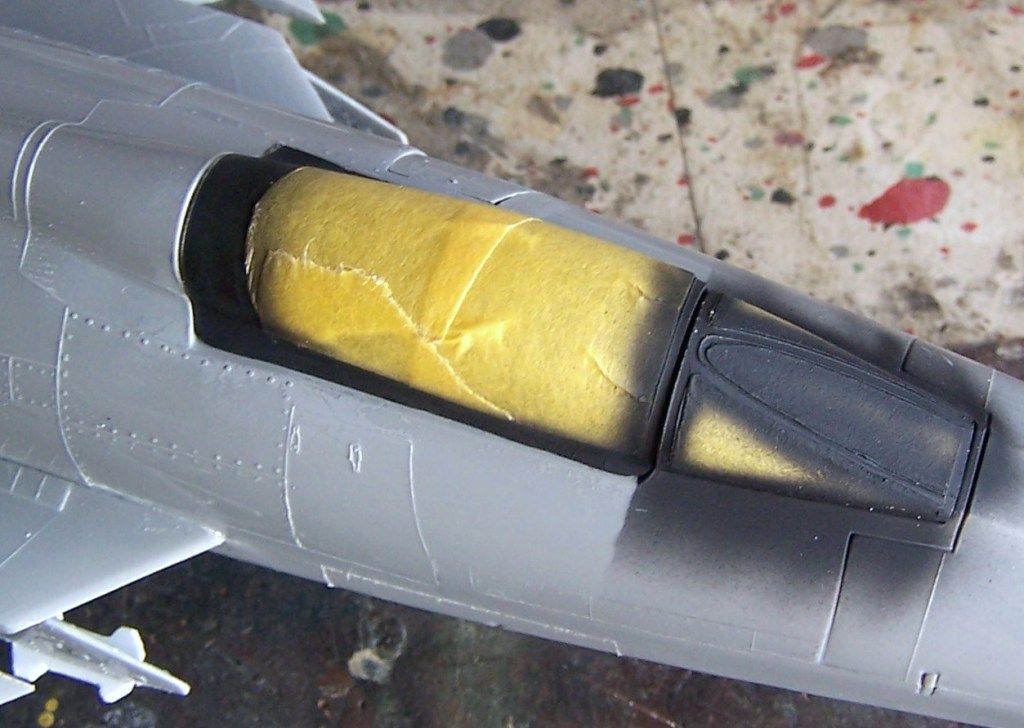
next I cut out the flat face on the kit afterburner and made a scratchbuilt anew burner face from a salvaged wheel in my spares box.

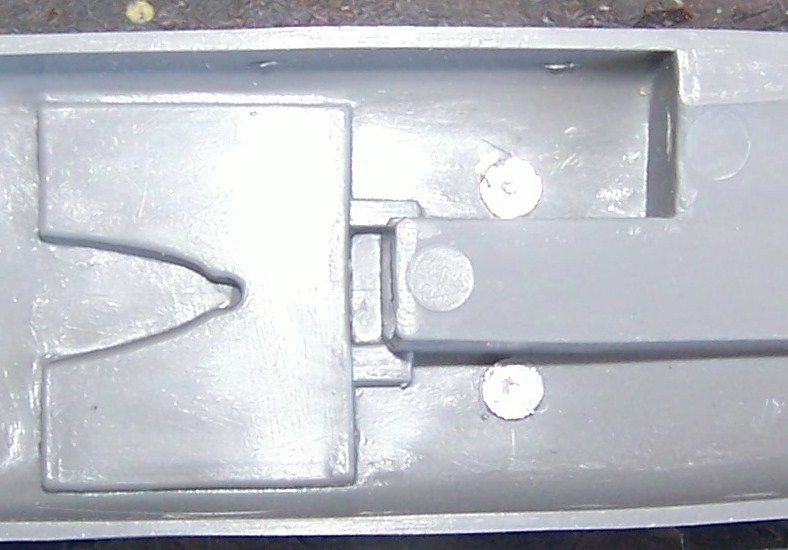
Then it was time to start airbrushing paint- Interior Green in the Speed Brake and Wheel Wells, and Aluminum around the Landing Lights

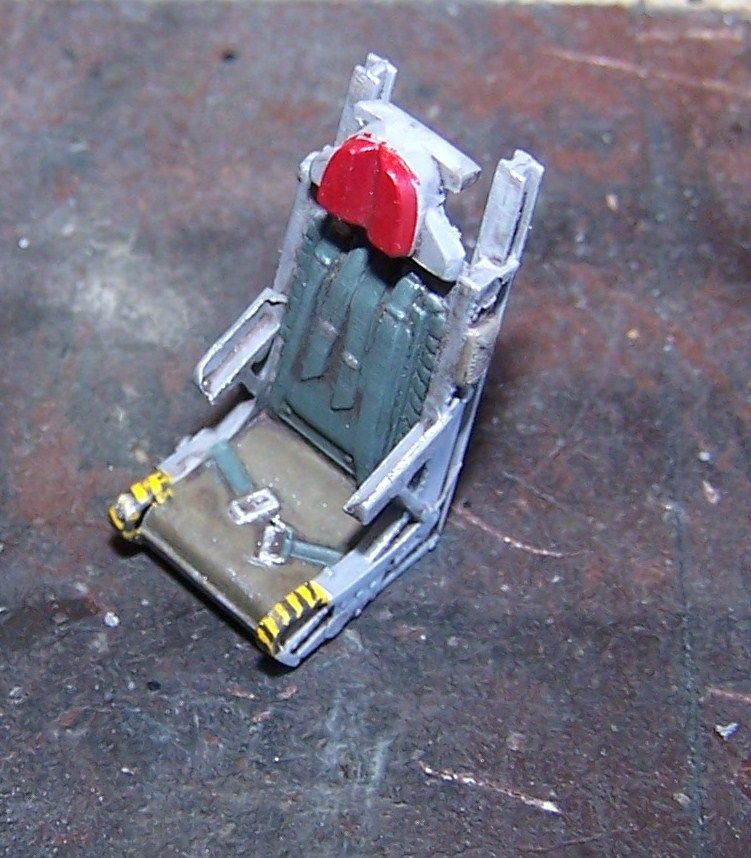
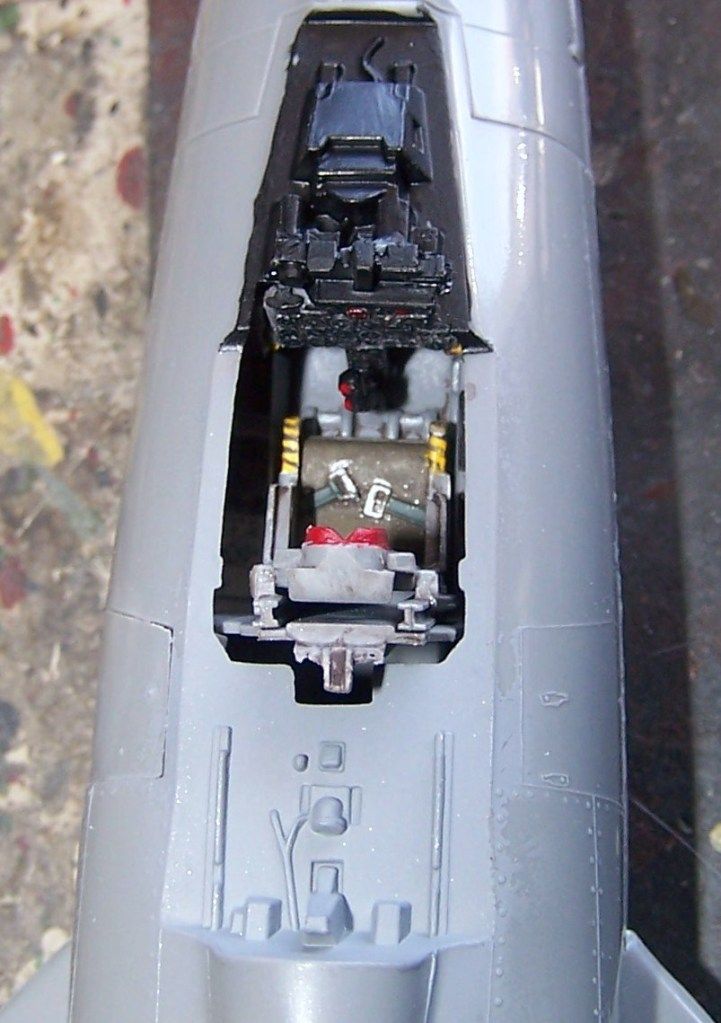
and Dark Gull Gray in the cockpit

then it was time for detail painting- Flat Black, OD,etc...

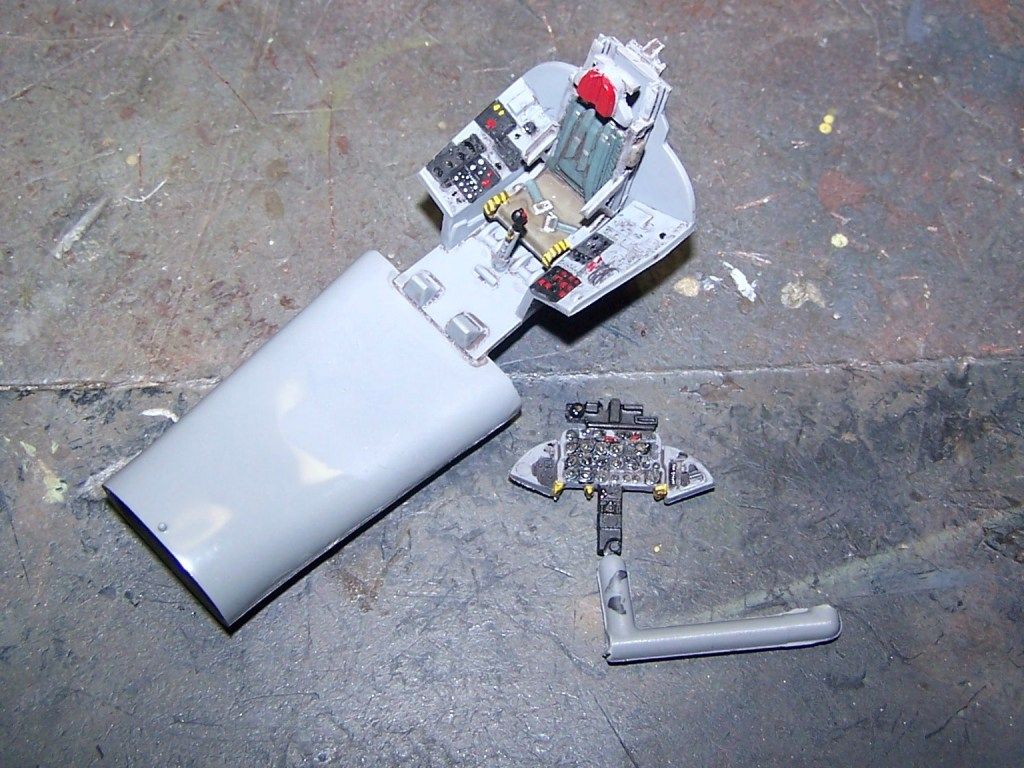
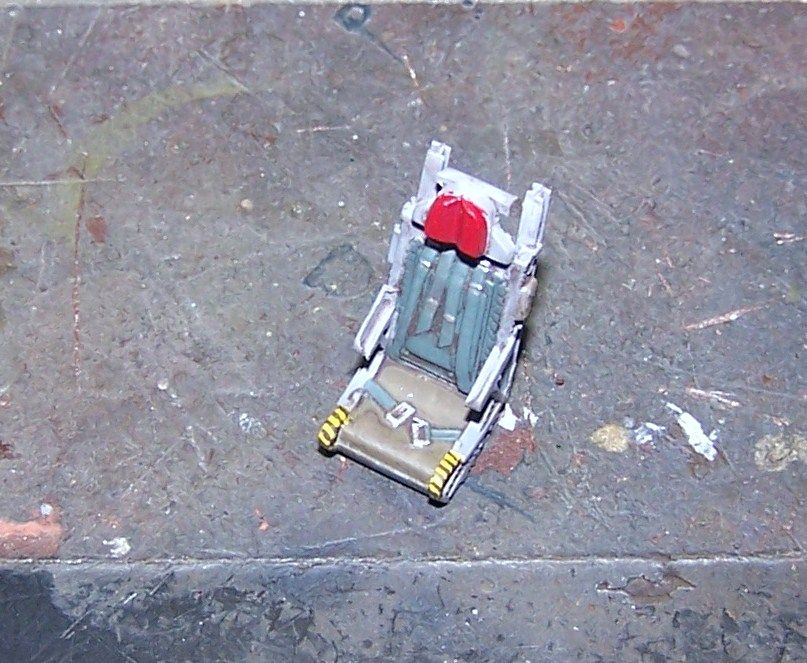
then washes and touch ups

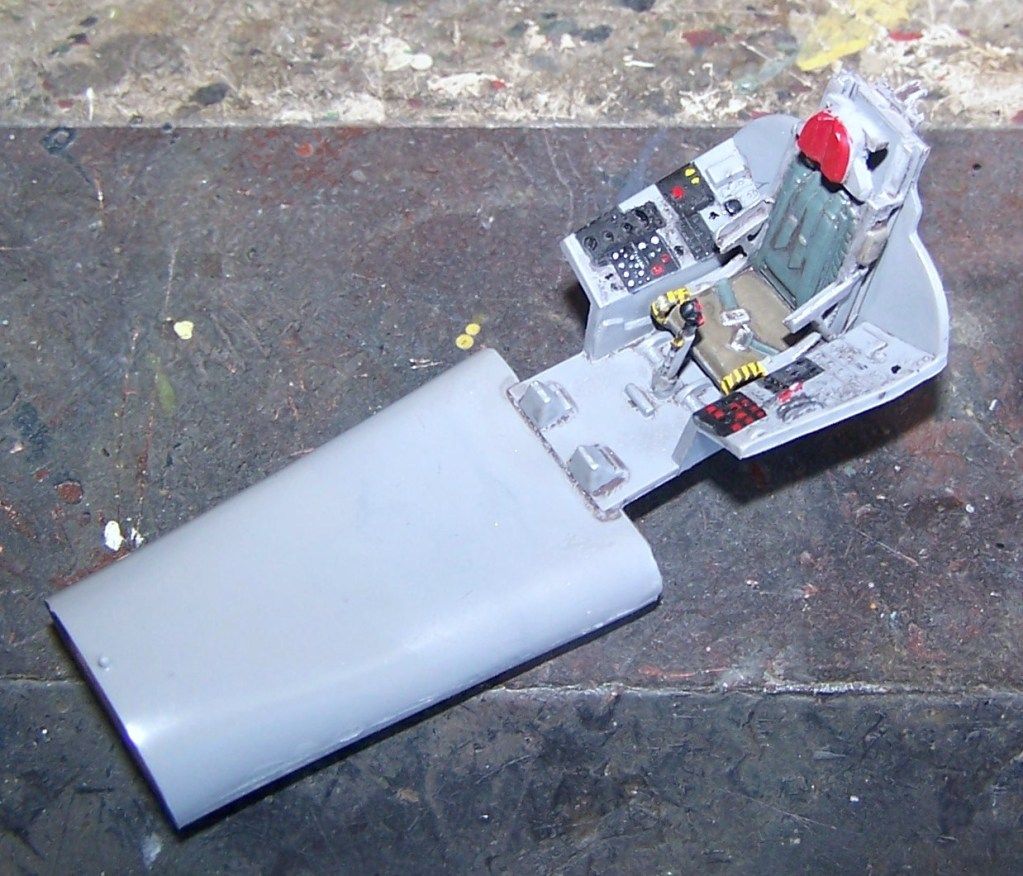
add the landing lights with some foil on the back

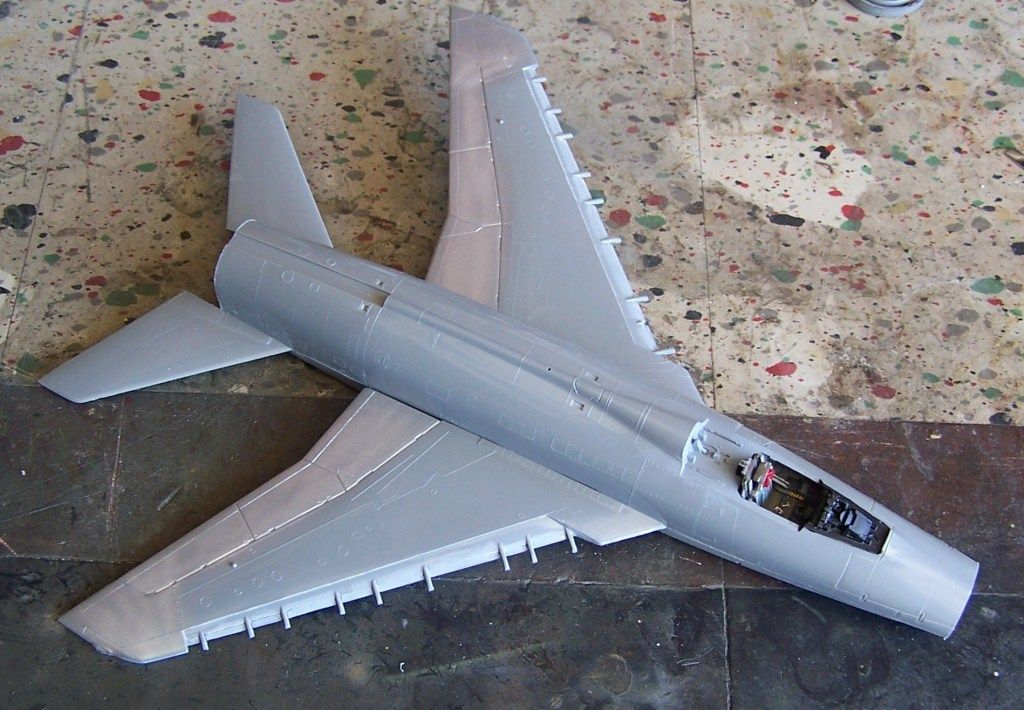
Then glue the cockpit and wings in place and the fuselage halves together

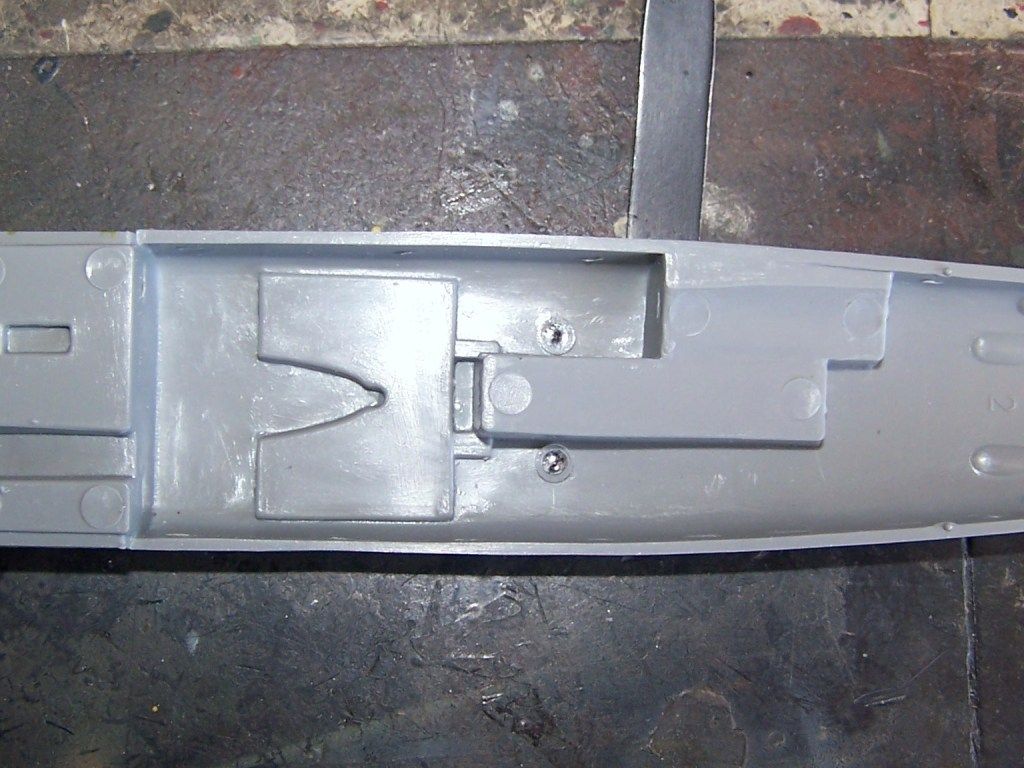
Then I modified the inboard pylons for bombs

built and added the Vertical Stabilizer and Wing Fences

Glued on the wing tanks, refueling probe, and inboard pylons

then it was time for masking the canopy after a dip in future

glue it in place...

and let the painting commence


F is for FIRE, That burns down the whole town!

U is for URANIUM... BOMBS!

N is for NO SURVIVORS...

       - Plankton

LSM


  • Member since
    July 2004
  • From: Sonora Desert
Posted by stikpusher on Monday, August 6, 2012 2:58 PM

Is this GB still going? I started my F-100 nearly two weeks ago and am now almost to the point of applying the decals.

Edit- I had not been able to find this thread with the format change since it had been almost 6 months since the last post. Then last nite when I figured it out...Dunce


F is for FIRE, That burns down the whole town!

U is for URANIUM... BOMBS!

N is for NO SURVIVORS...

       - Plankton

LSM


  • Member since
    October 2003
  • From: Mpls., Mn.
Posted by f-4phantom on Tuesday, February 28, 2012 5:42 PM

Well, no responses but more of "Death Dealer" done. The undercarriage is mostly complete.

Fuel tanks, Mk 84's & AN/ALQ 119 loaded


  • Member since
    October 2003
  • From: Mpls., Mn.
Posted by f-4phantom on Friday, February 24, 2012 3:11 PM

Stu,

I'd like to see the A-6 "Puff".

Dean

  • Member since
    January 2006
  • From: Earth
Posted by DiscoStu on Thursday, February 23, 2012 5:57 PM

I'll need to change my build.  Tragically my A-26 took a nosedive onto the garage floor and didn't pull out in time.  I'm afraid it was shattered beyond repair.  So with it off the table (literally) I'm kicking around a couple of ideas:

  1. Hasegawa 1/72 B-24 in Jolly Roger markings (perhaps not in the spirit of things as this one has been a shelf queen sitting at 60% complete)
  2. Kinetic's 1/48 A-6E in "Puff the Magic Dragon"
  3. GW/Monogram P-61A as "The Virgin Widow"
  4. Tamiya P-51 in any number of markings

I'm open to input on this Any preference as to what you would like to see?

"Ahh the Luftwaffe. The Washington Generals of the History Channel" -Homer Simpson


  • Member since
    October 2003
  • From: Mpls., Mn.
Posted by f-4phantom on Thursday, February 23, 2012 4:16 PM

The decals are finished on "Death Dealer"

Dean

  • Member since
    October 2003
  • From: Mpls., Mn.
Posted by f-4phantom on Thursday, February 23, 2012 4:11 PM

Hans,

I can't remember the name of the fort. Did it start with a A?

dean

  • Member since
    June 2008
  • From: Iowa
Posted by Hans von Hammer on Sunday, February 12, 2012 2:39 PM

I need to change from the B-25 to the 1/48 Revell B-17F Monogram B-17G.  She will be known as either the 918th BG's "Picadilly Lilly" I or II (12 O'Clock High-The TV Series), depending upon the variant.

I know that the "Triangle A" is actually the 91st BG, but this is a "Hollywood" build.. The center picture is the REAL "Lillly"...

BTW, anyone remeber the name of the Fort from the episode that guest-starred Roddy McDowell as the flight enginner/top turret gunner? The plot was that the plane was going to go on it's 25th and final mission before it returned to the States for a War Bond tour, ala' "Memphis Belle".

The aircraft, according to McDowell's character, "Wouldn't let "them" take her home" and that she'd "kill the whole crew before she'd allow it".. She went on her last mission, and then caught fire and burned to a crisp after bellying in, IIRC... 

It was the 2nd season's "Halloween" episode, complete with the "possessed" ship, ya know... A "Ghost story", if you will..

The other possibilty is to name her, "Bad Check" (becasue she always "bounced" back from a mission). 


  • Member since
    October 2003
  • From: Mpls., Mn.
Posted by f-4phantom on Sunday, February 12, 2012 8:03 AM

Painting complete on Viper.

Dean

  • Member since
    October 2003
  • From: Mpls., Mn.
Posted by f-4phantom on Monday, January 23, 2012 8:35 AM

A little more progress on "Death Dealer".

AN/ALQ119 complete.

Aim 9L's finished.

Dean

  • Member since
    October 2003
  • From: Mpls., Mn.
Posted by f-4phantom on Monday, January 16, 2012 11:36 AM

I got a little more work done on "Death Dealer".

The stiffener plates are attched and now it's ready for some paint.

Dean


  • Member since
    October 2003
  • From: Mpls., Mn.
Posted by f-4phantom on Tuesday, January 10, 2012 4:44 PM

I finally got a start on "Death Dealer". This is the Tamiya kit.

So far the kit is very well engineered. This is my first Tamiya F-16.

  • Member since
    July 2011
  • From: Land of Oz
Posted by MilitaryAircraft101 on Wednesday, January 4, 2012 4:15 PM

Cool! Great work there

  • Member since
    January 2006
  • From: Earth
Posted by DiscoStu on Saturday, December 31, 2011 10:13 PM

Happy new year all!  I was able to get some progress pics of my A-26.  Gotta say, this is a pretty snazzy little number that only cost me $15.00.  This is the Promodeler offering and I am loving this bird so far!

"Ahh the Luftwaffe. The Washington Generals of the History Channel" -Homer Simpson


  • Member since
    July 2010
Posted by jbrady on Friday, December 30, 2011 9:52 AM

Decals are in place and it's ready for weathering and final assembly. The Squadron decals go down well just make sure that you place them where you want them... they don't like to move around once they are down. The kit decals suck. Multiple applications of vinegar and they still won't settle down.


  • Member since
    July 2010
Posted by jbrady on Monday, December 26, 2011 6:56 AM

Had a major brain cramp last night.

Luckily I caught the mistake before I sealed the decals. Got them to come up without disturbing the paint. I've got a set of decals for the P-51 B that carried the QP K codes but they are too small for the Jug so I'll have to order another set... puts me back a few days. Should have this wrapped in a week or so.


  • Member since
    July 2010
Posted by jbrady on Sunday, December 25, 2011 9:26 AM

"Miss Dallas" on its wheels for decals. I think i finally got the USAAF od shade the way I want it... at least with Model Master enamels. Those turned brass blast tubes are awesome.


  • Member since
    July 2011
  • From: Land of Oz
Posted by MilitaryAircraft101 on Friday, December 23, 2011 3:52 PM

Looking good mate! :)

  • Member since
    July 2010
Posted by jbrady on Thursday, December 22, 2011 8:58 PM

Here's where I'm at with "Miss Dallas"

Got some work to do to buff out the marks on the underside, some more blending of the top surface, and a few touchups. Should be able to gloss coat tomorrow. Then I get it on its wheels for the decals.


JOIN OUR COMMUNITY!

Our community is FREE to join. To participate you must either login or register for an account.

SEARCH FORUMS
FREE NEWSLETTER
By signing up you may also receive reader surveys and occasional special offers. We do not sell, rent or trade our email lists. View our Privacy Policy.