SEARCH FINESCALE.COM

Enter keywords or a search phrase below:

The Ostfront GBII - 2011/12

43676 views
247 replies
1 rating 2 rating 3 rating 4 rating 5 rating
  • Member since
    July 2006
  • From: San Francisco Bay Area
Posted by bufflehead on Thursday, March 22, 2012 11:54 PM

Hey my Osfront buddies!  I hope everyone's doing well and enjoying some fun modelling this year!  I'm back with an update and default bump!!

Since I forgot to post the finished pics of the RPM T-26T Artillery Tractor and the Bronco F22 76.2mm Gun in the first Ostfront GB, here they are:

Back in November I accidentally hit the gun with something (?) and broke off the tall sighting mechanism.  I picked up two pieces and stashed them away to fix later.  At the end of the year I tried to glue them back on and found out I was missing a third piece, which was the base piece to mount to the breech....OOPS!  So now I can't fix it and in the last photos the mechanism is missing!

The last update on the Italeri BT-5 showed the model after the green base coat.  Soon afterwards I applied some highlights using a lightened basecolor, but I didn't take any photos.  Pic below are before the highlights were applied:

I was finally able to complete some other projects and get back to it!  So yesterday I applied some "preshading" on all the panel lines using Flat Black.  Yeah, it looks pretty garish, but its done on purpose.  You can also see the highlights in this photo

Then I applied a "blending coat" using the base color, but thinned down with about 40% thinner. This coat blends the very light highlights, the dark shading and the base color together resulting in a much nicer look. Most modelers apply the black preshading BEFORE the base color, but I like to do it after the base color and highlights are applied. Just me I guess...

Wheels received the same treatment:

Turret: Before and After

The muffler is mostly done.  It will get some final touch-ups before being installed and then get dirtied and dusted.

Filters, markings, detail painting and weathering to come!

Ernest

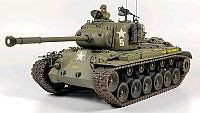
Last Armor Build - 1/35 Dragon M-26A1, 1/35 Emhar Mk.IV Female
     

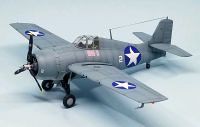
Last Aircraft Builds - Hobby Boss 1/72 F4F Wildcat & FW-190A8


  • Member since
    July 2006
  • From: San Francisco Bay Area
Posted by bufflehead on Thursday, March 22, 2012 11:28 PM

I like that battle damage on the stowage bin modeler#1!  Did you get more primer?  Oops


Ernest

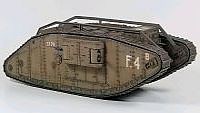
Last Armor Build - 1/35 Dragon M-26A1, 1/35 Emhar Mk.IV Female
     

Last Aircraft Builds - Hobby Boss 1/72 F4F Wildcat & FW-190A8
     

  • Member since
    March 2011
  • From: Ottawa,Ontario,Canada
Posted by modeler#1 on Sunday, March 11, 2012 11:19 AM

storage bin damage

tank comander

more weld lines turret about 50% done

some work on the hull

ran out of primer halfway through


On the Bench: Nothing atm

  • Member since
    March 2011
  • From: Ottawa,Ontario,Canada
Posted by modeler#1 on Wednesday, March 7, 2012 6:31 AM

Got some wark done

Added wire

did weld lines


On the Bench: Nothing atm

  • Member since
    June 2009
  • From: Netherlands
Posted by kermit on Tuesday, March 6, 2012 10:28 AM

Bufflehead,

By all means go right ahead. Now that you mention it... it kinda strikes me as odd to dig an old GB up from page six to post finishing pics. I totally agree.

Here is what i will do: i will just add your builds from the last GB to this term's roster so you still have ample time to work on your builds as you see fitWink I am delighted to host more of your workBig Smile

Richard

"Success is the ability to go from one failure to another with no loss of enthusiasm." - Sir Winston Churchill

  • Member since
    March 2011
  • From: Ottawa,Ontario,Canada
Posted by modeler#1 on Monday, March 5, 2012 6:06 PM

bufflehead

modeler#1 - I've been wanting to build that old Tamiya Pz.IV Ausf.D kit for the longest time!  Looking forward to how your's turns out!  If you don't mind a question:  What is that color chart behind the kit box cover?

The chart is a Vajeio Paint chart (sorry If i spelt it wrong)

On the Bench: Nothing atm

  • Member since
    July 2006
  • From: San Francisco Bay Area
Posted by bufflehead on Monday, March 5, 2012 4:54 PM

Greg - That is some excellent solder work on the Marder!  Reminds me of the work wing_nut did in the Marder Madness GB, IIRC!  You guys should be give the Heavy Metal  award for your PE work!!  Its going to look sweeet once its got some paint on her!

modeler#1 - I've been wanting to build that old Tamiya Pz.IV Ausf.D kit for the longest time!  Looking forward to how your's turns out!  If you don't mind a question:  What is that color chart behind the kit box cover?

kermit - no probs on the GB update!  To be honest, I didn't even know my info was missing!  Questions for you:  my T-26T and F-22 gun are done....can I post them here instead of the first Ostfront GB?  Same with the BT-5, which I should be resuming work on this weekend or next.   Does it make sense to post them here instead of resurrecting the first GB thread?  I'm still planning on building the GAZ69 and the T-70, but a bit later down the road.

Ernest

Last Armor Build - 1/35 Dragon M-26A1, 1/35 Emhar Mk.IV Female


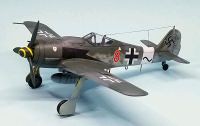
Last Aircraft Builds - Hobby Boss 1/72 F4F Wildcat & FW-190A8
     

  • Member since
    March 2011
  • From: Ottawa,Ontario,Canada
Posted by modeler#1 on Monday, March 5, 2012 3:24 PM

Ok

Here are some progress pics

I plan to do a tank from the 11 pz division

On the Bench: Nothing atm

  • Member since
    June 2009
  • From: Netherlands
Posted by kermit on Monday, March 5, 2012 2:09 PM

Anything eastern front i.e. russians against axis WW2 would apply modeler#1

Richard

"Success is the ability to go from one failure to another with no loss of enthusiasm." - Sir Winston Churchill

  • Member since
    March 2011
  • From: Ottawa,Ontario,Canada
Posted by modeler#1 on Monday, March 5, 2012 1:52 PM

Would the Balkans count as east?

On the Bench: Nothing atm

  • Member since
    March 2011
  • From: Ottawa,Ontario,Canada
Posted by modeler#1 on Sunday, March 4, 2012 12:34 PM

detailfreak

                                   Hey there modeler#1 ,what exactly are your concerns?

Something like a crate,I want to make this a transport tank

On another note did tank crews have sidearms

On the Bench: Nothing atm

  • Member since
    June 2009
  • From: Netherlands
Posted by kermit on Sunday, March 4, 2012 12:13 PM

Well... You can easily make sandbags with putty or clay and use some sheet and strip styrene to make crates... Heck you can even make real wooden ones with coffee stirrers. Best tip is to always be on the lookout with a modelers eye. I have heard people use the strangest stuff to aid in the hobbyWink

Richard

"Success is the ability to go from one failure to another with no loss of enthusiasm." - Sir Winston Churchill

  • Member since
    December 2006
  • From: t.r.f. mn.
Posted by detailfreak on Sunday, March 4, 2012 12:10 PM

                                   Hey there modeler#1 ,what exactly are your concerns?

[View:http://s172.photobucket.com/albums/w1/g-earl828/]  http://i158.photobucket.com/albums/t104/cycledupes/1000Roadwheels4BuildBadge.jpg

  • Member since
    March 2011
  • From: Ottawa,Ontario,Canada
Posted by modeler#1 on Sunday, March 4, 2012 11:23 AM

Does anybody have some good advice/tips for creating stowage?

On the Bench: Nothing atm

  • Member since
    June 2009
  • From: Netherlands
Posted by kermit on Sunday, March 4, 2012 12:43 AM

Guys,

Just had a chance to go over the entire GB thread and corrected (quite) a few errors on my part.

Noah T,

I failed to awknoledge you finishing up your Henschel. Your build is now displayed correctly on the front page galleryWink

Bufflehead,

Entirely missed you applying right at the start with your field car and the T70. My sincere apologies and i added you to the roster as i should have right away...

Sub Revolution,

Your Tamyia is now properly displayed on the roster as well. Also my apologies to you sir

Bsyamato,

Yes, people,... not two but three build applications entirely missed...Embarrassed Bsyamato, i have now added your jagdpanzer to the roster. Again,... my sincere apologies.


That concludes sorting out the mess i made of things.... Please remind me to go and eat a full tube of putty and go stand in the corner in shame when it happens again. I will change my life to the better now.....honestly...

Your host,

Richard

"Success is the ability to go from one failure to another with no loss of enthusiasm." - Sir Winston Churchill

  • Member since
    June 2009
  • From: Netherlands
Posted by kermit on Saturday, March 3, 2012 11:30 PM

Modeler#1,

You are most welcome sir! I will add your build to the roster and have funYes 1:35 scale, right?

Richard

"Success is the ability to go from one failure to another with no loss of enthusiasm." - Sir Winston Churchill

  • Member since
    November 2006
  • From: Coastal Maine
Posted by dupes on Saturday, March 3, 2012 9:24 PM

Wow, that is some nice solder work on your Marder, Greg. Definitely a LOT stronger than CA if you do it right!

  • Member since
    March 2011
  • From: Ottawa,Ontario,Canada
Posted by modeler#1 on Saturday, March 3, 2012 5:31 PM

Hi Kermit

I'd like to take part with tamiya's Pz.IV Ausf D And I'll have pictures around the middle of the week.

On the Bench: Nothing atm

  • Member since
    June 2009
  • From: Netherlands
Posted by kermit on Sunday, February 19, 2012 2:31 AM

Detailfreak,

That shield just looks mouthwatering gorgeous! A real improvement on the model an an eyecatcher once finished for sure!

Well guys,

My long holiday to the US has regretfully come to an end and i am currently catching up on stuff as i am delaing with my ginormous jetlag... always a PITA i can tell you... But anyways... im back and planning on continuing on the tiger ASAP

Richard

"Success is the ability to go from one failure to another with no loss of enthusiasm." - Sir Winston Churchill

  • Member since
    December 2006
  • From: t.r.f. mn.
Posted by detailfreak on Sunday, January 22, 2012 10:30 PM

                                   Greetings,this one seems to be a bit tough to keep on the front page. The Marder H is only going through some dry fitting trials and thats really all to date. Ok ok a picture is worth a thousand words I'm told so here they are.


[View:http://s172.photobucket.com/albums/w1/g-earl828/]  http://i158.photobucket.com/albums/t104/cycledupes/1000Roadwheels4BuildBadge.jpg

  • Member since
    December 2006
  • From: t.r.f. mn.
Posted by detailfreak on Monday, January 16, 2012 10:37 PM

                          Thanks for the comment Andy,the soldering is a god choice for structural work as the handling and even some tweaking may be nessecary later and in my opinion super glues don't cut the stresses.

                          As for fishing,I did catch a nice Pike at the local fishing hole. Threw it back. It was fun though as about the time I caught it and brought it up through the ice my two twin nephews came in the door only to come face to gills with this monster,haha they where all squeels man. Well by the end of the evening I had one of them daring enough to stick a minnow in his mouth,just not ready to swallow.Much to his mothers relief. Oh they're only like 4or 5.Could I be a bad influence?

                           I'll try for a more modeling related update tommorrow.And do'nt worry I'm still plugging away at those panzer III's.


                                                               Greg"Detailfreak"RowleyYes

[View:http://s172.photobucket.com/albums/w1/g-earl828/]  http://i158.photobucket.com/albums/t104/cycledupes/1000Roadwheels4BuildBadge.jpg

  • Member since
    April 2009
  • From: Carmel, IN
Posted by deafpanzer on Monday, January 16, 2012 11:53 AM

Greg- Beautiful soldering work.  I never have done that before.  After seeing your work, now I am more determined to learn how.  Maybe my local hobby store offers soldering lessons that I can take just like I did for airbrushing few years ago.  

Try not to have too much fun adding 200 plus rivets.  Catch any fishes yet, buddy? 

Andy

  • Member since
    December 2006
  • From: t.r.f. mn.
Posted by detailfreak on Monday, January 16, 2012 11:38 AM

                                    Ok just a small update,started work on the Voyager PE gunshield and fighting compartment.

                                 Pretty straight forward assembly considering that it is made up mostly of the internal bracing for the armor plates. My chosen method of attachment of these braces was naturally by soldering. My first attempt was to use a soldering iron but I quickly found that with the large plates the heat disapated far to rapidly. Next I turned to my trusty Butane pencil torch,this was a very quick method as the heat was intense. Both sides were soldered first then the roof added. Now just to place the two-hundred plus mini-rivets in place and the tie-downs, periscopes and other misc. and its off to the primer station.Now for some pics.


                                   My apologies to you dial-up folks,as always any questions or comments are welcome.


                                                    Greg"Detailfreak"RowleyYes

[View:http://s172.photobucket.com/albums/w1/g-earl828/]  http://i158.photobucket.com/albums/t104/cycledupes/1000Roadwheels4BuildBadge.jpg

  • Member since
    December 2006
  • From: t.r.f. mn.
Posted by detailfreak on Tuesday, January 10, 2012 10:17 PM

                                      Ok,update. The Marder III H is in primer and the lower hull assembly continues with the engine and transmission recieving attention currently.The lower hull in primer.


                                     Well thats all the pics I have to post at the present .As always any questions or coments are welcome.


                                               Greg"Detailfreak"RowleyYes


[View:http://s172.photobucket.com/albums/w1/g-earl828/]  http://i158.photobucket.com/albums/t104/cycledupes/1000Roadwheels4BuildBadge.jpg

  • Member since
    April 2009
  • From: Carmel, IN
Posted by deafpanzer on Thursday, January 5, 2012 12:38 PM

Greg- Always looking great.  You and details... perfect match!  Beer

Andy

  • Member since
    December 2006
  • From: t.r.f. mn.
Posted by detailfreak on Thursday, January 5, 2012 11:16 AM

                                  Another quick-date. Recieved Voyagers armor P.E. set in the mail this morning.All I can say is What a big difference in scale thickness,and about two-hundred micro rivets to install. Time to fire up the soldering iron.


                                 Well off to another day at the office. As always questions and comments are welcome.


                                                         Greg"Detailfreak"RowleyYes

[View:http://s172.photobucket.com/albums/w1/g-earl828/]  http://i158.photobucket.com/albums/t104/cycledupes/1000Roadwheels4BuildBadge.jpg

  • Member since
    December 2006
  • From: t.r.f. mn.
Posted by detailfreak on Wednesday, January 4, 2012 11:30 AM

                                       Getting ready to head out to work,so I can afford more styrene naturally,and thought I would toss in a bit of progress.Most of the assembly is focused on the lower hull . Adding a bit of wiring where it will be noticable and some not so noticeable. Any questions or comments are always welcome.


                                                        Greg"Detailfreak"RowleyYes

[View:http://s172.photobucket.com/albums/w1/g-earl828/]  http://i158.photobucket.com/albums/t104/cycledupes/1000Roadwheels4BuildBadge.jpg

  • Member since
    June 2009
  • From: Netherlands
Posted by kermit on Sunday, January 1, 2012 12:50 PM

Guys,

First of all my sincere apologies for not being very active on the forum as of late.Embarrassed The month december is notoriously busy for me at work and on top of that i have been suffering a bit of a modelling black hole so to speak Smile

And to make matters even more interesting i am posting this message to say i will most likely be hard to find the coming 7 weeks as i will be spending a long holiday with my wife in the USA (washington state, Walla Walla area) as of next thursday...Stick out tongue

Trey and detailfreak: I will add your builds to the rollcall right away! Thank you for joining and i hope you will have fun!Yes

And anybody else: If you are wanting to participate with a kit the coming weeks, by all means go right ahead after you stated what kit you are building. I wont be vanished from the face of the earth but i will be on dial up..... nuff said LOL

So thank you all for making this GB to what it is and i will be lurking in the background for the coming period.

Richard "Flying Dutchman" Jongepier Captain


"Success is the ability to go from one failure to another with no loss of enthusiasm." - Sir Winston Churchill

  • Member since
    August 2009
  • From: Borlando Fla home of the rat
Posted by TREYZX10R on Friday, December 30, 2011 2:36 PM

Doogs yet another killer looking build,nicely done Sir!

  • Member since
    December 2006
  • From: t.r.f. mn.
Posted by detailfreak on Friday, December 30, 2011 1:20 PM

                                     I would like to join with this kit.

                                Looks to be a nice kit and seeing that this is a 1 year build I may just finish.LOL


                                                                   Greg"Detailfreak"RowleyYes

[View:http://s172.photobucket.com/albums/w1/g-earl828/]  http://i158.photobucket.com/albums/t104/cycledupes/1000Roadwheels4BuildBadge.jpg

JOIN OUR COMMUNITY!

Our community is FREE to join. To participate you must either login or register for an account.

SEARCH FORUMS
FREE NEWSLETTER
By signing up you may also receive reader surveys and occasional special offers. We do not sell, rent or trade our email lists. View our Privacy Policy.