SEARCH FINESCALE.COM

Enter keywords or a search phrase below:

No More Excuses GB: Part Deux. Closed to New Entries But Finish What You Signed Up For

81867 views
690 replies
1 rating 2 rating 3 rating 4 rating 5 rating
  • Member since
    September 2009
  • From: Guam
Posted by sub revolution on Friday, May 4, 2012 1:51 AM

Almost there!

Driver is done:

SDC14890

SDC14892

With the driver done, I could finally finish construction:

SDC14902

Engine parts were a tight fit, but not as bad as I expected at this point. After a few minutes of wrestling and giant gobs of glue, they all got in their rightful places. (The bigger the glob, the better the job, right?)

SDC14903

I do want to make a complaint that the painting instructions SUCK. I realized far too late that the side of the box had pictures of the finished model that included paint details not mentioned/wrong in the instructions. I fixed a few, but it was too late for most. Oh well, remember for next time...

SDC14904

The back brace on the top of the chasis there was a real PITA. I had to tape that down to get it to glue into place as well.

SDC14906

Bottom actually done, with tires this time and no masking tape!

IMG_1707

Car body after painting and before decals. Not bad for my first time doing this, I think. Although I could tell I was used to airplanes where you really only have to do one side at a time due to different colors. I kept sticking my fingers into the wet paint on the opposite side I was spraying! Gah!

SDC14901

And finally after three days at several hours a day, the decals are finally done. What a pain! I will say the decals seem to be pretty good quality, which is good because otherwise I would have destroyed them with all the tweaking I did. The shear number of them alone is daunting, but all of the cuts are wrong so they don't line up the way they are supposed to, and the overlaps are a nightmare. I follow Paul Boyer's method for decals like my life depends on it, and I still couldn't get some of them to look right. But I guess at this point it's close enough/good as it's going to get. Now all it needs is a clear coat and windows, then it's done!

Oh, and I havetest fitted the body and chasis, and thankfully they fit together very nicely, no fighting involved! It's just building the chasis that involves all the fighting...

Going out of town this weekend, but next week the "all buttoned up" pictures should be out!

Thanks

NEW SIG

  • Member since
    September 2009
  • From: Guam
Posted by sub revolution on Friday, May 4, 2012 1:59 AM

Oh I forgot...

And the winner for most obnoxiously tiny and annoyingly placed decals goes to...

SDC14908

Thanks

NEW SIG

  • Member since
    April 2006
  • From: Denver, Colorado
Posted by waynec on Tuesday, May 8, 2012 2:07 PM
just to brag my locomotive and railroad gun from this group build took 1st and 2nd in miscellaneous at my club's annual contest and MAS also took a first in boats. that will be going into june other club quarterly contest "stars and stripes. picked up a windscreen so I-16 may be finished this month

Никто не Забыт    (No one is Forgotten)
Ничто не Забыто  (Nothing is Forgotten)


  • Member since
    October 2008
  • From: italy
Posted by bsyamato on Wednesday, May 9, 2012 11:40 AM

sub revolution

Oh I forgot...

And the winner for most obnoxiously tiny and annoyingly placed decals goes to...

http://farm8.staticflickr.com/7123/6995074006_21b5760f92.jpg

Thanks

LOL Big Smile

Good work Subrevolution Yes

  • Member since
    September 2009
  • From: Guam
Posted by sub revolution on Thursday, May 10, 2012 2:33 PM

Thanks Yamato!

Clear coat done today, will instal windows and button it up tomorrow.

Congrats Wayne! See, we told you they were good!

NEW SIG

  • Member since
    March 2010
  • From: Buffalo, NY
Posted by macattack80 on Thursday, May 10, 2012 3:10 PM

WOW!!! Great work Sub! Nice job with all those decals.  The finish on the body turned out great! 

Congrats on your award winning locomotives waynec! 

Sorry I haven't been around as of late. My wife had to have surgery.  All is good now and I hope to get some bench time in soon.

Kevin

[


  • Member since
    September 2009
  • From: Guam
Posted by sub revolution on Friday, May 11, 2012 7:20 PM

Here it is guys!

SDC15972

SDC15973

SDC15974

SDC15970

So that's it, all buttoned up! Ironically, this is probably the fastest I have ever done a model start to finish. Does that disqualify me from this GB? Stick out tongue

My biggest complaint about this was deifinitely the decals, in particular the large ones used to make the red "flame" look. Looking back it would have been  MUCH easier to just mask and paint those. As mentioned, the cuts were completely wrong nad the overlaps are terrible. I did what I could with it, but as you can see below, in a few spots they look pretty bad.

SDC15971

But overall I'm pretty happy with it, all things considering. And with a little (bad) photoshop:

talladeganewtrack1

talladeganewtrack2

As always, thank you guys for the feedback, any comments or suggestions are welcome. Thanks Mac for hosting, and to Yamato for always making me laugh with your comments. Keep the GB alive guys! I'll be around...

Thanks

NEW SIG

  • Member since
    April 2005
Posted by Thunderbolt379 on Friday, May 11, 2012 7:28 PM

Great job, SR -- you've just about convinced me to have a go at one of these colourful animals too!

Cheers, Mike/TB379

http://worldinminiature.blogspot.com/

  • Member since
    July 2006
  • From: San Francisco Bay Area
Posted by bufflehead on Friday, May 11, 2012 8:12 PM

Man 0 Man sub revolution, that is just a fantastic looking race car you've built!  Its definitely not something we see often in group builds (at least not the ones I join!).  Honestly I can't see where the decal problems are, you've done an amazing job with them!  The paint job looks great, the markings outstanding, and nice photos too!  As far as building it too fast, well that's the point.....NO MORE EXCUSES!!  Git er done!!

uh.....and as for EXCUSES.....I have SOO many for not getting any of my shelf queens done yet....Whistling

Ernest

Last Armor Build - 1/35 Dragon M-26A1, 1/35 Emhar Mk.IV Female


Last Aircraft Builds - Hobby Boss 1/72 F4F Wildcat & FW-190A8


  • Member since
    October 2008
  • From: italy
Posted by bsyamato on Saturday, May 12, 2012 9:11 AM

Excellent finish SubRevolution YesYes

  • Member since
    March 2010
  • From: Buffalo, NY
Posted by macattack80 on Monday, May 14, 2012 8:00 PM

Great work Sub!!  Bow Down The finish turned out awesome!  Which photo would you like me to put on the front page?

Kevin

[


  • Member since
    September 2009
  • From: Guam
Posted by sub revolution on Monday, May 14, 2012 9:38 PM

Thanks for the kind words guys. It means a lot coming from a fine group of modelers such as yourselves! Smile

And for those thinking about trying one, I say go for it! It wasn't nearly as hard as I expected (minus the decals) and it makes a very unique and colorful addition to my gaggle of airplanes!

Mac- As for the photo, I like the first one best, but you can see I picked a different one for my sig just because it fit better. So whichever one you think works best!

Thanks

NEW SIG

  • Member since
    March 2010
  • From: Buffalo, NY
Posted by macattack80 on Wednesday, May 16, 2012 11:11 AM

You got it Sub.  The front page has been updated. 

Kevin

[


  • Member since
    January 2010
  • From: Nebraska, USA
Posted by CallSignOWL on Monday, May 21, 2012 8:29 AM

No more excuses for not posting! lol

Started my first tank build: Tamiya's 1/35 M41 Walker Bulldog:

The original release was motorized Im guessing, so I had to fill in the little holes

road wheels took a while to slug through, each had 3 parts: two outer halves and a black rubber piece in the middle that allows for attaching/removal of the wheels

I also decided to do my first figure conversion. The only figures I've built before were pilots to place in a cockpit, so this was a bit different. Many slices and adjusting later, he went from this:

to this:

each limb was cut at the major joints (shoulder/hip, elbow/knee, waist, neck), a hand was cut off and repositioned, and each foot had 3 or 4 slices made in the ankle and foot to allow for the bend.

------------------------

Now that I'm here, where am I??

  • Member since
    April 2005
Posted by Thunderbolt379 on Monday, May 21, 2012 8:36 AM

OWL -- good to cross paths with you again! That's great figure conversion! That's a neat little kit that goes together without many arguments. The detail is on the soft side by later standards, you might like to refine it with the set of vinyl aftermarket tracks made by AFV Club (Tamiya's old tracks for this kit have no detail on the inner surfaces IIRC).

Cheers, Mike/TB379

http://worldinminiature.blogspot.com/

  • Member since
    January 2010
  • From: Nebraska, USA
Posted by CallSignOWL on Monday, May 21, 2012 10:27 AM

Thunderbolt379

OWL -- good to cross paths with you again! That's great figure conversion! That's a neat little kit that goes together without many arguments. The detail is on the soft side by later standards, you might like to refine it with the set of vinyl aftermarket tracks made by AFV Club (Tamiya's old tracks for this kit have no detail on the inner surfaces IIRC).

Cheers, Mike/TB379


thanks Thunderbolt. I had considered getting AM tracks, but I decided to go OOB for simplicity's sake. Id rather muck up the kit supplied stuff than expensive aftermarket, especially since this whole build is an experiment.

------------------------

Now that I'm here, where am I??

  • Member since
    March 2010
  • From: Buffalo, NY
Posted by macattack80 on Tuesday, May 22, 2012 2:17 PM

Welcome back Owl!  Nice work on the figure.  Looking forward to seeing your first tank build.

Kevin

[


  • Member since
    April 2006
  • From: Denver, Colorado
Posted by waynec on Sunday, May 27, 2012 12:38 PM
hi macattack80 how do i get my banner and how do i post it for this group build? thanks. just finished a VRC-105 CENTAURO but will be adding more shelf queens here as i get caught up.

Никто не Забыт    (No one is Forgotten)
Ничто не Забыто  (Nothing is Forgotten)


  • Member since
    January 2010
  • From: Nebraska, USA
Posted by CallSignOWL on Sunday, May 27, 2012 8:24 PM

Update!


I got some more work done in my spare time, relaxing form work.

Grab handles, lifting rings were replaced with wire because the supplied plastic either didnt look too right, was missing, or was flat on one side when it should've been round. The antennas were crafted from scrap guitar strings, and I made myself a tow-cable out of another scrap guitar string. A bit of tape was added on the jugs to give a bit more dimension, instead of the flat plastic detail. (pretty much everything you see that is not od green plastic, was added by me!)

some detail was added using thin plastic cards. The missing X thing on the sides of the tank was added using fine wire

I also crafted a bit of stowage to put on the tank using paper towels and floss (I mentioned I was going low-tech on this, right?). I also made a crate/box out of plastic card. While getting an idea of where/how to put the stowage on the tank, I experimented by looping a bunch of floss around the box and a bundle, then realized I could never get that to work again, so I glued it on, as is. And yes, the floss did hold the stowage on, amazingly enough! (I even flipped the tank this way and that to test it!)

------------------------

Now that I'm here, where am I??

  • Member since
    April 2005
Posted by Thunderbolt379 on Sunday, May 27, 2012 8:32 PM

OWL -- I'm impressed! You've come a long way in the last couple of years, you're doing stuff I didn't until I'd been twenty years in the hobby! This will be an excellent piece!

Mike/TB379

http://worldinminiature.blogspot.com/

  • Member since
    March 2010
  • From: Buffalo, NY
Posted by macattack80 on Monday, May 28, 2012 3:13 AM

Great work so far Owl!  I like the use of guitar strings for cables.  Nice scratch building!

Wayne, just  right click on the badge and copy or save it.  Then you can post the photo where ever you would like.

Kevin

[


  • Member since
    March 2006
Posted by simpilot34 on Monday, May 28, 2012 10:18 PM

Sub that turned out great!!!! Well done mate!!!ToastYes

owl that's some great progress happening!!!!Yes

Well not much has happened here lately. Got about 30-45min at the bench the other day and haven't been able to get back since n all I managed to do was clean up a strut. But any step forward is a plus as long as none are taken back I spose. Pics when something substantial happens lol.

Cheers, Lt. Cmdr. Richie "To be prepared for war, is one of the most effectual means of preserving the peace."-George Washington
  • Member since
    March 2010
  • From: Buffalo, NY
Posted by macattack80 on Friday, June 1, 2012 9:22 PM

I hear ya on that Sim.  Bench time for me has been nonexistant as of late.  Really starting to aggravate me.  Oh well.  As they say...sometimes life happens.

Kevin

[


  • Member since
    September 2009
  • From: Guam
Posted by sub revolution on Saturday, June 2, 2012 8:38 PM

Nice work, Owl! That's a lot more than I would ever do on my first try...

Speaking of which...

Normally I like to do one build per GB, but I would like to toss in another one here if you gents (and lady) don't mind. Another new genre for me, this time ships!

1/700 Hasegawa USS South Dakota, to be specific.

Thanks!

NEW SIG

  • Member since
    March 2010
  • From: Buffalo, NY
Posted by macattack80 on Monday, June 4, 2012 5:23 AM

Add all ya want there Sub!  I will update the front page.

Kevin

[


  • Member since
    March 2006
Posted by simpilot34 on Monday, June 4, 2012 5:55 AM

Well got a bit more mold line cleanup done. Still nothing to warrant a pic yet lol. Refer to last post  lol.

Cheers, Lt. Cmdr. Richie "To be prepared for war, is one of the most effectual means of preserving the peace."-George Washington
  • Member since
    October 2008
  • From: italy
Posted by bsyamato on Monday, June 4, 2012 2:57 PM

Owl great work on the tank!!! Bow Down

  • Member since
    February 2010
  • From: New Jersey
Posted by 68GT on Monday, June 4, 2012 5:50 PM

Looks like I'm rolling the Monogram EF-11A out of the back lot.

I'm not sure of why I stopped building this one but I think it was the cool weather and before I had a spray booth.

On Ed's bench, ???


  • Member since
    January 2010
  • From: Nebraska, USA
Posted by CallSignOWL on Tuesday, June 5, 2012 8:49 PM

sheesh! Working two jobs is tough....But I had a day off in between and did some modeling to de-stress

I tried something I saw in the magazine--adding artificial shadows using the paint. Darker paint on the shadowy areas, lighter paint on the very top surfaces. It looks pretty interesting, but I dont know if it was stark enough or if it will show up under the next layers of weathering, etc.

I also used a black marker to color the rubber on the road wheels.


its not much, but its progress!

------------------------

Now that I'm here, where am I??

  • Member since
    September 2009
  • From: Guam
Posted by sub revolution on Wednesday, June 6, 2012 1:23 AM

Ok, so here's my second go at this GB and my second new genre (what the heck is wrong with me??)

Like the racecar, this one has a backstory. Really more like three stories, but ya know... So it starts with my wife's grandfather was on a Destroyer Escort in WW2. So I have been thinking for a couple years about building a model of one for her. I got a kit for it, but before I do it, I want to work on my ship skills for obvious reasons.

Fast forward to a couple weeks ago. Checkmateking made little planes for a carrier he built, in the 1942 GB. I got such a kick out of them that I said it was really making me want to try a carrier just to play with the little planes. A few days later, I went to the LHS, and in their clearance section they had the Hasegawa 1/700 USS Hancock (carrier) and USS South Dakota (battleship.) I thought, why the heck not? So I bought them. Then a few days later when I finished a project i hit a kind of "builder's block." To solve it I put a poll on Facebook of what in my stash I should build next. The south Dakota won, so here I am again!

Here's the two kits:

SDC16344

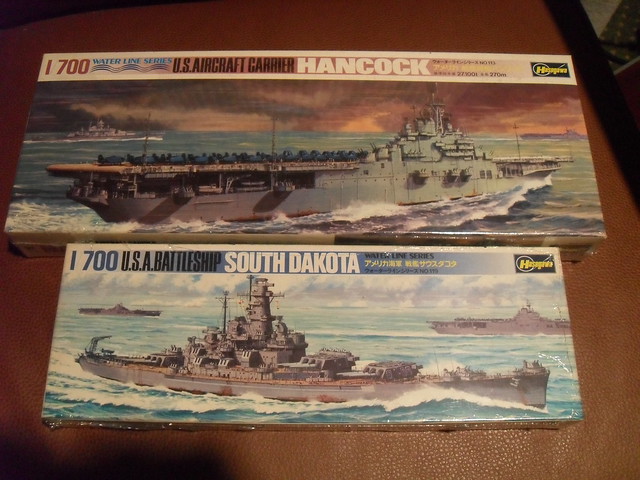
Eventually, when I get them both built, I want to display them together, which with some research shows occured in the winter on 1944-45, during the bombardments of Okinawa nad the Japanese mainlands. During this time period at least, the South Dakota was painted measure 21, which is all dark blue. I'll try some color variations, but for the most part, at least that keeps it simple for me on trying this for the first time.

SDC16375

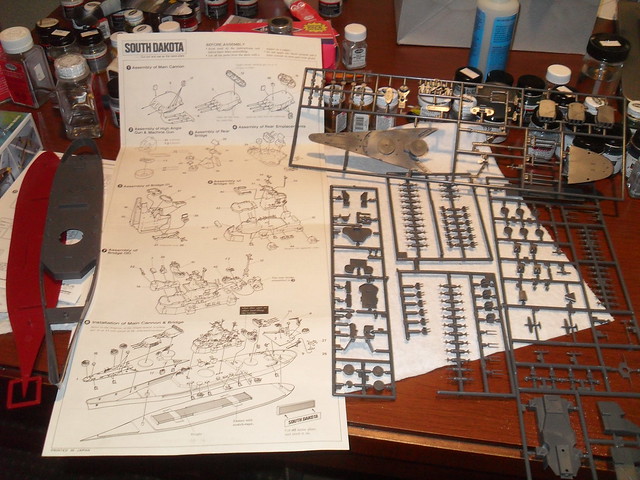
That's the sprues. Nothing fancy or aftermarket here! Just lots of tiny pieces. I have mad eone small modification so far, though. On the big 16" guns, I know they had the cloth covers warapped around them, which are not reproduced in the model. After experimenting (and much frustration) with masking tape, I finally managed to replicate these with putty:

SDC16383

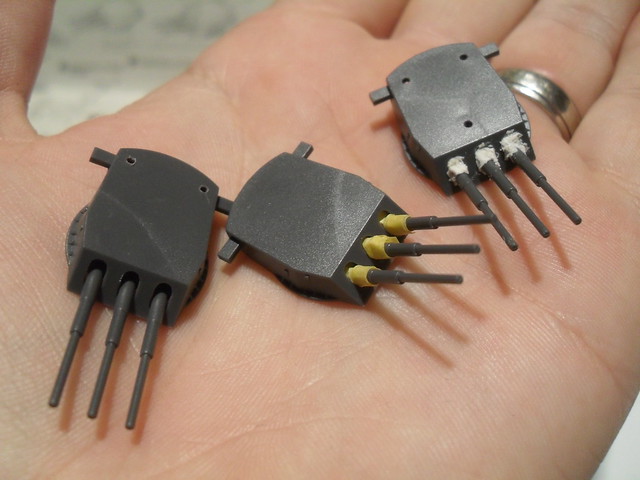
The left one is kit parts with no modification. The middle one is my attempt using masking tape. While it does look more like cloth, it still doesn't look right, and was just too much of a pain. The one on the right is done using putty. It looks pretty rough here, but less so in person. I think once it is painted up it will look the part all right.

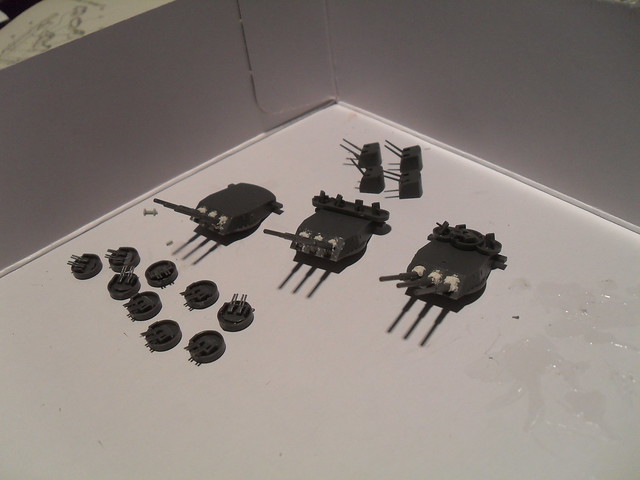
Here's the guns as I got them done a couple nights ago:

SDC16385

I have most of the structure sub-assemblies done now. My plan is to build everything in to sub-assemblies, then paint it, then do final construction and detail painting. Figure that's probably the easiest. but just to show why I am only doing a small amount of this each night:

SDC16386

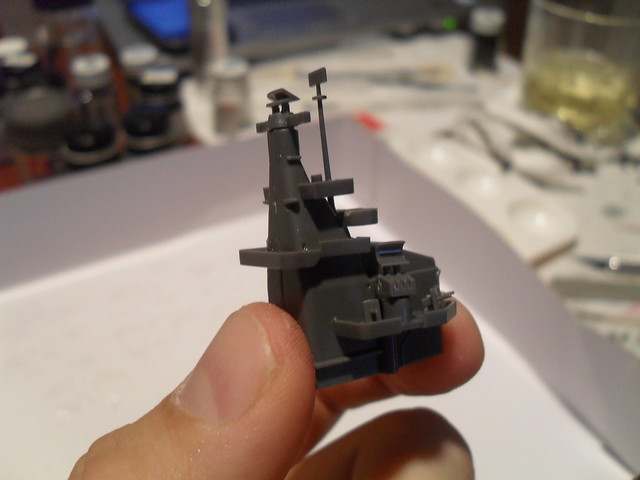
That little assembly I'm holding right there? 19 Pieces! 19!!!! That's crazy! Another assembly the size of my fingernail had eight! So yes, it's coming along slowly but surely.

Then tonight I picked up this at the LHS:

SDC16396

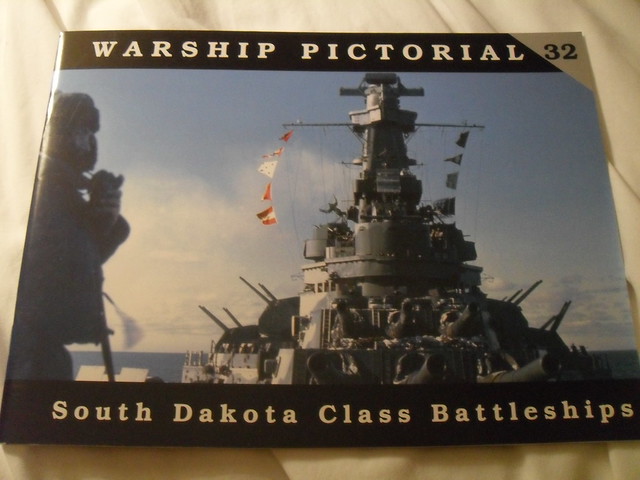
So now I can check the finer points of the details!

So that's where it is right now.

Thanks, -Budd

NEW SIG

JOIN OUR COMMUNITY!

Our community is FREE to join. To participate you must either login or register for an account.

SEARCH FORUMS
FREE NEWSLETTER
By signing up you may also receive reader surveys and occasional special offers. We do not sell, rent or trade our email lists. View our Privacy Policy.