SEARCH FINESCALE.COM

Enter keywords or a search phrase below:

''Fallen Angels" GB 2012-2013

3334 views
15 replies
1 rating 2 rating 3 rating 4 rating 5 rating
  • Member since
    April 2011
  • From: Dayton, OH
''Fallen Angels" GB 2012-2013
Posted by tcepilot on Sunday, September 9, 2012 5:11 PM

     This group build is a dedication to all who have lost their lives overseas fighting for our counrty, past and present. The goal of this group build is to give your best effort on any military kit and to honor the loved ones taken by war. The build will start on 9/11 of 2012 and end on 9/14 2013. This is an open thread to all modelers, enter as you like. Please, if you have a story feel free to dedicate this thread to them and your build. This is also dedicated to the victims and family of the attacks on 9-11-01.  

               take this badge if you participate (don't save it for the end) :

-tcepilot


 just make a gif here


  • Member since
    August 2005
  • From: Los Angeles, CA
Posted by corvettemike on Sunday, September 9, 2012 7:17 PM

Pencil me in, what subject yet I don't know. If I can get one I'm thinking (if it's allowed) a Boeing 767 painted in United 93 markings. They may not have fought overseas but those passengers did fight for our country in what I consider to be the first battle in the war on terror.

Rise my brothers we are blessed by steel in my sword I trust...

Arm yourselves the truth shall be revealed In my sword I trust...

Havoc Models

  • Member since
    April 2011
  • From: Dayton, OH
Posted by tcepilot on Monday, September 10, 2012 5:08 PM

Ok this GB is public and run by the FSM community, so you do what you want to do in this subject. It's just a dedication to our troops past and present, and those who lost their live's on September 11th 2001...

-tcepilot


 just make a gif here


  • Member since
    September 2003
  • From: AandF in the Badger State
Posted by checkmateking02 on Monday, September 10, 2012 5:54 PM

A wonderful idea to honor the sacrifice of our troops.  I'm in--but not exactly sure what:  maybe a ship, maybe a plane.

I think you're idea is very good, Mike.  Flight 93 had more than its share of courageous people.


  • Member since
    August 2005
  • From: Los Angeles, CA
Posted by corvettemike on Monday, September 10, 2012 6:54 PM

Any ideas where I can find what the proper serial number was for that aircraft? I'm thinking the FAA reports or 9/11 comission might list it.

Rise my brothers we are blessed by steel in my sword I trust...

Arm yourselves the truth shall be revealed In my sword I trust...

Havoc Models

  • Member since
    September 2003
  • From: AandF in the Badger State
Posted by checkmateking02 on Monday, September 10, 2012 7:17 PM

Would this be it?  

N591UA

There seem to be conspiracy theories out there about what the serial really was.  


  • Member since
    August 2005
  • From: Los Angeles, CA
Posted by corvettemike on Wednesday, September 12, 2012 5:44 AM

I think this is the kit I will need.

www.ebay.com/.../120962515443

Plus the UA livery decals and a panel of individual numbers to correct the serial.

The serial I find listed the most is the N591UA so that's most likely the correct one.

Rise my brothers we are blessed by steel in my sword I trust...

Arm yourselves the truth shall be revealed In my sword I trust...

Havoc Models

  • Member since
    September 2009
  • From: Guam
Posted by sub revolution on Wednesday, September 12, 2012 6:32 AM

I'm in. Don't know what yet, and it will be a while, but in for sure.

NEW SIG

  • Member since
    September 2003
  • From: AandF in the Badger State
Posted by checkmateking02 on Tuesday, September 10, 2013 3:08 PM

Just four days left in this GB, so figured I better start posting.  I'm nearly done with the project.

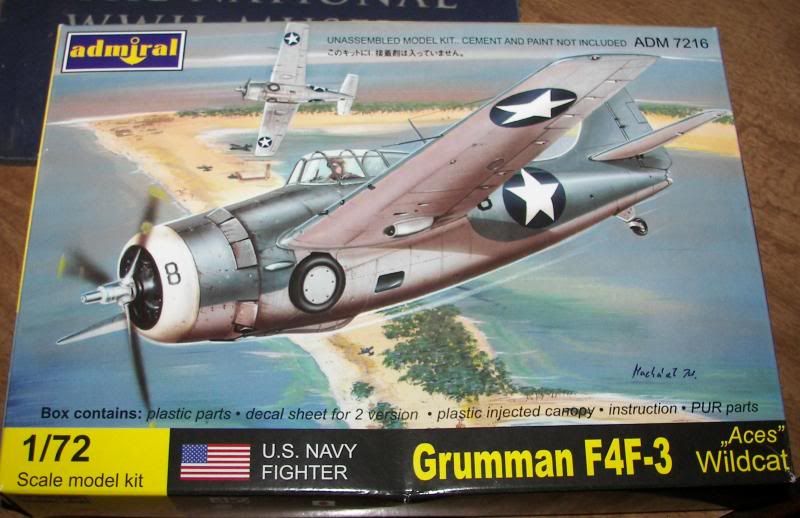
I chose to build an F4F-3 Wildcat, and put it in the markings of Butch O'Hare, when he flew his "bomber-a-minute" mission on 20 February, 1942, and earned the Medal of Honor.  Butch was later lost without a trace, flying a night mission.

I used the new Admiral kit, which contains the parts for a true -3 Wildcat.
   

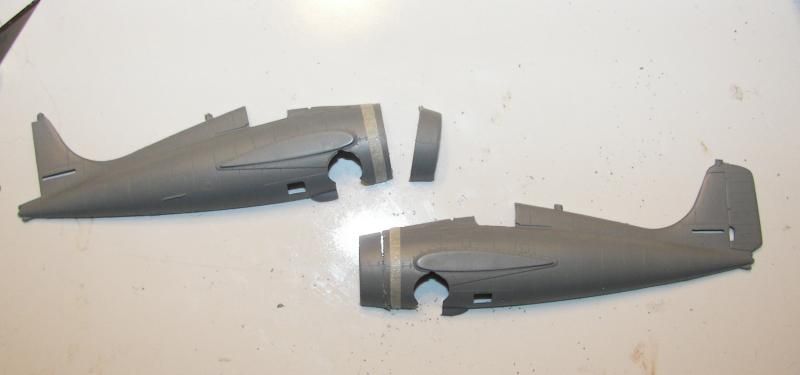
First thing the kit instructions say is to chop off 7.5 mm from the nose.  I measured and marked the cutline with masking tape, did the surgery and finished up by filing and sanding back to the cutline.
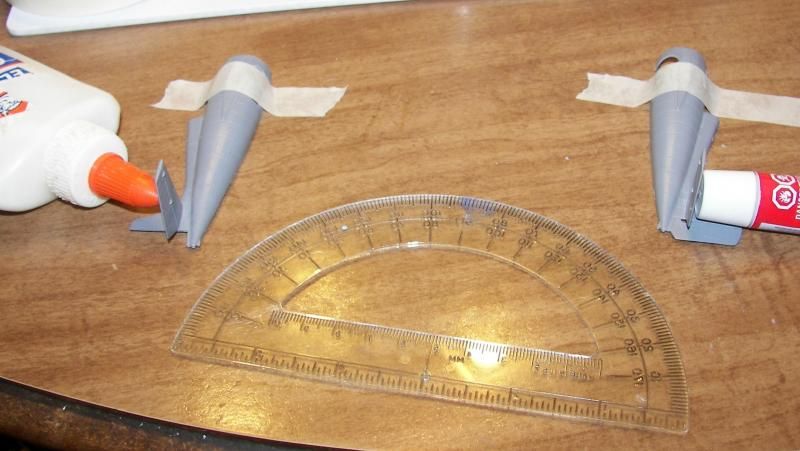
Next, I installed the horizontal stabilizers.  There wasn't much of a tab to hold them in place, and I was concerned that the result would be a weak joint, if I didn't really lather on the glue before closing up the fuselage.  I used a protractor to set the angle of the stabilizers at 90 degrees to the tailplane.
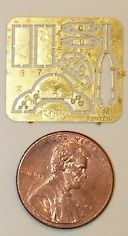
Admiral includes a small PE fret with parts for the instrument panel, alternate engine cowl flaps and a seat harness.
The engine is cast resin.  Also show are the parts used to replace the shortened nose.  These are cast in the standard plastic.

Here are the PE parts detached.  I painted the area behind the center insert black, and bent the seat belts to shape.  At this point in the war, the Wildcat was not equipped with shoulder harnesses, and there are plenty of stories about the pilot cracking his head against the gunsight, during ditchings (the gunsight is not included in this kit.

That's enough photos in one posting.  Thanks for looking.


  • Member since
    September 2003
  • From: AandF in the Badger State
Posted by checkmateking02 on Wednesday, September 11, 2013 7:42 AM

Here it is 9/11 and the GB is to end on the 14th, so here are more progress photos.

Two instrument panels are provided:  one is standard, one-piece plastic; the other consists of two PE pieces with two piece of film to represent the instruments.  As you can see, the two IP's are not nearly the same shape.

There was also an issue with one of the wings--the port side.  From the flap and into the aeliron, it was incompletely molded.  It required a lot of filler (I used superglue) and sanding.  In addition, both wings are molded so that a large gap appears at the trailing edge of both wings.  It takes a lot of filing, sanding and grinding to get the wings to assemble with a proper and thin trailing edge.

I painted the cockpit with WEM's Bronze Green and the area below that and into the wheel wells with MM's Gull Gray, to simulate Grumman's specific gray.  I picked out the instruments with acrylic black craft paint and applied some instrument decals from a spare sheet (although they don't appear here).

I finished the cockpit in Bronze Green, the forward side of the firewall and lower side of the firewall "Grumman" gray.  It's pretty nicely detailed.  Seat belts are some kind of MM tan and the hardware is gold.

I applied a black wash and some dry-brushed lightened green to break up the monotone.

Finally, for now, I installed the PE IP, and you can see it nowhere near conforms to the inside shape of the fuselage.  Rather than mess with it, I just glued  it in as solidly as possible with superglue.  It's not very visible anyway with the fuselage closed and the front canopy in place.  In this photo, you can barely discern the instrument decals on the panels.  They are nearly impossible to see once the fuselage is closed.

Thanks for looking.


  • Member since
    September 2003
  • From: AandF in the Badger State
Posted by checkmateking02 on Wednesday, September 11, 2013 3:49 PM

The engine is a resin casting and looks pretty good painted up.  I used some MM anthracite metallic, then gave it a wash of acrylic blacks and browns, finished up by some dry brushed silver.

Then I installed the engine in the cowling.  It seems to sit back a little too far, but the detail of the cowling is very sharp and crisp.

Landing gear is a different story.  Here the detail is kind of soft and indistinct.  In addition, one of the struts was molded too short, and the opposite number broke.  The photo is of the unpainted piece with what repairs I could accomplish.  I used .010 plastic rod to get the short strut to reach the gear leg.

Two shots of the gear, front and back, painted and with acrylic black wash applied.

Remember the incompletely molded wing?  Here it is, now sanded smooth.  The repair turned out well, and the defect disappeared under a coat of paint.

Here's a shot of the finished fuselage, with one wing attached.  Note that there is no locating slot or tab for positioning the wing.  The wing butt-joints onto the fuselage.  To get a firm connection, I applied tube glue, carefully, then coated it with  liquid glue and pushed the units together.  Remarkably, no glue oozed out.


  • Member since
    September 2003
  • From: AandF in the Badger State
Posted by checkmateking02 on Thursday, September 12, 2013 1:35 PM

The plane shown as ready for painting.

Unfortunately, I didn't take any photos of the painting process.  I used both masking tape and poster tack on the main assembly.

Below is a photo of some of the smaller pieces.

Since I wanted the canopy open, I purchased a vacuum formed Wildcat set from Squadron.  The kit canopy was in one piece, so I sawed it apart and sanded it down.  


  • Member since
    September 2003
  • From: AandF in the Badger State
Posted by checkmateking02 on Friday, September 13, 2013 10:41 AM

Finished photos following.

Decals are a mix of Superscale's F4F-3 sheet, which includes markings for Butch O'Hare's "bomber a minute" aircraft, and Starfighter Decal's Coral Sea sheet.  I followed the paint diagram on the Superscale sheet, which I'm not sure is 100% accurate, but it was unusual so I went with it.

Paint is from WEM's Colourcoats.

"4031" was apparently left on USS Lexington and was lost with the ship at Coral Sea.


  • Member since
    September 2003
  • From: AandF in the Badger State
Posted by checkmateking02 on Friday, September 13, 2013 10:47 AM


  • Member since
    September 2003
  • From: AandF in the Badger State
Posted by checkmateking02 on Friday, September 13, 2013 10:52 AM


  • Member since
    September 2003
  • From: AandF in the Badger State
Posted by checkmateking02 on Friday, September 13, 2013 10:59 AM

Butch O'Hare was lost at sea during a night mission on 26 November, 1943, probably by gunfire from a Japanese "Betty."


JOIN OUR COMMUNITY!

Our community is FREE to join. To participate you must either login or register for an account.

SEARCH FORUMS
FREE NEWSLETTER
By signing up you may also receive reader surveys and occasional special offers. We do not sell, rent or trade our email lists. View our Privacy Policy.