SEARCH FINESCALE.COM

Enter keywords or a search phrase below:

Japanese Group Build Part III

89868 views
946 replies
1 rating 2 rating 3 rating 4 rating 5 rating
  • Member since
    April 2013
Posted by SchattenSpartan on Sunday, January 19, 2014 6:41 AM

Oh boy, that's some great painting work, buddy!

  • Member since
    October 2008
  • From: Georgia
Posted by Rigidrider on Sunday, January 19, 2014 7:09 AM

Thanks again Guys... Cliff, I started with the masking on the tail, then found that I wasnt getting the "look" I was wanting so I switched to doing it free hand. Yes at times its funny, your going along just fine with the airbrush, I will add a few more drops of paint and the pattern goes totally different then it was. I use a gravity fed gun, and have found that if you remove the nozzle (the very last piece that protects the needle) and slightly increase the air pressure (5 psi for my needs) and get up close and personal with the tip,(about 1/4 in. from the surface) You can get damn near a pencil line spray, depending on the size of needle

Mine go .02, .03. and .05 in size. This takes alot of practice and patience, and a VERY light touch on the trigger. If you open too much you get a splotch, if not enough your too light and will not appear as you want. For goodnes sake , Be careful not to bump the needle tip and bend it! It is near impossible to straighten after its been damaged. Sounds like Im speaking from experiance(lol) Also remember to back flush your gun every now and then to clear paint passages and it also helps to keep paint mixed in reservoir, and clean tip at times to clear "dry tip" and buildup on needle.

Sorry, didnt mean ti get long winded, but I do have a passion for the airbrush and its abilities, with some experamenting and practice, we can achive some amazing results, and I am still learning every day!

Doug

When Life Hands You A Bucket Of Lemons...

Make Lemonade!

Then Sell It Back At $2 Bucks A Glass...

  • Member since
    November 2008
  • From: Central Florida
Posted by plasticjunkie on Sunday, January 19, 2014 8:58 AM

johnsan

Is that 1/72? Great work so far !

Doug

Great job as usual dude! That paint job is looking meaner by the day. Speaking of squiggly lines, I want to do that type of camo on the big Revell 1/32 He 219 that I have and with a huge area to cover it should be a hair pulling session for me if I go freehand.

 GIFMaker.org_jy_Ayj_O


Too many models to build, not enough time in a lifetime!!

  • Member since
    October 2008
  • From: Georgia
Posted by Rigidrider on Sunday, January 19, 2014 12:39 PM

Thanks PJ... I saw and am going to get one of the 32nd 219s! I have a 32nd He111 (what a beast that is!) Well just take your time, and do a section at a time. Just remember how the pattern you choose is applied and have at it! It took me almost 3 days to finish this one and I still need to do the engine cowling. The "Crane" pattern on the tail just didnt look right to me and I redid it three times before I got it like I wanted, You will be able to see the differance in the final pictures when they are posted.

Thanks

Doug

When Life Hands You A Bucket Of Lemons...

Make Lemonade!

Then Sell It Back At $2 Bucks A Glass...

  • Member since
    October 2008
  • From: Georgia
Posted by Rigidrider on Sunday, January 19, 2014 12:53 PM


OK, I finally got the whole upper camo pattern done.

Just dont like the way the tail looks...

I took a Qtip and put a drop of thinner and dried with a towl to remove the excess, then rubbed around the wing Honamarus to make it look like what it was, a field applied camo.

A little scratching around the pilots cockpit entry area.

And I finally got the tail the way I wanted it. I had to retape the "Crane" pattern and run the paint over the tape to make it look as if it were applied after camo, not the other way around, Im happy with it now.

Thanks... 

Doug 


When Life Hands You A Bucket Of Lemons...

Make Lemonade!

Then Sell It Back At $2 Bucks A Glass...

  • Member since
    April 2013
Posted by SchattenSpartan on Sunday, January 19, 2014 12:59 PM

You did an awesome job on that camo, bro! Not to mention all of it is freehanded! Bow Down

  • Member since
    October 2008
  • From: Georgia
Posted by Rigidrider on Sunday, January 19, 2014 1:24 PM

Thanks Clemens, This one took some doing, and I still have the cowling and the weathering, but so far , Im pleased with the way its going. Take care!

Doug

When Life Hands You A Bucket Of Lemons...

Make Lemonade!

Then Sell It Back At $2 Bucks A Glass...

  • Member since
    April 2006
  • From: Denver, Colorado
Posted by waynec on Sunday, January 19, 2014 2:48 PM

WOW. i will have to revisit this to study how you did the camo.

Никто не Забыт    (No one is Forgotten)
Ничто не Забыто  (Nothing is Forgotten)


  • Member since
    April 2005
  • From: Australia
Posted by taxtp on Sunday, January 19, 2014 4:44 PM

Very well done camo Doug. That stuff is tricky to apply consistently.

Cheers

Tony

I'm just taking it one GB at a time.

  • Member since
    November 2008
  • From: Central Florida
Posted by plasticjunkie on Sunday, January 19, 2014 5:03 PM

Can u say fantabulous or fanbloodytastic! Beer

 GIFMaker.org_jy_Ayj_O


Too many models to build, not enough time in a lifetime!!

  • Member since
    October 2008
  • From: Georgia
Posted by Rigidrider on Sunday, January 19, 2014 7:19 PM

Thank you... you are all too kind! Tony, you are right about a pattern like that, you tend to get in a rush after awhile and it shows. That is why I take breaks inbetween, When I feel the patience fading, I stop for a bit!(LOL) All in all it took between 2-1/2 and 3 hrs to apply, and like I said, I just didnt like the way the tail was coming out, and re did it 3 times. First the tail is denser and darker in the picture I have, and secondly I didnt like the way it looked around the yellow Chutai "Crane" emblem until the last redo.

Thanks again all...

Doug

When Life Hands You A Bucket Of Lemons...

Make Lemonade!

Then Sell It Back At $2 Bucks A Glass...

  • Member since
    January 2010
Posted by johnsan on Sunday, January 19, 2014 11:41 PM

Thanks for the comments, guys and for looking in.

Jgeratic - the mesh is from a nylon tea pyramidal infuser. The tea is from a US source and isn't terribly expensive should anyone be looking for really fine mesh suitable for detailing.

Plasticjunkie - yes, 72nd. 99% of my work is in this scale. I find it more challenging than other scales and because of the challenge more rewarding. It also has a much smaller footprint on the shelf.

Doug - Nice! I wouldn't worry too much about consistency, though. In one of my Tony books there is a series of photos of the same aircraft from all aspects. The blotching isn't consistent even on one side, let alone from side to side.

  • Member since
    November 2009
  • From: SW Virginia
Posted by Gamera on Monday, January 20, 2014 7:34 AM

Doug: That looks spectacular! I've tried to do the same but it always ends up, spray, spray, spray, WHAM huge gob of paint!!! Guess I need to practice more with the airbrush.

"I dream in fire but work in clay." -Arthur Machen


  • Member since
    October 2008
  • From: italy
Posted by bsyamato on Monday, January 20, 2014 8:22 AM

Great work on markings and camo Doug :) one of my missing jap planes!

Actually out of my original workbench, arrenged a smaller one ..but is not the same thing :(

I hope soon come back with the tenzan, for now just the resume of done work from previous GB

the box

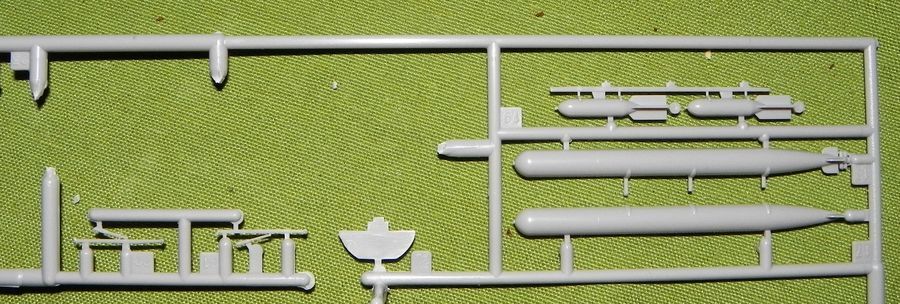
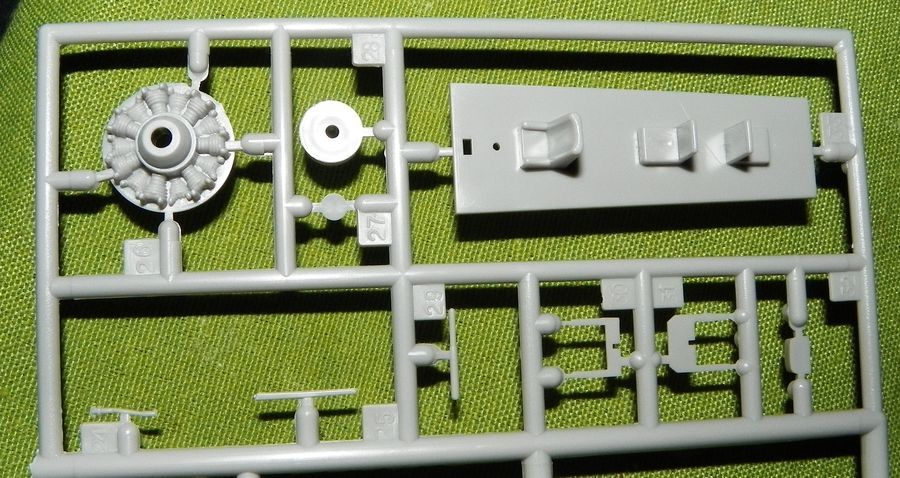
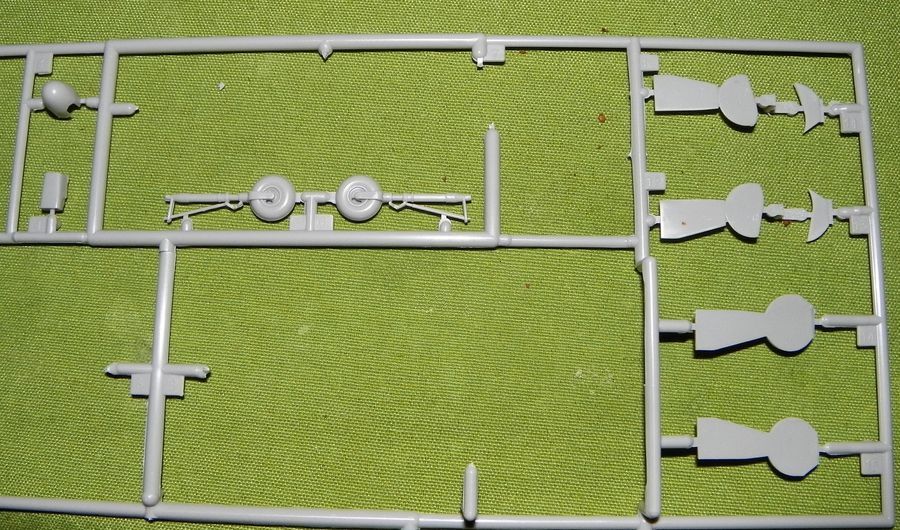
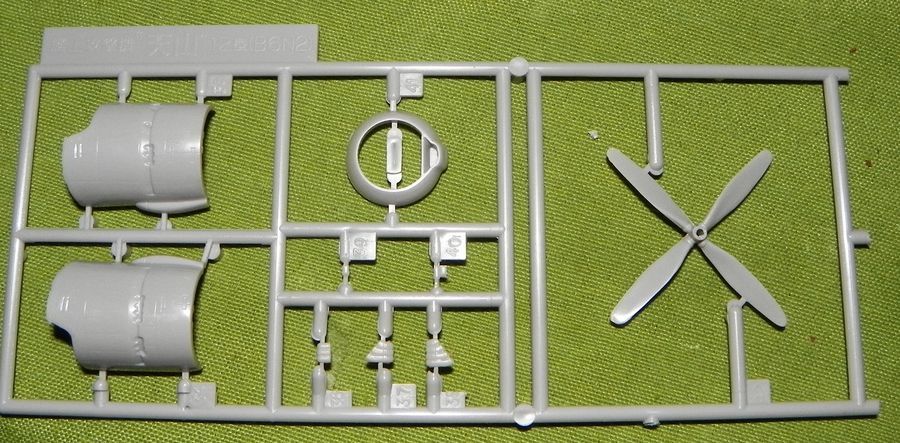
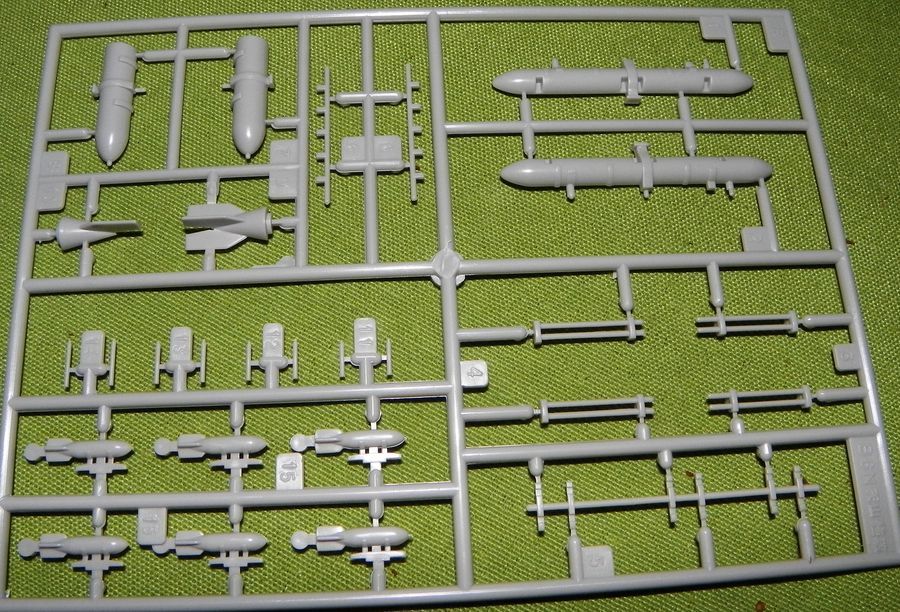
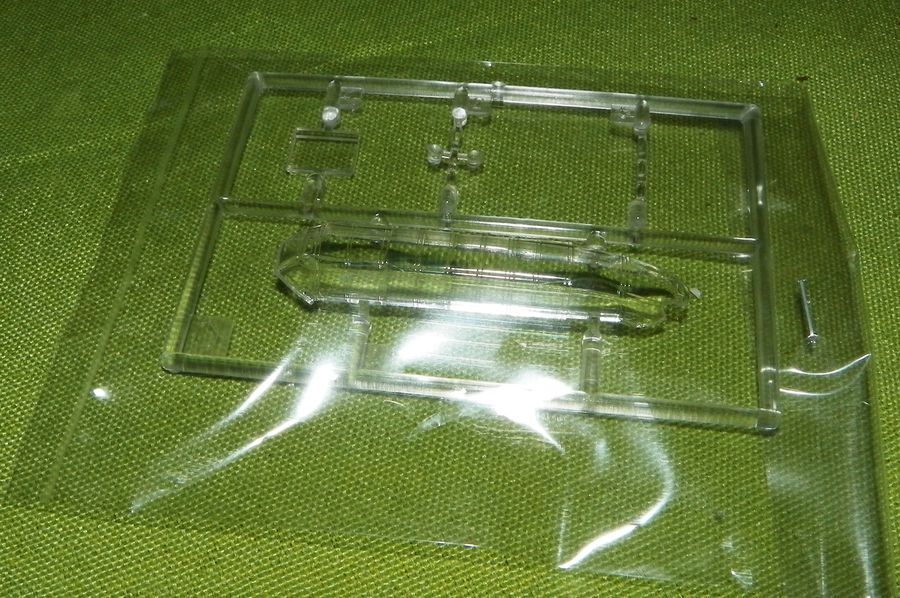
the sprues withouth main parts

test fitting 

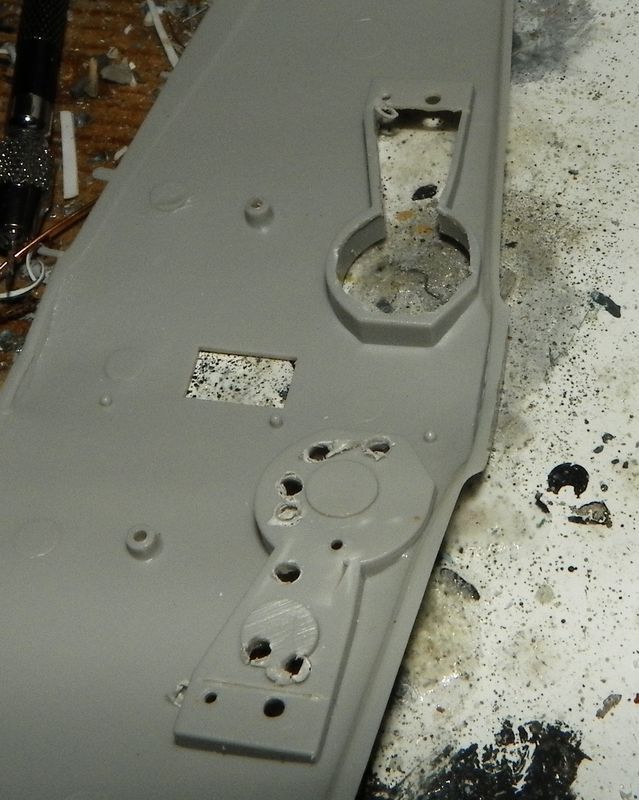
that shows "some" hole is needed in the wells!"

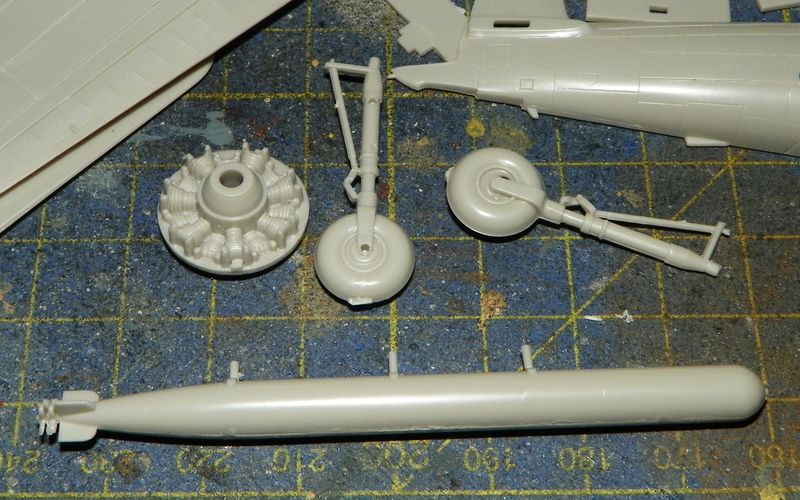
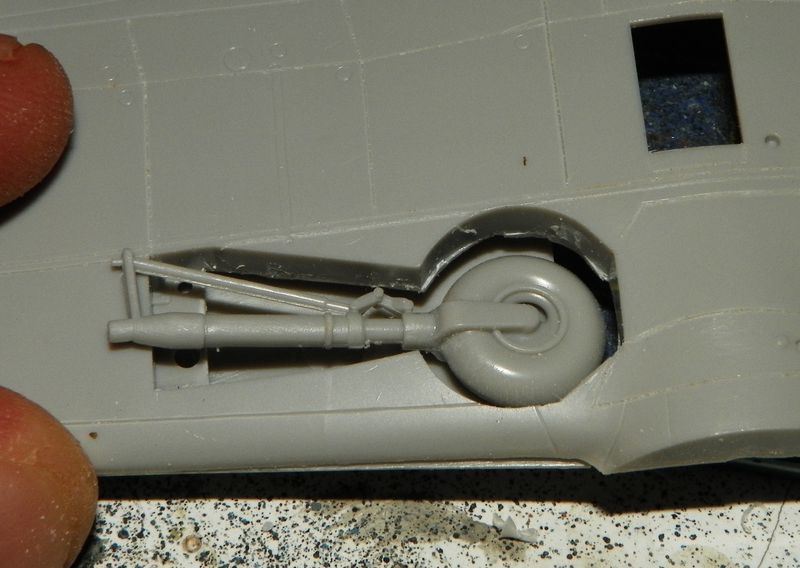
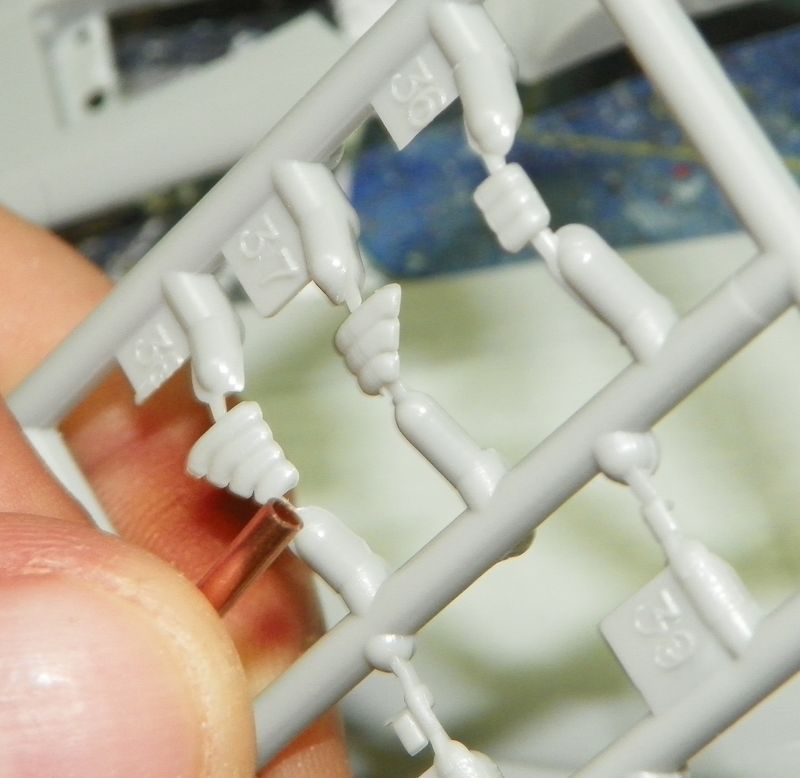
torpedo , endine and gears.. unfortunately an one piece gears with wheels :(

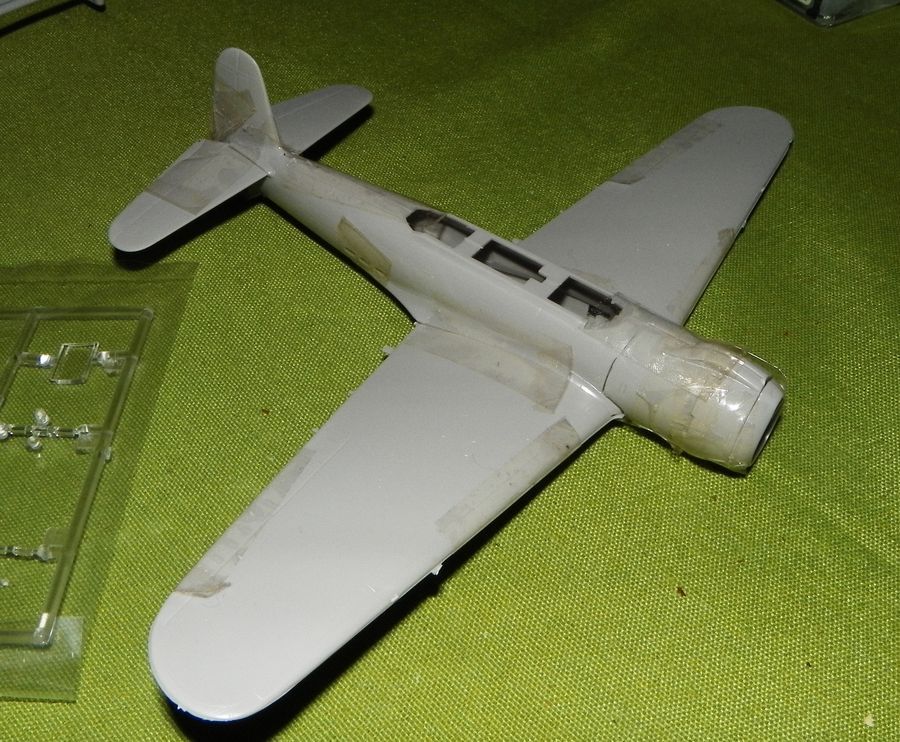
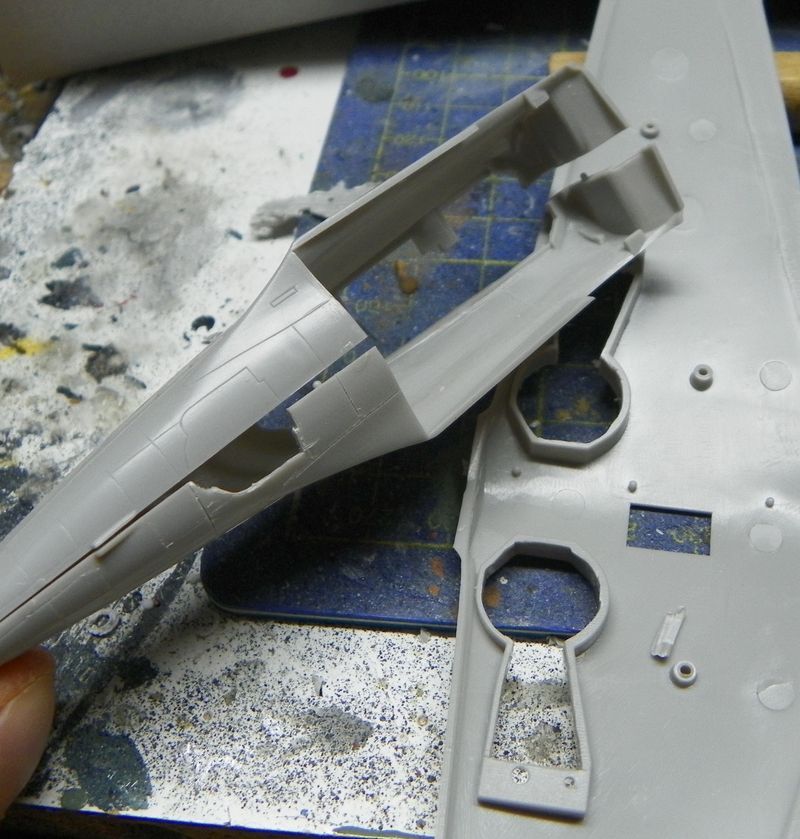
Cockpit roof cut in two as the real one, i will just use it as a dime for a full scratched cockpit

detatch and glued the vertical rudder

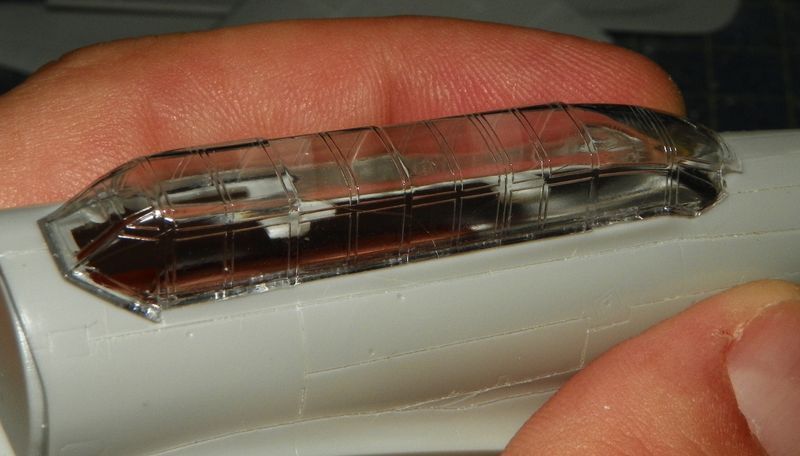
not too bad the canopy but i whish an opened one , then will heatform a new one in future.

Notice the panel lines, i redraw all of them to not lost details during the painting session

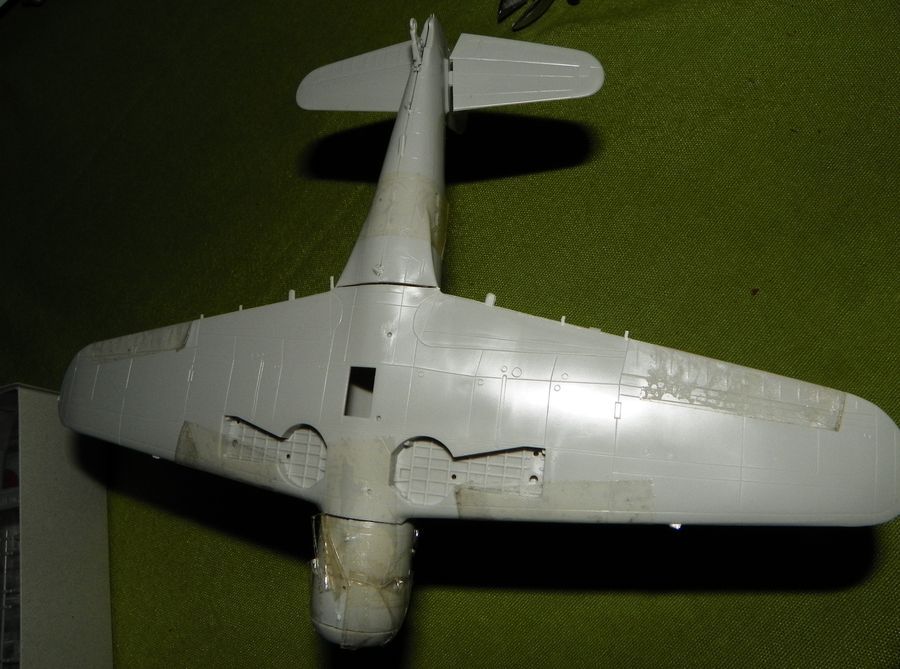
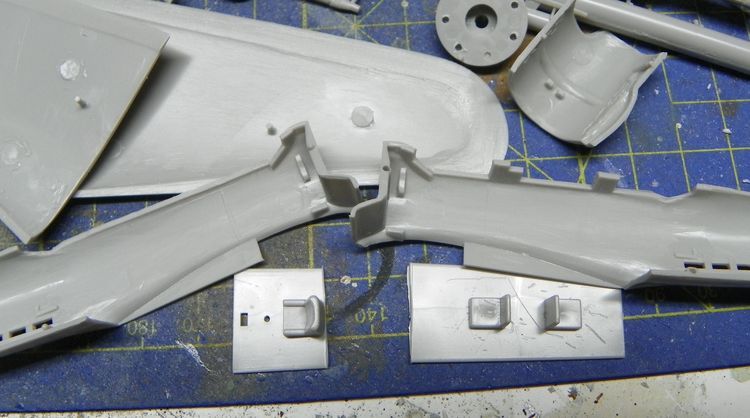
holes in the main wells to help the cutting operation

opened

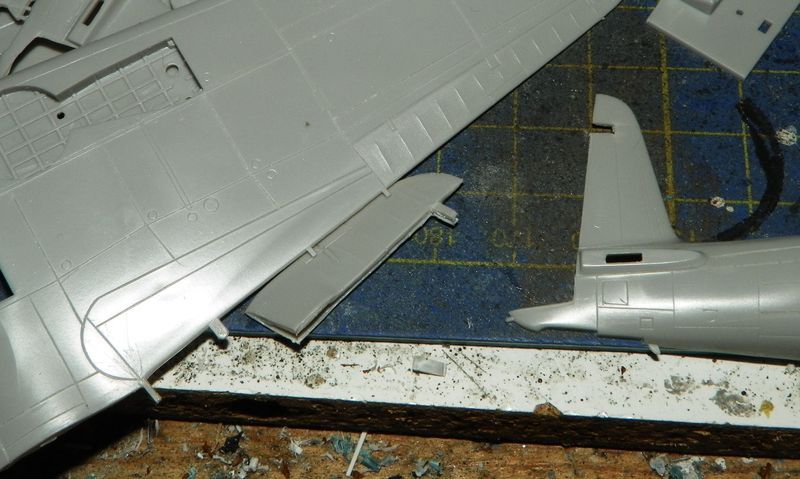
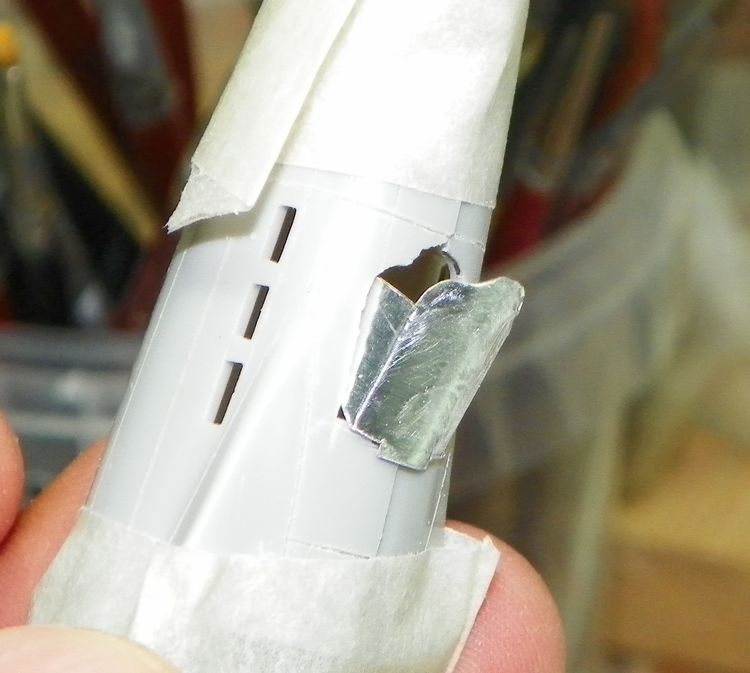
also opened the lower gun turret door

used aluminium sheet to scatch the opened door

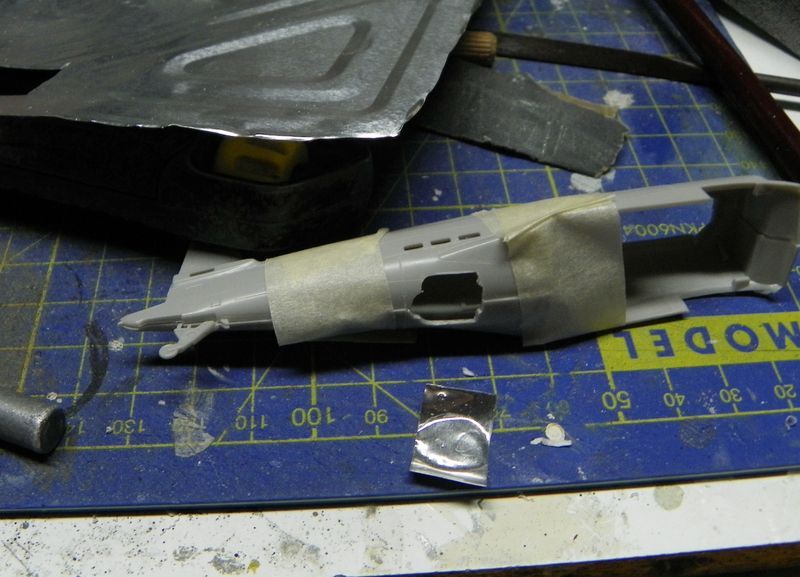
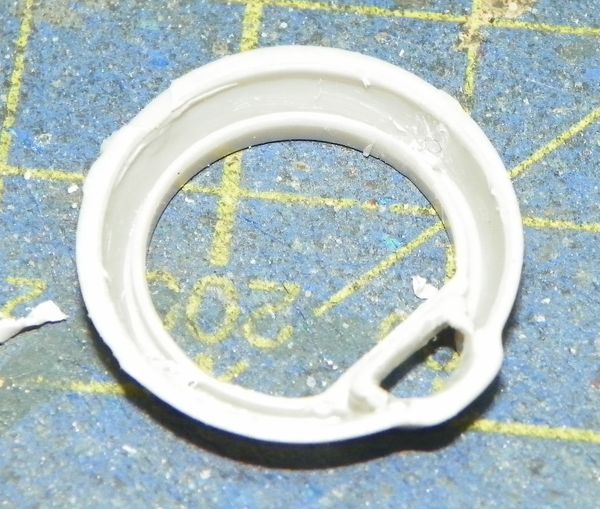
opened the cowling low air intake

exhausts are not so good :( will try to replace with something

That's all for now

  • Member since
    November 2008
  • From: Central Florida
Posted by plasticjunkie on Monday, January 20, 2014 8:27 AM

johnsan

Plasticjunkie - yes, 72nd. 99% of my work is in this scale. I find it more challenging than other scales and because of the challenge more rewarding. It also has a much smaller footprint on the shelf.


If my eyes Geeked and fingers would cooperate, I would build mostly in that scale. True that about the display space gained. The detail and quality of some of the kits in this scale are the same as the larger scales. 


 GIFMaker.org_jy_Ayj_O


Too many models to build, not enough time in a lifetime!!

  • Member since
    November 2009
  • From: SW Virginia
Posted by Gamera on Monday, January 20, 2014 8:33 AM

That looks really cool Bsyamato though that canopy looks like a pain to paint! I have the Hasegawa kit in 1/48th but everytime I pull it out I look at the canopy and put it back in the box!

Haven't seen you in a while, glad to see you've got your new bench up and ready.

"I dream in fire but work in clay." -Arthur Machen


  • Member since
    November 2008
  • From: Central Florida
Posted by plasticjunkie on Monday, January 20, 2014 8:44 AM

plasticjunkie

johnsan

Plasticjunkie - yes, 72nd. 99% of my work is in this scale. I find it more challenging than other scales and because of the challenge more rewarding. It also has a much smaller footprint on the shelf.


If my eyes Geeked and fingers would cooperate, I would build mostly in that scale. True that about the display space gained. The detail and quality of some of the kits in this scale are the same as the larger scales. 


 GIFMaker.org_jy_Ayj_O


Too many models to build, not enough time in a lifetime!!

  • Member since
    November 2008
  • From: Central Florida
Posted by plasticjunkie on Monday, January 20, 2014 8:56 AM

bsyamato

Great scratch work on this Tenzan, it greatly improves the kit. I have a Hasegawa Jake in 1/72 that needs tons of scratch work in the cockpit. Only a resin set in 1/48 is available.  Not too much info on Jakes out there. There's only one Nakajima Tenzan left in the world and it's at the Air and Space Museum in DC.

 GIFMaker.org_jy_Ayj_O


Too many models to build, not enough time in a lifetime!!

  • Member since
    October 2008
  • From: Georgia
Posted by Rigidrider on Monday, January 20, 2014 4:47 PM

Johnsan... Yup... I,ve seen pictures that are very close to the same pattern and you are right, not alot of consistancy. I think , like I read that many aircraft were very rapidly and crudely covered with a camo pattern upon arrival. Although, I do like the Japanese style of camo...

BSY, Good to hear from you ... I've tried to keep in on the builds in the Jap.2 build, but got wrapped up with my most favorite fighter the Fw190 at that GB. I am happy to be back here building now.

Doug

When Life Hands You A Bucket Of Lemons...

Make Lemonade!

Then Sell It Back At $2 Bucks A Glass...

  • Member since
    December 2012
Posted by flyerduke on Monday, January 20, 2014 8:16 PM

I was wondering if I could get in on this GB.  I'm relatively new to the FSM forum and have never participated in a group build.  I have a 1/48 Tamiya Ki-46 Dinah I started last week.  I'm kind of slow, but I'm pretty sure I can finish it.  Thanks.

Craig

  • Member since
    November 2009
  • From: SW Virginia
Posted by Gamera on Tuesday, January 21, 2014 7:34 AM

flyerduke

I was wondering if I could get in on this GB.  I'm relatively new to the FSM forum and have never participated in a group build.  I have a 1/48 Tamiya Ki-46 Dinah I started last week.  I'm kind of slow, but I'm pretty sure I can finish it.  Thanks.

Craig

Hello Craig! 

You're more than welcome to join us! The rules are on page 1 - pretty simple, the model must be Japanese and less than half build to qualify. The Dinah fits right in. And the build ends on Dec 31, 2014 so you've got eleven and a half months to finish her. If you don't no big deal either way.

Let me know if you want me to put you down.

Cliff 

"I dream in fire but work in clay." -Arthur Machen


  • Member since
    April 2013
Posted by SchattenSpartan on Tuesday, January 21, 2014 7:42 AM

Welcome to the forum and this GB, Craig!

Yamato: You're off to a good start!

  • Member since
    December 2012
Posted by flyerduke on Tuesday, January 21, 2014 8:19 AM

Cool. Sign me up.  Now I have to figure out how to post pictures.

  • Member since
    November 2009
  • From: SW Virginia
Posted by Gamera on Tuesday, January 21, 2014 12:06 PM

Hey Craig, just put you down- welcome to the funny farm!!!

I'm not very good at this but I'll try to help with your photos, maybe the other guys can pitch in here too (hint, hint).

For PhotoBucket (I don't know about ImageShack or any of the others) you'll want to copy the link under 'direct', click on the 'Insert Image' box and then paste the link inside. That should work. 

"I dream in fire but work in clay." -Arthur Machen


  • Member since
    October 2008
  • From: Georgia
Posted by Rigidrider on Tuesday, January 21, 2014 4:25 PM

Welcome Craig!

A few more wip posts...

Motor cowling done... According to the picture I'm using as referance, the pattern is heavier in the back and gradually gets less as you move forward, I think I got it right.

And yes , some exhaust stains.

Thats all for now my friends... May not get to do any more till the weekend.

Take care...

Doug 

When Life Hands You A Bucket Of Lemons...

Make Lemonade!

Then Sell It Back At $2 Bucks A Glass...

  • Member since
    April 2013
Posted by SchattenSpartan on Tuesday, January 21, 2014 4:52 PM

Holy Moly, that looks awesome, my friend! Simply perfect! Bow Down

  • Member since
    December 2012
Posted by flyerduke on Tuesday, January 21, 2014 5:14 PM

OK.  Here goes a try at posting photos.  I set up a photobucket account so I can do this.  Hope it works.

I snapped a couple photos last night to show my progress.  Got most of the heavy airbrushing done.  Time for details and assembly.  I'm gonna build this kit straight out of the box.  It seems pretty straight forward and pretty easy.  This is gonna be the first kit I hope to finish in over 20 years.

  • Member since
    December 2012
Posted by flyerduke on Tuesday, January 21, 2014 5:16 PM

Crap! It didn't work.  How do I get the pics to appear in the forum?

  • Member since
    April 2013
Posted by SchattenSpartan on Tuesday, January 21, 2014 5:33 PM

Click on "use rich formatting" and then select "insert image" from the toolbar. If you click on it a wndow should open. That's where you enter the "Direct"-link from Photobucket.

  • Member since
    December 2012
Posted by flyerduke on Tuesday, January 21, 2014 8:37 PM

Thanks.  Got it to work.

JOIN OUR COMMUNITY!

Our community is FREE to join. To participate you must either login or register for an account.

SEARCH FORUMS
FREE NEWSLETTER
By signing up you may also receive reader surveys and occasional special offers. We do not sell, rent or trade our email lists. View our Privacy Policy.