SEARCH FINESCALE.COM

Enter keywords or a search phrase below:

1944 Group Build

131983 views
1959 replies
1 rating 2 rating 3 rating 4 rating 5 rating
  • Member since
    December 2002
  • From: Bury St Edmunds, Suffolk, England
Posted by Bish on Wednesday, December 3, 2014 4:10 PM

depends how thick the piece of sprue is. I normally use a fine piece of wire, such as 5amp fuse wire or 34 gauge wire. I can normally get a really small blod of glue where I need it.

I am a Norfolk man and i glory in being so


On the bench: Airfix 1/72nd Harrier GR.3/Fujimi 1/72nd Ju 87D-3

  • Member since
    February 2010
  • From: Berkeley CA/St. Paul MN
Posted by EBergerud on Wednesday, December 3, 2014 5:38 PM

Nomad: you need to get over to Model Warship. That's modelwarships.com for the home page. Push forum. Then go to the "Tips and Tricks" Section and you'll find advice from some of the best ship modelers on the planet free of charge.

For railings check a 41 post thread (including advice from uber-meister David Griffith who has the best book about making plastic warships available) - search "Deck Rail Methods." Right at the top of the Tips list is a huge thread called "Weathering Guide". And there's uber-uber-meister Jim Baumann's thread on "Making Stretched Sprue and Rigging with Stretched Sprue".

If you want to gaze at the way ship modeling is done in the big leagues check out their Gallery. If you bring up the Gallery page you can see a search box at the bottom. You can search a ship name or a kit name. (Likely that you'll run into a partial or full photo build - fine resource right there.) You can also search a modelers name. Try David Griffith, Jim Baumann and/or Chris Floodberg to get a look at the meisters at play. (Model Warship has an excellent search engine, but the results will appear in a separate window and not replace the one you're on - just check your tabs. If a builder has ships in the Gallery his collection will be at the top of the search list.) There are dozens of others that have similar skills. (If you search the "Scratch Build" section for completed builds, it's like another planet.) Just remember that these guys are fanatics and have been at the hobby for years. One of their moderators warns new members not to be intimidated. Mortals can make really sweet ships without winning prizes - my ships don't hold a candle to the good ones there, but they are still the models that impress visitors.

Actually there is competition for "wow factor" in the model world - WWI biplanes. The loonies in that field around found on a gem of a site from Australia run by a great guy named Des Delatorre. http://www.ww1aircraftmodels.com/index.html . It's crammed with great information and some of the most complete and impressive photo builds available. The forum is open for all to view but a small donation is asked if you post. (Model Warship is free and registering is a good idea.) I believed Finescale ran a Site-wide build on WWI aircraft this year run by editor Peter Skinner - which I completely missed but I've seen some great models that were entered. Obviously there are some knock-out models here: likewise the Kitmaker network or Swannys. And Finescale is the biggest board in the US I'd guess so someone here knows something about almost everything. And it's the friendliest place in town in my experience. No small matter.  


A model boat is much cheaper than a real one and won't sink with you in it.

  • Member since
    September 2013
Posted by Raven728 on Wednesday, December 3, 2014 6:02 PM

Thanks for the kind words, guys. Schatten, I guess the first pic is probably my favorite. Thanks.

- Steve

  • Member since
    February 2010
  • From: Berkeley CA/St. Paul MN
Posted by EBergerud on Wednesday, December 3, 2014 6:06 PM

Forgot to comment on your rigging - looks very good. It's out of scale by a good margin. But that's not such a big sin early in the game. First of all, you got the ship rigged - and it will look better because of it and in future builds you'll do better. Also, people will be able to see your rigging without using a magnifying glass.. Some modelers build for shows or the camera. Then the super-thin line makes sense. But I rigged a 1/700 destroyer with the 20 Den Uni Caenis line beloved by fanatics. I almost threw the kit through the wall because it was so frustrating to handle. Also, it's almost impossible to see the rigging at all on that model and it's sitting 5 ft away from my desk. And if you can rig a ship you can rig a biplane - a kind of model everyone should build at least one of. (Blow the wad and get a WingNut Wings Kit. Yes, they're $50 minimum but the fit is astounding - no small thing when you're attaching wings to struts.)

Aleene's is the bees knees (my wife says there's a drink with that name - retro 20's hard liquor cocktail) and any variety of Aleene's is much better than normal white glue. (I've stopped guying Gator Glue.)  I prefer regular Aleene's - it's tacky enough and leaves the smallest residue. Both quick drying and super tack go on clear but they all dry just a little milky. So you want to use small amounts and clean excess while before it sets. Obviously the "touch up" paint job on my its includes covering little Aleene blotches which don't craze the plastic the way a plastic cement would. And yea, just a bit of CA will hold it for good - just find the applicator tool that works best for you. (Xacto knives are so cheap that I've dedicated two for CA applicators - but I also use plastic tooth picks.) Might add that Jim Baumann uses a UK version of Aleene's for attaching railing and PE and he's one of the best.

For your next rigging job, do give black fly tying line (about 6/0 - 10/0) a try because it's so easy to work with - more so than sprue in my book. Ditto with fly tippet material - something about 1lb test: it's easier yet to manipulate but doesn't knot quite as well. We're talking $2 a roll here - worth the risk.

Eric


A model boat is much cheaper than a real one and won't sink with you in it.

  • Member since
    September 2003
  • From: AandF in the Badger State
Posted by checkmateking02 on Wednesday, December 3, 2014 11:10 PM

Very good to hear that there will be more ships coming in '45.  Join the Navy and see the world.

Doug:  I just touch both ends of the sprue to a little pool of glue, and then try to pop it into place.  Usually doesn't work and I have to tack one end down separately.  Tweezers are helpful (I find them necessary) to hold the sprue while you work it into position.  I have a kind of broad nose tweezers; needle nose tweezers seem to pinch the sprue too much, sometimes leaving an unwanted bend.  But that just might be me being clumsy.

I hadn't thought about the lines being smooth, but I think the trick is not to get glue on the sprue-line to begin with.  But if you do, and if you use white glue, you should be able just to wash it off by gently "painting" at it with a small brush dipped in water.  Once white glue is set up, it seems to hold as well as needed, but until it does, it's generally easy to remove it completely and start over.

I'm too inept even to attempt using CA to attach rigging, so hats off to you for accomplishing it!

Personally, I find Aleene's a little too thick for attaching sprue (but more power to Eric since he can get it to work), so I use plain old Elmer's school glue, and sometimes I even thin that down some.

Believe me when I tell you that I'm no expert--just pig-headed and persistent.  I went through about nine feet of stretched sprue, just to get done what little I've posted.  Either I drop them and can't find them again; cut them too short; have them break when I tighten them; mislocate them on the ship where they end up not quite where I want them to be; the cats run off with them; or encounter some other pitfall that requires re-working them.  That's why it's important to walk away before you get too frustrated and sink a ship that the Japanese couldn't sink in the Pacific.

One other thing, too, if you don't have black sprue or line, you can color the sprue with a black permanent marker.  It's what I did.  Just tape each end of a long piece of sprue to a piece of paper or cardboard and carefully run the marker over it.  Be sure to check all sides for coverage.

Otherwise, it's just practice, practice and more practice.

Continued good sailing!


  • Member since
    August 2009
  • From: MOAB, UTAH
Posted by JOE RIX on Wednesday, December 3, 2014 11:36 PM

CMK & Eric, I'm curious. Is there a reason you guys do not use EZ Line for rigging? I use the stuff for antennas on my aircraft and I just love the stuff. Is it out of scale? Difficult to manage? Inquiring minds want to know.

"Not only do I not know what's going on, I wouldn't know what to do about it if I did". George Carlin

  • Member since
    September 2003
  • From: AandF in the Badger State
Posted by checkmateking02 on Wednesday, December 3, 2014 11:53 PM

Joe:  I like sprue because it's easy to get, cheap, and I'm old-school.  Been using it for decades.

And the cats like to play with it when I hang it from the closet door.

Is that the Hasegawa Ticonderoga you're considering?  She was sister to the Shangri-la (a long-hull Essex class), so that's what I'll be basing her on.  Found some photos of other modelers doing CV-38, so I think it'll work OK


  • Member since
    February 2010
  • From: Berkeley CA/St. Paul MN
Posted by EBergerud on Thursday, December 4, 2014 12:30 AM

I use Easy Line for airplanes too. Even the thinnest is a little out of scale for a ship I'd guess, and you're putting a little pressure on points and I think it could cause some uneven setting. Wing Nut Wings which is one of the best model companies on earth - and make only WWI aircraft (hey, it's Peter Jackson's toy and after the Lord of the Rings and the Hobbit he could probably buy Auckland) is now recommending it. I checked at Delatorre's WWI aircraft board and people there were rather bewildered by the recommendation. Actually it might work ok on ships but I don't see any advantage over mono for a biplane - EZ does have a kind of fuzzy texture. WingNut has been bugged about rigging since they started - maybe people that have never built a biplane find it easy - but if you're using buckles and tubing a really clean mono would be the way to go. Part of it is momentum I guess. I don't do enough ships so when I start rigging I have to relearn some stuff. Once I get a few good lines down your hand and brain want consistency and not experimentation. But I've got a WWI Battlecrusier next up (hopefully in a long time) and I'll try to remember to give a shot before I teach my eyes to work with things are much too small. At least now, thanks to WingNut you can buy EZ in a proper roll instead of wrapped around a piece of cardboard. In my case, it's easy to default to fishing lines because I've done a lot of fishing: there was a time when I could do a nail knot at night - but that was a long time ago.

Eric


A model boat is much cheaper than a real one and won't sink with you in it.

  • Member since
    May 2014
Posted by Nomad53 on Thursday, December 4, 2014 5:59 AM

Thanks guys for the great help.

Eric: I going to try and get to Caballa's today and get the fly ting line. That is if I have the time. Got a busy day ahead of me. Being disabled doesn't mean that I get to sit at home everyday but I do most of the time.

I went to the Ship Model Forum and found what your told me. WOW!!! I haven't registered yet but I will today. There are some great tips there. Thanks for telling me about it. The next ship I build will be better in all levels of the build. I have learned to take my time and make sure I can recover if I make a mistake.

Today I am going to try and do some weathering on the hull. I will attempt to do some rust streaks on the side. I do not have any enamel rust paint but I do have acrylic rust paint. Need some help on other things I can do. I will look at the Ship Model Forum and see what they have also. I have got so used to doing armor that I do not want to mess this up.

CMK: The photo that you posted on your rigging on one of the superstructures, the attachment points on the yard arm were even and looked like they even wrapped over the top of the arm. That was great work.

I feel that doing the small work is helping me to keep my hands working but I still have trouble holding things and drop parts all the time. When my wife hears me say " Damnit" she asks "What did you drop this time and comes to help find the part. She is good to me on that. I can not get down on the floor to look and if I did I have to have help getting back up.

Getting back into modeling has been a real blessing for me. It is my get away from all the real life drama that everyone has. I still have the drama but it's easier to handle.

Everyone here in this GB has helped me to keep my insanity to a very low level plus having someone to chat with me on things that the family knows nothing about.

Doug

Thanks again. You all are the best.

Nomad53


  • Member since
    August 2009
  • From: MOAB, UTAH
Posted by JOE RIX on Thursday, December 4, 2014 6:34 AM

Thanks for the input guys. The tension factor makes sense to me Eric.

CMK, It is indeed the Hasegawa kit. I was not considering doing the Tico as I felt that I simply would not have time to invest in the masking of the measure 33/10a dazzle scheme. But, then I did a little research. It seems that the Tico was wearing the dazzle scheme in Jan. '45 when it was damaged in a kamikaze attack. Tico was sent to Puget Sound for repairs and returned in May '45 in the Measure 21 all navy blue scheme. Although this would expedite building it, I would rather save it until I could build it in the dazzle scheme.

"Not only do I not know what's going on, I wouldn't know what to do about it if I did". George Carlin

  • Member since
    September 2003
  • From: AandF in the Badger State
Posted by checkmateking02 on Thursday, December 4, 2014 8:18 AM

Doug:  I took another look at the photo of the yardarm.  I believe what you see is detail molded into the yardarm.  With the sprue, I tried to glue it to the underside.  Sprue is pretty fragile, and I don't think it would survive the bending need to wrap it around.  Anyway, I can't take credit where no credit is due.  But thanks anyway!

One other point:  are you using magnification of some kind?  Like an Optivisor? When I was a lot younger, I could do without, but not in the bi-focal age.  Here's what I found at Amazon.  I bought a 10x version years ago when I was painting 54mm miniatures.  It's invaluable now for tiny parts and rigging.

www.amazon.com/s

I think you're doing terrifically well, and you'll only get better.  

Joe:  Thanks for the info.  CV-38's story is very similar.  Although she too was originally painted in a dazzle scheme, I don't think she sailed into combat that way.  One of Shangri-la's original plank owners is a friend for over twenty years (he's well along in his 80's now; lied about his age to enlist in the Navy), and I've picked his brain a lot about his experiences.

From what I've learned from him, it seems CV-38 was repainted at Pearl before Iwo Jima, so she was dressed out in Measure 21 for most of her active service.

After working on North Carolina for the last four months, I certainly understand the time needed to do a dazzle scheme!  Due to the work schedule, I haven't been able to do much all week, and it's frustrating cuz things are pretty close to the finish now.


  • Member since
    July 2004
  • From: Sonora Desert
Posted by stikpusher on Thursday, December 4, 2014 9:50 PM

The main reason for Measure 33 "Dazzle" schemes in 1944 vs. Measure 21 Overall Sea Blue in 1945 in the PTO was that the nature of the Japanese theat had changed. In 1944 Japanese subs and surface ships were still a significant threat to USN ships. By 1945, after Leyte Gulf the threat had changed to the Kamikaze. Measure 21 provided superior camouflage to Measure 33 against the air threat.

Ok, tonite I finally began my 1944 GB project, Bronco's 1/350 Type IXC U-Boat as U-505. I will have photos up soon here.


F is for FIRE, That burns down the whole town!

U is for URANIUM... BOMBS!

N is for NO SURVIVORS...

       - Plankton

LSM


  • Member since
    July 2004
  • From: Sonora Desert
Posted by stikpusher on Friday, December 5, 2014 12:03 AM

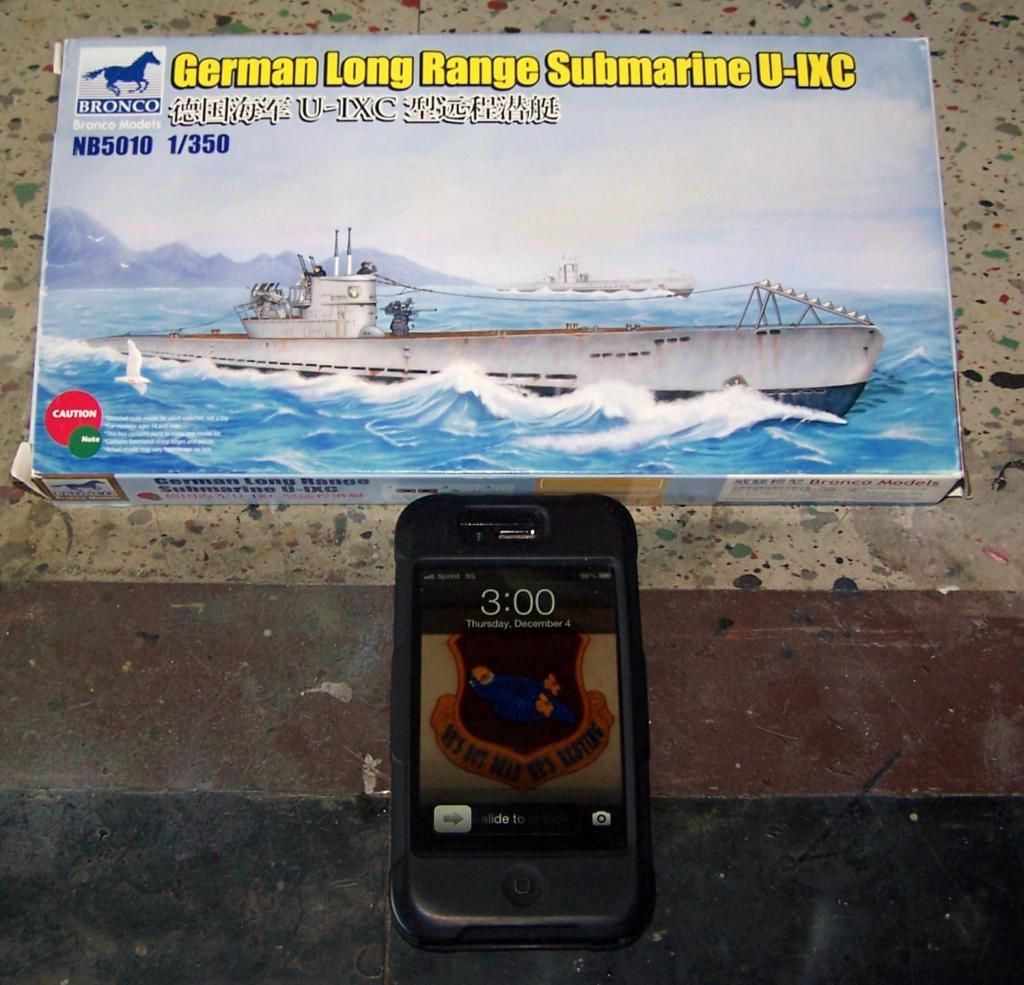
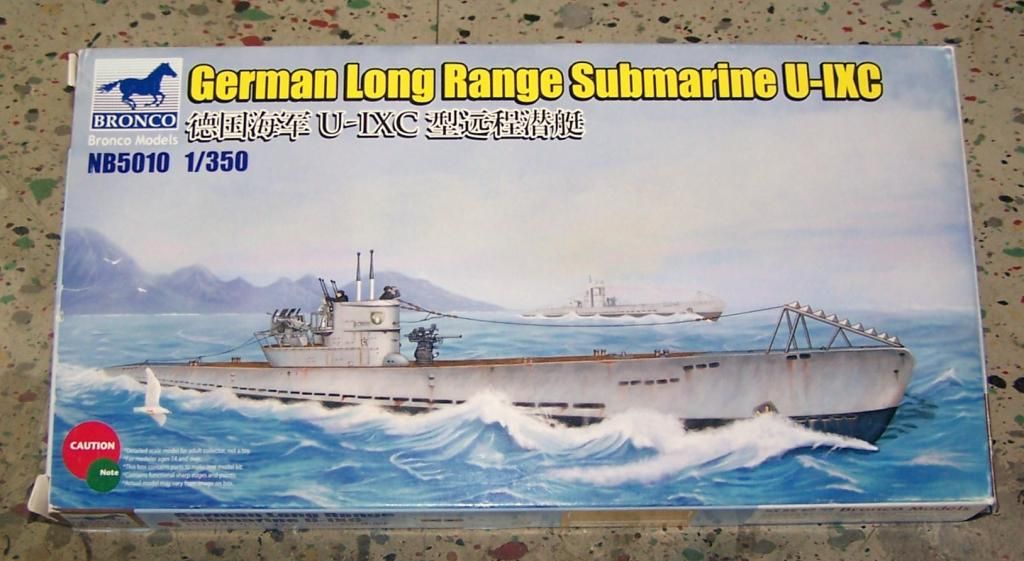
OK, I'm in! well here is my kit choice, Bronco's 1/350 Type IX C U-Boat, to be built as U-505. I am modifying the kit to show her as she was on her last war patrol. I am doing this as a crossover build with the Weekend Madness 2014 GB, so off we go.

the kit and my start time, 1500 hrs, Pacific Standard Time, 12/4/14

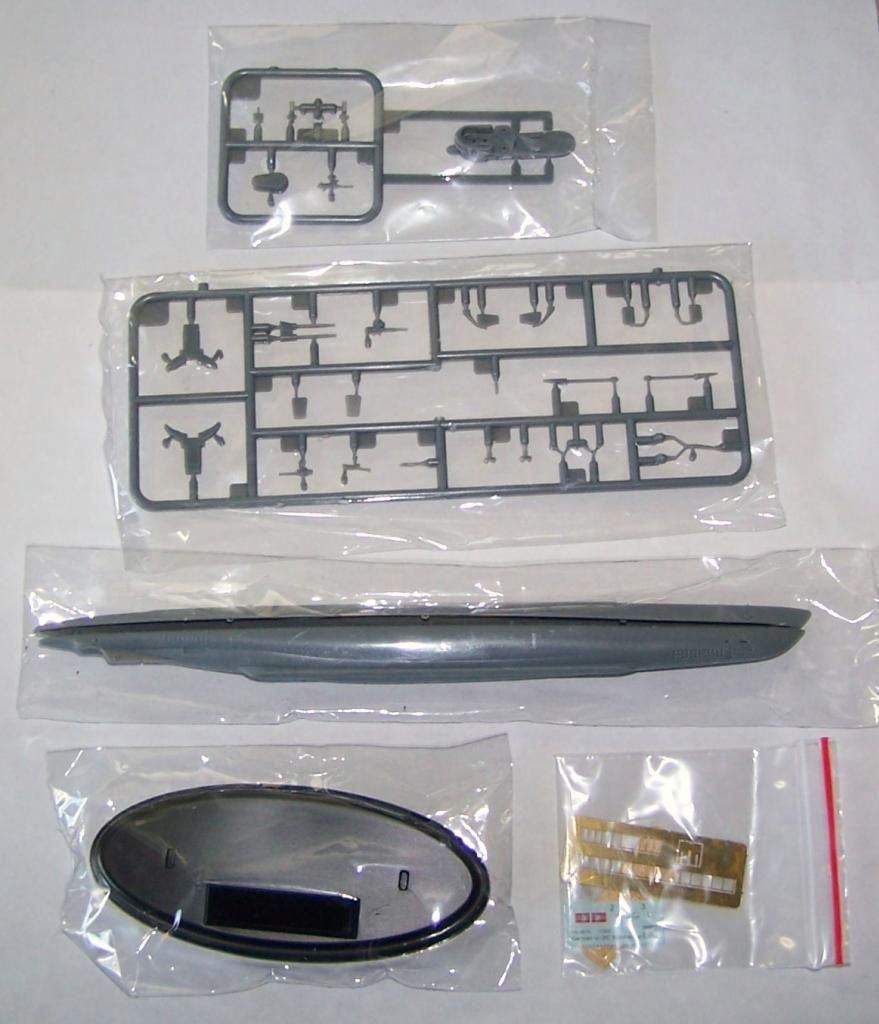
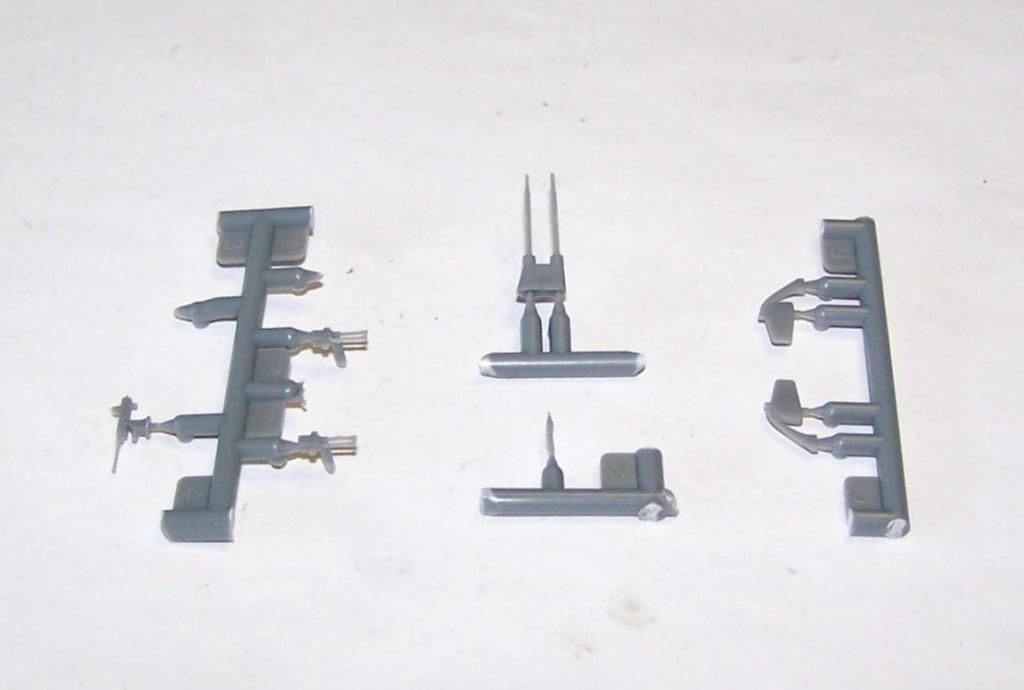
kit parts in their sealed bags....

out of their bags...

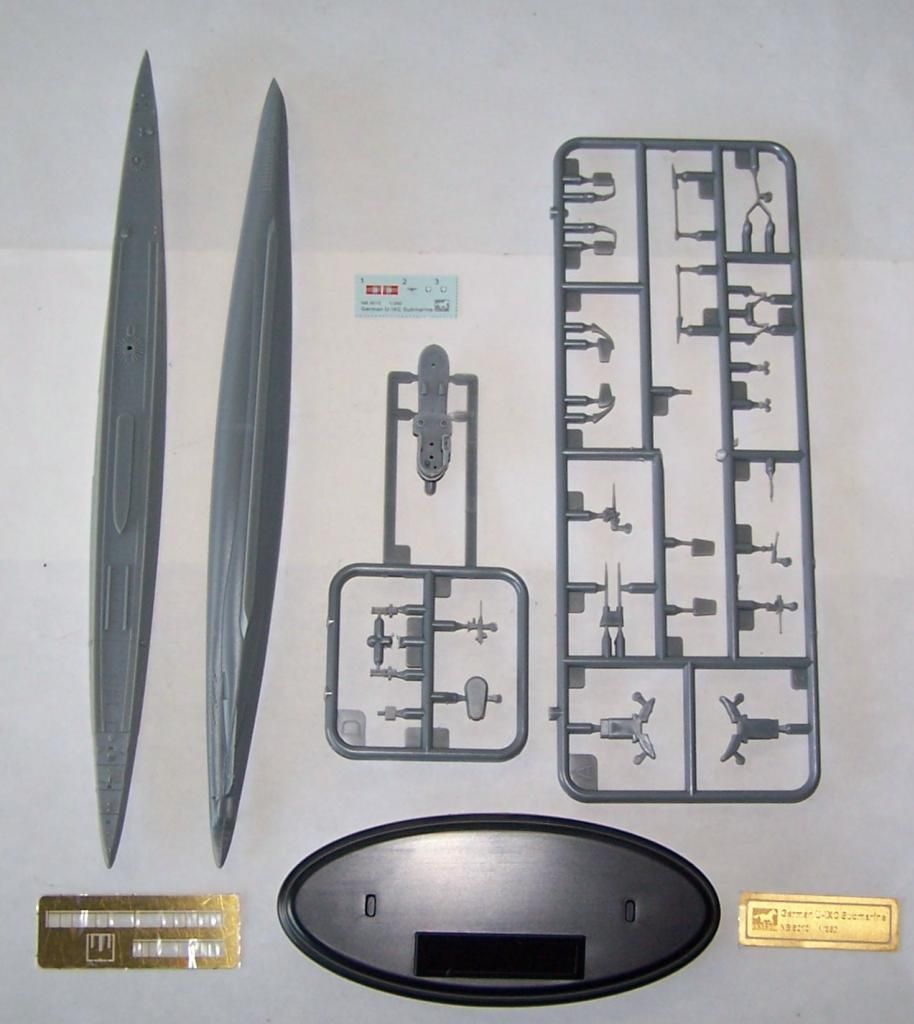
as you can see, a low parts count... but there are PE railings.... grrr....Bang Head

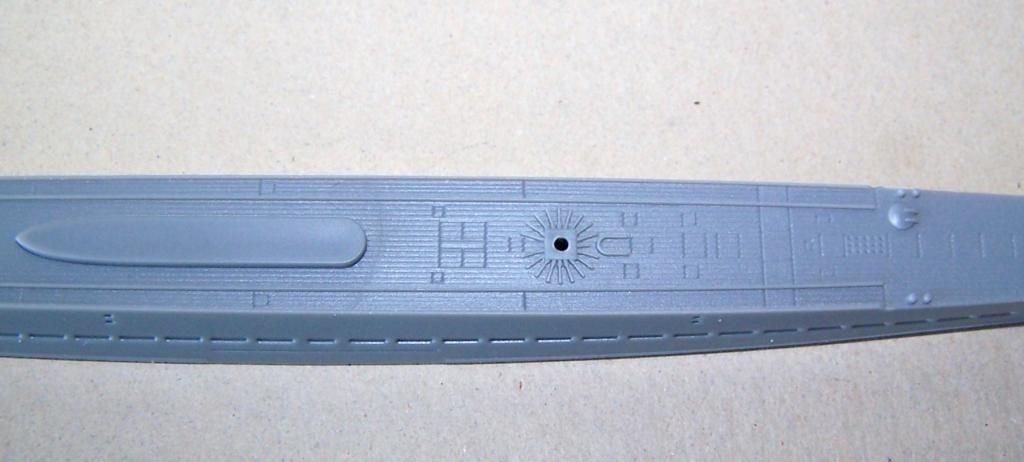
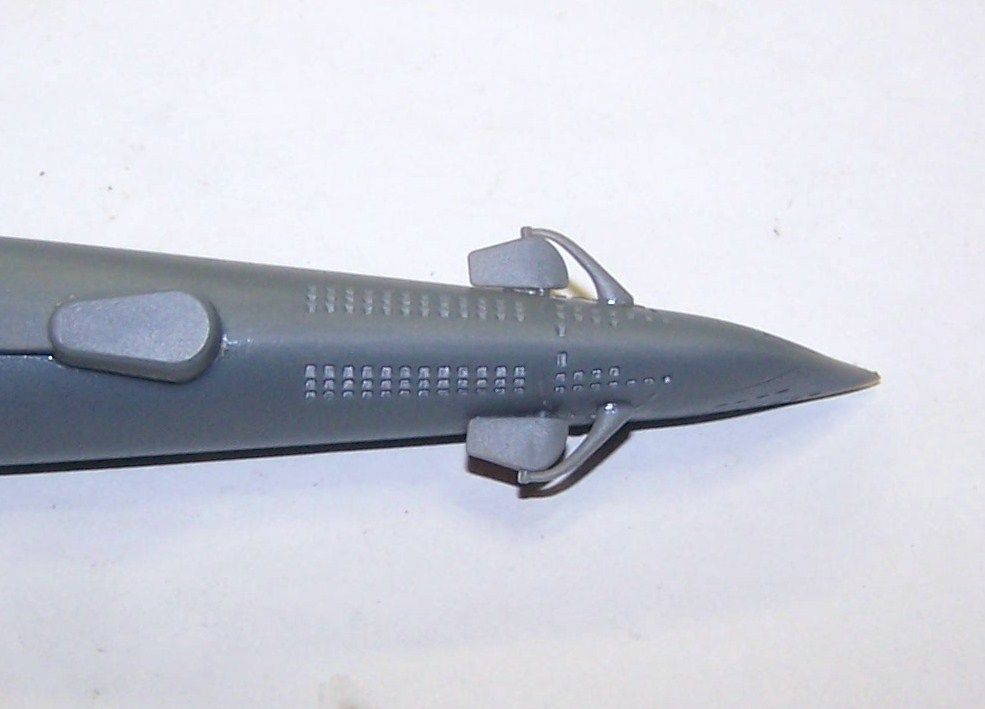
so anyways, to modify the kit to depict U-505 as on her last war patrol, one has to fill the hole for her forward deck gun mount. She did not carry one in Spring 1944.

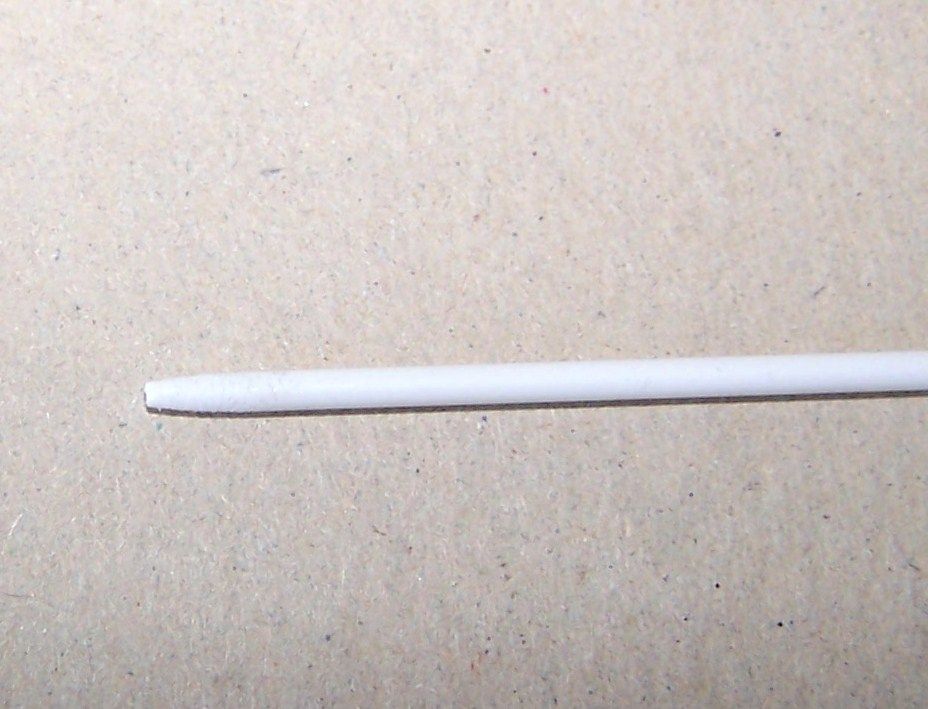
so I sanded a styrene rod to fit 

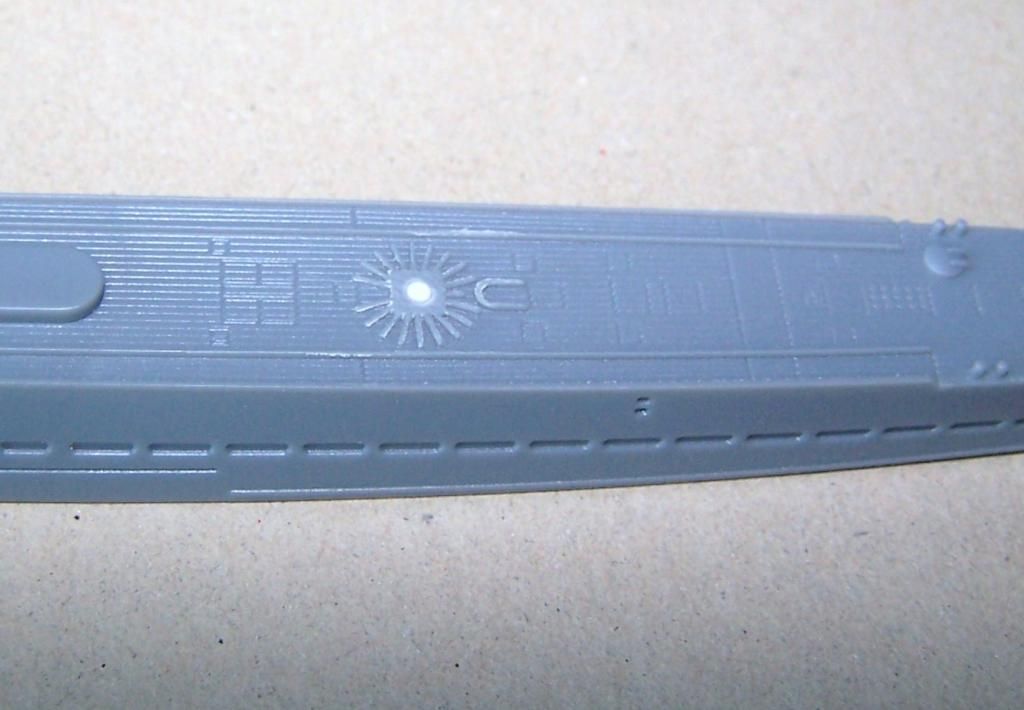
glued it in place... nipped off the excess

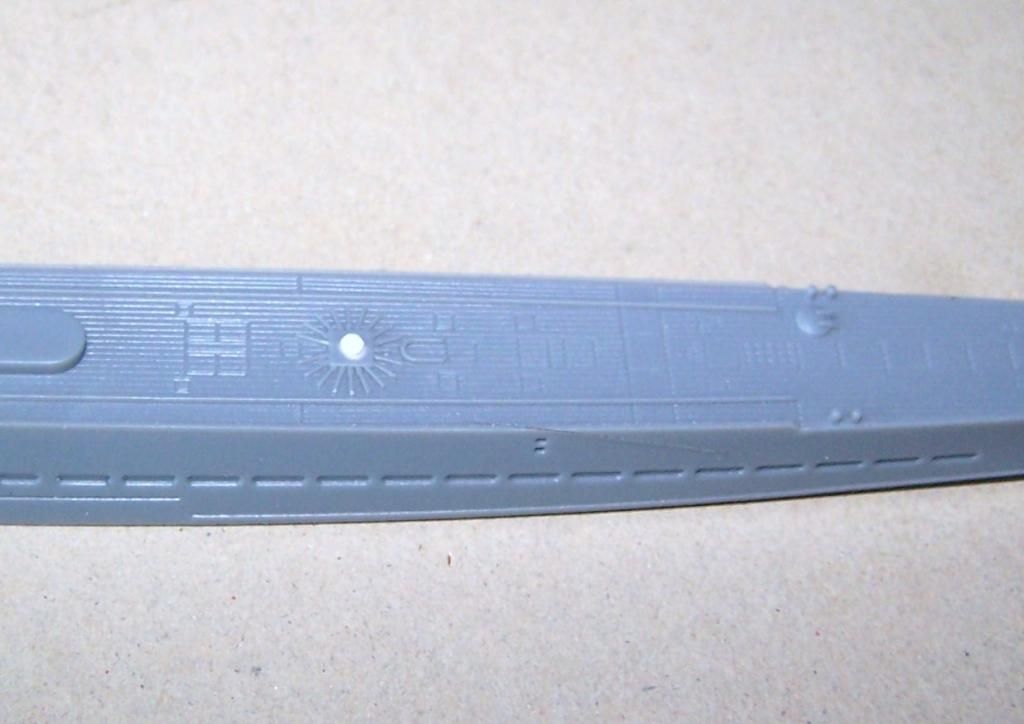
then sanded it flush

I deviated a bit from the instructions to speed up the build and finishing process... since I had learned some lessons on this on my Bronco Schnellboot that I built this Spring...

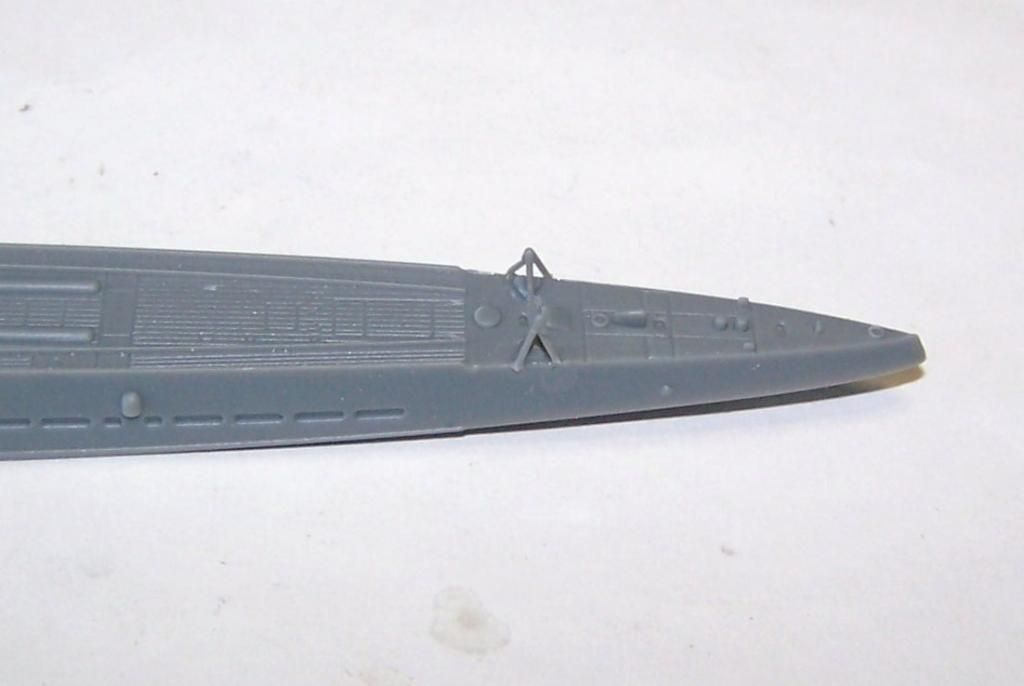
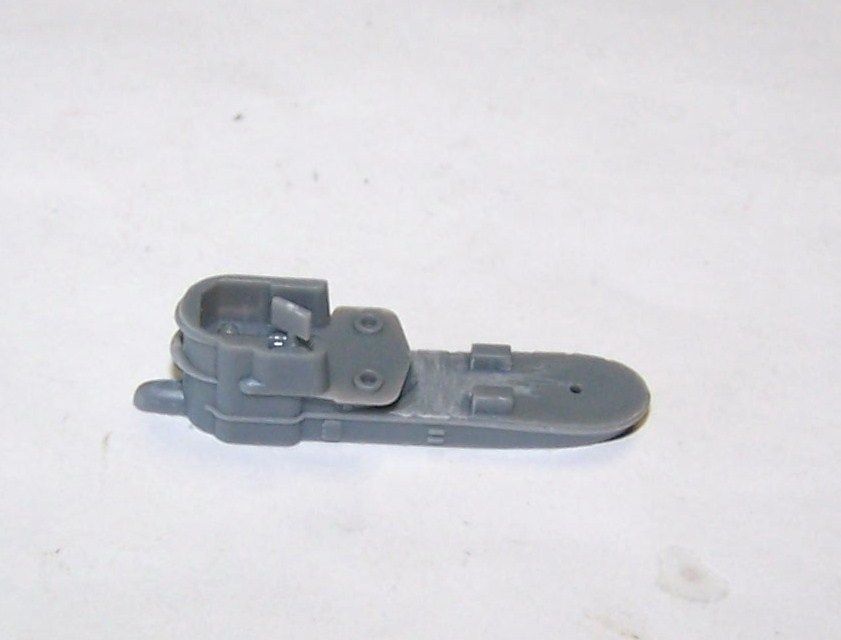
The hull is divided into upper and lower halves... I glued the screws, rudders and after dive planes in place... and some oval shaped fixture to the fore of the keel 

and later the bow dive planes as well

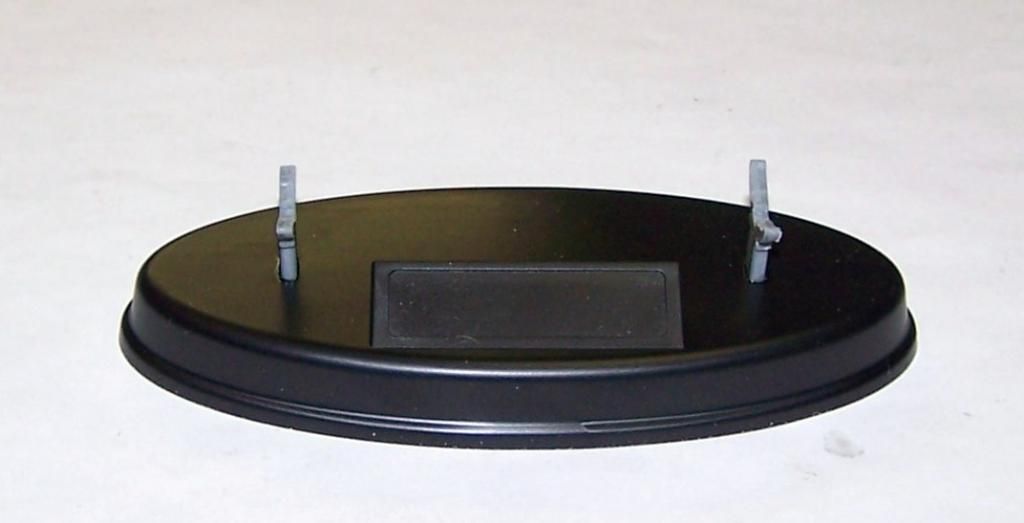
Then I built the stand, since it will assist me in later steps for how to keep the kit somewhere during this project

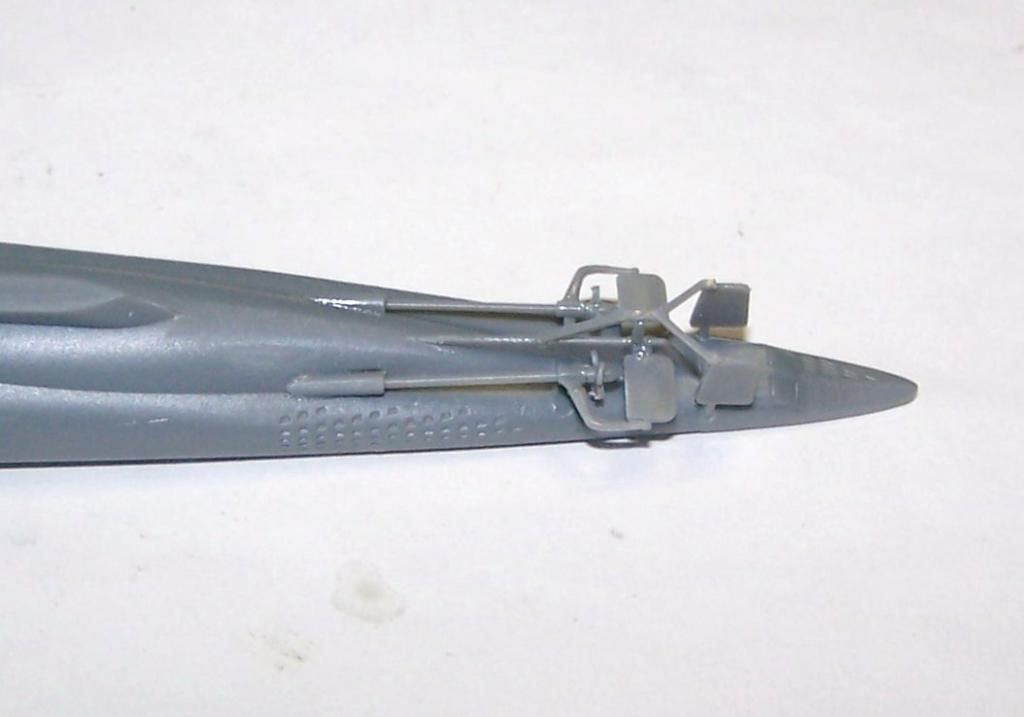
then I added the few parts that I would to the upper hull and conning tower (an oops there learned a bit later)... support structures to the fantail (that broke during sprue removal and took a bit of time to fix and place)

and a screen type assembly to the conning tower (I know the U-boats did not have a radar, so I presume this is some sort of RDF antenna screen)

this left these parts for painting on the sprues and attachment later (while I Later decided to add the bow diving planes)

Up to this point took me a bit over an hour... perfect for Weekend Madness... Then came the Censored part... adding the PE railings... many Censored and almost another 90 minutes later I had them on... 

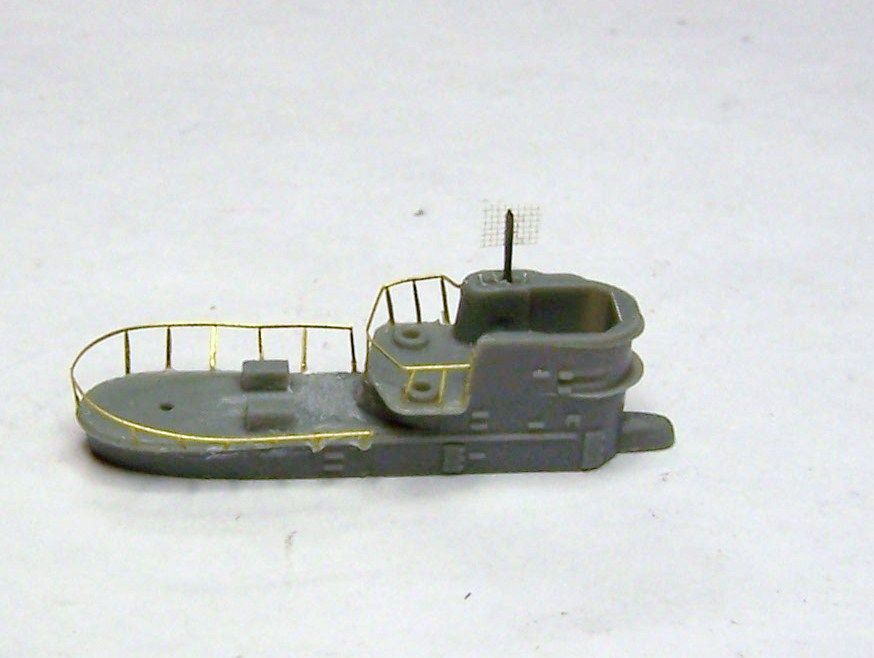
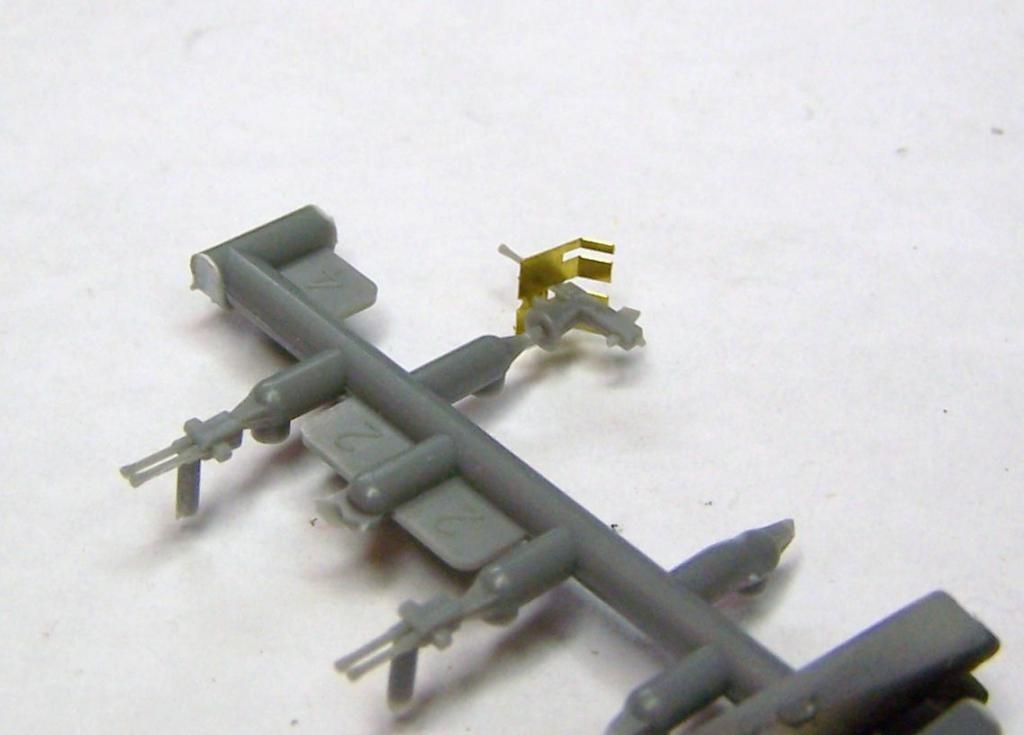
along the way I decided to yank out the kit RDF antenna out and replace it with a bit of wire and mesh...

and then there was the easy bit of kit PE, the 37mm gun shield...

and after 3 hours, and 1 1/2 Whiskey on the Rocks to unwind, this is where it stands, all ready for primer and paint in the morning...

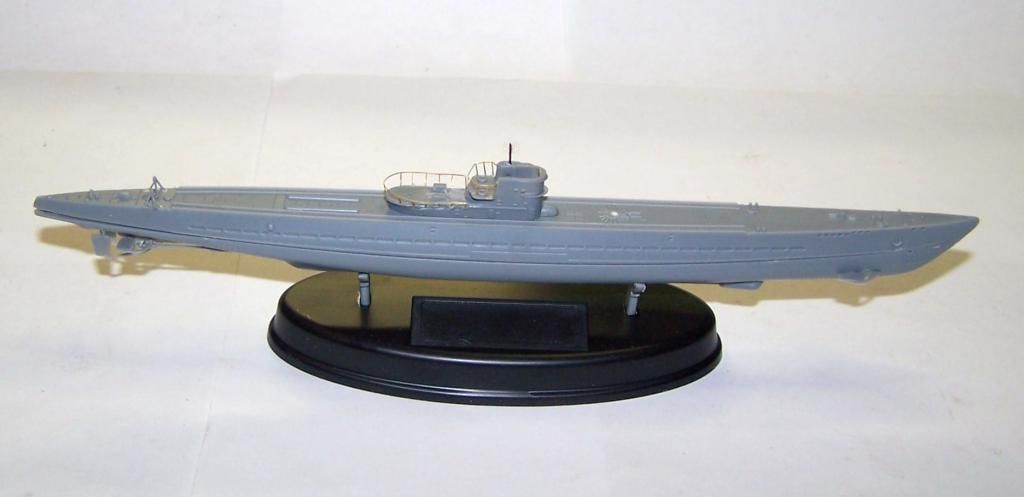
More to come tomorrow...


F is for FIRE, That burns down the whole town!

U is for URANIUM... BOMBS!

N is for NO SURVIVORS...

       - Plankton

LSM


  • Member since
    September 2003
  • From: AandF in the Badger State
Posted by checkmateking02 on Friday, December 5, 2014 12:20 AM

Fast work, stik.  Looks good.


  • Member since
    July 2004
  • From: Sonora Desert
Posted by stikpusher on Friday, December 5, 2014 12:22 AM

Thank you sir... if it was not for the PE headaches and speed bump, I probably would have started some painting tonite...


F is for FIRE, That burns down the whole town!

U is for URANIUM... BOMBS!

N is for NO SURVIVORS...

       - Plankton

LSM


  • Member since
    April 2013
Posted by SchattenSpartan on Friday, December 5, 2014 5:51 AM

Stik: She looks really great so far!

Joe: It's nice to see your kitten painted up!

  • Member since
    August 2009
  • From: MOAB, UTAH
Posted by JOE RIX on Friday, December 5, 2014 7:46 AM

That is some sort of awesome Stik. Certainly looking forward to the paint work. Way to crank it out.

"Not only do I not know what's going on, I wouldn't know what to do about it if I did". George Carlin

  • Member since
    December 2002
  • From: Bury St Edmunds, Suffolk, England
Posted by Bish on Friday, December 5, 2014 12:39 PM

Stik, now that's what I call a late entry. After seeing the S Boat I am looking forward to this. Looks a nice little kit.

I am a Norfolk man and i glory in being so


On the bench: Airfix 1/72nd Harrier GR.3/Fujimi 1/72nd Ju 87D-3

  • Member since
    May 2014
Posted by Nomad53 on Friday, December 5, 2014 2:42 PM

Looking good there Stik.

Eric: Got me some 6/0 fly tying thread. I love it. here are some photos of it in use.

I like the way things came out over all but I dislike the way I did things. I tried to use what everyone has told me and that worked but I had already ruined the paint and other things. I broke off the mast where the flag is and the old glue marks are eating at me big time. I still have to work out how to trim the thread without pulling something lose or breaking the thread.

I hate the way Revell did this kit on where the rigging points are. They are out of place, to big and not enough. No attachment points really at all. Just over-sized holes. As far as putting on rails that would be fine but there are two placed, one on each side, where rails need to go around the main deck but there is no place to put them. The gun deck goes all the way to the edge of the deck.

If I get another Revell Kit like this one I am going to fill in the rigging holes and drill some smaller ones that will let the thread go in them so I can have a clean glue surface. No more CA for me on rigging unless needed. Hate the cloudy film it leaves. Even in very small amounts. At least it does for me.

I will get better at all of this but to me I ruined this model. Now it is a test model for trying new things. Like PE railings and ladders. What fun that is going to be. I still need to get what Eric was telling me about to use to bend the PE.

No money left this month to get that right now. I do have some put back to get another Revell kit if I need to.

Okay now for the photos:

Nomad53


  • Member since
    September 2003
  • From: AandF in the Badger State
Posted by checkmateking02 on Friday, December 5, 2014 4:15 PM

Even with your dissatisfaction, I think you did a commendable job, Doug.  I often have trouble with the first kit I build of any particular model.  It never helps, either, when the kit itself leaves much to be desired.

Probably most of us are never completely happy with the way things turn out; he who builds also knows where all the mistakes and inadequacies are.  I think it's OK to be satisfied with "good enough."

As Admiral Kirk said, "we learn by doing," and you certainly have done a great deal.  I bet from a normal viewing distance, things look fine!

Keep pluggin' away, anyhow!


  • Member since
    July 2004
  • From: Sonora Desert
Posted by stikpusher on Friday, December 5, 2014 6:16 PM

Thanks guys! I will have photos up in a bit here. I have the initial base colors on now and am letting those dry before I tackle detail painting in awhile here.

Nomad, she is looking pretty darn good for a kit that dates back to the Eisenhower Administration. You gotta look at it from that perspective. When she is all finished I am sure that you will have her looking quite proper.


F is for FIRE, That burns down the whole town!

U is for URANIUM... BOMBS!

N is for NO SURVIVORS...

       - Plankton

LSM


  • Member since
    February 2010
  • From: Berkeley CA/St. Paul MN
Posted by EBergerud on Friday, December 5, 2014 6:20 PM

I've got the Revell Baltimore at home that I plan to build as St. Paul - it'll join another old Revell Ward and be my Minnesota Navy. (The Ward sunk a IJN mini-sub at Pearl Harbor and the gun crew that fired the first shots of the war were Minnesota Naval Reserve: the gun's at the state capital.)

I had no idea that Revell kits had rigging points. I did an Academy biplane that had them but had little plastic bars that you'd tie the line too inside the fuselage - anyway you didn't glue into a hole.

I avoid anchoring or ending a rigging point in a hole or straight into the superstructure. One thing nice about railings and ladders is that they multiply connection points for rigging. Thin line will slip right between those things really easy. I also use discreet bits of PE waste or even small bits of plastic and glue them into places on the ship where they're very hard to see and use them for rigging points. Cutting fly tying line should be pretty easy - one it's advantages over monofilament or fly tippet line. What you want are mini-scissors - 21/2" blades and strong reading glasses. Even Squadron brand - about $5 will do very nicely. The problem with bigger blades is that you have to get them pretty far beyond the cutting point and it can get clumsy - again even worse with mono.

Future ships. If you want to keep budget down there are very nice big ships in 1/700 scale. Some of the best modelers prefer the scale - probably because most resin kits at in it. In some ways I think 1/350 is easier, but the part count is higher. The Revell kits are all very old and none were ever "state of the art."  (That's why they're in such an odd scale - in the 60s standard scales were still kind of up in the air and did get settled until the mid-70s.) If you want a decent model for low cost, I'd check Airfix. They are 1/600 scale, several are still widely available and they are well under $20. (The HMS Sulfolk which was part of the Bismarck battle is under $10. I've got the kit and it looks good.) Airfix kits, like old Revell, vary considerably in quality. (I built a clunker and it didn't help the cause.) Go on our ships section and ask someone to recommend a good Airfix ship. Better would be to register and ask on the general forum at Model Warship: the place is great for advice like that. If you do want a Revell you could look either at the classic PT109 (1/72 scale) and HMS Campbeltown (which also appeared as USS Ward) which is 1/240 scale. There are some pretty straight forward and afordable models in 1/350. The Tamiya Fletcher ($25) is a Tamiya, which means really good even if it's from the late 70s. Academy makes a perfectly good Graf Spee (with it's own railings) for about $35. Dragon offers incredible destroyers for great prices, but Dragons are a handful with very high part counts.

The Mo is perfectly good. Get all the guns in place and throw on some filters, washes and some streaks - that'll help break up the overly sharp color distinctions. If you know how to weather tanks you can weather ships. If you don't have enamel stuff and dont want to buy it, go on YouTube and look for Acrylic AFV Weathering Techniques and watch the whole 55 minute Mig Jimenez video. It's absolutely crackerjack. I've weathered several kits with all acrylic and it can most certainly be done. There's also a really neat small video on YT called "Faux Rust Painting" shows how to make a rust pattern with acrylics that can be used for any size. It uses big brushes but is almost identical to how I make mine on smaller scale: big emphasis on the fact that "rust" is actually several different colors. Acrylics are great though.  I'm getting less fond of fumes as time passes, and there's something to be said for using paints and solvents that you could drink with no harm. Anyway, finish her all up and show it off.

Eric  


A model boat is much cheaper than a real one and won't sink with you in it.

  • Member since
    July 2004
  • From: Sonora Desert
Posted by stikpusher on Friday, December 5, 2014 8:11 PM

And here we are as of T+26 Hours (actually a few minutes shy of that when I took the latest photos)

in order of work today

conning tower and parts to be mounted there primed with Humbrol Primer (#1)

and then later painted in a dark blue black color (Humbrol Tarmac). Researching U-505 says that she was most likely in DunkelGrau 51 on the Hull and Blaugrau 58 on the Conning Tower. Only Lifecolor and White Ensign Make that in their lines and neither are carried by any LHS, so I approximated...

Hull base coated in Tamiya German Gray 

then I masked that off after giving it some time to dry and painted the upper hull sides with Model Master Acryl Marine Colors Dunkelgrau 51

then a photo with the conning tower placed on the hull for an idea of she will look when finished

detail painting on the conning tower fiddly bits

and finally a photo of all the wood horizontal surfaces painted with Floquil Weathered Black to represent the Teerfirness applied to the wood for camouflage and as a preservative against the sea water

I'm gonna let all this cure overnite before tomorrow's coat of Future, decals, washes, sealing topcoat and finally glue all the last bits in place...


F is for FIRE, That burns down the whole town!

U is for URANIUM... BOMBS!

N is for NO SURVIVORS...

       - Plankton

LSM


  • Member since
    June 2007
  • From: Seabrook, TX
Posted by Axemanwb on Friday, December 5, 2014 8:32 PM

Hi Guys. I'm starting to put the Dragon "magic" tracks together for the Pz IVJ I'm building. I've not done this before and I find that getting the "slack" between the return rollers is daunting. How do you get that right with these individual link tracks?

William 'Axeman' Hawes

In Progress: Tamiya 1/35 Panzer II

'Just' Completed: Testors P-51 1:48


  • Member since
    February 2010
  • From: Berkeley CA/St. Paul MN
Posted by EBergerud on Friday, December 5, 2014 9:24 PM

I glue magic tracks to the rollers themselves with a bit of CA. If the fenders are on, take some paper towel in small wads and stick it in between the tracks and the fenders to push them down on top of the wheels and a little more where you want sag. If the tracks are not set before you put them on, you can just leave them that way as the white glue sets. I've never had MT go together without a hitch - the trick is make sure the top sections are as you like and clean on both front and rear - then use a little patience and make some kind of connection underneath - if it ain't perfect, nobody will ever see it. There are always more MT than you need.

Stik

I did a AFV Club Type VII a while back. It was a cute kit, you'd never think of a 1/350 ship being that blinking tiny. I built it along with the AFV I-19 and the IJN boat dwarfed it. Really should do a Gato.

Yours will look great I'm sure. The GB doesn't have enough over-weathered models so if you're feeling nasty this would be a really good choice. I did a lot of reading when I was building those boats and some of the U-boats, especially if they got sea borne supply, were out for 8-10 weeks and were a real fright by the time they came home. (If you track down my build log on those boats, I think I quoted some of the U-boat officers on this subject.)

Eric


A model boat is much cheaper than a real one and won't sink with you in it.

  • Member since
    July 2004
  • From: Sonora Desert
Posted by stikpusher on Friday, December 5, 2014 10:01 PM

Yes, I have an I-19 on my workbench needing its final touches, along with a Los Angeles Class Flight II boat. I'll do a comparison shot with them at the end of the build. I am not sure if I want to depict 505 as she looked at the beginning of her last war patrol, or how she looked before her encounter with the Guadalcan's Task Group. I have until morning to decide...


F is for FIRE, That burns down the whole town!

U is for URANIUM... BOMBS!

N is for NO SURVIVORS...

       - Plankton

LSM


  • Member since
    February 2010
  • From: Berkeley CA/St. Paul MN
Posted by EBergerud on Saturday, December 6, 2014 12:50 AM

505 after its capture would be a heck of a diorama. That's not in my skill sets but some of the fanatics over at Model Warship build incredible stuff. They're not alone of course. I've learned a lot from watching YouTube videos concerning model railroads - some of their work is beyond impressive. I'd guess making big things small is the world's oldest hobby and remains one of the best. (Does inspire me though. I'll swap out two 1/700 DDs that sit underneath the wing of my 1/48 AM Avenger painted for Atlantic service put the subs there. The plane's a whopping big thing and I'd bet the subs would fit. I've got Tamiya's new 1/700 Bogue with PE - maybe that could make it into the 45 GB.)

I saw 505 when I was 12. It was outside then. It looked graceful and extremely impressive from the outside. When you got inside, yikes! how did forty guys live in a closet for a month? Pompanito is in San Francisco Bay and sits in the water. (It's still in great shape. About ten years ago Hollywood refurbished the sub in and out to make a pretty funny movie called Up Periscope - it's on Netflix now. I doubt the boat actually submerged but it was used as the set for the high seas shots.) It's a lot bigger than 505, but so was the crew and the missions longer. The weird thing was that you can hear the water running up against the hull when you get inside. Been told that submerging was accompanied by a kind of groaning noise at any depth. I'll stick to pontoon boats on Minnesota lakes. Also saw some "boomers" at Norfolk in 1976 (we're talking ten feet away from three of them - docked next to the Franklin - security was very lax then) and the things are as big as a WWII cruiser. But they still call them boats.

Eric


A model boat is much cheaper than a real one and won't sink with you in it.

  • Member since
    July 2004
  • From: Sonora Desert
Posted by stikpusher on Saturday, December 6, 2014 3:00 AM

Yes, my dad took me to Chicago and to see the U-505 41 years ago... I don't remember any details now, just that I was there and that I saw it..... I do vaguely recall some sort of 1/48 scale aircraft carrier model inside the museum itself more...


F is for FIRE, That burns down the whole town!

U is for URANIUM... BOMBS!

N is for NO SURVIVORS...

       - Plankton

LSM


  • Member since
    September 2003
  • From: AandF in the Badger State
Posted by checkmateking02 on Saturday, December 6, 2014 9:58 AM

Nice paint work, stik.  I had no idea U-boats came in two colors.  Looks great.


  • Member since
    September 2003
  • From: AandF in the Badger State
Posted by checkmateking02 on Saturday, December 6, 2014 12:19 PM

Some photos of completed sub-assemblies.

First, the oval structure, with radar attached.  I don't know what the little thing in the front is; I had to scratch build it from plastic rod, since the kit piece went flying out of the tweezers and disappeared when I was cleaning up the mold seam.

Right behind the oval sits the structure with the foremast and PE SK II radar dish.


Finally, the midship structure with stack.

After I took these photos, I glued the structures in place on the deck; now waiting for the glue to set up. All that's left is some additional rigging between the structures, some small detail parts and placing the gun directors and 5-inch batteries.  I hope to get this done yet this weekend or early next week.

Thanks for looking. 


JOIN OUR COMMUNITY!

Our community is FREE to join. To participate you must either login or register for an account.

SEARCH FORUMS
FREE NEWSLETTER
By signing up you may also receive reader surveys and occasional special offers. We do not sell, rent or trade our email lists. View our Privacy Policy.