SEARCH FINESCALE.COM

Enter keywords or a search phrase below:

2014 BRAILLE SCALE (UPDATE)

43717 views
540 replies
1 rating 2 rating 3 rating 4 rating 5 rating
  • Member since
    January 2014
  • From: Toronto
Posted by Rob S. on Monday, July 14, 2014 11:46 AM

Chris...brave, man, very brave!! Taking on that size stencil! Ok, not too bad, eh? Yeah, I get what you`ve already said, but, exactly, you have to start somewhere! Consider this...try building the letters one by one using Tamiya masking tape. You may have more control that way, I wonder?

______________________________________________________________________________


On the Bench: Nothing on the go ATM

  • Member since
    April 2006
  • From: Denver, Colorado
Posted by waynec on Monday, July 14, 2014 2:30 PM

the problem with a font like that is it has to be perfect. any line that is a bit wider or narrower stands out like crazy. on top of that they are slanted and both words have to fit the same space so the R in desert is narrower than the R in storm. it WAS worth a shot and i can see trying this on a civilian truck down the road, so to speak.

Никто не Забыт    (No one is Forgotten)
Ничто не Забыто  (Nothing is Forgotten)


cml
  • Member since
    March 2007
  • From: Brisbane, Australia
Posted by cml on Monday, July 14, 2014 6:10 PM

Cheers, thanks for the support gents.

Rob - i had toyed with the idea of individual letters, but as Waynec pointed out, with the words being slanted, it would have become very difficult. The other thing, is the spacing between letters is very very narrow, so getting the spacing correct doing one at a time may have been problematic in it's own right.

Waynec - you're very correct, any slight misalignment stands out like the proverbial.

Something that I hadn't anticipated is the width difference between the pencil lead (when tracing the stencil) vs the width of a no. 11 blade.  That alone meant it was difficult to correctly guage the widths of letters.

The final drama was the spacing that needed to block out between the letters. Due to how thin it all was, i had to cut them from the stencil and just lay down the outside first.

After that, i had to then lay down the spacing and gaps between the letters.

I'll re-evaluate later in the week whether it's salvageable, or whether i spray over and use the decals.

Part of me wants it to look good with the decals, part of me wants to have it as a reminder of what i did once, so i won't give up so easily on future projects.

Chris

  • Member since
    January 2014
  • From: Toronto
Posted by Rob S. on Monday, July 14, 2014 6:31 PM

Chris..yup, 'tis a tough technique.

______________________________________________________________________________


On the Bench: Nothing on the go ATM

  • Member since
    October 2004
  • From: Northern Virginia
Posted by ygmodeler4 on Monday, July 14, 2014 9:14 PM

Braver than I to try it...and your results are better than mine would be as well!

-Josiah

  • Member since
    April 2006
  • From: Denver, Colorado
Posted by waynec on Monday, July 14, 2014 10:13 PM

i would right it off and try again with something easier, say arab letters and numbers or soviet slogans on KV-2 turrets. something that in real life might have been hastily hand painted. that way if a letter in the stencil is a little thinner or fatter it really could have been. i may try this on a truck. OTOH my freehand arab and hebrew letters and numbers are pretty good.

Никто не Забыт    (No one is Forgotten)
Ничто не Забыто  (Nothing is Forgotten)


  • Member since
    October 2004
  • From: Northern Virginia
Posted by ygmodeler4 on Monday, July 14, 2014 10:17 PM

Here's my update. Got the cockpit finished sans pilots (I might've lost one, hopefully not for good). Also got the fuselage halves glued together along with the bottom part of the plane. Got the wing halves glued together for each wing and I have dry fitted them numerous times to see how I'm going to do the painting process.

As you can see the fit leaves much to be desired, but I'm not one to care too much anymore. While I would like to have a great fitting kit, not much challenge is that now is there? And while it may be frustrating trying to make the gaps and seams disappear while I'm working on it, it'll be nice in the end (hopefully). So I've been trying different techniques in gap filling on this build. Practicing for the big (I like how I think 1/48 is big now) revell planes I'm building or am about to build.

Here's the test fit wings...

The gap is too big for my liking, unlike the Eurofighter I did, I shall have to putty those seams most likely. I'm pretty sure I know how I'm going to go about painting this thing process wise, but I'm going to brainstorm some more ideas before I set myself to one way.

-Josiah

  • Member since
    January 2014
  • From: Toronto
Posted by Rob S. on Tuesday, July 15, 2014 5:45 AM

Josiah, great progress...keep it up!!

______________________________________________________________________________


On the Bench: Nothing on the go ATM

  • Member since
    October 2004
  • From: Northern Virginia
Posted by ygmodeler4 on Tuesday, July 15, 2014 10:05 AM

Thanks Rob

-Josiah

cml
  • Member since
    March 2007
  • From: Brisbane, Australia
Posted by cml on Tuesday, July 15, 2014 6:32 PM

Waynec - you make a good point. Anything like that on a plane will be done perfectly, no differences in widths etc.  

I'm thinking of one more attempt - but this time, i might do a black background, cut out individual letters to and then overspray with the topcoat, then remove the letters to see how that works.

I still don't know if i can do it perfectly, so i'm only going to do a couple of letters first and test on a plastic ice cream lid. If that doesn't work, i'll just resort to the decals.

Also, given i'll be spraying light sand over black, i'll have to add an in-between layer of light grey or something as a primer over the black i think.

Chris

cml
  • Member since
    March 2007
  • From: Brisbane, Australia
Posted by cml on Tuesday, July 15, 2014 6:36 PM

Good progress Josiah. The ejection handles turned out well and hold a prominent place in the 'pit.

I agree you'll have to putty those seams - my most loathed of tasked in modelling. All you can do is grit your teeth, grin and bear it. You're probably aware of this, but if you mask off either side with tape, it can help reduce the loss of panel lines etc when sanding the putty back.

Chris

  • Member since
    April 2006
  • From: Denver, Colorado
Posted by waynec on Tuesday, July 15, 2014 6:46 PM

cml

Good progress Josiah. The ejection handles turned out well and hold a prominent place in the 'pit.

I agree you'll have to putty those seams - my most loathed of tasked in modelling. All you can do is grit your teeth, grin and bear it. You're probably aware of this, but if you mask off either side with tape, it can help reduce the loss of panel lines etc when sanding the putty back.

i put tape down close to the seam on either side and than putty. after i have applied the putty i pull up the tape leaving a putty line. sometimes i knock that down a bit with nail polish remover before sanding. sometimes you don't need to retape before sanding if it's something smooth like a gun barrel. other times you will. i use testors silver to check seams, wash off and redo as needed. had sections of SS-25 i had to reputty. each time the area to be fixed was smaller until after the 4th when i was satisfied.

Никто не Забыт    (No one is Forgotten)
Ничто не Забыто  (Nothing is Forgotten)


  • Member since
    January 2014
  • From: Toronto
Posted by Rob S. on Tuesday, July 15, 2014 7:23 PM

Wayne...what do you mean by "i use testors silver to check seams, wash off and redo as needed" ? Are you talking about Testors enamels, or Testors MM acrylics? Why do you do this...very interested in what you have going on here...Cheers...

______________________________________________________________________________


On the Bench: Nothing on the go ATM

  • Member since
    April 2006
  • From: Denver, Colorado
Posted by waynec on Tuesday, July 15, 2014 7:47 PM

Rob Sherman

Wayne...what do you mean by "i use testors silver to check seams, wash off and redo as needed" ? Are you talking about Testors enamels, or Testors MM acrylics? Why do you do this...very interested in what you have going on here...Cheers...

it's cheap testors silver enamel in the old when we were kids bottles. after putty and sanding, paint the seam area with the silver paint. it will show all flaws. you can sand the area but if you need to apply putty use paint remover and dry the area and reapply. redo until the seam is good. when satisfied wash it up before priming.

Никто не Забыт    (No one is Forgotten)
Ничто не Забыто  (Nothing is Forgotten)


  • Member since
    January 2014
  • From: Toronto
Posted by Rob S. on Wednesday, July 16, 2014 6:17 PM

thanks Wayne!

______________________________________________________________________________


On the Bench: Nothing on the go ATM

cml
  • Member since
    March 2007
  • From: Brisbane, Australia
Posted by cml on Sunday, July 20, 2014 10:16 PM

Howdy All!

Over the weekend i managed to get some decent bench time in and am calling my F4U-1 DONE!!! (For the purposes of this GB).

I tend to be one of these people who will now toy with weathering and really use the model as more of test bed to try and perfect my weathering/pastel brushing etc. Given it may take some months to do, i'll post now as done.

This is the first time i've actually attempted to install an antenna wire - i used a piece of my fiance's hair for it. It did have nice tension...until i jagged it when photographing. I may pull it off and re-do, or even see how thin i can get a piece of sprue and use that.

Again, that will be part of my "testing" for this build.

Chris

cml
  • Member since
    March 2007
  • From: Brisbane, Australia
Posted by cml on Sunday, July 20, 2014 10:23 PM

Now that i've got one down, i'd like to put my hand up for another.

The A-7 is still on the bench and i stripped off the poor stenciling last night. I'll be resorting to the decals instead i've decided.

However, along side that, i'd like to nominate myself for this:

Dragon's 1/72 Ki61-1 Hein (Tony). I plan on trying to hand paint the green splotching with a paint brush - again, a technique i've never done and a skill i'd like to develop.

Cover Art:

One one sprue for this build!!! (Plus a clear parts sprue).

Some nicely molded details in the 'pit:

Wheel wells are a bit disappointing though:

Note: - kit comes with normal and compressed tyres:

Chris

  • Member since
    April 2010
Posted by Theuns on Monday, July 21, 2014 1:36 PM

Hi all. I have almost completed the filling and sanding on my EE lightning. I was a little "dissapointed" by this kit from Airfix, the surface detail is really nicem the decals look good on the paperm but the fit is slightly less good than on a few of their other "shake n' bake" new kits.

Nothing to bad, but for the price I would have liked to hav a better model. Could it be thatI am just "full of it".....yes maybe  LOL.

On a side note, my little Canadair CL-13 Sabre Mk6 I completed for this GB took a 3'rd place in 1/72 Jets at our SA IPMS nationals this weekend, I am really pleased with that :-)

Theuns

  • Member since
    October 2004
  • From: Northern Virginia
Posted by ygmodeler4 on Monday, July 21, 2014 8:49 PM

Chris that's a beautiful corsair!! Definitely one to be proud of!

-Josiah

  • Member since
    October 2004
  • From: Northern Virginia
Posted by ygmodeler4 on Monday, July 21, 2014 8:56 PM

Got the alpha jet primed...and did some more sanding. Got a few small things to do and then it'l be ready to paint!

-Josiah

  • Member since
    January 2014
  • From: Toronto
Posted by Rob S. on Monday, July 21, 2014 9:21 PM

Wow, lots of action going on here:

Chris - great job on the Corsair (who doesn't love a gorgeous Corsair Yes). That Japanese fighter is going to be a challenge to airbrush, eh?

Theuns - no doubt that that Sabre placed!! Very good news, two enthusiastic thumbs up YesYes!!!!!

Josiah - A7 looking awesome...keep at 'er!

______________________________________________________________________________


On the Bench: Nothing on the go ATM

  • Member since
    July 2006
  • From: San Francisco Bay Area
Posted by bufflehead on Monday, July 21, 2014 11:47 PM

Guys I'm back!  I was out of town for a week and a half on business and resumed working on the Sherman and StuG this weekend.  But first I need to get caught up here:

deattilio - man that P-51 came out great!  Love the faded OD paint job and excellent work on the stripes.  Top Notch dude!

Josiah - love all the work you're doing on the Alpha!  The cockpit details, filling and sanding, seams...whew!  That's some hard work for a little jet!!  Can't wait to see some paint on it!

Chris - 1st)  I was amazed at the stencil work you did on the A7!  Sorry it didn't work out for you, but an outstanding attempt nonetheless!  2nd) Gotta love the F4U!!  It came out great and the antenna wire looks fine to me! 3rd) A Tony!  We don't often see those being built!  I'm eager to see how this Dragon kit will come out!  Are you going to do that camo job shown on the box?  That's gotta be a real chore to do in 1/72!

I'll have an update tomorrow on the Sherman and StuG!  Suffice it to say that both are coming along well and painting should commence this weekend, if not earlier!

Ernest

Last Armor Build - 1/35 Dragon M-26A1, 1/35 Emhar Mk.IV Female


Last Aircraft Builds - Hobby Boss 1/72 F4F Wildcat & FW-190A8


cml
  • Member since
    March 2007
  • From: Brisbane, Australia
Posted by cml on Tuesday, July 22, 2014 6:07 PM

@Josiah - thanks for the compliments! It was an enjoyable little build, but for canopy masking. I was not much of a fan of WWII navy planes, but after building that one, i definitely want to pick a 1/48 version.

Looking forward to your next Alpha Jet update. Once priming is done - that's when the real fun begins!!

@Rob - yeah, i think airbrushing that scheme on the Tony is out of the question - hence the reason i'm going to give it a shot via brush painting. Also, i just want to test my brush painting skills too. I won't be able to achieve the nice feathered edges, but might be able to do a misting overcoat of silver to make them appear feathered - we'll see how i go Wink

@Bufflehead - i was wondering what might have happened to you - looking forward to your update. Thanks for the comments!

The Dragon mold is a little soft with a fair bit of flash on the Tony, but i'm going to expend my energies in the paint scheme more than trying to fix/correct anything on the kit. 

PS: my LHS has just started stocking Tasca kits, including various Shermans. Here in Australia, they'er only a few $ more expensive than the Tamiya and Dragons. My birthday is coming up in 3 weeks, guess what i'll be treating myself to Stick out tongue

Chris

  • Member since
    April 2006
  • From: Denver, Colorado
Posted by waynec on Tuesday, July 22, 2014 6:18 PM

Theuns

On a side note, my little Canadair CL-13 Sabre Mk6 I completed for this GB took a 3'rd place in 1/72 Jets at our SA IPMS nationals this weekend, I am really pleased with that :-)

Theuns

totally cool. congrats on the win.

nice work everyone. as i await my 2nd SS-25 i think i will grab a smaller build.

Никто не Забыт    (No one is Forgotten)
Ничто не Забыто  (Nothing is Forgotten)


  • Member since
    July 2006
  • From: San Francisco Bay Area
Posted by bufflehead on Wednesday, July 23, 2014 12:40 AM

Theuns - sorry I missed the last part on your post!  Congratulations on the win!

Updates on the Sherman and StuG!

I finally fixed (to some extent) the HVVS suspension on the Sherman.  At least the bogie assemblies are now locked in place and don't wobble around anymore! Yes and they're mostly all flush with the ground. With that done I could focus on the small details.  First I needed to sand many parts down to a more scale thickness.  In the photos below you can see one of each example has been thinned down and the other hasn't:

Headlight guards

Hatch periscope guards

Tail light guards.

 Most of the details have been added.  The rest will be installed just before painting.  The white upright plates on the rear deck are the engine door rests.  The kit parts were deformed so I made new ones from card stock.

The StuG.

I really like how they did the roadwheels.  Very easy to clean up and best of all, you can leave them on the sprue to paint!  Bottom set is untouched, the top two have had the nodules removed, seams cleaned up and masked for painting.  (BTW. the bottom set is from another Dragon Pz. IV kit I have in the stash.  I just used it for this photo....the kit only comes with two sets of roadwheels)

The roadwheel centers are cleverly molded....use the attached post during painting and simply trim away when ready to glue to the roadwheel!

As with the Sherman, most of the small details have been added, including all the fender parts. 

With the fender parts now installed, I proceeded to fill all the little mounting holes under the fenders.

Its PINNED!!  hehe!  I took your advice and used pins to create the track sag.  .016 dia brass rod was used.  Final adjustments will be made later, but I think it looks pretty good.

Almost ready for paint!

Paint this weekend.......??Hmm

Ernest

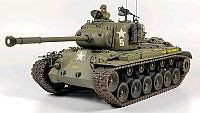
Last Armor Build - 1/35 Dragon M-26A1, 1/35 Emhar Mk.IV Female
     

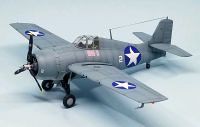
Last Aircraft Builds - Hobby Boss 1/72 F4F Wildcat & FW-190A8
     

  • Member since
    October 2004
  • From: Northern Virginia
Posted by ygmodeler4 on Wednesday, July 23, 2014 12:46 AM

Thanks all, finished painting the bombs...need to do some research as to the color of the drop tanks. Will hopefully get it painted up by the end of the week.

Dang Ernest! Aside from the road wheels and the unsanded parts on the sprue, you can't tell that's a small stug, great job along with the sherman, I can't wait to see paint on these bad boys.

-Josiah

  • Member since
    April 2010
Posted by Theuns on Wednesday, July 23, 2014 7:45 AM

The Sabre was not a win LOL, only placed 3'rd ;-)

Theuns

cml
  • Member since
    March 2007
  • From: Brisbane, Australia
Posted by cml on Wednesday, July 23, 2014 8:19 AM

Theuns - 3rd is still an excellent result, well done!!

Chris

  • Member since
    October 2004
  • From: Northern Virginia
Posted by ygmodeler4 on Saturday, July 26, 2014 8:59 PM

Here's a small update on the alpha jet...

Obviously I have some touch up work to do on the cluster bombs...

And here's the plane as it is now...I have a bit more sanding to do and then it's ready for the top paints...

-Josiah

  • Member since
    April 2010
Posted by Theuns on Sunday, July 27, 2014 2:28 AM

I still need to sand around the canopy area, strange that the fit for a new tool kit was not so good.....maybe just me that stuffed it up lol.

Wingroots and nose ring also needed some attention with the tamiya putty  :-)

Theuns

JOIN OUR COMMUNITY!

Our community is FREE to join. To participate you must either login or register for an account.

SEARCH FORUMS
FREE NEWSLETTER
By signing up you may also receive reader surveys and occasional special offers. We do not sell, rent or trade our email lists. View our Privacy Policy.