SEARCH FINESCALE.COM

Enter keywords or a search phrase below:

VK-4502 Vorne: "The Berlin Hedgehog" FINISHED PICS!

29144 views
105 replies
1 rating 2 rating 3 rating 4 rating 5 rating
  • Member since
    January 2007
Posted by the doog on Sunday, June 23, 2013 6:29 PM

Yet another update in the stage-by-stage painting of this model....

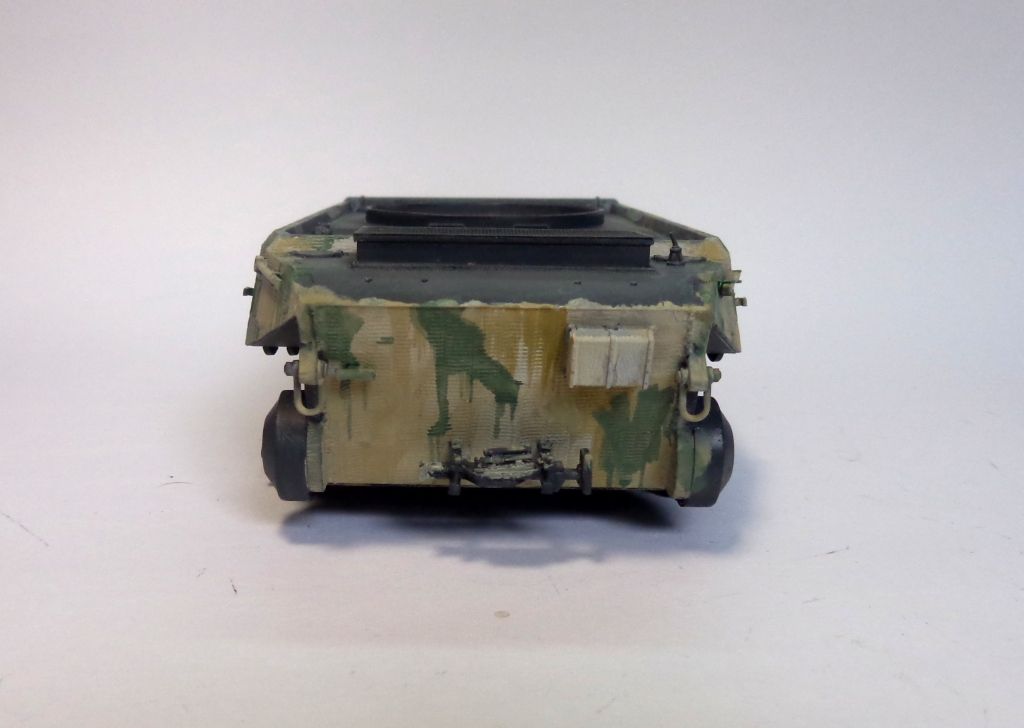
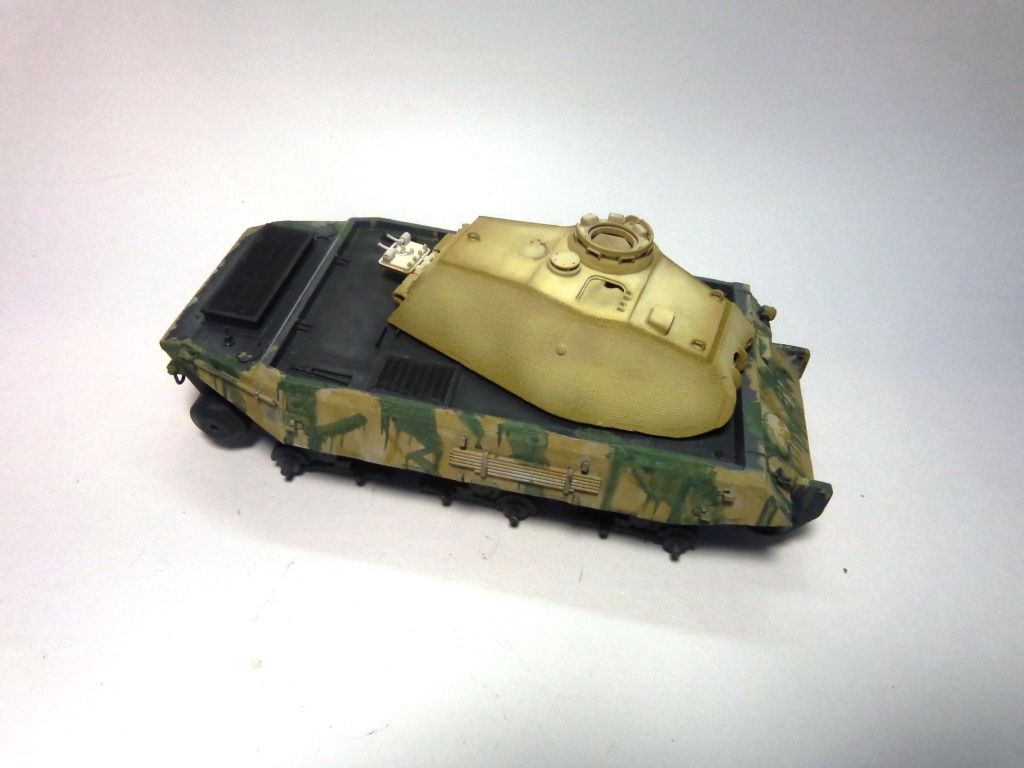
I have added some Panzer Green camo---this is Tamiya's XF65 (erroneously called "Field Grey" but really their version of Panzer Dark Green.) In order to get effect of sloppy brush painting with runny, diluted paint, I thinned it with Tamiya's own thinner, and added some dishwashing liquid to really cut down the surface tension to allow it to run. I slopped it on with a medium brush--first the highly-diluted coat. I then took a smaller brush of UN-diluted paint and added lines of thicker paint--mostly along the top and where it would have pooled on the bottom. I slopped some over the sides of the upper hull, and added runs in the corners of the interior upper hull.
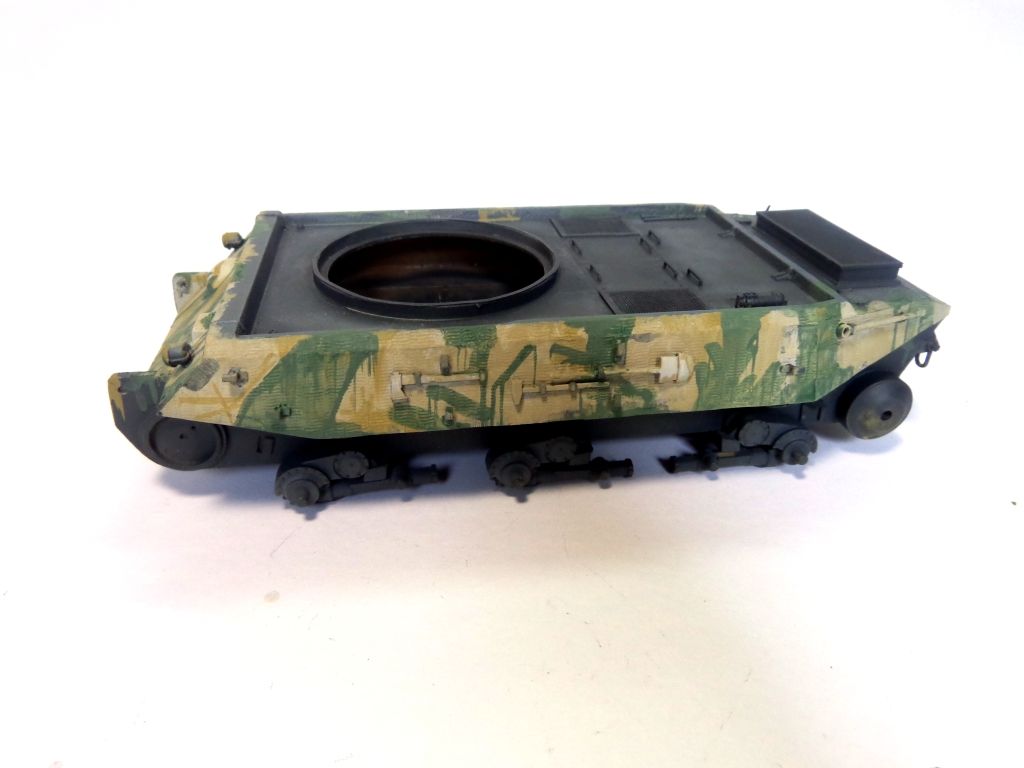
I tried to imagine myself as three inches tall and wielding a brush...
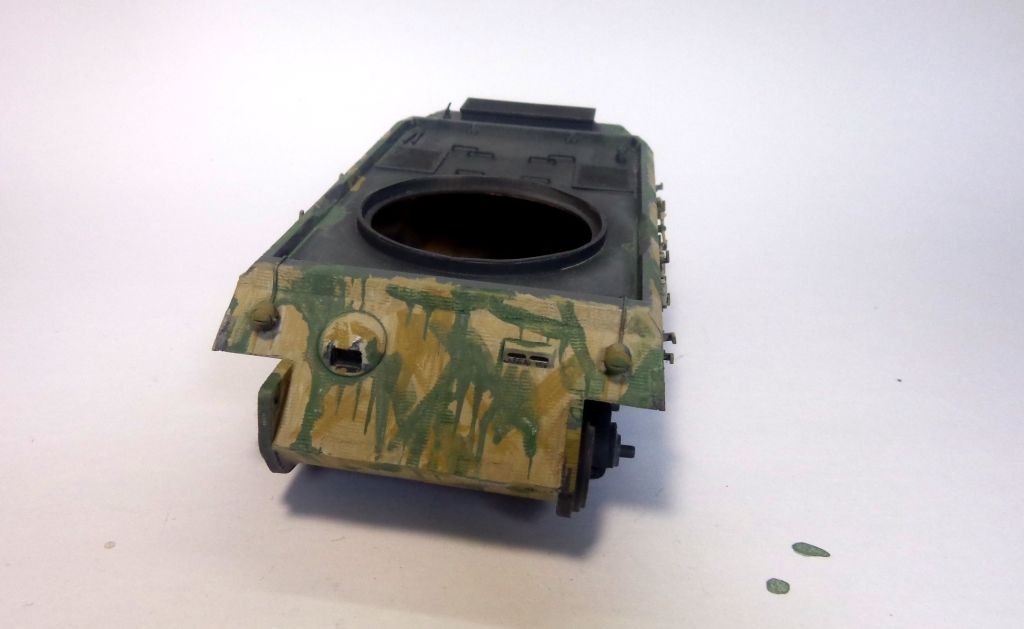
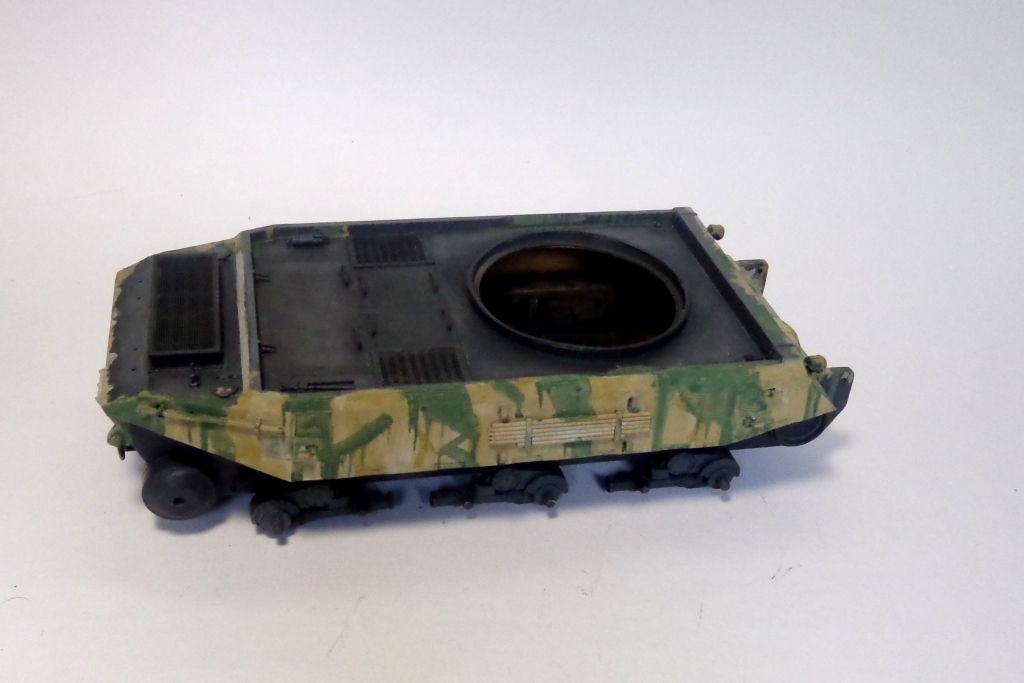
Hard to see here, but the thin strip behind the engine screens has been left in unpainted zimmerit.
The turret, meanwhile, has been basecoated in untinted Tamiya Dark Yellow. Yikes, but is that dark!
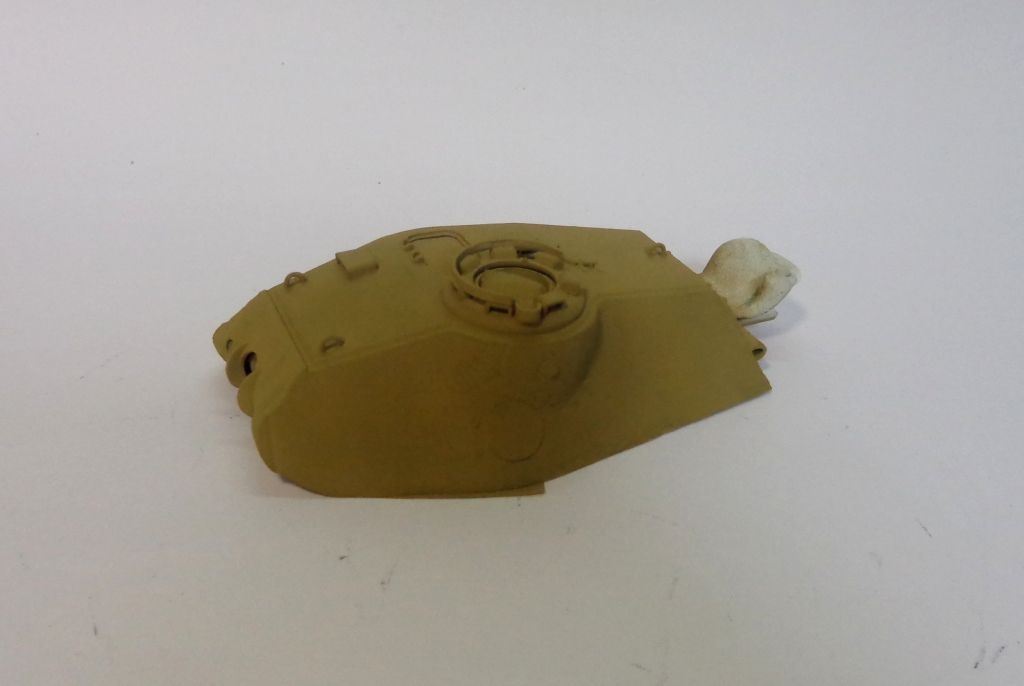
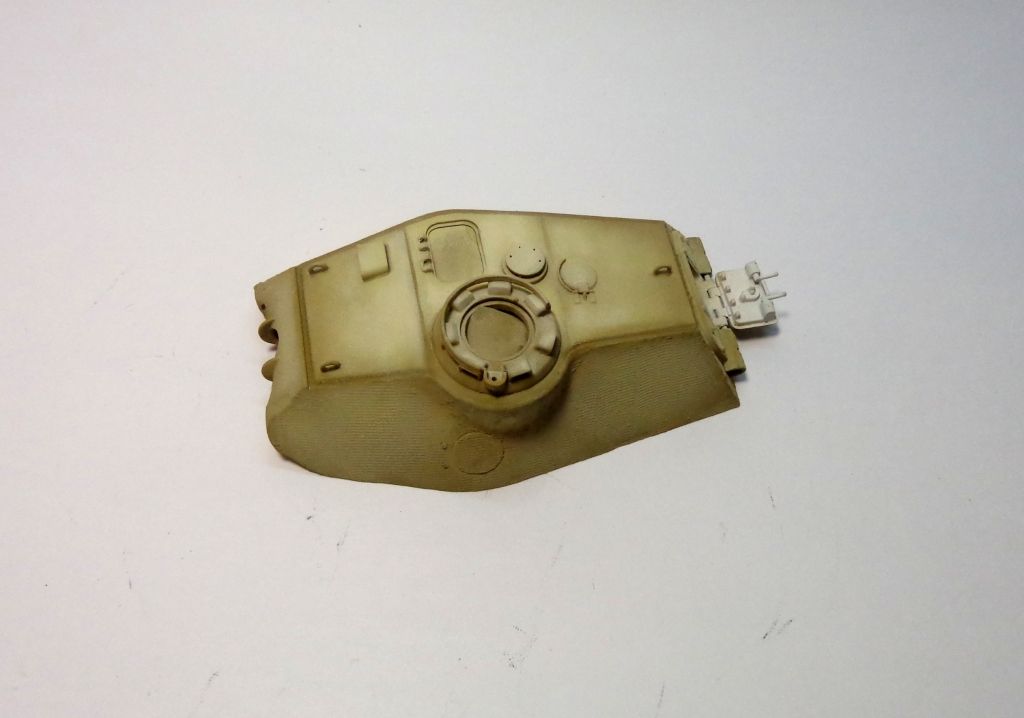
Next, using a series of tape masks, and three different shades of successively-lightened DY, I've done some color modulation on the turret.
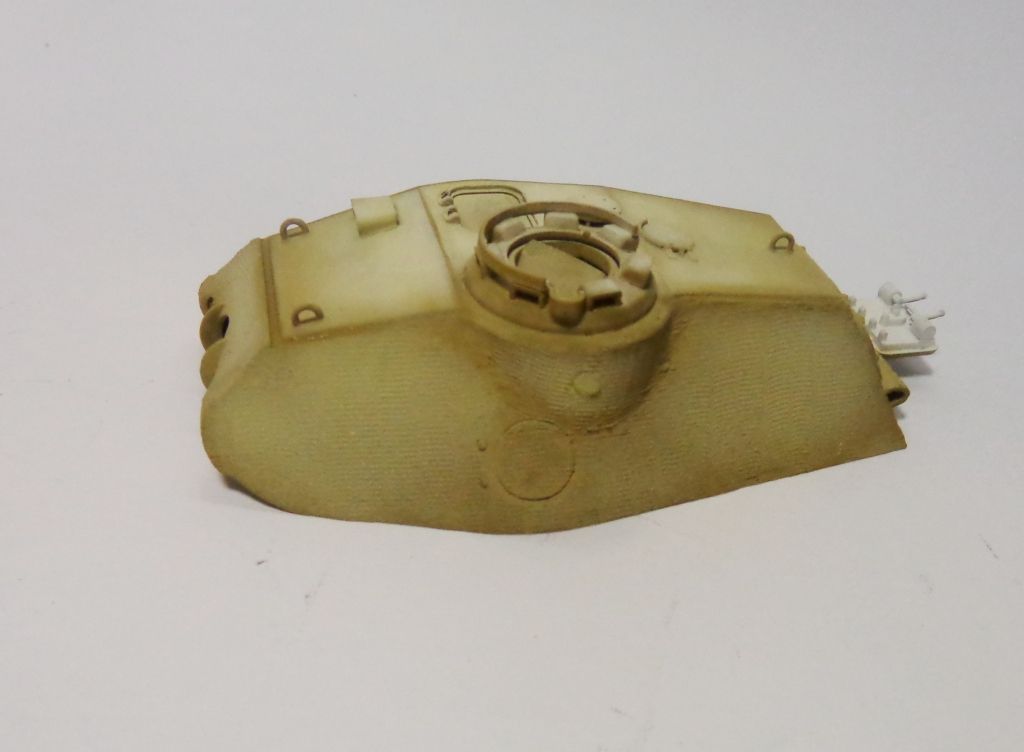
I've added some straight Flat Yellow to the top highlight coat to give the turret some sleight color variation from the hull;
The hull and turret together, giving somewhat of a hint of what the model will eventually look like....
Thanks for looking in, if you are, and let me know what you're thinking---comments are always fun and appreciated!!

Big Smile Doog

  • Member since
    July 2003
  • From: On my kitchen counter top somewhere in central North Carolina.
Posted by disastermaster on Sunday, June 23, 2013 7:15 PM

   That green paint application looks a

                      bit aggressive......http://www.4smileys.com/smileys/drinking-smileys/shake-smiley.gif

            but that turret is totally awesome.

 Your weathering will bring it all together though....

              http://www.4smileys.com/smileys/drinking-smileys/beer-drinking-smileys.gif  it always does.

                                            (Been a watching utube looking for ideas.........)

 https://i.imgur.com/LjRRaV1.png


  • Member since
    March 2003
  • From: Western North Carolina
Posted by Tojo72 on Sunday, June 23, 2013 7:19 PM

Looking real good Karl,not one you see every day

  • Member since
    July 2003
  • From: On my kitchen counter top somewhere in central North Carolina.
Posted by disastermaster on Monday, June 24, 2013 5:57 AM

 Okay Karl - 3:10 am, now 'ya done it.......http://www.sherv.net/cm/emoticons/sleep/sleepy-smiley-face.gif

       I'm up http://www.smiley-lol.com/smiley/fatigue/tres-fatigue.gif

         http://t2.gstatic.com/images?q=tbn:ANd9GcR_L7cHWhW5Msb3iDqnWNKpf4YXCo8MLEtrATf7KQqDPy5r5ETxRlSA2vQI'm still working on mine at 6:57 am.....

           http://i20.photobucket.com/albums/b202/sneezytwo/camera_smiley.gif and I got a new camera to figure out too.


 https://i.imgur.com/LjRRaV1.png


  • Member since
    October 2010
  • From: Hoodsport, WA
Posted by Dogfish_7 on Monday, June 24, 2013 8:28 AM

Looking good DOOG!

Bruce

  • Member since
    January 2007
Posted by the doog on Monday, June 24, 2013 4:33 PM

Ha ha, GREAT, Steve!!!! Let's see some WIP pics!!!?

Thanks too, BRUCE!!!!

  • Member since
    January 2007
Posted by the doog on Monday, June 24, 2013 4:39 PM

OK, the painting is done, as far as the camo...

I added a couple dozen more micro "drips" and runs of paint in the hull, but otherwise concentrated on the turret. The Field Grey color had some JA Green mixed in to make it darker, and then lightened with a touch of yellow and Green. The Red Brown was darkened a bit with Brown + Black, and then lightened a bit with Desert Yellow. The highlights were painted in the centers for the most part.

Here she is so far!

The gun is not attached, just posed in the gun hole.

Gonna put some numbers and a cross on it now and then paint them out, and put a new single hand-painted Roman numeral on it somewhere.

Thanks for looking in, all! Toast

  • Member since
    April 2013
Posted by SchattenSpartan on Monday, June 24, 2013 4:55 PM

That's looking awesome, Doog! I love that hand-painted camo on the hull!

Cheers, Clemens

  • Member since
    July 2004
  • From: Sonora Desert
Posted by stikpusher on Monday, June 24, 2013 6:31 PM

Looking real good there Karl... it definitely has a "scraping the bottom of the barrel for any weapons" look... just a suggestion though, the rear turret hatch inner face should be a color that matches the exterior, either Panzer Gray or Dunkelgelb I imagine.


F is for FIRE, That burns down the whole town!

U is for URANIUM... BOMBS!

N is for NO SURVIVORS...

       - Plankton

LSM


  • Member since
    July 2003
  • From: On my kitchen counter top somewhere in central North Carolina.
Posted by disastermaster on Tuesday, June 25, 2013 5:17 AM

stikpusher

Looking real good there Karl... it definitely has a "scraping the bottom of the barrel for any weapons" look... just a suggestion though, the rear turret hatch inner face should be a color that matches the exterior, either Panzer Gray or Dunkelgelb I imagine.


Good mornin'...

  http://www.smileyvault.com/albums/userpics/10001/book-smiley.gif

 In September 1944, an order went out to stop using the Ivory paint and leave the tanks entirely red inside. This seems like sheer idiocy, but there are surviving Panthers and Hetzers with 100% red interiors. Other simplifications were being made to tank manufacture at the same time - Zimmeritt was discontinued, for example. There were loud complaints, and at the very end of 1944 the Ivory paint was officially reinstated.

 Hmm... you would think that entirely red would include the hatch interiors but common sense dictates the exterior color would be more sensible as you stated.

Crazy Germans.

 This info's word for word http://i475.photobucket.com/albums/rr120/Angelintown/Smiley%20diversen/smiley_book.gif 'bout halfway down the page at http://byrden.com/panzers/Colours/index.html

 https://i.imgur.com/LjRRaV1.png


  • Member since
    January 2007
Posted by the doog on Tuesday, June 25, 2013 6:49 AM

Thank you, Clemens! I appreciate you taking the time to leave a comment! Smile

  • Member since
    December 2006
  • From: N. Georgia
Posted by Jester75 on Tuesday, June 25, 2013 7:25 AM

Karl you have definitely achieved a unique look with this paint work and I think it definitely screams 'hurry up and get this machine into action' if you ask me.

Eric


  • Member since
    January 2007
Posted by the doog on Tuesday, June 25, 2013 7:39 AM

stikpusher

.. the rear turret hatch inner face should be a color that matches the exterior, either Panzer Gray or Dunkelgelb I imagine.

Thanks for weighing in, Carlos, and Steve!

I thought a LOT about this model and how to most accurately pull it off---did a lot of research, and I came across this photo on google of a Jagdtiger where you can see the rear hatch. I was surprised to see that it was in Elfenbein (Ivory, basically), same as the interior. Even at that late date!

I have also seen a KT hatch interior in an old photo where it appears to be ivory. In the end, I take it as a judgment call--I prefer to keep it in ivory, as I've seen enough back-n-forth discussions about what constitutes "correct" colors on a particular week, or month, of German tank production to have come to a firm belief that, although there are indisputable guidelines and designated colors, there is enough leeway and exceptions to allow for choices to be made, within reason.

My thought is that this turret would have been necessarily removed from this hull at some point, and applied to an operational hull, which was then in refurbishment when the need for an operational turret saw it transferred to this existing prototype hull, which would have been "headless" in some warehouse in Kummersdorf when the war came there. The painting of it is intended to relate that narrative, with the two different paint schemes. In the case of the turret interior, the rear hatch really didn't open "up", so I wouldn't have seen it as being "glaring" if it were standing up, like a loader's hatch--so I don't think that the crew would have painted it over. And then there's ta Jagdtiger picture....Whistling

Big Smile Thanks for your heads-up on it though! Good to know that you're paying attention and watching out for mistakes! Yes

  • Member since
    January 2007
Posted by the doog on Tuesday, June 25, 2013 7:40 AM

Eric, thanks man! That makes me feel good that you're feeling that when you look at it! I appreciate it!

  • Member since
    July 2004
  • From: Texas
Posted by wbill76 on Tuesday, June 25, 2013 7:51 PM

Man, really love the look of that camo pattern Karl! Very nice. Yes Yes

  • Member since
    September 2006
  • From: Dripping Springs, TX, USA
Posted by RBaer on Wednesday, June 26, 2013 4:38 PM

Looking at the camo makes me think of a particular Stug that looked like Picasso painted it. Maybe this one was done by an as-yet-undiscovered modernist or impressionist?

Cool, way cool.

Apprentice rivet counter.

  • Member since
    November 2008
  • From: Central Florida
Posted by plasticjunkie on Wednesday, June 26, 2013 9:13 PM

That is one unique looking camo. Looks great!

 GIFMaker.org_jy_Ayj_O


Too many models to build, not enough time in a lifetime!!

  • Member since
    July 2003
  • From: On my kitchen counter top somewhere in central North Carolina.
Posted by disastermaster on Wednesday, June 26, 2013 10:53 PM

RBaer

Looking at the camo makes me think of a particular Stug that looked like Picasso painted it. Maybe this one was done by an as-yet-undiscovered modernist or impressionist?

Cool, way cool.

http://www.modelhorseblab.com/forums/images/smilies/guffaw.gifHilarious!

Picassos last ride.......  http://www.emofaces.com/en/smilies/p/picasso-smile.gif      

                        http://i1006.photobucket.com/albums/af183/shawbutte/zhemademe-smiley.gif http://orbiter-forum.com/images/smilies/facepalm.gif

Looking forward to the final roundup!


 https://i.imgur.com/LjRRaV1.png


  • Member since
    January 2007
Posted by the doog on Thursday, June 27, 2013 8:45 AM

Bill, thanks my friend, that's nice of you to say!

  • Member since
    January 2007
Posted by the doog on Thursday, June 27, 2013 8:47 AM

RBaer

Looking at the camo makes me think of a particular Stug that looked like Picasso painted it. Maybe this one was done by an as-yet-undiscovered modernist or impressionist?

Cool, way cool.

lol, thanks, Russ! I"m trying to do something eye-catching and diferent for this build. I'll be taming this down, of course, in the weathering stags, but it sure does look glaringly "artistic" in the bare state it's in now!

  • Member since
    January 2007
Posted by the doog on Thursday, June 27, 2013 8:48 AM

Thank you too, Plastickjunkie, I appreciate it!

STEVE! Let's see some in-progress pics, buddy!!

  • Member since
    January 2007
Posted by the doog on Thursday, June 27, 2013 8:59 AM

Got the markings on....

Added some decals in appropriate spots, and then painted out the "old" markings and adding a big, honkin' "1" on the front. I've since outlined it in dark green.

New updates soon!!!

  • Member since
    April 2013
Posted by SchattenSpartan on Thursday, June 27, 2013 10:36 AM

That yellow one looks great! It really makes the tank look even more like it was just thrown together and painted as fast as possible! The painted over nubers add to it as well!

Cheers, Clemens

  • Member since
    July 2003
  • From: On my kitchen counter top somewhere in central North Carolina.
Posted by disastermaster on Thursday, June 27, 2013 11:41 AM

http://www.sherv.net/cm/emoticons/flirt/drool-smiley-emoticon.gif A very nice bit of craftmanship on that turret doog. Should be killer after the weathering.

 https://i.imgur.com/LjRRaV1.png


  • Member since
    January 2007
Posted by the doog on Friday, June 28, 2013 7:50 PM

Thanks, Clemens, and Steve!!! Gawd but its goood to be finished with this turret already!

And speaking of that......I finally got the whole detail painting done (in between knocking off two dozen or so small parts inside the turret every 15 minutes, it seemed?!Angry)

Here's the main gun built up and painted.

The completed turret interior:

I wanna cry though, because now I have to seal the two turret halves together and cover up most of this detail! Crying

The turret halves glued together. I've added a little chipped zimmerit by just chipping some off with an exacto knife, and painting the chips grey behind the chips. The white is the actual White putty.

The beast is taking shape! Man, this is going to eat up space in my display case with that mondo-long barrel! There are some chips on the hull as well...

Thanks for looking in guys! On to the weathering phase next, and the tracks!

Smile Doog

  • Member since
    July 2004
  • From: Texas
Posted by wbill76 on Friday, June 28, 2013 8:37 PM

At least you know all that detail is there in the turret Karl (and so do we now that we've seen the pics! Big Smile) Looking forward to seeing the weathering applied to this beast!

  • Member since
    July 2003
  • From: On my kitchen counter top somewhere in central North Carolina.
Posted by disastermaster on Friday, June 28, 2013 9:37 PM

http://www.freesmileys.org/smileys/smiley-fc/ohwell.gif  you can always show the pictures......

 https://i.imgur.com/LjRRaV1.png


  • Member since
    March 2003
  • From: El Dorado Hills, CA
Posted by IBuild148 on Saturday, June 29, 2013 12:29 PM

Hi doog,

I have been watching and taking notes as usual. Fantastic work as always.

IBuildOne48

Teach modeling to youth!

Scalefinishes.com

http://i712.photobucket.com/albums/ww122/randysmodels/NMF%20Group%20build%20II/Group%20Badge/NMFIIGBbadgesmall.jpg


  • Member since
    September 2006
  • From: Dripping Springs, TX, USA
Posted by RBaer on Saturday, June 29, 2013 1:19 PM

I'm likin' it......

Leave the back hatch open, doog. It'll be a great point of interest.

Apprentice rivet counter.

  • Member since
    July 2004
  • From: Sonora Desert
Posted by stikpusher on Saturday, June 29, 2013 2:48 PM

Oh that turret interior is beautiful Karl! At least with the hatches open you will be able to show off a little bit of that... But that design sure does look  nose heavy with the turret so far forward and that very long gun tube.


F is for FIRE, That burns down the whole town!

U is for URANIUM... BOMBS!

N is for NO SURVIVORS...

       - Plankton

LSM


JOIN OUR COMMUNITY!

Our community is FREE to join. To participate you must either login or register for an account.

SEARCH FORUMS
FREE NEWSLETTER
By signing up you may also receive reader surveys and occasional special offers. We do not sell, rent or trade our email lists. View our Privacy Policy.