SEARCH FINESCALE.COM

Enter keywords or a search phrase below:

M3 Lee (Work in Progress)...PART 3 (4/17/2009)

18185 views
39 replies
1 rating 2 rating 3 rating 4 rating 5 rating
  • Member since
    May 2005
  • From: Dublin Rep Of Ireland
Posted by terry35 on Saturday, April 18, 2009 4:17 PM

Excellent work going on there. looks incredible.

Terry.

  • Member since
    April 2009
  • From: Canada
Posted by vector123 on Saturday, April 18, 2009 3:52 PM
Cool.
always looking for tips and suggestions!
  • Member since
    October 2005
  • From: Maryland
Posted by usmc1371 on Saturday, April 18, 2009 7:38 AM

 vector123 wrote:
thanks it realy helps alot.Smile [:)] are you going to put any mods into it?

No, it's pretty much straight out of the box except the toolboxes and light guards.  This kit requires enough modifications just to get it to fit correctly.

-Jesse

  • Member since
    October 2004
  • From: League City, Texas
Posted by sfcmac on Saturday, April 18, 2009 6:26 AM
Woo HOO!Thumbs Up [tup]
  • Member since
    April 2009
  • From: Canada
Posted by vector123 on Friday, April 17, 2009 5:11 PM
thanks it realy helps alot.Smile [:)] are you going to put any mods into it?
always looking for tips and suggestions!
  • Member since
    October 2005
  • From: Maryland
Posted by usmc1371 on Friday, April 17, 2009 4:35 PM

 vector123 wrote:
looks great how did u do the weathering? keep us posted! 

Thanks.  The weathering is just a wash of raw umber and dry brushing with Model Master Steel.  I wasn't going to spend much time on the interior since most of it won't be seen.

-Jesse

  • Member since
    April 2009
  • From: Canada
Posted by vector123 on Friday, April 17, 2009 2:21 PM
looks great how did u do the weathering? keep us posted! 
always looking for tips and suggestions!
  • Member since
    October 2005
  • From: Maryland
Posted by usmc1371 on Thursday, April 16, 2009 11:01 PM

Got some more work done.  This time it's the main 75mm gun and the tracks.
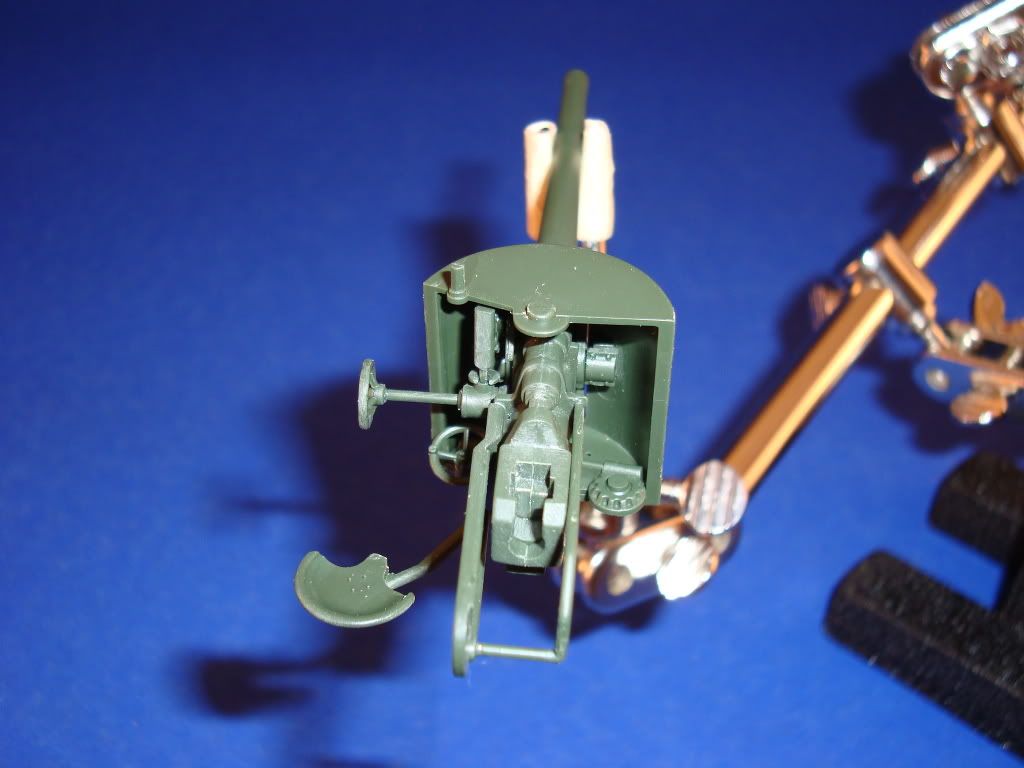
The gun went together well with no problems.  I did realize that the gun shield won't fit into the trunnions at the top and bottom of the hull.  The shield is slightly too short.  I decided to just glue the gun in place.

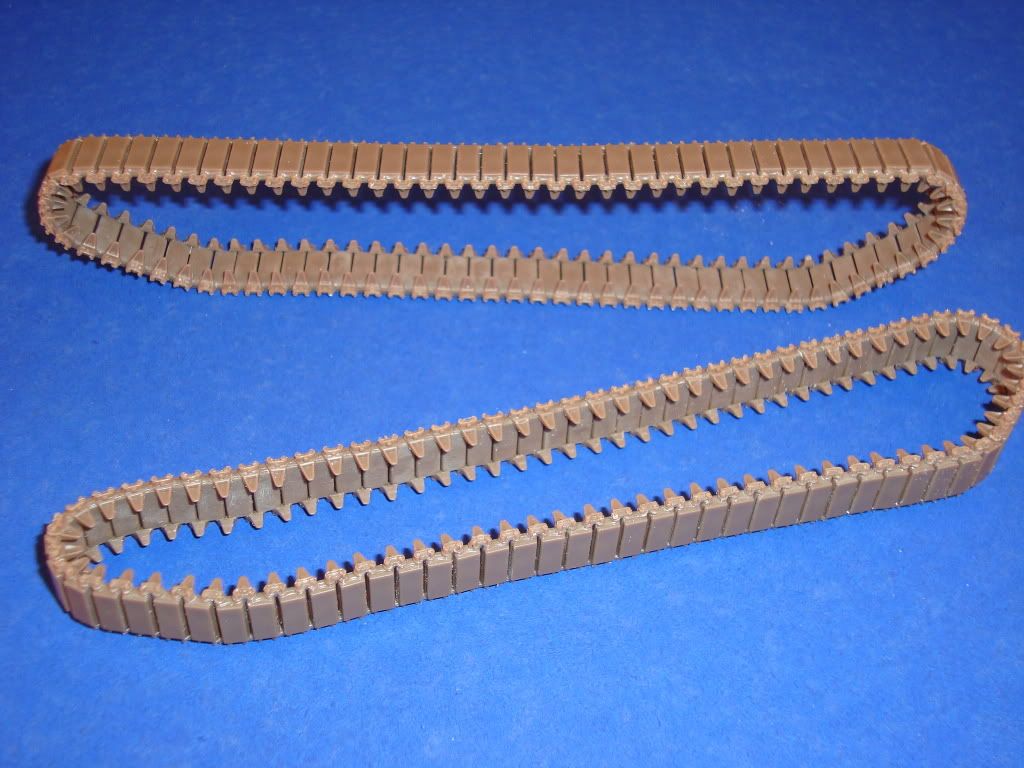
The tracks went together fine, just a little time consuming.  Each run is in two sections, a top and a bottom.  After painting, I'll just slip them onto the running gear.

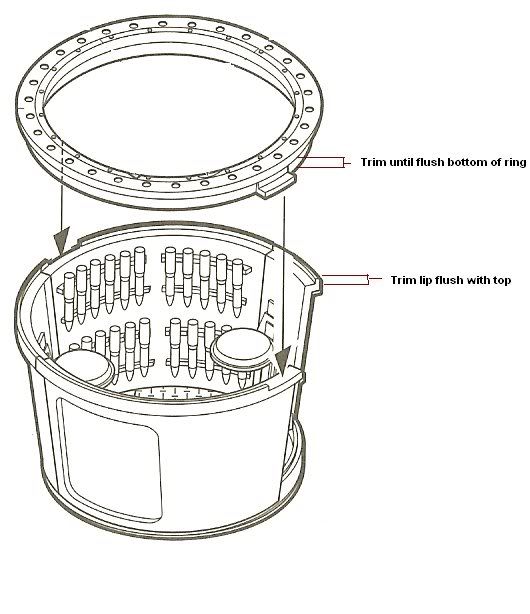
I ran into a problem with the turret basket.  I was dry fitting it and realized the basket won't sit all the way down into the hull.  The problem was the bottom of basket was hitting the top of the left sponson.  The clearance is 26 mm.  The basket and ring is 27 mm.  I decided to do some sanding.  The picture below shows were I removed excess material.  Basically, I removed the top lip of the basket and all of the underside of the turret ring.  I then glued the ring to the top of the basket and now everything fits fine.
I don't know if it's just me, but this kit has some fit issues.  I'm still polishing this piece of poo though.

-Jesse 

  • Member since
    April 2009
  • From: Canada
Posted by vector123 on Thursday, April 16, 2009 8:12 PM
OMG that looks amasing im so impressed! Smile [:)]Bow [bow] 
always looking for tips and suggestions!
  • Member since
    July 2004
  • From: Texas
Posted by wbill76 on Thursday, April 16, 2009 1:06 PM
The two forward firing fixed MGs were literally "point and shoot". The driver aimed the vehicle and had control of them. Same concept that was in the M3 Stuart before it was dropped. Definitely not a concept that caught on much in actual combat and was dropped in favor of the ball mounts. Laugh [(-D]
  • Member since
    June 2008
  • From: Iowa
Posted by Hans von Hammer on Thursday, April 16, 2009 11:53 AM
Still... I can't figure out how they're even aimed & fired in that kinda mount... Ah well... Gonna build an AVLB anyway...

  • Member since
    October 2005
  • From: Maryland
Posted by usmc1371 on Thursday, April 16, 2009 11:15 AM

Yup, your right.  When we started talking about this, I thought I read there was a coaxial .30 cal.  But the picture I emailed you didn't show it.  It kind of through me off.  Here's Steve Zaloga's M3 clearly showing the coaxial .30:

http://www.missing-lynx.com/gallery/usa/images/m3acadsz_c.jpg 

But there are 2 .30 cals in the hull.  That makes 4 .30 cals carried in the Lee.

In regards to the ammo carried, I think we should remember that the US didn't know "jack" about mechanzied warfare when the M3 was designed, hence the "more machine guns, the better" concept.

-Jesse

  • Member since
    June 2008
  • From: Iowa
Posted by Hans von Hammer on Thursday, April 16, 2009 10:26 AM

Looks like a coax in this one to me... To the right of the 37mm...

I did see a pic earlier of one crewman dismounting witha Thompson, but another one was totin' an Ought-3, lol...

At any rate, I ain't saying you're wrong bud... I'm just saying that the storage doesn't make a lot of sense... 9200 rds of 30-cal vs 1200 rds of .45... Lotta 30-cal ammo cans..

  • Member since
    October 2005
  • From: Maryland
Posted by usmc1371 on Thursday, April 16, 2009 8:25 AM

Ok.  Maybe where stuck on something here because my references show two forward firing .30 cal machine guns mounted in the hull to left of the driver.  My reference is Steve Zaloga's book on the M3.  Here's the ports welded over:

http://data3.primeportal.net/tanks/david_lueck/m3_lee/images/m3_lee_03_of_86.jpg

There are 3 .30 cals on the Lee.  Two in the hull and one in the cupola.  In terms of the coxial, there is no .30 cal lined up next to the .37mm.  That tube you see in pictures is the stabilization counterweight for the .37mm.

Steve Zaloga also states that the tank carried 1,200 .45 cal rounds.  That rack on the model would hold 1,000 rounds in 50 round drums.  Remember, the M3 carried a crew of 6-7 men.  That's about 200 rounds a man.  Makes sense.

I sent you an email with pictures.  Just don't post them due to copywrite restrictions.

-Jesse


  • Member since
    June 2008
  • From: Iowa
Posted by Hans von Hammer on Thursday, April 16, 2009 7:55 AM

Well, that's where the confusion sets in fer me, pard... There isn't a bowgunner in a Lee, in the classic sense like a Sherman, meaning a ball-mounted .30 cal, just the coax and commander's .30s...

Been lookin' over this build...

http://www.ipmslivonia.org/ipms/Gallery/M3-Lee/KitRM3Lee.htm

And this interior

http://depothobbies.com/Verlinden/VER%201807%20M3%20Lee%20Interior.jpg

For my Tamiya Lees, plus various stuff to do a Lee AVLB scratch-build down the road..

  • Member since
    October 2005
  • From: Maryland
Posted by usmc1371 on Thursday, April 16, 2009 7:21 AM

 Hans von Hammer wrote:
I don't think they're Thompson mags, although I could be wrong.. But... Why would there be that many drum-mags for Thompsons and no ammo-cans (so far at least) for the 30-cals?

Judging by interior pictures, I believe extra ammo cans would be carried under the bow gunner/radio operator's seat.  Makes sense. The kit area is modeled solid but interior pics show shelves.  You can't see this area on the model once the hull is together.  Here's a pic of the bow gunner/radio operator's seat.  The seat in the middle is the driver's seat.  The shelves would have a seat on top of them for the radio operator: http://data3.primeportal.net/tanks/david_lueck/m3_lee/images/m3_lee_57_of_86.jpg

There are some stowage boxes Academy missed.  I didn't bother scratchbuilding them since most of the interior won't be visible anyway.  For the same reason, I'm not worried about really detailing the interior.  I'll only have two hatches open, one side hatch and the drivers hatch. 

-Jesse

  • Member since
    June 2008
  • From: Iowa
Posted by Hans von Hammer on Thursday, April 16, 2009 12:28 AM
I don't think they're Thompson mags, although I could be wrong.. But... Why would there be that many drum-mags for Thompsons and no ammo-cans (so far at least) for the 30-cals?

  • Member since
    January 2012
Posted by I make stuff on Wednesday, April 15, 2009 7:21 PM
Wow, that's what I thoguht they were, too, that's 1000 rounds of .45 acp ready to go.  Quite the load.
  • Member since
    October 2005
  • From: Maryland
Posted by usmc1371 on Wednesday, April 15, 2009 6:14 PM

Constuctor,

Yeah, I'm worried about the turret basket fitting.  I haven't assembled it yet.  I already had to snap off and reglue the ammo basket on the right side.  It was getting in the way of the upper hull.  I'm beginning to really not like this kit.

Dre,

Thanks.  I believe those are for the Thompsons.

-Jesse

Dre
  • Member since
    June 2007
  • From: here, not over there
Posted by Dre on Wednesday, April 15, 2009 5:44 PM

Beautifully done interior!  To my eyes, it has just the right amount of wear for that "lived in" look without it looking trashed.

What are those steel tobacco tin-looking things on the right side?? Drums for a Thompson?

  • Member since
    July 2006
  • From: Philippines
Posted by constructor on Wednesday, April 15, 2009 5:13 PM
I encountered the same problem with my Lee. I think the ammo racks holder are too close to each other it is impossible to fit all the shells in. The part the I am referring to regarding the part that gets in the way of the turret basket when it turns is the pump-looking part directly atop the fire extinguishers.
  • Member since
    January 2007
Posted by the doog on Wednesday, April 15, 2009 1:33 PM

OH, ok, Jesse--you're right; I see it there!

Yup--that looks great! I must need glasses or something!? Laugh [(-D]

  • Member since
    October 2005
  • From: Maryland
Posted by usmc1371 on Wednesday, April 15, 2009 12:58 PM

Thanks, Karl.  I actually used Model Master Steel, I just didn't do the dry brushing as heavily as you did.  The M3 wasn't in service very long, so wear and tear wouldn't be very heavy.  If you look in my pictures, you'll see the heaviest steel dry brushing on the transmission casing and the turret drive motor (I think that's what it is).  Also, the MM Steel is lighter than the Metallic Grey you used.

I do think I'll do some more dry brushing on the corners of the bulkheads though.

-Jesse

  • Member since
    January 2007
Posted by the doog on Wednesday, April 15, 2009 12:11 PM

WOW, Jesse! This looks awesome!! What a great interior!

You might not want to "go there", but I'd give the pristine white angles and edges a bit of drybrushing with some metallic grey, to show the natural wear that would occur--here's a pictureof how I did it on my Hetzer interior....

Just might give it a little more "used" look? Wink [;)]

  • Member since
    July 2004
  • From: Texas
Posted by wbill76 on Wednesday, April 15, 2009 9:28 AM

Jesse,

I was referring to the scale dimensions based on your description that they wouldn't fit in the racks. There wasn't a lot of space in the turret for ammo so I guess they stuck it as close as they could!

  • Member since
    October 2005
  • From: Maryland
Posted by usmc1371 on Wednesday, April 15, 2009 6:41 AM

Thanks, wbill76.  What do mean by "Academy got the round sizes wrong"?  You mean the scale dimensions of the rounds or the caliber of the rounds used in the kit.  I thought it might be a little silly to have 37mm rounds in the hull instead of the 75mm.  Plus, I can figure out how the crews got those rounds off the rack with it being behind the turret.  Must of been a tight fit.

-Jesse

  • Member since
    July 2004
  • From: Texas
Posted by wbill76 on Tuesday, April 14, 2009 5:15 PM
Very nice work on the interior, looks like you found a good solution to the fat 37mm round problem. Makes you wonder who had it right...Eduard at 9 or Academy with 14 but Academy got the round sizes wrong.
  • Member since
    October 2005
  • From: Maryland
Posted by usmc1371 on Tuesday, April 14, 2009 4:32 PM

OK everyone.  I finished the inside of the lower hull.  I found the 37mm ready rounds don't all fit.  The rack holds 14 rounds, but the rounds are too fat to fit all 14 in there.  Interesting, Eduard's detail set replaces the rack with 9 slots. 

Thanks for looking and comments are always welcome.

-Jesse

  • Member since
    October 2005
  • From: Maryland
Posted by usmc1371 on Friday, April 10, 2009 6:56 AM

Smeago,

This is the product I'm referring too:

It's used to remove paint and decals.  I have never tried the Denatured alcohol that Phil mentioned but if he says it works, I'm sure he's right.  I've used ELO to remove lacquer, enamel and acrylic based paints with no damage to the plastic.  I use just a little bit on the end of a cotton swab and rub the area gently.

Phil_H,

Thanks for the info on the denatured alcohol.  I might give a try after I'm out of ELO.  I still have most a container left.

Constuctor,

Thanks for the heads up.  I haven't built the turret yet but I did start painting the interior.  Maybe now I'll finish the interior painting after I build the turret.  I've looking around online and I haven't found anyone who's completed this kit yet, interior and all.  I know Steve Zaloga built it but I don't think he added the interior.  He gave the a kit a B- rating.  I'd give it a C.  It's a real shame.  I really like the M3 also.  Oh well, just gotta keep on "keeping-on".

-Jesse

JOIN OUR COMMUNITY!

Our community is FREE to join. To participate you must either login or register for an account.

SEARCH FORUMS
FREE NEWSLETTER
By signing up you may also receive reader surveys and occasional special offers. We do not sell, rent or trade our email lists. View our Privacy Policy.