Thanks again redleg!
Aren't that two of the top ten modelling problems - the carpet monster and the kit inaccuracies?
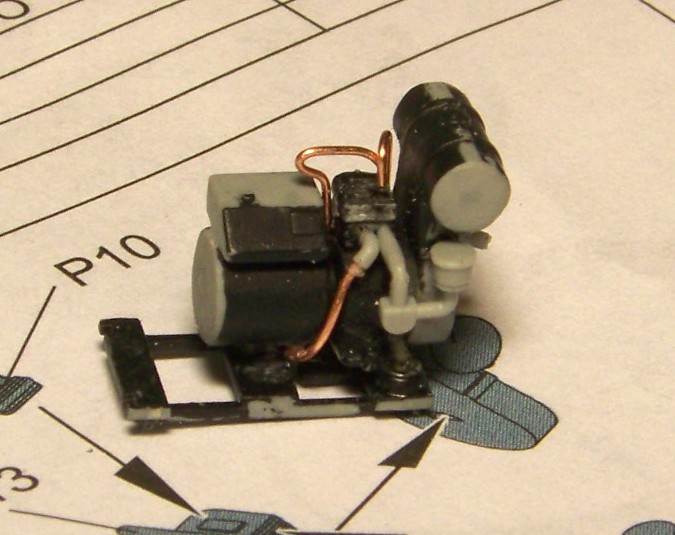
Anyhow, goin' on with the build. Recently I finished the power charger. I added the carburetor, and also replaced the kit exhaust (partially) with copper wire. I also used the same wire for the ignition cable and the carrying handle. That's what it looks like:

I also assembled the battery. I added the hold-down pin, also from the same copper wire. By the way, I pulled my wire from an auto battery cable, I recommend this source. The battery, yet unpainted looks like this:
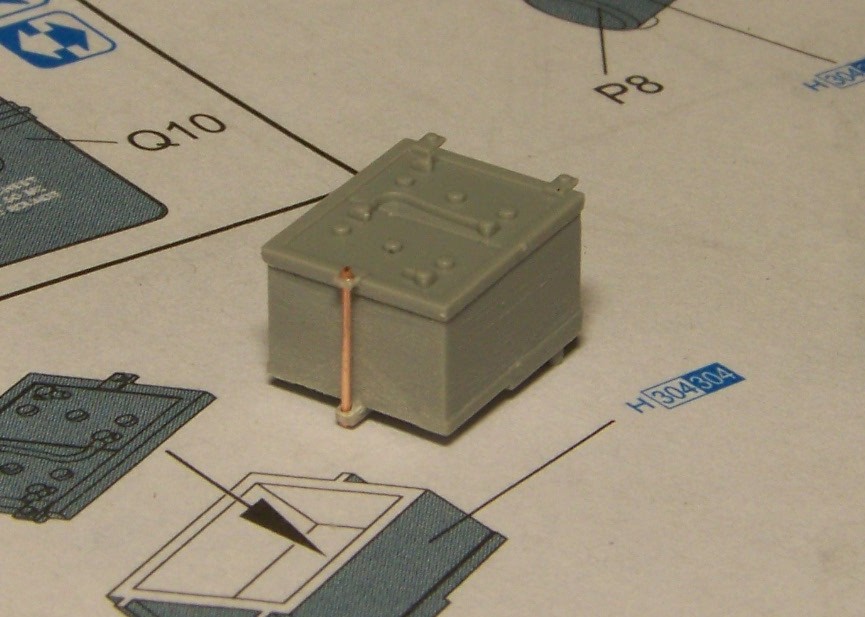
Just after pasting the picture I noticed I still have to scribe the joint where the batteries meet at the sides. Just another example how this forum helps make better models![Shy [8)]](/emoticons/icon_smile_shy.gif)
And the big question for all: What color would such battery be? Would it really be olive-drab? Could some more civilian color be realistically used for variation? Thanks a lot in advance, looking forward to Your comments, and have a nice day
Pawel