SEARCH FINESCALE.COM

Enter keywords or a search phrase below:

#6 Polish Artillery Tractor C7P-WIP 4/18--More Weathering Pics Page 12

43330 views
170 replies
1 rating 2 rating 3 rating 4 rating 5 rating
  • Member since
    December 2008
  • From: Goffstown, NH
Posted by New Hampshire on Sunday, April 18, 2010 6:44 PM

She came out wonerful Bill!  You put a lot of effort into this one and it sure does show!

Brian

  • Member since
    January 2012
Posted by I make stuff on Sunday, April 18, 2010 4:28 PM

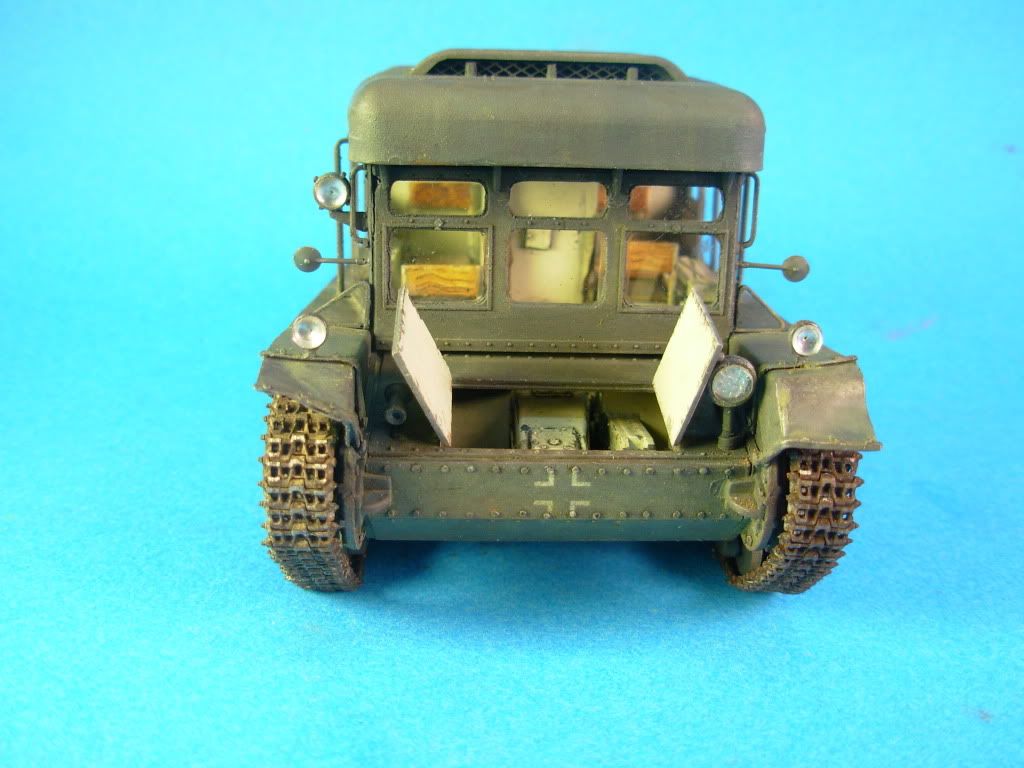
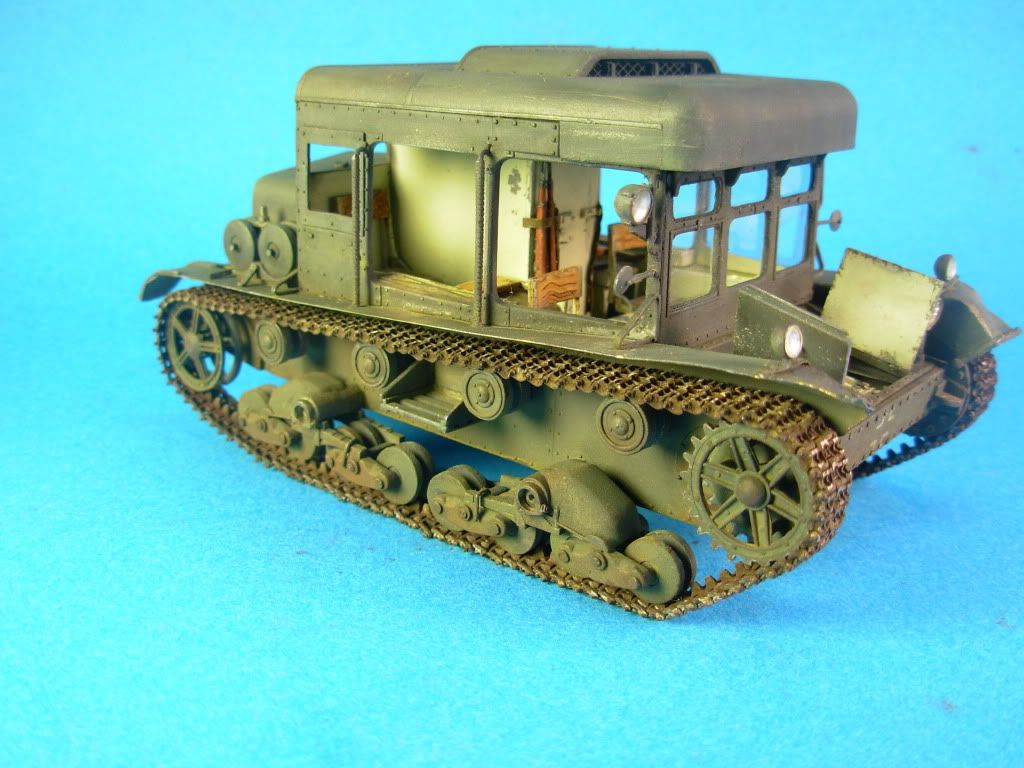
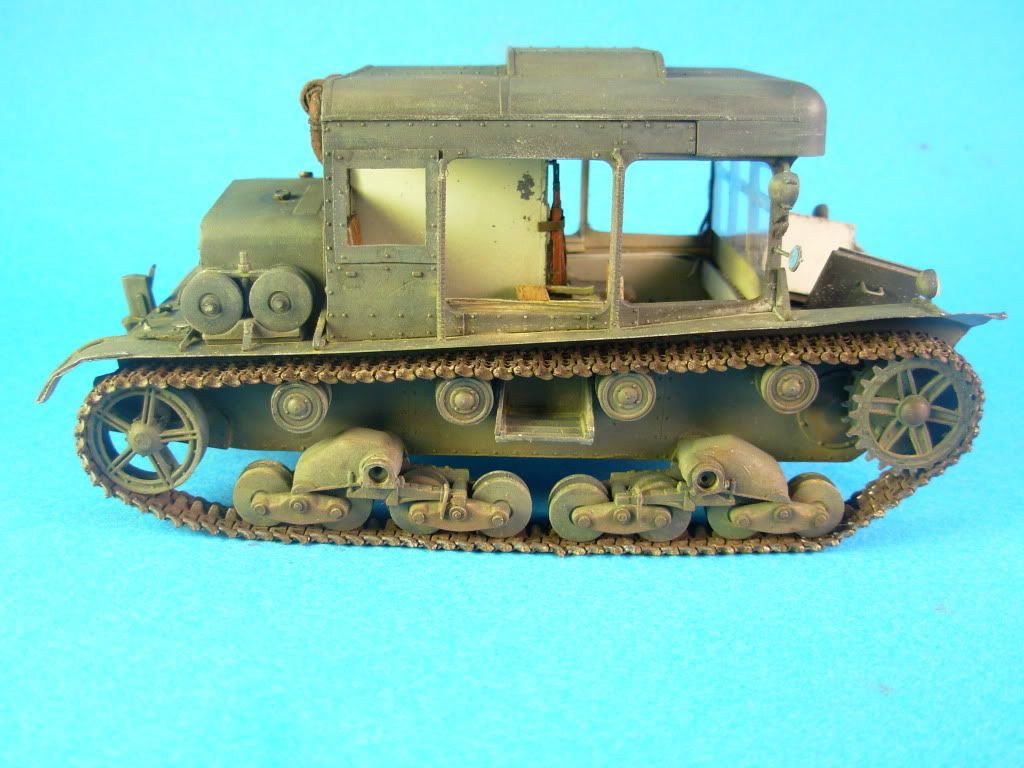
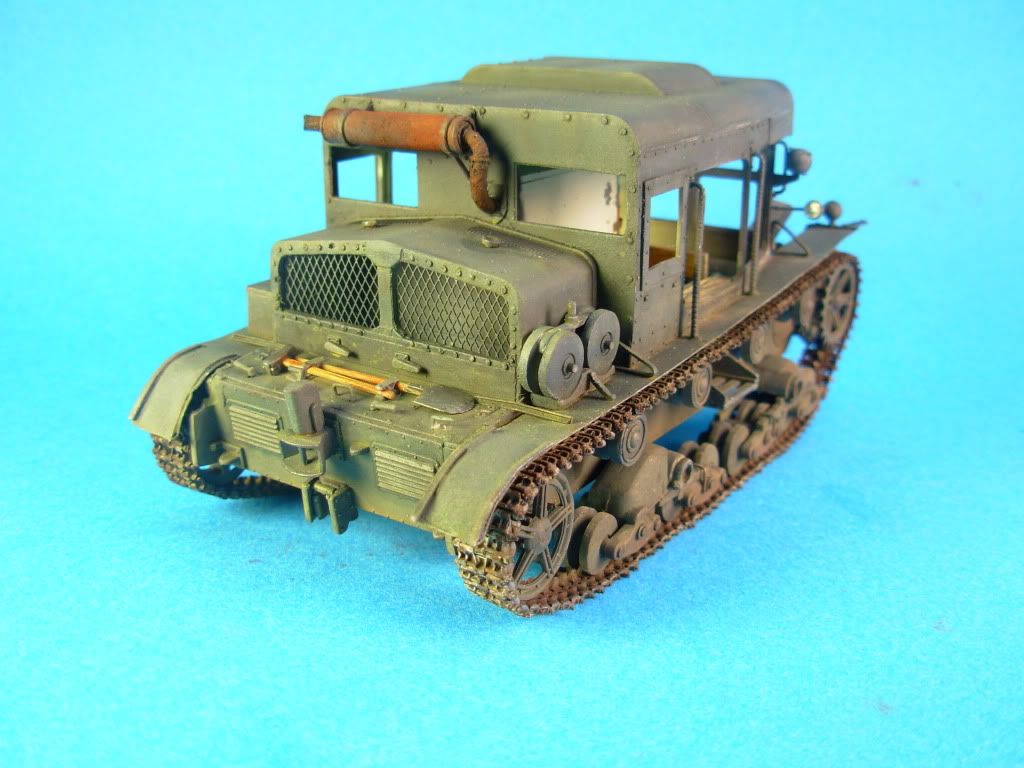
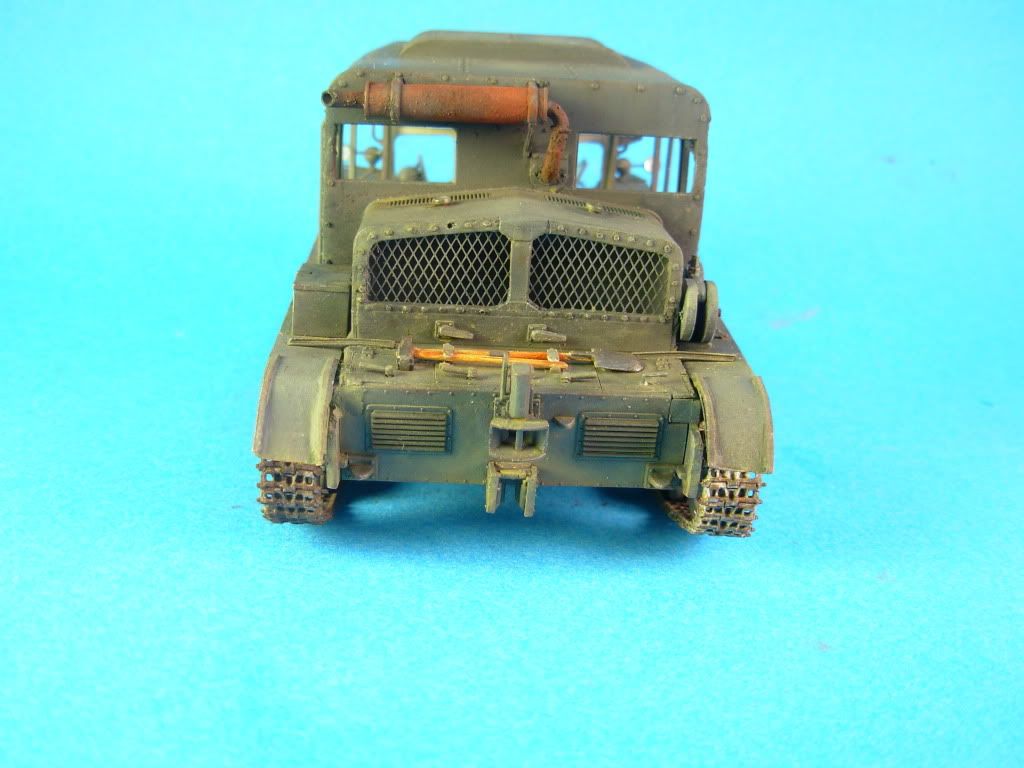
Thanks, Edmund, WBill, and WIngnut!  I didn't get discouraged, but I did get busy with both work and a total overhaul of my workspace, I am transitioning from a stand up bench to a sit down corner unit with a lot more space to scread out and occupy. Still not complete, but yetsterday I decided to add some more Vallejo washes to try to push this one across the finish line.  I was really rushed to get it done for that show, and then I left it in a box, but nw I like what i have done:

THanks for joining me for that strange ride, and all the nice comments, I appreciate every word.

Bill


  • Member since
    April 2005
  • From: Piscataway, NJ!
Posted by wing_nut on Monday, March 8, 2010 6:57 PM

yes the hardware would have been the gravy but that is a bad..s piece of meat there.  That is very cool looking and very well done.

Marc  

  • Member since
    July 2004
  • From: Texas
Posted by wbill76 on Monday, March 8, 2010 1:17 PM

Sorry to hear you didn't bring home any hardware but the raffle score more than makes up for it Bill! Hearing that a Staghound was entered in a softskin category is a bit strange but then you never know about those things. Don't let it get you down, you did an awesome job with this one and conquered a lot of new ground with it. Yes Beer

  • Member since
    January 2009
  • From: Everett, WA
Posted by Schnobs on Monday, March 8, 2010 10:11 AM

  No DId I hear No Joy! 

Let's see let me list off your first's on this one......

  • First German Grey Monotine build that you did a great job with to make visually inteesting which is not an easy thing to do,
  • First scratch built soldered brass fenders that turned out beautiful!
  • First scratch built rivets which turned out very believable
  • First picture window on an AFV!  Roll
  • Time spent with fellow modelers and vendors!  I would of loved to meet Mike Bishop!
  •  Oh and a free LSW that cost me $89.00 last year!!

I am done now and  I hope you feel properly chastized!

Great job on the build Bill I would be proud to have that unique ugly duckling in my shelf!


"There is a principle which is a bar against all information, which is proof against all arguments and which cannot fail to keep a man in everlasting ignorance. That principle is contempt prior to investigation." Herbert Spencer
  • Member since
    April 2008
  • From: Ventura (at the beach) in California
Posted by *INDY on Monday, March 8, 2010 1:20 AM

Awsome Bill! You won buddy!! BIG time. Personally I'd rather have the free models than the ribbons & plaques  Surprise I'd say you did well---can't wait for the blog of the Land Wasershleppershiptracckdealy--that will be EPIC---and the {planes}--I got a few waiting to be needed for Dio's---{no shame}

"Well...you gunna pull them pistols, or just whistle Dixie?"

  • Member since
    January 2012
Posted by I make stuff on Sunday, March 7, 2010 11:39 PM

OK, guys, thanks for the good wishes, but no joy today.  I took my Sherman, that BA20, The Klipboard Karl figure, and this recently, well, pretty completed build.

The results, a not unexpected non place finish. I had pretty high hopes for the tractor, and got some very nice compliments on it.  It was in a competitve category of soft skins, displaced by a pretty magnificent Willys, a Kubel, and I think a staghound.  I didn't feel bad, but I would have rather got a 3d place than nothing!

Now for the good news, I triumphed in the raffle AGAIN.

This time, I scored a 1/48 Hasegawa FW190 wiht a car in the same kit, and a Hobby Boss Landwasser Schlepper!  Love the floaty tracky thing, I wonder why I keep winning wingy things, last time I won a 1/32 Hase P47.  I also bought a nice Monroe Perdue base of a waterwheel and a water course, perfect for displaying a single tank.

Thanks for the company on this one.

Bill


  • Member since
    April 2008
  • From: Ventura (at the beach) in California
Posted by *INDY on Sunday, March 7, 2010 2:44 PM

CaliBill~  I love your work on the little Polish tractor. Your efforts to reach farther and grow your skills should inspire darn near everyone to keep moving! Well done one this project-my fingers are crossed for you at theshow today Mate.  Best'a luck---but in any case--you're a success!

"Well...you gunna pull them pistols, or just whistle Dixie?"

  • Member since
    May 2005
  • From: Eugene, Oregon
Posted by hughes2682 on Sunday, March 7, 2010 12:36 PM

Bill,

Outstanding work sir!YesYesYes  Best of luck at the show!

Cheers

Dave

http://img.photobucket.com/albums/v317/Aaronw/Groupbuilds/ClassicAviationGB2010bomb.jpg

With enough thrust, pigs fly just fine.

  • Member since
    July 2004
  • From: Texas
Posted by wbill76 on Sunday, March 7, 2010 12:13 PM

Looks mighty nice from here Bill, best of luck at the local show! Beer

  • Member since
    July 2003
  • From: On my kitchen counter top somewhere in central North Carolina.
Posted by disastermaster on Sunday, March 7, 2010 1:37 AM

 That's true, those tracks ARE pretty dinky. It's a bit hard to realize the lack of weight involved there. I have a quick fix if these are to be static display only.

ROTFLThere's more than one way to scan a cat.http://img.photobucket.com/albums/v208/Psycho_Wolf/Funny%20Stuff/catscan.png

  On the very inside top of the rear idler - a small dollop of gel superglue to hold the track in place.                                    

  Now, roll the front sprocket backwards to compress the track until the sag is what you want...... 

  Next, a very small drop of (I use laquer thinner) fast drying liquid glue to the axle attachment point (hold it a few seconds) of the front sprocket; if the rear idler is movable you will have to do the same thing first with that also.

Using a small amount of liquid glue in a capillaried manner shouldn't hurt the paint at all. If it does, that's what dirt pigments are for.

 Hope this explanation was understandable.

I've been following/watching your progress and you are doing a wonderful job here. Looks like you're going to be another diehard modeler. The contest should go well for you; make sure to document your work.

Good luck.

Thanks for being a fan.... I'll have another project up in the near future.

http://i20.photobucket.com/albums/b232/gluetank/Decorated%20images/th_T1-4-copy.jpg


 https://i.imgur.com/LjRRaV1.png


  • Member since
    January 2012
Posted by I make stuff on Sunday, March 7, 2010 12:37 AM

disastermaster

 Citadelgrad87:


I am entering this in a small local contest, and I have never used Fruils before.  Please check my tension:

Also, if anything jumps out at anybody, I have a couple hours to fix it, please sound off!

THanks for looking,

Billy boy.


http://smileys.smileycentral.com/cat/4/4_6_2v.gif Maybe an extra link or two on each side to enhance the track sag?

Hi DIsasterMaster.  THat was my first instinct, I actually tried more links, but these are so light, they kind of honked up and didn't sag, they sort of floated and bunched.  WHen I pick it up, they actually hang about 1/4 inch below the bogies, they are far from tight.  Maybe I will try one more link?

I have a set for my ISU152 that weight about an ounce a link those better sag.

Thanks for checking in, I admire yuo work a LOT.

Bill

  • Member since
    January 2012
Posted by I make stuff on Saturday, March 6, 2010 11:43 PM

Well, thank you Ed.  You are a powerful and positive influence in my pursuit of excellence, and not just in modeling.  This would not be half the build if I didn't know and rely on you.

ANd, of course, Adam, with his gentle shove off the "SUre, solder it, you can do it!" right off the cliff!  Man, I'm glad I didn't look down before I jumped, but I can tell you I have NO FEAR of pe or soldering at all now.

THis was a kit of many firsts...first non DML kit since my return to this hobby.  FIrst large scale scratchbuilding, first sodering, first German Grey, first use of Vallejo to weather, first use of Fruils...

IF I sound melancholy, gents, it's becasue build #6 is now in the history books.  Tomorrow bright and early, I'm taking it to Pasadena and entering it in a small local show.  Thanks to all, and I mean ALL, who joined me on this journey.  I would do a roll call, but then I'd leave someone out, and I want to include everyone who checked in and watched this wierd thing take shape.  I kind of like it...

Here's the walk around.  I have about 12 hours until the contest, so if you see anything fixable, sing out!
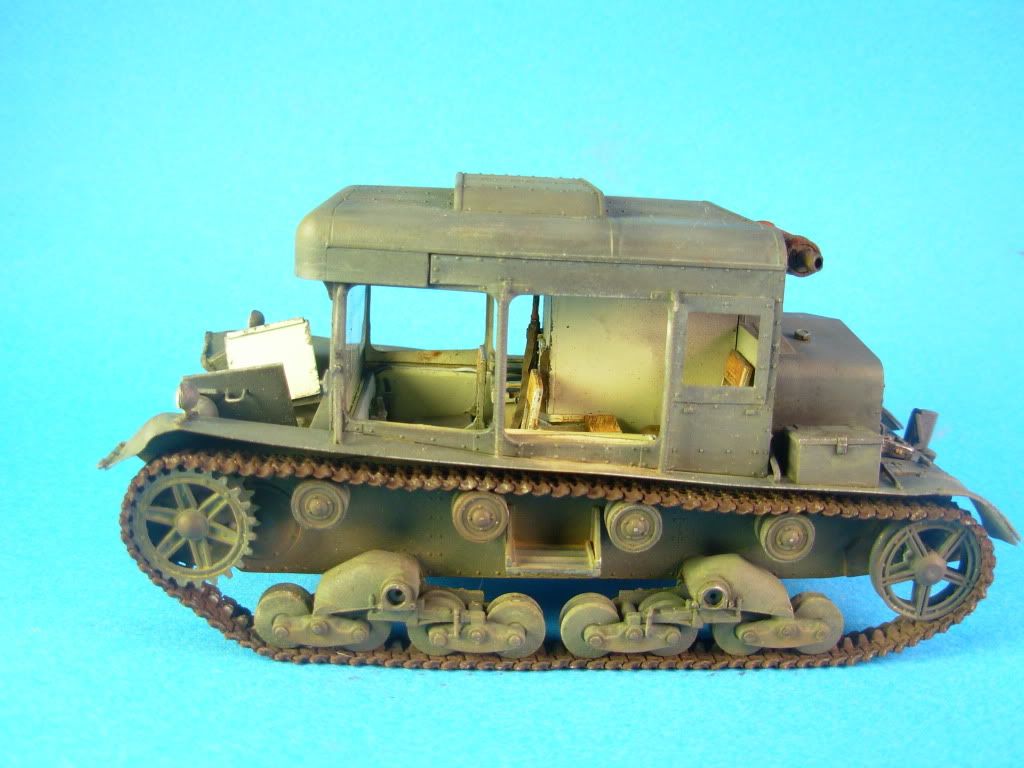
 

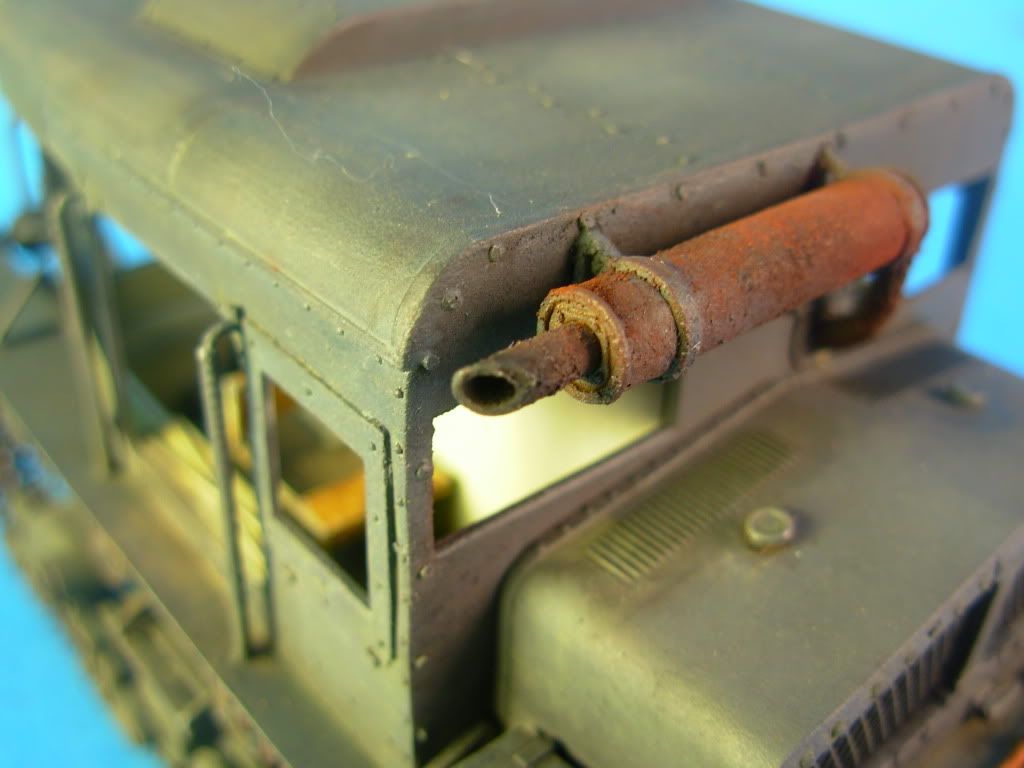
I added some soot to the end of the muffler, Mig's black pigment
 

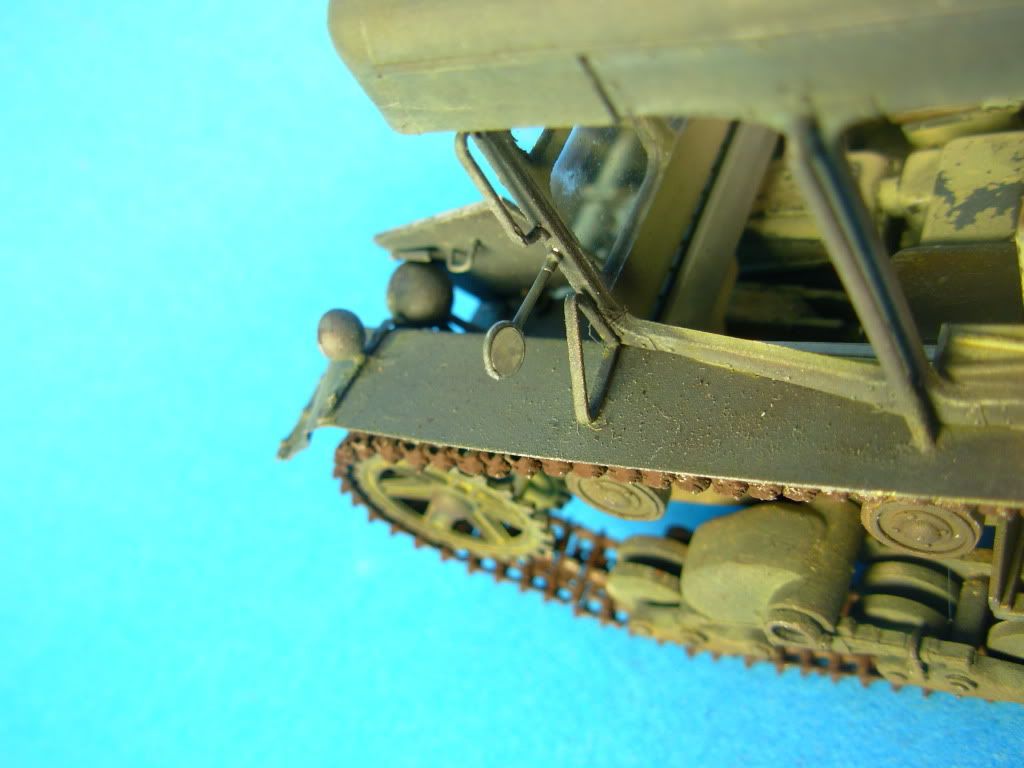
And I was pretty happy with this:  two mirrors that I plan to break off before the show, but I punched out discs of aluminum tape and stuck them on for glass, looks OK to me:
 

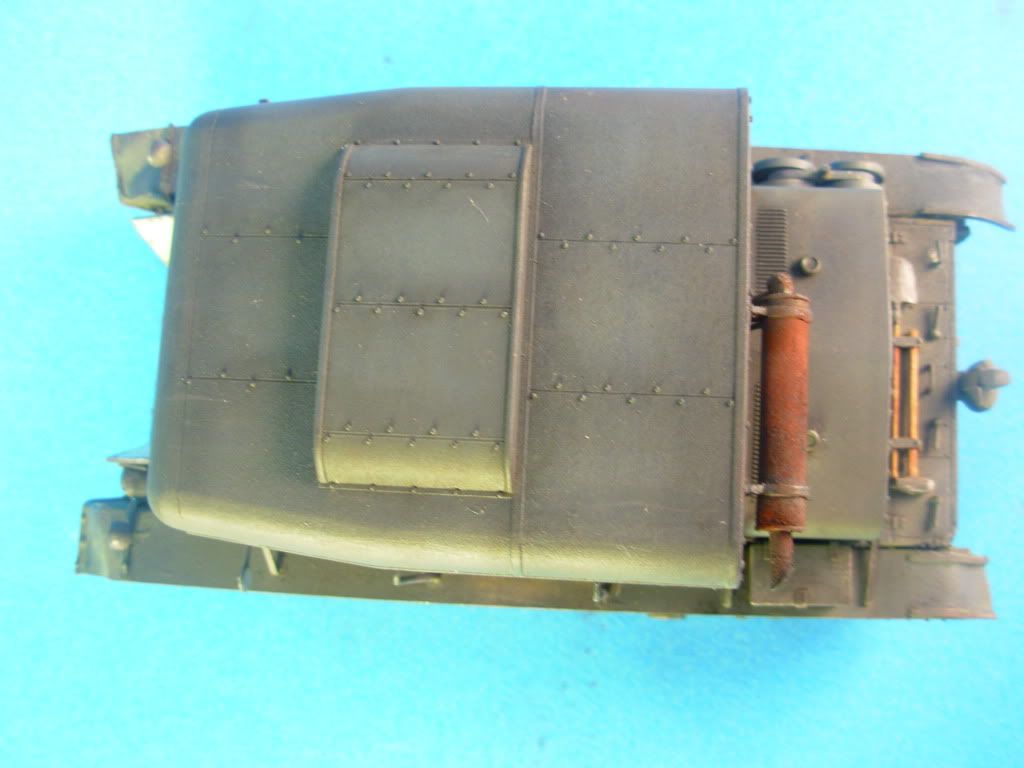
And the top, the shading is still pretty apparent, maybe I overdid it?
 

And for scale, I figure you are all probably saying "I wonder what it looks like next to an obscure RUssian armored car?"  Well, here you go:
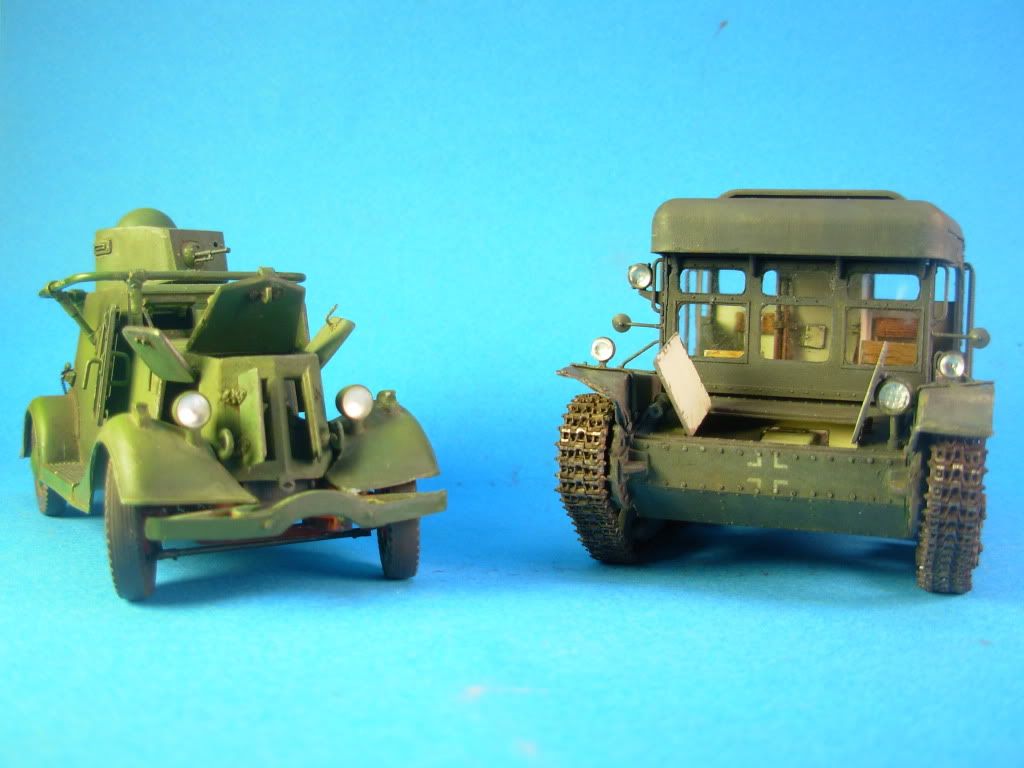
 

Thanks, guys, I'm taking the day off tomorrow--to go to the show, I will report back no matter what!

Bil

  • Member since
    July 2003
  • From: On my kitchen counter top somewhere in central North Carolina.
Posted by disastermaster on Saturday, March 6, 2010 11:38 PM

Citadelgrad87


I am entering this in a small local contest, and I have never used Fruils before.  Please check my tension:

Also, if anything jumps out at anybody, I have a couple hours to fix it, please sound off!

THanks for looking,

Billy boy.

Hmm Maybe an extra link or two on each side to enhance the track sag?

 https://i.imgur.com/LjRRaV1.png


  • Member since
    January 2009
  • From: Everett, WA
Posted by Schnobs on Saturday, March 6, 2010 9:32 PM

 Bravo! Bill!

This is beautiful!!

I am so glad you found the idler.  Nice work Bill by far your best and the Sherman was fanstastic but this is better! 


"There is a principle which is a bar against all information, which is proof against all arguments and which cannot fail to keep a man in everlasting ignorance. That principle is contempt prior to investigation." Herbert Spencer
  • Member since
    January 2012
Posted by I make stuff on Saturday, March 6, 2010 9:27 PM

Well, it's been a frustrating day, but I listened to the advice of my great frind Edmund, stepped away, then methodically searched the bench for the left rear idler wheel, and then I gave up, then I looked in one last place, a bag of alligator clips for my soldering, and there is was.

I am entering this in a small local contest, and I have never used Fruils before.  Please check my tension:

Also, if anything jumps out at anybody, I have a couple hours to fix it, please sound off!

THanks for looking,

Billy boy.


  • Member since
    June 2009
Posted by Guney on Saturday, March 6, 2010 6:14 PM

Really good work...:)

  • Member since
    January 2012
Posted by I make stuff on Saturday, March 6, 2010 5:21 PM

Thanks for checking in, Bill.  I will work on the handles, I have not been sleeping this week...

I got the headlight lenses mounted and have started making some dusty washes with Vallejo green ochre, which I saw used to spectacular results on another board.  Right now it only has a light wash, I will increase the intensity on the lower areas and drive train.


THanks for looking, PM to Ed, call me please. MY phone died again and I lost my contacts until Monday....

\Bill

  • Member since
    July 2004
  • From: Texas
Posted by wbill76 on Thursday, March 4, 2010 2:00 PM

Making good progress! IMHO you should replace the other handles only if you won't be able to sleep at night knowing that 1 doesn't match the rest...after you paint it I'm sure no one who doesn't know won't notice. Wink

  • Member since
    April 2005
  • From: Piscataway, NJ!
Posted by wing_nut on Thursday, March 4, 2010 6:39 AM

i really like they way this has taken shape.  It looks very nice.

Marc  

  • Member since
    January 2012
Posted by I make stuff on Wednesday, March 3, 2010 11:11 PM

Tonight, I ran some dot filtering, trying to use light colors, Mig buff, flesh, light mud, and faded grey, on the portions that are exposed, and using darker colors, dark rust, dark mud, shadow brown, wash brown, etc. in the areas where shadows need to be potrayed.

Pretty subtle so far, I also started a pinwash.

I also unveiled the transmission area


I was really starting to roll, when I launched an engine handle during the washes of the engine deck, and had to replace it with this, not a huge deal, but I am pretty angry that I conquered all the shrotcomings of the kit, only to now have an unmatching handle.


Should I pull them all off and make 4 that match out of wire?

Thanks for looking!

Bill

  • Member since
    January 2012
Posted by I make stuff on Tuesday, March 2, 2010 11:18 PM

Wayne, I very much appreciate your kind words.

Adam, All good things to those who wait

Go to fullsize image


Tonight, I took some mixed by eye light Vallejo german grey to apply some scratches and chipping, and went back with some german camo brown to represent the bare oxidizing metal on the largest of those scratches.  I intentioanlly understated this, it's too easy to get a cartoon result.  I quite while I am ahead. 

Then I applied an overall filter wash of Mig for panzer grey, it's basically an electric blue wash, to tone down the shading I intentionally over emphasized so it would survive the steps to come.

Here's a baby walk around.


And a close up of that styrene and wire detail I added to the rather plain bogies


Finally, I have been playing with the tracks, to review they are Fruils treated with blacken it, they turned out a light tan, so I first hit them with a heavy raw umber wash, which gave me a better base color.  Then I added mig track brown and old rust, mostly the former, and some thinner to hold it in place, not totally happy with it yet but its better than it was.


And a shot of them next to the hull for contrast:


But i will be honest, this is my favorite shot of the model so far:


That's it for now, next stop, dot filtering, thanks for looking and weiging in, guys.

Bill


  • Member since
    April 2008
  • From: Ventura (at the beach) in California
Posted by *INDY on Tuesday, March 2, 2010 9:50 PM

Wayne....You may decide to "rethink" a great many things........

Bill~ That's look'in smoking cool !This is shaping right up.``That exhaust looks darn real. Now--Are you going to show them the magic bullet for the name? Or just bring it in time?

"Well...you gunna pull them pistols, or just whistle Dixie?"

  • Member since
    January 2012
Posted by I make stuff on Tuesday, March 2, 2010 5:26 PM

Thanks so much, Dave and Bill, I appreciate it.  I really liked the idea of “Sophia” more than my execution, I may go back with a watercolor pencil and try again, as suggested by Adam/Indy.  The script just got a little thick for scale.


Anyway, I went back and tried to do some additional chipping with the assistance of alcohol, which is much hotter than the tap water I sued to chip the interior MM Acryl paints, but I painted the hull with Tamiya. And we were NOT amused with the outcome.  The alcohol dramatically changed the character of the paint, making is a semi gloss and darkening the grey, then, when it did bite, it just wiped off everything all the way down to the light gray shiny plastic, so I am not yet a chipmaster.


I was able to go back and re spray the most heavily damaged areas, and I will then go back again and, using both a graphite pencil/mig’s gunmetal powder, and traditional painted chips, try to distress it somewhat.


I also put some hurt on the kit’s prominent muffler assembly.  I started off just wanting to put on an orange Vallejo undercoat, but while it was still wet, I dusted on some Vallejo pigment, my first try, it’s called red oxide, and was far too red.  So I added some Mig strandard rust wash, then some Mig old and new rust pigments, then, finally, some Mig track brown to take away some of the brightness.


My first real effort at a rusty muffler, how did I do?


BTW, these are pictures taken with a new phone, not too bad in depicting the correct colr as percieved by my eyes.

Thanks for looking,

Bill 

  • Member since
    May 2005
  • From: Eugene, Oregon
Posted by hughes2682 on Tuesday, March 2, 2010 10:07 AM

Bill,

I am with Bill on this one. Nonetheless, Sophia or not, this is coming along wonderfully.  Thank you for posting this enjoyable build. Yes

Cheers

Dave

http://img.photobucket.com/albums/v317/Aaronw/Groupbuilds/ClassicAviationGB2010bomb.jpg

With enough thrust, pigs fly just fine.

  • Member since
    July 2004
  • From: Texas
Posted by wbill76 on Monday, March 1, 2010 1:52 PM

I personally liked the name, thought it gave the whole thing a "human" touch. These were artillery towing tractors after all so would generally have been used behind the lines vs. say a front-line tank or similar vehicle. Anyhow, it's gone now so I guess it's a moot point!

Looking forward to where you're taking this one Bill! Beer

  • Member since
    January 2012
Posted by I make stuff on Monday, March 1, 2010 12:23 AM

I believe you guys are correct.  I went back and painted over the name, those Vallejo paints are so thin, it's gone.

I also put a dark umber oil wash on the tracks to give them some more brown color.

Tomorrow, drybrushing and oil dot fading.

Then, some earth type stuff for the running gear.

Thanks, guys.

Bill

  • Member since
    July 2006
  • From: San Francisco Bay Area
Posted by bufflehead on Sunday, February 28, 2010 10:49 PM

Hey CG, this is coming along great!  Nice paint job and markings!  The "sophia" lettering looks good, but maybe a little large?  However, your weathering and chipping might do the trick and make it stand out less.  Keep up the great work!

Ernest

Last Armor Build - 1/35 Dragon M-26A1, 1/35 Emhar Mk.IV Female


Last Aircraft Builds - Hobby Boss 1/72 F4F Wildcat & FW-190A8


  • Member since
    January 2009
  • From: Everett, WA
Posted by Schnobs on Sunday, February 28, 2010 9:29 PM

Hey Bill,

First of all you this is your best vehicle yet and you have accomplished quite a bit of firsts with this one.  Well done Sir. now about the name.  I know you already have a Pink Mystery machine Panther out there so in this case I think the name is a little over the top and will take away from the fantastic realistic details you have accomplished here.  I also think it would make a great sighting point for a crew served weapon which is also not a very good ideal.  You did a great job free handing the script but I think you would best be served using that area for some oil dot fading and tonal variations of the paint.

Again Bill that is just IMHO and this is your art do what makes you happy!  it was nice to har that in your voice today when we talked on the phone!

Let's Do This!!


"There is a principle which is a bar against all information, which is proof against all arguments and which cannot fail to keep a man in everlasting ignorance. That principle is contempt prior to investigation." Herbert Spencer
JOIN OUR COMMUNITY!

Our community is FREE to join. To participate you must either login or register for an account.

SEARCH FORUMS
FREE NEWSLETTER
By signing up you may also receive reader surveys and occasional special offers. We do not sell, rent or trade our email lists. View our Privacy Policy.