SEARCH FINESCALE.COM

Enter keywords or a search phrase below:

1/6th scale Dragon Jeep quick build

18430 views
16 replies
1 rating 2 rating 3 rating 4 rating 5 rating
  • Member since
    April 2005
1/6th scale Dragon Jeep quick build
Posted by armourguy on Tuesday, March 1, 2011 8:12 PM

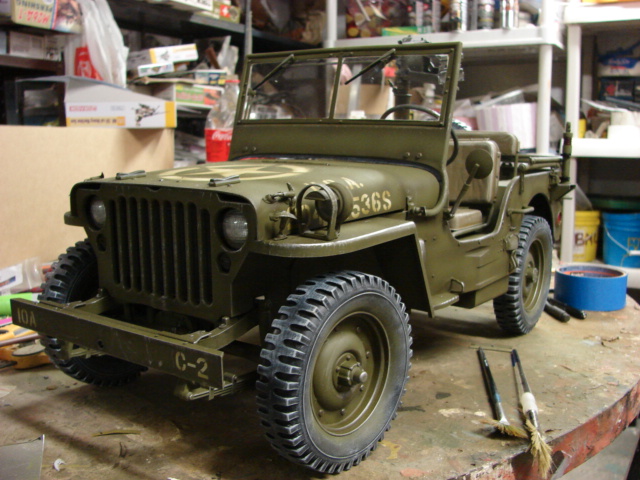
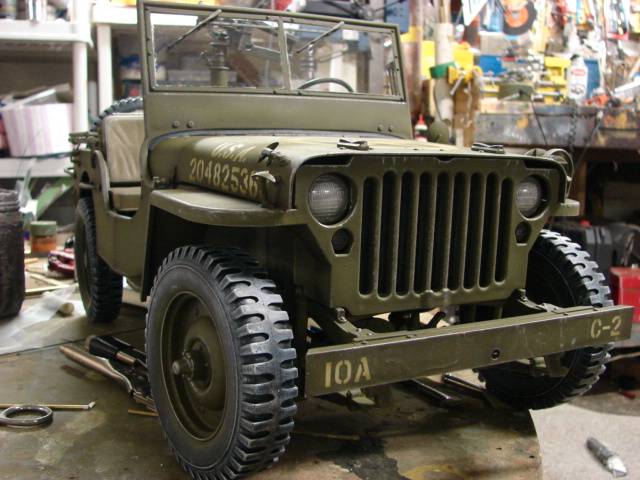
Hi guys, I'm about 95% complete with the Dragon Jeep kit. I started working on this kit after I completed the schwimmwagen. Like the schwimmer I wanted a quick build and I built the model mostly out of the box. I did add to the model my Resin Pedestal mount and my Soft Skin MP-48 spring antenna base. I also replaced the very simplistic molded in tow hitch with one of my functional resin ones.


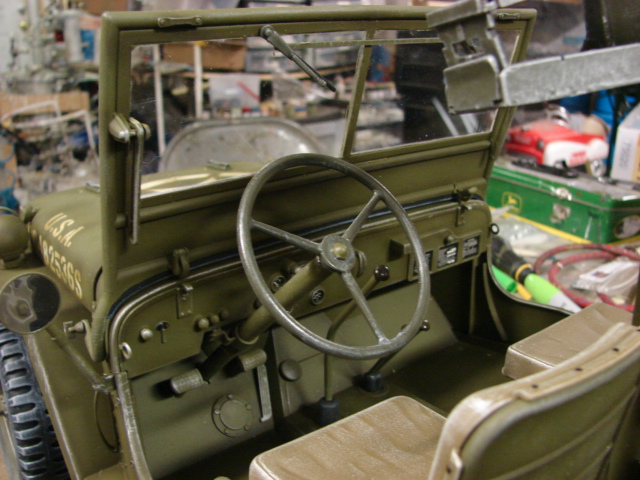
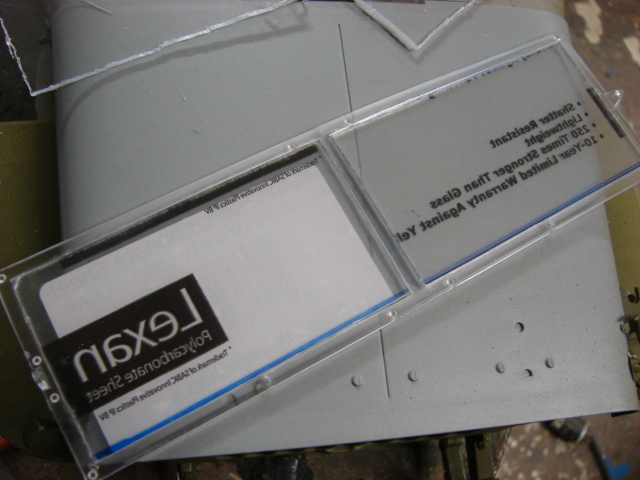
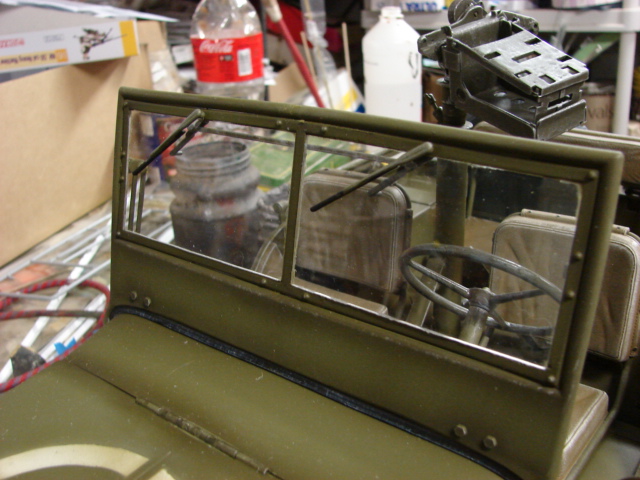
The kit itself is a very nice build with no real surprises. The one issue I had was I found a crack on the clear plastic wind shield. Rather than calling Dragon care I decided to cut out both window panes and I replaced them with clear lexan plastic.


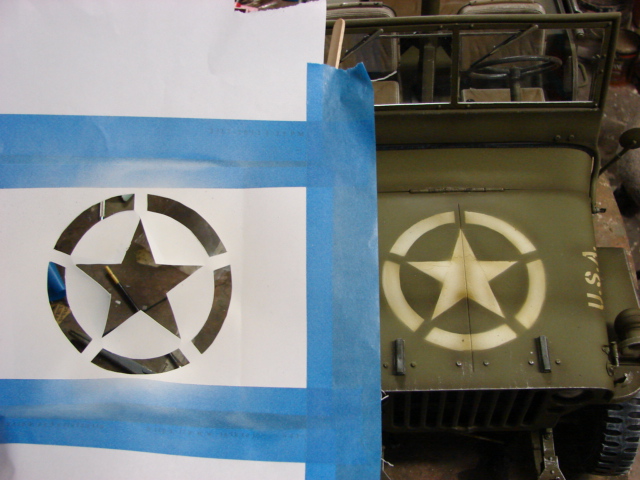
Another Issue that I expected and encountered was the application of the hood star decal. The decals are very nice, but the star decal is too large to be easily applied. The decal crimples, rips, and snags too easily. So instead of using the decal I created a stencil and airbrushed the star onto the model. The decals were used for the rest of the markings and worked out just fine.


Resin Bolt heads were added to the rear bumpers.


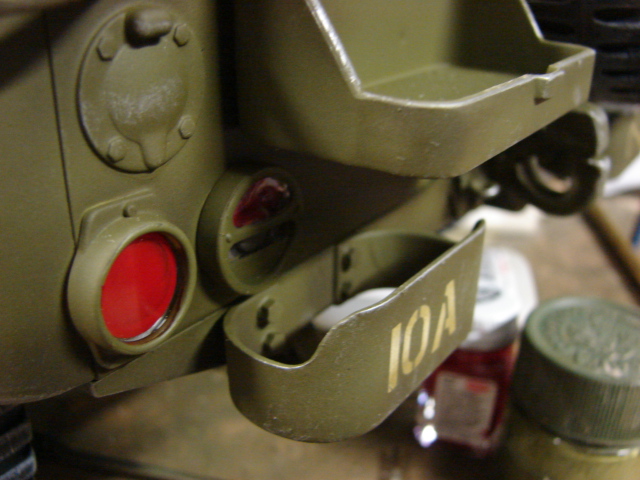
I replaced the kit's tow hitch with one of my own functional resin versions. For the tow eyes I snipped off the kit supplied ones of the kit tow hitch and simply added them to mine. The tow hitch upgrade does improve the look of the model.


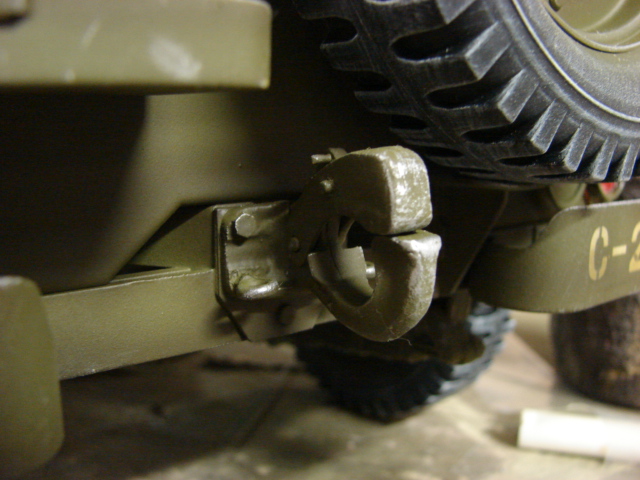
[/img]http://eastcoastarmory.com/forumPic/jeep/DSC00171.JPG[/img]


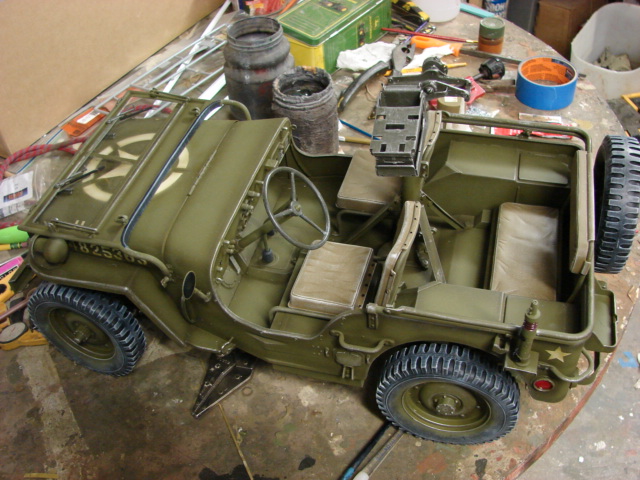
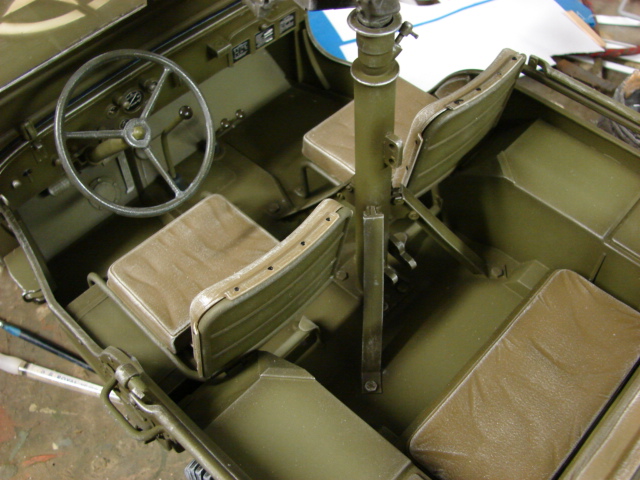
I wanted to arm my jeep. To do this I used one of my resin M31C pedestal pintle mounts. I scratch built the support legs out of two lengths of plastic angle. The angles are glued together and the trimmed to shape. I still have to finish up the DML M2 HB, and the Travel lock brace.


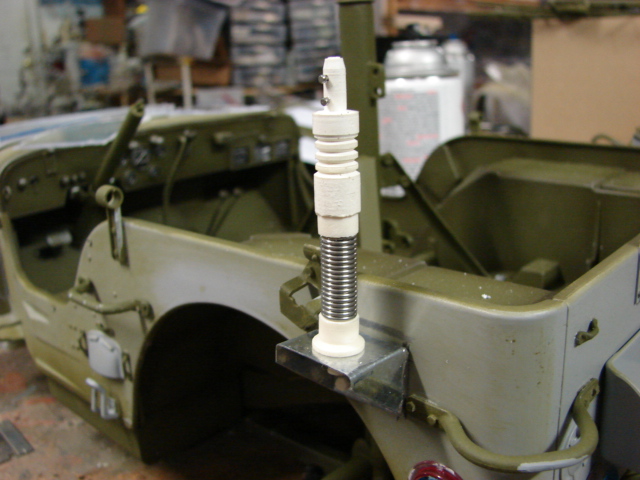
I also like the look of The MP 48 spring antenna base and I wanted to add this to my model. I have seen jeeps with the 50.cal mg mount and the antenna base mounted, but with no radio hooked up. Since I don't have the radio mounted I will not be adding the antenna to the antenna base. The antenna base mount was fabricated out of sheet metal.


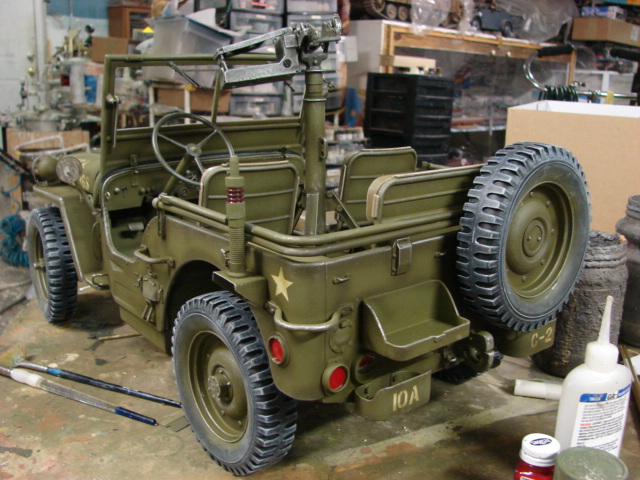
All I have left to add to the model is the tools, DML 50.cal HB, Jerry can, and tie down straps. Once complete I can then jump into my next olive.

  • Member since
    January 2011
  • From: The Great North Woods, Maine
Posted by Chazzer on Saturday, March 5, 2011 10:21 PM

   Great job! Can't wait to see this baby armed!Jeep The windshields , in my opinion,  look much better with the   lexan and I'm sure much clearerWindow Washer.


Thanks for the postThanks


ChazzerBlack Eye

  • Member since
    December 2006
  • From: t.r.f. mn.
Posted by detailfreak on Sunday, March 6, 2011 12:36 AM

       WOW,thats big,and very nicely done I might add!!Yes

[View:http://s172.photobucket.com/albums/w1/g-earl828/]  http://i158.photobucket.com/albums/t104/cycledupes/1000Roadwheels4BuildBadge.jpg

  • Member since
    September 2005
  • From: beacon falls , Ct.
Posted by treadwell on Sunday, March 6, 2011 8:47 PM

man, I think this is a really nice looking, realistic looking build.  I think you should scratch a drive train and engine, and market it .    very cool.

tread


  • Member since
    March 2003
  • From: El Dorado Hills, CA
Posted by IBuild148 on Sunday, March 6, 2011 8:57 PM

Another quality build AG. Yes I have liked your past builds and this one is no exception!

IBuildOne48

Teach modeling to youth!

Scalefinishes.com

http://i712.photobucket.com/albums/ww122/randysmodels/NMF%20Group%20build%20II/Group%20Badge/NMFIIGBbadgesmall.jpg


  • Member since
    April 2005
Posted by armourguy on Monday, March 7, 2011 12:41 PM

Thanks guys.

I finished the jeep the other day, but waited for the weather to clear so  can take some nice out door shots, and some shots of the jeep towing the DML 75mm Pack howitzer  


I was not able to find the tool toes down straps that the kit gives you. I was able to use the spare straps left over from the schwimmwagen for the tools, but I still need to tie down the jerry can and the canopy rails. I'll give Dragon care a call today to see if I can get some replacements.


Like on the schwimmwagen I replaced the plastic tool handles with real wood ones. I also added a small length of chain to the jerry can.


I was also able to complete the tank's DML M2 HB. The gun received the same improvements as my other DML M2s which can be seen on my M26 and M4 sherman posts. For the grips I went with the black Bakelite look for the main grips, and a reddish Bakelite look for the charging handle giving the gun more color.  


 For the pintle mount I completed and installed the travel lock bar.


With these two quick builds out of the way I can now roll up my sleeves and get into some more serious scratch building with my next olive….


 which will be on this guy . More info to follow .

GJR
  • Member since
    April 2011
Posted by GJR on Sunday, April 17, 2011 12:38 PM

Thank you for the inspiration. I went out and bought the pintle, hitch, and antenna.

I have the DML .50 kit but could you please explain the mount that goes on the pintle?I would like to try to build the .50 mount and ammo box holder for my jeep to look like yours and would like to see a bit more. Did you make other modifications to the DML .50?  I checked the awesome Sherman and Black Jack site pictures and they are a big Smile help. 

I was wondering if ECA would offer a casting of that .50 mount to go on the pintle? (Is there already one available? I am stunned by how many parts there already are for this scale! A suggestion would be to offer a smaller "U.S. Tanker" display mount for those that have the figure and would like to put one in a hatch. With a .50?)

I think I can do the box holder with a scale drawing but the gun mount looks tricky. Any help would be appreciated.

But this is inspiring modeling! 

  • Member since
    November 2005
Posted by T26E4 on Monday, April 18, 2011 7:53 AM

Great stuff!  I've yet to do anything in that big of a scale.  May I point out two nitpicks?

1) the upper lens of the right tail light was not red.  In reality the opening was a rectangle and appeared black for all intents and purposes

2) All fuel cans I've seen have the retaining strap in place -- otherwise it'd be easy to lose.


Thanks again for sharing your awesome project!


Roy Chow 

Join AMPS!

http://www.amps-armor.org


  • Member since
    December 2008
  • From: Northern Va
Posted by psstoff995's lbro on Monday, April 18, 2011 7:58 AM

Amazing work as usual! Yes

-Will young modeler Test fit master
  • Member since
    January 2007
Posted by the doog on Monday, April 18, 2011 4:31 PM

Really an excellent result, but man, I want to see some dirt on that baby! A jeep just ain't a jeep without some grime and mud!


  • Member since
    April 2005
Posted by armourguy on Wednesday, April 20, 2011 7:03 PM

Thanks for the compliments everyone, Sorry for the delay with this post but I just noticed all of the replies. GJR, For the 50.cal cradle mount I used the white metal version from Armorpax. They are a UK based company, but the cradle kit is a work of art. They can be purchased at http://www.armorpax.com .


As for the DML 50, the gun is very nice and builds easy.

the only modes that can help the build are the addition of the two missing wrench slits on the DML barrel. 

To mount the feed cover to the receiver I recommend replacing the kit molded in nubs with a small wire brad nail.

(before)

(after)

As for producing a "Tanker Display" I currently offer the later M4 Sherman copula, and other US AFV turret components to create the display.

Also since this build I have released several conversion sets for the DML 50.cal.

Resin M2HB slotted barrel support conversion. Conversion is designed to replace the holed barrel support on the Dragon M2HB kit.

Resin Early production M2HB conversion set


Resin M2HB flash suppressor. Not WWII, but still looks cool!


Roy, I built the tail lights out of the box as per the instructions. I figured that the tail light was supposed to be blacked out. I'll do that on my next jeep build. As for the gas can strap the kit did come with one, but I lost it Angry I'll either try to get another from Dragon, or hopefully the kit one will turn up one of these days.  

  • Member since
    January 2011
  • From: The Great North Woods, Maine
Posted by Chazzer on Wednesday, April 20, 2011 8:14 PM

  Jeep I just left a post on your Sherman WIP and this is just as impressive#1 Trophy. Your instructions and attention to detail really help mid level modelers like myself. One day.........................


Chazzer(Scott)


ChazzerBlack Eye

GJR
  • Member since
    April 2011
Posted by GJR on Wednesday, April 20, 2011 9:11 PM

Thanks for the clarification about the .50 mods and taking all the time to post those clear and comprehensive pictures. That is exactly info I was looking for.

I am going to build up the .50 kit first and order the mount/cradle for the jeep mount. That slotted barrel is sure tempting but I like the look of the holy one so will stick with that.

One sad fact I noticed is that the cost of the .50, post, and mount cradle is going to end up the same price as the rest of my jeep!

Sheesh! Ain't it always how it happens? But I just "had" to have a .50 on my jeep and your post showed me that it not only looks great but how to get it done! I see now that Dragon is doing an SAS version of this kit. *sigh*. I will be buying that I guess but at least now my U.S. Army jeep won't be "outgunned"!


Thanks again, 

GJR


p.s. Thinking of painting Eugene on front of windshield support. For sure there is plenty of room. Only a few people get the reference.

  • Member since
    January 2007
  • From: Richmond, Va.
Posted by Pavlvs on Thursday, April 21, 2011 12:15 AM

Really nice work!  If you have prior posts showing how you did it, I would be grateful if you could post the link to them.  I have an old Kettenkrad kit in the same scale, I believe.  

May I make a suggestion?  You weathered the whole model beautifully except one part.  The windshield looks too new and clean.  What I have done on jeep and other windshields is to make a mask in the shape of the crescent shaped area covered my the sweep of the windshield wipers.  I mask it on there in the proper place and spray the window panel with a light coat of dullcoat.  It will look like dust on the windshield except where the wipers cleared it.  The effect is truly dramatic.  2 cents

Keep up the great work.

Deus in minutiae est. Fr. Pavlvs

On the Bench: 1:200 Titanic; 1:16 CSA Parrott rifle and Limber

On Deck: 1/200 Arizona.

Recently Completed: 1/72 Gato (as USS Silversides)

  • Member since
    April 2011
  • From: Gemert, The Netherlands.
Posted by DRAGONWAGON on Monday, May 2, 2011 6:00 AM

WOW!! Great build!! You have infected me with the big-scale virus now, so I've bought one of these beauties myself....Now raised me a question: Is it possible for me, living in the Netherlands to purchase the tow-pintle and the antenna base? If so, can I order at the link given below your posting?

Do you have the resin bolt heads also in your range??

I know a lot of questions but this is a new ball-game for me...


Grtz from the Netherlands, John. Beer

  • Member since
    April 2011
  • From: Gemert, The Netherlands.
Posted by DRAGONWAGON on Friday, May 6, 2011 1:55 AM

Order is placed......


You got me hooked, LOL Wink

JOIN OUR COMMUNITY!

Our community is FREE to join. To participate you must either login or register for an account.

SEARCH FORUMS
FREE NEWSLETTER
By signing up you may also receive reader surveys and occasional special offers. We do not sell, rent or trade our email lists. View our Privacy Policy.