SEARCH FINESCALE.COM

Enter keywords or a search phrase below:

Marder III M

2141 views
8 replies
1 rating 2 rating 3 rating 4 rating 5 rating
  • Member since
    March 2003
  • From: Fort Worth, TX
Posted by RESlusher on Tuesday, February 7, 2012 7:56 PM

I really like it!  I think the tracks came out great!


Richard S.

On the bench:  AFV Club M730A1 Chaparral

On deck:  Tamiya Marder 1A2

In the hole:  Who knows what's next!


  • Member since
    August 2005
  • From: Sydney, Australia
Posted by Phil_H on Tuesday, February 7, 2012 7:12 PM

Looks pretty good to me Andrew.

If anything, the issue with your pin wash is more that the paint is insufficiently thinned rather than the lack of a gloss coat. I have often pin-washed directly to flat paint without problems. In my case, I'll use an oil-based pin-wash, but to prevent tide marks and the heavy outline, wet down the surrounding area with clean thinner first before applying the pin-wash to the detail areas. this allows the pigment to dissipate a little rather than form a hard edge (even if the base coat is "flat").

  • Member since
    May 2009
  • From: Hobart, Tasmania
Posted by Konigwolf13 on Tuesday, February 7, 2012 7:07 PM

tigerman, I used my smallest tip a .3, first time I've used that size so maybe I just need more practice or to thin down more.

  • Member since
    March 2003
  • From: Rain USA, Vancouver WA
Posted by tigerman on Tuesday, February 7, 2012 6:42 PM

Andrew, you did a great job replicating it, perhaps use a smaller tip brush next time.

I agree, this kit was screaming for AM tracks. Still a fantastic kit. 

   http://i7.photobucket.com/albums/y269/wing_nut_5o/PANZERJAGERGB.jpg

 Eric 

  • Member since
    May 2009
  • From: Hobart, Tasmania
Posted by Konigwolf13 on Tuesday, February 7, 2012 6:33 PM

Subhuman - Didn't think of the base color wash. Will keep it mind for next time thanks.

The crescent shapes I used a bit of rubber/sponge stuff trimmed to shape, didnt work as well as I hoped but it was all about the learning curve so didn't really matter.

tigerman - Yes its the Tamiya kit. I think I would like to build it again soonish with some good reference stuff and AM tracks (not rubber bands) and and maybe some PE.

I had big bag of foliage left over from a diorama base and this build just called out for it .

Yeah wasnt impressed with the oversized cammo either. I did it freehand, next time a mask I think

Andrew

  • Member since
    March 2003
  • From: Rain USA, Vancouver WA
Posted by tigerman on Tuesday, February 7, 2012 1:15 PM

Tamiya kits, correct? One of my personal favorites.

Overall it looks pretty good. I do agree with your  track comments. You could tone it down with dark pigments.

I've always wanted to try some sort of foliage on one of my builds. I just never know what to use.

Good effort on the camo, I've seen that pattern before and might be a tad oversized, but it looks good. 

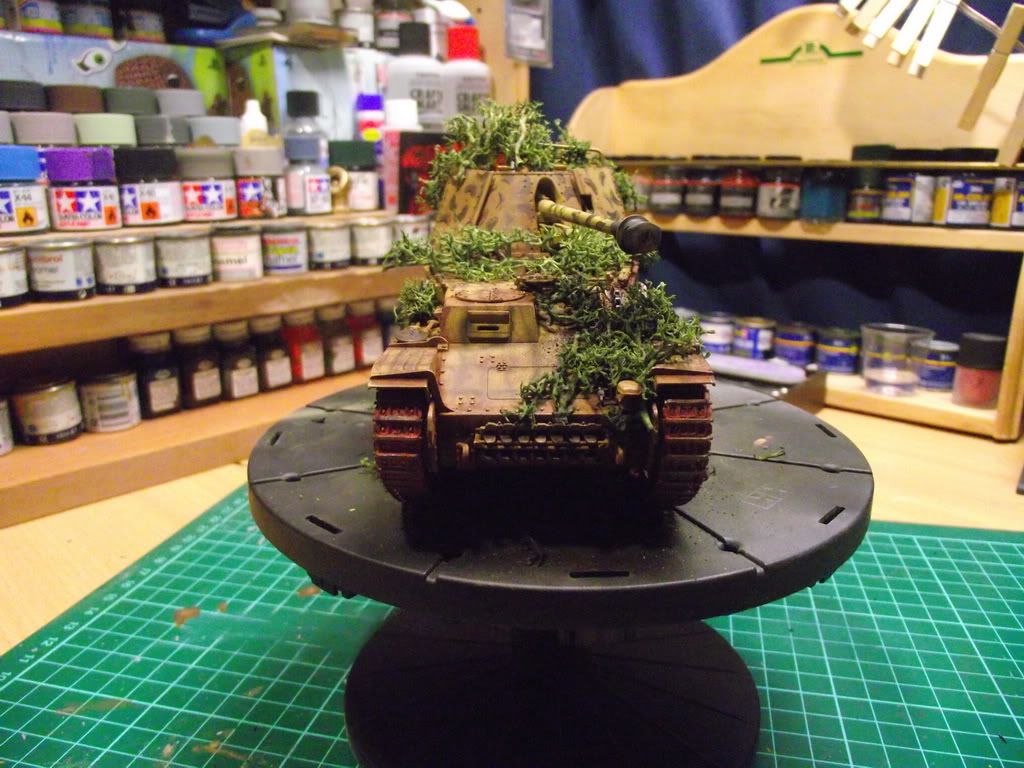
One other note, is the muzzle. From everything I've read, is that they wouldn't be blackened. I made the same mistake on some earlier builds, including my Marder III.

   http://i7.photobucket.com/albums/y269/wing_nut_5o/PANZERJAGERGB.jpg

 Eric 

  • Member since
    July 2010
  • From: Surrey B.C. Canada
Posted by Subhuman1 on Tuesday, February 7, 2012 1:04 PM

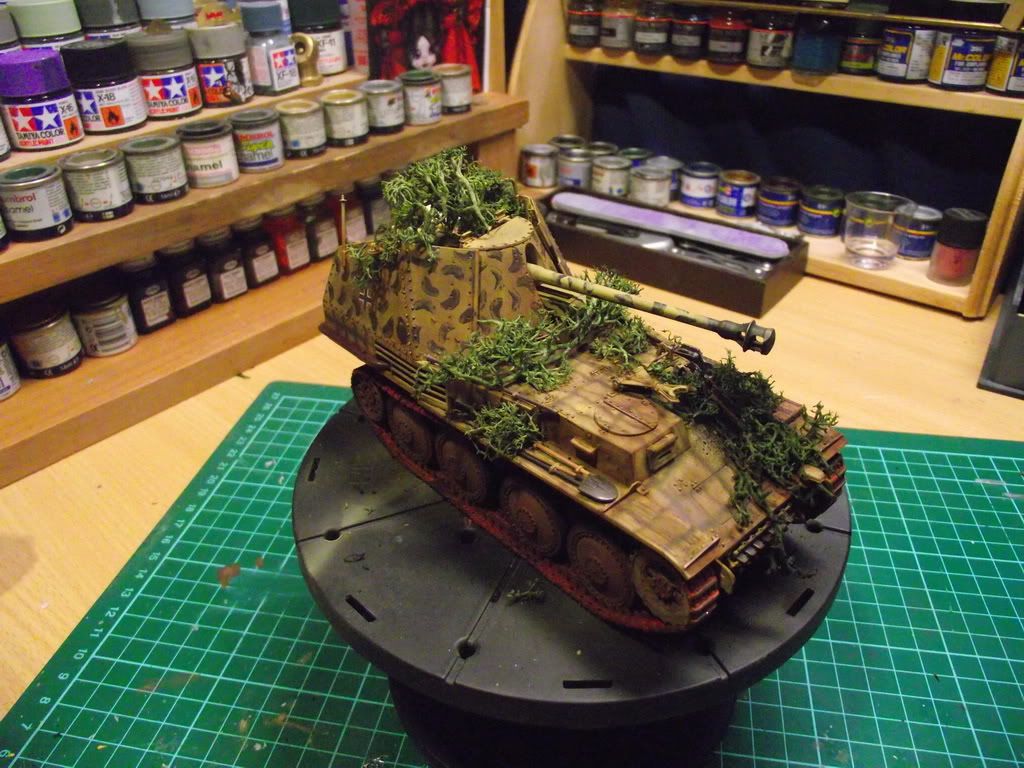
You know sometimes we are our own worst critics, I think it turned out pretty damned good Yes nothing that a thinned was of the base colour over the top surfaces, and a wash of black/umber couldn't take care of on the tracks.

What did you use to create the little crescent shapes of you camo pattern?


Edit/P.S. - the addition of a bit of lychen to simulate some brush on it as camo, really makes the entire model pop, and catch your eye.

  • Member since
    May 2009
  • From: Hobart, Tasmania
Posted by Konigwolf13 on Tuesday, February 7, 2012 7:36 AM

PS yes forgot to mention, the tracks are very over done lol

  • Member since
    May 2009
  • From: Hobart, Tasmania
Marder III M
Posted by Konigwolf13 on Tuesday, February 7, 2012 7:26 AM

Picked up this little thing cheap as a practice palette. Mainly it was for practice weathering the office before I got really into my 1/16 King Tiger. Then with a few things that have happened along the way its also turned out to be a practice run for weathering with water colours and then trying concrete colouring pigments instead of pastels or MIG powders.

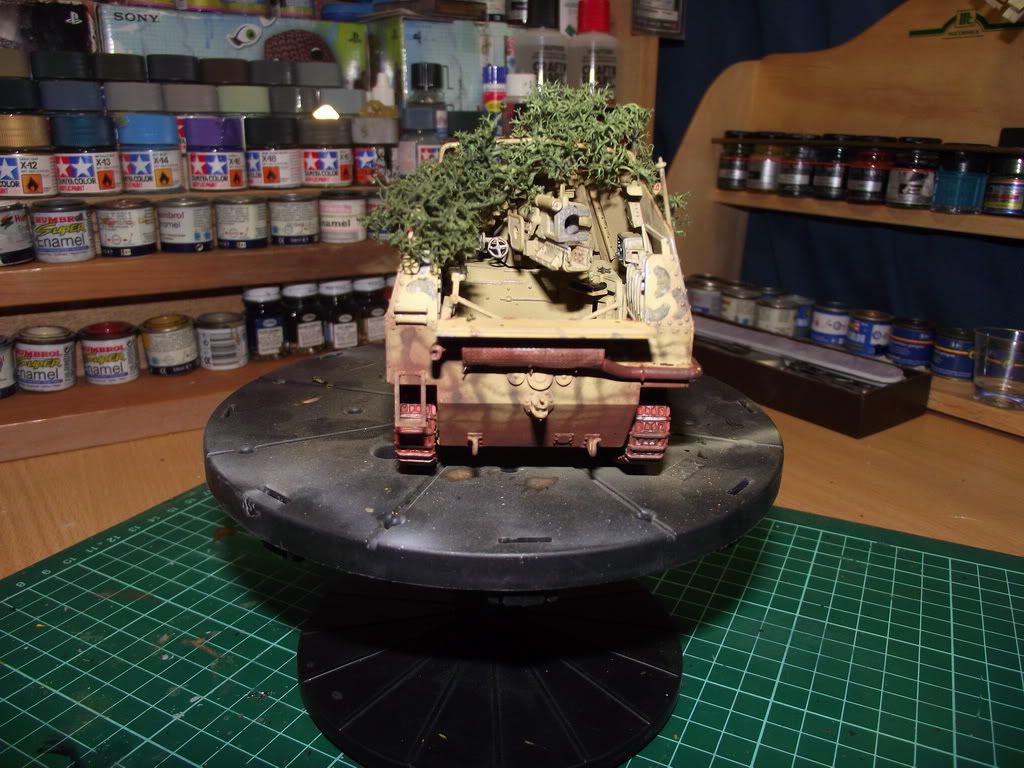
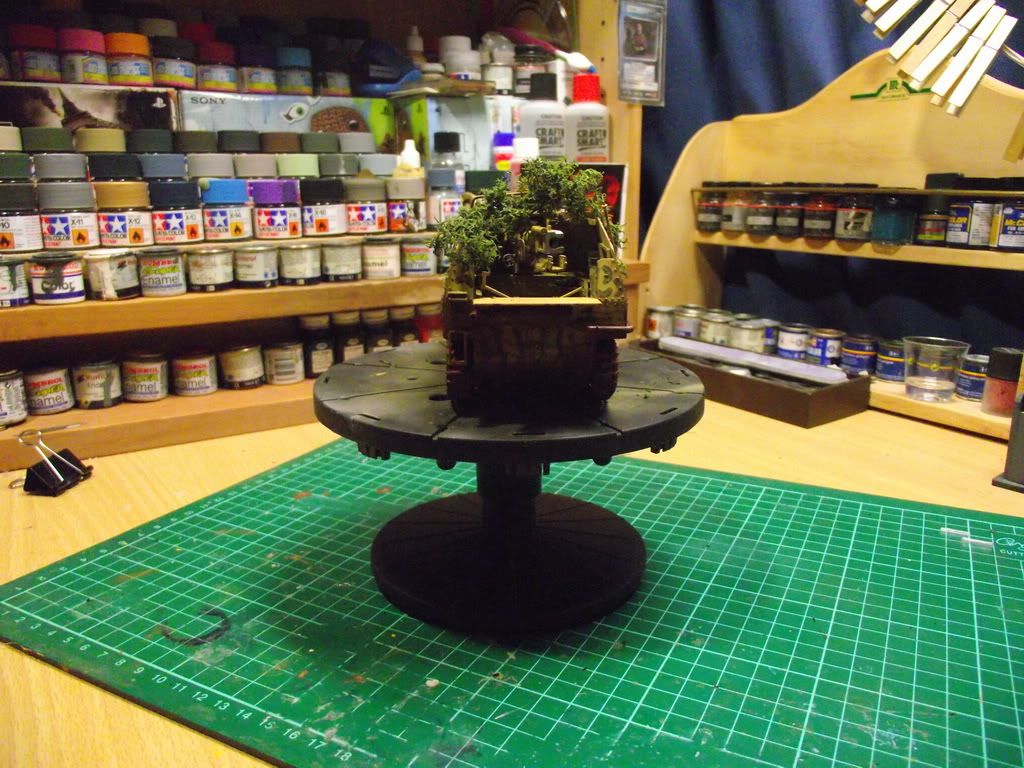
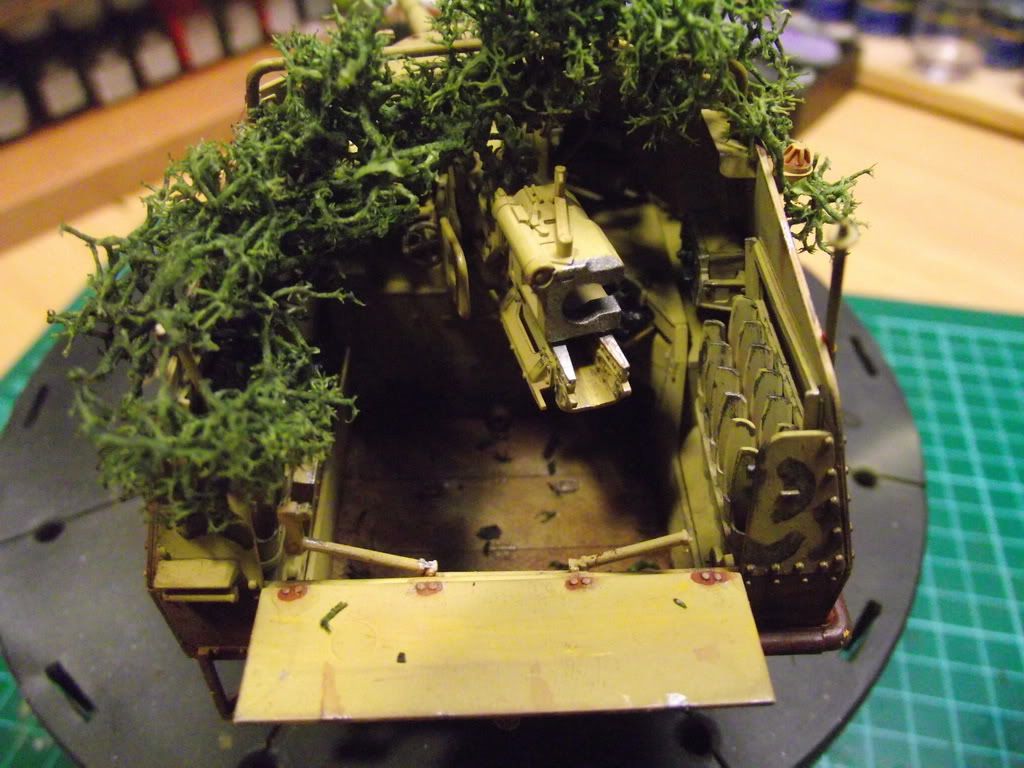
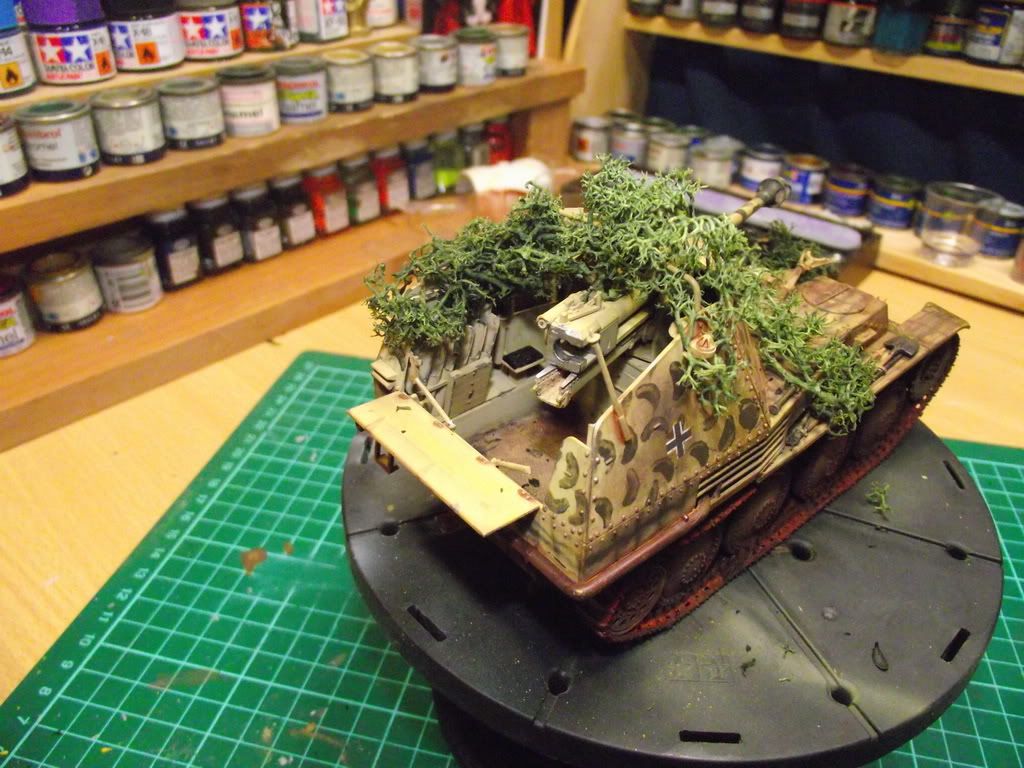
Some personal thoughts before the pics. Yes I think I over did it (powders) or didn't complete far enough (rust stain areas). Not really happywith the way the paint/cammo turned so I didnt waste my time with a gloss coat before the weathering this showed as a problem when doing the powder stage as it ground into the paint work and was to hard to remove, it also presented problems in both the application and removal in the pin wash stage.

Anyways heres the pics, please criticise constructively.
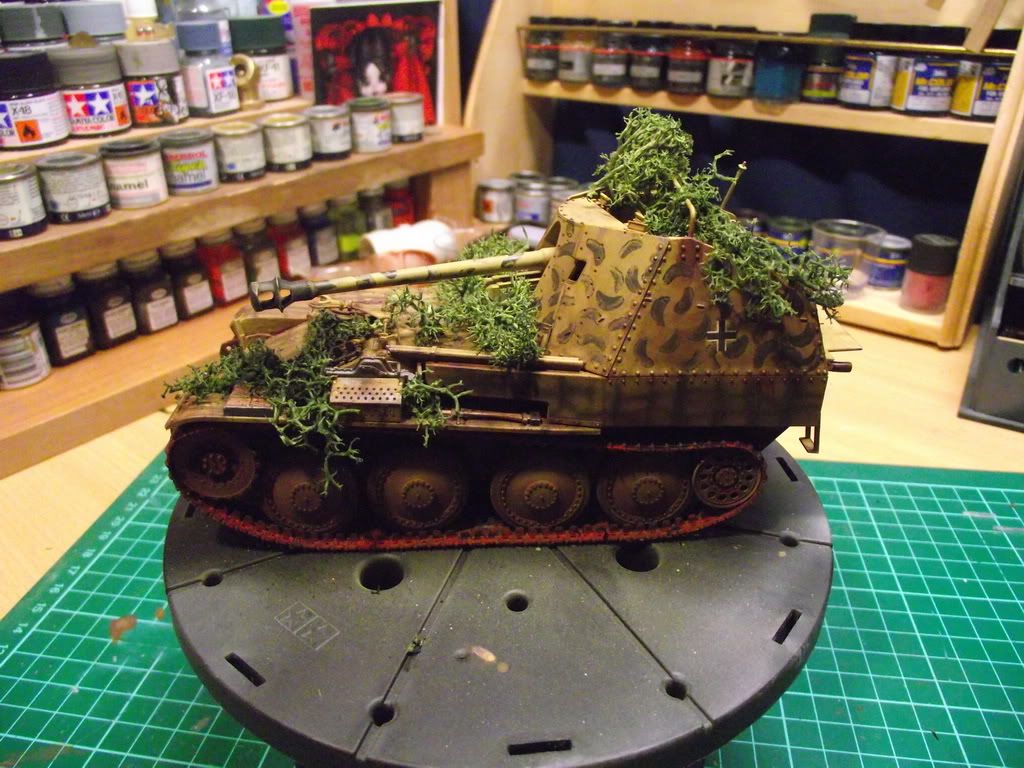
The following shot (and the one after as well) shows the concept behind the build and what I was after. The shell storage area looks fairly decent to me chip/worn paint wise. But the hinges on the rear plate really show the pin wash the didnt go well because of the lack of gloss coat
 

Andrew

JOIN OUR COMMUNITY!

Our community is FREE to join. To participate you must either login or register for an account.

SEARCH FORUMS
FREE NEWSLETTER
By signing up you may also receive reader surveys and occasional special offers. We do not sell, rent or trade our email lists. View our Privacy Policy.