SEARCH FINESCALE.COM

Enter keywords or a search phrase below:

GERMAN RAILWAY GONDOLA TYP OMMR

43400 views
134 replies
1 rating 2 rating 3 rating 4 rating 5 rating
  • Member since
    October 2009
GERMAN RAILWAY GONDOLA TYP OMMR
Posted by PANZERWAFFE on Tuesday, March 27, 2012 12:48 AM

This project has been sitting on the bench for a while so it must be done.

Rail bed

Now onto the car.

Rob

  • Member since
    October 2008
  • From: England
Posted by P mitch on Tuesday, March 27, 2012 2:08 AM

NIce work on the wood there Yes

"If anybody ever tells you anything about an aeroplane which is so bloody complicated you can't understand it, take it from me: it's all balls." R J Mitchell


  • Member since
    February 2012
  • From: Jersey Shore
Posted by Thecat40 on Tuesday, March 27, 2012 9:04 AM

WOW... that's a great job!!! It's going to be a very interesting build.

  • Member since
    October 2009
Posted by PANZERWAFFE on Tuesday, March 27, 2012 1:19 PM

PMITCH, FELIX - Thanks guys.  Will later add some grass and more weathering to the rail bed but that will be much later.  Have other cars that will be build in the future and added to this one, when that happens will connect the rails and continue to weather.  Now onto the car.

Gondola went together fairly straight forward and with no problems.  Their were some details lacking underneath and have decided to add a bit to it.  Added real wood planking to the bottom, it had no wood details on it and it should have.  Then added the air system and plumbing.  Also added the brakes and linkage for them.

Rob

  • Member since
    March 2003
  • From: Rain USA, Vancouver WA
Posted by tigerman on Tuesday, March 27, 2012 1:22 PM

Cool project Rob. You don't see any of these here.

   http://i7.photobucket.com/albums/y269/wing_nut_5o/PANZERJAGERGB.jpg

 Eric 

  • Member since
    July 2004
  • From: Texas
Posted by wbill76 on Tuesday, March 27, 2012 1:45 PM

Nice work on the railbed Rob...and the detailing you're adding to the car itself is a nice touch as well. Only you know it will be there when it's done, but then that's the fun! What did you use to replace the wood planking with?

  • Member since
    September 2005
  • From: beacon falls , Ct.
Posted by treadwell on Tuesday, March 27, 2012 4:16 PM

Hey Rob, nice job on all the brake linkages.. really adds a lot !

treadCool


  • Member since
    September 2005
  • From: Uppsala, Sweden
Posted by bultenibo on Tuesday, March 27, 2012 4:45 PM

A very unusual build! I've never seen this kit finnished, so I'm going to follow it.

Have you given any thought to the figs? I see that there are some included in the kit.

/Tony

  • Member since
    October 2009
Posted by PANZERWAFFE on Tuesday, March 27, 2012 6:10 PM

ERIC - Yes, haven't seen one of these on here myself giving me that much more interest in this project.  This is though only one small piece of the project Wink

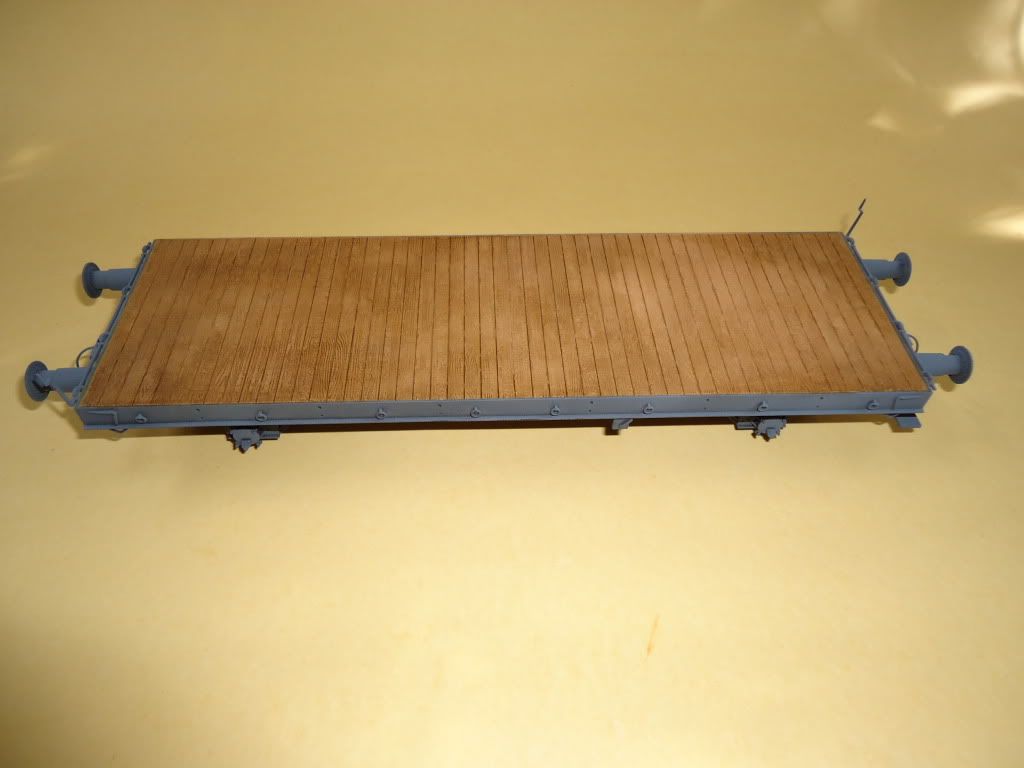
WBILL - The planking is a sheet of real wood veneer made for dollhouses.  Have a few different sheets with different board widths.  comes in handy every now and then.

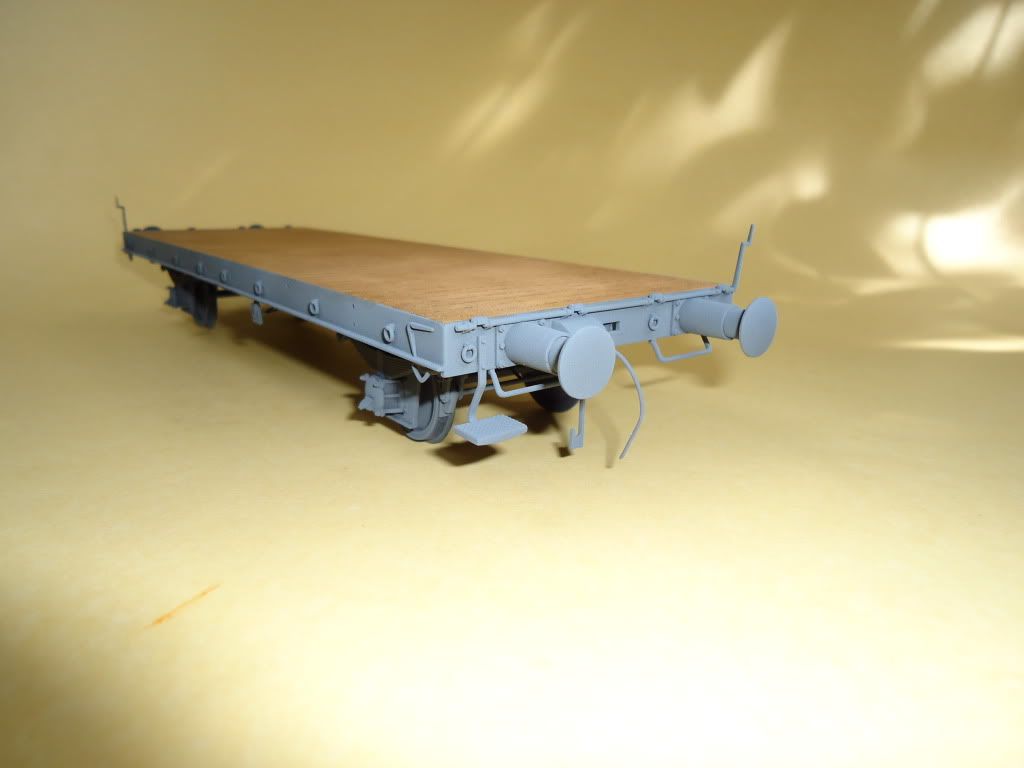
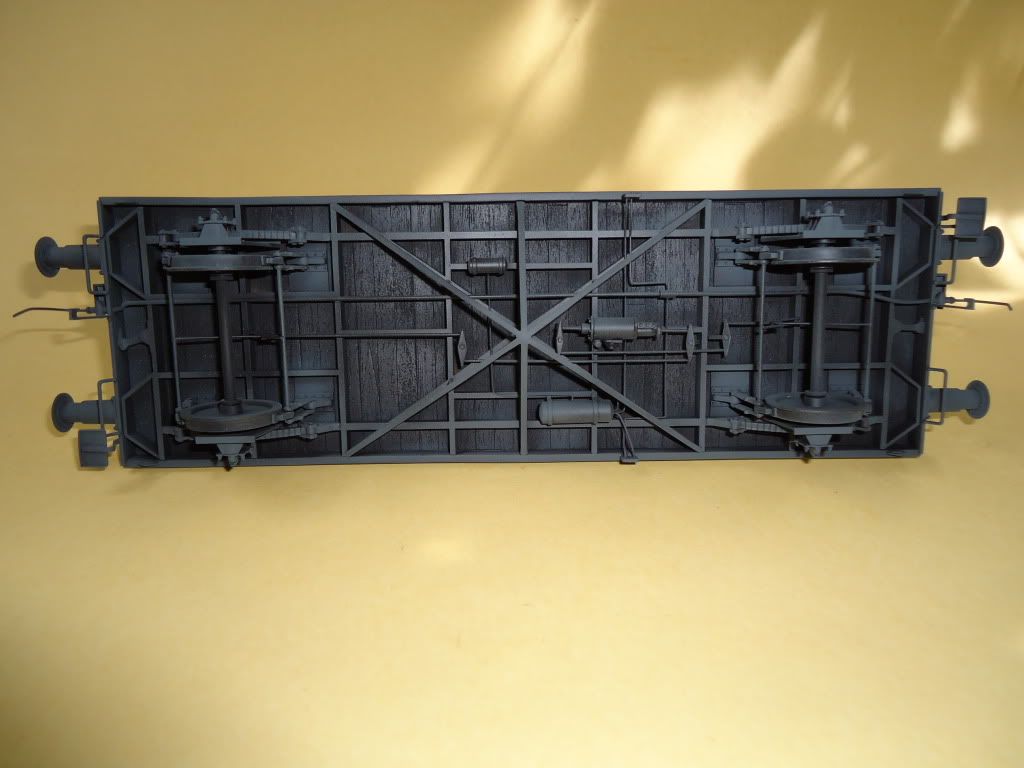
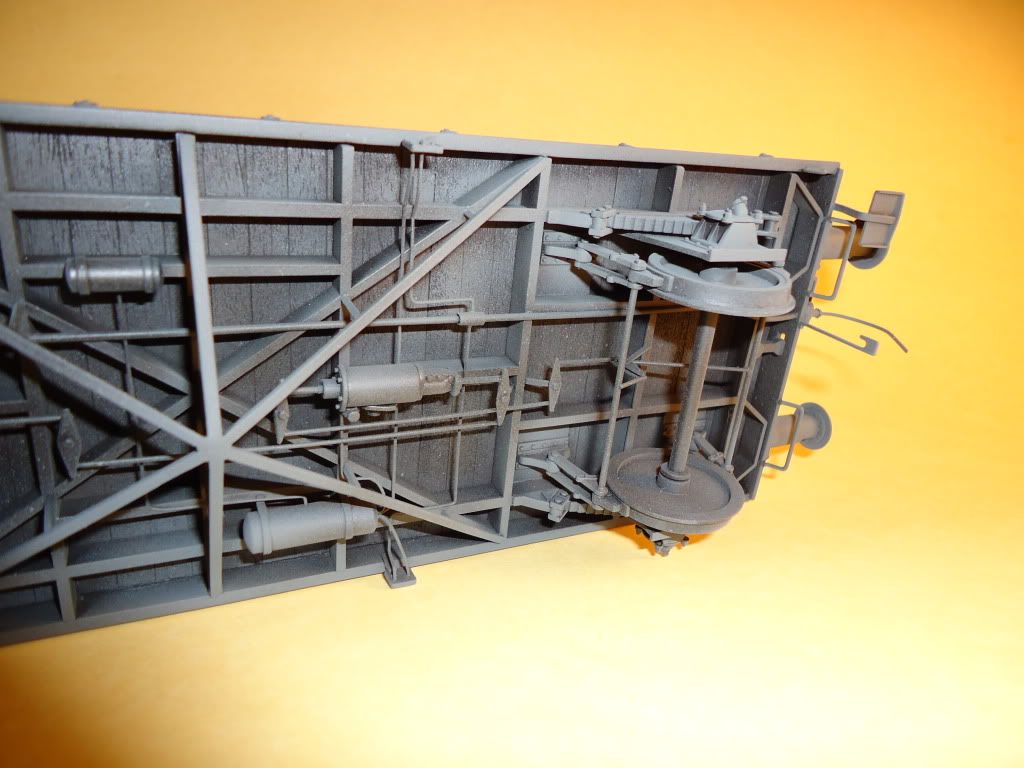
Could not help myself with adding some of the stuff on the bottom.  Like you said, it will not be seen but I know it's there Big Smile

TREAD - Hey man, thanks!  How's the hand doing?

TONY - The kit came with 2 figure sets and they do not go together.  1 of them is an anti-aircraft MG team and they are topless Surprise  (hot weather)  The other is 2 policemen with dogs and they are dressed in great coats and cold weather gear.

There will be fig's but they too will come much later with the other cars that are waiting to be built.  That way I can see what figs will work best in the overall plan.

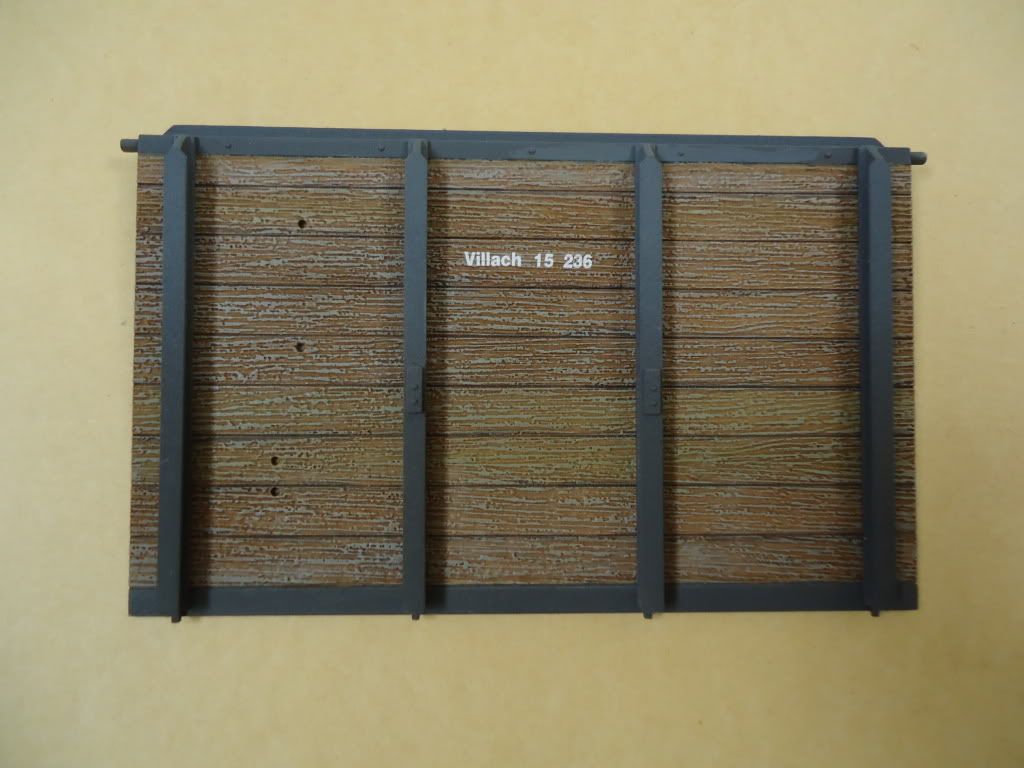
Continuing with the Gondola:

Laid down some base color.  Some of the pics make it hard to work out the colors properly.  Some have flash and some do not, just could not get a good picture of the car with my little camera but here goes.

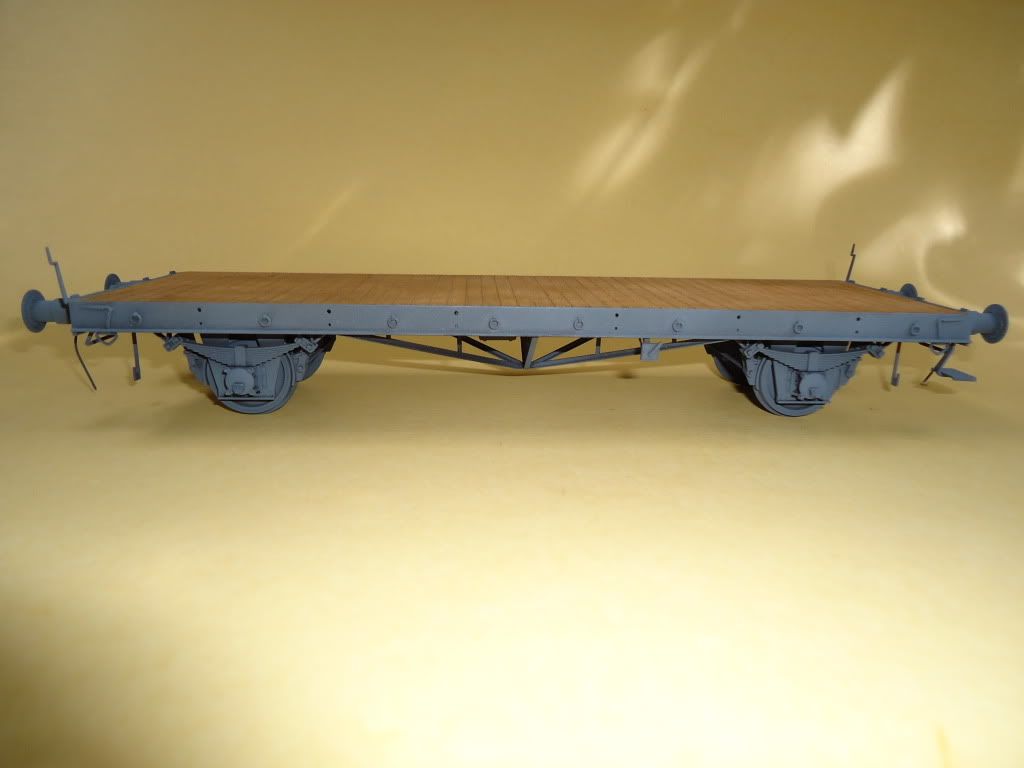
Not sure if you can see it but there is some modulation with the grays.  Darker base color is MM Euro I Gray and then feathered in at the top sections is MM German Uniform Gray.

Base coat on the bottom is Flat Black with some over spray of the German uniform color.

Sides of the car with base coat.

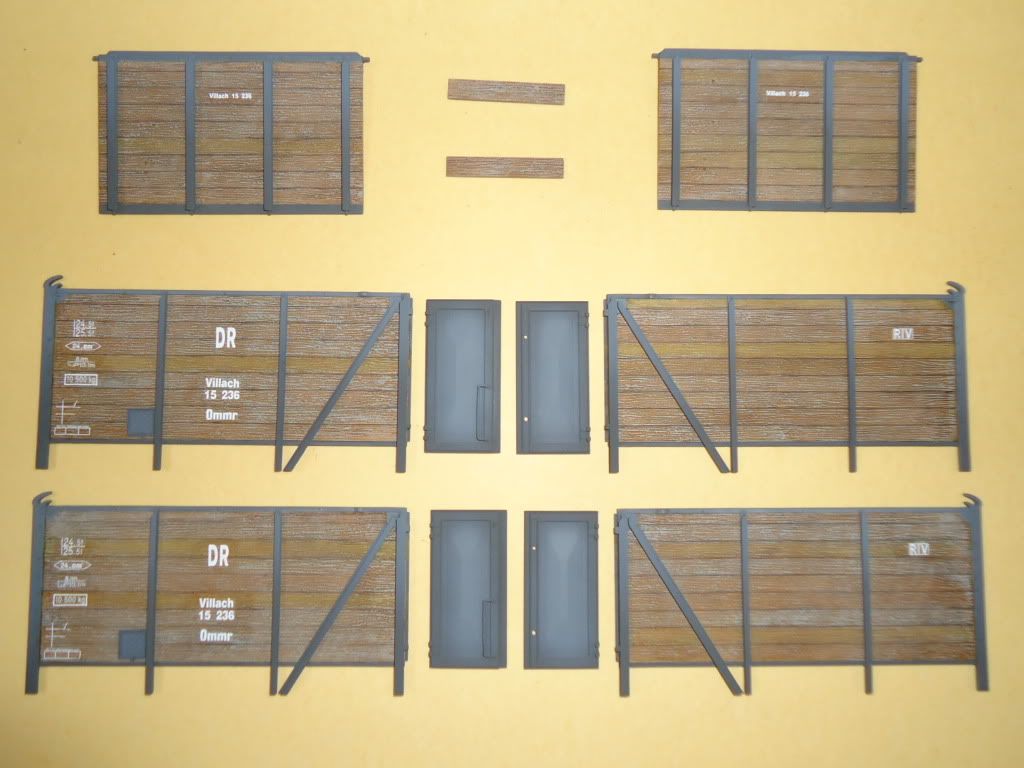
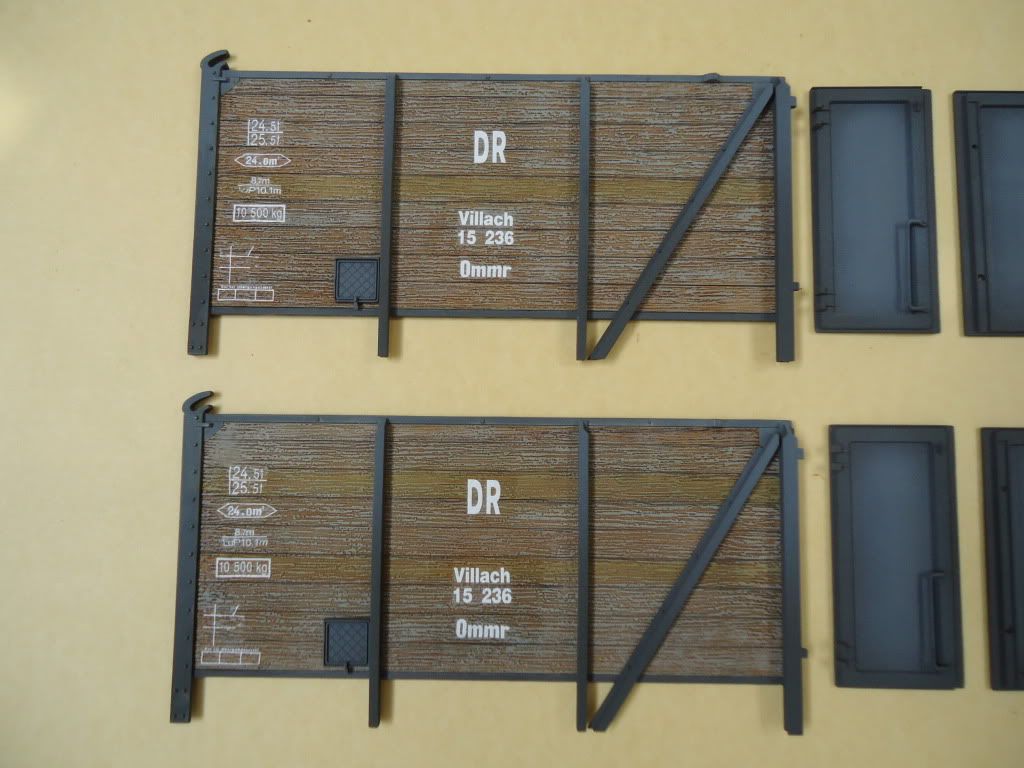
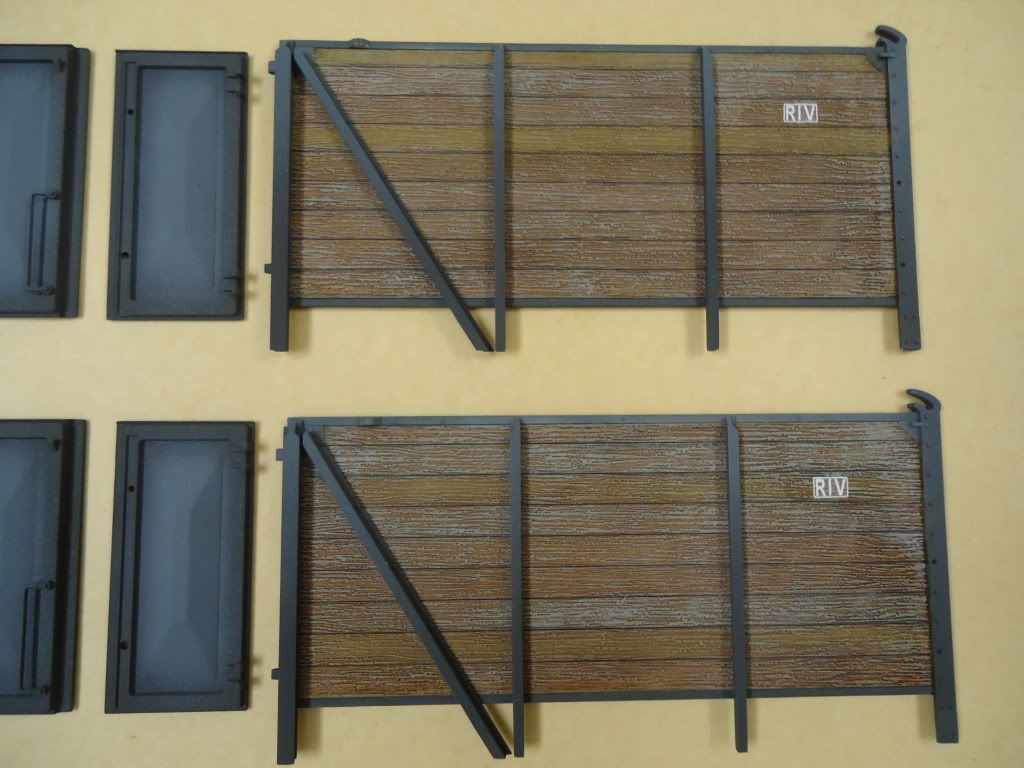
These are all just base coated and all will still be receiving some detail painting and weathering.

Thanks to all for stopping by Yes


Rob

  • Member since
    July 2006
  • From: New Jersey
Posted by redleg12 on Tuesday, March 27, 2012 6:37 PM

Very nice job on the wood...love it!!

Rounds Complete!!

"The Moral High Ground....A Great Place to Emplace Artillery."

  • Member since
    March 2003
  • From: Rain USA, Vancouver WA
Posted by tigerman on Tuesday, March 27, 2012 7:22 PM

I think different variations of color of wood was a smart call.

   http://i7.photobucket.com/albums/y269/wing_nut_5o/PANZERJAGERGB.jpg

 Eric 

  • Member since
    July 2003
  • From: On my kitchen counter top somewhere in North Carolina.
Posted by disastermaster on Tuesday, March 27, 2012 8:56 PM

http://a4.ec-images.myspacecdn.com/profile01/116/1ad98af9f19c4a3e99ebba63e0ee85b6/t.jpgTHIS is just beautiful.

        No other words do it justice.

https://encrypted-tbn0.google.com/images?q=tbn:ANd9GcTWpabX0aT5gpbzDCT2GDm7OnuORHmf_n6Ew6CkwtKfjPc_FErUFqTE LOVE IT!

Sherman-Jumbo-1945

"I was so much older then, I'm younger than that now"


  • Member since
    October 2009
Posted by PANZERWAFFE on Tuesday, March 27, 2012 9:48 PM

REDLEG - Thanks brother Yes  Since most of the car is wood it is really good too hear you like it.

ERIC - Yes Figured because of the large volume of wood it would need some variation.  Those side panels are a combination of 2 different base colors, 3 powders, and 2 shades of dry brushing.  Finished it off with a shot of Dullcote.  There will be more too follow with those panels once all is put together.

DM - Always good to see your smilies approve, Thanks.  Standby though because their is more to come Yes


Little more weathering on the deck was done.  Not completely finished, there will be some fresh oil stains and such, but thought would go ahead and let yall take a look.

Rob

  • Member since
    March 2006
  • From: Right Side of a Left State
Posted by Shellback on Tuesday, March 27, 2012 10:23 PM

WOW !


  • Member since
    March 2003
  • From: Rain USA, Vancouver WA
Posted by tigerman on Wednesday, March 28, 2012 12:04 PM

PANZERWAFFE

REDLEG - Thanks brother Yes  Since most of the car is wood it is really good too hear you like it.

ERIC - Yes Figured because of the large volume of wood it would need some variation.  Those side panels are a combination of 2 different base colors, 3 powders, and 2 shades of dry brushing.  Finished it off with a shot of Dullcote.  There will be more too follow with those panels once all is put together.

DM - Always good to see your smilies approve, Thanks.  Standby though because their is more to come Yes


Little more weathering on the deck was done.  Not completely finished, there will be some fresh oil stains and such, but thought would go ahead and let yall take a look.

http://i951.photobucket.com/albums/ad352/PANZERI/Train%20-%20Gondola%20Type%20Ommr/DSC01313.jpg

http://i951.photobucket.com/albums/ad352/PANZERI/Train%20-%20Gondola%20Type%20Ommr/DSC01314.jpg

Now that is what I'm talking about!

   http://i7.photobucket.com/albums/y269/wing_nut_5o/PANZERJAGERGB.jpg

 Eric 

  • Member since
    July 2004
  • From: Texas
Posted by wbill76 on Wednesday, March 28, 2012 12:59 PM

The wood variation is just beautiful Rob. Yes

  • Member since
    April 2009
  • From: Carmel, IN
Posted by deafpanzer on Wednesday, March 28, 2012 7:25 PM

DittoDittoDitto  Wood just look great and very realistic!  Just found this... now you have my attention! Beer

Andy

  • Member since
    October 2009
Posted by PANZERWAFFE on Sunday, April 1, 2012 12:18 AM

CARL, ERIC - Yes

WBILL, ANDY - Thanks guys Yes

Was going to add those fresh oil stains that I had mentioned and throw some barrels and just junk in the car..........after thinking for a while figured that was a waste of a gondola car and it needed to be carrying something?????

This is what I came up with.

There is not much for parts or really a build progress for this little fellow so just slapped it together real quick.  Here are the sprue's.

It had a fair amount of detail and the fit was really good.  There were no big problems but care had to be taken removing and cleaning some of the small and fragile parts.  Everything is out of the box and the only mod I did was to drill out the sight telescope tube.  Even on something this small I normally paint things as I go but this time, the first time, I just built everything first.  I did leave the shields off for now to make it easier to paint.  Here she is built.

This is the basic concept.

Now since the gondola has the high sides I figured I will have to make a platform for the Flak Gun to sit on.  Had first thought of making a grate like platform so that you could still see the wood planking underneath but thought that would not be correct.  Will just build a wood planked platform for the gun.  Picture below you can see how high the sides are compared to the Flak Gun.

I'm thinking of going 4 boards from the bottom to put the platform in.  That should provide enough hight and not give any interference to the gun but still give the gun crew some protection.

More to come.

Rob

  • Member since
    March 2006
  • From: Right Side of a Left State
Posted by Shellback on Sunday, April 1, 2012 12:36 AM

When i looked at this the other day i was thinking "what would make this a piece of armor ? " A gun !Yes

  • Member since
    October 2009
Posted by PANZERWAFFE on Sunday, April 1, 2012 1:47 AM

Yes, wasn't very sure if it should have been in here with armor but now with the Flak Gun it fits right in.  Much later on when I get to the other cars it will all make a little more since being here.  Have a few other cars that will be transporting Pz III's and they will be connected to this car along with the engine and another flat car.  Beside this train I may put my armored train on the track next to it?  Thats all a long way from here now so will just have to see how it all pans out.  With all of that said, thats another reason had wanted to arm this gondola car.  With a full load transport figured it would need some air protection.

Thanks for taking a look Yes


Rob

  • Member since
    March 2003
  • From: Rain USA, Vancouver WA
Posted by tigerman on Sunday, April 1, 2012 3:37 AM

I like the idea of a 20mm. I was thinking maybe a couple of MG-34's, but I think you're on the right track.

   http://i7.photobucket.com/albums/y269/wing_nut_5o/PANZERJAGERGB.jpg

 Eric 

  • Member since
    July 2004
  • From: Texas
Posted by wbill76 on Sunday, April 1, 2012 11:07 AM

I like the idea you're heading in with this one Rob, the 2.0cm Flak 38 was often used in this kind of an ad-hoc role. Just a thought in terms of the platform, make sure there's enough room for 3 crew members to work/serve the gun (gunner, spotter, ammo loader) effectively and you should be golden with the concept! The width of the car should be sufficient to allow the gun to rotate cleanly through 360 degrees even with the splinter shields fitted so you have some options as to how high to mount the platform within the bed. Stock the car with plenty of ammo and you should have a nicely occupied space while still showing off some of that awesome wood work! Yes  

  • Member since
    April 2006
  • From: Denver, Colorado
Posted by waynec on Sunday, April 1, 2012 9:47 PM
i have the trumpeter version of this kit partially built. i will use your techniques for the wood. that looks really nice. i will put the sides on since i have a low sided car too. the single 20mm is a good choice, maybe even a 37mm. the quad 20mm gun would fit but there are too many crew members which us why thay didn't stay long on u-boats. i will be laying my own track. already did this with 1/72 br-52 and k-5. i use o scale rails and basewood with a miter saw to cut the ties after staining the entire strip(s). at 1/72 i can spike the rails but at 1/35 i am going to have to figure out how to make a boat load of german rail holders since i probably have 12'-14' of 1/35 rolling stock and locomotives.

Никто не Забыт    (No one is Forgotten)
Ничто не Забыто  (Nothing is Forgotten)


  • Member since
    October 2009
Posted by PANZERWAFFE on Monday, April 2, 2012 6:45 PM

WAYNEC - Have not tried any of the Trump kits yet though I do have a few in the stash.  You say you have a start on yours, sure would like to take a look.  The low sided car sure would make things easier for mounting an anti-aircraft gun of any type in.  Have found a few pictures on line of the low sided car with the 20, 37, and a lot of quad mountings.  That will be quite the job to lay all of that track.  Not sure how to make the rail holders?  Could be wrong but I believe either Dragon or Trumpeter makes them as an accessory kit?  Will have to take a look.  I too have thought about laying my own track when ever I get to a permanent location but for now will just use the kit supplied ones.  Have you built up any of the Trumpeter locomotives in 1/35?  OH yea, thats alot of cars....12' - 14' !

This is how I painted the wood:  All MM enamel paints.  Base coat of WOOD 1735, a few small random spots of MILITARY BROWN for an addition to the base coat.  Light wash this with Winsor & Newton RAW UMBER.  Heavy dry brush (almost paint them) random boards with LIGHT SEA GRAY and then go back over all the boards lightly, dry brush LIGHT GRAY.  Use the W&N RAW UMBER again and pin wash the lines between the boards.  Thats it for paint, now the fun part is using MIG pigments.  I used 2 different pigments, P023 BLACK SMOKE and P039 INDUSTRIAL CITY DIRT.  Put these pigments on at your discretion and use rubbing alcohol as a carrier.  Thats it, let me know if you have any questions when you try it.

Rob

  • Member since
    October 2009
Posted by PANZERWAFFE on Monday, April 2, 2012 7:00 PM

ERIC - Thanks for helping me stay on track.

WBILL - Thanks for the input.  That was on the same lines I was thinking.  My only concern would be is if it really should have the splinter shield on or not?  Have seen them with the shields on flat cars but not sure about these taller gondolas.  Don't think it would make any difference if it was a tall or short car as long as it had enough room to traverse 360 as you had pointed out.  I'm still going with the shields unless anyone knows any better.  Went back searching for pictures and this is the closest thing I could come up with on a high sided car.


Have been detailing the Flak Gun, will get pic's when finished with it.

Rob

  • Member since
    July 2004
  • From: Texas
Posted by wbill76 on Monday, April 2, 2012 7:21 PM

Rob,

That pic is of a Flak 30 and they were commonly fielded without splinter shields regardless...one of the reasons the Flak 38 did get them...the crews were awfully exposed otherwise as you can see! Wink I would suggest sticking with the shields...if for no other reason than it gives you some more "canvas" to work with in terms of painting/finishing.

  • Member since
    August 2006
  • From: Oromocto, Canada
Posted by Gun Tech on Monday, April 2, 2012 7:35 PM

Rob,

I am utterly speechless...  That wooden effect is simply amazing!!! Yes


BRAVO!!!!!

Jean-Michel    "Arte et Marte"

  • Member since
    April 2006
  • From: Denver, Colorado
Posted by waynec on Monday, April 2, 2012 9:39 PM
mine is partially done. i think the dragon kit has a more detailed undercarraige which no one will see. it's on hold as i finished or will have finished this week my 1/35 MAS (ship forum), 1/72 k-5 rr gun (get 'er done group build), me-163, LAV-III and COUGAR (armor forum). i hand brushed it after it was together. bad move lots of hard to get to nooks and crannies. see lessons below. i will post some pics by end of the week. this is my first rail bed which i will use for 1/72 k-5. o guage rail, basswood ties ballast on top of modeling clay. (NOTE PAINT MODELING CLAY CLOSE TO BALLAST COLOR SO THE BLUE CLAY DOESN'T SHOW THROUGH GAPS IN THE BALLAST.) they may make them but i think they are still attached to the plastic ties. i will investigate further. i have not built the big locomotives yet, just 3 1/72 and 1/87 locomotives. WHAT I LEARNED DOING RAILROAD STUFF: 1. patience. 2. really look at the instructions to figure out what can be put together before painting and what has to be painted before assembly 3. don't put all the fiddley stuff like ladders, lights, etc on until major construction and painting is done. keeps it from getting broken. 4. on 1/35 be very careful building the couplers. they should be completely moveable in order to couple cars together. in 1/72 thet tend to be one piece so that is not an option. look at how some of these guns are mounted on trucks. looks like you take the feet off so the bottom is flush, brace on both dsides of the legs with lumber and maybe BIG u-bolts through the deck.

Никто не Забыт    (No one is Forgotten)
Ничто не Забыто  (Nothing is Forgotten)


  • Member since
    March 2006
  • From: Right Side of a Left State
Posted by Shellback on Monday, April 2, 2012 10:12 PM

Rob , i didnt say it b4 , but thats some nice wood man ! OopsHmm Thats ok to say i think ...........Toast

  • Member since
    April 2009
  • From: Carmel, IN
Posted by deafpanzer on Monday, April 2, 2012 10:24 PM

Catching up here... it still makes me drool every time I look at your work on the wood.  Nice work on the flak too!  

Andy

JOIN OUR COMMUNITY!

Our community is FREE to join. To participate you must either login or register for an account.

SEARCH FORUMS
FREE NEWSLETTER
By signing up you may also receive reader surveys and occasional special offers. We do not sell, rent or trade our email lists. View our Privacy Policy.