SEARCH FINESCALE.COM

Enter keywords or a search phrase below:

GERMAN RAILWAY GONDOLA TYP OMMR

43417 views
134 replies
1 rating 2 rating 3 rating 4 rating 5 rating
  • Member since
    March 2006
  • From: Right Side of a Left State
Posted by Shellback on Sunday, April 15, 2012 5:20 PM

That makes perfect sense Bill .Yes

  • Member since
    April 2006
  • From: Denver, Colorado
Posted by waynec on Sunday, April 15, 2012 5:53 PM
i have seen these jury-rigged on truck beds. usually the feet are taken off the base and large timbers are secured to the bed on either side (like the 3.7cm at on the bow of pt-109). i was thinking big u-bolts over the legs too, but chains are used to tie down light vehicles so why not.

Никто не Забыт    (No one is Forgotten)
Ничто не Забыто  (Nothing is Forgotten)


  • Member since
    April 2009
  • From: Carmel, IN
Posted by deafpanzer on Sunday, April 15, 2012 6:25 PM

Love those chains!  I believe everything had to be secured.  Train rides can be rough and I have seen tanks being secured down with chains too so it is very possible that flak had to be secured too.  

The only thing is missing... a case of German beer for a long ride.  Of course Carl would agree with me! Beer

Andy

  • Member since
    October 2009
Posted by PANZERWAFFE on Sunday, April 15, 2012 8:41 PM

WBILL - Working on some more smaller crates now and think I will use your suggestion of storing them under the gun deck, also know as the "Penthouse" thanks to Andy.

ERIC - There will defiantly be figs in the build but it may be a while before getting to them.  Have been looking at this car along with the other cars I have and am still working on which figs would work best.  Presently, believe this car may have the crew sitting and relaxing in this car and enjoying the ride.  One fig will be on top of the "Penthouse" acting as a look out.

CARL - Good point and good question.  Bill good answer and agree.  The chains are going to stay.

WAYNEC - Had remembered your suggestion and appreciated it Yes  That is what started me thinking of how to secure the gun.  If I would of planned this out more from the beginning I may have taken the feet off of the Flak gun but decided to leave them on because had already had everything built.  I did go back looking though and have found these guns mounted on various things and some still had there feet.  For these reasons I went with the chains. 

ANDY - Sounds like were going to have to keep you chained up in the "Penthouse" Surprise  That barrel you see in the car is actually full of German beer Beer  Just have to make a tap for it Wink  Glad you like.

This is what I have been working on today.  They are not to difficult but quit time consuming.

Will make a few more until I cant take making them anymore so that means not sure how many more will be made?

Rob

  • Member since
    March 2006
  • From: Right Side of a Left State
Posted by Shellback on Sunday, April 15, 2012 8:42 PM

Of course i agree with you Andy .................Yes  Beer

  • Member since
    April 2006
  • From: Denver, Colorado
Posted by waynec on Sunday, April 15, 2012 10:29 PM
the mounts i talked about looked more permanent. if anyone asks you can tell them this a quick mount to protect the train in transit and the gun will be removed at the final destination. which means you need another car for the trailer and supplies and maybe a third car for the truck and an engine to move it and....... i will revisit mine after early may ipms club annual contest which i am finishing stuff up for. and they chain cars to flatbed trucks all the time plus i don't think the 20mm has much of a recoil. don't recall it being so when shooting the 20 on the m-114 recon vehicle in the '70s.

Никто не Забыт    (No one is Forgotten)
Ничто не Забыто  (Nothing is Forgotten)


  • Member since
    October 2009
Posted by PANZERWAFFE on Saturday, April 21, 2012 2:44 PM

After a few days have completed construction on the ammo boxes that will loaded into the railcar but they still need to be painted.  Have completely assembled all kit parts onto the car, latches, hand grabs, etc. and applied all decals with future.

Added a handle to the inside on the doors for the gun crew.

With the car complete it is now time to weather the car as a whole.  Then there is just the gear that will be inside left to paint.

Rob

  • Member since
    September 2005
  • From: beacon falls , Ct.
Posted by treadwell on Saturday, April 21, 2012 5:19 PM

Really looking great, Rob ! The wood and all the colors you have chosen really work well together

forming a real 'realistic' , cohesive build !Toast .

treadCool


  • Member since
    March 2006
  • From: Right Side of a Left State
Posted by Shellback on Saturday, April 21, 2012 7:33 PM

Looks perfect Rob ! I really like the wood colors . They are just a bit different than what i usually see for wood and thats makes the color even more interesting and realistic ................like Tread sead .Yes

  • Member since
    April 2009
  • From: Carmel, IN
Posted by deafpanzer on Saturday, April 21, 2012 10:44 PM

I swear I saw it few days ago at the train crossing.  Your work turned a styrene into very realistic looking wood... 

Andy

  • Member since
    September 2005
  • From: Uppsala, Sweden
Posted by bultenibo on Sunday, April 22, 2012 1:33 AM

The build is coming along nicely. Yes

I just love the attention to the details and the composition of the equpiment, and can't wait to see the wagon wheathered.

Also, with some figures added the wagon should come alive and become a small world in itself, so to say.

One thing that caught my attention is that the Deutche Reichsbahn district type (Gattungsbezirk) of the wagon, as shown on the decals, is Villach. It was a small, insignificant town in southern Austria, but due to the fact that is was - and  still is - a central railroad connection point with Italy and the Balkans the town was frequently bombed by the allies during ww2. During 37 air missons some 42 000 bombs was dropped on the town, which atleast in relation to the town's population - just some 35 000 inhabitants - made it one of the most heavily bombed German towns during the war! Surprise

In this regard I would say that your choice of making the wagon into a AA-wagon gives the whole build quite a symbolic dimension. So you better add some seriuos amount of ammo crates! Big Smile


/Tony

  • Member since
    July 2004
  • From: Texas
Posted by wbill76 on Sunday, April 22, 2012 2:44 PM

Looking great Rob, the decals and other details including the wood finish have really brought it to life! Yes

  • Member since
    October 2009
Posted by PANZERWAFFE on Tuesday, April 24, 2012 8:05 PM

TREAD, CARL, ANDY, WBILL, Thanks guys.  Really appreciate the comments and glad you like.

TONY - Thanks for the comments and thanks for that bit of history Yes  Was unaware of this information and was very pleased to receive it, very interesting and agree helps support the car as an AA.  One of the reasons I like too build is because of the history / research and building provides a more "Hands on" way of learning.  It's even more enjoyable when someone, such as yourself, is able to fill in and share some of their knowledge.  Thanks Beer

Here is the bulk of the gear now painted.  The last addition of gear will be a tarp laid over, or what should be, the remainder of ammo boxes.  Ignore the woodpecker MG thats for something elseWink  Hope you enjoy.

Rob

  • Member since
    March 2003
  • From: Rain USA, Vancouver WA
Posted by tigerman on Tuesday, April 24, 2012 11:31 PM

I like all the different gear you have there Rob. Going to look sweet!

   http://i7.photobucket.com/albums/y269/wing_nut_5o/PANZERJAGERGB.jpg

 Eric 

  • Member since
    September 2005
  • From: Uppsala, Sweden
Posted by bultenibo on Wednesday, April 25, 2012 2:33 AM

Great choice of equipment for the AA wagon! The painting on the green wooden box is really realistic with its worn off paint!

The only thing I think is missing is a case containing the spare barrels for the MG. They should atleast have one extra barrel to function effectively.


/Tony

  • Member since
    March 2006
  • From: Right Side of a Left State
Posted by Shellback on Wednesday, April 25, 2012 11:58 AM

Rob , details , details and details !!! YesYesYes

  • Member since
    July 2004
  • From: Texas
Posted by wbill76 on Wednesday, April 25, 2012 12:01 PM

Sharp work on the details and gear Rob, look forward to seeing the car equipped and ready for action. Yes

  • Member since
    October 2009
Posted by PANZERWAFFE on Sunday, April 29, 2012 5:05 PM

ERIC - Thanks!  Almost to the point of loading the gear in........almost.  Stat tuned Smile

TONY - Agree about the MG case.  Look in the last pic, the case under the MG came with it and I believe the intention was that is suppose to be the MG case.  Will try to come up with something better, may cut some barrels off some extra MG 34's and use them for spare barrels?

CARL, WBILL - Thanks guys Beer

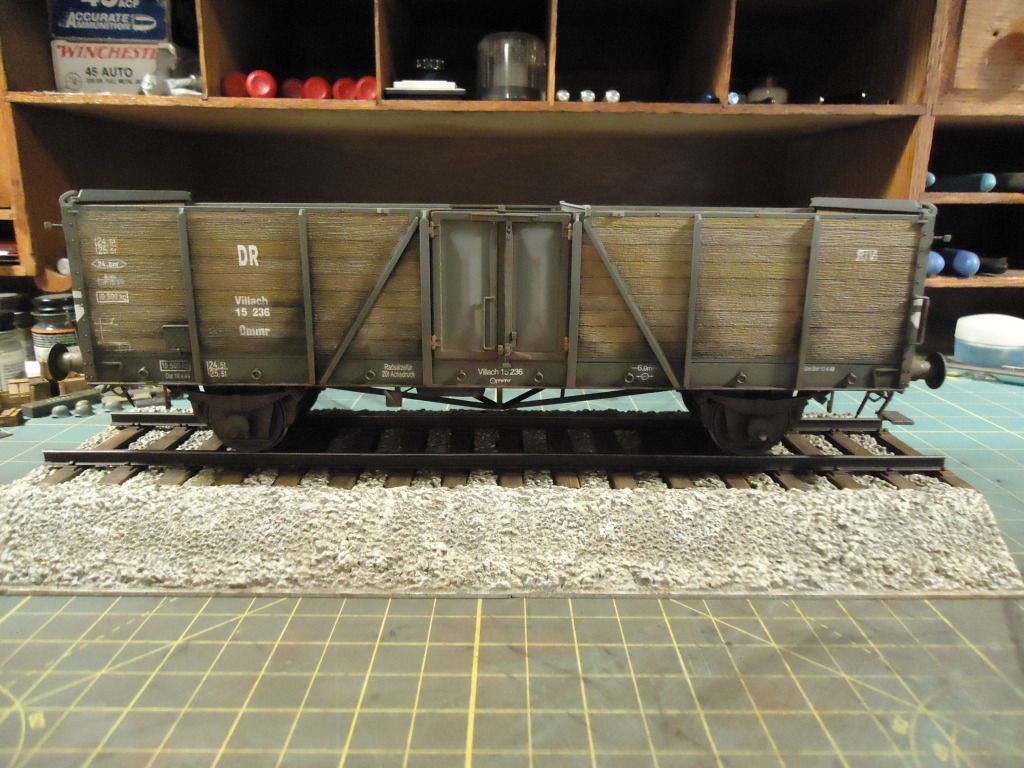
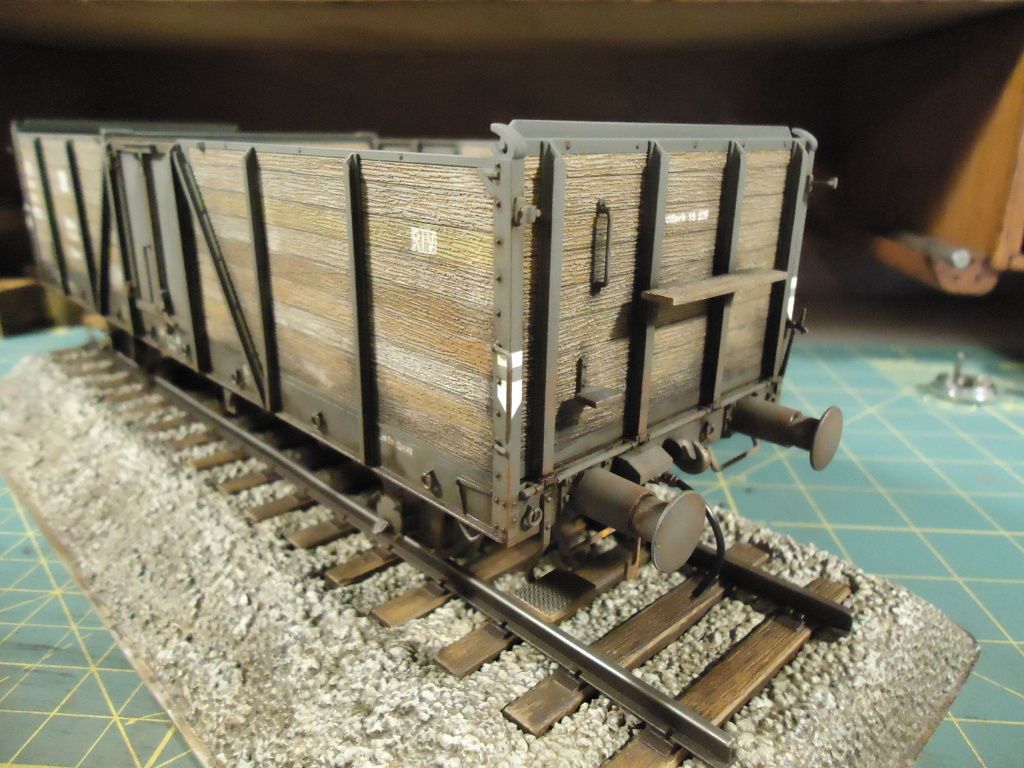
Lots of pictures here, hope not too many.  Pics were hard to take and still did not come out as well as wanted because of lighting.  When I get to my new place, next month, will make a photo booth.  This is the main reason for so many pics and different backgrounds.  Weathering has started.  There were several applications of washes, pin washes, various powders and pigments and paints.  Almost there........

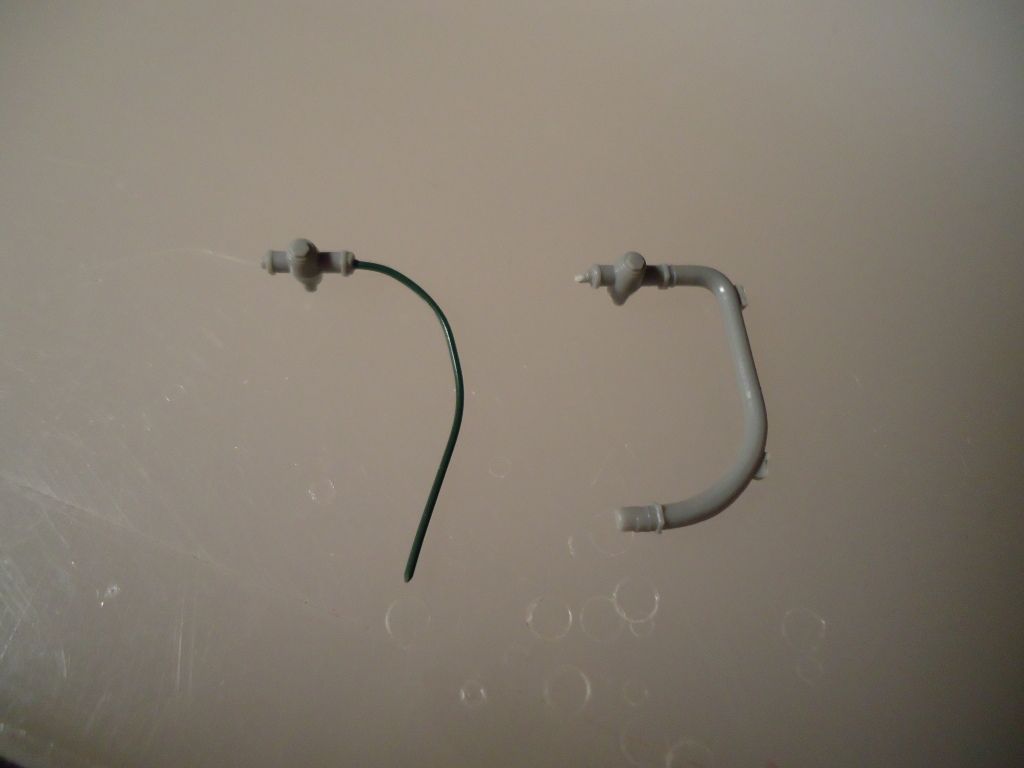
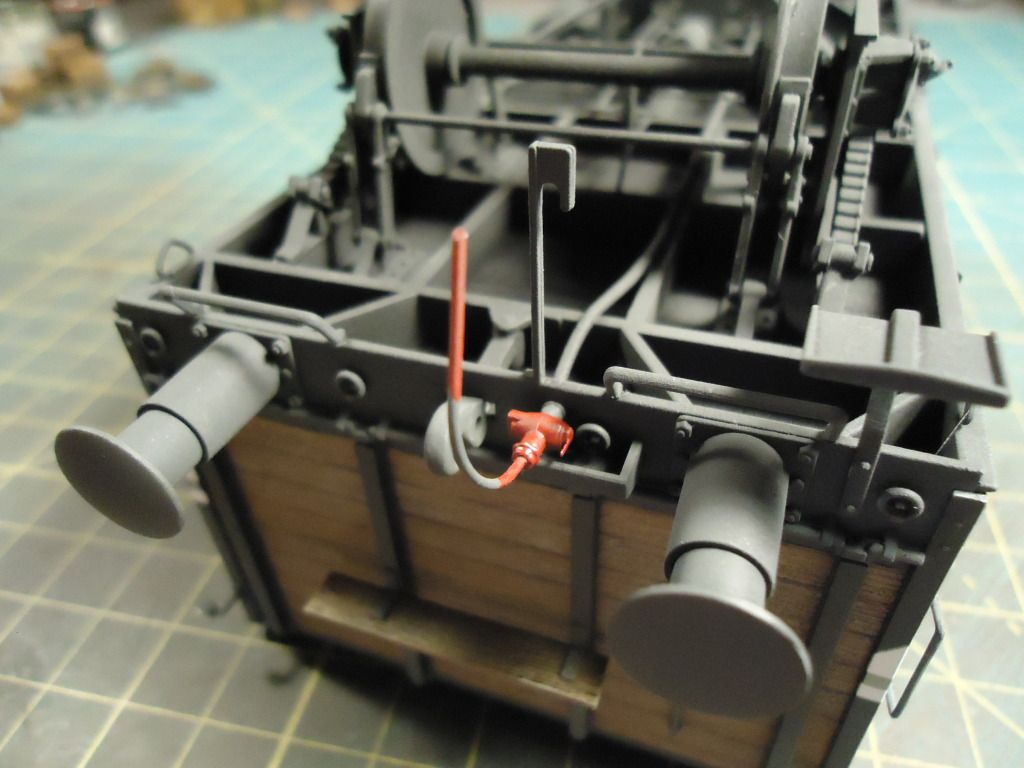
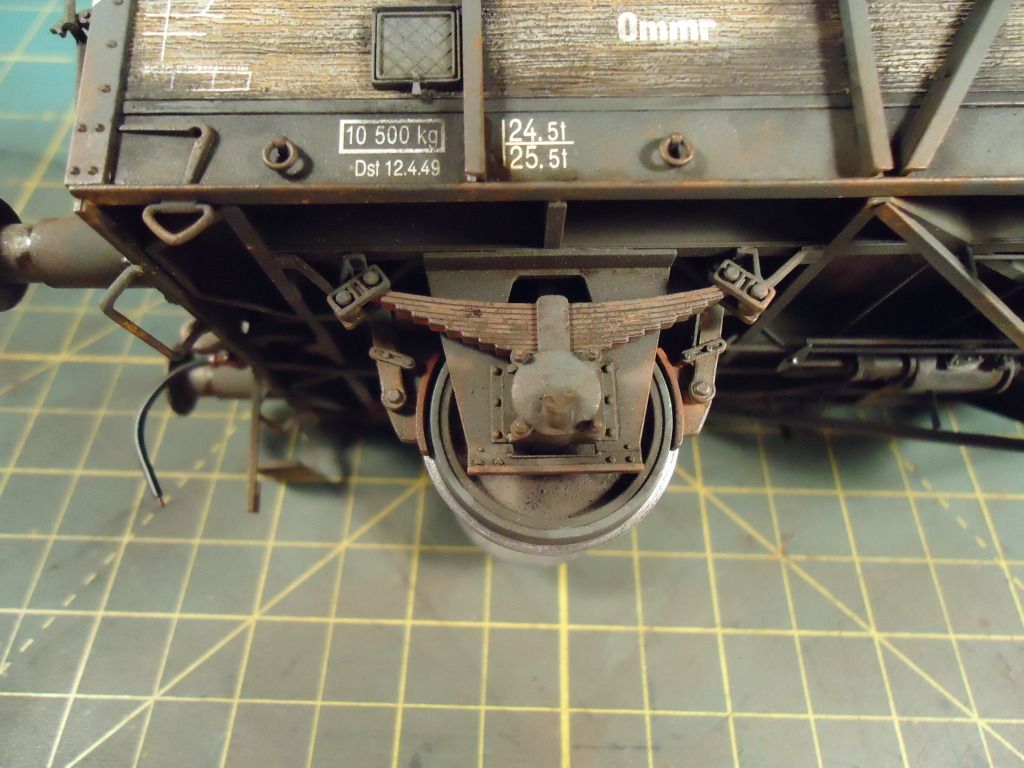
There was one last modification done before going any further.  Did not care for the kit supplied air line connector so had cut the hose off and replaced with wire.  Added some metal valve handles and then slide a rubber tube over the wire to simulate the hose.  The advantage of the wire is that it is flexible and should make things easier when connecting to the future cars.

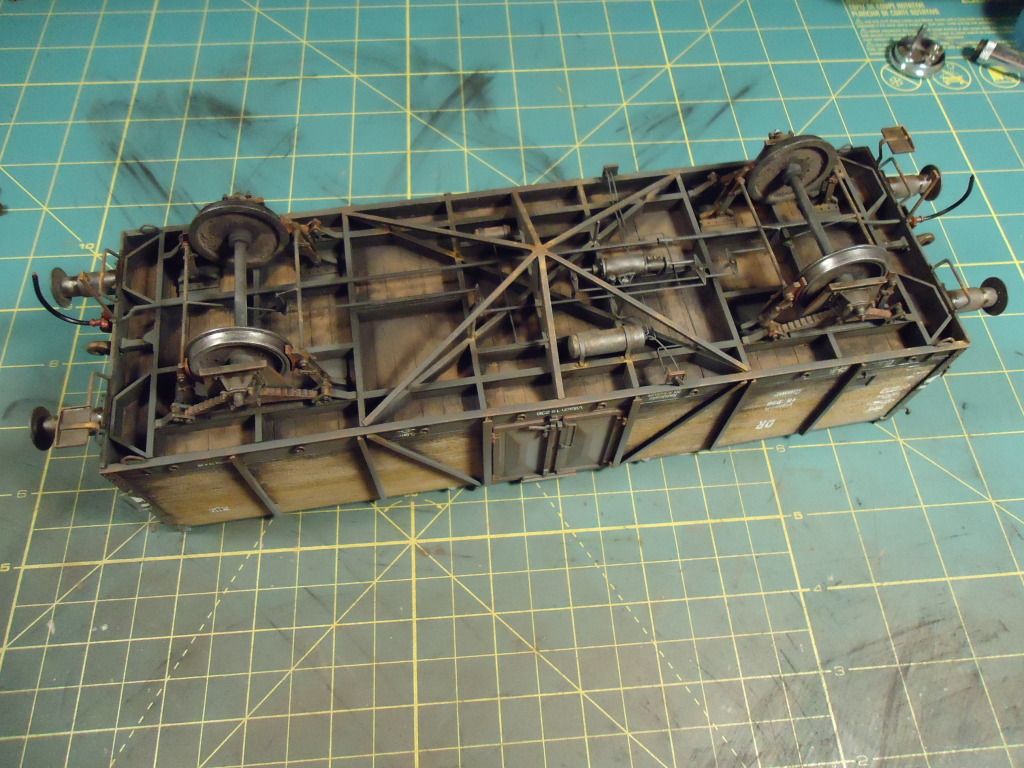
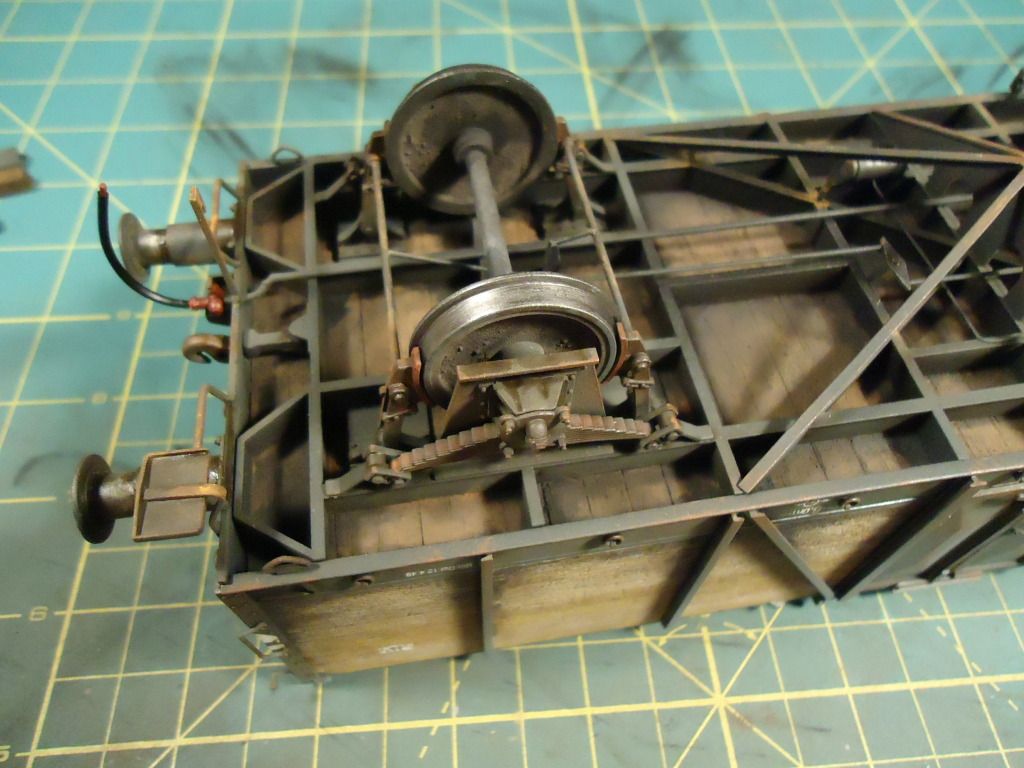
went back to the undercarriage, to bad it wont be seen.

And now back topside

Thanks to all for taking a look.  Until next time Beer


Rob

  • Member since
    April 2009
  • From: Carmel, IN
Posted by deafpanzer on Sunday, April 29, 2012 5:10 PM

Looking great with all of those scratch building... good move replacing the air line!  Beer

At AMPS Auburn a guy put a mirror under his truck so we could see the scratch built details so I thought maybe you can add thin strip of mirror between the rails so your friends can see your work better.  It may sound corny but it worked... 


Andy

  • Member since
    July 2004
  • From: Texas
Posted by wbill76 on Sunday, April 29, 2012 6:24 PM

Rob,

I was going to suggest the same thing as Andy but he beat me to the punch! Very nice work on the underside. Yes

  • Member since
    March 2006
  • From: Right Side of a Left State
Posted by Shellback on Sunday, April 29, 2012 7:14 PM

Holy mackeral  !!!!

Rob , beautiful detail and weathering !!!

I agree with Andy and Bill about putting a mirror under the model .........all of that super detail has got to be seen !!!

I impressed Rob Yes

  • Member since
    October 2009
Posted by PANZERWAFFE on Sunday, April 29, 2012 9:34 PM

ANDY, BILL, CARL - Thanks for the feedback and it's good to hear you guys like it.  I like the idea of the mirror but dont think I will use it in the end when everything is done.  If this was the only car I would use a mirror.  Believe it or not, I have a stack of mirrors of different shapes and sizes that I have collected just for the purpose of placing under models.  Funny, I have not yet used one of them for this purpose........on day.  Will not use the mirror because back to what I had mentioned early on in this WIP when finished there will be several cars connected and things going on around the train.  Here are some of the other cars waiting to be connected.  There are also a few other small kits included in this pic that will be on the train or in the scene when complete.  There is also some more stuff buried in the stash that will be pulled out at a later date.

Rob

  • Member since
    September 2005
  • From: beacon falls , Ct.
Posted by treadwell on Sunday, April 29, 2012 9:44 PM

Hi Rob :  )

Man what a fantastic job you are doing on thisYes  I gotta say that the chassis (under carriage) on this just looks real..... I can't think of a better adjective !   even without the gun and extras it's great.

On a side note , I was wondering what scale in model rail roading does 1/35 translate to ?  I know H.O. is 1/87 I think...

nice man !

treadCool


  • Member since
    March 2006
  • From: Right Side of a Left State
Posted by Shellback on Sunday, April 29, 2012 9:48 PM

OMG, this is going to be an impressive train !

Rob , did you use dry transfers or decals for the rail car markings ? I cant tell , they look painted on (complement) though !Yes

  • Member since
    July 2003
  • From: On my kitchen counter top somewhere in North Carolina.
Posted by disastermaster on Sunday, April 29, 2012 11:38 PM

Absolutely Masterfully Gorgeous.

http://forums.digitalpoint.com/image.php?u=187332&dateline=1324488554  A REAL treat and treasure.

Sherman-Jumbo-1945

"I never know what to expect here anymore."


  • Member since
    October 2009
Posted by PANZERWAFFE on Monday, April 30, 2012 6:27 PM

TREAD hey man !  Thanks for that great complement.  That has to be about the best one could get.....cant get no better than looking real.  Lets see how everything looks when all components are put together.

Thats a good question with armor scale to train scales and not an easy answer.  This has been my first experience with train related items and am not very familiar with them.  I have often looked at some of the accessories in the train department, they have so much, and once in a great while find something that works for a diorama.  About 3 weeks ago had stopped by a train store here and asked the owner the same question you have asked.  His answer was ...It is difficult to say, train manufactures competing with each other went the wrong route and messed up the scales in the process.  There was one company that intermixed parts on there trains with different scales in order for there trains to fit on others tracks and then this eventually carried over to other parts and so on and so on.  Now scales for even trains is kinda off.  The closest to 1/35 should be I scale = 1/32.  Here is a chart that may be more useful then me blabbing Smile

1:12 Large Scale
1:13.7 7/8 inch scale
1:20.3 G, Three-Foot Gauge on Gauge 1 Track
1:22.5 LGB and Bachman
1:24 Half scale
1:29 Aristo-Craft, USA Trains, standard gauge on #1 gauge
1:32 I scale
1:48 O scale
1:64 S scale
1:87.1 HO scale
1:120 TT scale
1:160 N scale
1:220 Z scale

This is from this site which also has a scale calculator on the page.  May be useful for you.  http://www.csgnetwork.com/modrrscalecalc.html

Rob

  • Member since
    October 2009
Posted by PANZERWAFFE on Monday, April 30, 2012 6:49 PM

CARL - OMG is right...........lets see if I can make it too all those rail cars Indifferent  I am REALLY enjoying this build but I am missing my armor Heart

All the markings were the kit supplied decals.  The ones on the wood texture were applied with micro set / sol and the ones on the car frame with Future.  Thanks for the great words.

DISASTER MASTER - As always, Thanks.......you are too kind with your words.

Beer

Rob

  • Member since
    March 2003
  • From: Rain USA, Vancouver WA
Posted by tigerman on Monday, April 30, 2012 7:00 PM

What's a German train without quad-20's? 

Excellent work sir.


   http://i7.photobucket.com/albums/y269/wing_nut_5o/PANZERJAGERGB.jpg

 Eric 

  • Member since
    July 2006
  • From: New Jersey
Posted by redleg12 on Monday, April 30, 2012 7:23 PM

I'm speechless.....the model RR guys would be drooling......as for the armor guys.....fantastic

Rounds Complete!!

"The Moral High Ground....A Great Place to Emplace Artillery."

  • Member since
    January 2007
Posted by the doog on Monday, April 30, 2012 10:14 PM

I'm honestly speechless! I can't see a thing I would change or improve upon!

Absolutely SUPERIOR work! Bow Down

JOIN OUR COMMUNITY!

Our community is FREE to join. To participate you must either login or register for an account.

SEARCH FORUMS
FREE NEWSLETTER
By signing up you may also receive reader surveys and occasional special offers. We do not sell, rent or trade our email lists. View our Privacy Policy.