SEARCH FINESCALE.COM

Enter keywords or a search phrase below:

1/35 TACP Stryker and 1/72 ICV Stryker with slat armor.

6342 views
15 replies
1 rating 2 rating 3 rating 4 rating 5 rating
  • Member since
    June 2006
  • From: Ft. Worth, TX.
1/35 TACP Stryker and 1/72 ICV Stryker with slat armor.
Posted by Bulldog 09 on Monday, February 11, 2013 8:40 AM

Hello all,

Well let me first start off by saying I am mainly an aircraft and helicopter builder so armor is not my strong point. With that said here are my latest builds. The TACP Stryker is for a local museum that contacted me and the ICV Stryker is for me. Both builds will have Eduards PE utilized and the 72nd project will have some resin. So without further ramblings here is the progress so far.

1/35 TACP Stryker. Soldered together the Eduards suspension pieces and installed them, installed the lower forward armor plates, and started work on the forward and rear differentials.

1/72 ICV Stryker. Added perforated suspension covers and pinner compartment hinge. Soldered together the fuel can racks, along with their associated side lights. Soldered together the rear troop access door slat armor brackets, plates, and bracing.

I am presently working on the left side armor plate brackets for 72nd kit and finishing up the clean up of the suspension components on the 35th kit. I will try and get some more photos posted by next weekend as the work progresses. PLEASE FEEL FREE TO GIVE ME YOUR FEEDBACK, COMMENTS, CORRECTIONS , AND CONCERNS. Again armor is not my strong point so any help will be much appreciated. Thanks for looking and have a great day.

Dave Fassett

  • Member since
    March 2003
  • From: Western North Carolina
Posted by Tojo72 on Monday, February 11, 2013 9:31 AM

looks good so far,looking forward to your build

  • Member since
    December 2006
  • From: N. Georgia
Posted by Jester75 on Monday, February 11, 2013 9:50 AM

Very cool looking project!

Eric


  • Member since
    January 2010
  • From: Nebraska, USA
Posted by CallSignOWL on Friday, February 15, 2013 10:55 AM

waiting for more!

------------------------

Now that I'm here, where am I??

  • Member since
    June 2006
  • From: Ft. Worth, TX.
Posted by Bulldog 09 on Tuesday, February 19, 2013 4:13 PM

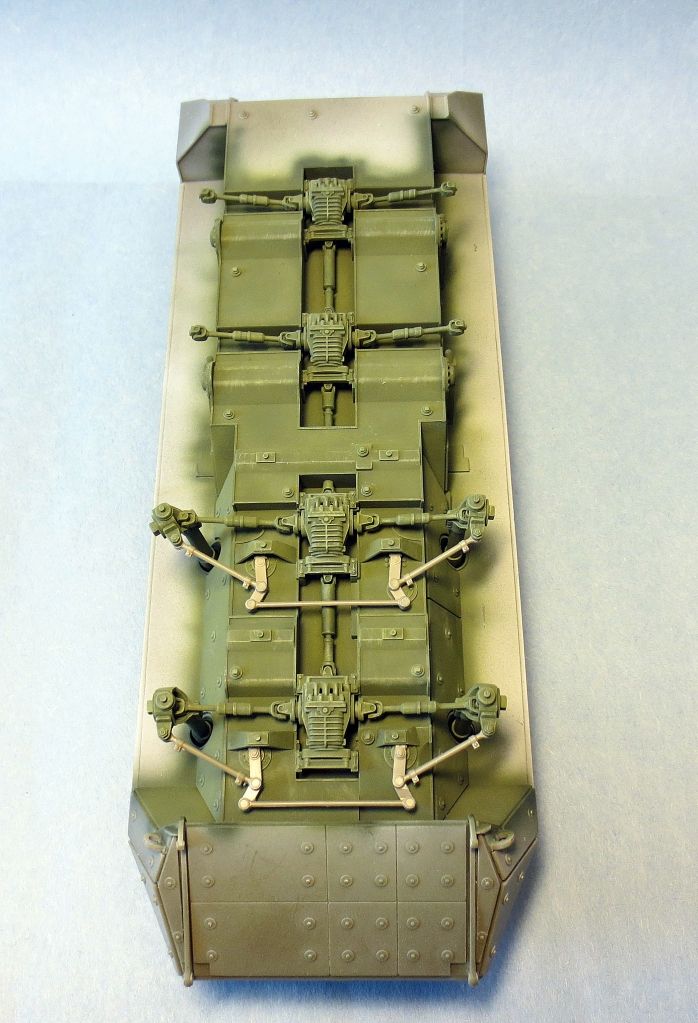
Well here is a small update. Work, family, and me working on my degree's have left me little time this week to work on my Stykers. I did manage to get some paint laid down on the under side of the 1/35 kit. I have yet to add the filter, wash, and mud so it looks a little "bright" to me, what do you all think, any recommendations? I think that the filter and wash will tone down the color and add some depth.
MG]

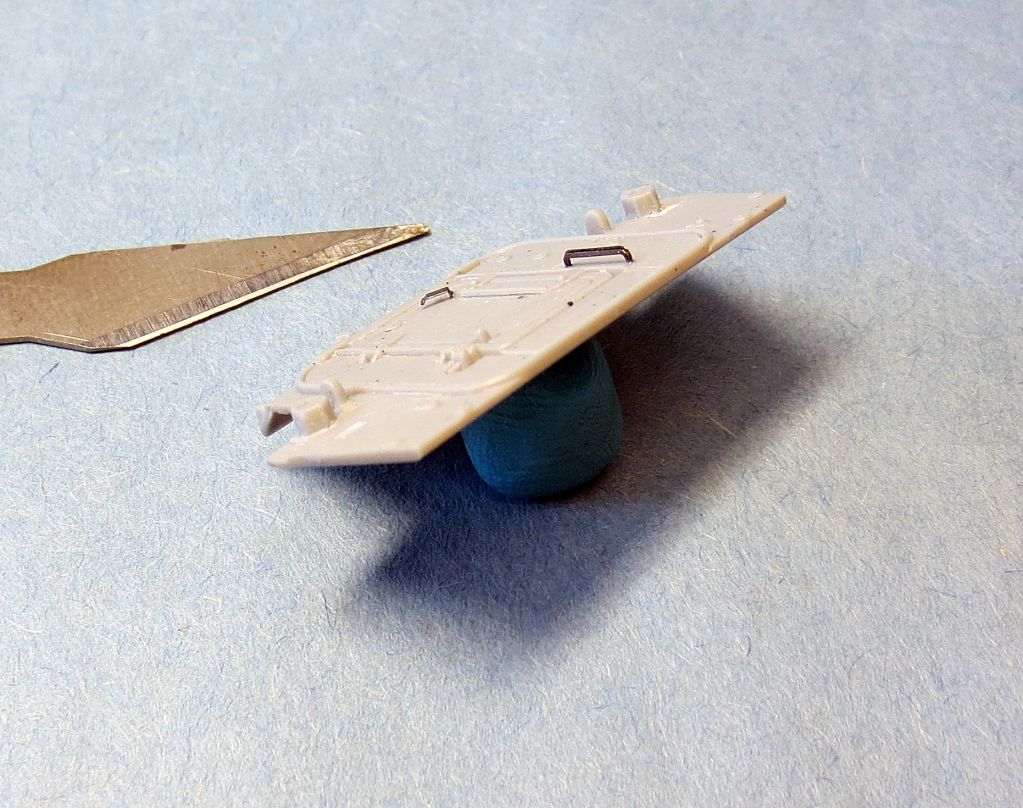
Now for the 1/72 kit. Work continues applying PE to the left side and rear troop door. All of the left side molded on detail has been removed and holes filled. The upper armor mounting bracket was finished and installed along with some of the slat armor bracing plates. A grab handle and door latch handle were added to the rear troop door.
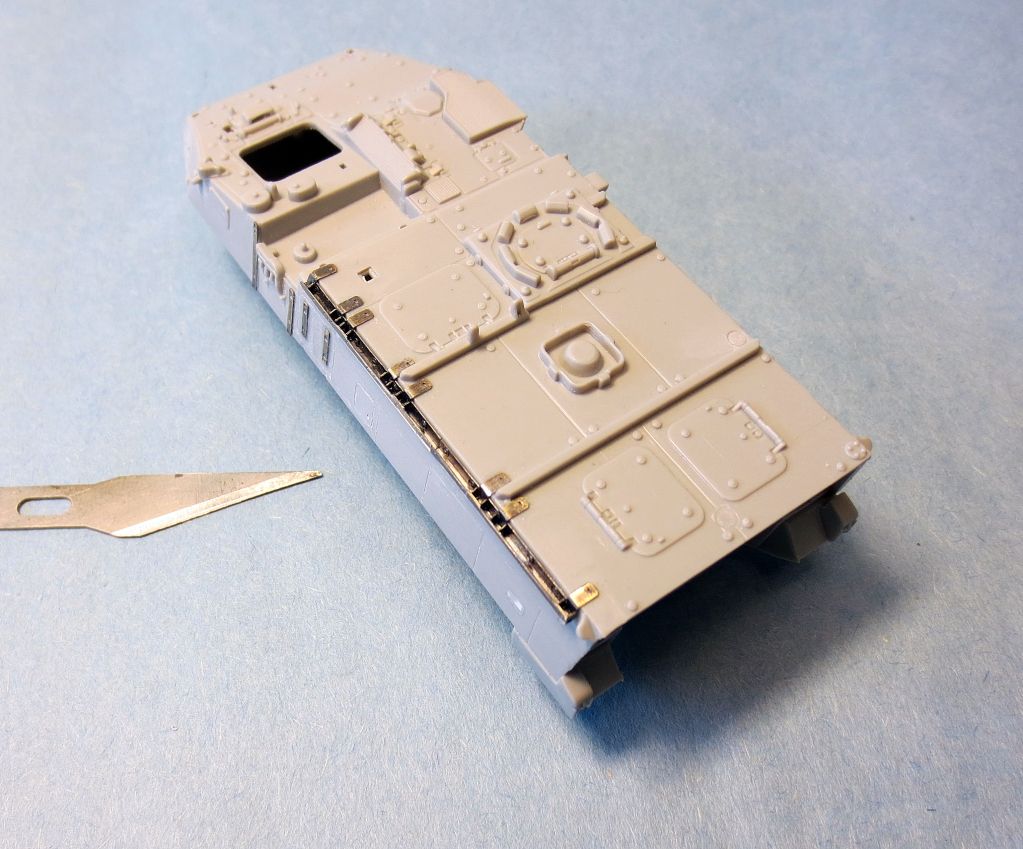
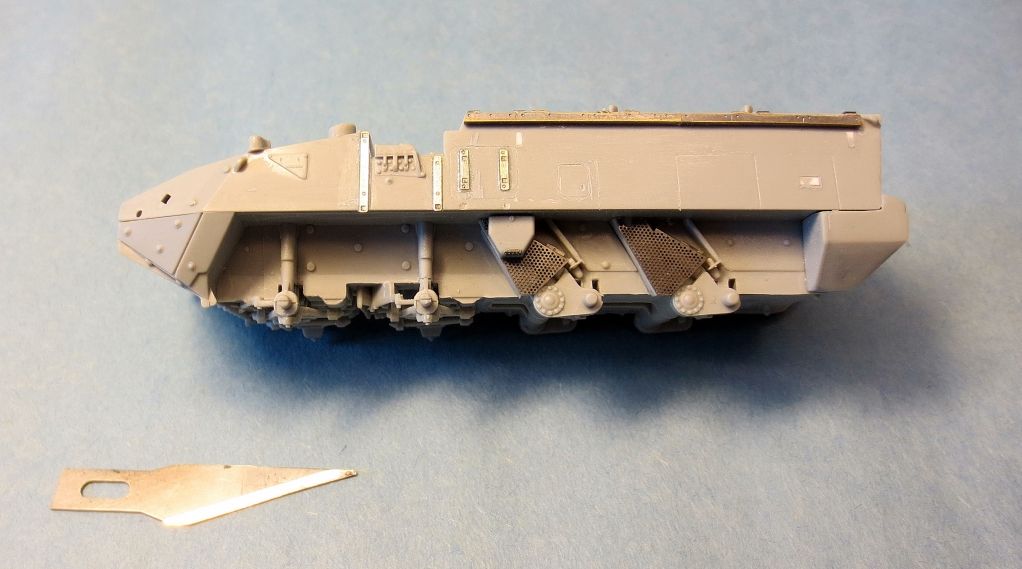
I have started work on the lower armor mounting bracket and the assembly, painting, and weathering of the wheels and tires for the 72nd kit. I am still working on the lower suspension for the 35th kit. I should have this all done and primed by this weekend. I will try and post some more pictures this weekend, time permitting. PLEASE FEEL FREE TO GIVE ME YOUR FEEDBACK, COMMENTS, CORRECTIONS , AND CONCERNS. Again armor is not my strong point so any help will be much appreciated. Thanks for looking and have a great day.

Dave Fassett

  • Member since
    December 2006
  • From: N. Georgia
Posted by Jester75 on Tuesday, February 19, 2013 9:32 PM

I don't know a thing about this vehicle, but I do know your pe work looks really nice and clean! I agree that after a filter and wash the bottom will look much less stark.

Eric


  • Member since
    June 2006
  • From: Ft. Worth, TX.
Posted by Bulldog 09 on Thursday, February 21, 2013 7:44 AM

Morning to all.  I need y'all (as we say here in Texas) to give me some honest feedback. I was able to get the tires/wheels together and weathered on the 1/72 Stryker. This is where I need your feedback, do you think the weathering is just right, not enough, or to much. The 72nd build is going to portray an in theater (Iraq) vehicle during the summer months (which is very dry, and HOT). So give me what you got, thanks in advance.

Dave Fassett

  • Member since
    June 2006
  • From: Ft. Worth, TX.
Posted by Bulldog 09 on Thursday, February 21, 2013 12:44 PM

OK, take two.  After looking at several pictures of Strykers in the time frame I am depicting, and listening to several armor guys, I decided I needed to redo the weathering. So here we go, what do y'all think? Do we have a winner?

Dave Fassett

  • Member since
    July 2004
  • From: Texas
Posted by wbill76 on Thursday, February 21, 2013 6:11 PM

Dave,

They look like they've seen a lot of dusty miles to me, v2 looks the part! Yes

  • Member since
    December 2006
  • From: N. Georgia
Posted by Jester75 on Thursday, February 21, 2013 6:57 PM

They look great!!

Eric


  • Member since
    June 2006
  • From: Ft. Worth, TX.
Posted by Bulldog 09 on Thursday, March 7, 2013 11:45 AM

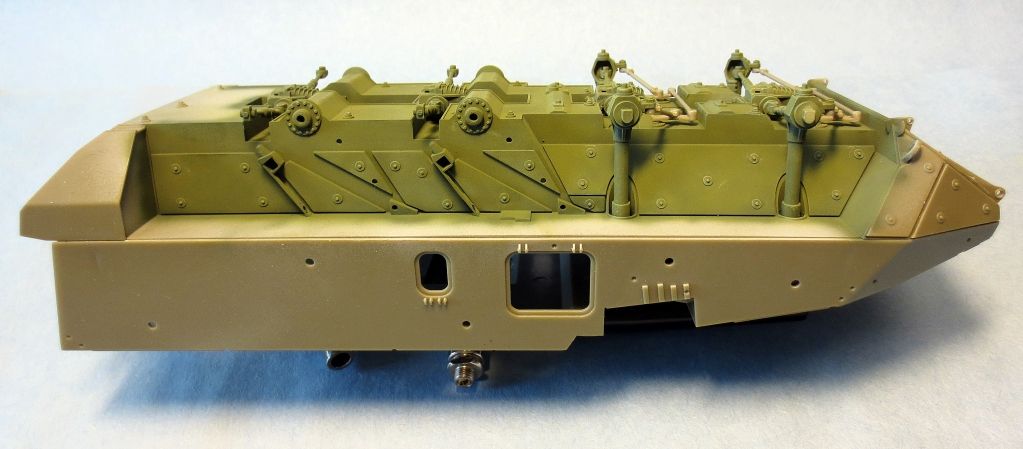
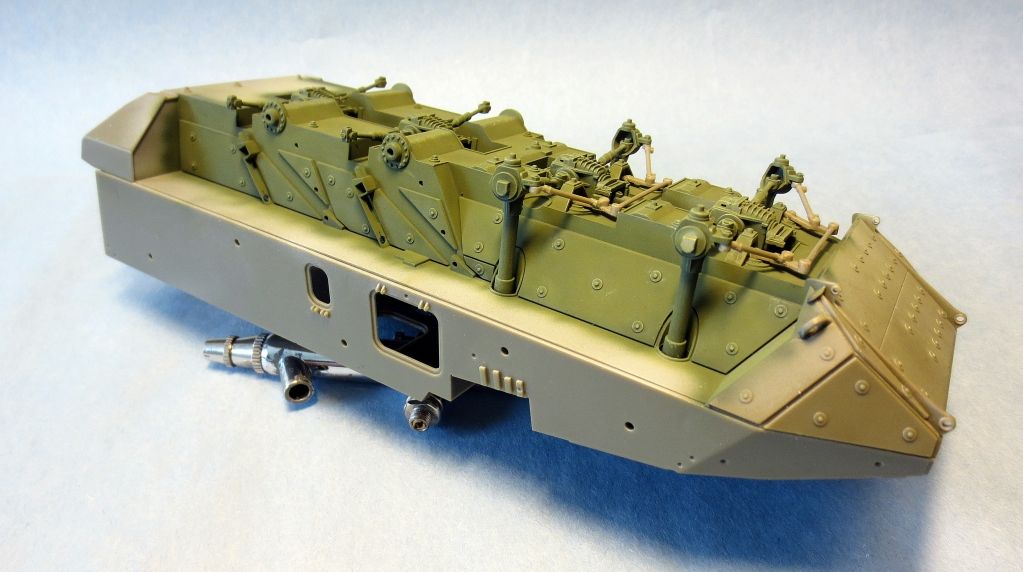
Thank you everyone for the great feedback. Ok,its been a couple of weeks since my last update, so I figured I would post some more progress. Work, family, and working on my duel degrees have left me with little time the last couple of weeks, but I did manage to get some building in. I was able to finish, paint, and weather the suspension area of the TACP Stryker. To me the color looks a lot better after the washes where applied (pictured), and darkened up some when I coated it with Future (not pictured). The pinner compartment in the third photo in just set in place for now, I will attach it after the upper and lower hulls are glued together. I was also able to get the tires weathered and ready for the wheel, which is next on my agenda. As for the 72nd Stryker, I started removing the detail on the right side and adding non-skid to the upper surface. My goal this week and over spring break is to catch up on the small Strker and start on the top side of the 35th Stryker. More pictures to come in the next week or so. PLEASE FEEL FREE TO GIVE ME YOUR FEEDBACK, COMMENTS, CORRECTIONS , AND CONCERNS. Again armor is not my strong point so any help will be much appreciated. Thanks for looking and have a great day.

Dave Fassett

  • Member since
    June 2006
  • From: Ft. Worth, TX.
Posted by Bulldog 09 on Tuesday, May 14, 2013 7:32 AM

Well after many weeks I AM BACK Cool. For the last three years model building has been taking a back seat accept on school breaks and holidays. This was a must when you are a full-time student, father, husband, and employee. Well no more, on Friday, 10 May, I graduated with dual degrees. So with this milestone behind me, my time is now wide open for building. I hope to post some photos here within the week.

Dave Fassett

  • Member since
    December 2006
  • From: N. Georgia
Posted by Jester75 on Tuesday, May 14, 2013 10:03 AM

Congratulations on your graduation and degrees!! Can't wait to see some updates on your work!

Eric


  • Member since
    April 2006
  • From: Denver, Colorado
Posted by waynec on Tuesday, May 14, 2013 12:12 PM

tires look great. what is your technique?

Никто не Забыт    (No one is Forgotten)
Ничто не Забыто  (Nothing is Forgotten)


  • Member since
    June 2006
  • From: Ft. Worth, TX.
Posted by Bulldog 09 on Tuesday, May 14, 2013 1:19 PM

Thank you gentlemen. Waynec, on the tires I just cleaned them well with warm water and Dawn. After they had air dried I applied several coats of Tamiya weathering powder until I achieved the desired effect. I have also used pastels in the past with good effect.

Dave Fassett  

  • Member since
    June 2006
  • From: Ft. Worth, TX.
Posted by Bulldog 09 on Sunday, May 19, 2013 5:18 PM

Alright update time. I will start off with the 72nd Stryker first. Non-skid is finished, PE antenna bases in place, drivers hatch and winch cover is finished. The drivers hatch only lacks weathering and a wash, I still also have to install the reflective viewing ports.

Next up 35th build. Started applying non-skid surface (by hand), rebuilt tool rack and HF coupler rack, and last but not least gave the underside a coat of future to darken things up a little.

Thanks you all for looking and PLEASE FEEL FREE TO GIVE ME YOUR FEEDBACK, COMMENTS, CORRECTIONS , AND CONCERNS.

Dave Fassett

JOIN OUR COMMUNITY!

Our community is FREE to join. To participate you must either login or register for an account.

SEARCH FORUMS
FREE NEWSLETTER
By signing up you may also receive reader surveys and occasional special offers. We do not sell, rent or trade our email lists. View our Privacy Policy.