SEARCH FINESCALE.COM

Enter keywords or a search phrase below:

WIP IDF M50 "Short hull"

11936 views
63 replies
1 rating 2 rating 3 rating 4 rating 5 rating
  • Member since
    September 2006
  • From: Dripping Springs, TX, USA
Posted by RBaer on Tuesday, September 10, 2013 8:40 PM

Amen to that, bro.

House search is fun, but we gotta pimp this one first, which looks to be a pretty sure thing. As to the job, I accepted one today, start next week. Good hours, good pay, cool concept. I'm baa-aack!

Of course the stash (with almost all my spare parts) is packed up......

Apprentice rivet counter.

  • Member since
    January 2007
Posted by the doog on Tuesday, September 10, 2013 5:29 PM

Terrific finish, R! It looks proud to be a Sherman!

More than that though, I hope that the job search and house sale goes smoothly. These are tough times for modelers....and everyone it seems.

  • Member since
    September 2006
  • From: Dripping Springs, TX, USA
Posted by RBaer on Tuesday, September 10, 2013 10:26 AM

Thanks, Eric.

Now to do some catching up.....

Apprentice rivet counter.

  • Member since
    December 2006
  • From: N. Georgia
Posted by Jester75 on Tuesday, September 10, 2013 8:46 AM

Good to see this one finished! Awesome work all around, its been a real joy watching it come together!

Eric


  • Member since
    September 2006
  • From: Dripping Springs, TX, USA
Posted by RBaer on Tuesday, September 10, 2013 8:45 AM

Wow, it's been a while.......

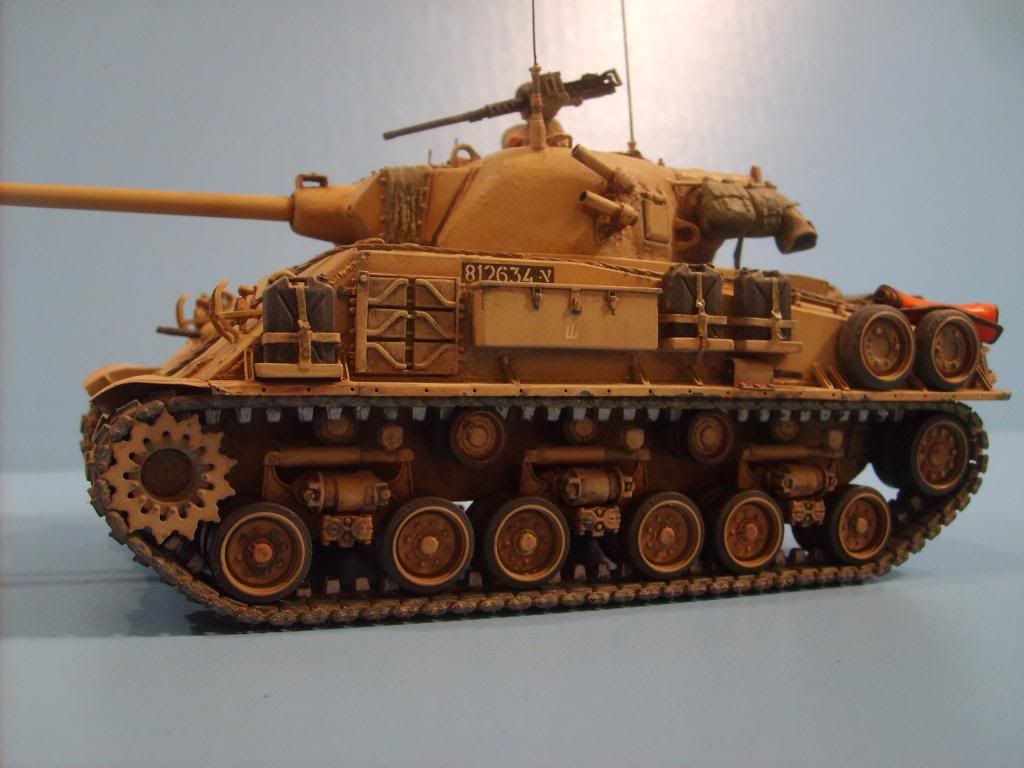
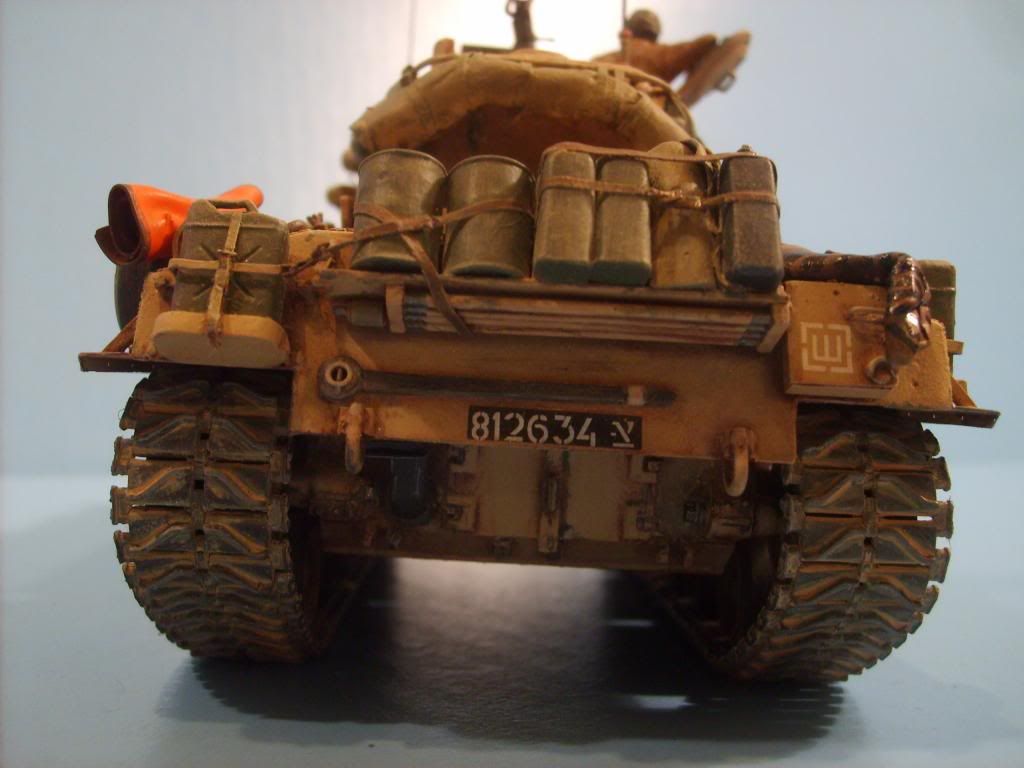
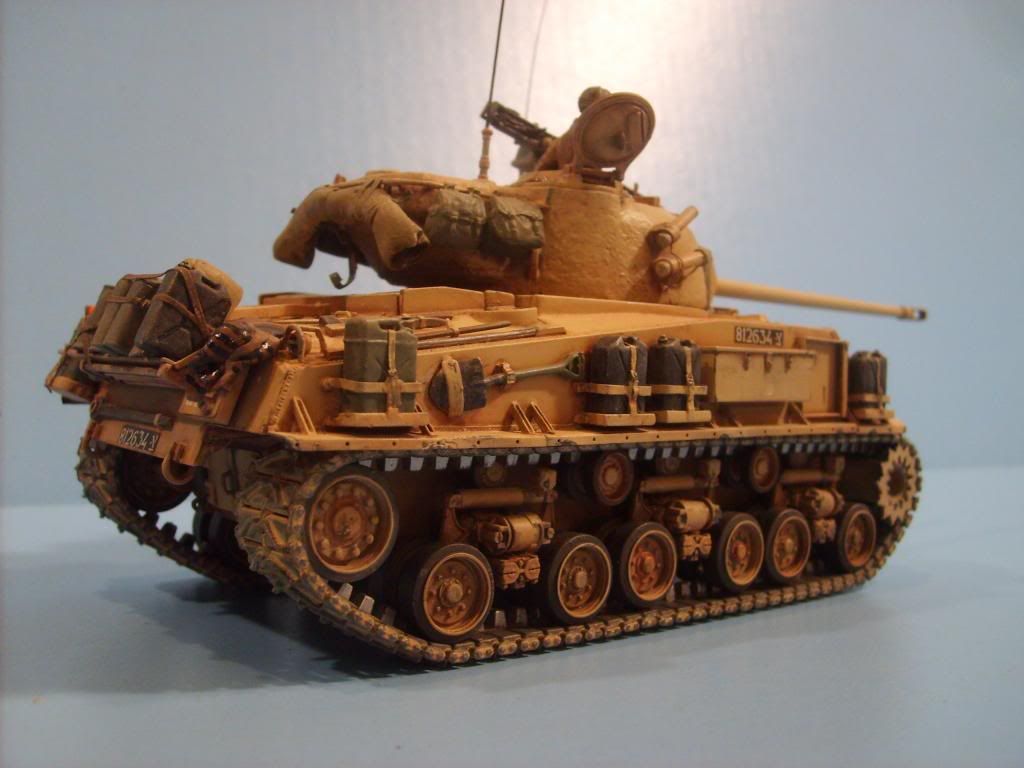
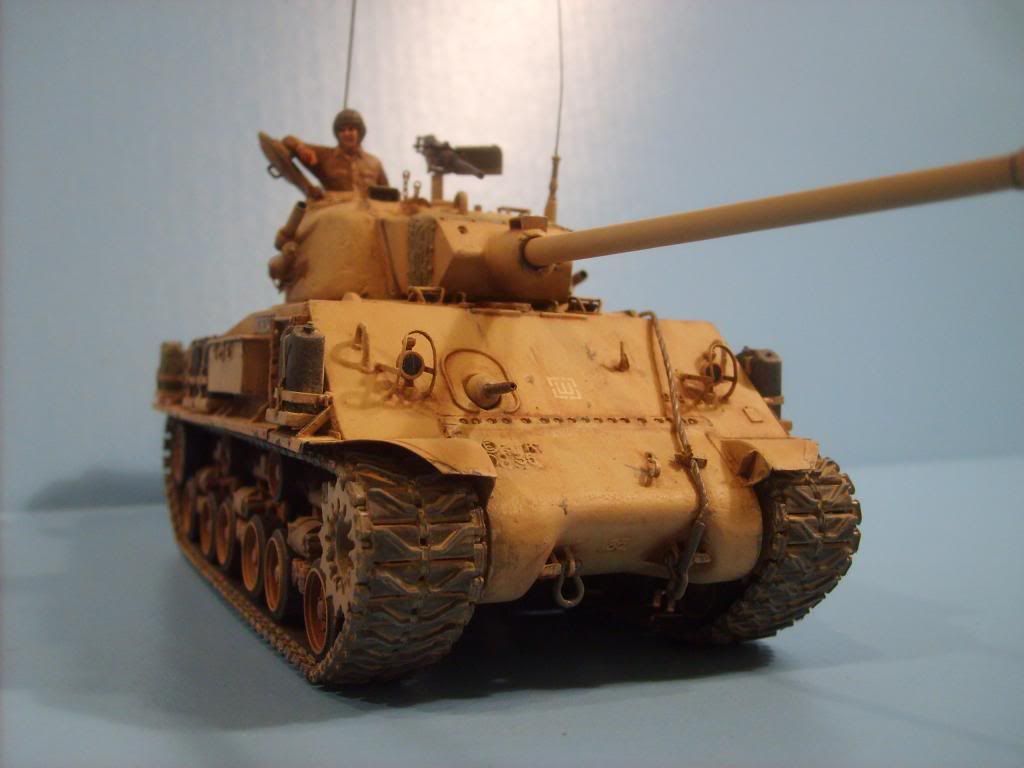
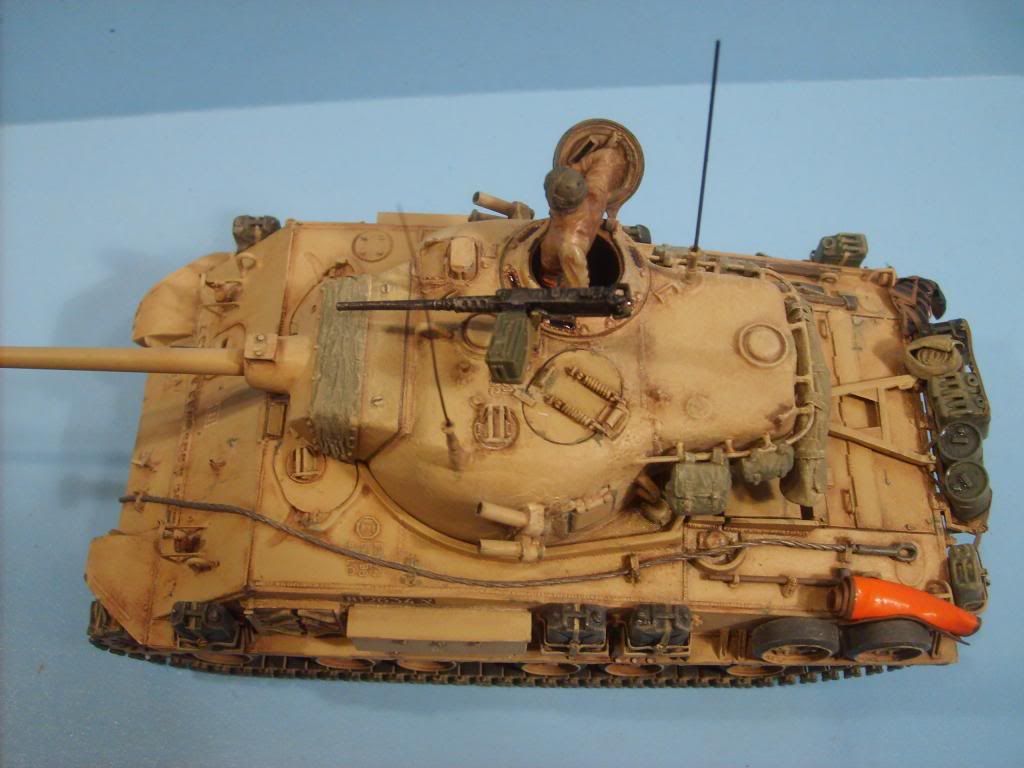
I've been deeply wrapped up in a job search, both here in Texas and in Missouri, getting the house ready to go on the market, and packing up the stash, so zero modeling time has been on my calendar for a while. But all that is accomplished now, and I actually got a couple of hours at my newly cleaned bench to finish this puppy up. Sorry for the delay (it probably bothered me more than you, nyuk, nyuk) but here it is, complete with TC. I did manage to lose the 50 cal I had ready for it, so I pulled one out of the stash and threw it together for the pics.

Thanks for looking, as always.
 

Apprentice rivet counter.

  • Member since
    September 2006
  • From: Dripping Springs, TX, USA
Posted by RBaer on Thursday, July 18, 2013 4:26 PM

Apprentice rivet counter.

  • Member since
    September 2006
  • From: Dripping Springs, TX, USA
Posted by RBaer on Monday, July 15, 2013 7:52 PM

Thanks, Eric.

Apprentice rivet counter.

  • Member since
    December 2006
  • From: N. Georgia
Posted by Jester75 on Saturday, July 13, 2013 10:47 PM

Just gets better and better!! The chipping looks great!

Eric


  • Member since
    September 2006
  • From: Dripping Springs, TX, USA
Posted by RBaer on Saturday, July 13, 2013 6:24 PM

Quickie update. Chipping in progress, or almost done, actually. Chips and scrapes are light and dark green, with dark gray in the center of some of the larger ones to represent bare metal. No rust whatsoever on this one,  as it's an in-action vehicle with lots of abrasion.

Thanks for looking, as always.

Apprentice rivet counter.

  • Member since
    September 2006
  • From: Dripping Springs, TX, USA
Posted by RBaer on Saturday, June 29, 2013 1:30 PM

Gents, thanks so much.

I've done a little chipping, no pics yet, hope to get some taken and posted soon. Tracks are base coated, ready for detail painting and weathering.  If I can stay away from the Magach I've got  going on,   I should have this one finished soon.

Thanks again.

Apprentice rivet counter.

  • Member since
    July 2003
  • From: On my kitchen counter top somewhere in central North Carolina.
Posted by disastermaster on Friday, June 28, 2013 4:12 AM

Looks as "busy" as a http://www.adiumxtras.com/images/thumbs/yahoo_messenger_all_2_10143_4428_thumb.gif

 http://surf.co.nz/media/markitup/sets/bbcode/images/emoticon-eek.gif  Well Russ, a very extraordinary and good looking build if you ask me.

                                            http://www.predatortalk.com/public/style_emoticons/default/smiley-good-post-sign.gif

 https://i.imgur.com/LjRRaV1.png


  • Member since
    January 2007
Posted by the doog on Thursday, June 27, 2013 9:24 AM

Fabulous work, Russ! It's really a work of art!

Be careful you don't over-pastel it and cover up that fine painting! It COULD stand alone as it is, in the state you have it now! It looks great!

  • Member since
    November 2008
  • From: Central Florida
Posted by plasticjunkie on Thursday, June 27, 2013 9:13 AM

It is looking better with every post, outstanding work! I could kick my self, could have picked up a couple of Dragon Israeli Shermans for $10 each at the last show I went to!Crying

 GIFMaker.org_jy_Ayj_O


Too many models to build, not enough time in a lifetime!!

  • Member since
    September 2006
  • From: Dripping Springs, TX, USA
Posted by RBaer on Wednesday, June 26, 2013 4:18 PM

A little detail painting, chipping, and drybrushing has happened, but I'm going to have to get to the art supply store to make any more progress- no light enough pastels in the box, dang it.

Thanks for looking, and comments always appreciated.

Apprentice rivet counter.

  • Member since
    September 2006
  • From: Dripping Springs, TX, USA
Posted by RBaer on Monday, June 17, 2013 5:23 PM

Thanks, doog. 'preciate it.

I spent the last few days on a guy trip, but should get a little more time this week to get into the weathering.

Apprentice rivet counter.

  • Member since
    January 2007
Posted by the doog on Monday, June 17, 2013 5:12 PM

Russ, it's looking perfect! Nice job on all the detailing and paint, and a heck of a job on all that brass!

  • Member since
    September 2006
  • From: Dripping Springs, TX, USA
Posted by RBaer on Monday, June 17, 2013 2:55 PM

Gentlemen, thank you all very much.

I generally paint stowage on the tank, since I have yet to find a way to do all the straps and such after applying a base coat without making a real mess. I do have a couple of items that will go on later, but they're both small rolled tarps that are stowed by being shoved into a gap or space between other, secured items. Also, because I make so much of my stowage from 2-part putty and form it into or over its surrounding parts, it's difficult to make it removable for painting.

Apprentice rivet counter.

  • Member since
    October 2010
  • From: Hoodsport, WA
Posted by Dogfish_7 on Saturday, June 15, 2013 7:37 AM

Awesome kit bashing! Fantastic work!

Bruce

  • Member since
    March 2003
Posted by icit on Thursday, June 13, 2013 8:46 PM

Outstanding, I love Israeli armour! I noticed you painted your model all one colour even with the storage and equipment on it, do you remove it later to detail paint it or do you paint it while still on the model?

ICIT

  • Member since
    December 2006
  • From: N. Georgia
Posted by Jester75 on Thursday, June 13, 2013 6:07 PM

Nice!! Yes

Eric


  • Member since
    November 2008
  • From: Central Florida
Posted by plasticjunkie on Thursday, June 13, 2013 6:03 PM

To say FANTASTIC is an understatement! You have taken this kit far beyond in detail and attention! Toast And by the by, I think the Israeli Shermans are the coolest!Cool

 GIFMaker.org_jy_Ayj_O


Too many models to build, not enough time in a lifetime!!

  • Member since
    September 2006
  • From: Dripping Springs, TX, USA
Posted by RBaer on Wednesday, June 12, 2013 7:20 PM

Holy long-time-no-update, Batman!

Well, I got involved with another Magach, and this one took a back seat for a while, but I'm getting close enough to push on and get those warm fuzzies I get when I finish something. Anyway, the pics:

Thanks for looking, as always.


Apprentice rivet counter.

  • Member since
    September 2006
  • From: Dripping Springs, TX, USA
Posted by RBaer on Saturday, June 1, 2013 12:39 PM

Wow, long time no updates. Well, tan is on, decals and wash in progress, along with some detail painting. I still have to erplace those big screw heads though.....

Anyway, pics, base tan, decals from Bison for an M50, M4A3 hull "command tank", Golan, 1967. All I had to do to match Bison's drawing was move an antenna mount, sweet.

Then the wash, made from Tamiya acrylic brown and alcohol:

And then I begin the scrubbing.

This leaves a very slight tint behind, and a dead flat finish. If I ahd applied a clear coat before the wash, my base color would have been unaffected, but I wanted a little brown to be present.

And then I can start detail painting:

Thanks for looking, as always!


Apprentice rivet counter.

  • Member since
    September 2006
  • From: Dripping Springs, TX, USA
Posted by RBaer on Wednesday, May 22, 2013 11:24 AM

One reason I do WIPs: On another forum, an error I had made was caught by the guy who wrote the book I'm using as my main reference on this build, just in time for me to correct it.

Tom Gannon, if you're out there, thanks. Really.

So, my mistake was in adding a weld bead at the union ot the mantlet extension and turret front. In fact, the extension id bolted to the turret from the inside, and the join is protected by a thin splash shield, which is all that's welded to the turret front. This is actually represented pretty well on the original MP turret. So, out came the micro chisel and small files, to get this far:

To this:

To here, which is probably the final fix, after I get the two large screw heads back on top of the mantlet extension....


Apprentice rivet counter.

  • Member since
    September 2006
  • From: Dripping Springs, TX, USA
Posted by RBaer on Tuesday, May 21, 2013 10:54 AM

'preciate it.

And Krylon's my friend, good value, goes on good, dries tight.

Apprentice rivet counter.

  • Member since
    May 2013
Posted by KrashK on Monday, May 20, 2013 1:15 PM

I love the texture of the turret, good stuff. thanks for the Krylon hint, will give it a try.

Glenn

  • Member since
    September 2006
  • From: Dripping Springs, TX, USA
Posted by RBaer on Monday, May 20, 2013 10:39 AM

Thanks, doog, but I think you're safe.....  :)  I've probably burned myself out on detail on this one (for a while anyway).

Re. the Krylon: since I'm not in need of a gloss finish, I can use the big cans of camo paint and primer, probably both intended for automotive use. The finish is smooth enough to not be grainy but matt enough to be give a good tooth to whatever color coat I put on later. I first got onto the primer because of price, but when the camo colors hit the market (aimed at hunters and rednecks in general I believe) I gave them a shot and was pleased. The red oxide primer is a dead ringer for WWII german primer, too.

Apprentice rivet counter.

  • Member since
    January 2007
Posted by the doog on Sunday, May 19, 2013 3:38 PM

Holy crap, man---I just checked into this build again and just shook my head and laughed---wow, you've really raised a bar here! I got step up on my next build, but I don't know if I can top what you're doing here. That's a commendable and inspiring bit of dedicated detailing, Russ!

Hope that Krylon works well for you.Man, I could never get that paint to work for me in car modeling!

  • Member since
    September 2006
  • From: Dripping Springs, TX, USA
Posted by RBaer on Saturday, May 18, 2013 5:01 PM

Nope, right out of the can.

Apprentice rivet counter.

JOIN OUR COMMUNITY!

Our community is FREE to join. To participate you must either login or register for an account.

SEARCH FORUMS
FREE NEWSLETTER
By signing up you may also receive reader surveys and occasional special offers. We do not sell, rent or trade our email lists. View our Privacy Policy.