SEARCH FINESCALE.COM

Enter keywords or a search phrase below:

Dragon King Tiger with winter camo

5070 views
14 replies
1 rating 2 rating 3 rating 4 rating 5 rating
  • Member since
    April 2013
Dragon King Tiger with winter camo
Posted by SchattenSpartan on Sunday, October 13, 2013 10:18 AM

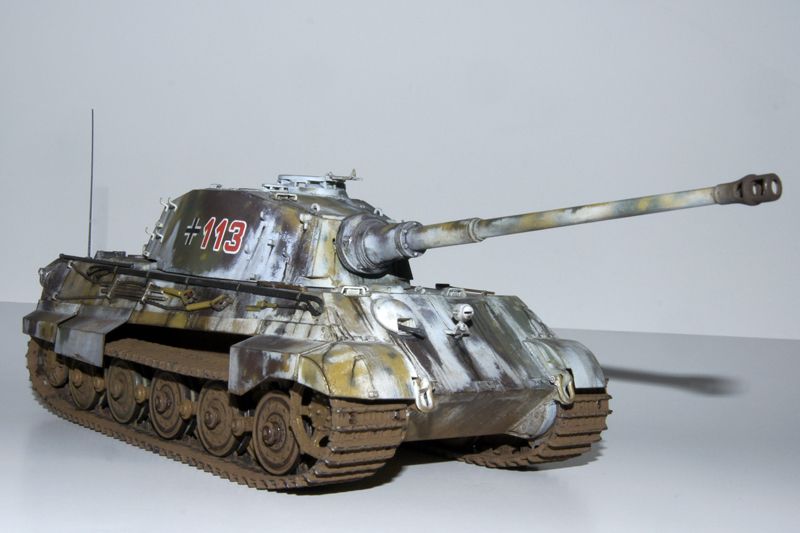
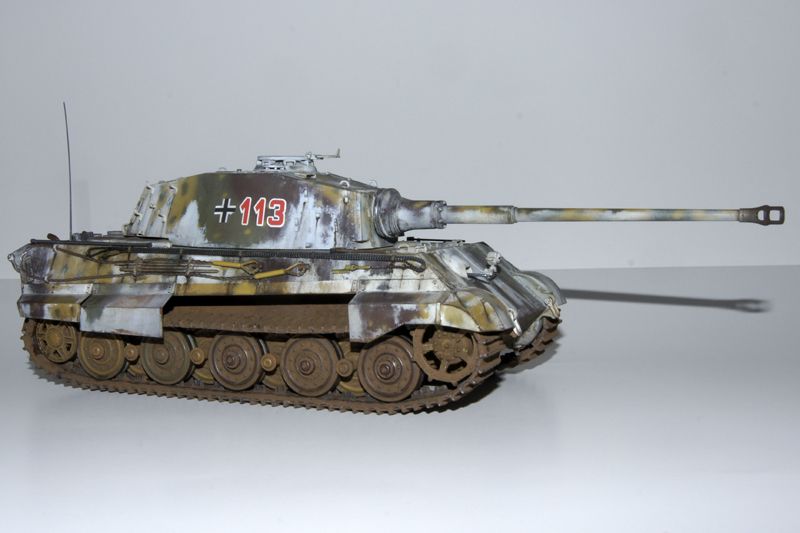
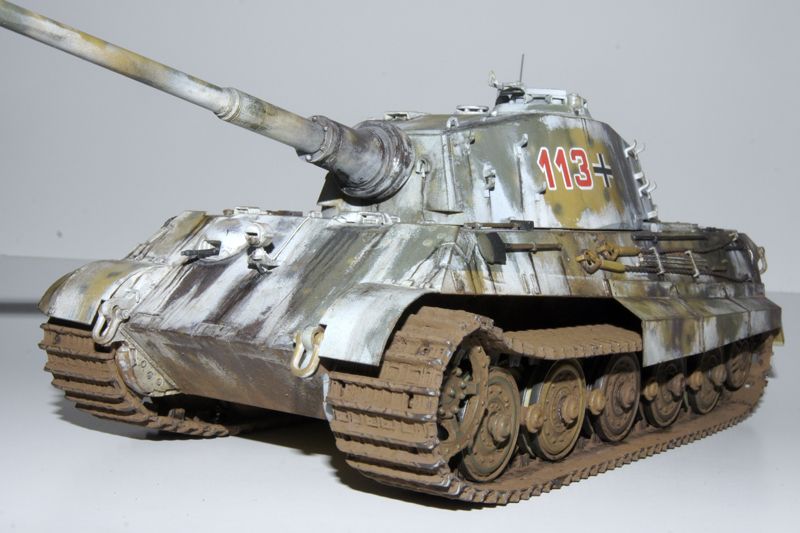
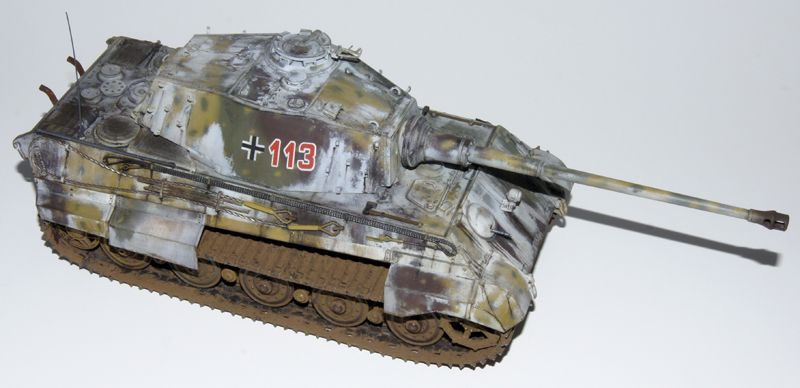
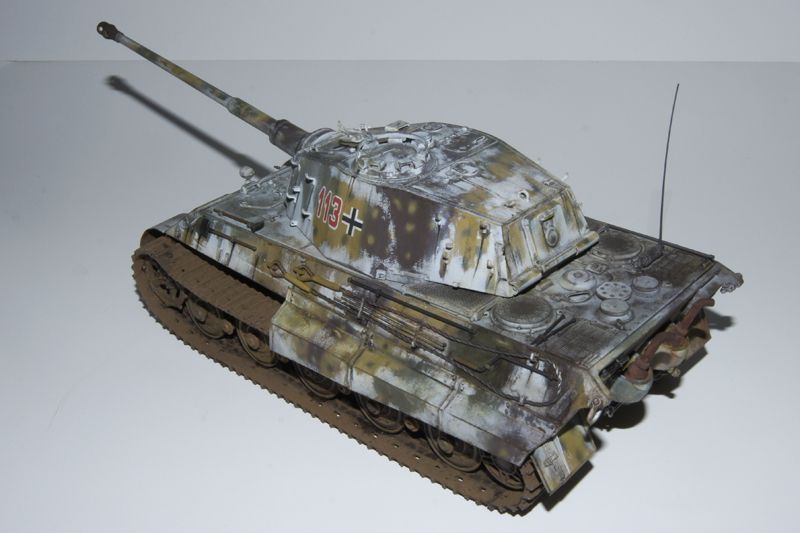
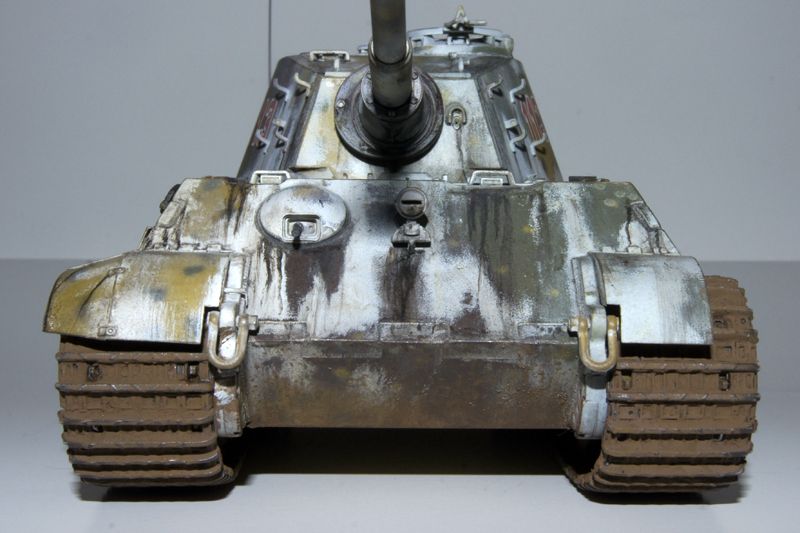
I recently completed this Tiger 2 for the "Steel Cats" GB and I thought I might share it with you guys as well...

It is the Dragon 1/35 "Battle of the Bulge" kit. I got it at 1/3rd off at my LHS because the figures were missing.

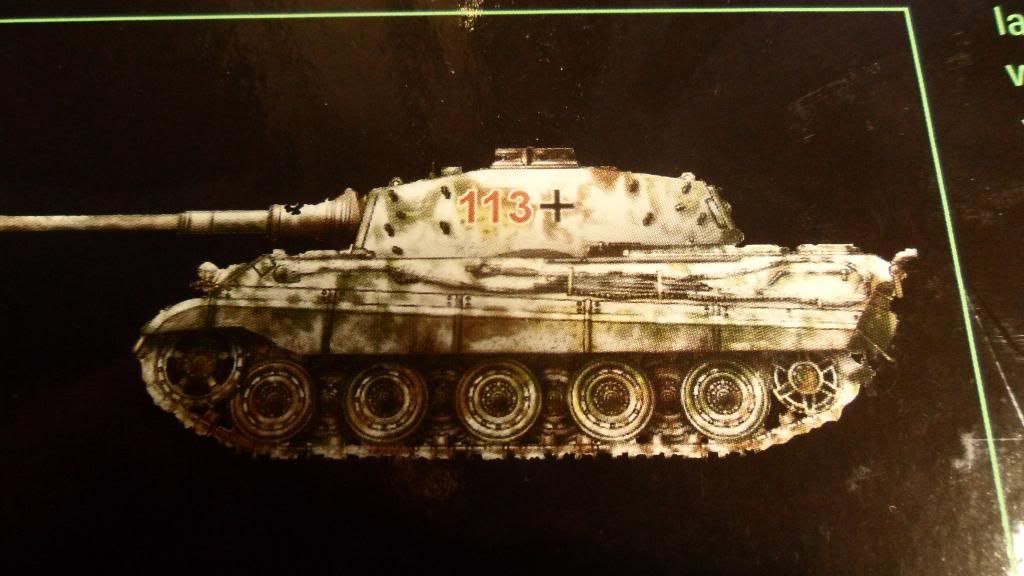
The inspiration for this build was a small drawing on the Back of my main reference book regarding the Tiger and it's variants:
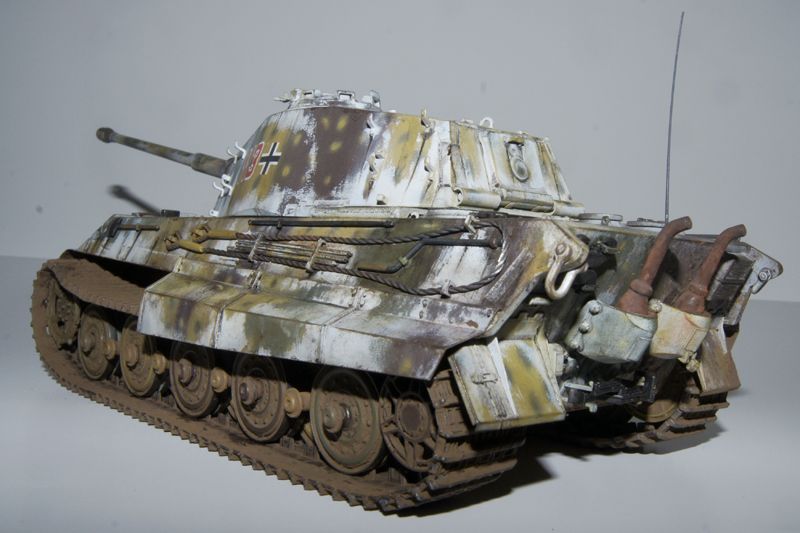
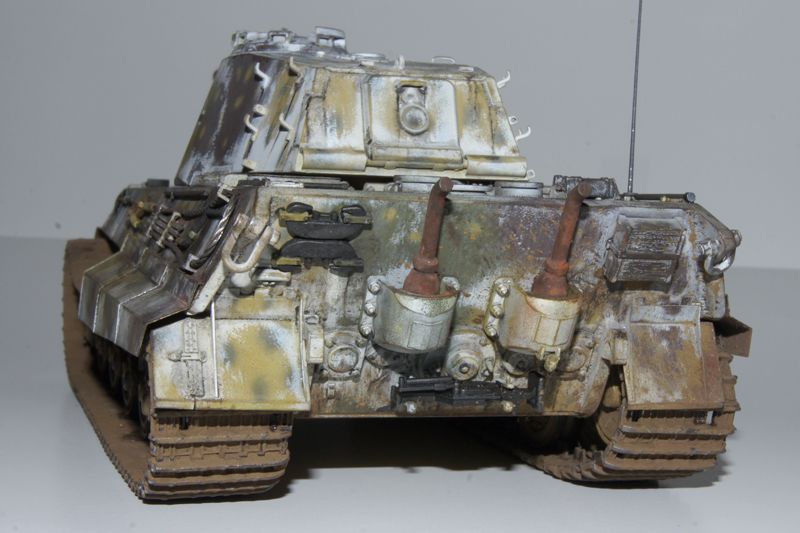
The model was painted with Gunze acrylics (dark yellow, olive green and chocolate brown) and then sealed with Alclad clear gloss. Then I sprayed Vallejo Air white in a blotchy pattern on top. When the white paint was dry, I used Vallejo's airbrush thinner and a large brush to remove the white again. The kitten recieved some streaking with black and brown oil paints, as well as a black washing to give it a grimy and used look and to bring out some details. I sealed everything with Alclad flat clear and applied the pigments (black pigments on the engine grills and muzzle brake, mud on the lower hull and suspesion/tracks, rust on the exhausts).

I can post the the technique I used to make the worn whitewash if you want me to...

Here are some pics for ya:
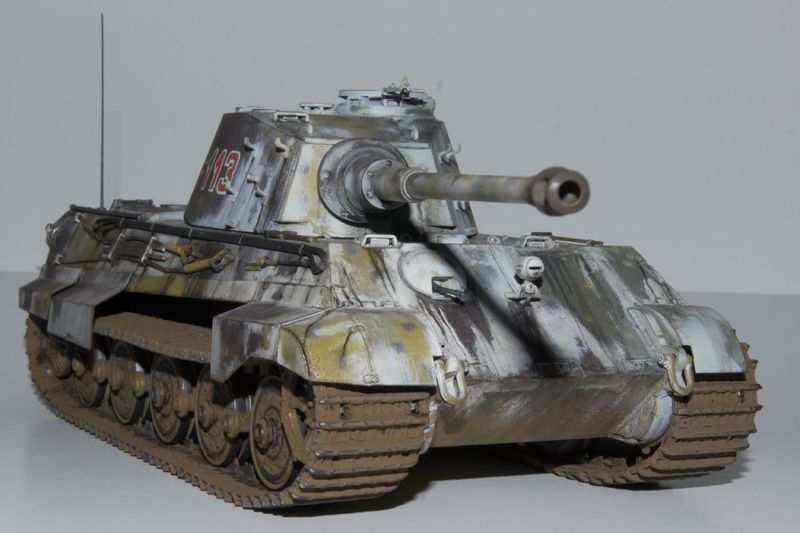
 

I'm quite happy with how she turned out, but I think I could've done better on the mud.

This is my 3rd Armor model (the other ones being 2 Tamiya Shermans) and my 1st Dragon armor kit.

I had a lot of fun building this steel cat for the most part, but there were some things I didn't like:

  • Assembling/mounting the tracks - They are magic tracks, but I still had to remove 3 ejector pin marks on every track link. Mounting those things was a royal pain as well. Next time I'll use friuls!
  • Sanding all those roadwheels - I guess I have to live withat issue when building german armor...
  • Mounting the towing cables - This was the last and worst part of the build. They didn't fit under the mounting brackets properly and i almost ruined the model when attachiong them. Everything turned out quite good and I only had to rebuild one of the brackets from scratch. I'll use an AM solution here as well when building another King Tiger (or any other German vehicle with those thick cables)
  • Assembling the bent engine grills - They were wrinkled when I got the kit, so I had to straighten them out before even trying to bend them and glue them in place. Their fit was also horrible to make things worse: They were too big and the shape was completely off...

Everything else was pure joy and I think I have to get me another one of those kits (or the Tamiya King Tiger)!

I hope you like her...

Cheers, Clemens

  • Member since
    January 2013
Posted by jibber on Sunday, October 13, 2013 2:36 PM

Welcome to Armor. Very nice paint job on the winter wash. Steel Cats had a lot of very nice build, yours included. Did you copy this from a photo? I think the white wash would really look great over panzer grey and a mixture of snow/mud on the wheels and tracks would really bring out the overall effect. One minor thing, the tank number could be toned down a bit with a dark wash, it seems very bright and crisp.

Very nice build, thanks for sharing it.  

  • Member since
    April 2013
Posted by SchattenSpartan on Sunday, October 13, 2013 2:42 PM

Thank you very much!

I actually did tone down the turret markings, but they appear really bright in the pics somehow...

  • Member since
    January 2013
Posted by jibber on Sunday, October 13, 2013 4:00 PM

Great job...

cb1
  • Member since
    December 2009
  • From: D/FW Texas
Posted by cb1 on Sunday, October 13, 2013 5:59 PM

now that looks dang good! Wow

  • Member since
    December 2008
  • From: Goffstown, NH
Posted by New Hampshire on Sunday, October 13, 2013 6:04 PM

Ya done a top notch job my friend!

Brian

  • Member since
    March 2003
  • From: Rain USA, Vancouver WA
Posted by tigerman on Sunday, October 13, 2013 6:52 PM

Great finish Clemens. Very nice whitewash with a suitable dirty underside. I will get your picture up soon.

   http://i7.photobucket.com/albums/y269/wing_nut_5o/PANZERJAGERGB.jpg

 Eric 

  • Member since
    January 2007
Posted by the doog on Sunday, October 13, 2013 8:33 PM

For your third armor model, I'd say you did a mighty fine job. The mud is fine--you'll learn over time how to make it a little less monotone. But it's perfectly plausible as it is. Nice job.

  • Member since
    March 2003
  • From: El Dorado Hills, CA
Posted by IBuild148 on Sunday, October 13, 2013 9:20 PM
Very well done.

IBuildOne48

Teach modeling to youth!

Scalefinishes.com

http://i712.photobucket.com/albums/ww122/randysmodels/NMF%20Group%20build%20II/Group%20Badge/NMFIIGBbadgesmall.jpg


  • Member since
    December 2002
  • From: Bury St Edmunds, Suffolk, England
Posted by Bish on Monday, October 14, 2013 10:52 AM

Really nice build there, I like the white wash finish.

I am a Norfolk man and i glory in being so


On the bench: Airfix 1/72nd Harrier GR.3/Fujimi 1/72nd Ju 87D-3

  • Member since
    March 2003
  • From: Western North Carolina
Posted by Tojo72 on Monday, October 14, 2013 11:51 AM

I really like it,the Magic Tracks,their sag and weathering came out good.

Is this DML 6254,I have that KT in the stash,slated for an early next year start

  • Member since
    April 2013
Posted by SchattenSpartan on Monday, October 14, 2013 12:15 PM

Thanks for all the nice words, gents!

Doog: Yeah, I definitely have to improve on my track weathering. I actually used different pigments and it looked really nice with a lot of different shades of brown when wet, but the effect disappeared almost completely when the pigments were dry. You can see a wee bit of color change in some spots if the lighting is right. I might come back at some point and try to imrove the mud, but I'm quite happy with how the kitten looks now.

Tojo: Yep, it is 6254, but there are no figures included in my kit (the sprues are mentioned in instruction sheet, but are simply missing) I got myself a second kit already because I like like that much...

  • Member since
    October 2013
Posted by Tiger 1 tank crew on Tuesday, October 22, 2013 7:41 AM
Great job! I have recently ordered that exact kit and should be here any day now.
  • Member since
    April 2013
Posted by SchattenSpartan on Tuesday, October 22, 2013 9:28 AM

Thank you! You won't regret ordering it. It's a great kit!

  • Member since
    November 2005
Posted by T26E4 on Tuesday, October 22, 2013 10:34 AM

Nice work Clemens.  Something that I struggle with when doing the worn whitewash camo jobs is paying attention to what areas should show the most wear on the whitewash.  If you plan more carefully, I think you'd clean the whitewash off of the commander's hatch area more and less so from the areas that receive little to no actual wear.  Also with the engine vents: know which are intake vs. outgoing vents.  GL with your next model!

Roy Chow 

Join AMPS!

http://www.amps-armor.org


JOIN OUR COMMUNITY!

Our community is FREE to join. To participate you must either login or register for an account.

SEARCH FORUMS
FREE NEWSLETTER
By signing up you may also receive reader surveys and occasional special offers. We do not sell, rent or trade our email lists. View our Privacy Policy.