SEARCH FINESCALE.COM

Enter keywords or a search phrase below:

1/35 Tamiya Jagdtiger progress "Weathering the Big Kitty"

3442 views
7 replies
1 rating 2 rating 3 rating 4 rating 5 rating
  • Member since
    January 2013
1/35 Tamiya Jagdtiger progress "Weathering the Big Kitty"
Posted by ievil on Wednesday, January 22, 2014 12:24 PM

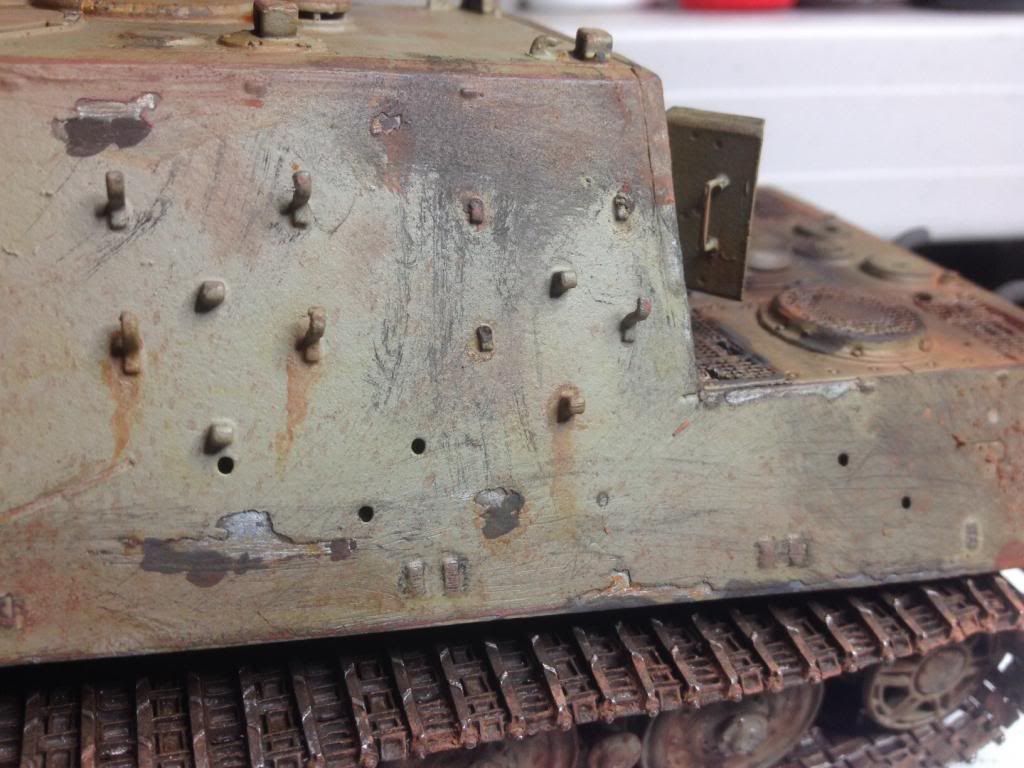
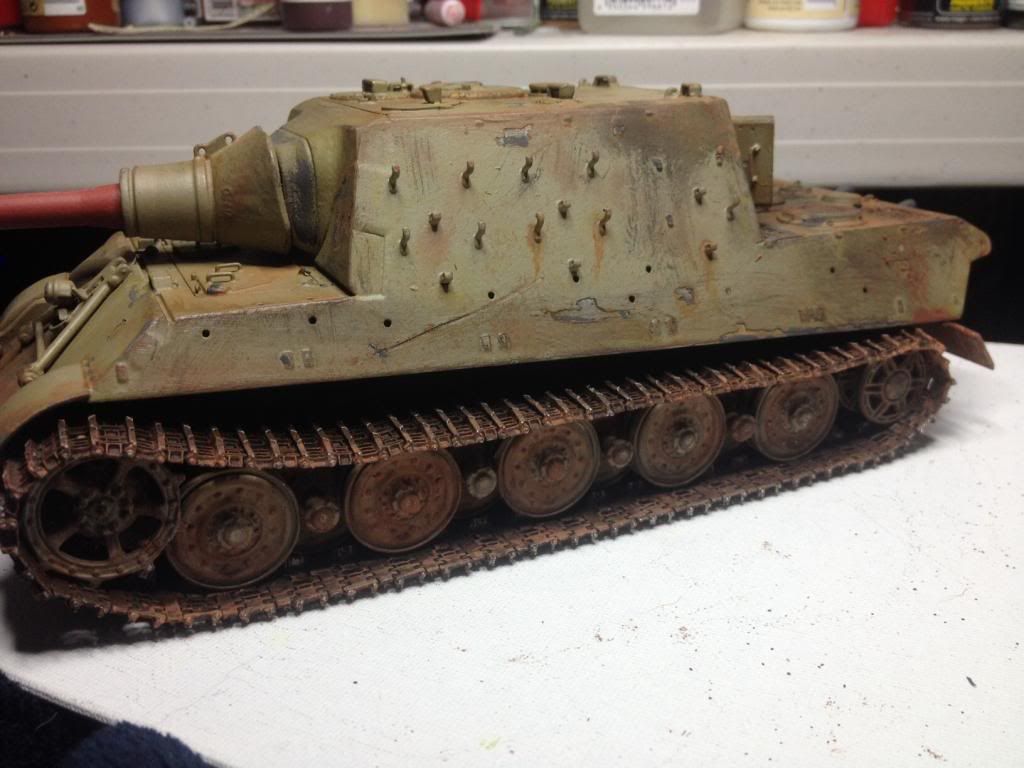
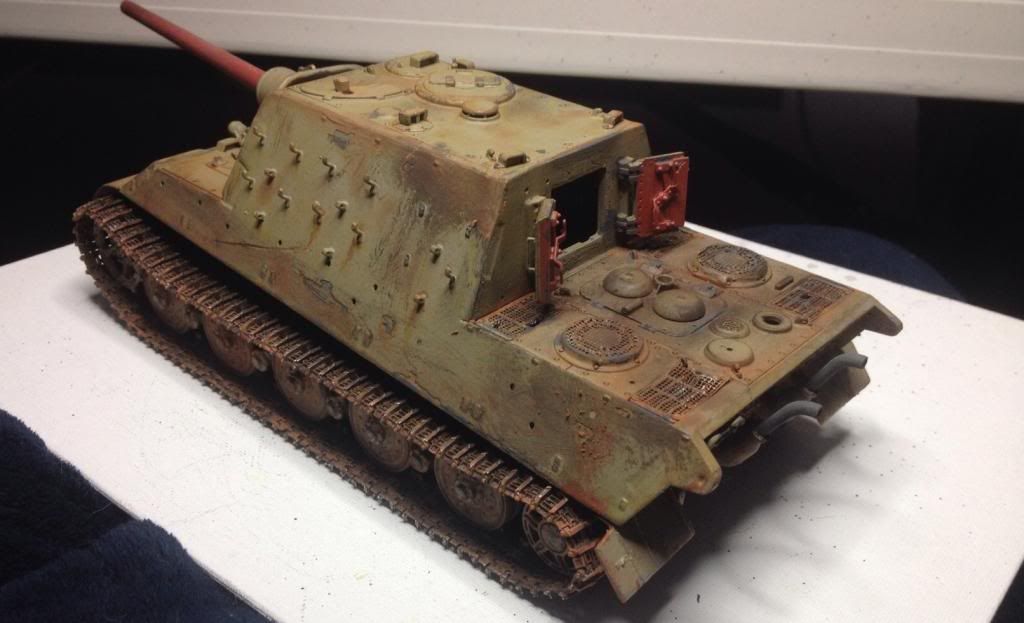
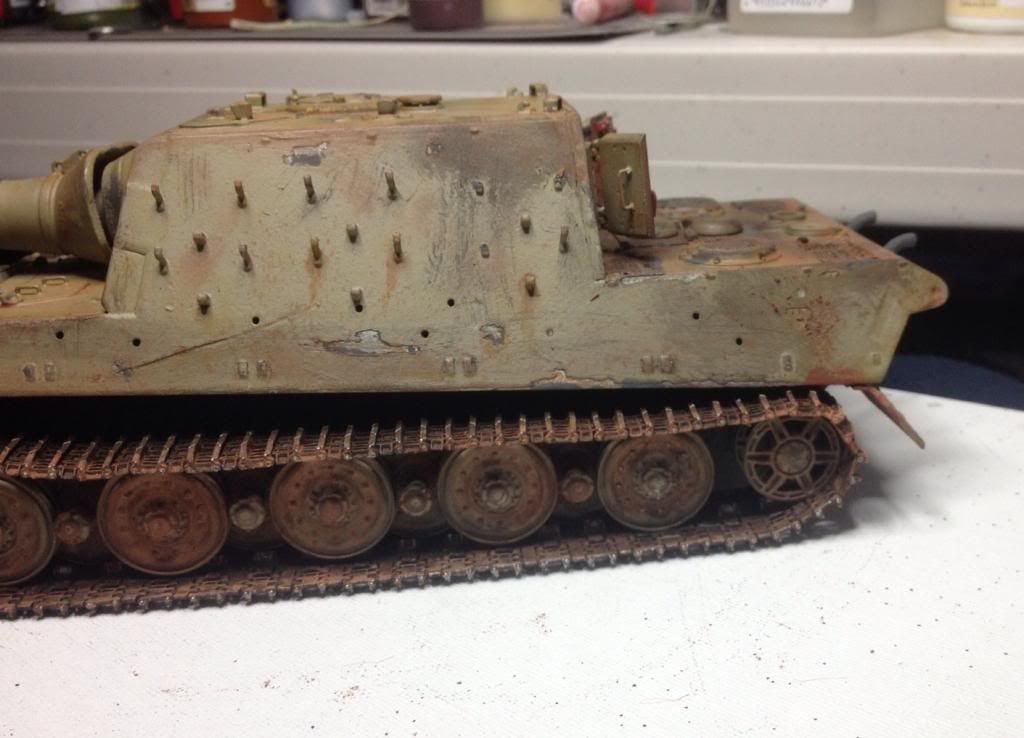
Big SmileSo here is the progress on my 1/35 Tamiya Jagdtiger, I tried to post this the other day, but had some issues, so I tried to remove my post, to try again... So here it is:

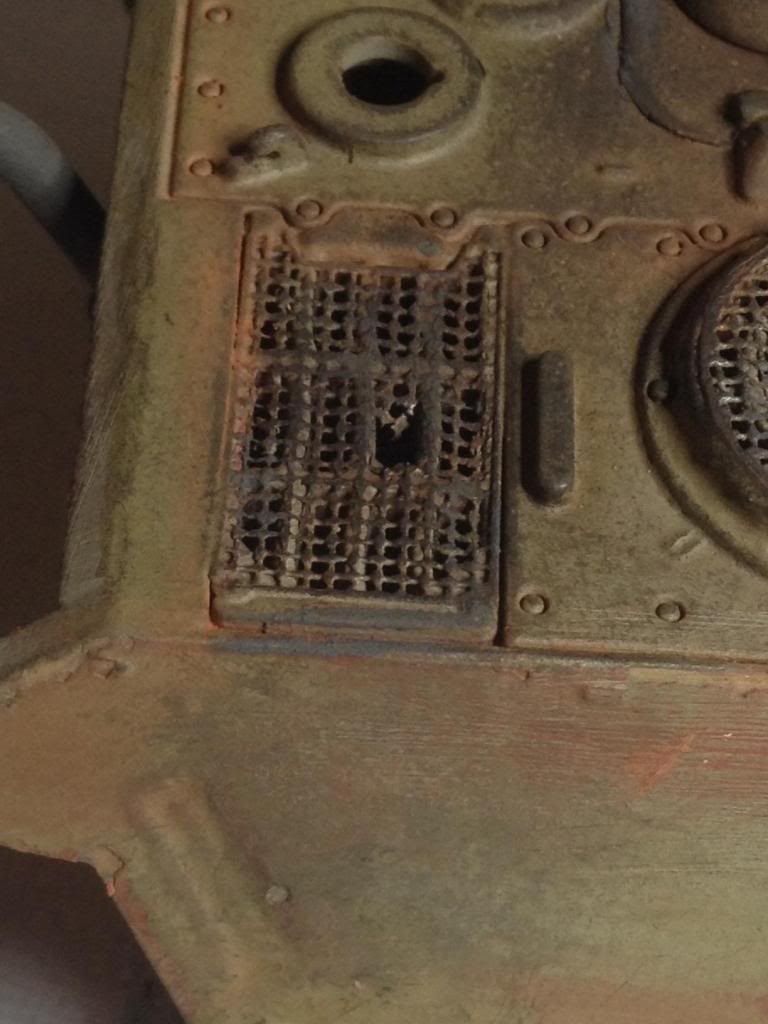
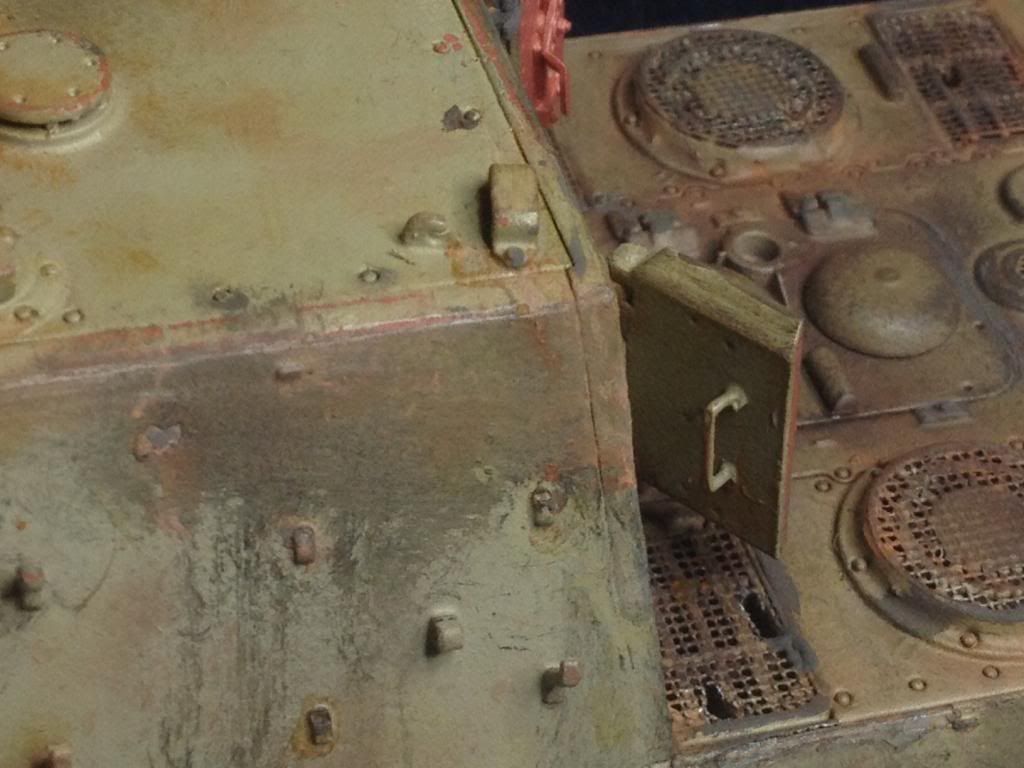
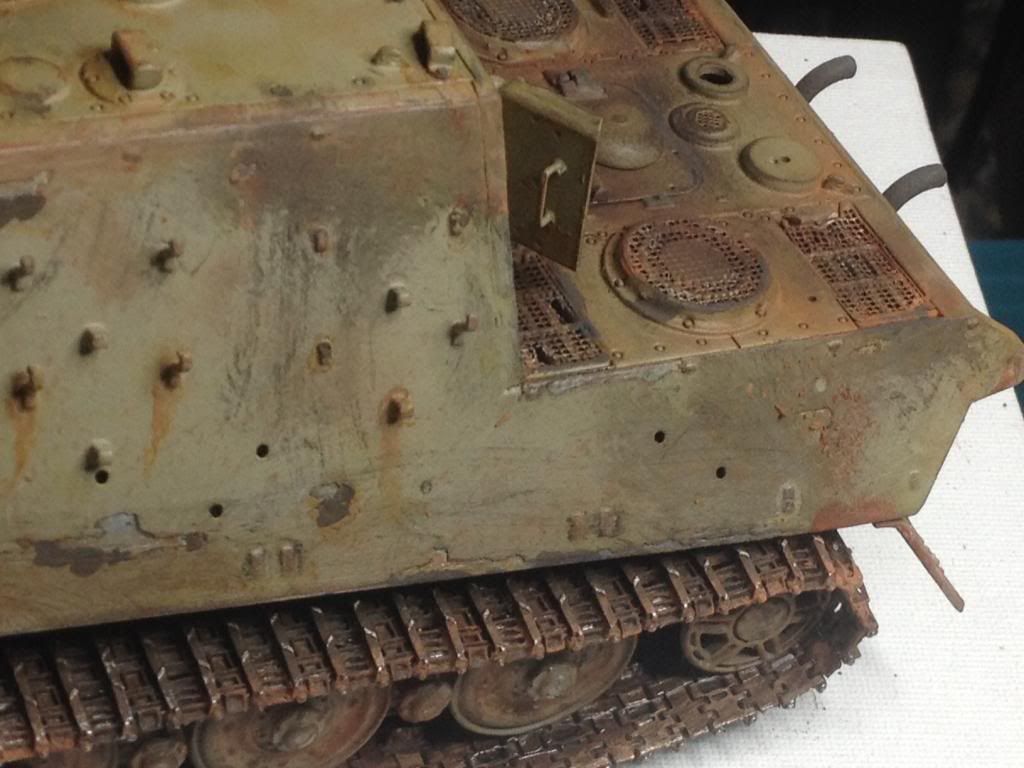
This Big Cat has gone through numerous stages, to get the outcome you see in the photos, but please keep in mind, that this is a "progress" report, and not the final product....

To start, I cleaned all the parts in warm soapy water, then I used a large paint brush and wiped her down with 99% alcohol, and let it air dry.

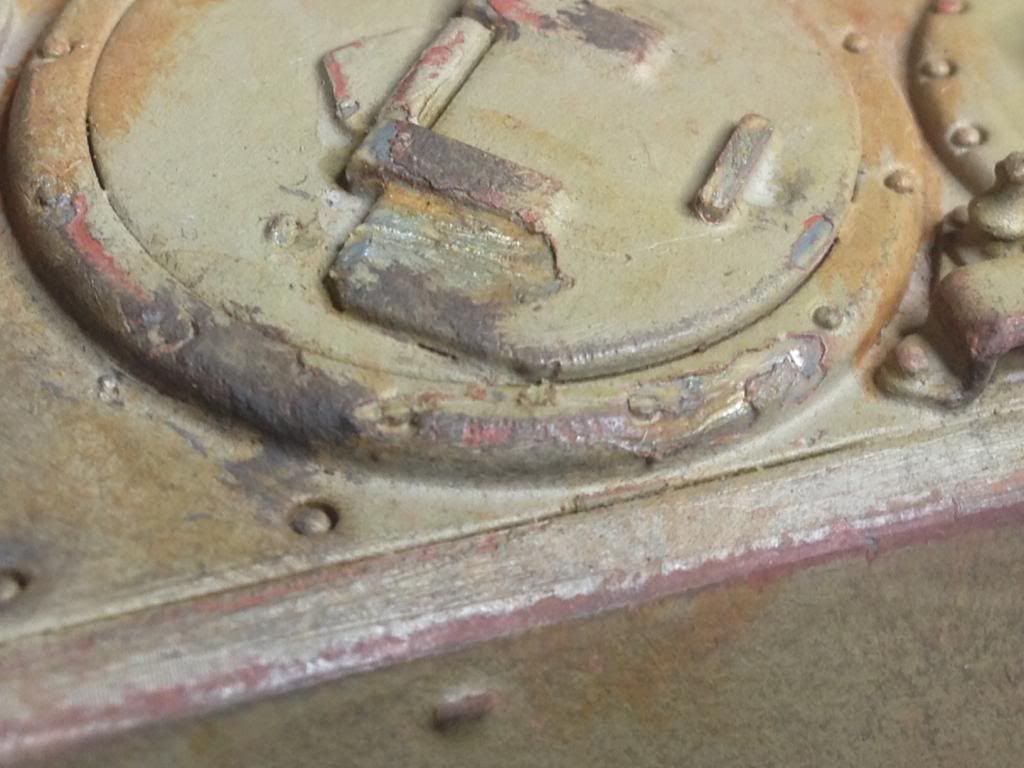
Now the 1st coat was 3 layers of Krylon Metallic Matt  aluminum, this was for the chipping process,then 1 light spray of hairspray ( Garnier Fructis Style - Hold & Flex - Extra Control Spray) this brand sprays a fine mist, and it works well! Then I added 3-4 layers of Krylon  Dual Paint & Primer Satin ( Brick Color) this was to replicate Red Oxide primer, after this was good & dry, I then sprayed 3-4 coats of the hairspray again, this was done, one layer @ a time, letting each layer dry to touch, before adding the next! After every area that was sprayed, was completely dry to touch, I then sprayed with Krylon's "Ultra Flat Camouflage" Fusion for Plastics (Khaki color), I applied 3 coats, making sure to cover everything! And then letting it all dry.... Now I proceeded to Chip, scratch and pretty much bang this beast in to submission! Lol

once I had the damage, I was happy with? I then applied "Ammo of Mig" products, including rust effects, washes, mud and staining, all the items I used are here: http://www.migjimenez.com .

although it seems like there was allot of work to get to this point?. It was really mostly done over a 2 day period... But it is far from done, as I have small items to add (ie: tow cables, tools, road wheel wear, barrel color and weathering, and I am thinking that this Big Cat deserves a dio, what do you think guys?
"Suffer Well...."

On Deck: 1/35 Hobby Boss GMC w/bofors 40mm Gun, 1/35 Tamiya Jagdtiger, 1/35 Bronco 5t 'Diana', 1/35 Bronco Land Wasser-Schlepper mid pro

Wall of Shame: 1,300+ kits & counting

  • Member since
    March 2013
  • From: Puebla, Mexico
Posted by garzonh on Wednesday, January 22, 2014 2:33 PM

WOW! very convincing rust and grime, chipping look.

I only have a couple of observations...

Was the tank really having those things hanging around on the sides?, what was the use for them?

As for my opinion, seems you did not put all of them on it, as to display they were lost in battle and/or use, but the holes in the missing ones look perfectly round holes and clean, I guess if some of them were damaged, they would bend or just the tip knocked, it will not leave a hole through the armor plate to see the interrior...just a small observation.

But I like, very much the color fading and chipping.

Good work!

  • Member since
    January 2013
Posted by ievil on Wednesday, January 22, 2014 4:28 PM

Thanks for the comment! But like I mentioned above, it's not done yet, and those holes are for the tools, cables and other items to be added still

"Suffer Well...."

On Deck: 1/35 Hobby Boss GMC w/bofors 40mm Gun, 1/35 Tamiya Jagdtiger, 1/35 Bronco 5t 'Diana', 1/35 Bronco Land Wasser-Schlepper mid pro

Wall of Shame: 1,300+ kits & counting

  • Member since
    March 2003
  • From: Western North Carolina
Posted by Tojo72 on Wednesday, January 22, 2014 4:50 PM

wear and tear looks very convincing

  • Member since
    January 2014
Posted by radfahrer on Wednesday, January 22, 2014 6:37 PM

Nice, she's seen some fighting! I really like how your paint chipping has turned out, especially down by the tracks. The different layers really make the chips pop. Is that "thickness" created by the hairspray layers?

  • Member since
    January 2007
Posted by the doog on Wednesday, January 22, 2014 8:35 PM

I'm so happy to hear that you're not finished with the barrel color. I assume that you will be painting it in the correct shade of dark gray primer? It would be a shame to leave it in primer red, now that the information has been confirmed that this was an error for many years in modeling. Smile

  • Member since
    January 2013
Posted by ievil on Wednesday, January 29, 2014 8:02 PM

No, it'll be finished in german grey (mig) and then weathering, but all my armor is done with my method of 4 stages of coloring ( various layering of each, depending on the paint applied) (1) flat metallic color (2) primer - red oxide for this kit (3) hairspray - fine misting type (4) exterior color - either camo or solid color, and then chipping, scratching, then weathering paints, washes and powders, with rust and metallic fine touches.

"Suffer Well...."

On Deck: 1/35 Hobby Boss GMC w/bofors 40mm Gun, 1/35 Tamiya Jagdtiger, 1/35 Bronco 5t 'Diana', 1/35 Bronco Land Wasser-Schlepper mid pro

Wall of Shame: 1,300+ kits & counting

  • Member since
    January 2007
Posted by the doog on Wednesday, January 29, 2014 8:36 PM

Glad to hear that, ievil. That's the only way to go for a "professional" finish--layering. I am of the same school, if you will...

I'm glad too, that you're not mad for my posting that information again; you know, about the color. I did it only because I myself was unaware of the "updated" informationon the subject at one time, and wanted to make sure that other newer modelers didn't get misdirected by your "in progress" work. :)

Can't wait to see you finishthis baby up!

JOIN OUR COMMUNITY!

Our community is FREE to join. To participate you must either login or register for an account.

SEARCH FORUMS
FREE NEWSLETTER
By signing up you may also receive reader surveys and occasional special offers. We do not sell, rent or trade our email lists. View our Privacy Policy.