SEARCH FINESCALE.COM

Enter keywords or a search phrase below:

Dragon Vorpanzer---FINISHED PICS!

23567 views
154 replies
1 rating 2 rating 3 rating 4 rating 5 rating
  • Member since
    November 2009
  • From: SW Virginia
Posted by Gamera on Monday, March 30, 2015 7:51 AM

Yes! I really like how things are going!

"I dream in fire but work in clay." -Arthur Machen


  • Member since
    January 2007
Posted by the doog on Monday, March 30, 2015 9:26 AM

Thanks, Chris, Cliff and Steve! I appreciate your kind comments!

Castelnuovo (name???) to do the wood handles, paint the wood part a light tan. Then use raw umber oil paint to paint a wash on the "wood". The wash should be rather thick at first. Let it dry for about ten minutes, then take a clean brush that is wet with thinner and "clean" a percentage of the wash brushing in a longitudinal direction, that is, with the "grain" as you would like to see it. You can also add some orange oil paint or a "rust" color to it to vary the amount of warmth to it. You can also go back and add "grain" to it using a very fine brush.

The only thing that you have to watch is to not make the handle look "stained", like as if it's fine mahogany or something. I've seen some guys who do tools as with a deep, rich red stain, and they just don't look right. Pretty, but not really appropriate. I like to use a little bit of grey in the wood wash mix to show wear and ground-in dirt in the handle. Then I may scribe in umber "grain" with a very fine brush.

Hope this helps!

  • Member since
    December 2007
  • From: Eagle River, WI
Posted by PANZERJAGER on Monday, March 30, 2015 11:11 AM

Very interesting technique there Karl!

It is much harder to "pull off" a monotone camo job vs. a multicolor one, and make it believable.

I like were you're going with this one.

I don't know if I would do too much more to it though, you could go too far...

Congrats so far "mein freund!"

PANZERJAGER

 PANZERJAGER


  • Member since
    December 2012
Posted by RX7850 on Monday, March 30, 2015 8:21 PM

Simply perfect. Your technique brings out all the intricate details of this kit.

  • Member since
    May 2006
  • From: Queensbury,NY
Posted by panzer88 on Monday, March 30, 2015 10:00 PM

Looking totally awesome.


  • Member since
    October 2007
  • From: Louisville, KY
Posted by pordoi on Tuesday, March 31, 2015 6:57 PM

PANZERJAGER

I don't know if I would do too much more to it though, you could go too far...

Karl, for what it's worth, I agree with Panzerjager.  Looks pretty weathered as is.  Depending on what you have planned, it might be a bit too much to give this the full treatment of pigments and other weathering approaches.  What are your plans?

Don

  • Member since
    January 2007
Posted by the doog on Tuesday, March 31, 2015 7:07 PM

pordoi

PANZERJAGER

I don't know if I would do too much more to it though, you could go too far...

Karl, for what it's worth, I agree with Panzerjager.  Looks pretty weathered as is.  Depending on what you have planned, it might be a bit too much to give this the full treatment of pigments and other weathering approaches.  What are your plans?

Don

Oh ye of little faith! Big Smile lol! Don't worry, I'm not going to "ruin" it! Propeller

There are certain effects that I can't get with these acrylics. I can't get "texture" in the weathering like grainy mud or dirt. This "pre-weathering" step certainly took me a lot farther than I thought I could take it--I'm really quite thrilled with it, to be honest, but I will add some pigments to give the bottom hull some textured mud/dirt. Not a LOT, mind you. I also plan some spattering and speckling to give some very subtle spots and tones.

Also, the tracks need pigments and other treatments.Some choice oil stains and pools will be just the finishing touches to set it off. I may have an update later.. stay tuned!!! Big Smile

  • Member since
    October 2007
  • From: Louisville, KY
Posted by pordoi on Tuesday, March 31, 2015 7:33 PM

the doog

Oh ye of little faith! Big Smile lol! Don't worry, I'm not going to "ruin" it! Propeller

Smile  Ruin it?... haven't lost the faith, no way  Bow Down   Just didn't want to see this turn out to be the Panzer found buried in the woods in the coal country of Northern Pennsylvania. Big Smile  BTW, went to school at Kutztown and had many friends from St Clair and areas north...  Cool

Don

  • Member since
    January 2007
Posted by the doog on Tuesday, March 31, 2015 7:58 PM

pordoi

the doog

Oh ye of little faith! Big Smile lol! Don't worry, I'm not going to "ruin" it! Propeller

Smile  Ruin it?... haven't lost the faith, no way  Bow Down   Just didn't want to see this turn out to be the Panzer found buried in the woods in the coal country of Northern Pennsylvania. Big Smile  BTW, went to school at Kutztown and had many friends from St Clair and areas north...  Cool

Don

Don, that's so cool!!!! I dated a girl from Kutztown U once--wow, what a wild bird she was! St Clair is well known to me---I've explored it, and found the remains of St John's Eagle colliery, and found the old slope mine that served it as well as the well-known water-level drift entrance behind the Burger King! We used to do an enduro race that took us up in the coal hils there behind St Clair where there was a lot of old minng gear. We'd run up those HUGE culm piles on our dirt bikes, and bounce around on all those boulders and old coal roads..ah yes, good times they were! My sister lives down jusat past Pottsville.  Smile

  • Member since
    January 2007
Posted by the doog on Tuesday, March 31, 2015 8:55 PM

Again, thanks, all who have weighed in! I have another update, and don't worry, I"m not going to "go too far" Wink I really like the way this is coming out, and I don't want to cover it up too much.

So, last night before I went to bed, I did a quick acrylic wash of the lower hull, just slapped it on and let it dry overnight. More of that in a minute--now. I wanted to get a start on the tracks, which needed some color before I really addressed their metallic tones. I used a combination of Raw Umber,Terra Cotta, and Clay Bisque--interesting names, but really just a rust color with a darkening and/or lightening agent.The tracks have already been airbrushed a deep Brown. (darkened w/ Black)

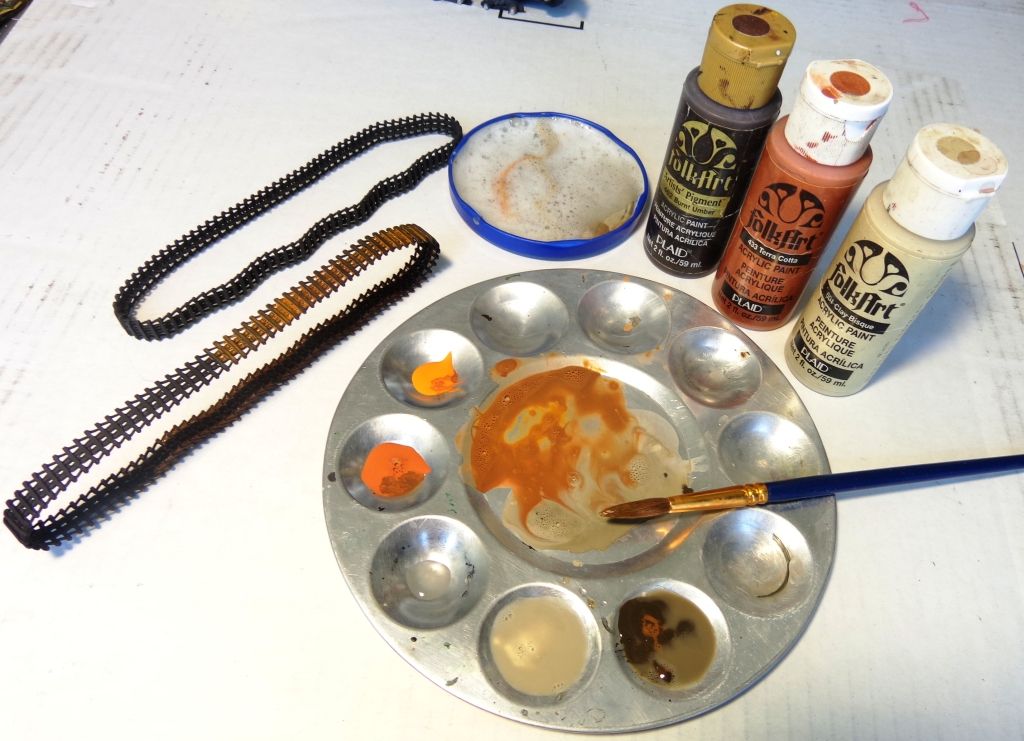
Load up the brush and slap it on. Make sure to get it in all the treads...

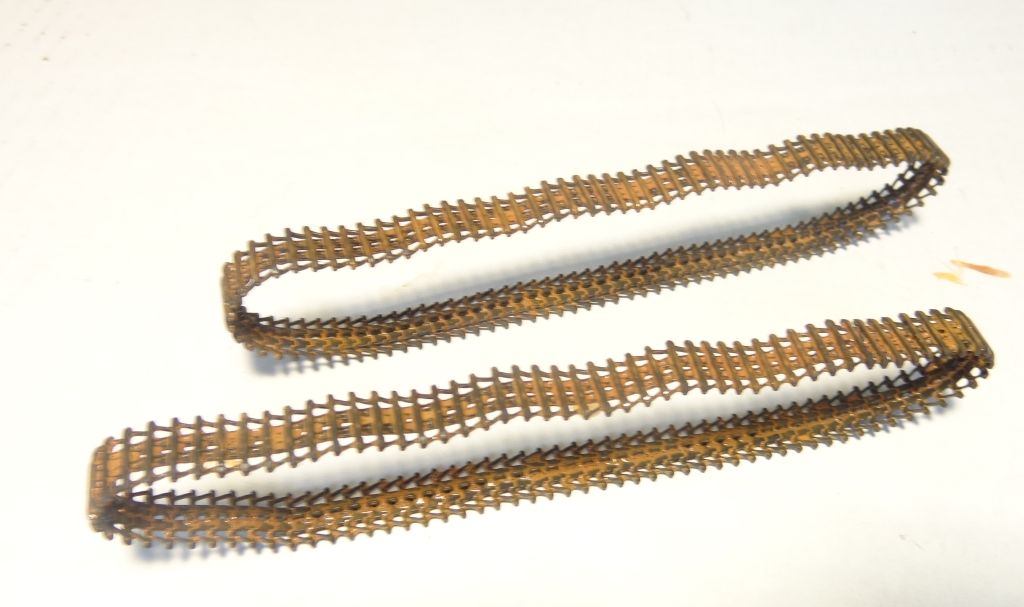
When it was wet, it had the depth I wanted, but when it dried it didn't quite stand out from the deep Brown.

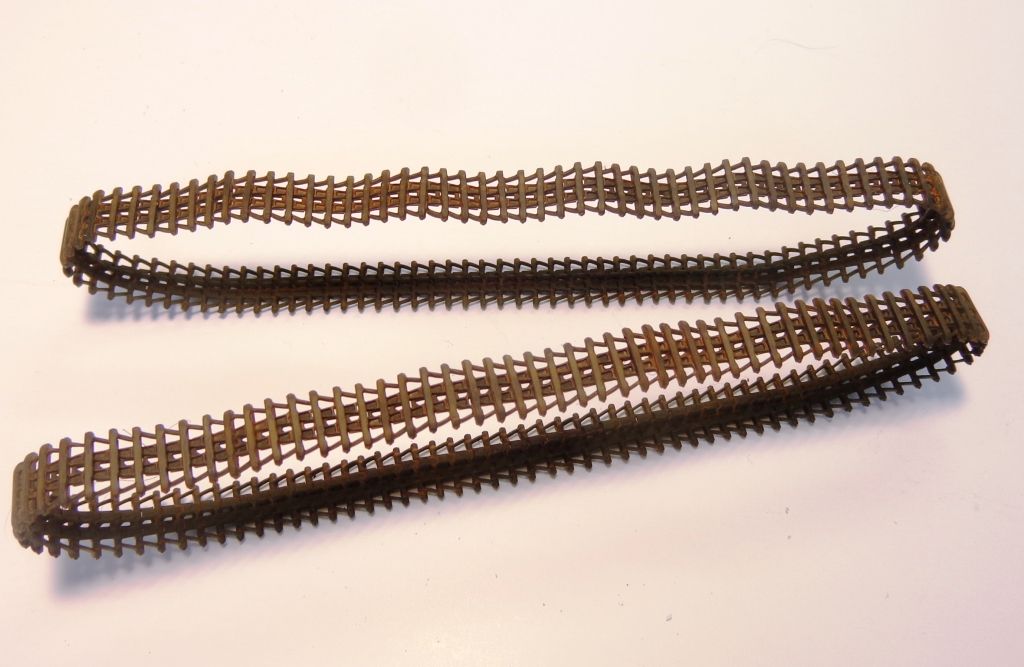
It's actually darker in real life--the camera picked out more of the rust. So I decided to add some Wilder pigments. I used Track Dark Brown, Light Rust and Red Rust, and mixed them together in a cup.

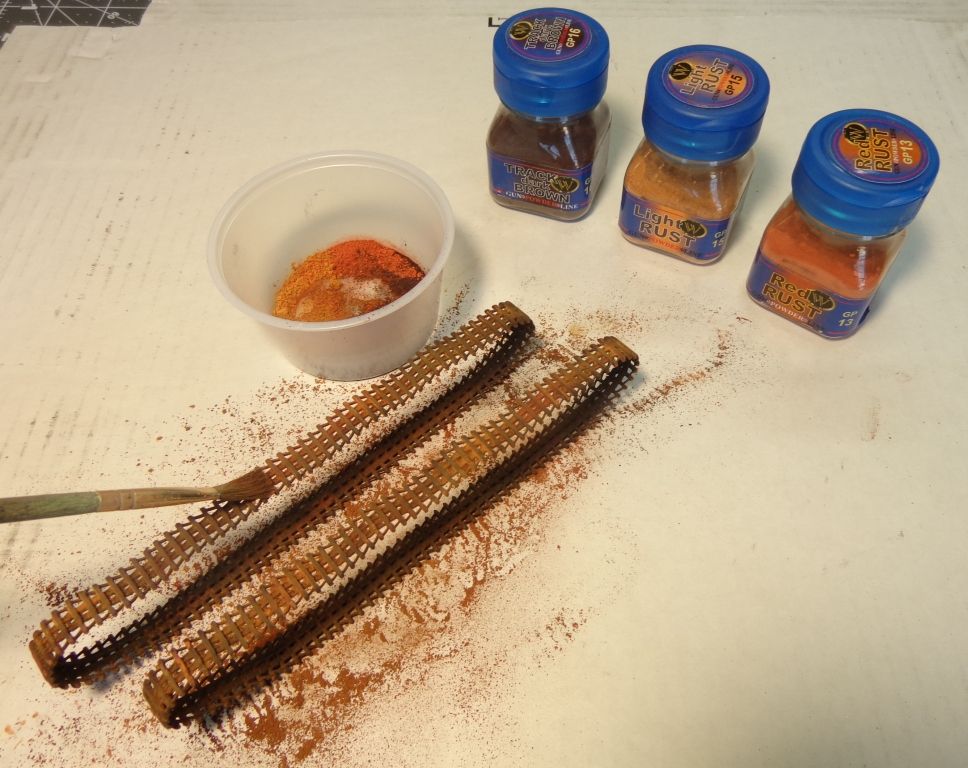
I fixed these with some sprayed-on WIlder fixer when I had covered the whole tracks, This will give some nice texture to the tracks. More on those in a future update.

I was pretty pleased for the most part with the hull wash which had dried overnight. I needed to put some more color under the fenders though, so I loaded up a large, soft brush and rather haphazardly run down some streaks of color. REMEMBER that each brush load of paint would be dipped in a pool which had some degree of soap in it to cut the surface tension--THIS IS VITAL to get proper dispersion and flow of paint.

On the one side, there were these weird little pooled "balls" of paint and I wanted to see if I could de-emphasize them and also get some bare areas in there for variety.

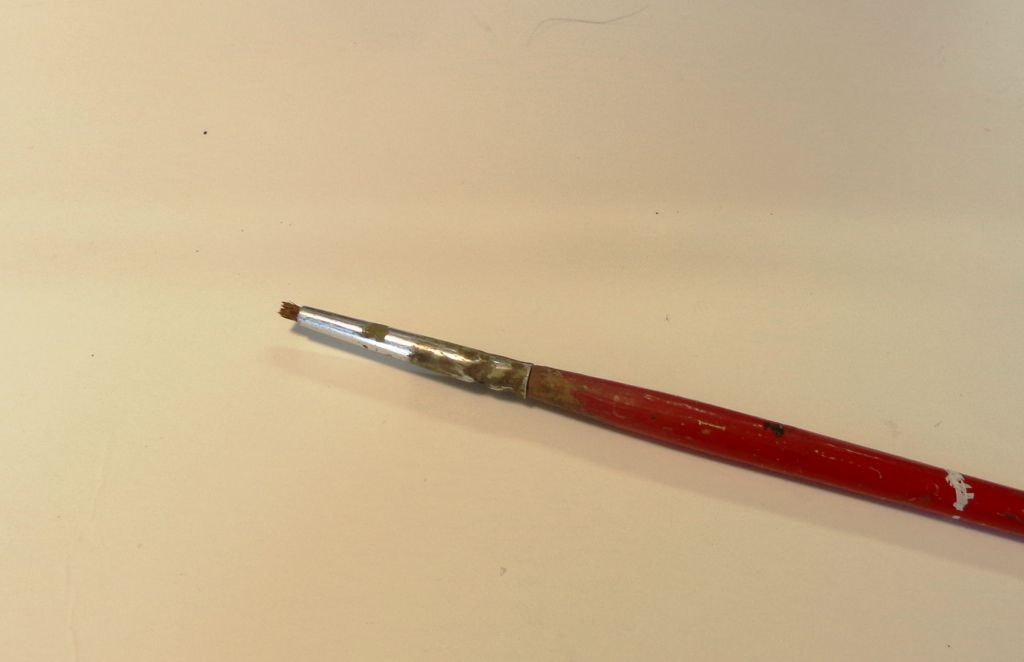
I used this brush...it's a short-bristled thing of my own creation.

I forgot to mention last night that I found that, by wetting the brush and dabbing it in a little raw soap, I could actually scrub away the dried acrylic! This paint apparently does not exactly harden like what we would expect of regular hobby acrylics---it can be scrubbed away within a rather long time period. It takes a little effort, but it actually works!

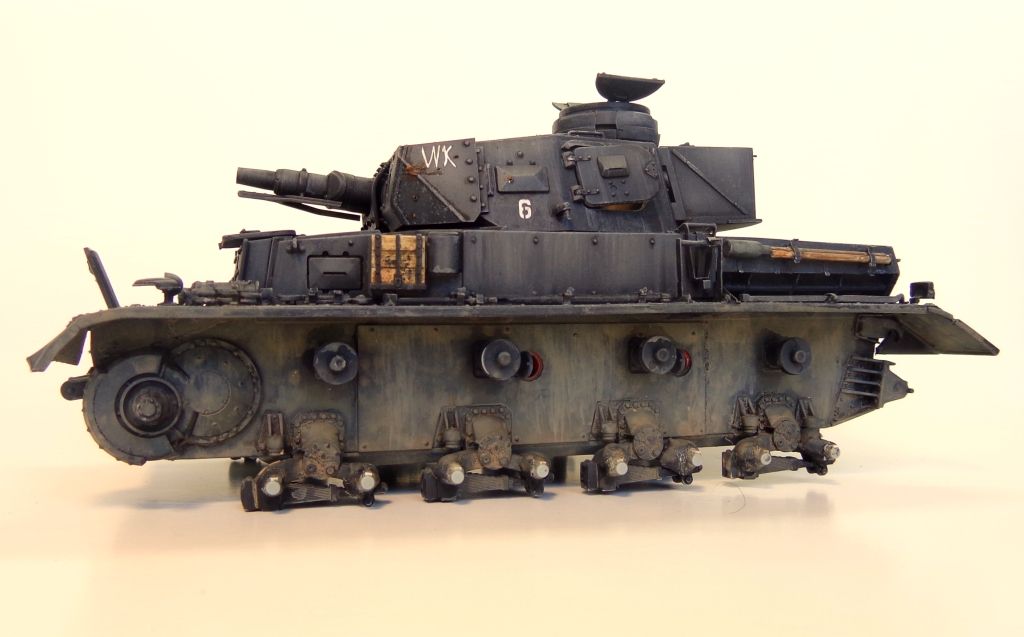
I have also found that by simply wetting the brush and dabbing off most of the water, you can "scrub": against tide marks and sharp lines of delineation to smooth them out. Look at the before-after shots here.. I used this technique on the top hull as well. It works wonderfully.

Much smoother, right? Stick out tongue

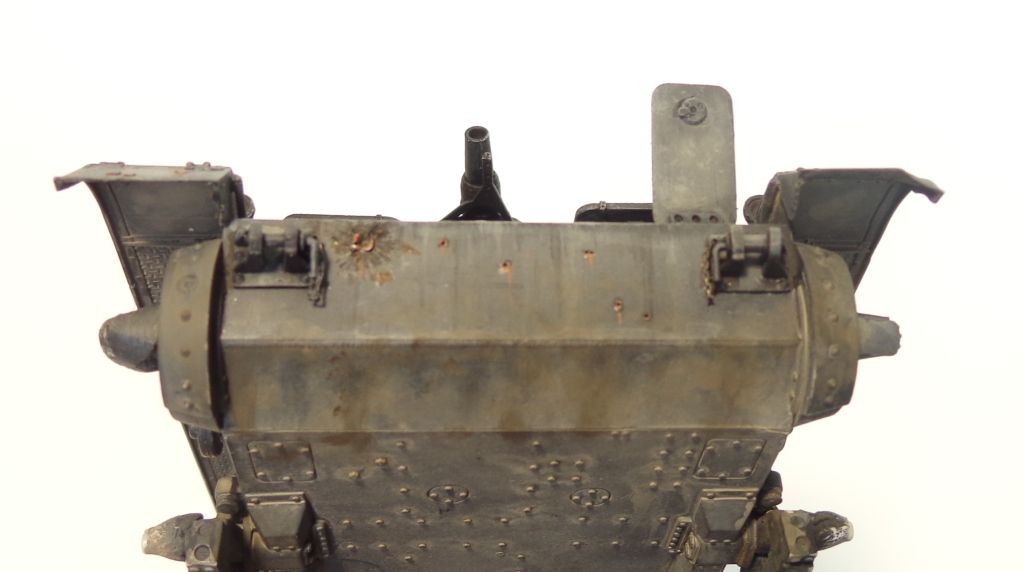
The bottom of the tank is also similarly smoothed and refined.

Here's the bottom weathering so far, without any pigments or additional washes.

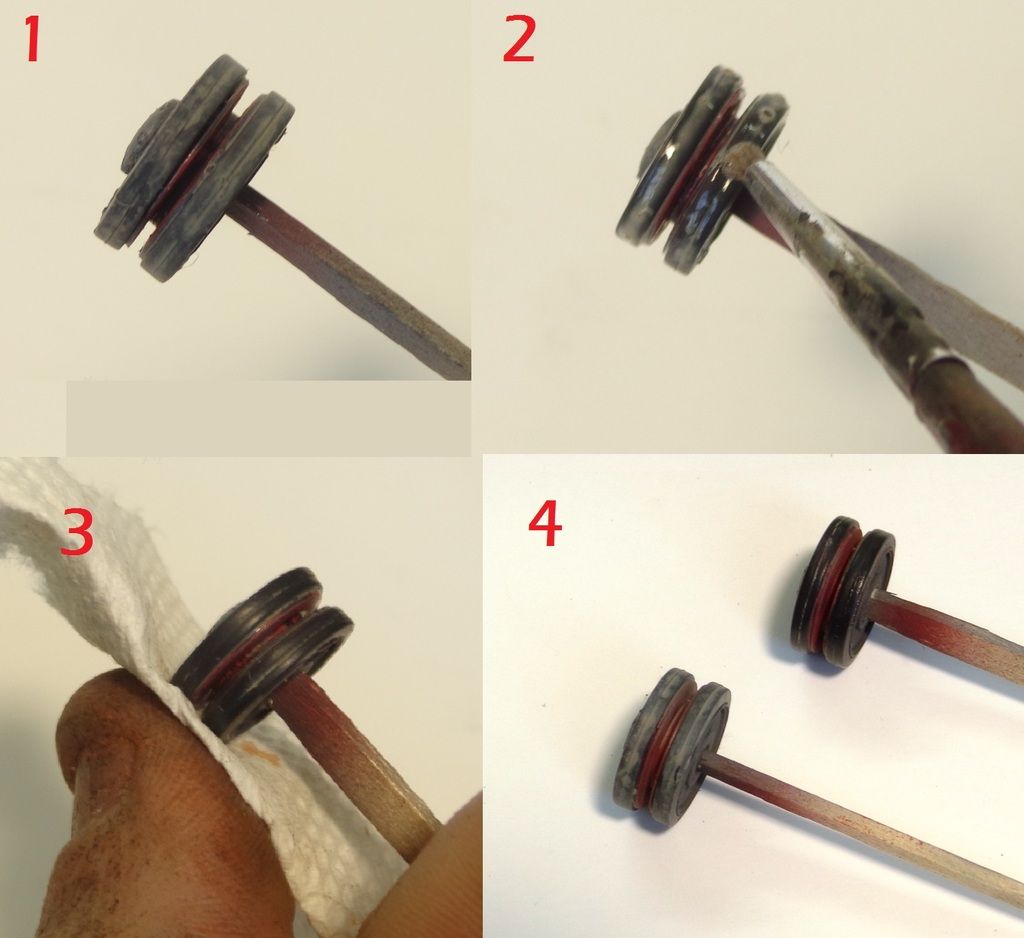
The wheels got a liberal coating of paint-gunk. They looked a little too monochromatic for me, so I wondered if they could be cleaned up a little to reflect how the rubber would have been rubber clean during contact with the wheels? And just in case you're wondering--YES, I painted each and every wheel one by one, by brush...Propeller

I tried my trick with the small brush again:

1. The wheel before...

2 Using the brush and some soapy water

3 clean it off with a paper towel

4 the original wheel and the clean one.

That was today's efforts...more to come, in a few days.

By the way, I contacted Plain Industries, makers of all the craft paints, and asked them what their thinner or carrier was, with the intent of being able to possibly airbrush them, since the pant itself is a little oily almost, and needs water thinning in order to best and most effectively brush paint it. I got a swift response;

                          "We do not make a thinner for our paint products. We do not recommend our paints for airbrush".

Sigh...oh well. Looks like I'm "going Frankenstein" if I want to AB these in the future!

Hope you all are enjoying the latest lab rat... Big Smile

Tags: W
  • Member since
    January 2006
  • From: California
Posted by SprueOne on Tuesday, March 31, 2015 9:27 PM

pure artistry Mr. Doog

I remember my baby sitter (at the time an older lady) would thin craft acrylics with Smirnoff .

Or maybe that was her excuse for always having a glass of it on the table while she painted ceramic figures Hmm 

Anyone with a good car don't need to be justified - Hazel Motes


Iron Rails 2015 by Wayne Cassell Weekend Madness sprueone

  • Member since
    February 2014
  • From: Michigan
Posted by silentbob33 on Wednesday, April 1, 2015 8:46 AM

That is fantastic Karl!  I think I might try the same thing with the Hellcat I'm working on.  I love the dusty look you've created.  I cant' wait to see the next installment.

On my bench: Academy 1/35 UH-60L Black Hawk

  • Member since
    February 2014
  • From: Michigan
Posted by silentbob33 on Thursday, April 2, 2015 5:27 PM

By the way, are you doing the weathering with acrylic paints on a flat or gloss surface? Sorry if that's a dumb question but I'm an armor newbie

On my bench: Academy 1/35 UH-60L Black Hawk

  • Member since
    January 2007
Posted by the doog on Thursday, April 2, 2015 8:38 PM

Thanks, guys! I should have another update over the weekend; heck, I may be finishing it by then!

SilentBob I am doing this over a semi-gloss or flat surface. NOT shiny--gloss!

  • Member since
    November 2009
  • From: SW Virginia
Posted by Gamera on Friday, April 3, 2015 10:05 AM

Karl, thanks for the commentary on how you're doing all this weathering. I'm going to have to drag out a paint mule and give it a go myself.

"I dream in fire but work in clay." -Arthur Machen


  • Member since
    December 2002
  • From: Bury St Edmunds, Suffolk, England
Posted by Bish on Friday, April 3, 2015 12:24 PM

Nice work Karl and a great tut there.

I am a Norfolk man and i glory in being so


On the bench: Airfix 1/72nd Harrier GR.3/Fujimi 1/72nd Ju 87D-3

  • Member since
    January 2007
Posted by the doog on Friday, April 3, 2015 9:21 PM

Hey Cliff, I'm happy to share! Nothing like paying back the forum that taught me to be a better modeler! Thanks to, Bish; glad you're diggin' it!

UPDATE!

I've started to add speckling and spattering. For the record, "speckling" is adding tiny dots of color--almost like pixels--to the model surface to add very subtle tonal variations to the finish. "Spattering" is to simulate mud thrown up in travel.

Here, I'm spattering the muffler and rear. I also did this around the whole suspension area. I used speckling on top of the tank, concentrating on the front hull top and rear deck.

Using Wilder rust tones to "speckle" the tracks,

Just gonna get right to the results: here's where I am so far...I think that I've added another layer to the weathering. You can still see the variation of the acrylic washes, but there's even more subtlety to the finish if you look closely.

I am pretty sure that the next update will be a "Finished" post! Stay tuned, and thanks for looking in!! Smile

  • Member since
    July 2003
  • From: On my kitchen counter top somewhere in North Carolina.
Posted by disastermaster on Friday, April 3, 2015 10:20 PM

Okay king tut ..... http://www.smiley-lol.com/smiley/celebre/antiquite/egyptien15.gif

 Just when this gets good, it gets better.

 You really have a "good eye" for this type of thing 'ya know.

 I have a good eye too;http://thumbs.ebaystatic.com/d/l96/m/m_ZJ0d3pyvsDgd8lWrTzrpQ.jpg

unfortunately, a blind one to go along with it.


You might ought'a add a bit o' dried mud sandwiched inside those drive sprockets on front....... and don't forget to polish up those sprocket teeth.

           (dang, I gotta hop back over to the house tomorrow and do some more work on it... at least it's easter)

           I'ma     http://i92.photobucket.com/albums/l28/michael51091/bunnyhop.gif~original  hoppin'.

Save

Sherman-Jumbo-1945

"I was so much older then, I'm younger than that now"


  • Member since
    April 2006
  • From: ON, Canada
Posted by jgeratic on Friday, April 3, 2015 10:23 PM

Karl - wow!  I tell ya, if I had no self control I would need to fetch me a drool bib - lol!

So the speckling technique is just appropriate vehicle colour(s),  but  applied in the same fashion as spattered mud by flicking a stiff brush?

regards,

Jack

  • Member since
    December 2003
  • From: Charleston, SC
Posted by sanderson_91 on Saturday, April 4, 2015 9:00 AM

Karl,

Your model is amazing!  I've been following this build closely.  I usually build aircraft, but I'm really getting the urge to start on some armor!  Thanks for sharing!!

Steve


  • Member since
    January 2007
Posted by the doog on Saturday, April 4, 2015 9:29 AM

lol, thanks Steve for the recommendations--I'm going to get to all those little details in the next "installment". I did shine up the sprocket teeth when I put the tracks on last night. Hopefully this should be finished by early next week--I've go a busy weekend here too; lots of "DYI" projects on my "Honeydo" list! lol

  • Member since
    December 2003
  • From: Colorado
Posted by psstoff995 on Saturday, April 4, 2015 9:44 AM

Wow!! Looking better and better Karl, really well done, spot on in my opinion for a vehicle that's been out in the field for months without the benefit of a wash rack. The acrylic to me is like the old, forgotten and rained on dust and mud of weeks gone by, while the splattering is the stuff they just drove through. Really shows a lot of "vehicle history" alongside the rusty old battle damage and the new, shinny silver hit.

jgeratic

So the speckling technique is just appropriate vehicle colour(s),  but  applied in the same fashion as spattered mud by flicking a stiff brush?

I had the same question, I remember a while back there was a lot of tutorials (and I think you had a few yourself) with the oil paint, polkadot turned streak approach (I'm sure that had a real name...). That involved all kinds of different, random colors, so I was wondering how exactly you went about speckling, as that technique sounds totally different.

Anyway, well done- really looking forward to the next update! YesSmile

-Chris

US Army Infantryman

  • Member since
    January 2007
Posted by the doog on Saturday, April 4, 2015 9:57 AM

jgeratic

Karl - wow!  I tell ya, if I had no self control I would need to fetch me a drool bib - lol!

So the speckling technique is just appropriate vehicle colour(s),  but  applied in the same fashion as spattered mud by flicking a stiff brush?

regards,

Jack

Jack, thanks for the kind words!' Chris, I just saw your post--thanks too, bud; I"ll try to answer both your questions...

You can use speckling in either altered base tones or in rust tones--what it does is add tiny dots -- I like to think of them as "pixels" of color to the finish. If you do it in lighter/darker base tones, it breaks up the monotone finish in a very subtle way that only gets better the closer you look at it. If you use rust tones, you get a nice weathered appearance of old chips and just plain old "age" that adds years to your finish.

Speckling is basically the same technique, but using dirt and mud tones. You have to experiment with paint thickness and viscosity though, and honestly PRACTICE because the paint will fly of differently depending on the paint's wetness, type, and brush used. Depending on the brush (bristle stiffness or not) and how much you thin the paint, you can get a dispersion tha can be large glops or a fine mist--or something in between. I ALWAYS "test" the dispersion of EACH and EVERY paint-load before turning it toward the model. Most of the times you have to thin the paint to get it to fly--but TOO thin will result in "glops". PRACTICE!!!

Chris, the "Oil Dot Method" was something pioneered by Mig. He used mostly the primary colors--red, yellow, blue--in oil "dots" that were then blended into the model finish to provide a rich color patina to the finish. The idea, as he described it,  was to impart some of the chromatic richness of the hot Spanish sun to the models. This is a different method than speckling, which I credit to Adam Wilder. Each has its own pros and cons, but they are definitely different in both application and results.Our own Bill Plunk has modified the Oil Dot method to use weathering colors and more "base" tones to good effect.

Here-- HETZER -- is the Oil Dot Method. Same thing here---PRACTICE before you apply to a real model.

Hope this helps ya, guys! Big Smile

  • Member since
    January 2006
  • From: California
Posted by SprueOne on Saturday, April 4, 2015 10:53 AM

disastermaster

Okay king tut ..... http://www.smiley-lol.com/smiley/celebre/antiquite/egyptien15.gif

        just when this gets good, it gets better. . . .

. . .

Exactly what I was thinking. Yes Thanks for describing the detailed S-B-S 

Anyone with a good car don't need to be justified - Hazel Motes


Iron Rails 2015 by Wayne Cassell Weekend Madness sprueone

  • Member since
    December 2003
  • From: Colorado
Posted by psstoff995 on Saturday, April 4, 2015 1:58 PM

Thanks a lot Karl! For both the detailed description of the different techniques and for that link to your Hetzer/Oil Dot Filter walk through. I actually picked up a Hetzer-STARR kit by Trumpeter a few weeks ago- (straight OOB build to practice working with my new Iwata double action airbrush) and I think I'm going to do a similar camo pattern to your first version (prior to the Sillyputty masking). Definitely something soft edge. So that link back to 2007 was exactly what I needed! Thanks again. Smile

-Chris

US Army Infantryman

  • Member since
    January 2015
  • From: Tumwater, WA.
Posted by M. Brindos on Saturday, April 4, 2015 2:36 PM

I'm blown away Karl. Everything you are doing is amazing and the effects are coming together in magnificent ways. I've not yet combined so many effects because I though it would get too effect heavy, but you have just showed us all that you can do it and it can work flawlessly.

Deep respect Karl. You are very, very talented and I am learning.  :D  Thank you sir.

- Mike Brindos "Lost Boy"

  • Member since
    February 2011
  • From: St louis
Posted by Raualduke on Saturday, April 4, 2015 6:03 PM

Just friggin awesome!

  • Member since
    March 2003
  • From: Western North Carolina
Posted by Tojo72 on Sunday, April 5, 2015 12:08 PM

Just fantastic looking work Karl.Looks like Michael Rinaldi's style in Tankart.

Again weathering and wear look just right.

  • Member since
    November 2007
  • From: Wisconsin Rapids, WI
Posted by moose421 on Sunday, April 5, 2015 12:45 PM

I love the effect Karl that you have achieved on this vorpanzer.

And yes I am finally back.  Just a couple year detour. Kids and RC naval combat kept my occupied for a few years.  Lost interest in my boats and kids are getting older.

Just have to finish up an aircraft then I will start on maybe another aircraft.  Then again I love my armor.

moose

  • Member since
    December 2002
  • From: Bury St Edmunds, Suffolk, England
Posted by Bish on Sunday, April 5, 2015 1:36 PM

Great work Karl, I like the look of the exhaust.

I am a Norfolk man and i glory in being so


On the bench: Airfix 1/72nd Harrier GR.3/Fujimi 1/72nd Ju 87D-3

JOIN OUR COMMUNITY!

Our community is FREE to join. To participate you must either login or register for an account.

SEARCH FORUMS
FREE NEWSLETTER
By signing up you may also receive reader surveys and occasional special offers. We do not sell, rent or trade our email lists. View our Privacy Policy.