It's been a while since I posted on this project, but even though I have not posting regularly I've been muscling through the build and currently the tank is 90% complete!!
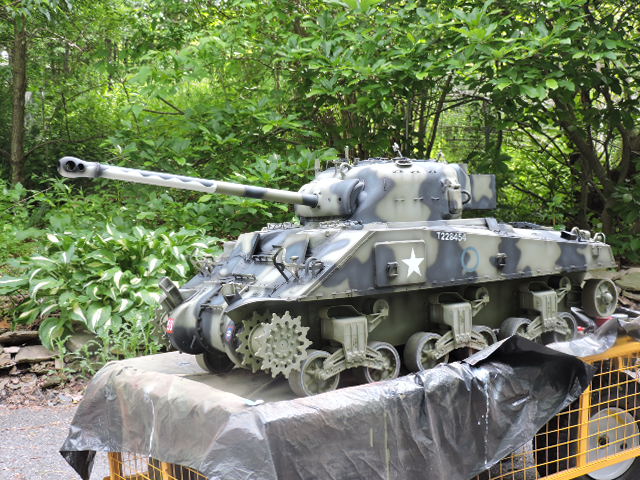
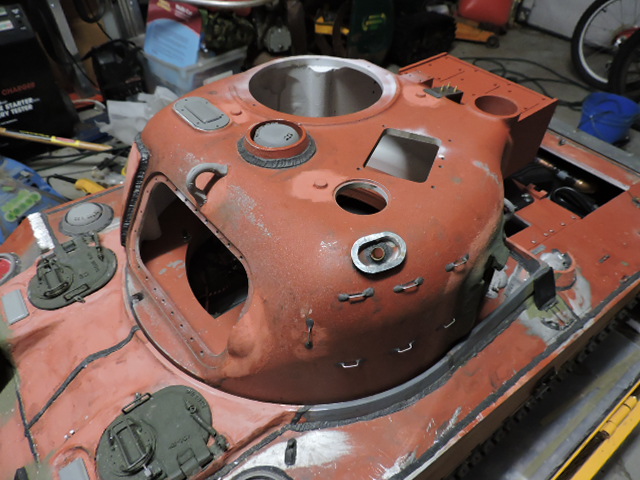
After my last post I turned my attention to the tank's turret. The first steps that were done prior to adding any sorts of equipment and details would be adding the fastener removal notch, the rotor blister, and removing the stock provisions for adding the kit's lift handles, and spent shell ejection hatch. After this prepwork it was time to add details.
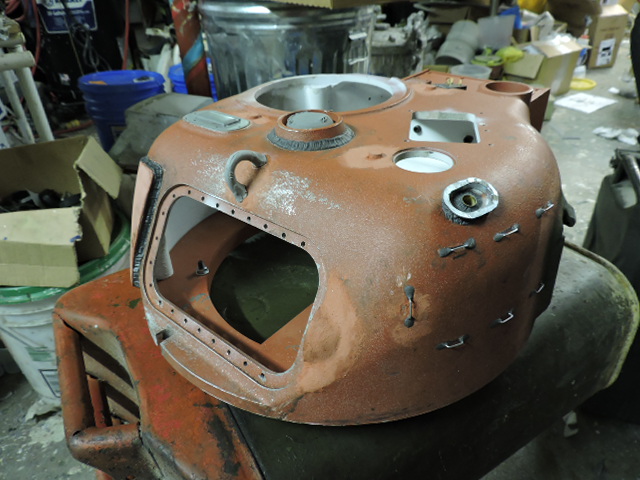
Some of the details that were added were the applique cheek armor. The armor was not kit included and was scratch built by sculpting the armor to the turret side via epoxy.
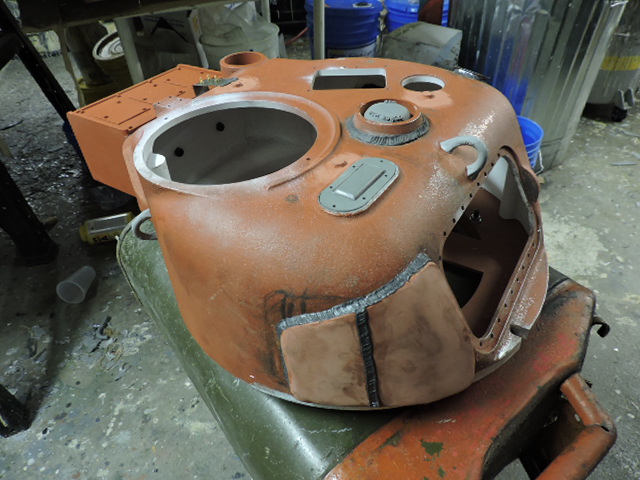
ECA spent shell ejection port, and ECA turret lift rings. These two components once added were flared and blended into the turret's body work.
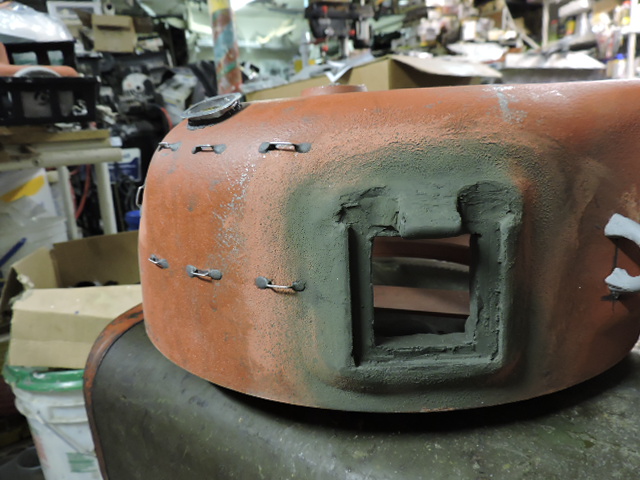
British army style turret footman loops
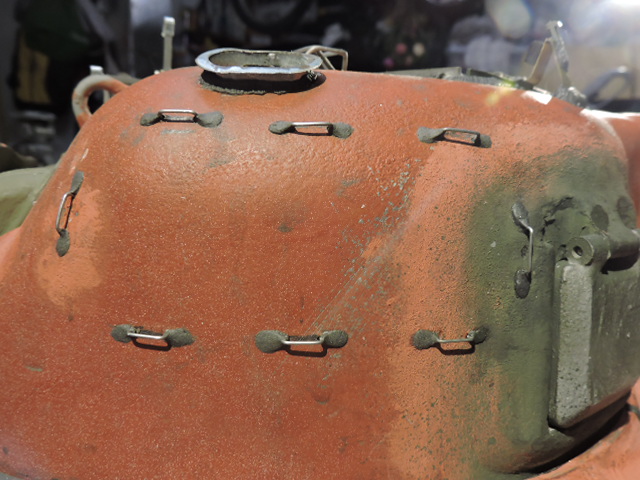
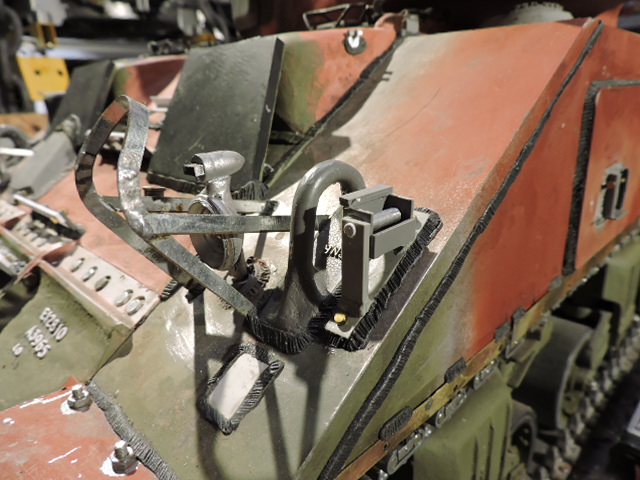
ECA vane sights, ECA Gunner's scope, as well as a rod iron style brush guard.
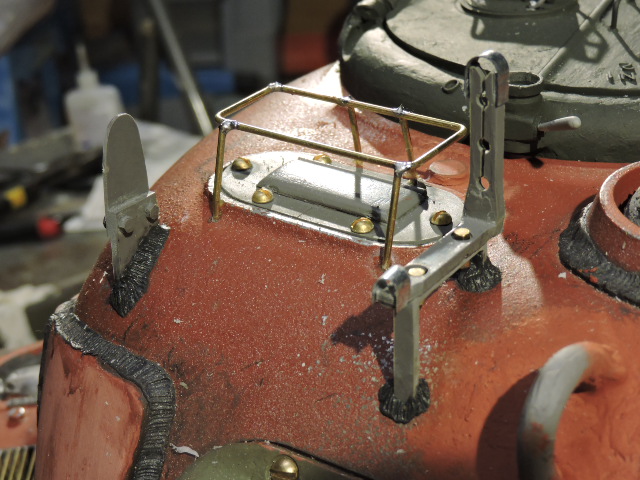
Not sure but from my research it looks as this pattern of brush guard was a British army mod as the US pattern was a different design and when these tanks were handed over for lend lease the US pattern was still in development, so the brits went ahead and made their own.
The design is similar to the ones found on the M5A1 stuart gunner's scope just scaled up for the sherman. For the model one was fabricated out of soldered brass rod
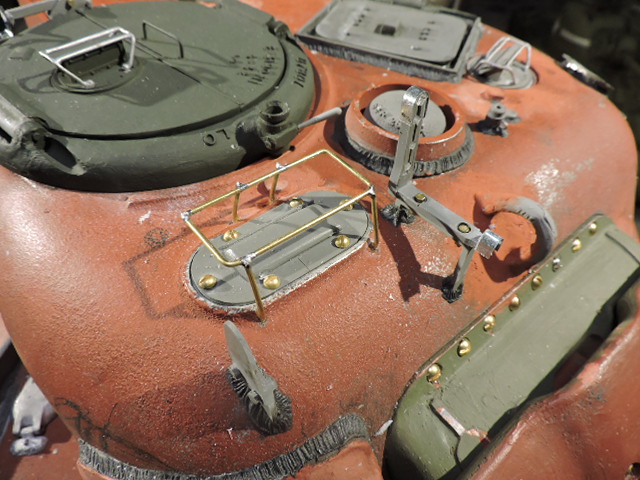
ECA blower center, ECA turret lift handles were added along with provisions for mounting a search light.
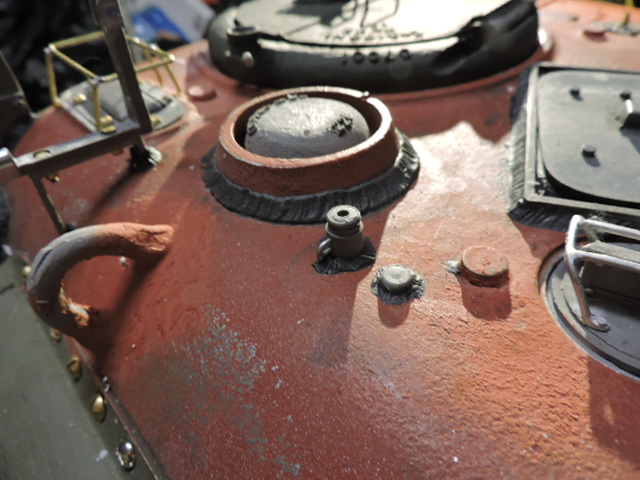
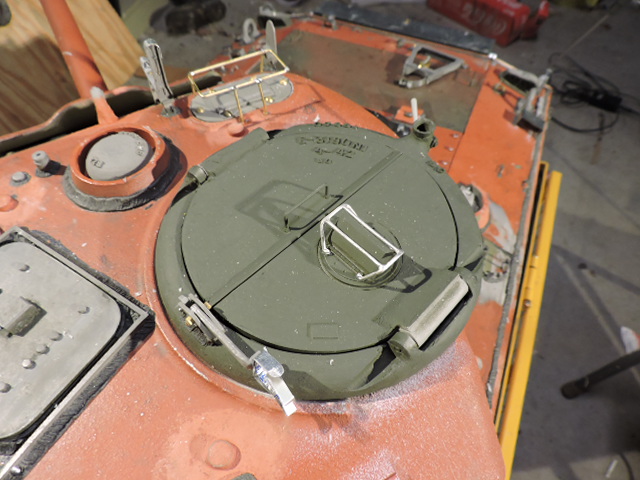
The commander's copula was also mounted. For this I used the ECA early pattern version, but replaced the ladder pattern 50.cal travel lock with a later folding one. This was one mod that I've seen on several of the rebuilt / upgraded tanks that were sent to lend lease.
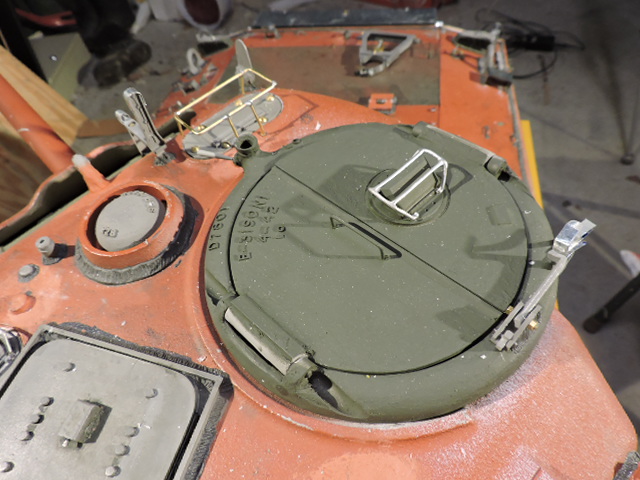
Just like with my A4 build I made the copula rotate as it would do on the real tank, however the design was changed to use a spring retention system that holds the copula in yet allows it to rotate freely
The Turret smoke grenade launcher was another part that was added. The part was a simple tube mounted to the turret. Welds were mounted to finish off the install. After the mounting of the tube, I went and fabricated the British army pattern tarpaulin mount.
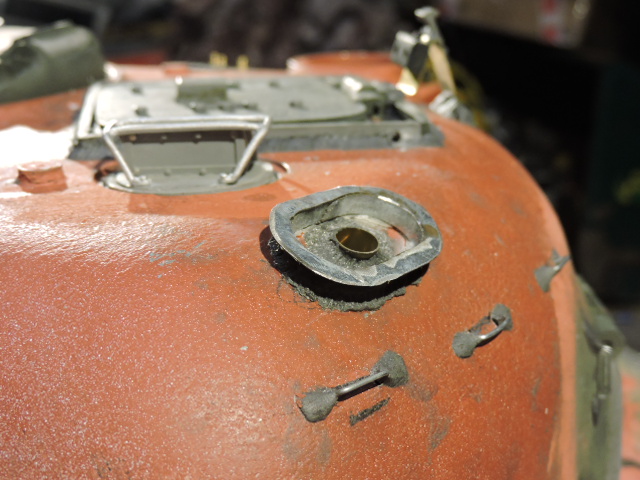
Rather then a rubber chain retained cap as what was seen on US tanks, the brits fabricated an elevated oval design which surrounded the mortar and allowed what I believe was a cloth tarpaulin to clip over sealing it off from the elements
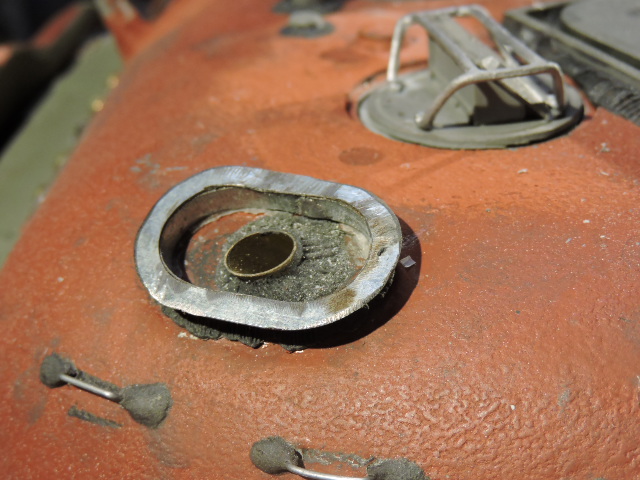
The one on the model is all sheet metal fabrication and is a new item to the ECA catalog, http://eastcoastarmory.com/m4.htm
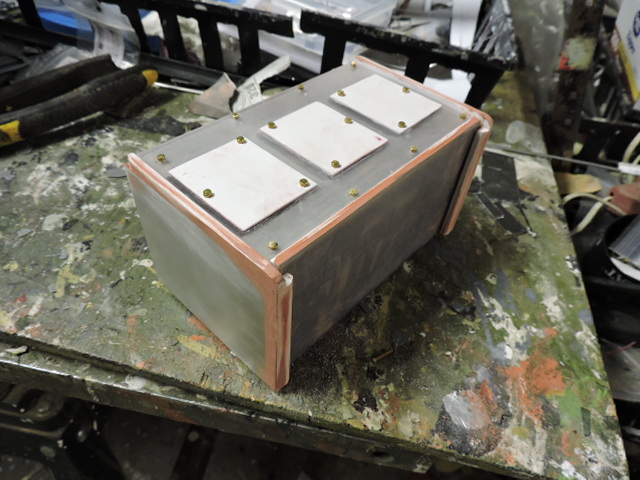
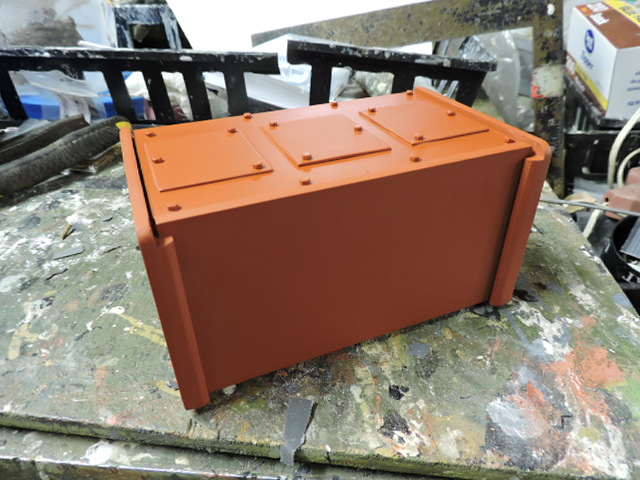
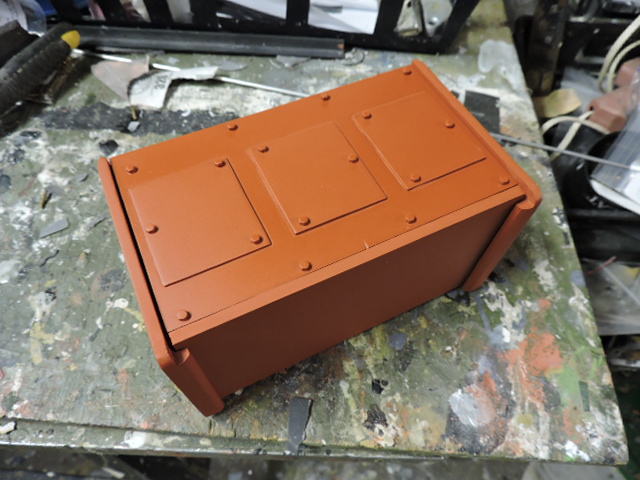
For the Turret rear I needed to assemble the rear bustle counter weight / radio box. This was needed for the firefly due to the longer length of the 17 pounder gun.
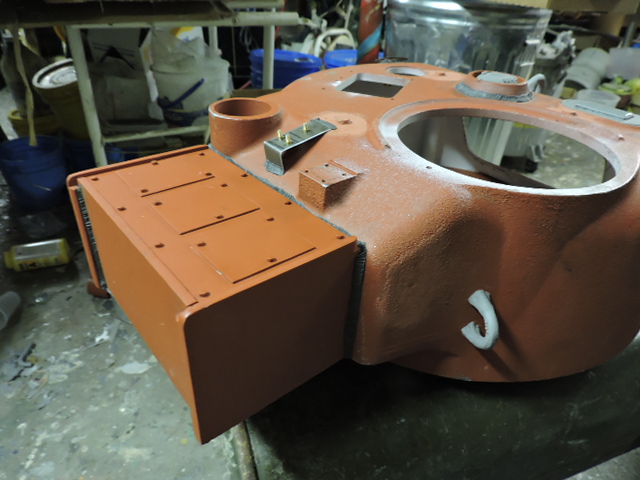
The part started as the kit original. The kit supplies the basic shape of the counter weight with the overall correct dimensions. The parts are all CNCed aluminium
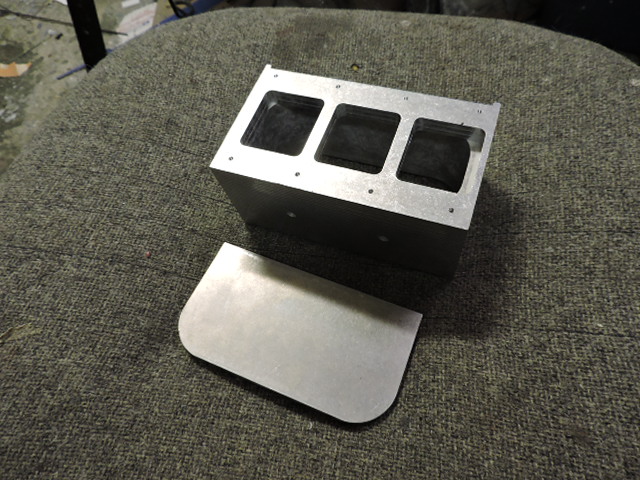
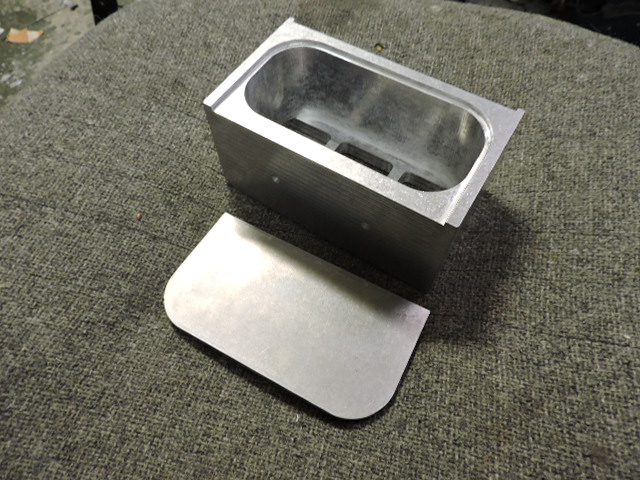
The box was a good base to enhance by adding sections of plastic strip here and there, a new bottom, and a new lid with access hatches mounted. Once the revisions were ready the box was mounted to the turret's rear and weld beads added.
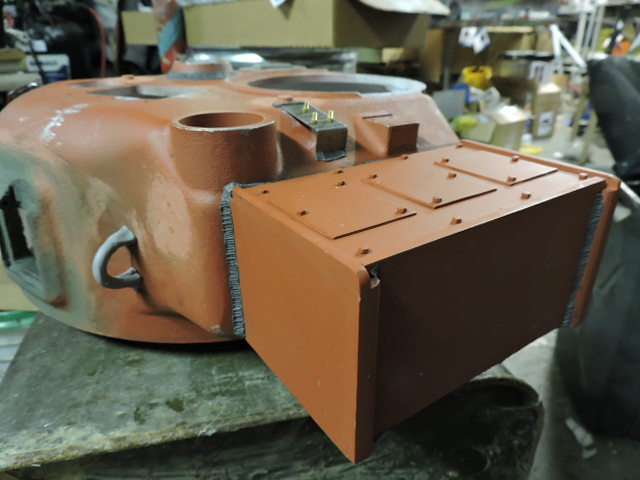
Once the box was out of the way I added a small plate with fasteners to the rear bustle top, not sure what purpose this unit has but was added as I've seen this plate found on many fireflys.
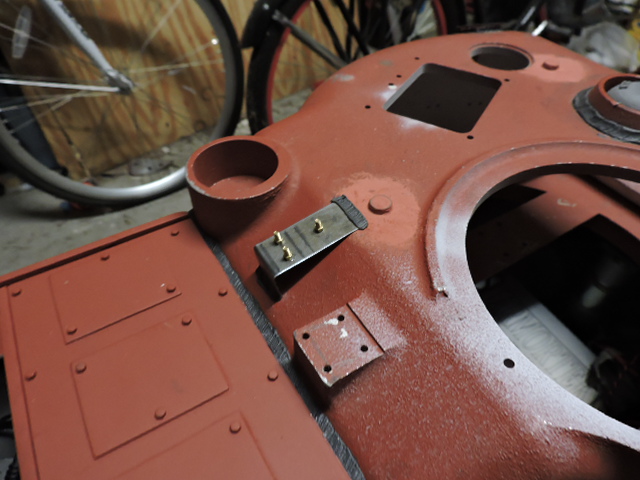
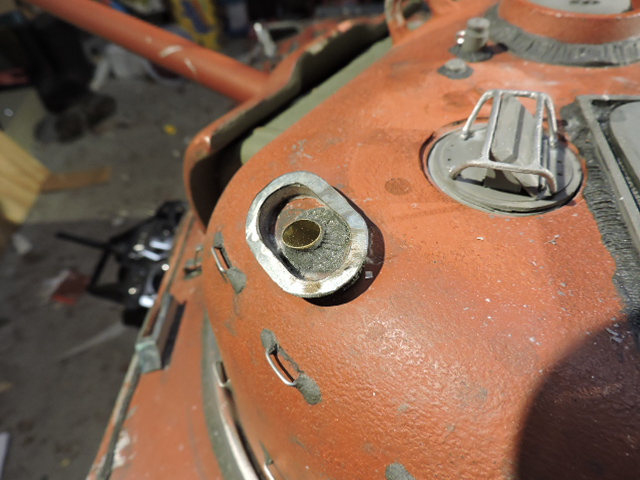
Also on the turret roof I added the molded in lift eyelets bosses. These bosses were a carry over from the initial pilot design of the sherman and were meant for a eyelet to be threaded into these locations where a crane would lift the turret.
This design was used on the M3 Lee, but was never done to the sherman and the bosses remained as they were found in the early turret castings, and were never drilled out / tapped. For an early turret like this one these details were needed to be added.
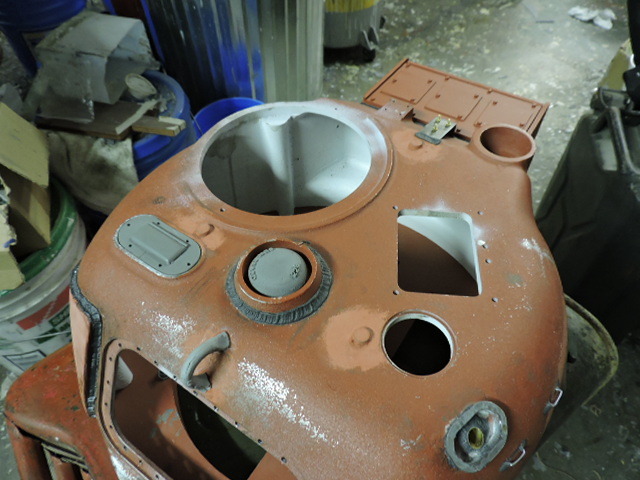
For the loader's periscope I made the component function as I've done on RC sherman builds in the past, however for this build I developed a new easy way to add this animation.
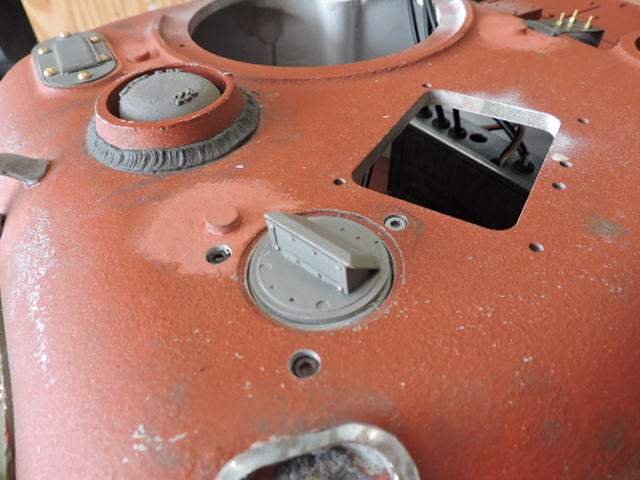
The component is designed to be a all in one servo mounted drop in installation unit. With this system it removes any need to fabricate servo mounts / harnesses and complex motion arms to make the part animate. The device has been added to the ECA catalog aswell, http://eastcoastarmory.com/m4.htm
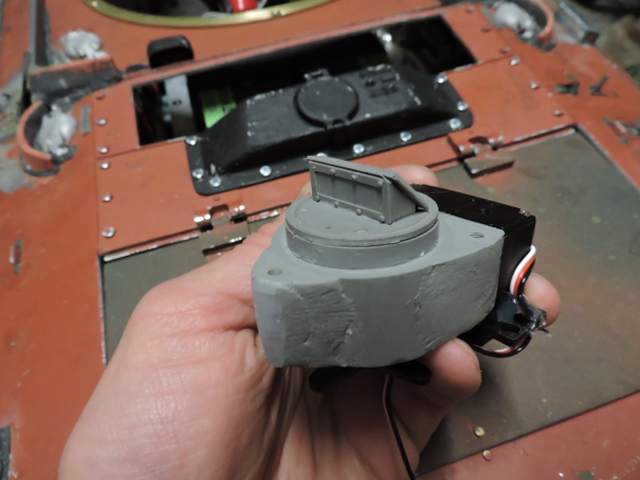
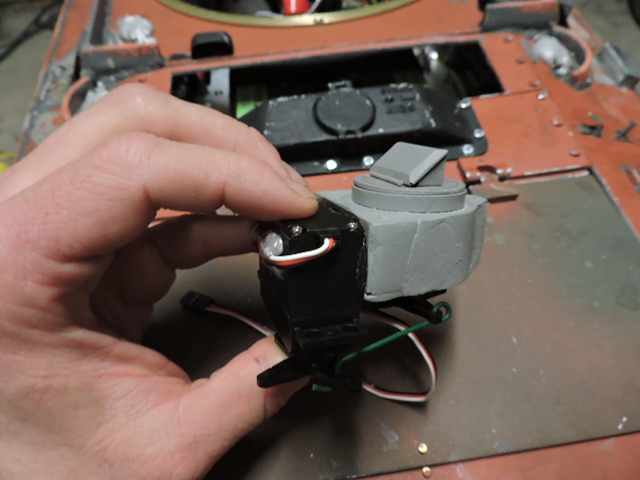
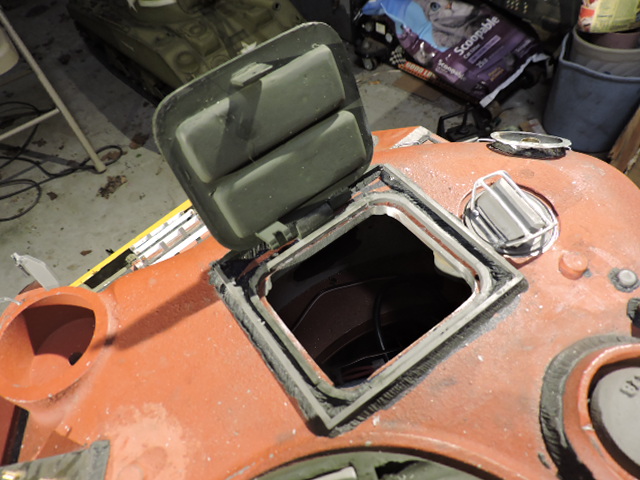
Another new addition to the ECA line was that of the firefly loader's hatch set,
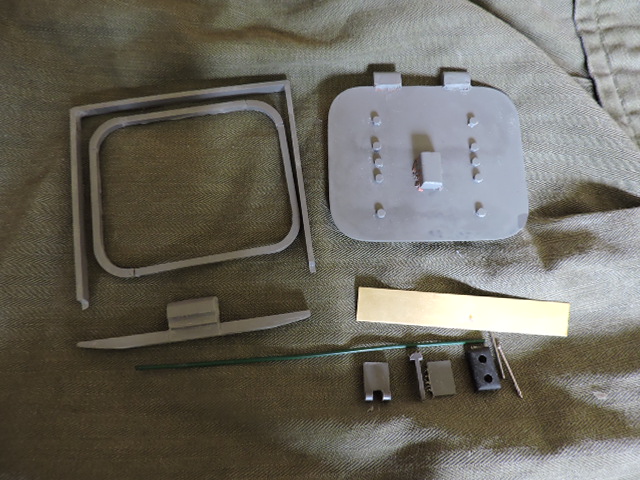
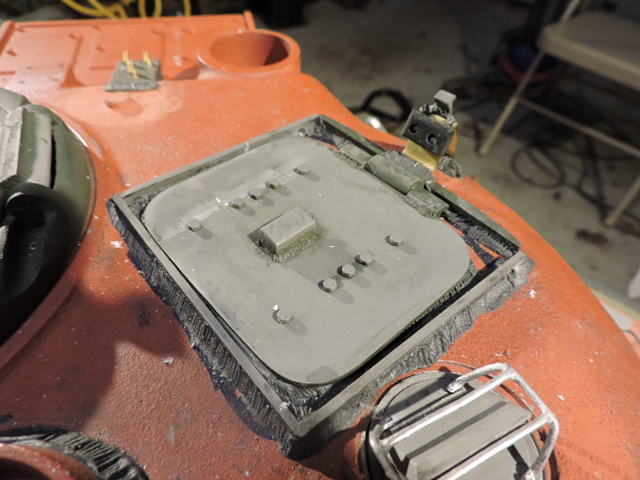
The new hatch was added to the model,
![]()
The stock mantlet and rotor had the basic overall shape and appearance for the firefly parts, and were a good base to work with for the mods. The rotor drum was modded in having it's internal details added, along with extending the left hand side as the firefly rotor was larger then the 75mm version. Counter sunk holes were also added for the fasteners which is a common sight for sherman rotor drums.
![]()
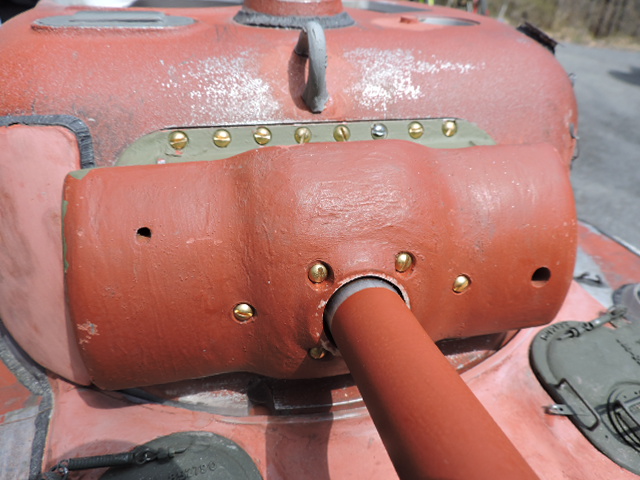
For mounting the parts The real shermans used large slot screws. For the model I replaced the kit fasteners with brass slot screws, however the only fasteners that I can find in my area with the correct dimensions for the real screws are in imperial, so the mounting holes in the mantlet and turret were retapped.
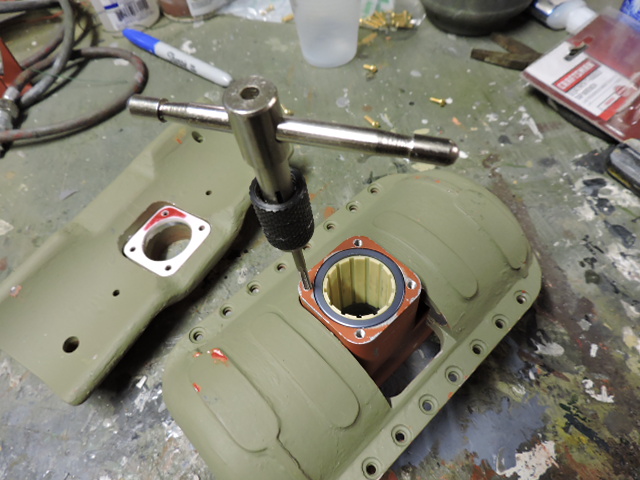
Also because of the new rotor surface details the mantlet needs to stand off from the rotor more compared to the kit original, To do this a simple plastic spacer disk was fabricated and added in place.
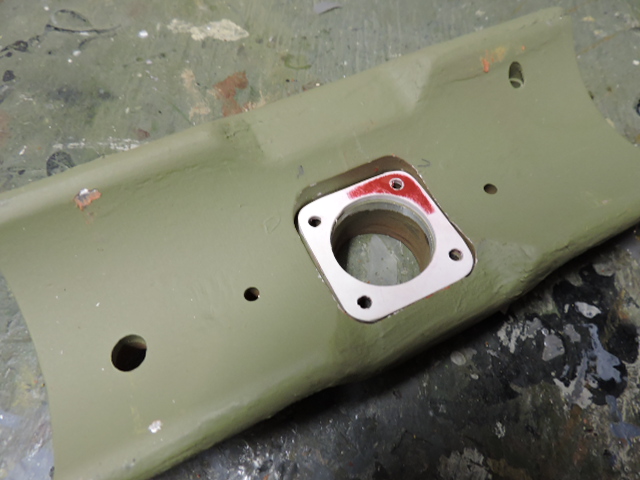
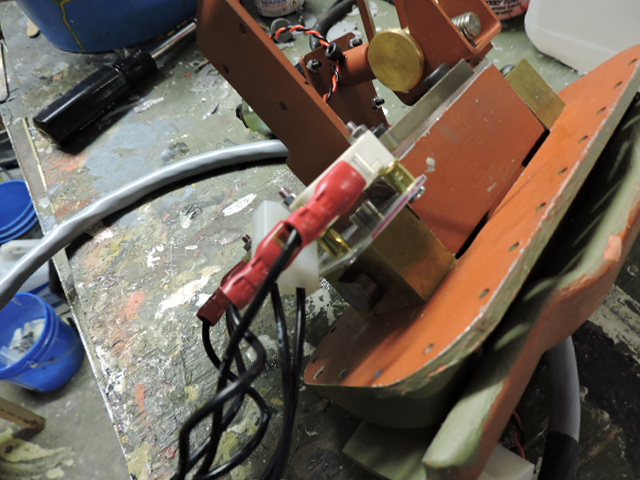
The rest of the gun elevation system was assembled mostly OOB, with a mod made to the limit switch system, Rather then using the kit design I fabricated a self contained system that mounted to the trunion.
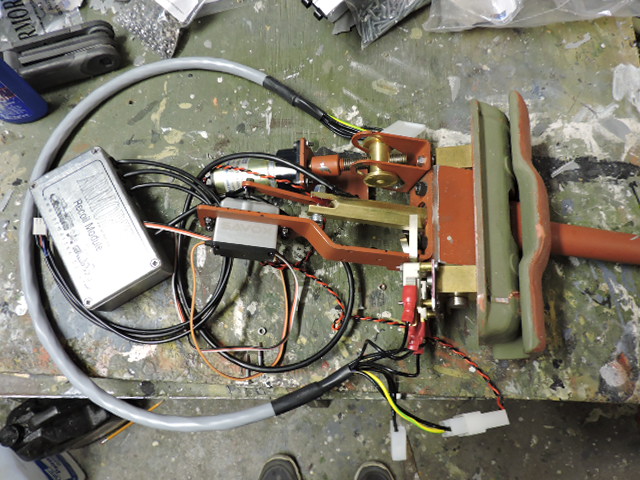
with this design the whole gun system is one complete unit and is easier to install or remove if need be, Also this system makes it easier for me to calibrate the limit switches compared to the kit design.
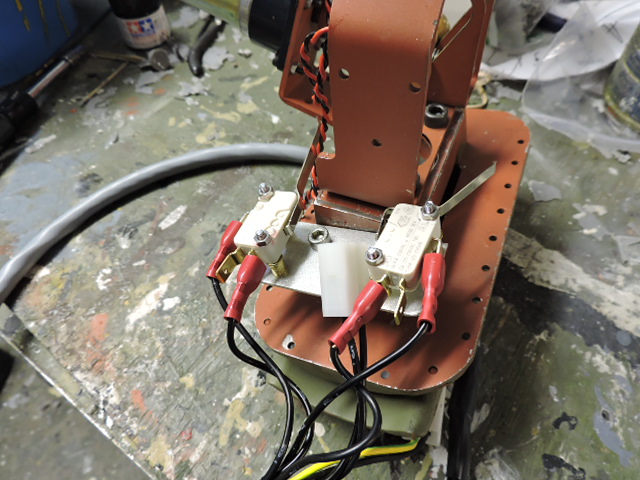
For the bracket Aluminium strip was used, and for the switch spacers modded spent .22LR casings were used
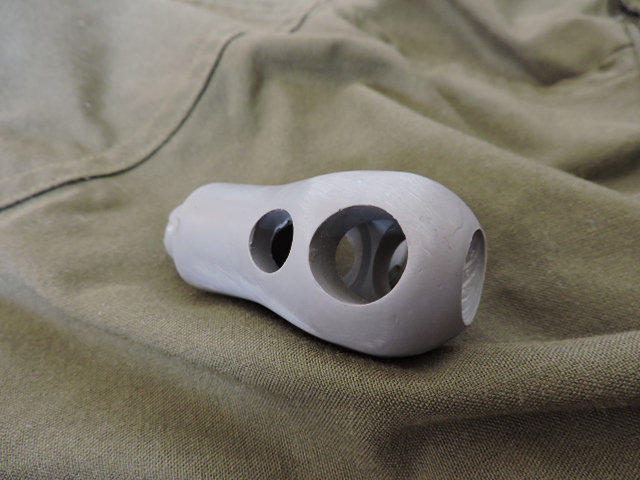
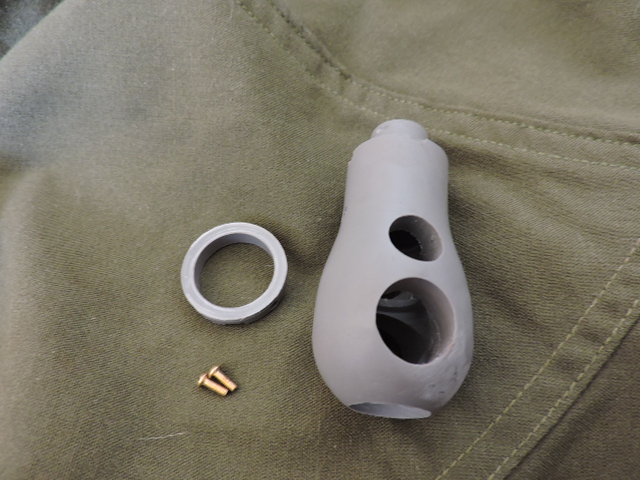
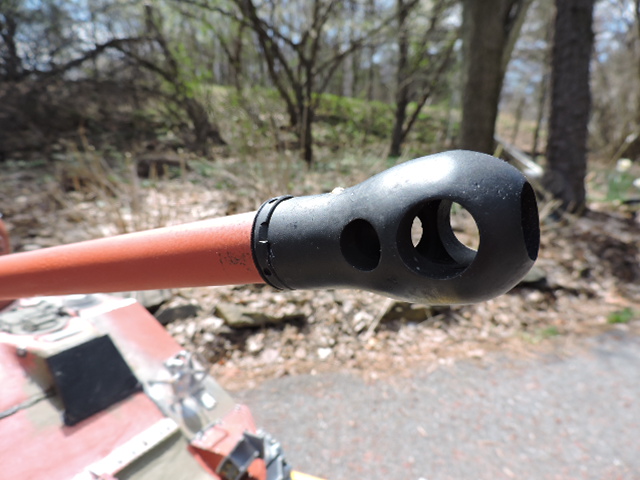
For the tank's iconic 17 pounder gun muzzle I tooled up a new resin unit and used it in place of the kit original. This was another new addition to the ECA catalog, http://eastcoastarmory.com/m4.
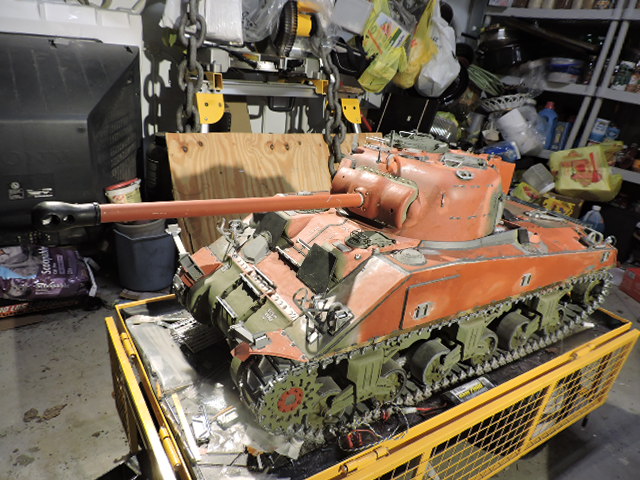
Once the turret was done I turned my attention to completing the hull and getting her ready for paint,
The tank's grill work was first to be fabricated. Just like with the A4 a new grill was fabricated out of strip brass and all soldered together assembly
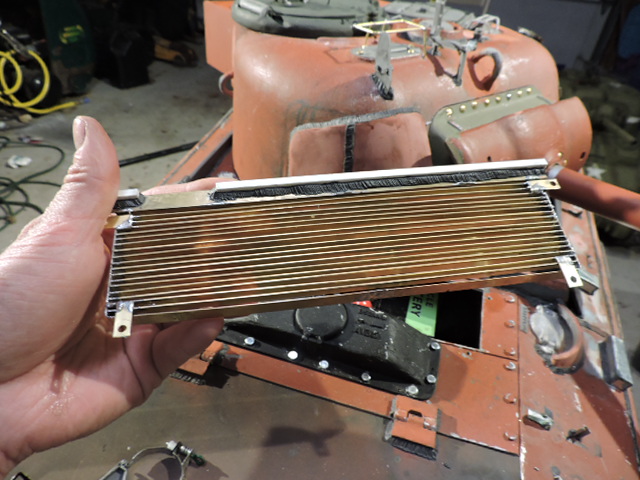
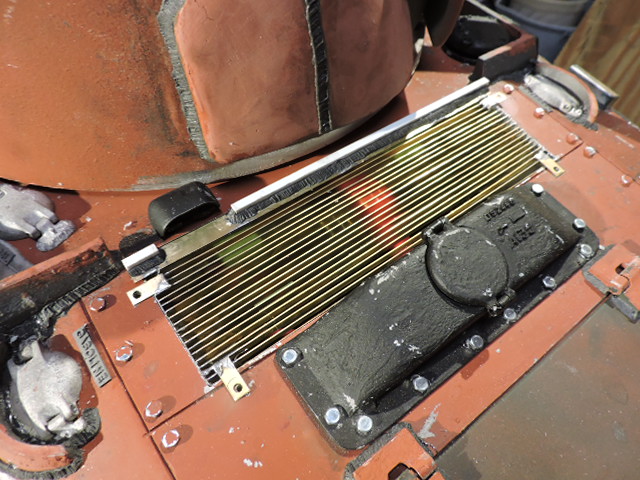
Unlike the a4 however this model I made the fasteners bolt directly to the upper deck as this allows easy access to the battery terminals.
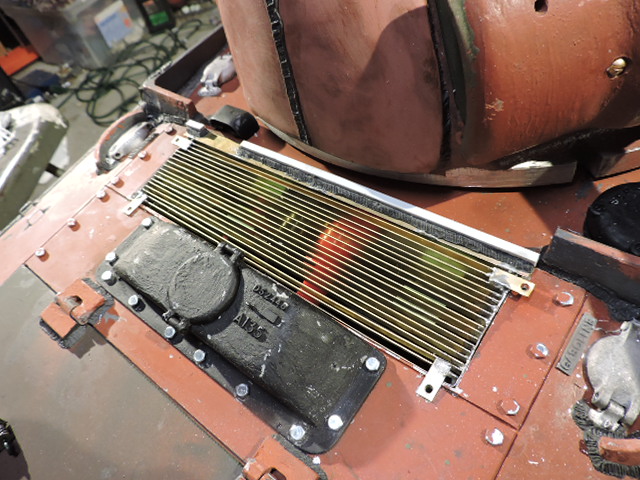
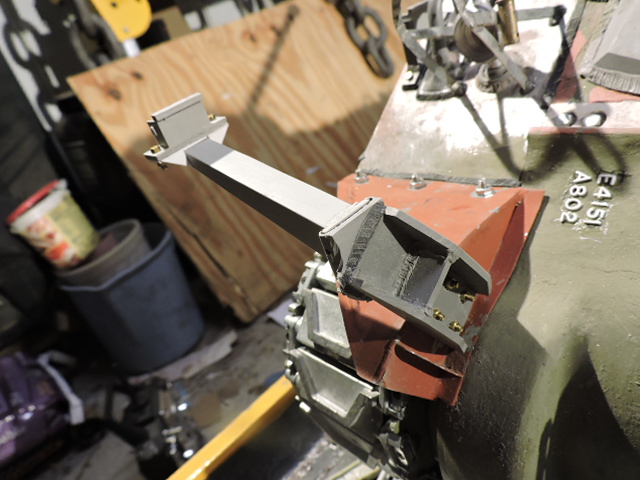
The 17 pounder travel lock was also added. This will be added to the catalog but right now I'm still working out some fittings that need to be made. The one on this model is more or less a one prototype
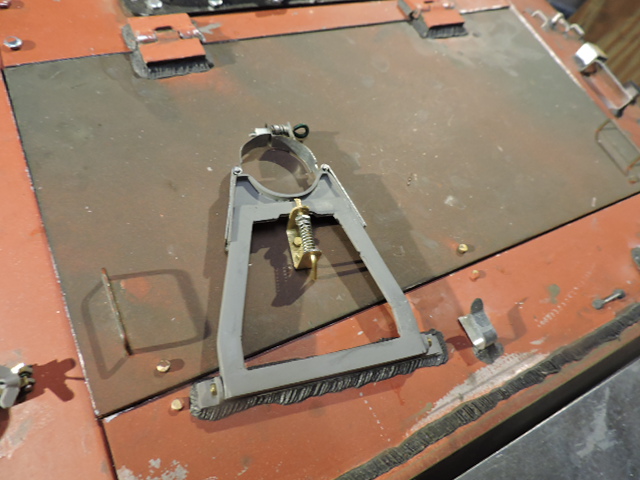
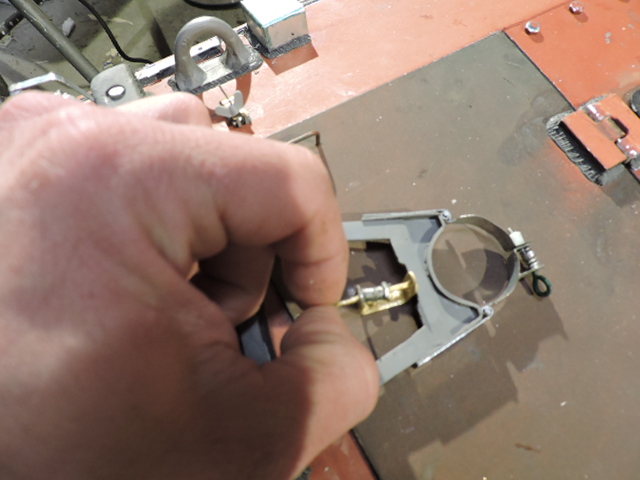
On the model the travel lock secures to the engine hatch via a real spring loaded latch, This needs to be opened prior to getting access to the control panel underneath the engine hatch
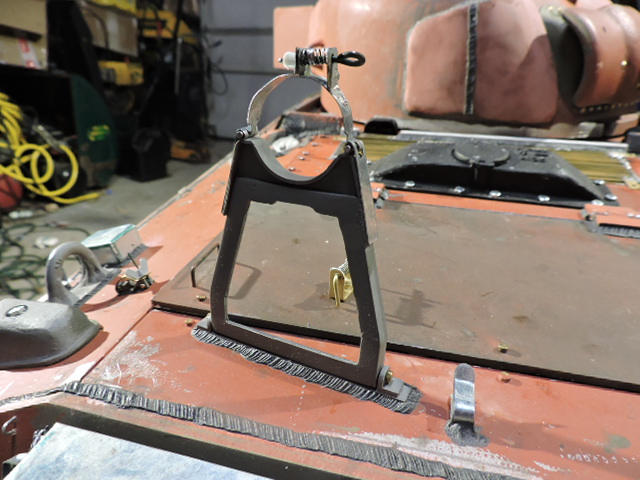
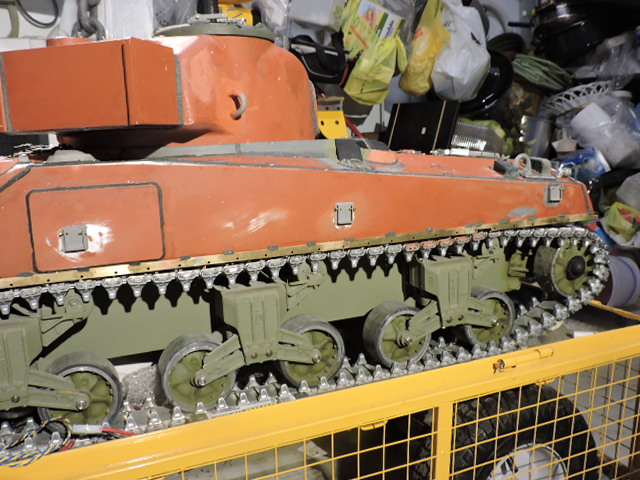
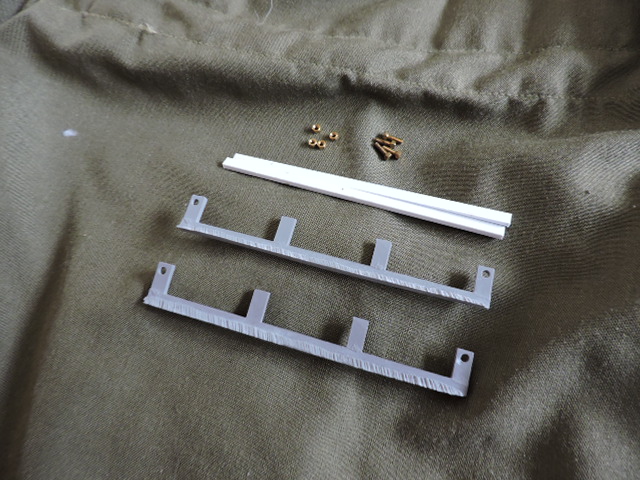
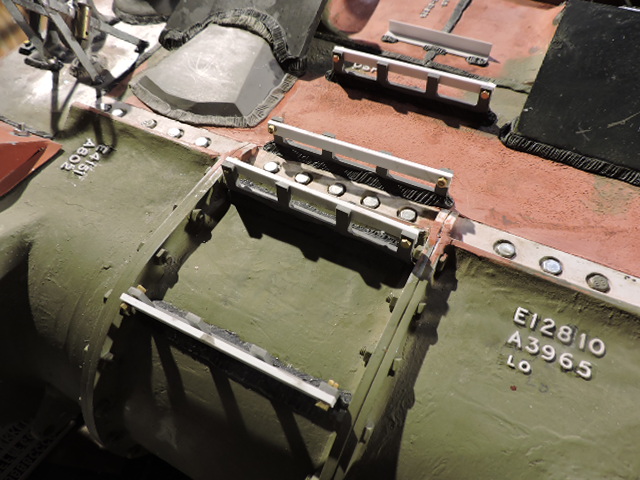
On the tank's front hull the last of the cast numbers were added with my usual method (plastruct letters sets) along with the British army pattern spare track racks
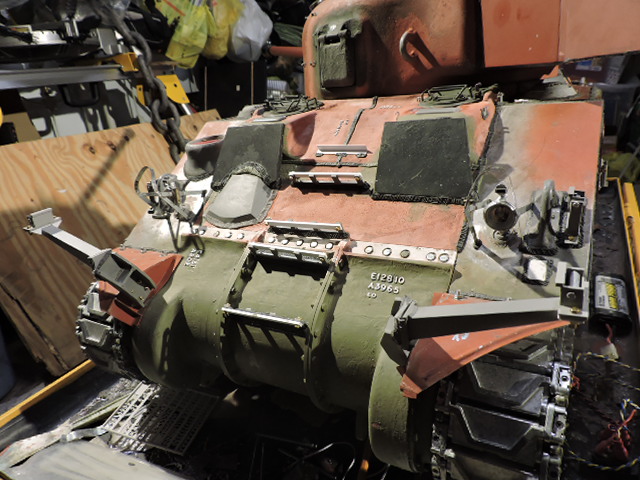
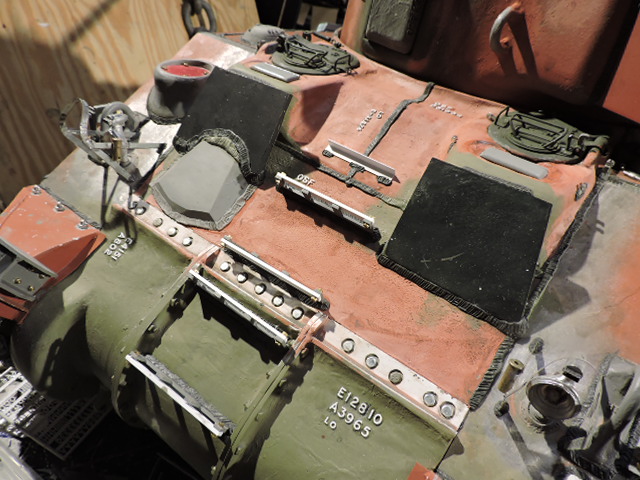
The final components for the House boat camouflage system were added aswell. Both the house boat and the track racks were added to the ECA catalog pages http://eastcoastarmory.com/m4.htm
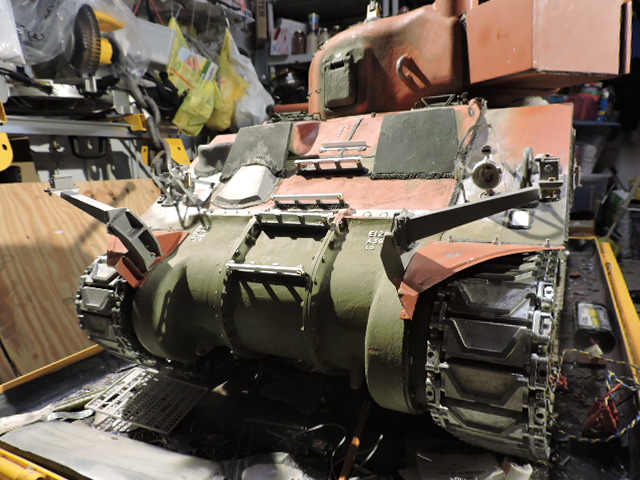
One of the last parts needed to be added were the tank's hub caps. The stock caps were modded to have their fasteners pointing outward (as like the real tank) and the center mounting bolt was hidden under a removable detail face disk
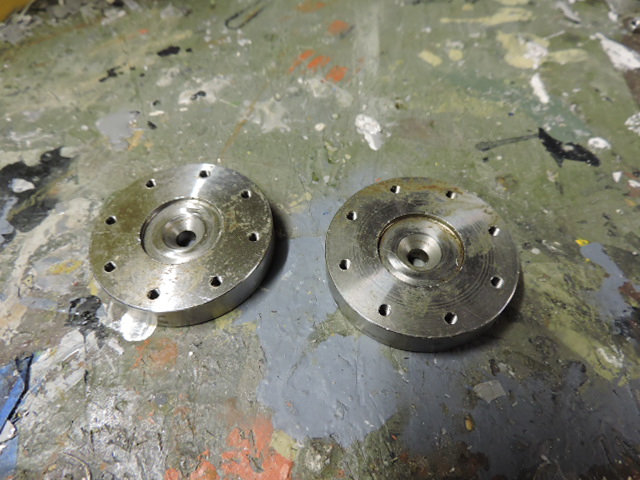
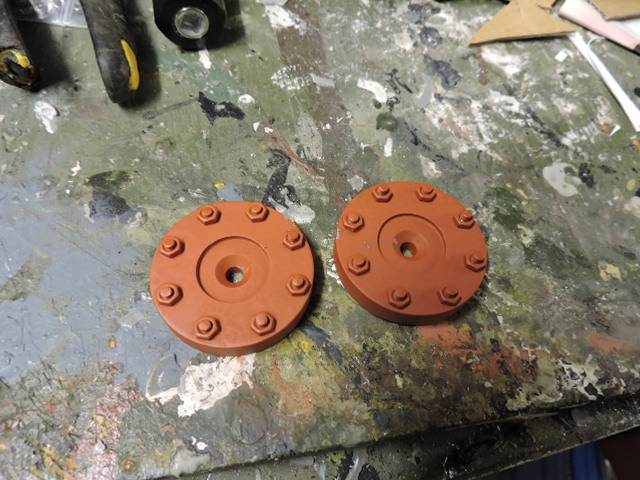
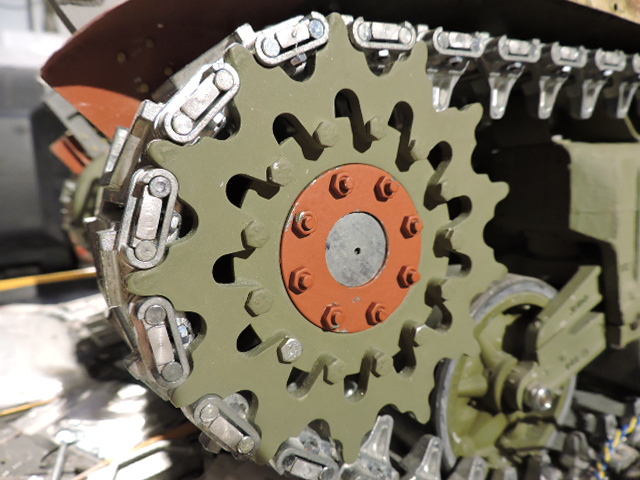
Once all these parts were done the tank went into paint! first was final prime
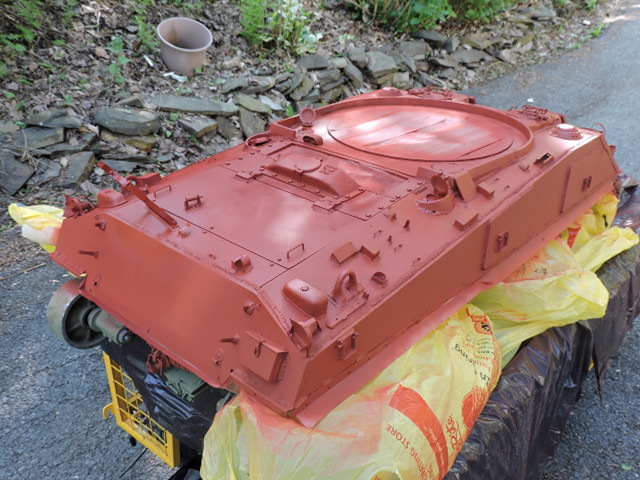
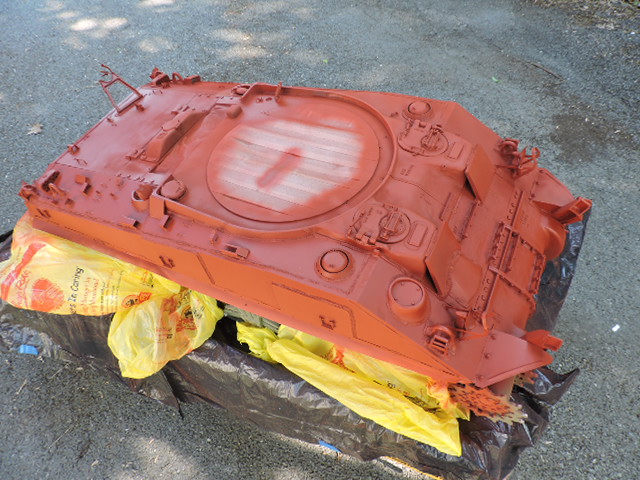
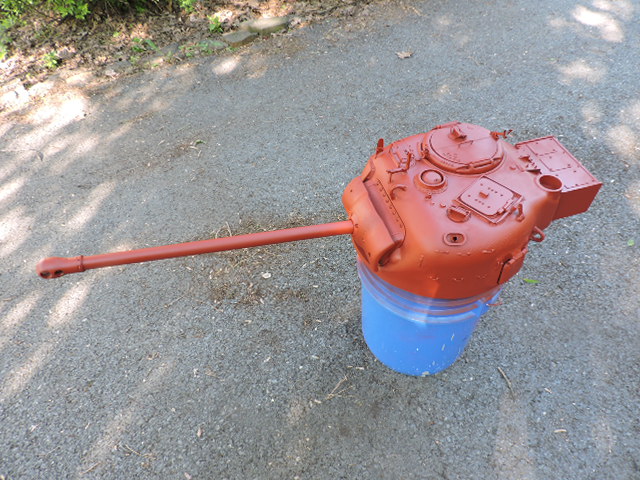
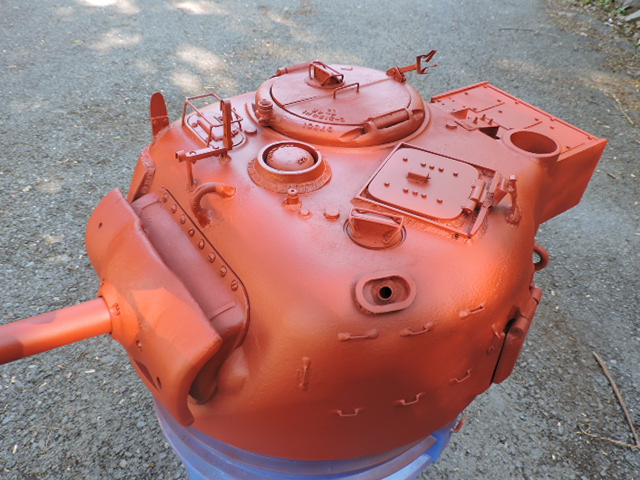
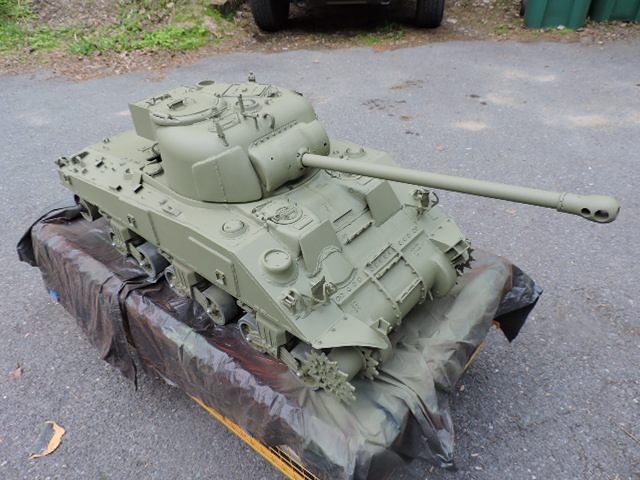
Once the prime was done, the base coat was added... The color I used was a new mix of OD that differs from the US shades of OD I've used on my US builds
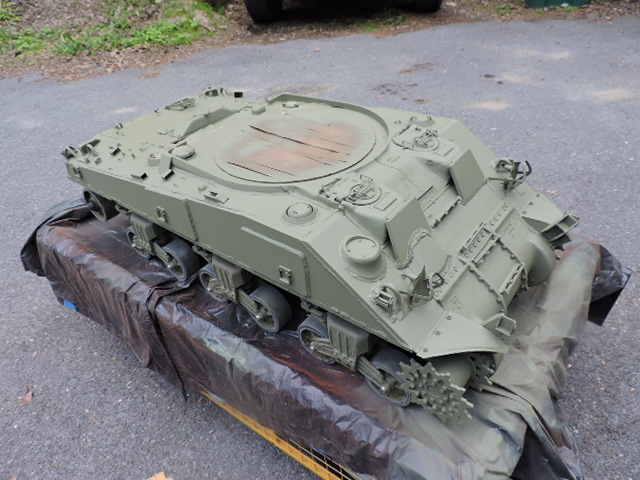
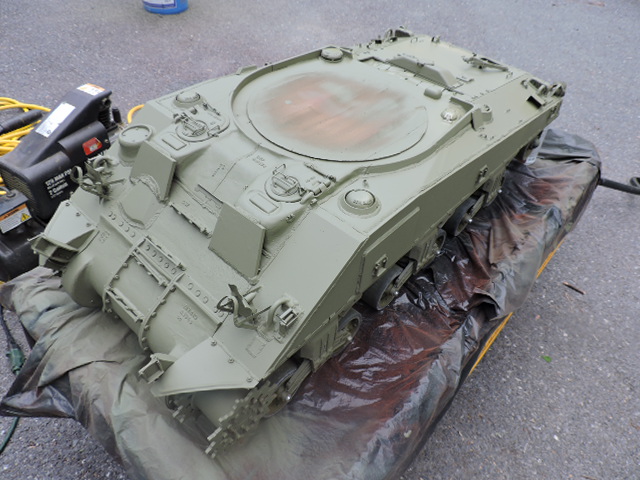
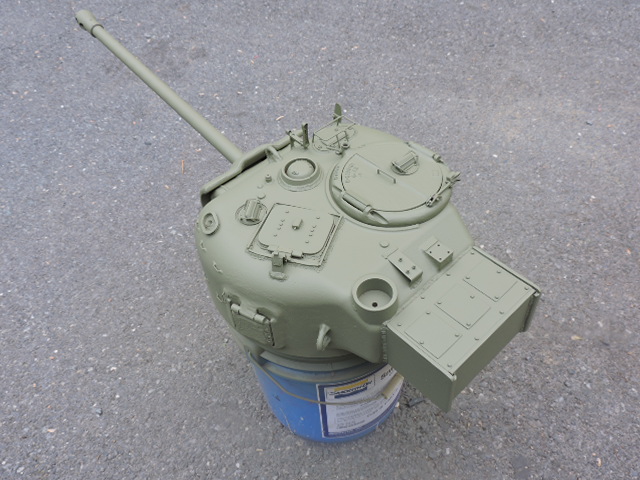
And it was a nice sight to see the tank in one color of green as opposed to the mix of painted / unpainted parts during construction.
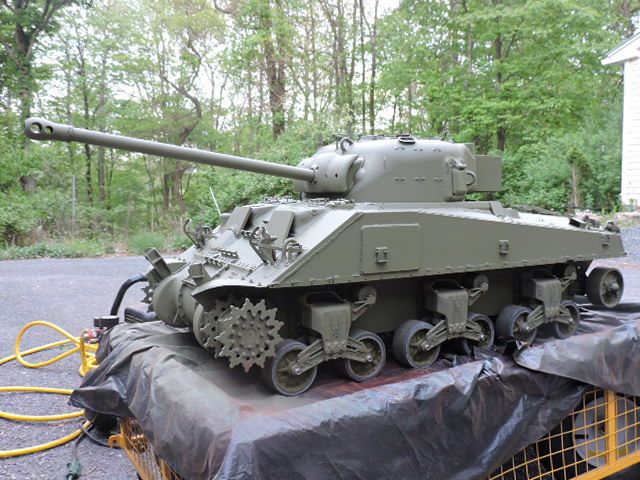
Once the base was done, the fun began, first with the camo / markings.
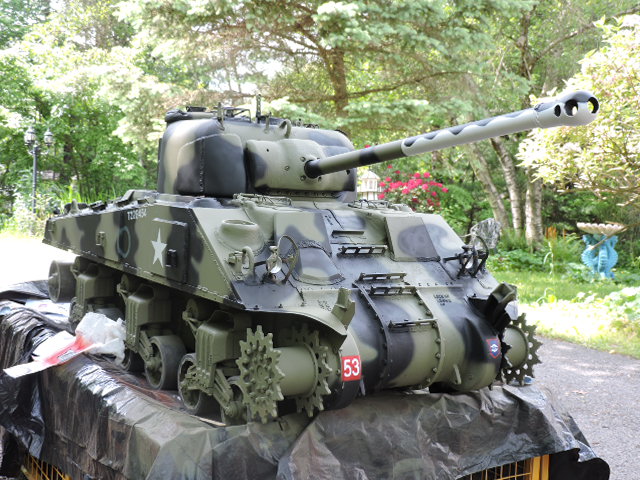
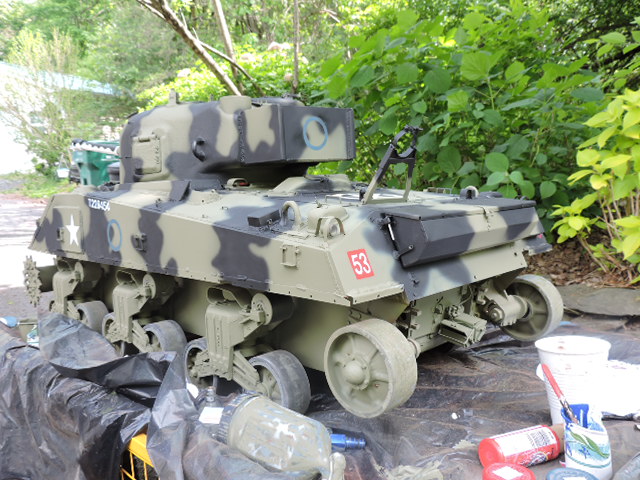
One of my favorite parts to paint was the distinctive firefly barrel wave cammo. From what I read this was done to hide the extra length of the 17 pounder. The long barrel would protrude from cover as well as would at a quick glance make the tank look like a standard 75mm sherman.
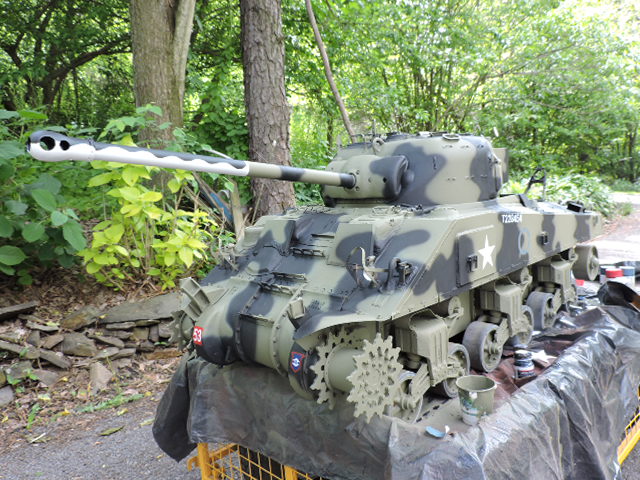
This was important as the firefly was a primary target for german tank gunners. So the barrel was cammoed to conceal the fact it was a firefly and would be easier to have it blend into the other 75mm shermans that were in the column. This is why the cammo stops at the point where the 75mm barrel would end on a regular sherman.
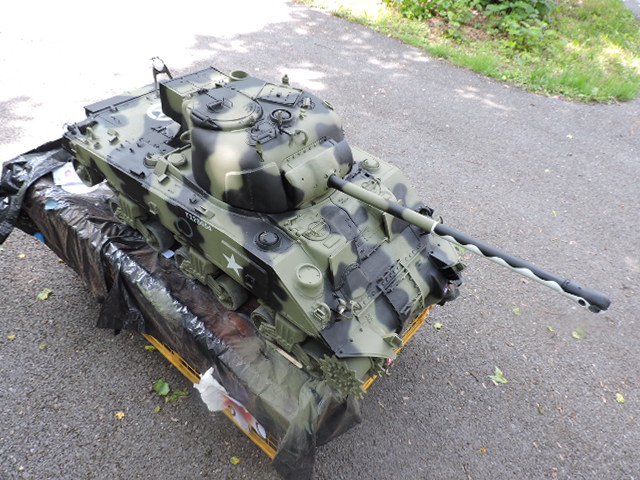
What's unique about the cammo is that it heavily resembles the barrels found on WWI / WWII period British battleships.
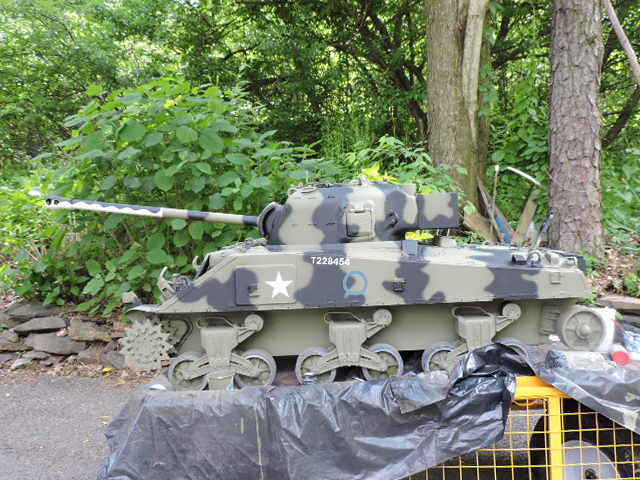
As for the markings, they are all painted on via my disposable stencil technique. The tank is not based on a real tank but it's unit and markings would be for summer 1944 time frame.
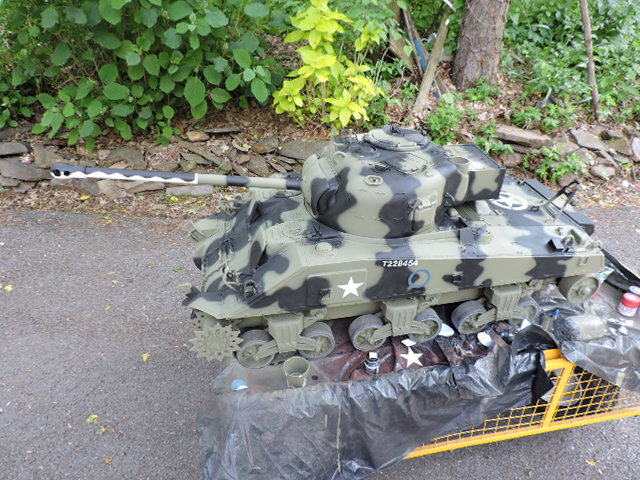
Once that stage was complete the model went into weathering.
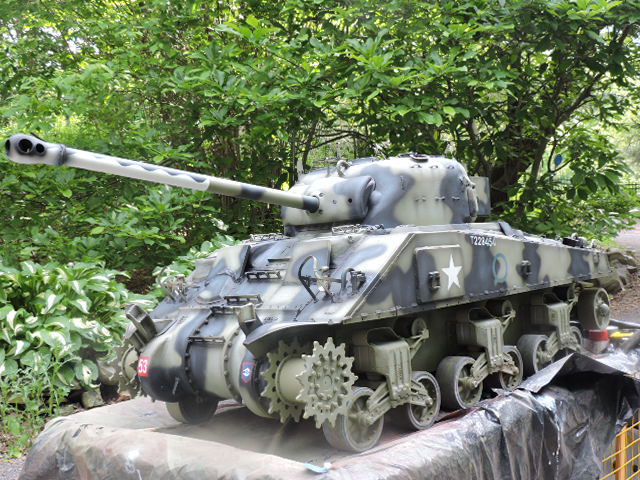
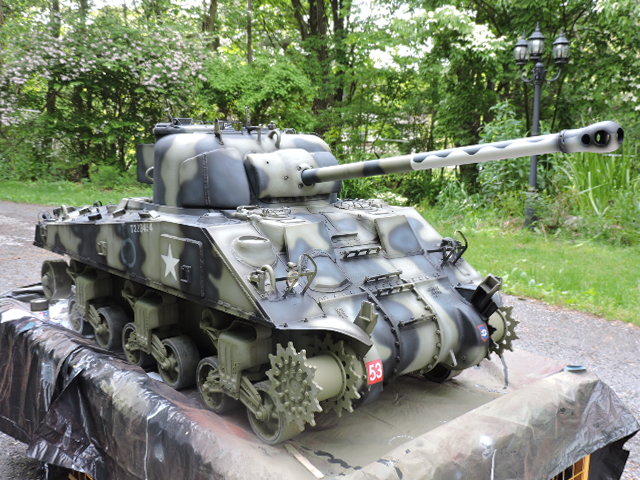
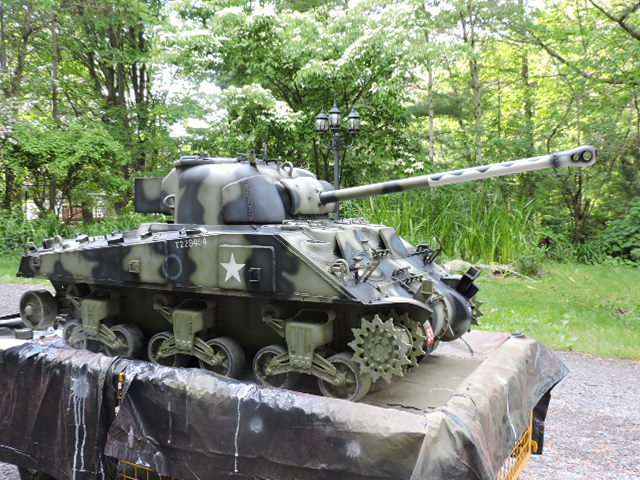
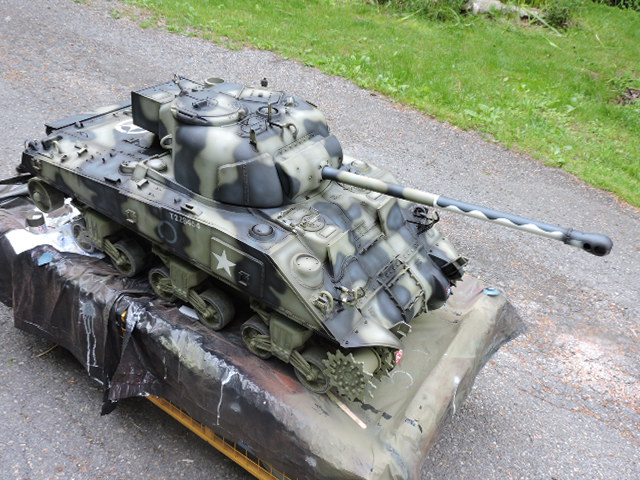
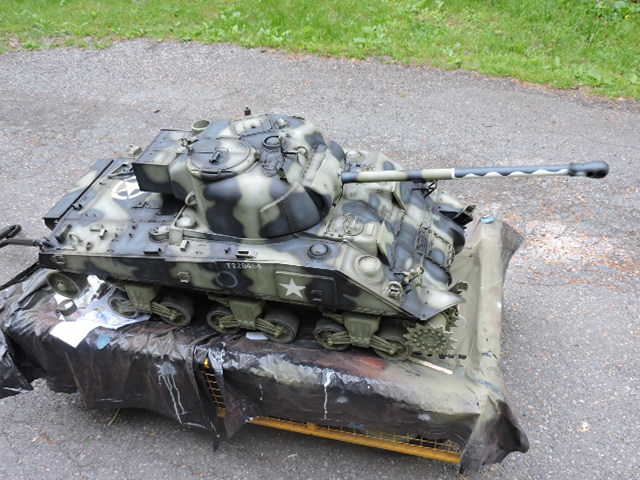
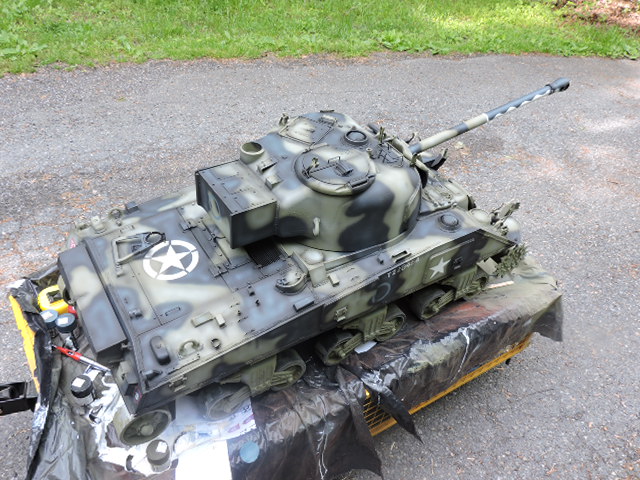
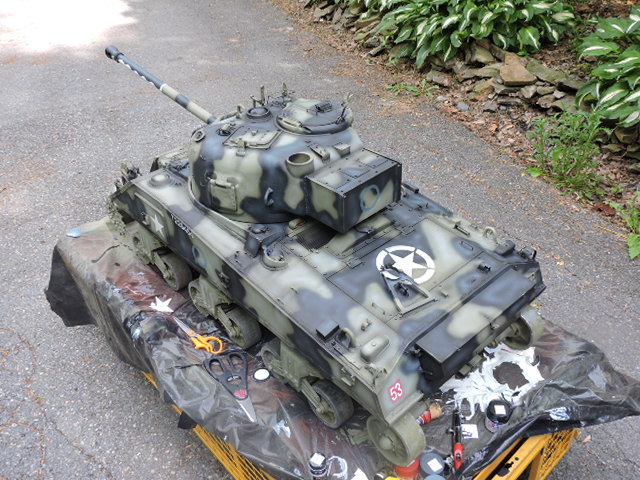
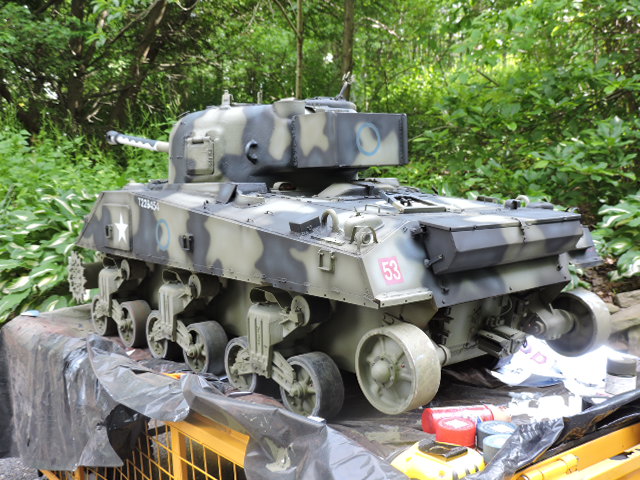
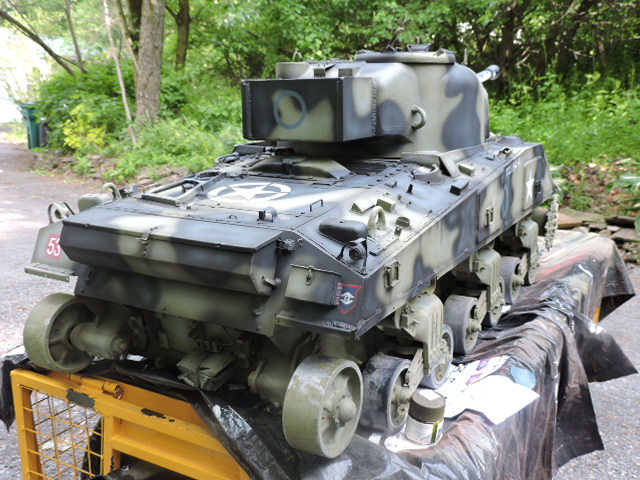
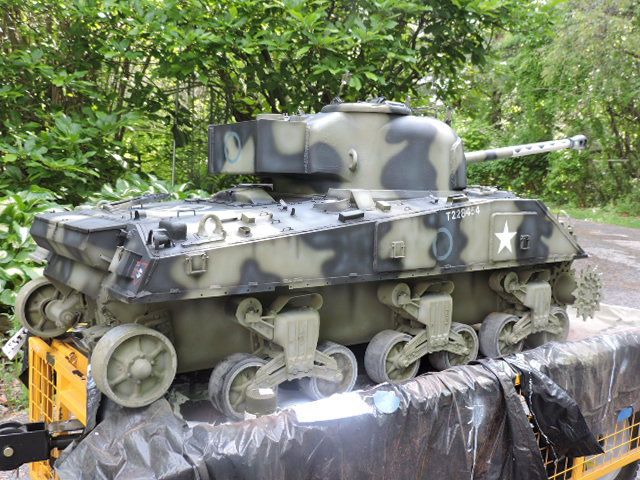
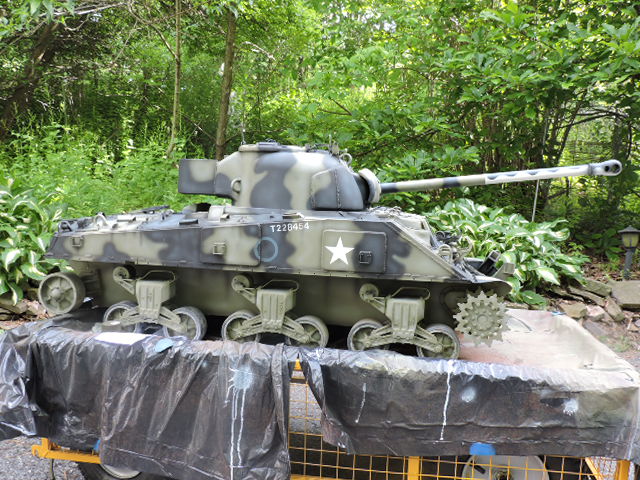
More pics were posted on the ECA facebook page, https://www.facebook.com/EastCoastArmory/
Also lots of video updates were posted that go into more detail then I wrote above,
update #8
https://youtu.be/w9Xbu54gBTU
https://youtu.be/NvAS6-cE1D8
Update #9
https://youtu.be/o1qSm8BdgSA
Update #10 (pre paint test run)
https://youtu.be/o1qSm8BdgSA
Currently I'm mounting on the tracks now and within a couple of days she'll be ready to hunt down some cats.
Also something about finishing a Sherman on memorial day just feels right... even if it's a Brit :D