SEARCH FINESCALE.COM

Enter keywords or a search phrase below:

Tamiya 1/35 SU-76M--Complete 04/10/16

8771 views
101 replies
1 rating 2 rating 3 rating 4 rating 5 rating
  • Member since
    July 2004
  • From: Texas
Posted by wbill76 on Tuesday, April 12, 2016 8:31 PM

Thanks Steve! Enjoyed working on it. Appreciate the comments. Beer

  • Member since
    July 2003
  • From: On my kitchen counter top somewhere in North Carolina.
Posted by disastermaster on Tuesday, April 12, 2016 8:17 PM

 Congrats to "one of the best" on the Finescale Modelers Forum.
Looks like you're up to your usual standard of classic building.
Always a treat to see  your stuff!http://www.freesmileys.org/smileys/smiley-shocked025.gif
                                          
http://i20.photobucket.com/albums/b232/gluetank/Animated/Disastermastermotion-3.gif

Sherman-Jumbo-1945

"I was so much older then, I'm younger than that now"


  • Member since
    July 2004
  • From: Texas
Posted by wbill76 on Tuesday, April 12, 2016 8:43 AM

Thanks Rob! Appreciate the comments. Beer

  • Member since
    October 2015
Posted by Modelrob on Tuesday, April 12, 2016 7:36 AM

Bill the final model came out great. The weathering worked great to tie the base to the model.


Robert

  • Member since
    July 2004
  • From: Texas
Posted by wbill76 on Monday, April 11, 2016 7:22 PM

the doog

A nice little package there, Bill. The base and figures really make it shine! Yes


Thanks Karl! Beer Who knows, figures might start to make an appearance more often in the future... Wink 


  • Member since
    January 2007
Posted by the doog on Monday, April 11, 2016 6:38 PM

A nice little package there, Bill. The base and figures really make it shine! Yes

  • Member since
    January 2016
  • From: A Galaxy Far, Far Away
Posted by Hunter on Monday, April 11, 2016 6:23 PM

The Hobbyist


Hunter


The Hobbyist

Not bad...don't care for the base much...it's so small (not much bigger than the AFV footprint) as to really add nothing, and, in fact, detracts from the AFV.  IMO, of course.Yes Figures are slightly above average. 


REALLY?? 


Sorry, was my praise not strong enough for your liking? Wow, I heard FSM was a place where you could express honest opinions and not get your hand slapped for not "bowing and scraping" enough for certain members... 


First, there's nothing to be sorry about. If that is your opinion, then that's your opinion. Second, I have never seen anyone get their hand slapped for expressing their opinion or suggestions. Bowing and scraping....haven't seen that either.

FSM is a place where you can express and discuss modeling without prejudice...I was just, I guess surprised by your comments. That is a well built and displayed presentation. Like most of us we are limited on how large we can build a dio setting without eating up a lot of space. And yes, you have all the rights to disagree with me or anyone in here. 

It's obvious that you sir are an expert, and I look forward to seeing your work to gain tips, techniques and modeling expertise.

Hunter 


  • Member since
    July 2004
  • From: Texas
Posted by wbill76 on Monday, April 11, 2016 6:18 PM

Greatmaker

, thanks for the comments. Tamiya did a great job molding in different expressions, facial features, and detail into these guys. It's a shame that once installed, their faces are either completely hidden (like the gunner, he's got the most character of the bunch!) or virtually so in the case of Comrade Putin and the loader. 


stikpusher

Beautiful finish! Toast And here I was thinking it was gonna be too clean for the base. Your final weathering tied the two together nicely!Yes Adding the figures gives a nice sense of animation to the completed build.

I think my only critique point would be to leave off the Moscow and Warsaw signs in the sign post. Those strike me not quite pausible. Perhaps a German town to the east would fill that role better on the post.

 
Thanks as well Stik and a fair point about the road signs. Originally I was only going to have the one sign for Berlin and leave it at that...but the historian side of me wanted to include the other two 'milestone' locations and their distances in the whole 'road to victory' from start to finish so that the little base told a bit more of a 'story' in the process. Warsaw marking the start of the war in 1939, Moscow the 'high water mark in 1941/42, and of course Berlin as the end in 1945. If the signs were going to be truly representative and historically accurate in depicting an actual road/crossroads in Germany, the signs would've also had the German spelling and lettering fonts appropriate for the era. The other option would've been Cyrillic lettering for Russian signs, but then that would've made them more cryptic to ethe casual viewer. In the end I took a little artistic license for my own purposes vs. historical accuracy. Beer  
  • Member since
    July 2004
  • From: Sonora Desert
Posted by stikpusher on Monday, April 11, 2016 4:22 PM

Beautiful finish! Toast And here I was thinking it was gonna be too clean for the base. Your final weathering tied the two together nicely!Yes Adding the figures gives a nice sense of animation to the completed build.

I think my only critique point would be to leave off the Moscow and Warsaw signs in the sign post. Those strike me not quite pausible. Perhaps a German town to the east would fill that role better on the post.


F is for FIRE, That burns down the whole town!

U is for URANIUM... BOMBS!

N is for NO SURVIVORS...

       - Plankton

LSM


  • Member since
    April 2013
  • From: Eleva, Wisconsin
Posted by Greatmaker on Monday, April 11, 2016 3:37 PM

Beautiful Build! and your figures look like they are seriously ticked off.. My last figures looked like they fell down face first into a latrine. Yours are super


  • Member since
    July 2004
  • From: Texas
Posted by wbill76 on Monday, April 11, 2016 2:51 PM

Hunter


Wonderful build Sir, and I immensely enjoyed every aspect of your build. The entire build turned out fantastic. 


Thanks, appreciate the kind words. Beer

  • Member since
    January 2016
  • From: A Galaxy Far, Far Away
Posted by Hunter on Monday, April 11, 2016 12:31 PM

The Hobbyist

Not bad...don't care for the base much...it's so small (not much bigger than the AFV footprint) as to really add nothing, and, in fact, detracts from the AFV.  IMO, of course.Yes Figures are slightly above average. 


REALLY?? 


Bill,

Wonderful build Sir, and I immensely enjoyed every aspect of your build. The entire build turned out fantastic. 

Hunter 


  • Member since
    July 2004
  • From: Texas
Posted by wbill76 on Monday, April 11, 2016 10:08 AM

Thanks Eric, glad to hear the SBS will be helpful! Beer


Gamera

Nice simple clean straight-from-the-box build, I love it. I have a habit to keep adding stuff to any build till it becomes so complex I never finish it, something like this is good inspiration on how less can be more. And I like the figures, they give a sense of scale and a 'lived-in' look if that makes any sense.  

I hear you on how easy it is to fall victim to AMS on a build! It was a fun reminder on how enjoyable a good OOB kit build can be. I agree about the figures too especially since the Russians tended to take shorter guys for the Tank Regiments, they had to be on good terms with each other in those tight quarters! Big Smile

  • Member since
    November 2009
  • From: SW Virginia
Posted by Gamera on Monday, April 11, 2016 7:46 AM

Nice simple clean straight-from-the-box build, I love it. I have a habit to keep adding stuff to any build till it becomes so complex I never finish it, something like this is good inspiration on how less can be more. And I like the figures, they give a sense of scale and a 'lived-in' look if that makes any sense.  

"I dream in fire but work in clay." -Arthur Machen


  • Member since
    March 2003
  • From: Rain USA, Vancouver WA
Posted by tigerman on Monday, April 11, 2016 2:04 AM

I like the addition of the crew Bill. As per usual, your WIP will come in handy for any future builds. Well done my friend.

   http://i7.photobucket.com/albums/y269/wing_nut_5o/PANZERJAGERGB.jpg

 Eric 

  • Member since
    July 2004
  • From: Texas
Posted by wbill76 on Monday, April 11, 2016 1:08 AM

Thanks Terry! Tamiya really did a great job all around with this kit IMHO. Was a real pleasure to build. Beer

  • Member since
    January 2013
Posted by jibber on Sunday, April 10, 2016 11:57 PM

Bill I think this is one of those times when the figures and vehicle compliment each other. I think all too often the figures are just thrown in without too much thought, but these look coordinated and functioning while the vehicle does its own job. I think its just the harmony between the two that strikes me. Super clean, super detailed and just a super build. Bill thanks for bringing us along. 

Terry

  • Member since
    July 2004
  • From: Texas
Posted by wbill76 on Sunday, April 10, 2016 10:47 PM

Thanks Knox, appreciate the comments. 


The Hobbyist

Not bad...don't care for the base much...it's so small (not much bigger than the AFV footprint) as to really add nothing, and, in fact, detracts from the AFV.  IMO, of course.Yes Figures are slightly above average. 

I agree in regards to the base size, but the display cabinet space available dictates that I normally don't add a base at all to my builds. It's very rare for me to include one in fact. This one was small enough on its own to allow for a simple base of this size but nothing bigger. In a perfect world it would occupy a proper dio sized base with more elements to create a more visually interesting scene, but that takes up real estate I don't have available. 

Figures aren't my strong suit either and to hear they are slightly above average means I'm improving there as well considering I'm still learning and trying out things each time I decide to work with them. They are about as rare as bases for inclusion on projects.  Beer  They made an appearance this time around since they were like Everest...they were there in the kit. Wink


  • Member since
    February 2011
Posted by knox on Sunday, April 10, 2016 8:24 PM

Nice job.  I really like the looks of your tank and you did a great job on your figures.    gk

  • Member since
    July 2004
  • From: Texas
Posted by wbill76 on Saturday, April 9, 2016 4:49 PM

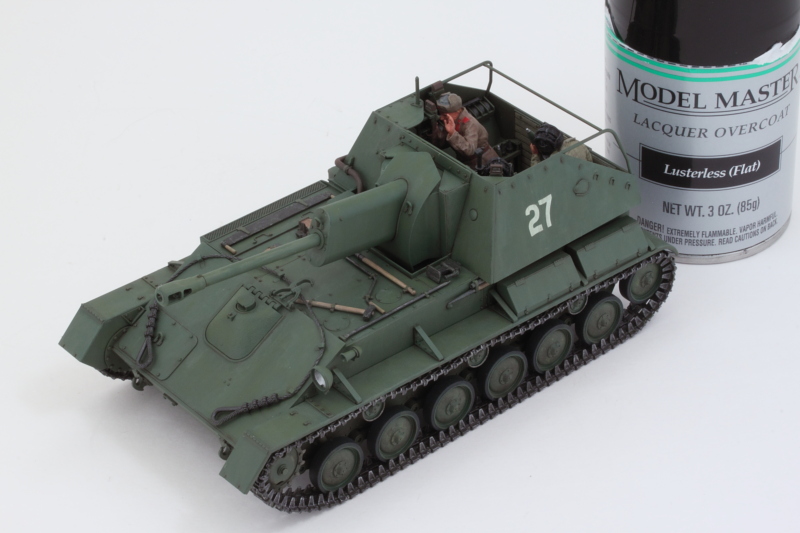
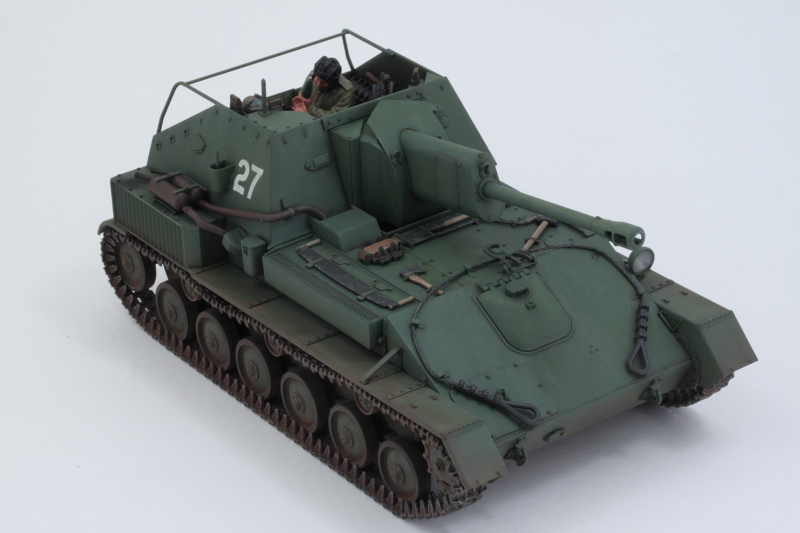
Put the final touches in on this project today. First order of business after making some minor adjustments to the dot filter and pin wash treatment was a dose of MM Lusterless Flat. 


The pigment weathering objective was to get the tracks/suspension and hull to match up with the base, so to that end I applied some Mig Dark Mud pigments. I applied it as a wet mix using ordinary tap water as the carrier with a drop of liquid dish soap added to break the surface tension. 


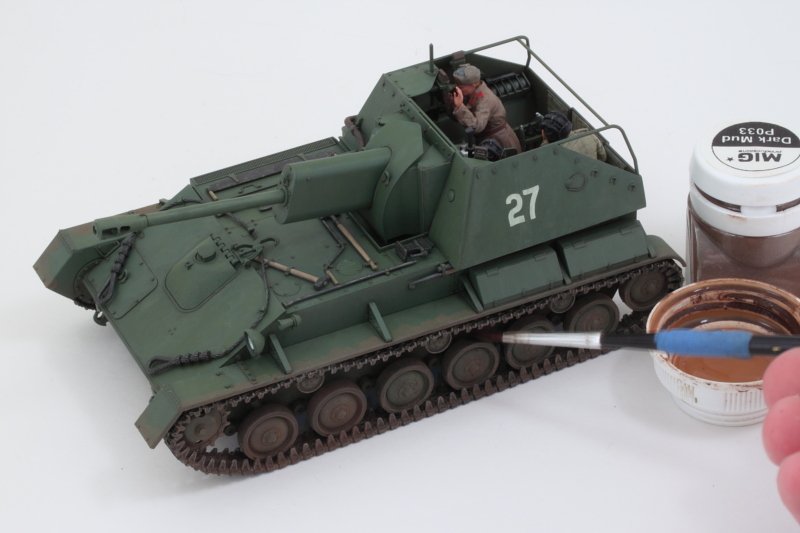
After it had air dried, I used a stiff bristled brush to remove the excess. I had to be careful not to be too harsh on the track runs, especially the top portions, and had to reattach a couple spots that came loose in this process. 


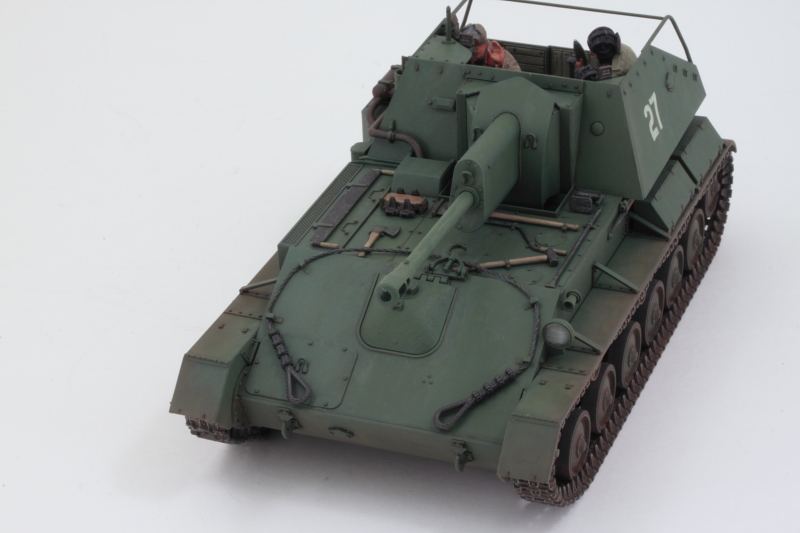
More adjustments were done with a combination of wet and dry q-tips. For the tight spaces around the road wheels where the q-tip couldn't fit, I used a small round sable brush and clean water to make changes where needed. 


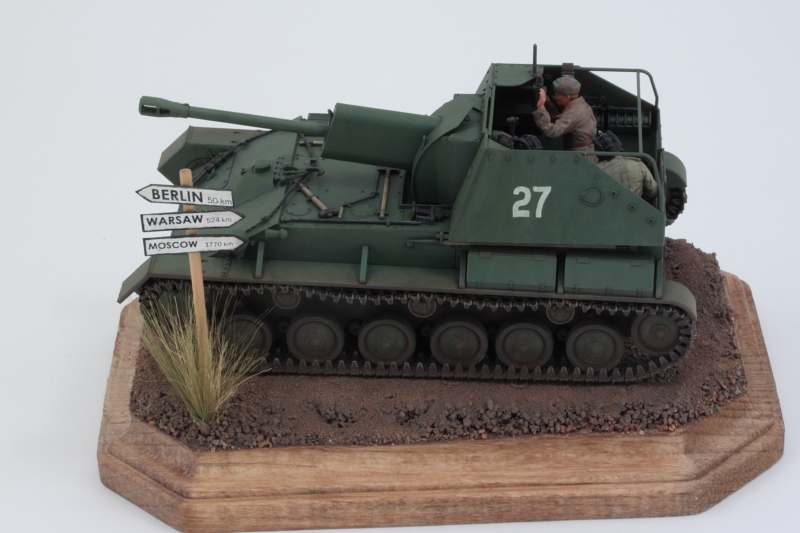
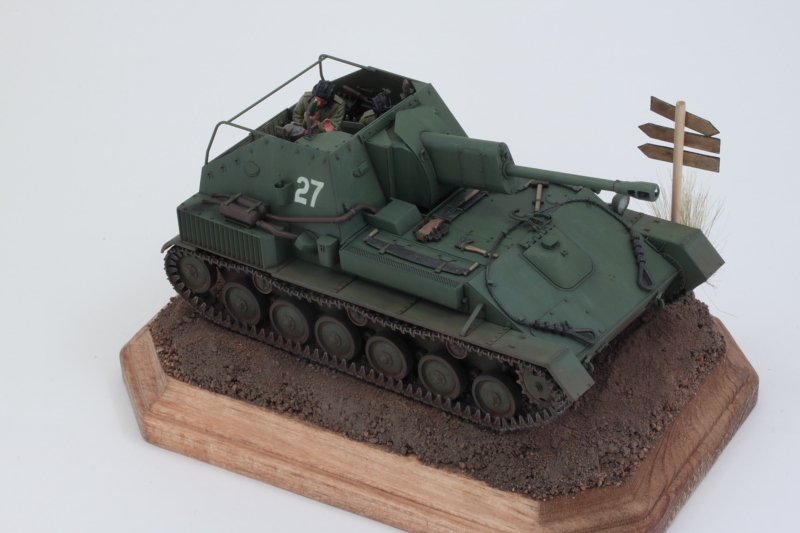
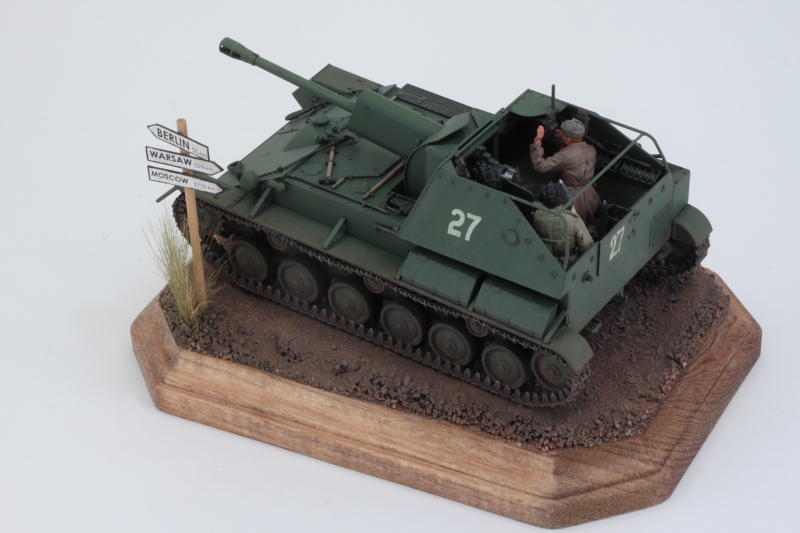
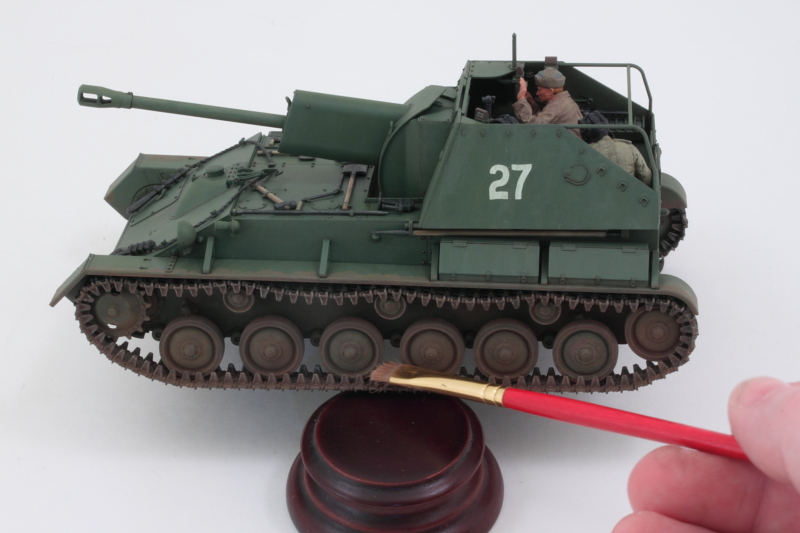
The end result  looks good, but the ultimate check was with the base.


That meant I could turn to the last couple of details remaining. I used some black artist pastels to add some more exhaust soot and staining to the right side of the hull. 


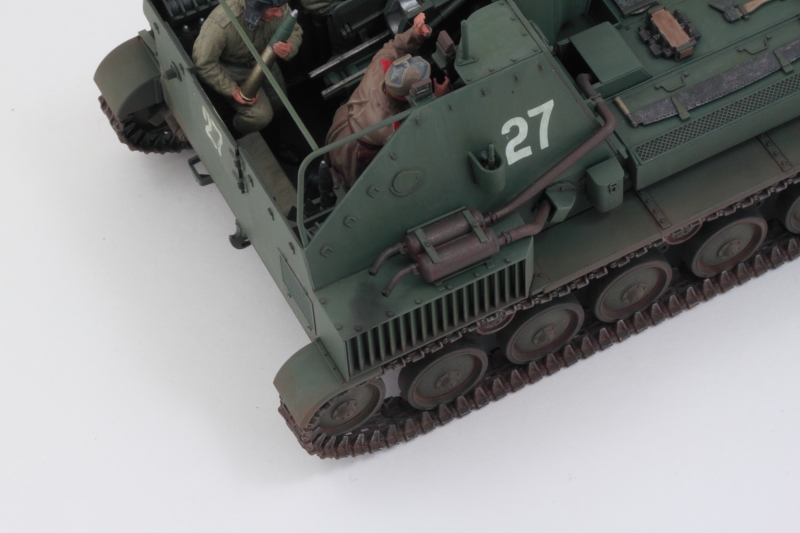
The headlight finally got its clear lens as well. I installed it with liquid glue, then brushed a light coat of Future over the front. Once that was dry and protecting the clear part, I ran some thinned green around its edge so that it would look integrated with the rest of the housing. 


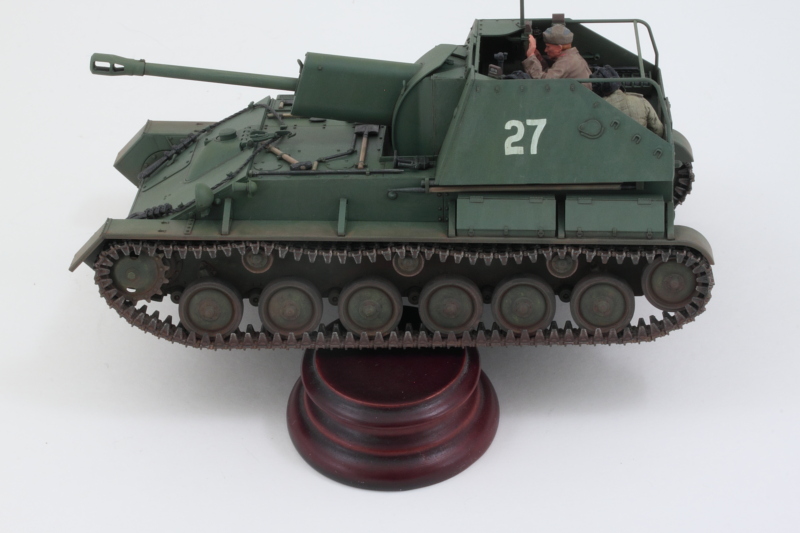
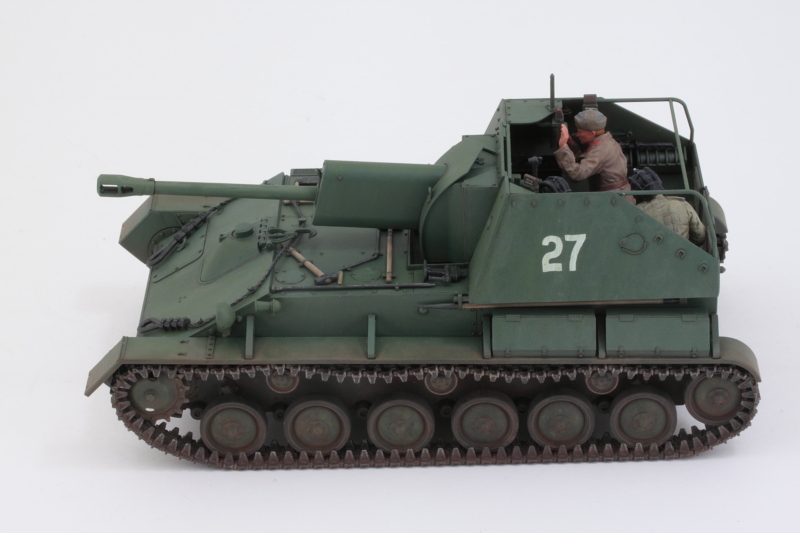
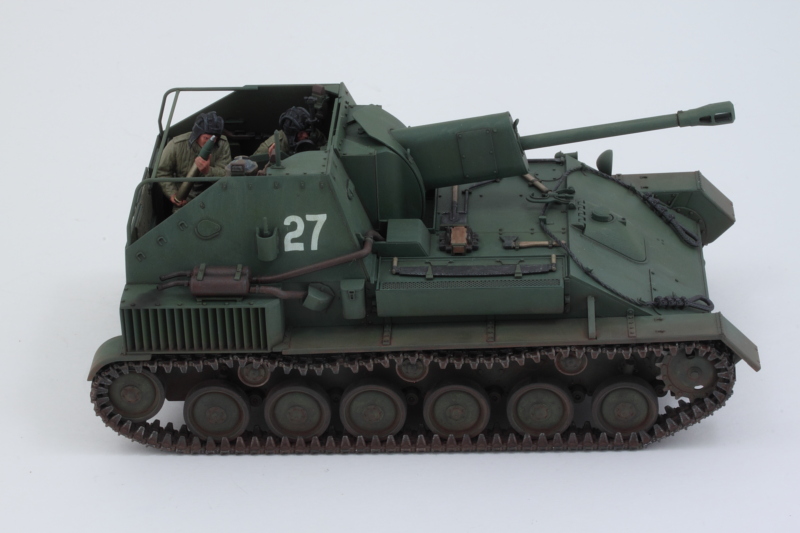
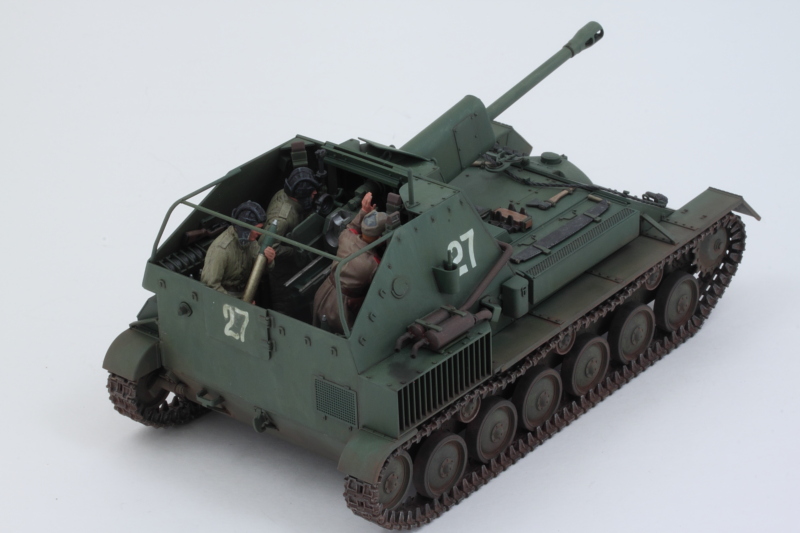
That meant it was time for the walkarounds to check for any other small things that I might have missed. 


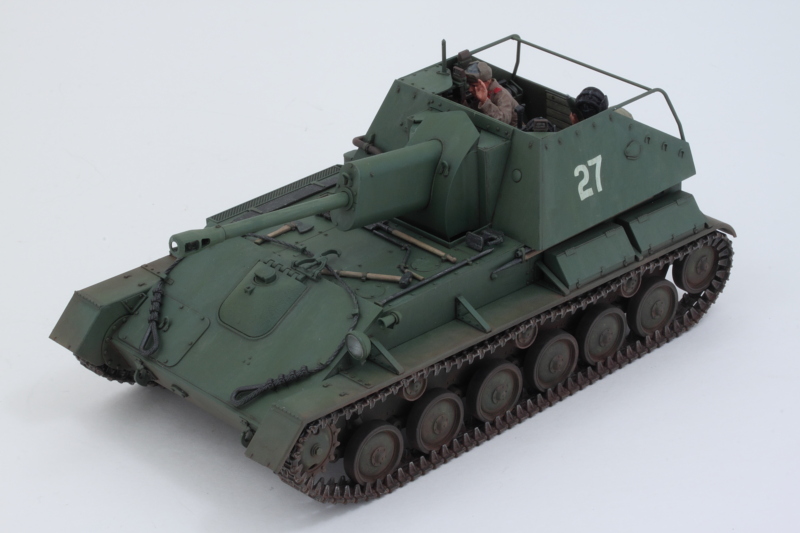
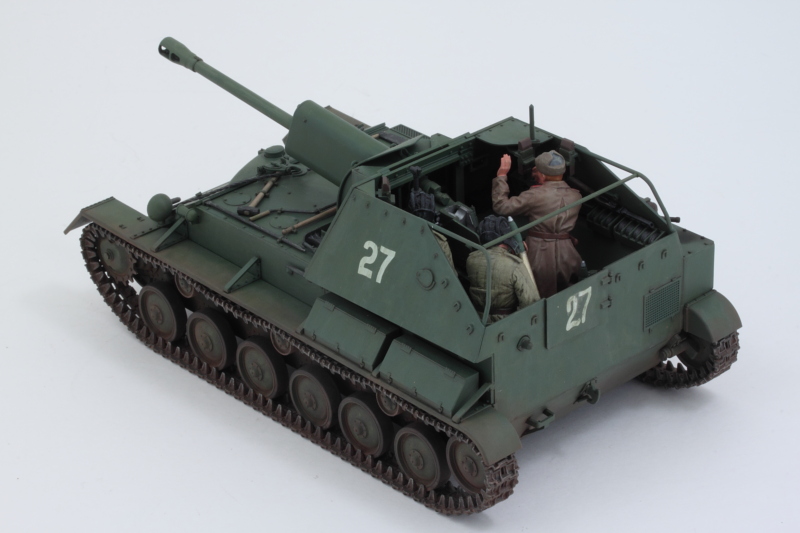
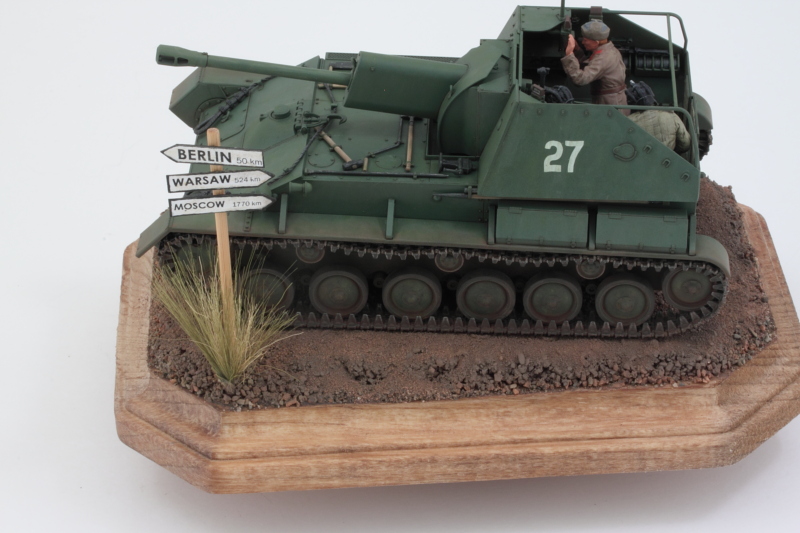
And then the placement on the base! 


  • Member since
    July 2004
  • From: Sonora Desert
Posted by stikpusher on Saturday, April 9, 2016 1:38 PM

Bish, If you need a good source for nylon string, get ahold of parachute cord. It is sold in many camping sporting good stores around here in lengths of 50 feet or so for pretty cheap. You cut off a length, remove the "guts" from the braided sheath and have plenty of high quality nylon line for making cables. I have plenty left over from my service time, supply used to give us tons of the stuff and we mostly used the sheathing for "dummy cord", tying down  equipment or adding a wrapped cord cover to handles for better non slip grips, leaving me with lots of inner line. Hit the cut end of the line with some heat to keep it from unravelling and your in business.


F is for FIRE, That burns down the whole town!

U is for URANIUM... BOMBS!

N is for NO SURVIVORS...

       - Plankton

LSM


  • Member since
    July 2004
  • From: Texas
Posted by wbill76 on Saturday, April 9, 2016 10:58 AM

Thanks Bish! I discovered that little trick when using crochet thread for tiedowns. Works well enough if you don't want to spring for ship rigging type thread or similar! ;)

  • Member since
    December 2002
  • From: Bury St Edmunds, Suffolk, England
Posted by Bish on Saturday, April 9, 2016 3:15 AM

Thanks for the info on the string. I will keep the future trick in mind.

Looking very nice, great little base you have there, really sets it off well.

I am a Norfolk man and i glory in being so


On the bench: Airfix 1/72nd Harrier GR.3/Fujimi 1/72nd Ju 87D-3

  • Member since
    July 2004
  • From: Texas
Posted by wbill76 on Friday, April 8, 2016 5:27 PM

Today was a 'Darth Vader' day that meant I spent virtually the entire session with the breather mask on. I started in on the weathering process and applied dot filters using a combination of MM enamel Faded Olive Drab and the last 'green' shade that I had mixed up for the hull. The Faded OD was added at about a 2-to-1 ratio so that it would do it's job in terms of fading and adding in some color variation but without going too crazy. It did the trick beautifully and created a nice subtle tonal variation in the process, something that's not so easy to capture in the photos but which should show up a little more pronounced once a flat coat is applied over it. 


Next up, I added a pin wash using Ammo's Africa Korps Wash and a 10/0 pointed brush. After the initial application, I used the same brush and clean thinner to tighten it up and make adjustments where necessary. 


Here's where it stands now, I'll let it sit overnight and look at it with 'fresh eyes' to see if there are any other adjustments I want to make before moving on to the pigment stage. 


One step closer to the finish line! :)

  • Member since
    July 2004
  • From: Texas
Posted by wbill76 on Friday, April 8, 2016 11:14 AM

Thanks Rob!


stikpusher

Yes

Even on a display base, these things do not take up much room. Looking real good as you near the finish line!

 
Definitely not a huge vehicle. The base in question is 7" x 5" only, not a space hog at all! Wink
 

Gamera

Whoa almost there now!

And nice work on the base, somehow even a small one seems to put the tank 'in it's element' and thus look much better than just plopping the tank down on the table. 


I agree Gamera, since I had added the figures, it seemed like a small base was also in order. Ordinarily I don't include bases for storage reasons among others but in this case it didn't substantially increase the space footprint in the display cabinet. Smile 

  • Member since
    November 2009
  • From: SW Virginia
Posted by Gamera on Friday, April 8, 2016 7:35 AM

Whoa almost there now!

And nice work on the base, somehow even a small one seems to put the tank 'in it's element' and thus look much better than just plopping the tank down on the table. 

"I dream in fire but work in clay." -Arthur Machen


  • Member since
    October 2015
Posted by Modelrob on Friday, April 8, 2016 6:49 AM

Bill it looks great and the base came out nice.

Robert

  • Member since
    July 2004
  • From: Sonora Desert
Posted by stikpusher on Friday, April 8, 2016 3:06 AM

Yes

Even on a display base, these things do not take up much room. Looking real good as you near the finish line!


F is for FIRE, That burns down the whole town!

U is for URANIUM... BOMBS!

N is for NO SURVIVORS...

       - Plankton

LSM


  • Member since
    July 2004
  • From: Texas
Posted by wbill76 on Thursday, April 7, 2016 9:25 PM

Thanks Karl! It's been a fun project, almost done! Beer

JOIN OUR COMMUNITY!

Our community is FREE to join. To participate you must either login or register for an account.

SEARCH FORUMS
FREE NEWSLETTER
By signing up you may also receive reader surveys and occasional special offers. We do not sell, rent or trade our email lists. View our Privacy Policy.