I served in South Vietnam from January 28 to March 5, 1966. I was a Navy hospital corpsman assigned to the Marine Corps' 3rd Battalion, 1st Marine Division. I hadn't planned on such a short tour of duty — 37 days — but in Operation Utah, a sniper shattered my right femur, a wound which gave me a free ticket home and more than 10 months in the Navy's Balboa Hospital in San Diego.
A few days after our amphibious landing in South Vietnam, I encountered an Ontos, which I had never heard of at that time. Here's a photo, taken with my Nikonos I under water/all-weather camera, which I had bought specifically for Vietnam:
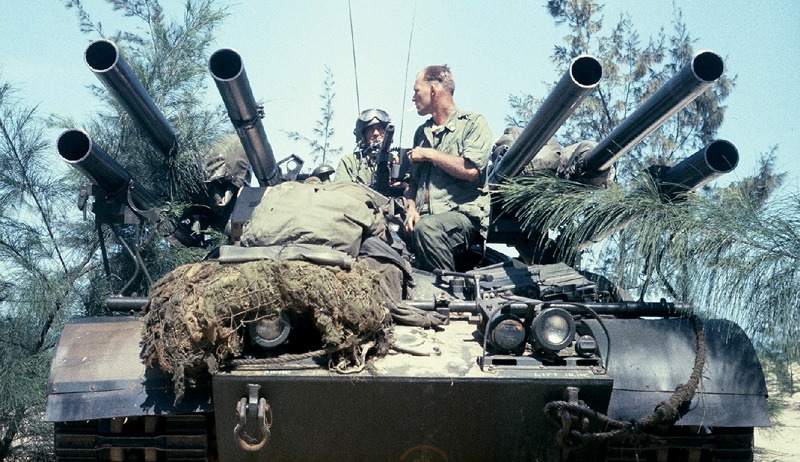
I talked briefly with one of the crew, probably the bare-headed guy. He told me that a day or so previously, they had fired all six of the 106mm recoilless rifles at the base of a pagoda, which promptly and not surprisingly collapsed. I guess we showed those Buddhists who was boss!
Bob Ingraham
Vancouver