SEARCH FINESCALE.COM

Enter keywords or a search phrase below:

My First Tamiya Tank - Again!

9132 views
105 replies
1 rating 2 rating 3 rating 4 rating 5 rating
  • Member since
    May 2011
  • From: Honolulu, Hawaii
Posted by Real G on Thursday, August 6, 2020 6:08 PM

Okay I flexed my Google-Fu and came up with some shots showing the counterweight thingy as a stub with a bolt.  Is this correct?

Now to decide whether or not to replace the flexible (but inaccurate) tracks.

“Ya ya ya, unicorn papoi!”

  • Member since
    May 2011
  • From: Honolulu, Hawaii
Posted by Real G on Thursday, August 6, 2020 5:49 PM

Stik,

You are a true doyen of armor information!  When the instructions said the M3 was equipped with five(!) 30 Cals, I assumed the one under the 37mm gun was one of them - and Tamiya has you use one of the barrels.  Before I use my Google, are there any decent photos showing what the counterweight looks like?  Or is it just a skinny tube?

That's great news that I only need two 30 Cal barrels - now I don't have to unearth the Academy Stuart parts!  Thanks again Stik!  Yes

“Ya ya ya, unicorn papoi!”

  • Member since
    July 2004
  • From: Sonora Desert
Posted by stikpusher on Thursday, August 6, 2020 2:34 PM

Real G

Oh, I'm all about the Dark Side, Armornut!  Cool

I had lunch with a friend the other day, and he was trying to push resin tool clamps, stowage, and other aftermarket stuff on me to use.  I politely declined, but he had an excellent idea to replace the skinny, smooth 30 Cal gun tubes without recourse to AM.  I have several Stuart models he had given me, and being the type that throws nothing away, still have all the unused parts including the sponson mounted 30 Cal barrels.  Since the Lee uses three of them, I'll use two from the new Tamiya Stuart, and one from the Academy Stuart.  Or the other way - the nicer one will be used for the commander's cupola, and the other two will go on the 37mm mantlet.

My friend also mentioned he had ordered Star Decals' Tunisian M3 Lee sheet for me to use (darn it, he really wants me to finish this one), so I'll post pics of the guns and decal shortly.

I have a hard time figuring out who is contaminating who.  I'm the one who is the troublemaker who makes people buy stuff, but the wheel has turned and it is me who is doing the buying!

Perhaps I am NOT so strong with the Dark Side...


You only need two .30 cal barrels for the Lee, one for the cupola, and one co-ax alongside the 37mm gun. The tube under the 37mm gun is not a machine gun barrel. It is a counterweight for the gun when fitted with a stabilizer.

This is a nice old kit. Its always fun to go back and have another go at those early build kits from childhood. 


F is for FIRE, That burns down the whole town!

U is for URANIUM... BOMBS!

N is for NO SURVIVORS...

       - Plankton

LSM


  • Member since
    February 2011
Posted by GreySnake on Thursday, August 6, 2020 2:15 PM

The classic Tamiya kit is looking good. 

  • Member since
    May 2011
  • From: Honolulu, Hawaii
Posted by Real G on Thursday, August 6, 2020 1:22 PM

Oh, I'm all about the Dark Side, Armornut!  Cool

I had lunch with a friend the other day, and he was trying to push resin tool clamps, stowage, and other aftermarket stuff on me to use.  I politely declined, but he had an excellent idea to replace the skinny, smooth 30 Cal gun tubes without recourse to AM.  I have several Stuart models he had given me, and being the type that throws nothing away, still have all the unused parts including the sponson mounted 30 Cal barrels.  Since the Lee uses three of them, I'll use two from the new Tamiya Stuart, and one from the Academy Stuart.  Or the other way - the nicer one will be used for the commander's cupola, and the other two will go on the 37mm mantlet.

My friend also mentioned he had ordered Star Decals' Tunisian M3 Lee sheet for me to use (darn it, he really wants me to finish this one), so I'll post pics of the guns and decal shortly.

I have a hard time figuring out who is contaminating who.  I'm the one who is the troublemaker who makes people buy stuff, but the wheel has turned and it is me who is doing the buying!

Perhaps I am NOT so strong with the Dark Side...

“Ya ya ya, unicorn papoi!”

  • Member since
    March 2007
  • From: Northeast WA State
Posted by armornut on Thursday, August 6, 2020 7:47 AM

    The Force is STRONG with this one, you don't know the power of the dark side.....lokks good G and sound like your having fun. Keep it upBig Smile

we're modelers it's what we do

  • Member since
    May 2011
  • From: Honolulu, Hawaii
Posted by Real G on Wednesday, August 5, 2020 5:53 PM

Armornut and RBaer - Keeping this one as simple as possible, so no major mods.  I am a pathological liar though...  Wink

Greg - I just noticed that the M3 has no provisions for motorization!  No holes to fill in the hull, which is great.  Maybe Tamiya did not want to go through the trouble of making a fancy gearbox to accomodate the external final drive?

Plasticjunkie - Thanks, will try not to disappoint (but see the first response).

BrandonK - I gotta get back on my M41 too, even though it's not "my" kit.

GAF - Star Decals makes sheets for North Africa and Burma theaters for the M3/Grant.

So anyway, I got a little more work done on the M3.  Aside from the lack of motorization provisions, the kit has no polycaps.  There are some plastic polycap-like inserts for the sprockets and idlers, but they allow too much lateral slop.  I'll just glue them in place.  The 37mm turret gun is already floppy, so I also glued it.  At least the sponson mounted 75mm can still be used for battles in the sandbox!

The other thing I noticed is that all the parts need seam line cleanup, most likely due to the age of the molds.  Pretty much all separately molded items needed their mounting holes enlarged to allow proper fit.

On to some piccies!

The transmission cover fits pretty good, except there is a gap you can see on the left side.  But with a little adjustment of the upper hull, it can be minimized.

The gas caps are all separate parts.

Hollow sponsons!  Sheet plastic will be used to blank them off.  Note lack of motorization holes.

I dry fitted the suspension parts to have a look at the M3 on its legs.


“Ya ya ya, unicorn papoi!”

GAF
  • Member since
    June 2012
  • From: Anniston, AL
Posted by GAF on Tuesday, August 4, 2020 8:12 PM

RG,

Been wanting to get one of those to do a 14th Army version in Burma.  Got a PDF on unit insignias just in case!  Big Smile

Might want to pick up a Grant instead.

Gary

  • Member since
    February 2011
Posted by GreySnake on Tuesday, August 4, 2020 10:59 AM

Real G

GreySnake,

I was around the same age as you when I built the M3! But I don’t remember any problems because my standards were very low!  I didn’t paint the kit, except for a completely spurrious camouflage using glossy charteuse.


I didn’t have many standards either when I built it other then I knew there shouldn’t be a massive gap somewhere on the hull. I can’t even remember what was wrong with it and I think my father ended up fixing it in the end and the problem was me putting something upside down. I didn’t do any painting and put the decals on the bare plastic.
  • Member since
    June 2014
Posted by BrandonK on Monday, August 3, 2020 9:43 PM

I am currently working through the old Tamiya M41. It's definately not up to todays standard, but it's been a fast build and kinda nice to just toss one together quick fast and in a hurry. I'm looking forward to watching you do this M3.

BK

On the bench:

A lot !! And I mean A LOT!!

2024 Kits on deck / in process / completed   

                         14 / 5 / 2  

                              Tongue Tied

  • Member since
    November 2008
  • From: Central Florida
Posted by plasticjunkie on Monday, August 3, 2020 8:54 PM

G those old Tamiya kits are a delight to work with. May not be super duper detailed as the new ones but they build up with low parts count and easy assembly. I recently built the old Tamiya Tiger I and it looked pretty nice. I'm sure your's will look great too.

 GIFMaker.org_jy_Ayj_O


Too many models to build, not enough time in a lifetime!!

  • Member since
    May 2013
  • From: Indiana, USA
Posted by Greg on Monday, August 3, 2020 6:45 PM

Thanks for the fond memories of Tamiya tanks, G. Motorized versions were a big deal in the late 60's and into the 70's....I don't know when they phased out. I think I got as much enjoyment out of those as anything i've ever done with modeling.

Very cool you found a childhood kit. That is always a real treat.

It's looking good so far.

  • Member since
    May 2011
  • From: Honolulu, Hawaii
Posted by Real G on Monday, August 3, 2020 6:33 PM

GreySnake,

I was around the same age as you when I built the M3! But I don’t remember any problems because my standards were very low!  I didn’t paint the kit, except for a completely spurrious camouflage using glossy charteuse.

“Ya ya ya, unicorn papoi!”

  • Member since
    February 2011
Posted by GreySnake on Monday, August 3, 2020 5:55 PM
Nice work RG. I built the Tamiya M3 when I was around ten or eleven. For whatever reason I had a very hard time getting the upper hull fit right as I recall. Think it was the first time I was tempted to throw a model at a wall. I eventually got it built  but was never happy with it.
  • Member since
    September 2006
  • From: Dripping Springs, TX, USA
Posted by RBaer on Monday, August 3, 2020 5:04 PM

I can't say how many of those kits I've built, but I have two in the case and one in the stash.....   Always fun. I promise one day to do one with some corrections, but hey.

Apprentice rivet counter.

  • Member since
    March 2007
  • From: Northeast WA State
Posted by armornut on Monday, August 3, 2020 4:05 PM

   Nice find Real G, welcome to the Dark Side.Wink

    Good start for just a couple hours of work.

we're modelers it's what we do

  • Member since
    May 2011
  • From: Honolulu, Hawaii
My First Tamiya Tank - Again!
Posted by Real G on Monday, August 3, 2020 3:48 PM

A long time ago, in a childhood far, far away...

In 1976 I got my first Tamiya kit as a Christmas present from one of my dad's friends.  Being a little kid busy with Revell, Aurora, and Monogram kits, I had never heard of Tamiya.  When I opened the box, I knew this was not an ordinary kit.  The instructions were unlike those of any other manufacturer, and the whole package felt very "grown up".  The MRC gatefold flyer in the box was pretty cool as well.

The tank itself was kind of ugly in my eyes, and my dad explained the reasoning for the triple stacked armament.  He also pointed out the riveted construction and compared the design to its successor the M4 Sherman.

But being a little kid, I didn't care about how good (or otherwise) the M3 Lee was in real life.  I just tore into the kit to have some fun.  Now, there were two things that needed to be done that I had never attempted in a kit.  Using a heated screwdriver to secure the track pins required an open flame, which my mom would have never approved of - so lucky I was building it under dad's supervision!  The second thing was stretching sprue for the radio antenna - another activity requiring an open flame!  I cannot believe we did it in the living room on an end table, but both the tracks and antenna came out fine in one go.  And the furniture survived un-scorched, thank God.  Sprue stretching seems to be regarded as a black art by some, but this experience made it seem natural for me.

Fast forward 44 years.

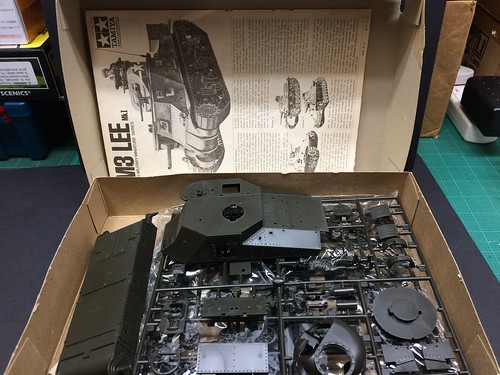
A friend had "rescued" one of these kits from an estate sale and knew of the above story, so at our monthly get together he presented me with it.  By the condition of the box, the kit must have been purchased around the same time as I got mine!

The instructions had yellowed and was brittle, and the decal sheet was nowhere to be found.  The rubber bands holding the belt type tracks had solidified into a clear dark brown substance that crumbled away when touched.  But the plastic parts were fine, as were the tracks.

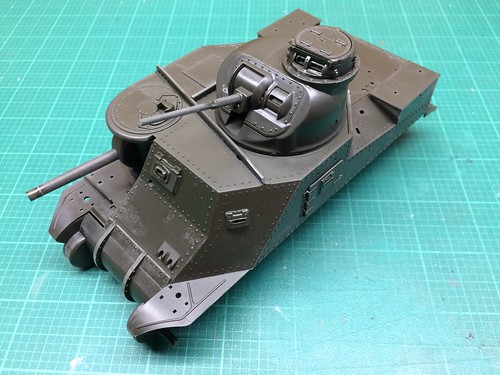
I decided I would try to build this kit OOTB as much as possible (including using those inaccurate tracks with the end pin connectors in the wrong place).  The only modifications I will allow myself will be simple things like closing off the open sponsons, making an antenna, and sourcing fresh decals.  I also want to try to modify the commander figure to resemble the box art, with him deep inside the cupola.  No aftermarket PE, resin etc. will be allowed.  Pinkie promise.

So here is where I am at after a couple of hours work:

As I get older, I have to accept that my modeling horsepower is declining, so I need to practice dialing things back to keep on enjoying building.  This will be a good exercise to that end.


“Ya ya ya, unicorn papoi!”

JOIN OUR COMMUNITY!

Our community is FREE to join. To participate you must either login or register for an account.

SEARCH FORUMS
FREE NEWSLETTER
By signing up you may also receive reader surveys and occasional special offers. We do not sell, rent or trade our email lists. View our Privacy Policy.