SEARCH FINESCALE.COM

Enter keywords or a search phrase below:

MODEL T--"Unfinished Project"--FINISHED! Pg 6

25498 views
87 replies
1 rating 2 rating 3 rating 4 rating 5 rating
  • Member since
    January 2007
Posted by the doog on Friday, December 18, 2009 12:16 PM

vespa boy

Another top notch build Karl. Well done. Beautiful weathering on the metal, and I really like the slant from the collapsed wheels. Give your self a big pat on the back.

Thank you, Narayan! That's a generous compliment, and I do appreciate it!

I'll have to get back over to DIorama's and check out your latest progress as well. Your work is always inspirational;!

  • Member since
    April 2004
  • From: Boston MA
Posted by vespa boy on Friday, December 18, 2009 11:24 AM

Another top notch build Karl. Well done. Beautiful weathering on the metal, and I really like the slant from the collapsed wheels. Give your self a big pat on the back.

http://public.fotki.com/nkhandekar

This ain't no Mudd Club, or C.B.G.B.,
I ain't got time for that now

  • Member since
    January 2007
Posted by the doog on Friday, December 18, 2009 1:17 AM

JTRACING

Awesome!! everything looks spot onYesBeer

Thanks so much, James! I appreciate you commenting!!! Smile

  • Member since
    April 2007
  • From: Canada
Posted by JTRACING on Thursday, December 17, 2009 9:27 PM

Awesome!! everything looks spot onYesBeer

  • Member since
    January 2007
Posted by the doog on Wednesday, December 16, 2009 9:43 AM

mm23t

Karl, I've enjoyed following this project, and it looks great. Everything about it just is amazing work. Now, on to the '34.

Thanks, Mike! And don't worry--I'm still working on that sucka! I've finally got a good finish, and will use Future to gloss it up! I"m still working on masking certain parts of it, but after that, it should go fairly quickly! Stay tuned!

  • Member since
    September 2004
  • From: Tulsa, Oklahoma
Posted by mm23t on Tuesday, December 15, 2009 10:12 PM

Karl, I've enjoyed following this project, and it looks great. Everything about it just is amazing work. Now, on to the '34.

Medals are not "Won", they are "Earned".

Mike..


  • Member since
    January 2007
Posted by the doog on Monday, December 14, 2009 10:15 AM

Thanks, fox, for the kind comment!

You too, Bill; thanks for looking in!

And thanks, Andy! I've seen your "rust bucket" as well--you're no slouch in the rusting department either! Wink Thanks for your nice words!

  • Member since
    January 2008
  • From: Bournemouth UK
Posted by Bodge on Monday, December 14, 2009 8:17 AM

WOW AND DOUBLE WOW, the effects youve done there are some of the best ive seen, Awsome Karl and its inspireing. I want to do a car model now .Stick out tongue

  • Member since
    May 2005
  • From: Left forever
Posted by Bgrigg on Sunday, December 13, 2009 6:41 PM

What a wreck! Looks very real.

So long folks!

fox
  • Member since
    January 2007
  • From: Narvon, Pa.
Posted by fox on Sunday, December 13, 2009 4:28 PM

Absolutely OUTSTANDING Doog. Bow DownBow DownBow DownBow DownBow Down Words fail me.

JimCaptain

 Main WIP: 

   On the Bench: Artesania Latina  (aka) Artists in the Latrine 1/75 Bluenose II

I keep hitting "escape", but I'm still here.

  • Member since
    January 2007
Posted by the doog on Sunday, December 13, 2009 12:40 PM

Thanks guys, and everyone who;s been following this project!

Well, I've finished this one. Here's the last update and the photos! Enjoy!

To make a damaged window, I cut out a window from clear styrene sheet--the kit windows were like, 3 mm thick! Than I drilled small "bullet holes" in it, and scored it with an Exacto blade. Then I glued it into the froa with clear white glue.

The title of the vignette comes from the unused "hot rod" engine in the back. To model it in its packing crate and wrapping, I cut out some plastic from a typical heavy sandwich zip-top bag, and then sprayed a light coat of dirty brown paint over it.,

...and after cutting some strapping material from lead foil, I wrapped the plastic around the engine, bound it with the straps, and then tore up the plastic with a tool.

Here's the truck before I put it on the base..You know, when I finished the truck, it looked ok, but something just wasn't right...that's when I realized that the sit of the truck needed to reflect its state of decay. In a suddent fit of inspiration, I broke the front sway bar, and tilted the truck on its suspension--PERFECT! Just what it needed!. You'll notice some "Joefix" leaves that I also used in my "Rust Bunnies" diorama.

I made a simple base of Celluclay, static grass, sisal fiber rope "grass", and some accessories. And yup--there's one of those darned "rust bunnies", lol!

And here is the finished product!

Questions, comments, and critiques always welcomed! Thanks for chiming in, guys!!!


  • Member since
    January 2007
Posted by the doog on Wednesday, December 9, 2009 7:06 PM

model maniac 96

Amazing, awesome, fantastic, unbelievable!  Dang, I can not really find a word that sums up how GREAT that is! That really is just sweet!


     Thanks, Jim

Thanks a lot, Jim! I appreciate it!

  • Member since
    December 2008
  • From: Las Vegas, Nevada
Posted by model maniac 96 on Tuesday, December 8, 2009 9:36 PM

Amazing, awesome, fantastic, unbelievable!  Dang, I can not really find a word that sums up how GREAT that is! That really is just sweet!


     Thanks, Jim

"Veni, Vidi, Vici" Julius Caesar: I came, I saw, I conquered.
  • Member since
    September 2009
  • From: hamilton , Ontario
Posted by EliteModelling on Sunday, December 6, 2009 12:23 PM

WOW. THAT IS AMAZING! it looks like you you took a real old car and shrunk it!


  • Member since
    May 2005
  • From: Dublin Rep Of Ireland
Posted by terry35 on Saturday, December 5, 2009 8:00 PM

I'm speechless Karl, that is just fantastic. One of your best yet, really convincing.

Terry.

  • Member since
    January 2007
Posted by the doog on Monday, November 30, 2009 6:36 PM

Thanks, Waybe, Steve, and Narayan!

I appreciate the nice compliments! I"m in Pa hunting deer right now, but I'll havea new update by the weekend!

Stay tuned! Big Smile [:D]

  • Member since
    April 2004
  • From: Boston MA
Posted by vespa boy on Monday, November 30, 2009 4:40 PM
beautiful colour and texture of on this Karl. I am super impressed, especially with the crumbly rusty paint.

http://public.fotki.com/nkhandekar

This ain't no Mudd Club, or C.B.G.B.,
I ain't got time for that now

  • Member since
    January 2008
  • From: Woodbine, MD
Posted by 666Irish on Monday, November 30, 2009 6:27 AM

Doog,

You have captured the look and feel to perfection! As someone who works with vehicles like this (and sometimes worse) on a daily basis, I am amazed at your work!

Just spectacular!


Steve

She was only a whiskey maker, but he loved her still.

  • Member since
    January 2007
Posted by the doog on Wednesday, November 25, 2009 9:02 PM
 mm23t wrote:

Karl, what are the names of the mig oil paints that you used. I would like to try this myself and would like to be using the correct oils.

Thanks............................

Thanks, Mike and James!

James, the MIG oils are their "502 Abteilung" oils. They are available on many sites, but you can also just order them from their online site.

I used "Dark Rust", Light Rust Brown", and "Faded Dark Yellow" from the 502 line.

  • Member since
    September 2004
  • From: Tulsa, Oklahoma
Posted by mm23t on Wednesday, November 25, 2009 8:36 PM

Karl, what are the names of the mig oil paints that you used. I would like to try this myself and would like to be using the correct oils.

Thanks............................

Medals are not "Won", they are "Earned".

Mike..


  • Member since
    April 2007
  • From: Canada
Posted by JTRACING on Wednesday, November 25, 2009 6:50 PM
excellent ! very nice effect with the hair spray
  • Member since
    September 2004
  • From: Tulsa, Oklahoma
Posted by mm23t on Wednesday, November 25, 2009 6:20 PM
Ah rust, what a beatiful thing! The old "T" is looking good.

Medals are not "Won", they are "Earned".

Mike..


  • Member since
    January 2007
Posted by the doog on Wednesday, November 25, 2009 3:51 PM

Guys, thanks for all the support and comments/compliments! I'm sorry that I haven't acknowledged you sooner; it's been a busy week, and I've been trying to get some work done on this baby.

Here's a new update on finishing the Model T. Sorry to the dial-up users; this will be somewhat picture-heavy. All paints are Tamiya acrylcs.

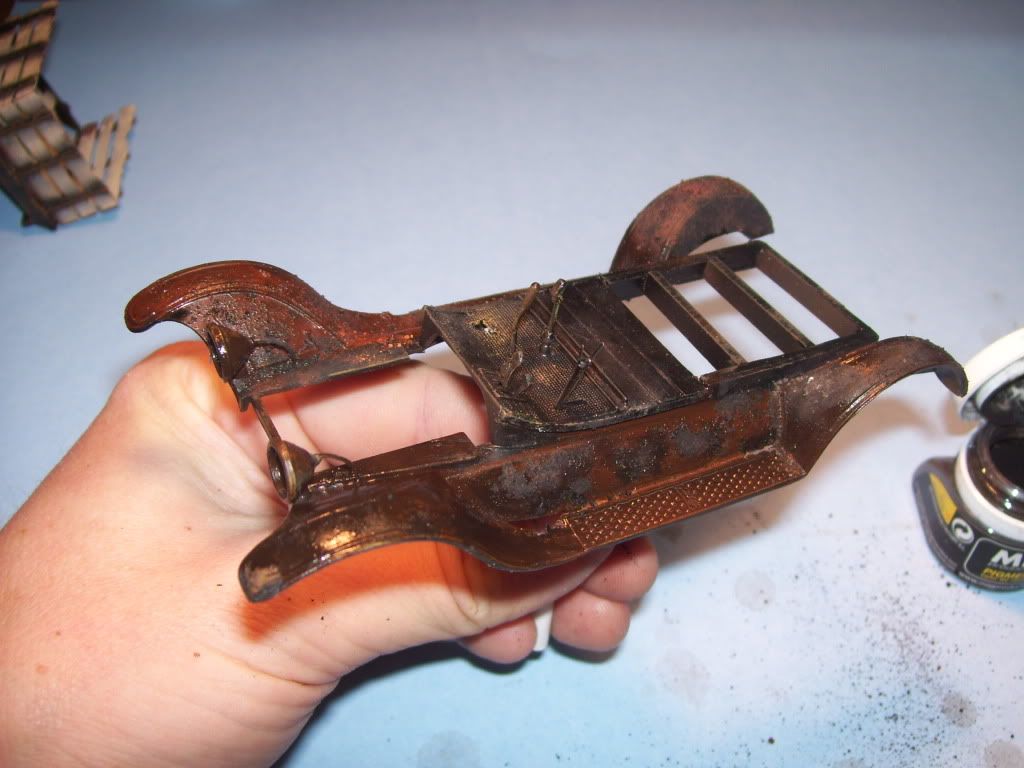
First, I started by painting the model a combination of Tamiya Red Brown mixed with Black. Several shades were used, and then the model was drybrushed with lighter rust shades from craft store paint. This would be revealed by the "hair spray" method. NO sealant was used at this point!

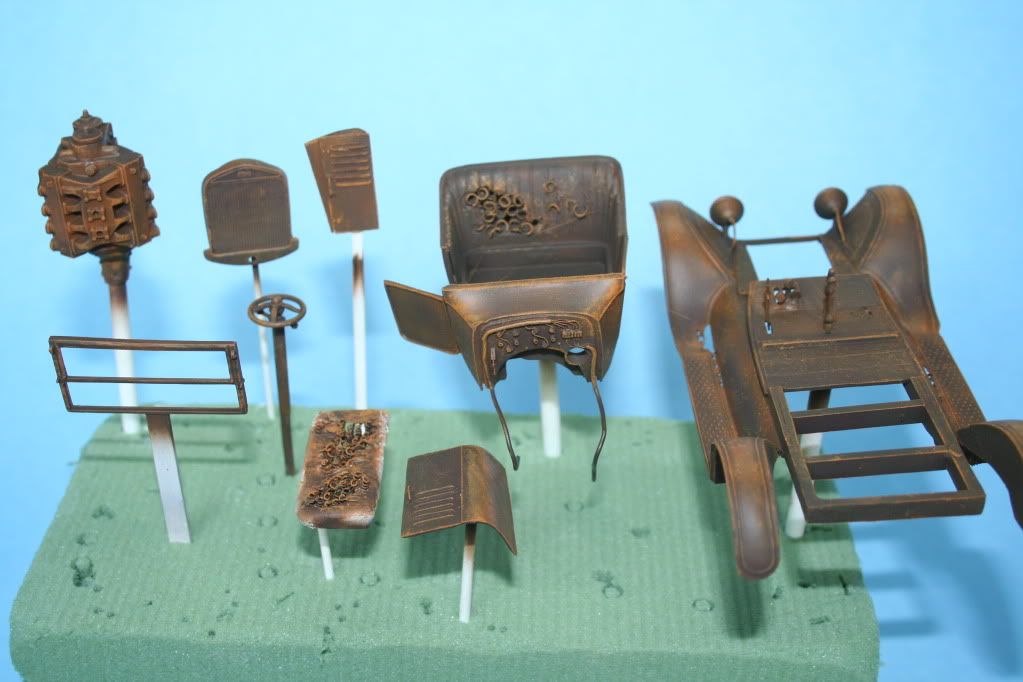
Then, the model was sprayed with a coat of "Aqua Net Super Hold" hair spray, and set aside to dry for about an hour.

After the hair spray had dried, the model was painted using Semi-Gloss Black.

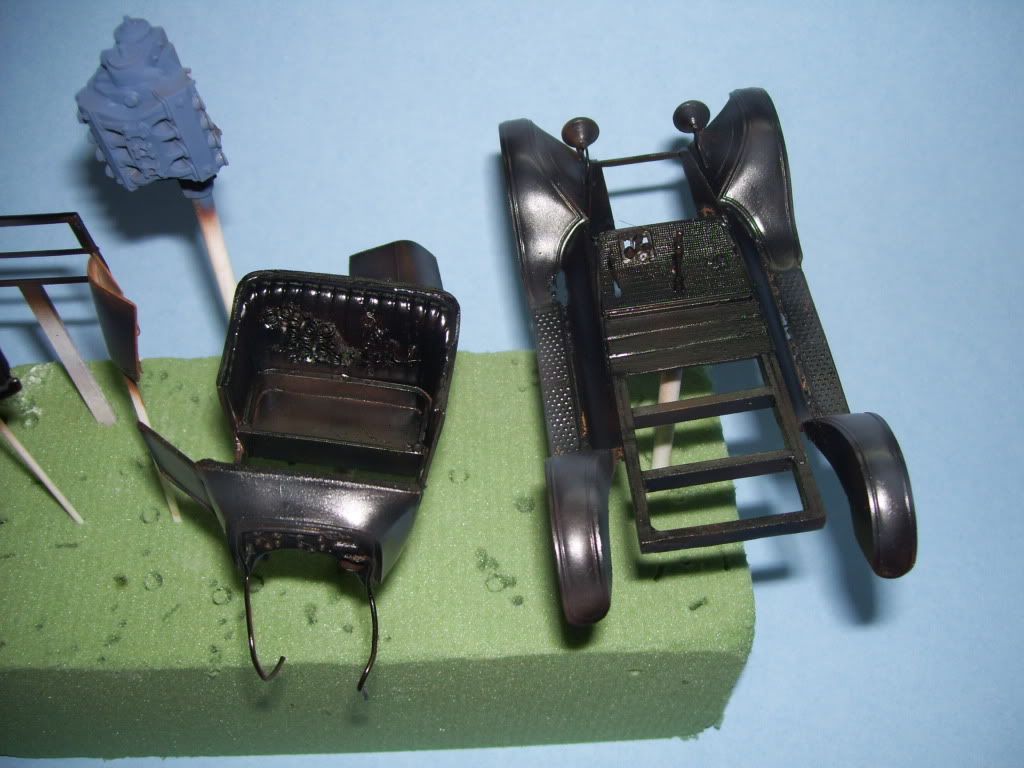
I then took a stiff brush, and after dipping it into water, I started scrubbing away the paint.

Here's what it looked like....hmmmm...it was cool, but not exactly the look I was going for.

The body and engine in particular didn't really groove me...

I therefore decided to use a method which I had first thought of and used in my "SPOOKED!" diorama which was published in FSM last year. I used this to weather a burnt-out Pz IV.

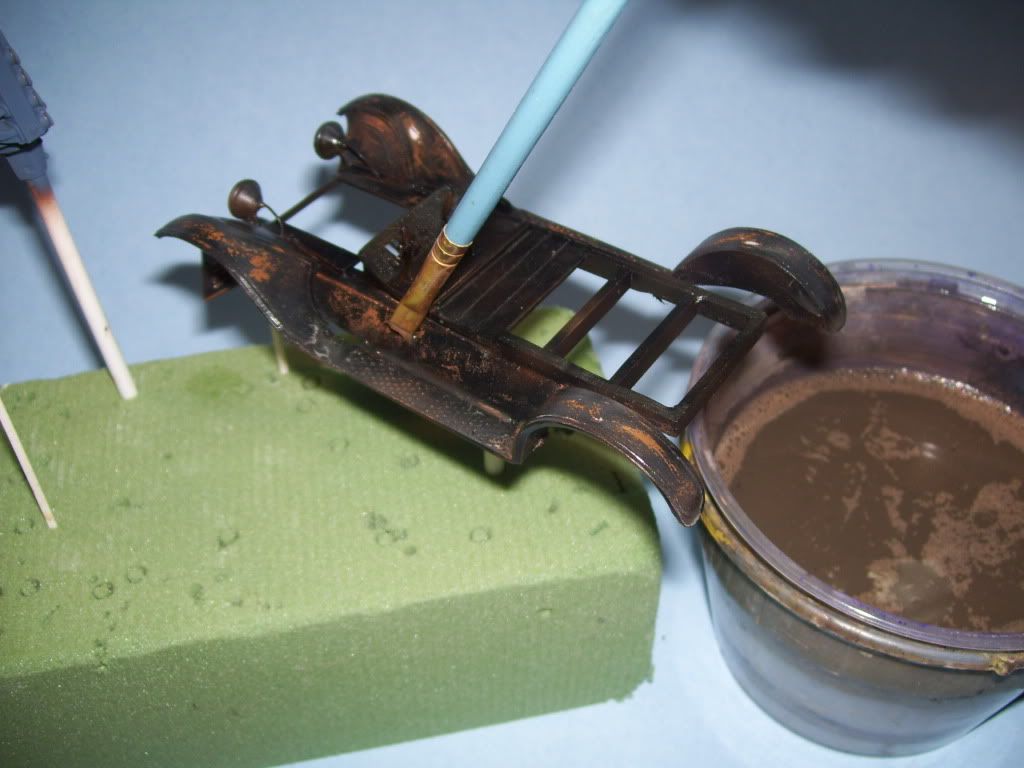
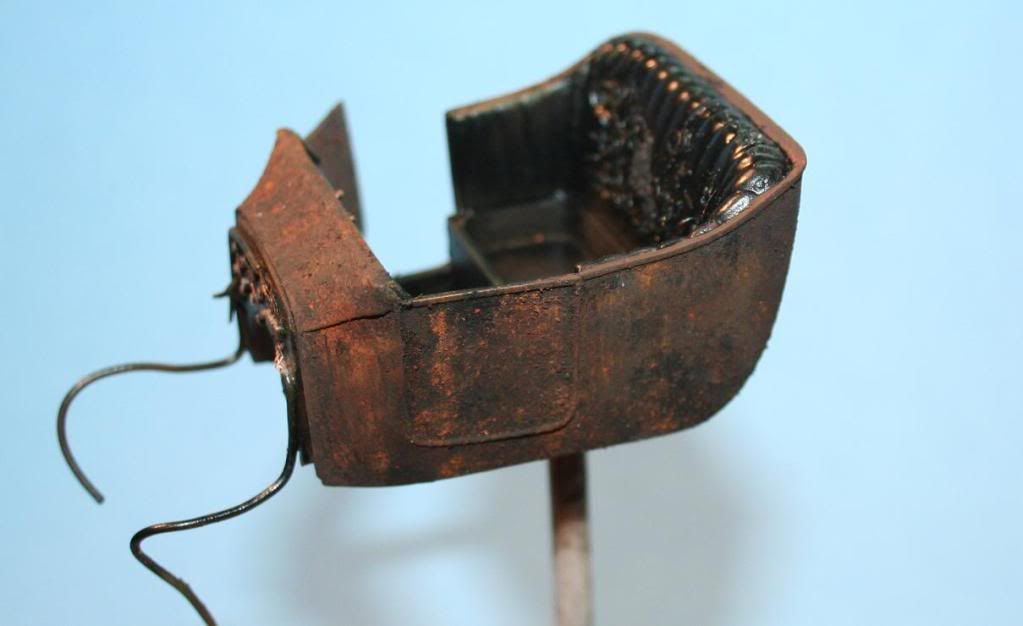
First, I assembled some oil paints in rust shades, and some similar MIG pigments.

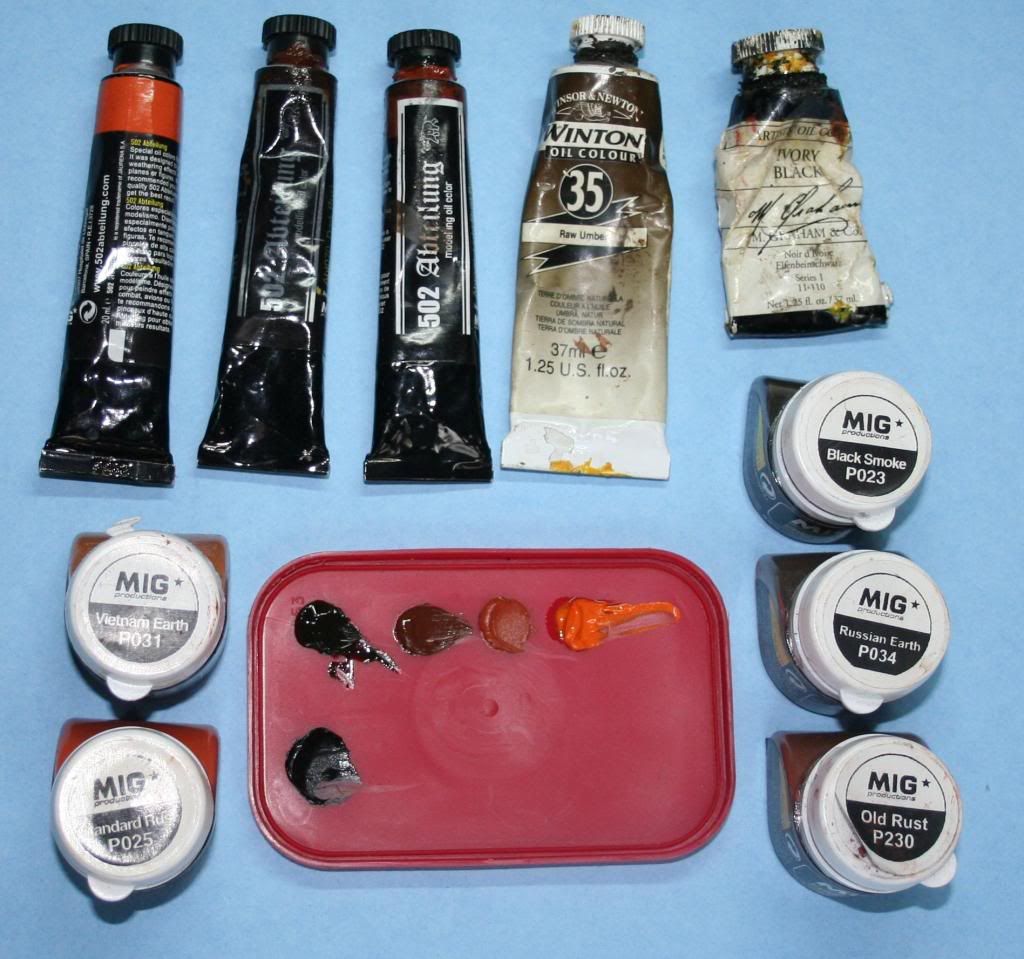
I thin the oils slightly, using mineral spirits, and then after slopping them on the model, I add some various pigments while still wet. Those of you familiar with "scratchmod"'s beautiful rusting method of modeling knocked-out tanks will notice the similarity. You can't go wrong with oils and pigments!

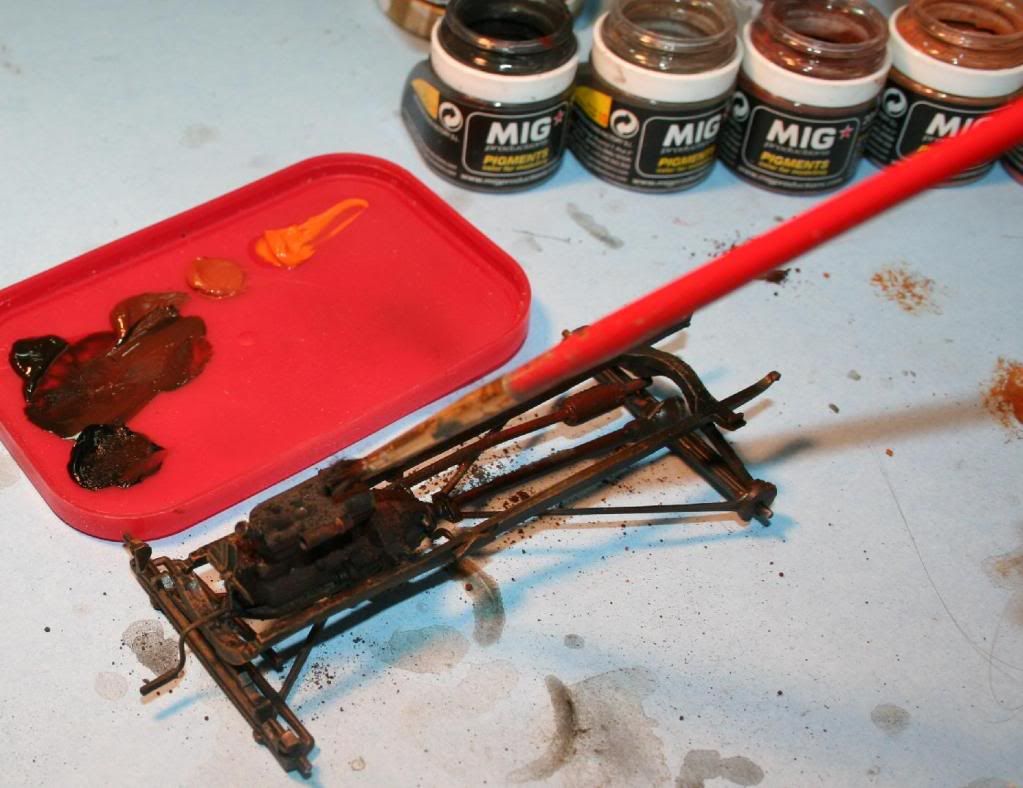
The whole model got it.

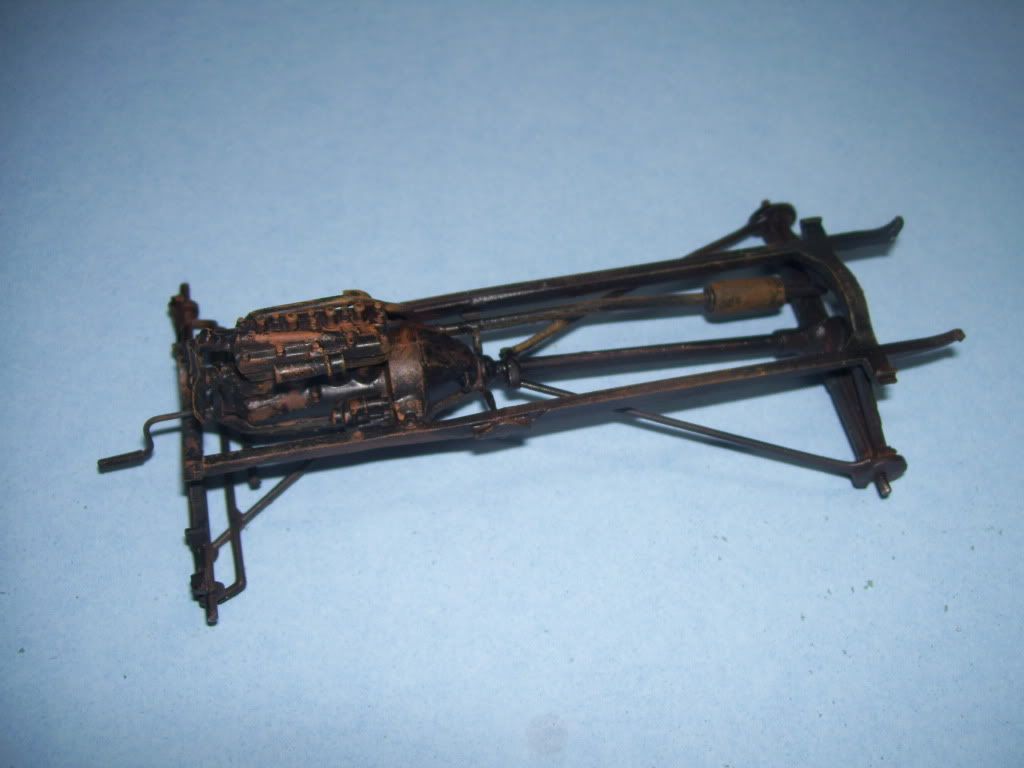
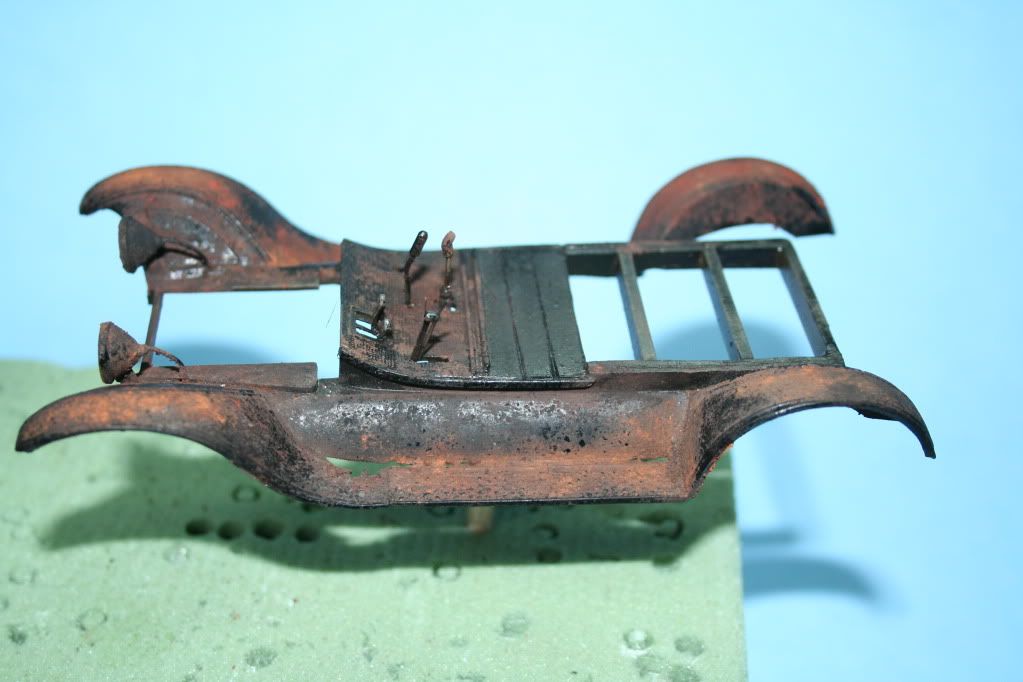
After it dries, some of it is knocked off and blended together using another clean brush. Heres what it looks like at this point.

That's more like it! Now, because I wanted remnants of the black paint clinging to it. I took some sponge/foam, and after dipping it into the paint lid, started transferring it to the model.

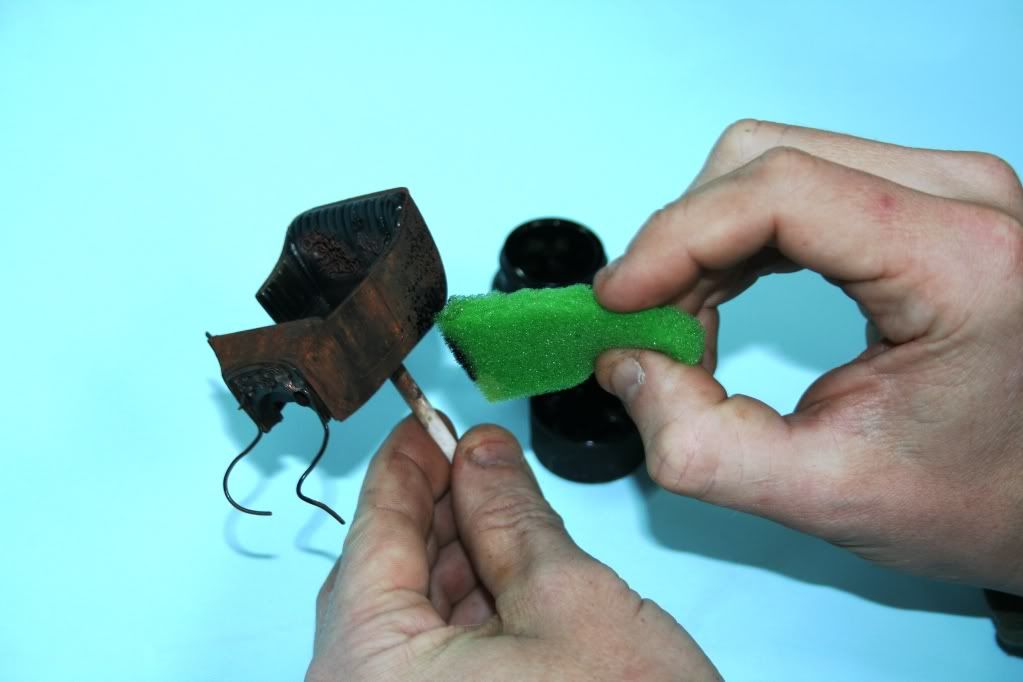
And now it's starting to look like what I see in my mind..

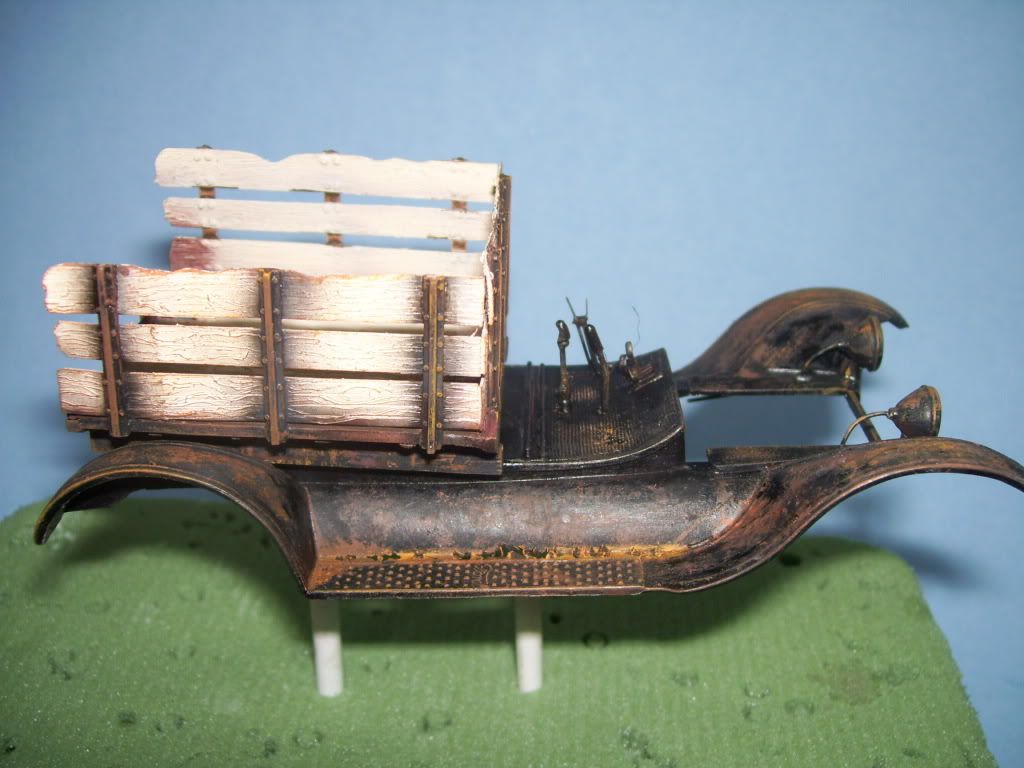
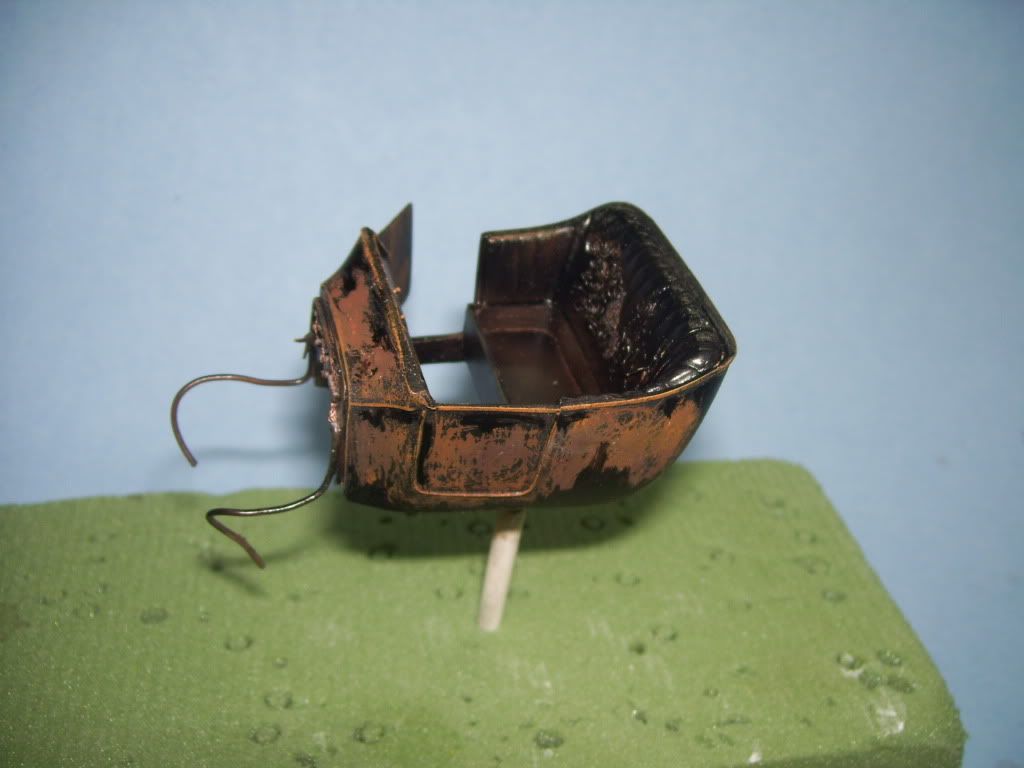
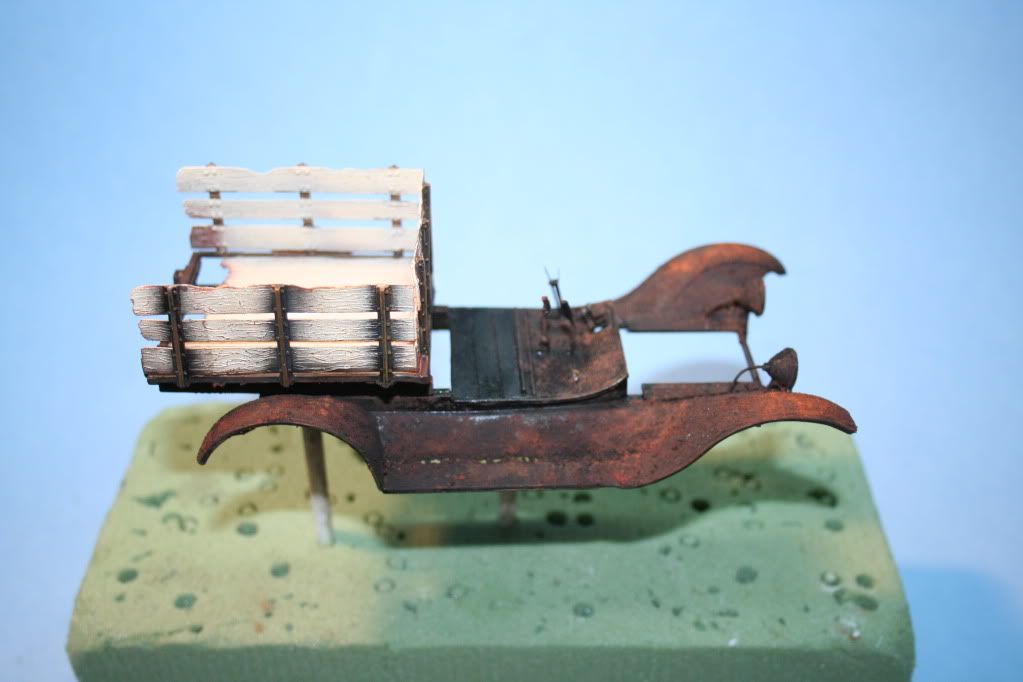
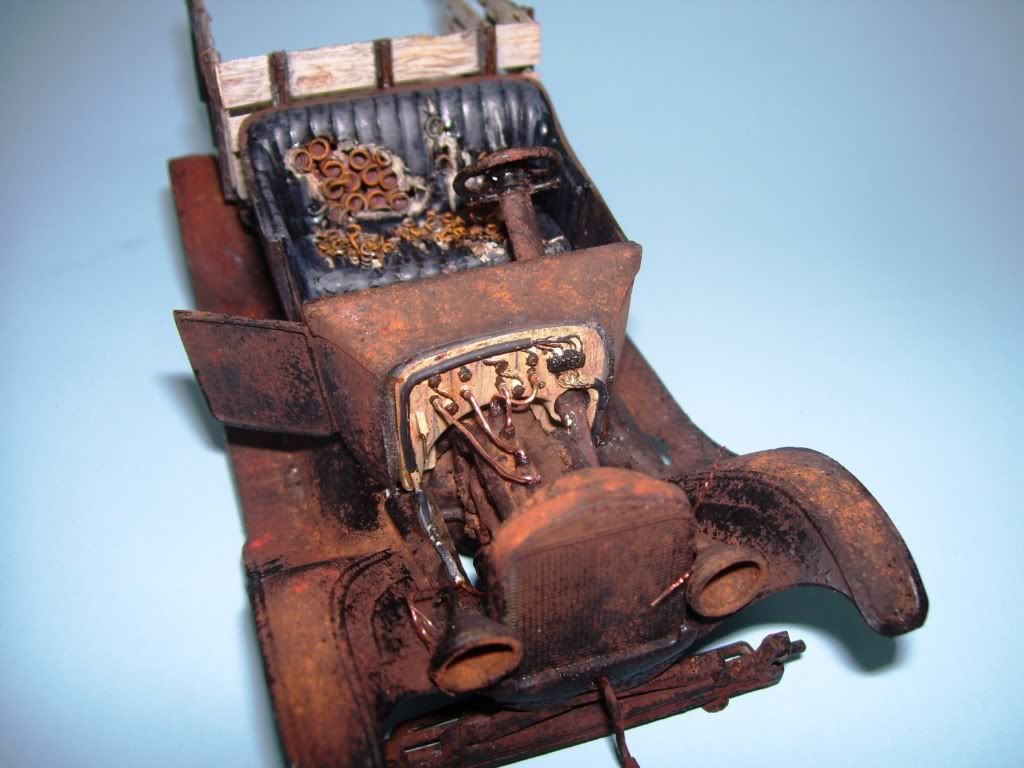
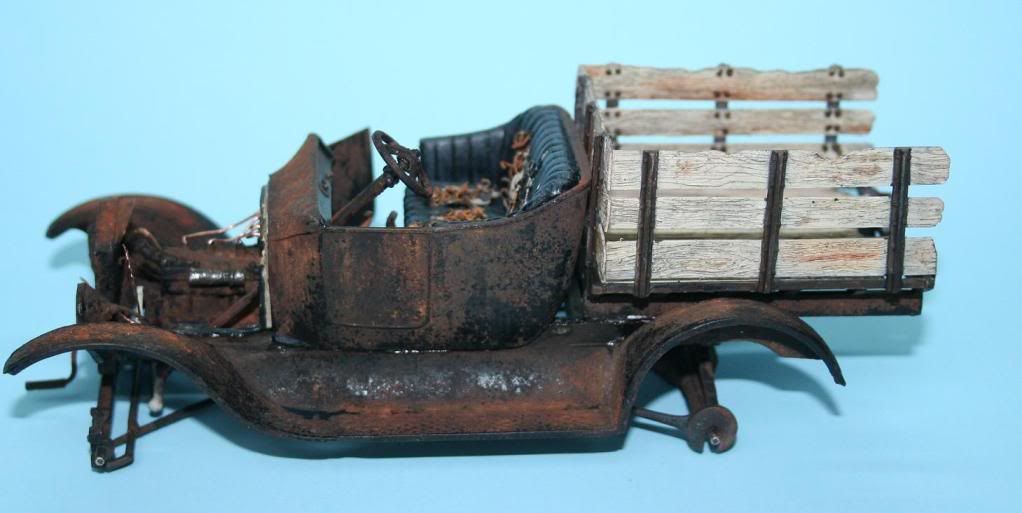
And here's what I have so far...

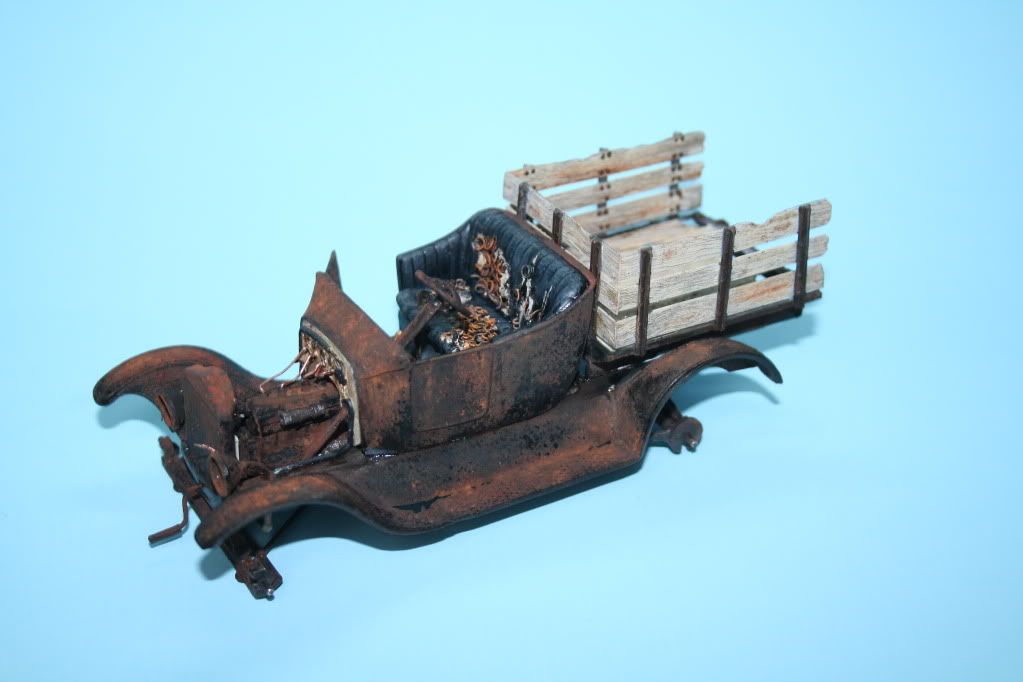
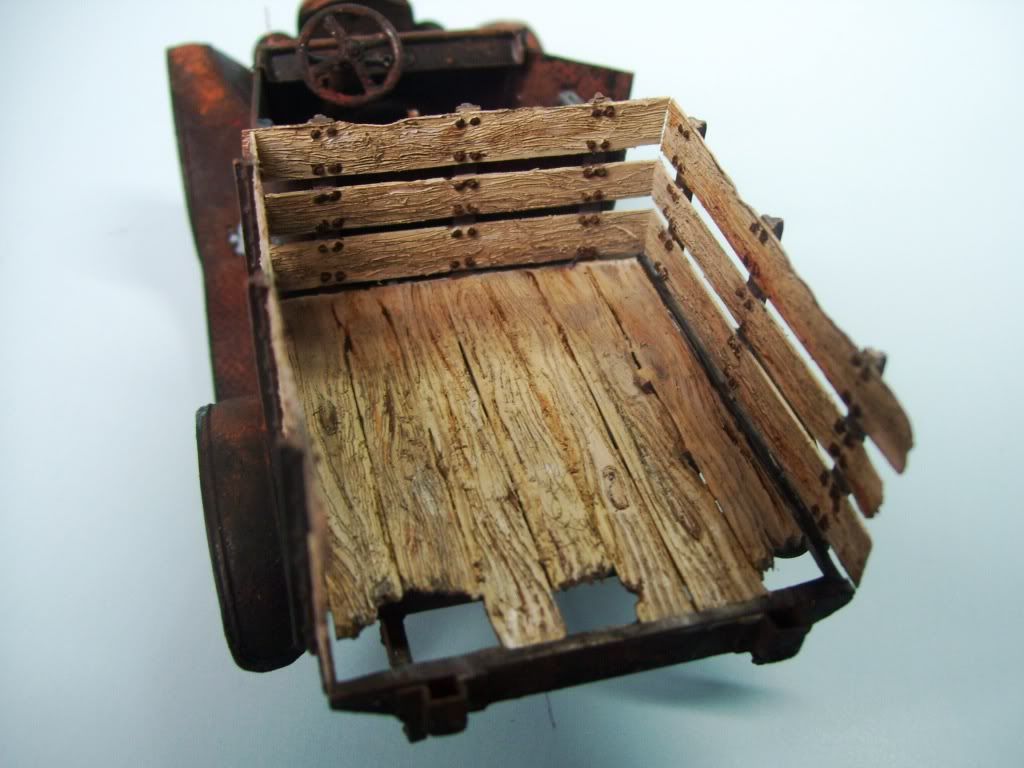
The wood was painted with White+Desert Yellow base, than weathered with some oils--Grey, WHite, Burnt Sienna and Raw Umber. Not quite exactly what I want yet, but I may let it suffice--you can really screw things up by monkeying too much with them.

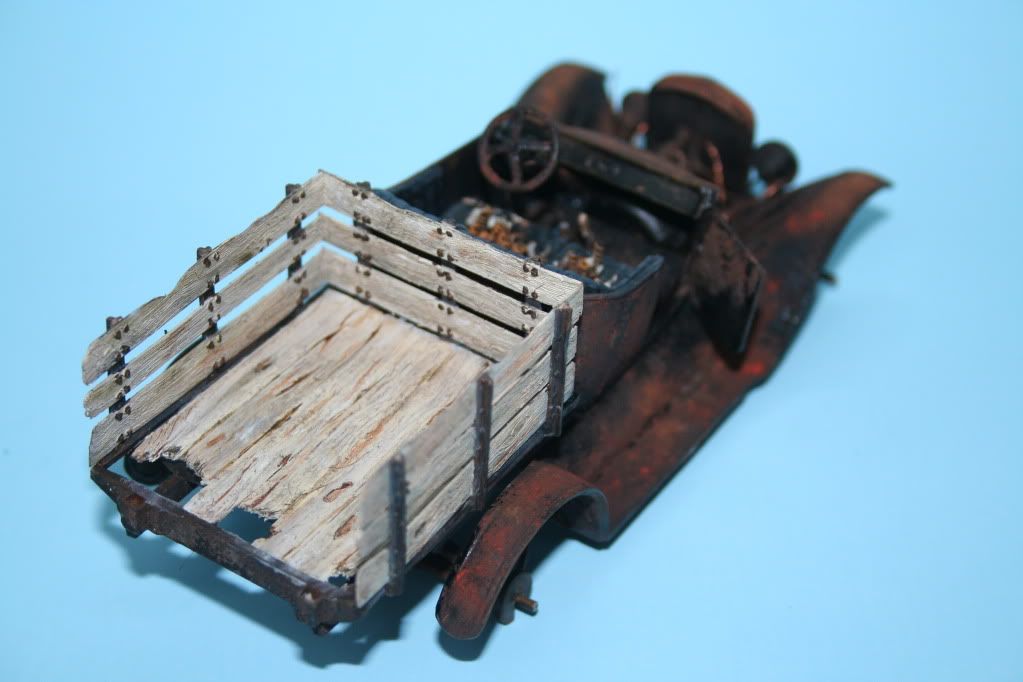
The firewall would have been wood, and I wish that I had "grained" it like the bed, I simply forgot....Sigh [sigh] I added the wiring to the spark plugs, These will be painted, of course.

So....that's it for now. Thanks for keeping with this project, guys. I'll try to get another update soon. I'm in the home stretch now. I will also be adding a base to this, and also, I have decided to include some sort of tires in there as well, as per your suggestions.

HAPPY THANKSGIVING EVERYONE! Comments always welcomed! Big Smile [:D]


  • Member since
    December 2006
  • From: t.r.f. mn.
Posted by detailfreak on Wednesday, November 18, 2009 7:23 PM
Karl:looks like your going to have to make up some modular bases that can be set-up side by side to depict your relics sitting in a pasture or junk yard side by side.Also could you get the rodents that chewed those seats up to do a little number on that fresh looking wiring there under the hood?  PS:I have the lindberg Color Me Gone in 1/25th,I'll send it your way and you can work a little of that forgotten and forlorn magic on it.I'll take care of the postage and handling OK.Just joshing ya.Great work as usual Karl.Thumbs Up [tup]Thumbs Up [tup]

[View:http://s172.photobucket.com/albums/w1/g-earl828/]  http://i158.photobucket.com/albums/t104/cycledupes/1000Roadwheels4BuildBadge.jpg

  • Member since
    May 2005
  • From: Dublin Rep Of Ireland
Posted by terry35 on Wednesday, November 18, 2009 4:55 PM

Karl that looks just brilliant. Can't wait to see you get some paint on this baby.

Terry.

  • Member since
    April 2004
  • From: Boston MA
Posted by vespa boy on Wednesday, November 18, 2009 10:56 AM

Doog, This is fantastic work. Its coming together beautifully. This one really belongs on a base, maybe with a nearby railway line...that's how most people see cars like this.


You know you don't have to rely on Jen to get the foil...you can always invest in some bottles of good wine and justify it by your model building!


http://public.fotki.com/nkhandekar

This ain't no Mudd Club, or C.B.G.B.,
I ain't got time for that now

  • Member since
    April 2008
  • From: Ventura (at the beach) in California
Posted by *INDY on Tuesday, November 17, 2009 7:43 PM
~ Brilliant Idea El Doog !    Dig it.     The crate motor & the basket case.   My Father 'n Law is working on one of these in 1;1 SCALE. a '29 Ford pick-up rust bucket. No doubt he'll need to put some serious ponies into it having recently retired from N.H.R.A. & selling his dragster.  He would probably reccomend you display some sign of upgrades on your base besides the new engine. Maybe a stack of 'fatty' tires near-by?            Anyway, looking forward to watching this thing rust-away!

"Well...you gunna pull them pistols, or just whistle Dixie?"

  • Member since
    February 2009
  • From: mass,USA
Posted by scratchmod on Tuesday, November 17, 2009 6:40 PM

Holy Censored [censored] Karl that looks awesome dude. That roof is fantastic and once it's painted will be even better, man I can't wait to see what you do next.


Rob

  • Member since
    September 2004
  • From: Tulsa, Oklahoma
Posted by mm23t on Tuesday, November 17, 2009 5:26 PM

Looks real good Karl. I'm surprised you did'nt use your little friend to grove the spokes on the wheels, for that wooden look. I have to agree on one point, It needs some rubber somewhere.

When you do the hairspray procedure, would you go step by step, as I've never seen this done.

Good luck on the '34

Medals are not "Won", they are "Earned".

Mike..


JOIN OUR COMMUNITY!

Our community is FREE to join. To participate you must either login or register for an account.

SEARCH FORUMS
FREE NEWSLETTER
By signing up you may also receive reader surveys and occasional special offers. We do not sell, rent or trade our email lists. View our Privacy Policy.