Hi guys,
Well, it's time for another junker. This particular project comes from a real-life experience and car. Lemme explain.
If you saw my thread about the '34 modified race car that took me 9 time and one body ruined to finish, you'll remember that it was a fond "tribute" so to speak, to an old quarter-mile dirt track that I used to go to as a kid, but that has long since closed. Well, this past winter, Jenn and I took a trip up to Moc-A-Tek Speedway in Pennsylvania to see what was left of it--it is remarkably still there, and fairly intact.
Anyway, as the main gate was closed,, we had to go in "the back way" (through the woods) and we came upon this old modified stocker--an old Impala that had been raced at one time. The hood scoop wasn't stock; it had racing tires, and unbelievably someone had put the '63 shell over a '64 interior! The engine was gone, of course, but it remained there, a mute testimony to good times gone past.
First, here's some looks at the car;
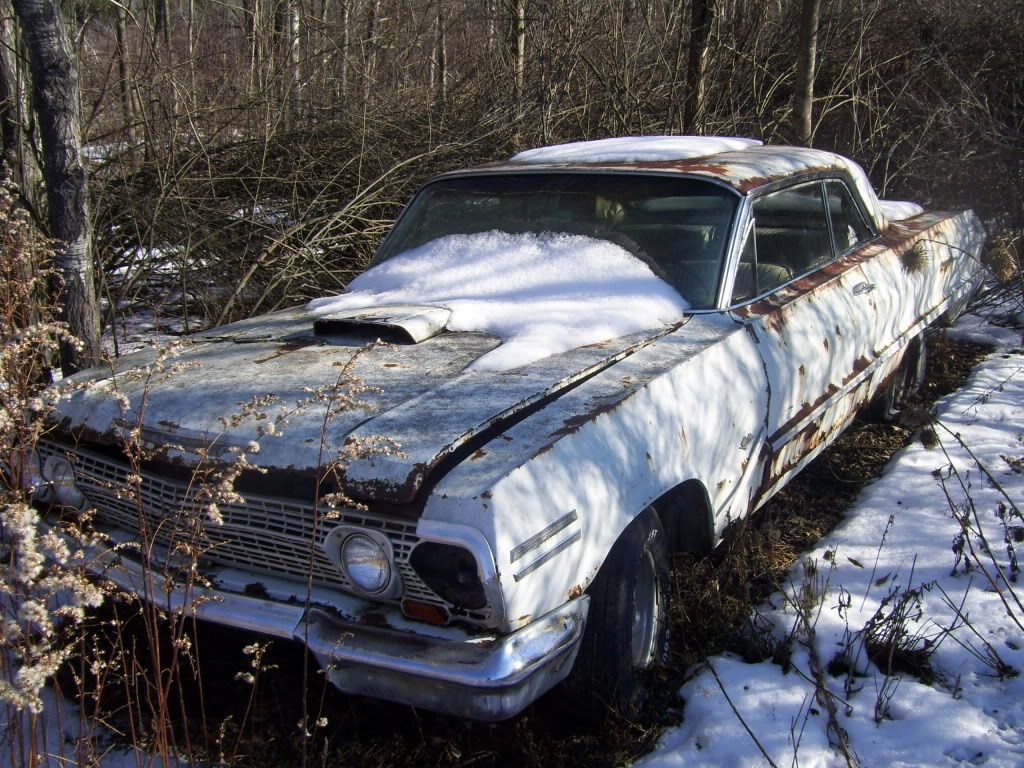
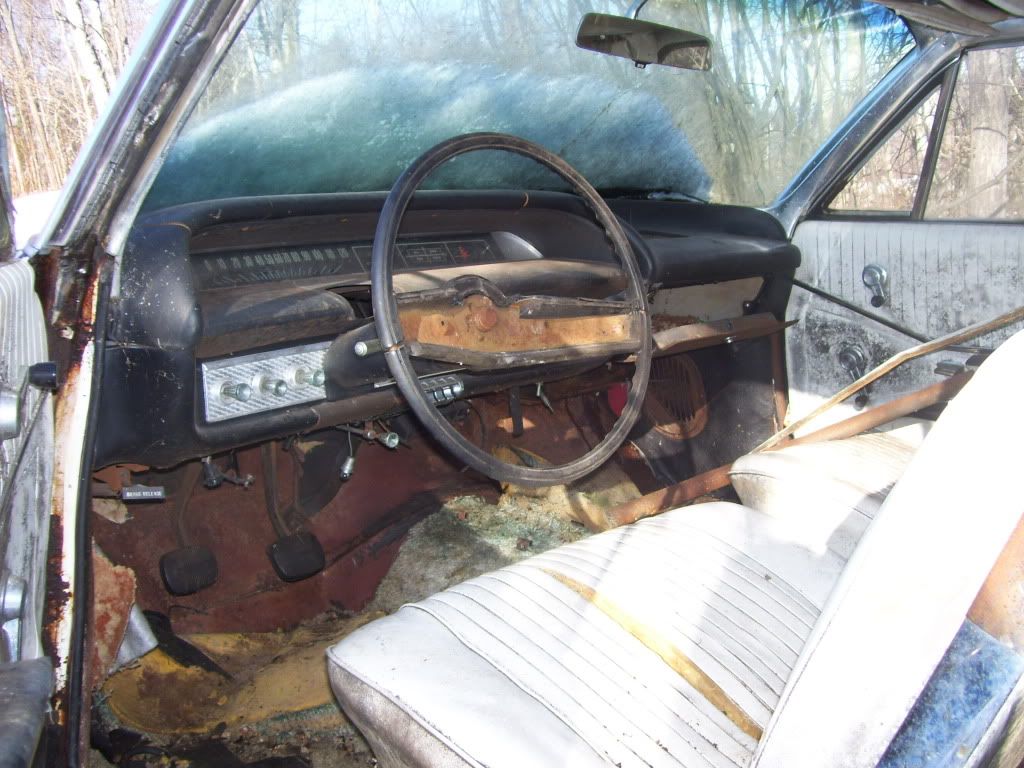
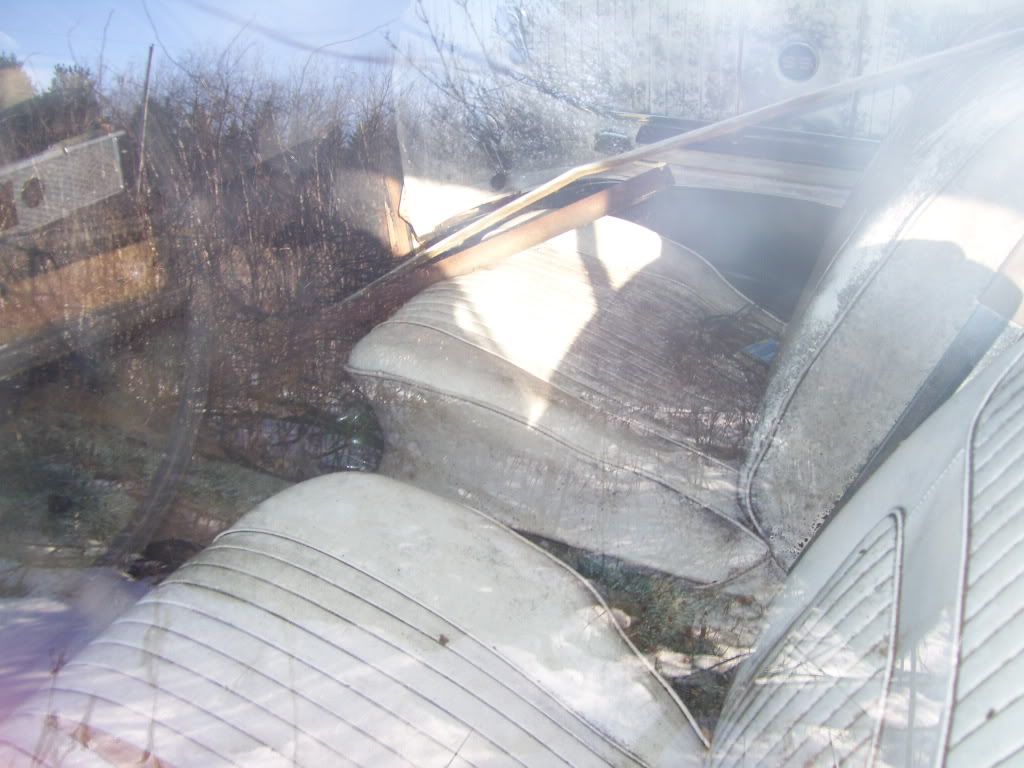
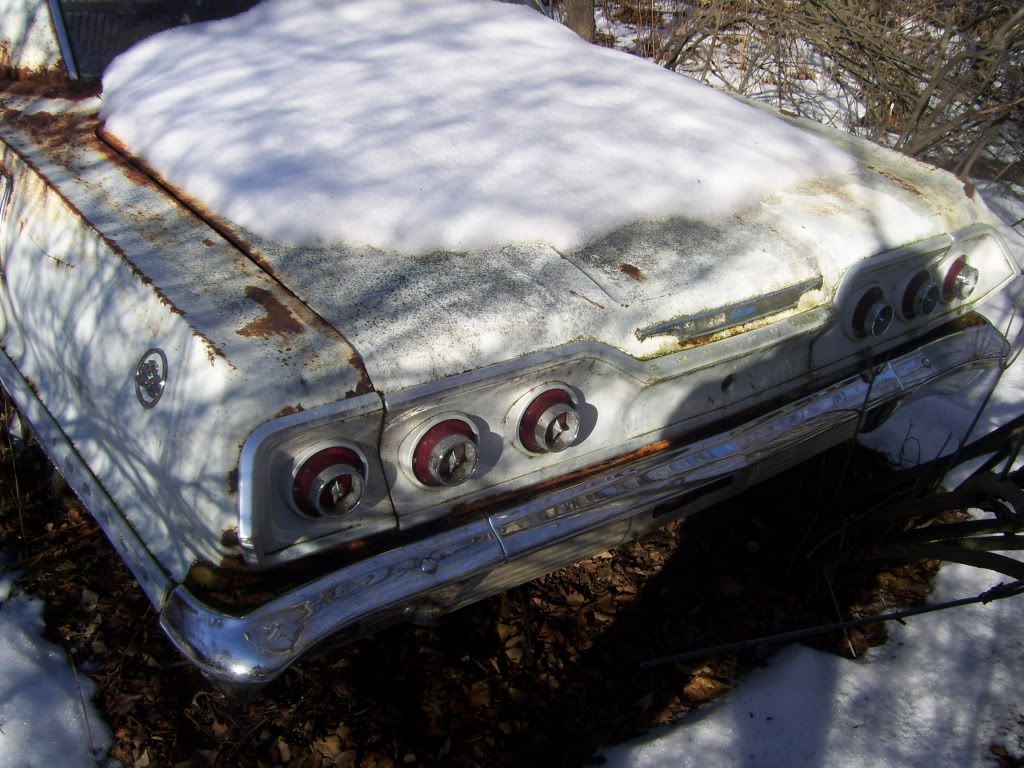
Pretty roached, huh? So the first thing I had to do was to procure two kits to put together. Luckily, Revell makes both! I hoped that this would make the "squeeze" a little easier. Hmmmm...lesson #1--NEVER ASSUME!
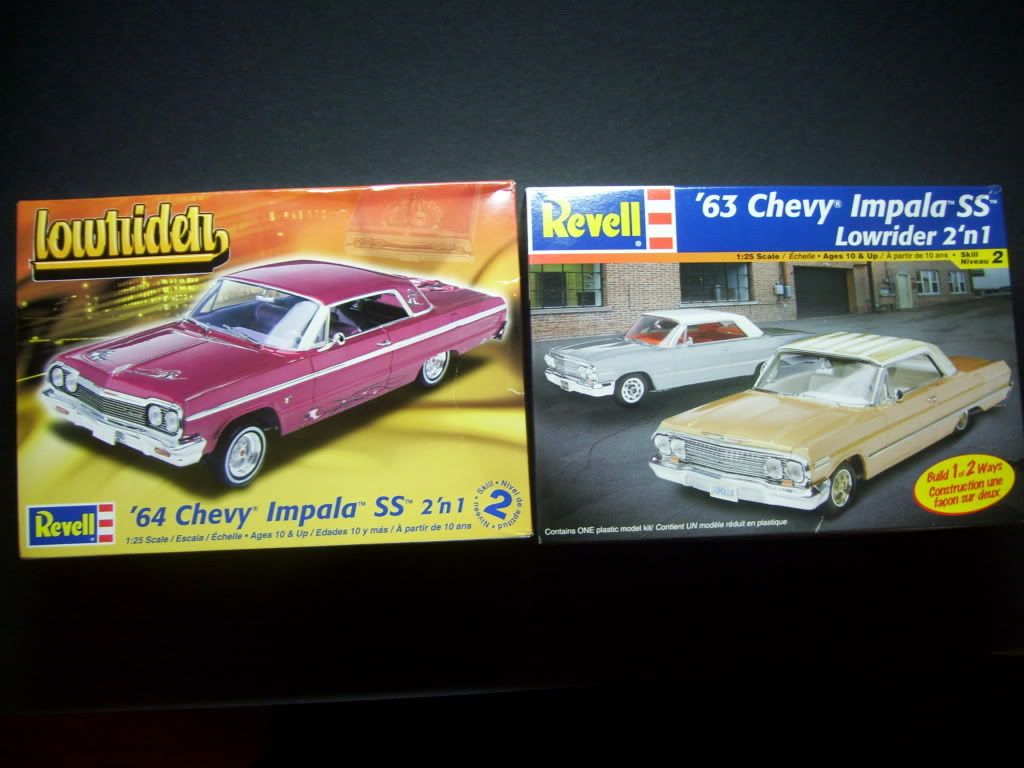
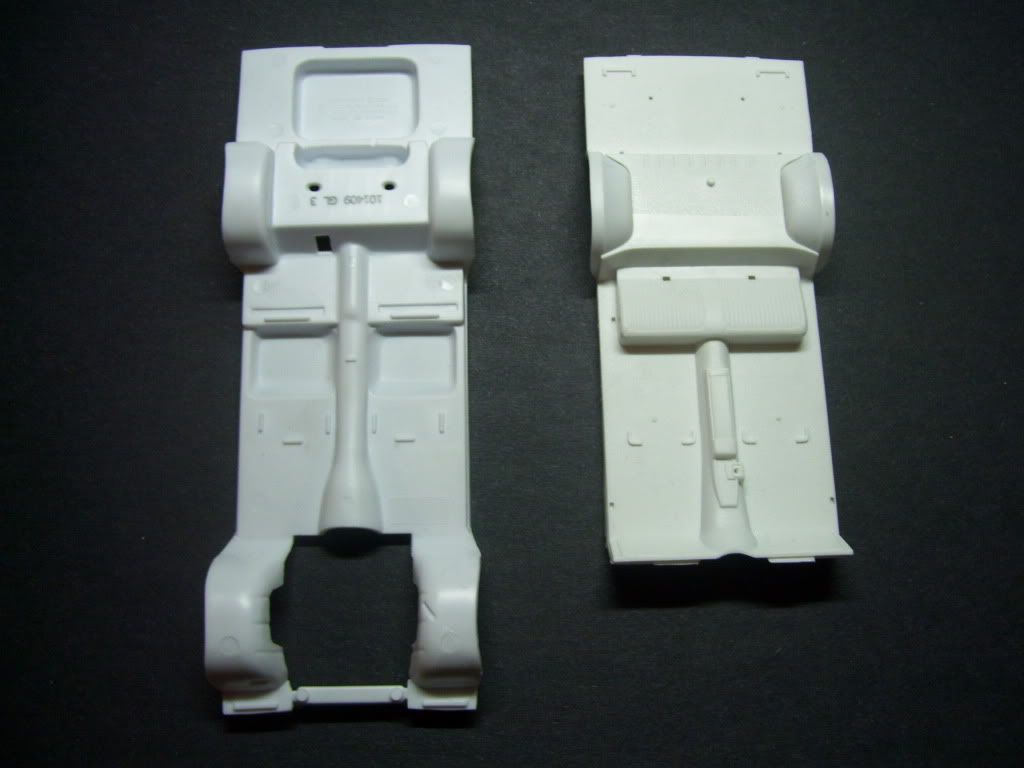
First, the two kits are completely different in the way the tub and floorpan fit;
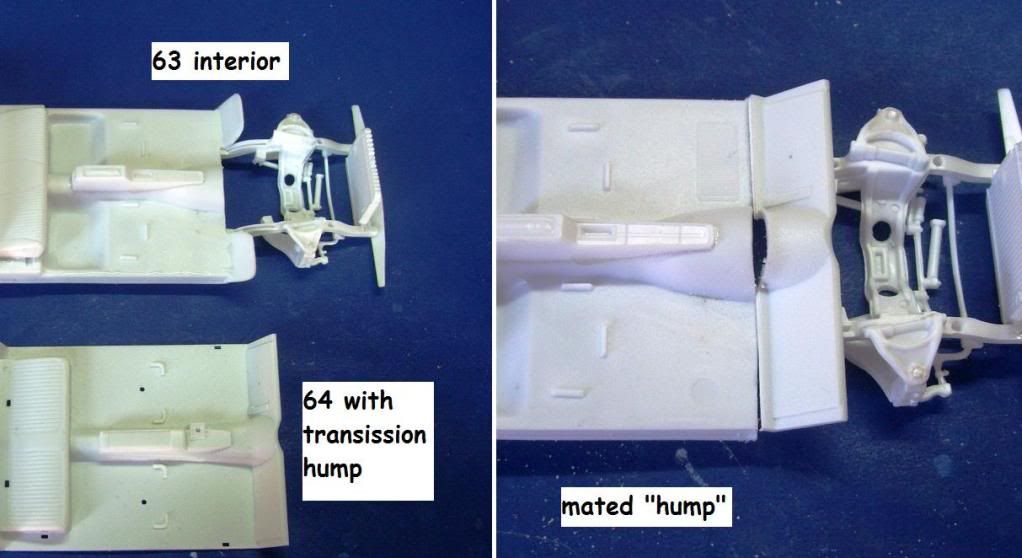
I wound ip having to cut the front off both, and join the 63 transmission hump to the 64 floorpan.
When I tried to mate some spare "Goodyear" tires instead of the stock whitewall-type tires, I got this mismatch--the tires wouldn't fit.
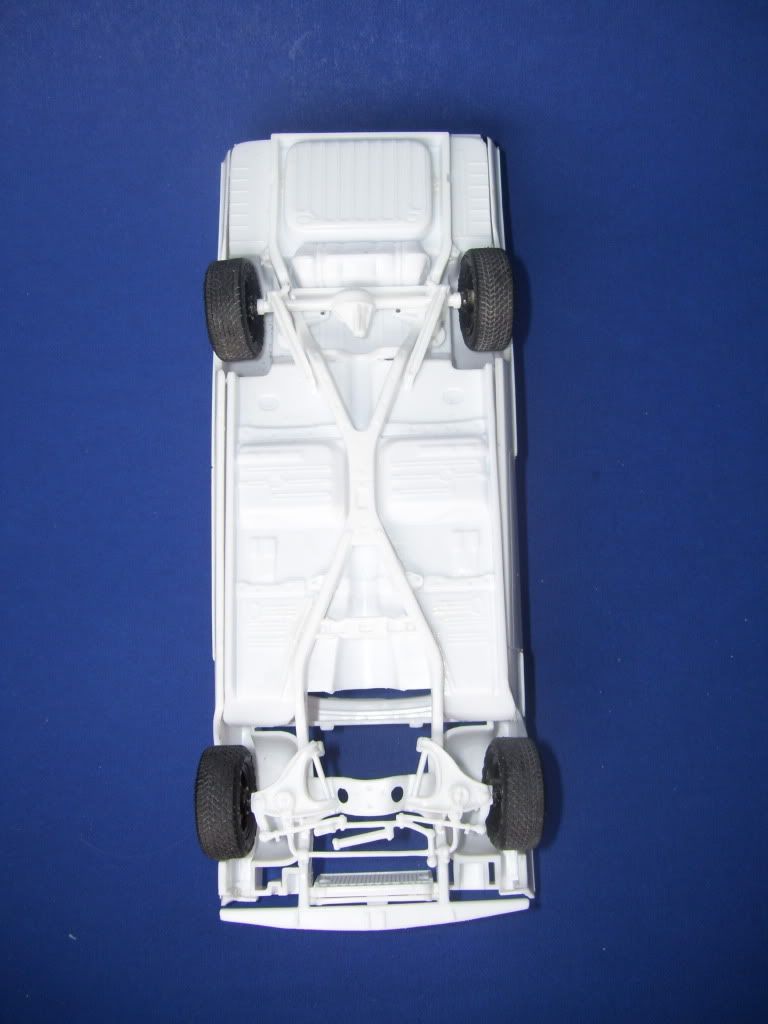
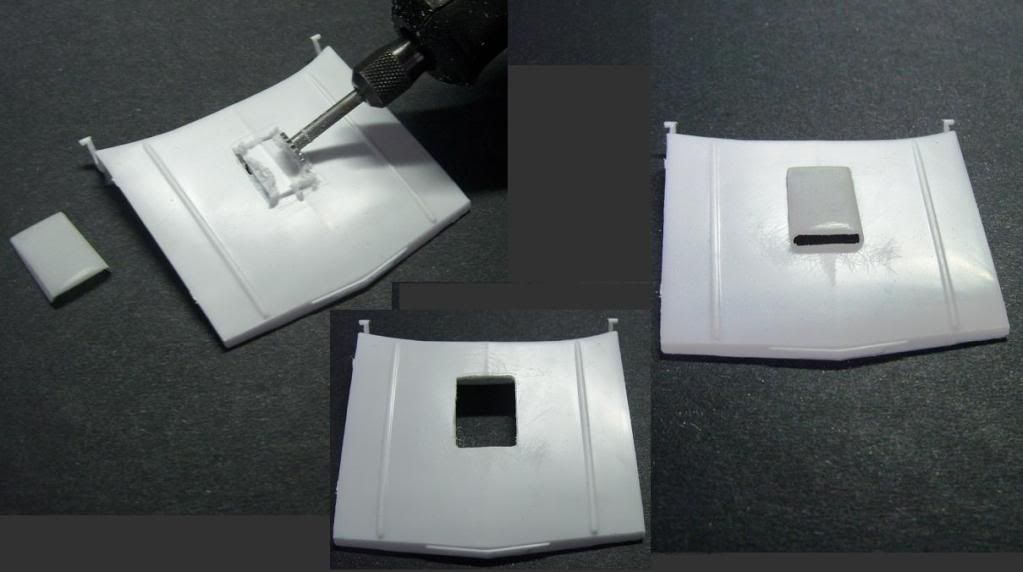
I had to fix that, and got a good sit by using a Dremel to ground down the hubs. I also cut out the hood for the scoop, and used a scoop sent by a friend from a '49 Ford kit.
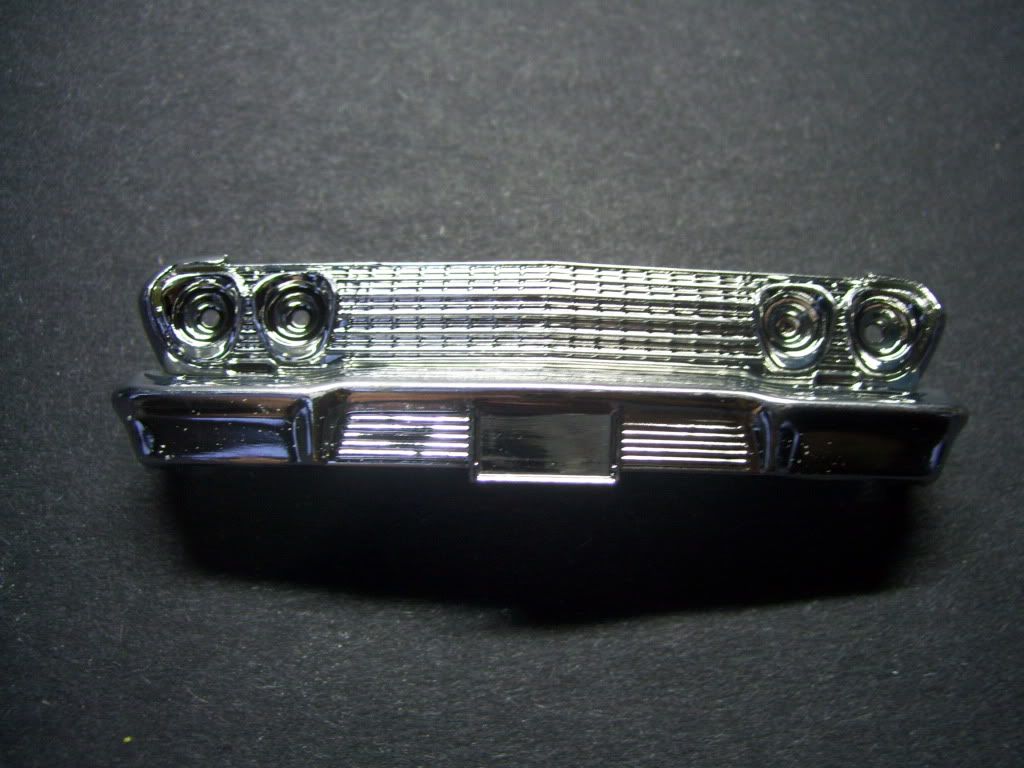
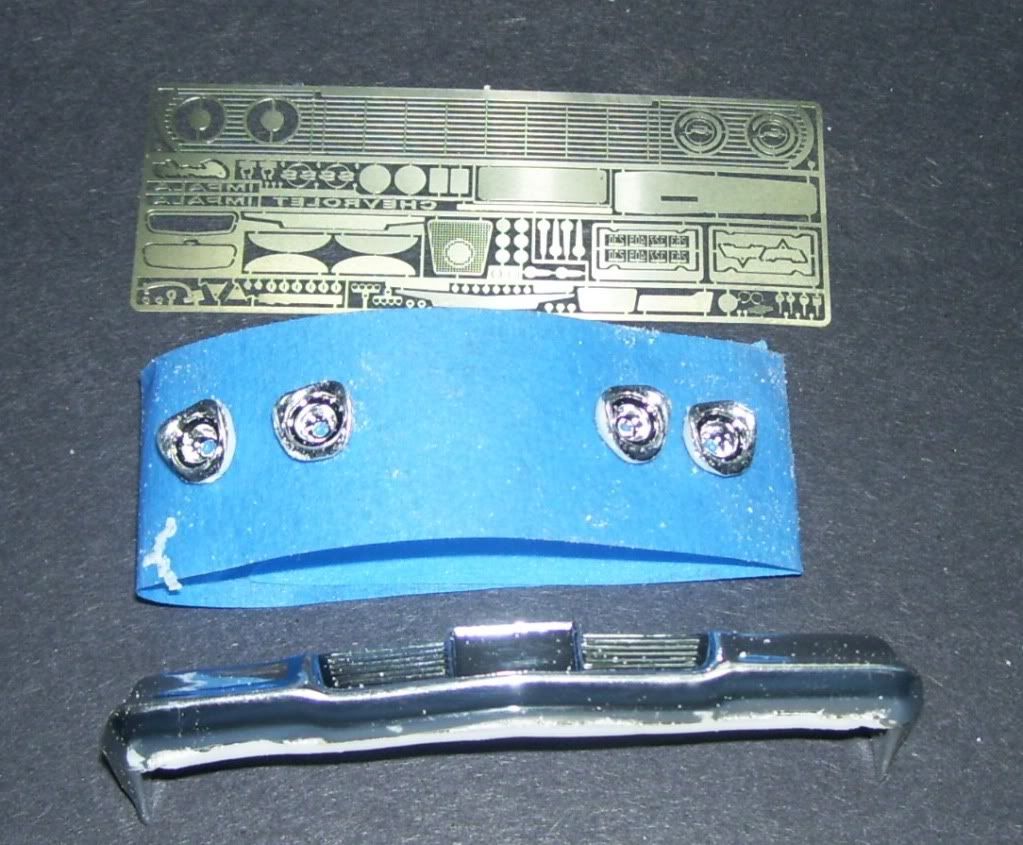
The grille was just too heavy-looking, and too much work to make usable. I used a Detail Master 64 Impala PE set to fashion a new grille.
I had to detach the grille from the bumper; I also then removed the individual light sockets from the plastic frame.
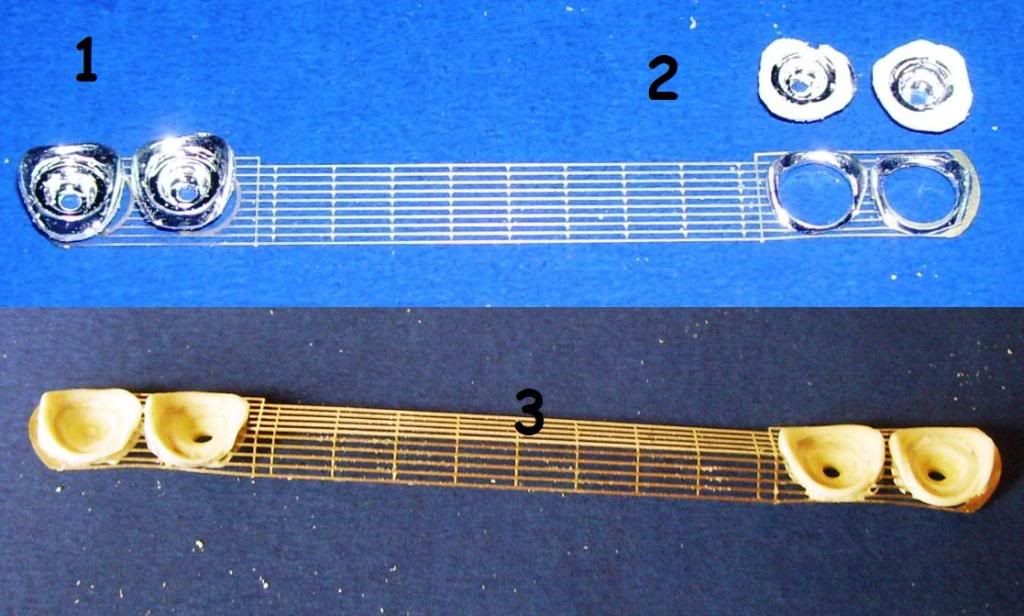
...and then carefully cut those in half, joining the two halves around the PE frame. In #1 you can see that they wouldn't have fit without this mod--they would sit too high in the PE frame.
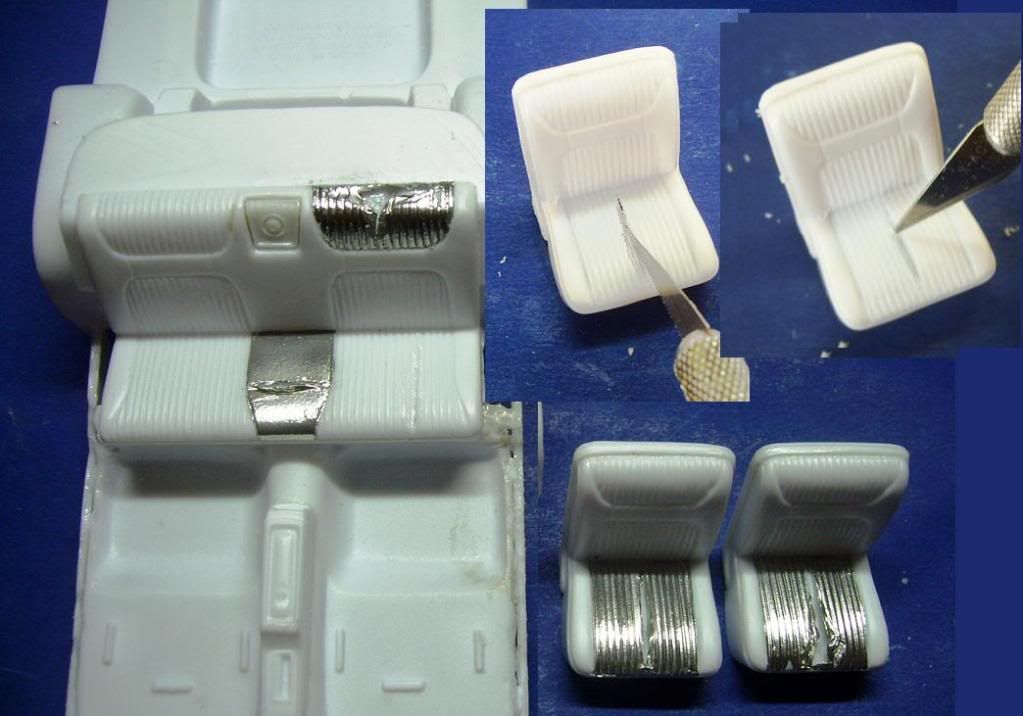
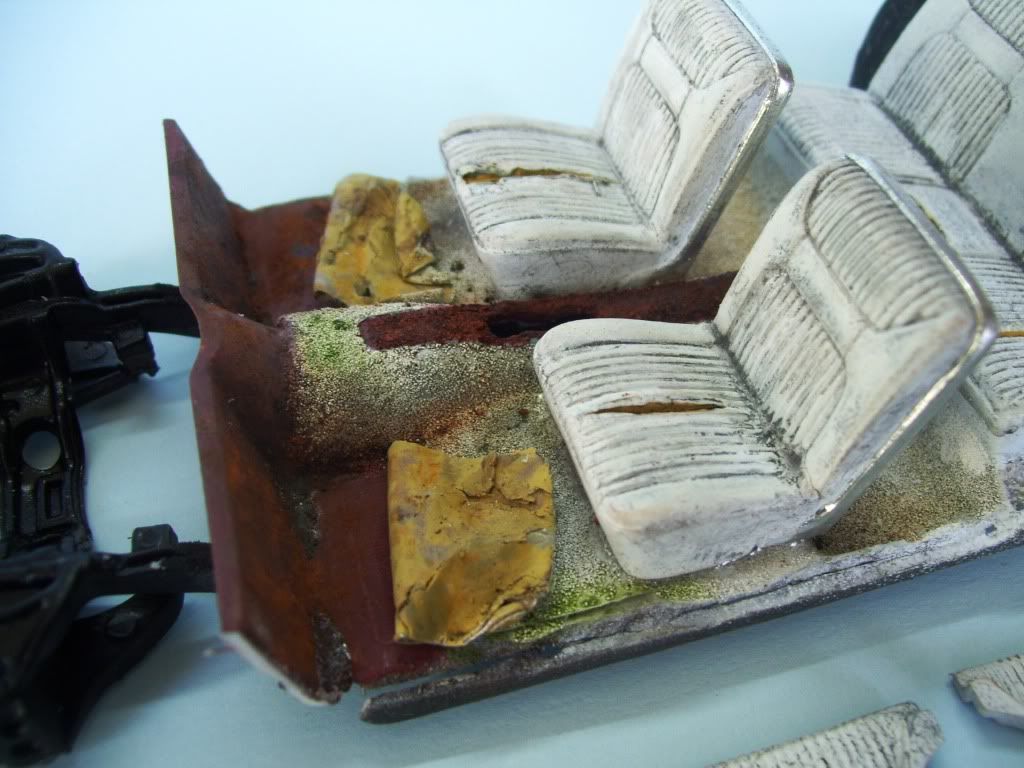
The seats needed some aging. I cut into the seat with a razor saw, opened up the cut with a #11, and used BMF to simulate the ripped fabric.
The car's carpets have been pulled up near the tranny hump, exposing red primer. I painted this with a Tamiya mixture, and used lead foil to simulate the ripped-up carpet. Then, the floor was "flocked" with embossing powder (THANKS JTRACING!) and then MIG "502 Abteilung" oils were used to tint and paint the piece.
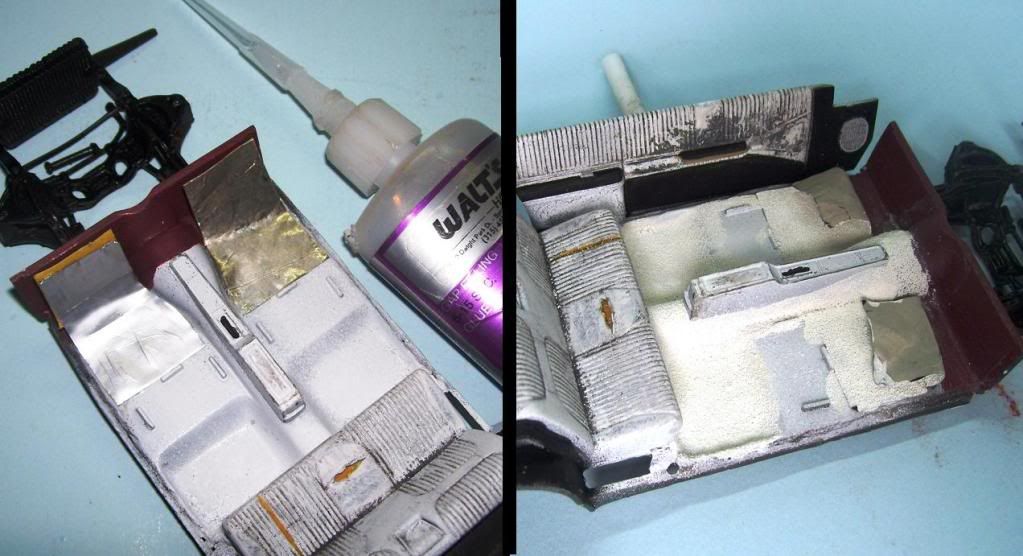
The "bottom" of the "carpet" was coated with Squadron White putty--this would be "cracked" later to simulate the degraded insulation underneath the carpet. Note too, the ripped seats.
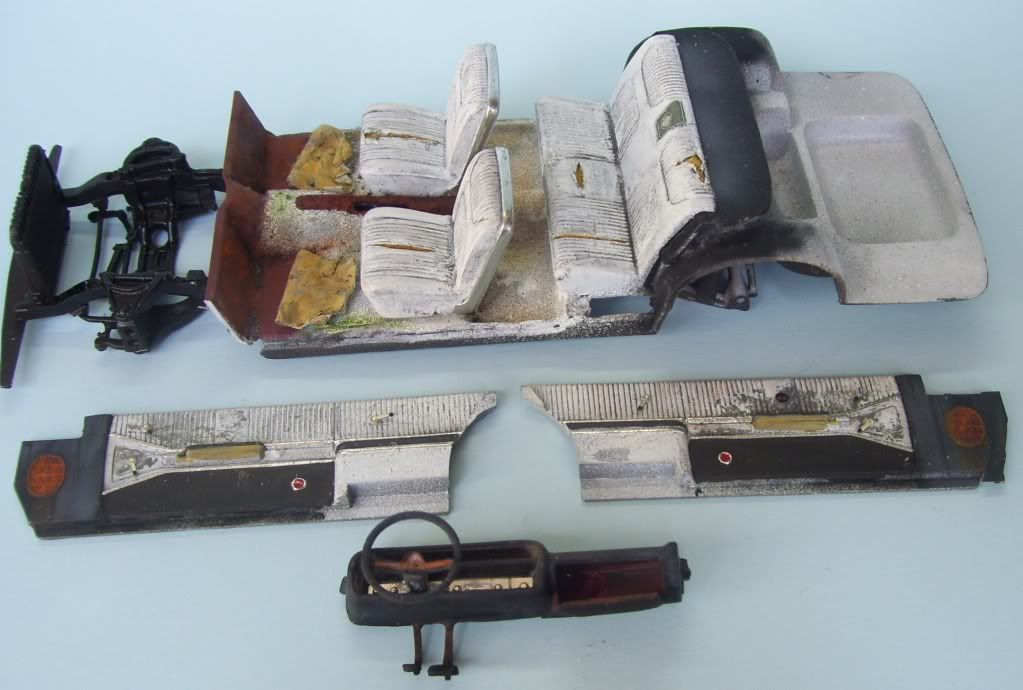
The interior pieces. I cut out the glove compartment, and fashioned an inside. The door panels have BF trim, and Detail Master door handles set upon styrene posts.The interior of the steering wheel was also hollowed out.
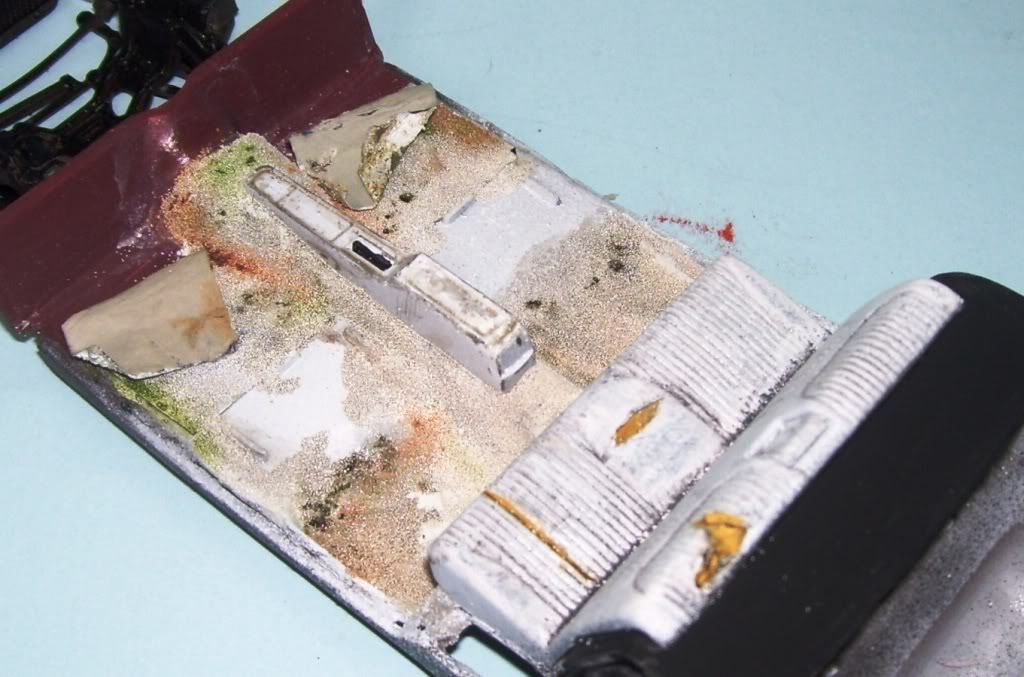
Compare the finished interior with the above photo. The insulation has been painted, and I noticed that the console had been ripped out as well in the real car, so with a pair of channel-lock pliers, I did the same. MIG weathering pigments were used to rust that area, and a Dremel used to open a hole for the shift linkage.
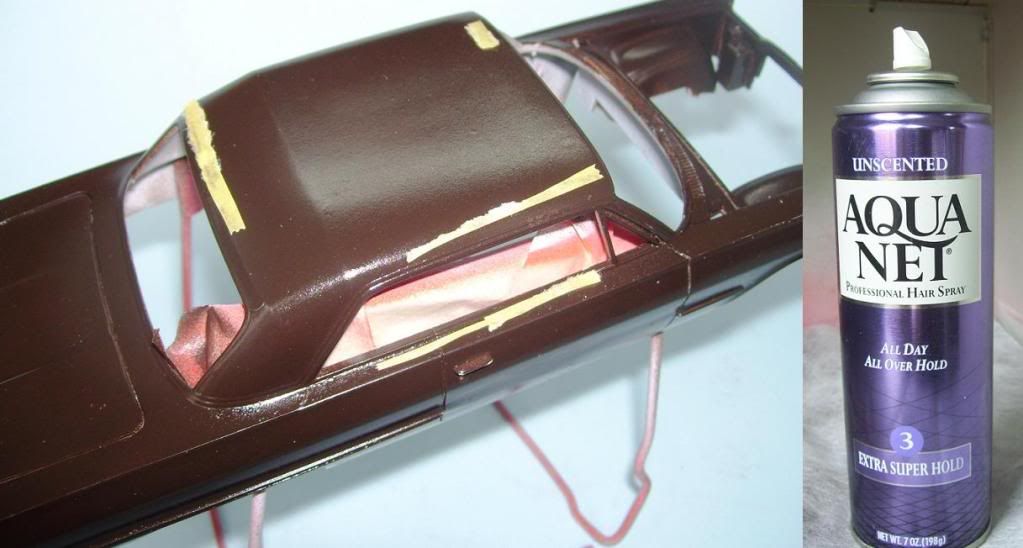
Now, getting to the exterior--I had to plan how to portray that degraded finish. There was a lot of cracking and fracturing of the paint, with gray primer showing through beneath, and of course, the rust. I decided to use the hair spray method.
Once again, I called upon my old lover, Aqua Net Extra Super Hold, to assist me. I mixed up an appropriate dark rust color from Tamiya Red-Brown, Orange, and Black, with some added Tamiya Clear to give a glossy shine to the paint. Tamiya "Clear" is NOT a "clear gloss" that you can spray over a finish! If you do that, it will fog and ruin your finish! In this photo, the car has been sprayed with the color, then sprayed with some hair spray, and pieces of tape used to block off areas that I know I will want exposed This also helps to facilitate the passage of water into the hair spray underneath the next color coat, As the hair spray is easily water-soluble, the hair sray dissolves and carries away the top layer of paint.
Next, the model was painted with a mix of Tamiya White + Black, both gloss colors. The tape was removed, and then a swath of water put on the exposed rust/hair spray and left to sit for a few minutes.
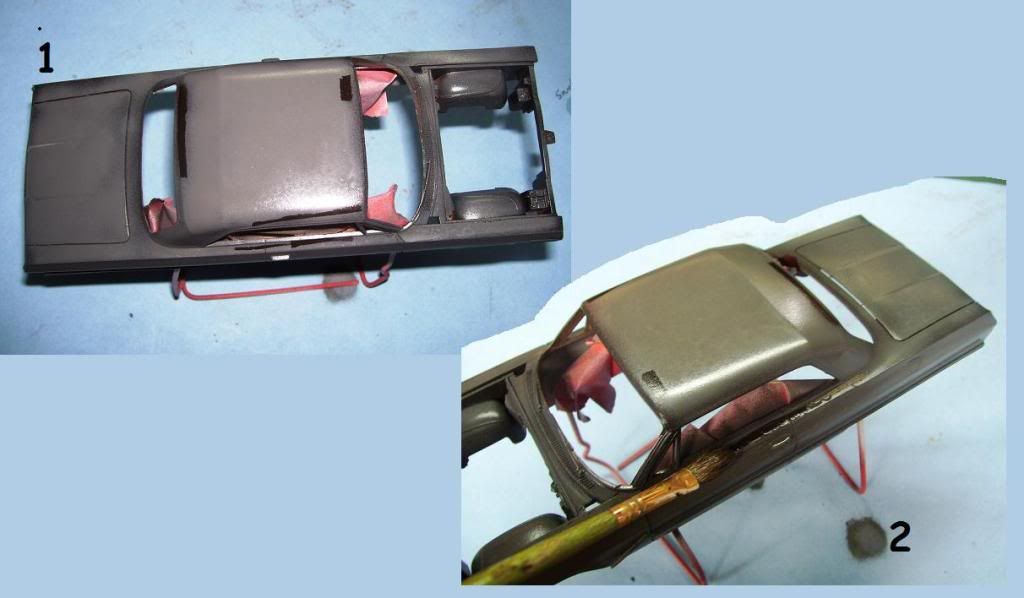
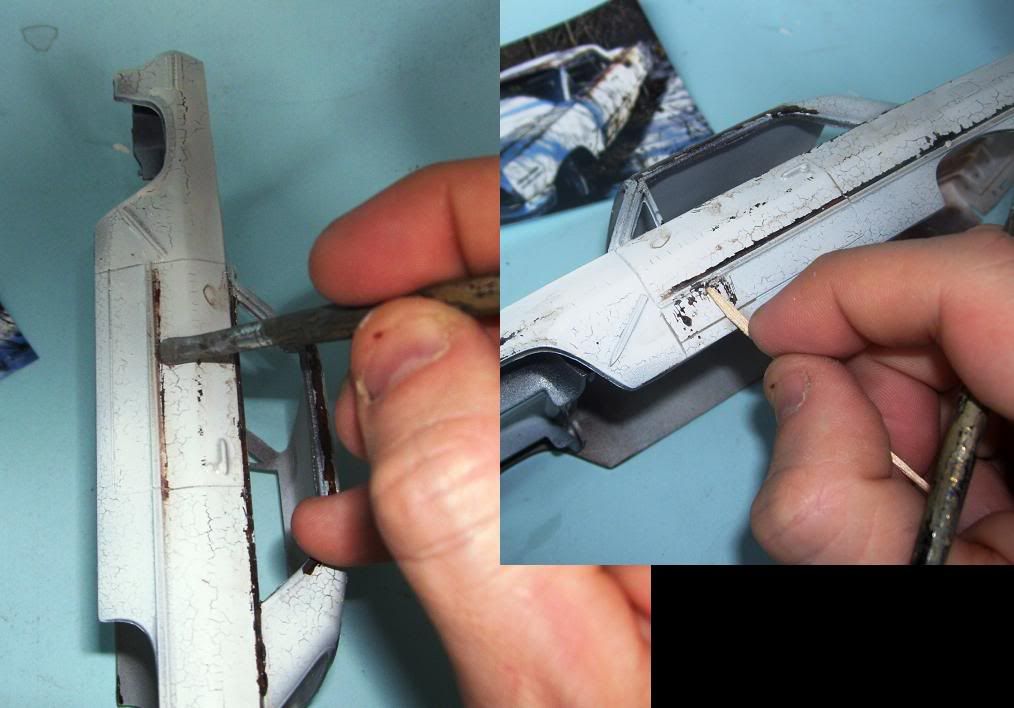
Using short and stiff-bristled brushes as well as toothpicks, I started removing paint where I wanted the rust to be prominent.
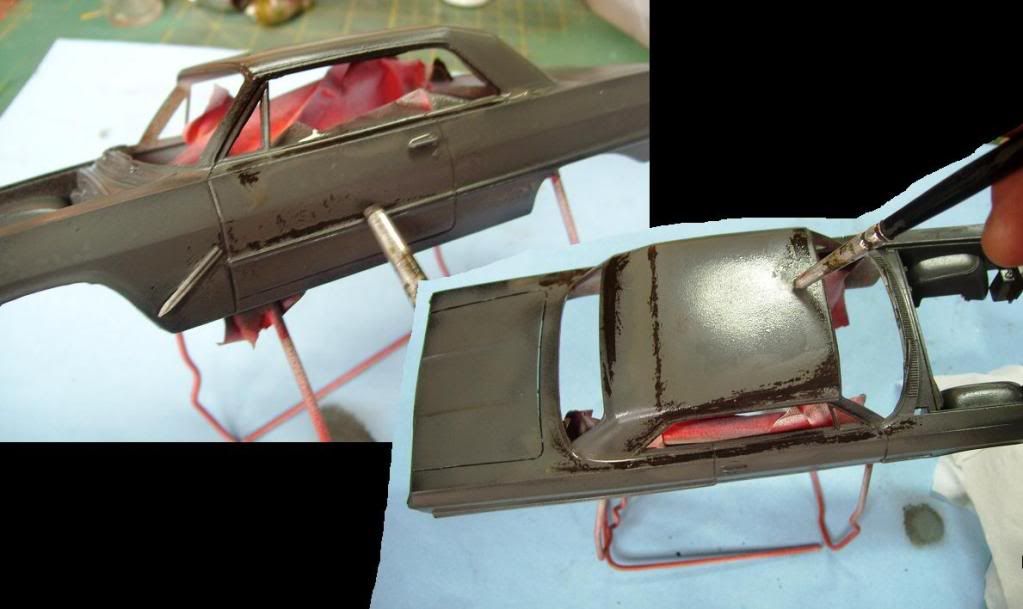
I then used some MIG "602 Abteilung" oils to play up the rust color to a lighter shade.
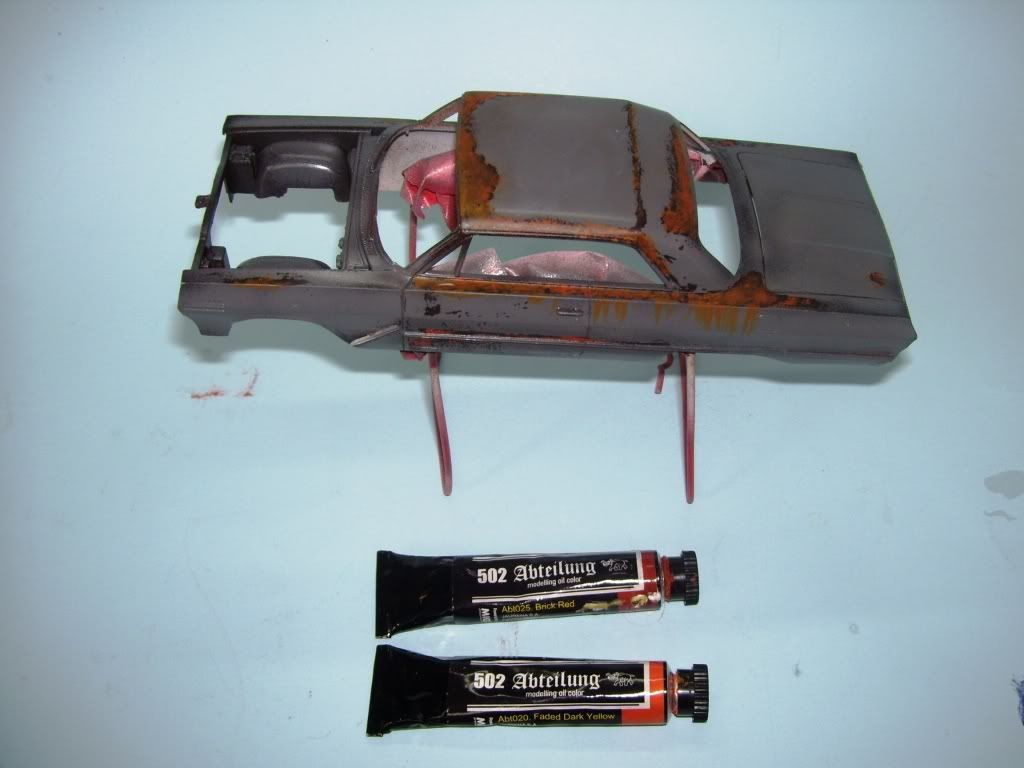
OK, fast forward a bit....the model was then sealed--yes, sealed!--(I
RARELY EVER use sealing coats!) using some Testor's Gloss. Why gloss?
Because again, the gloss helps the next layer of paint slide off the
dissolving hair spray easier. I then used some MicroMask to cover the rusted parts, instead of the tape, which is rather imprecise. Then, another generous coat of hair spray. The model then got a few coats of Model Master acrylic Flat White. I used MM acrylic, because it's not as "toothy" as Tamiya, which is actually a form of acrylic/lacquer.
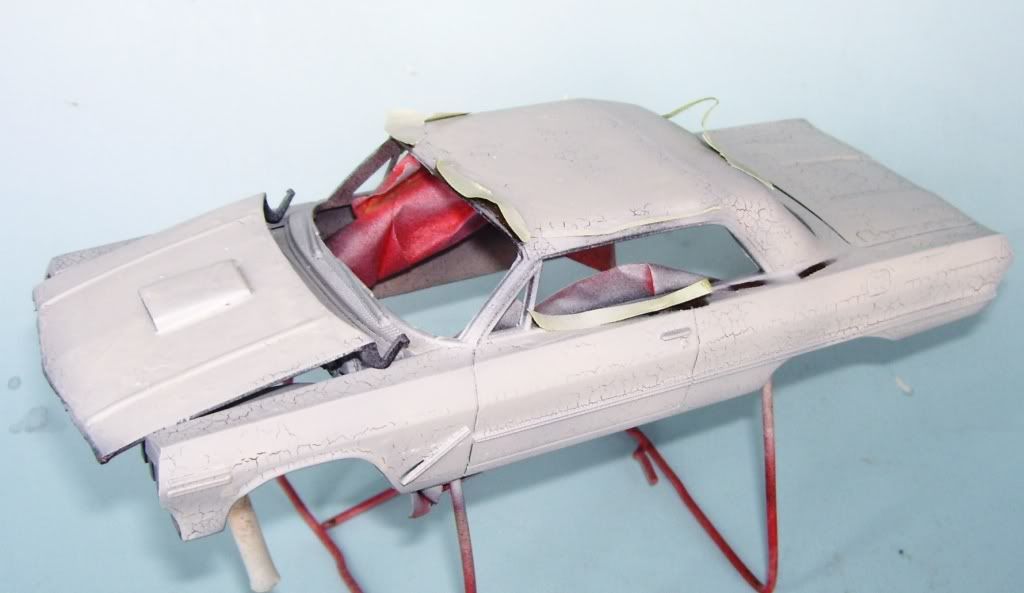
And then, this wonderful "accident" happened--I used a hair dryer to speed up the drying time (it was a somewhat humid day) and the paint crackled and split in a most unexpectedly wonderful way!
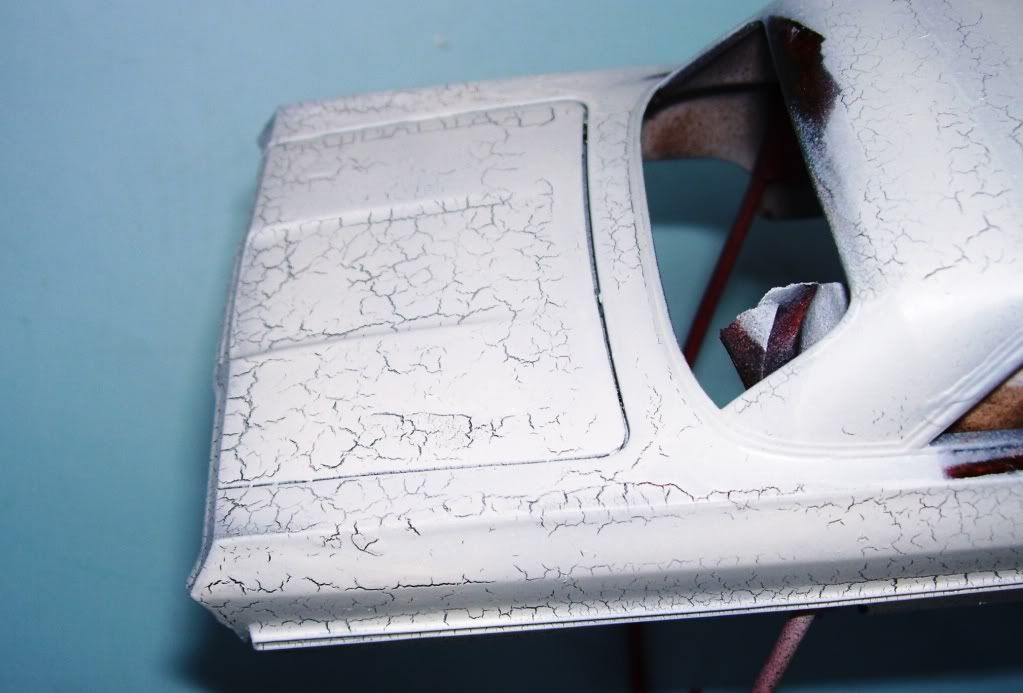
I'll take it! The next step was to then weather and beat-up the finish as per the photo of the real car.
I used th Exacto, toothpicks, and even rough sandpaper to remove selected areas of paint, I used water to loosen the hair spray.
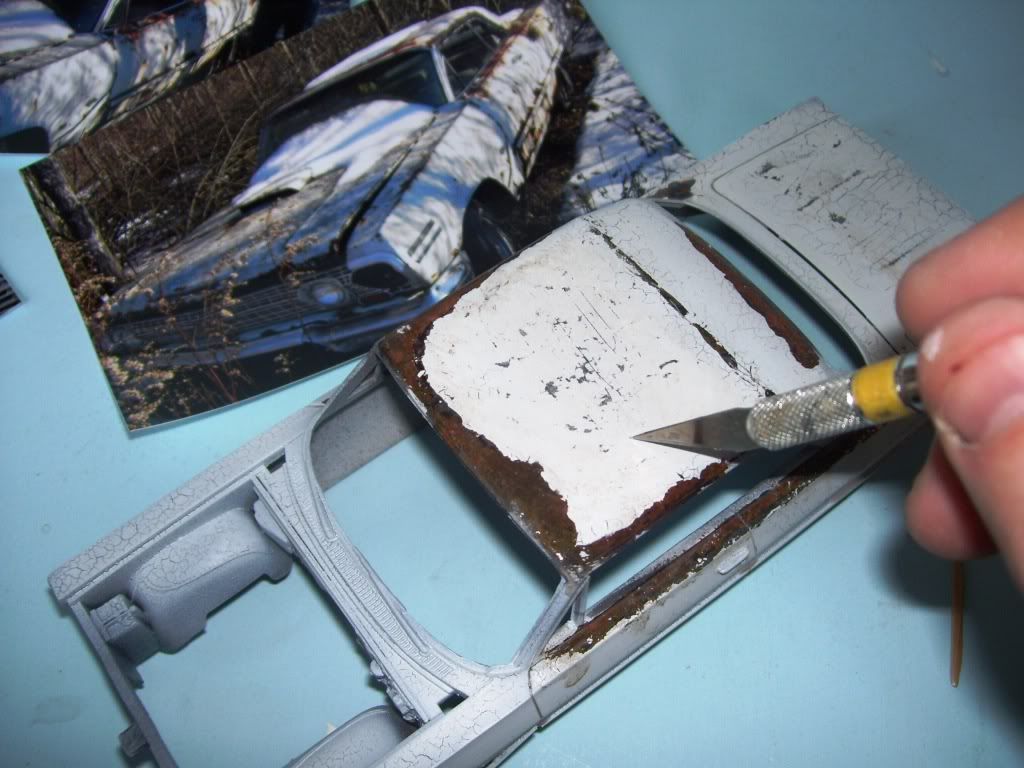
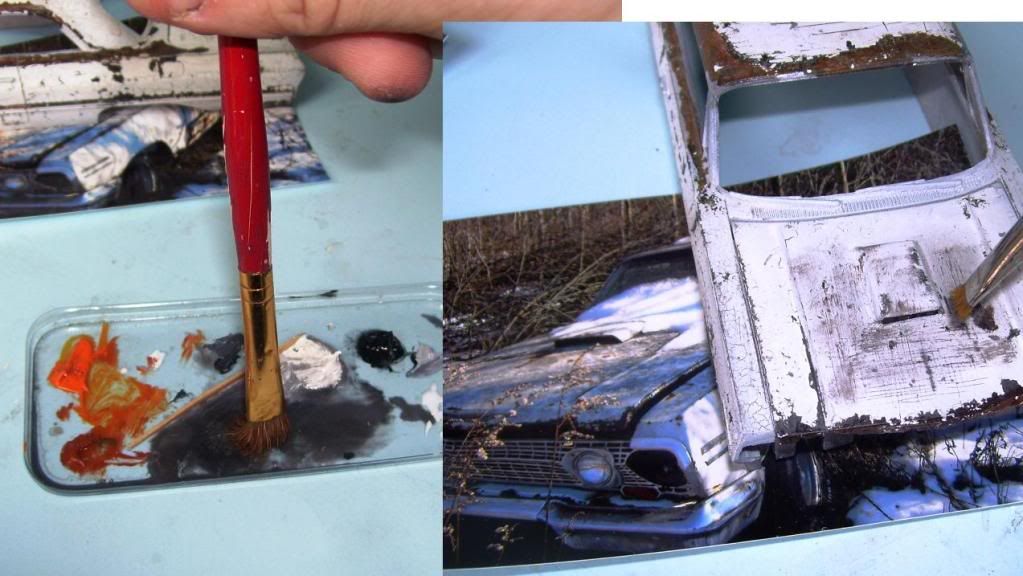
I then used some gray mixed oil paint to accentuate the degradation of white-into-gray.
And the result so far..
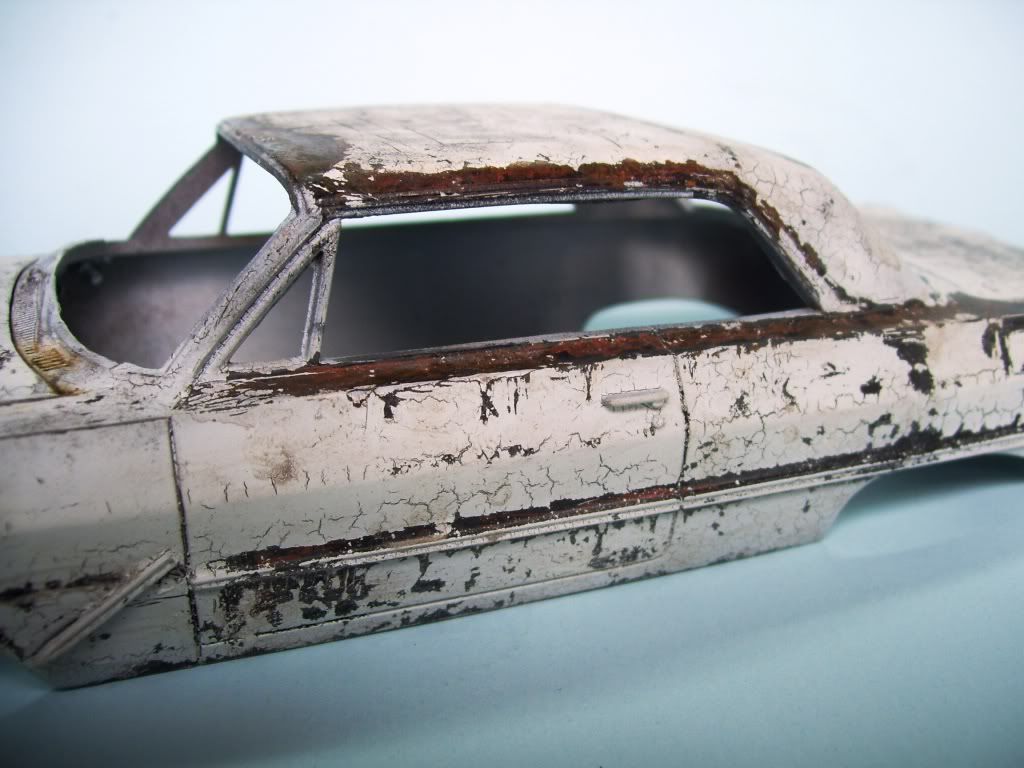
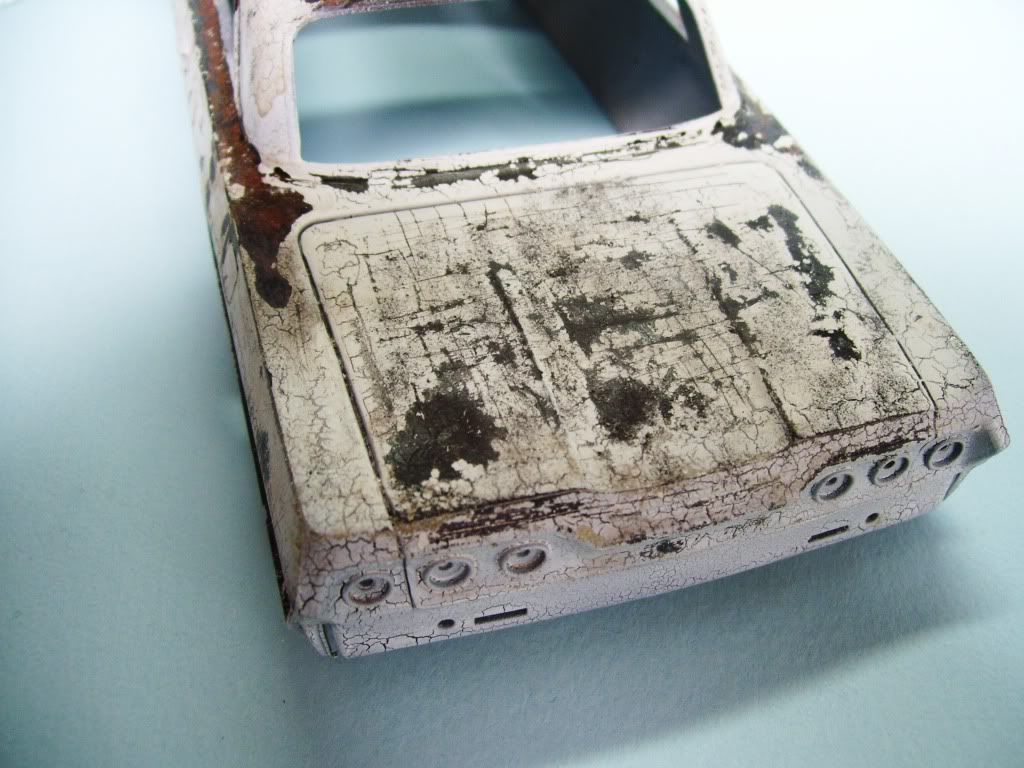
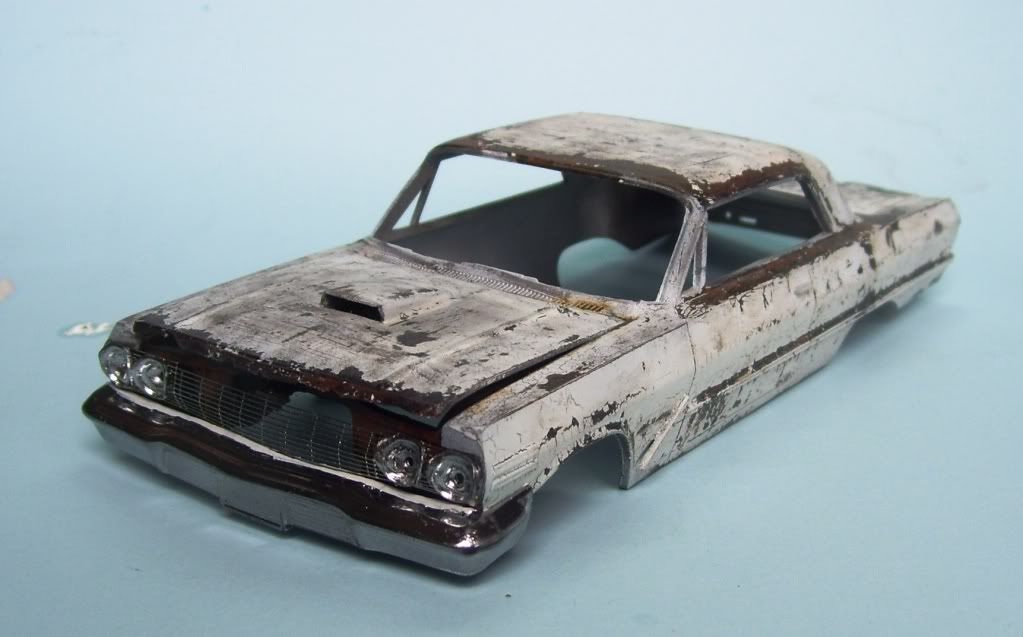
Well, that's where I'm at for now. I'm currently working on BMF'ing the car, and still need to do the rust streaking and pigments. Plus a lot of small detailing. Hope you like it so far!
All critiques, observations, and comments are always welcomed and appreciated!
Karl the doog