SEARCH FINESCALE.COM

Enter keywords or a search phrase below:

1/25 MPC Deserter GMC 4x4

5789 views
9 replies
1 rating 2 rating 3 rating 4 rating 5 rating
  • Member since
    June 2014
1/25 MPC Deserter GMC 4x4
Posted by BrandonK on Friday, May 25, 2018 10:16 AM

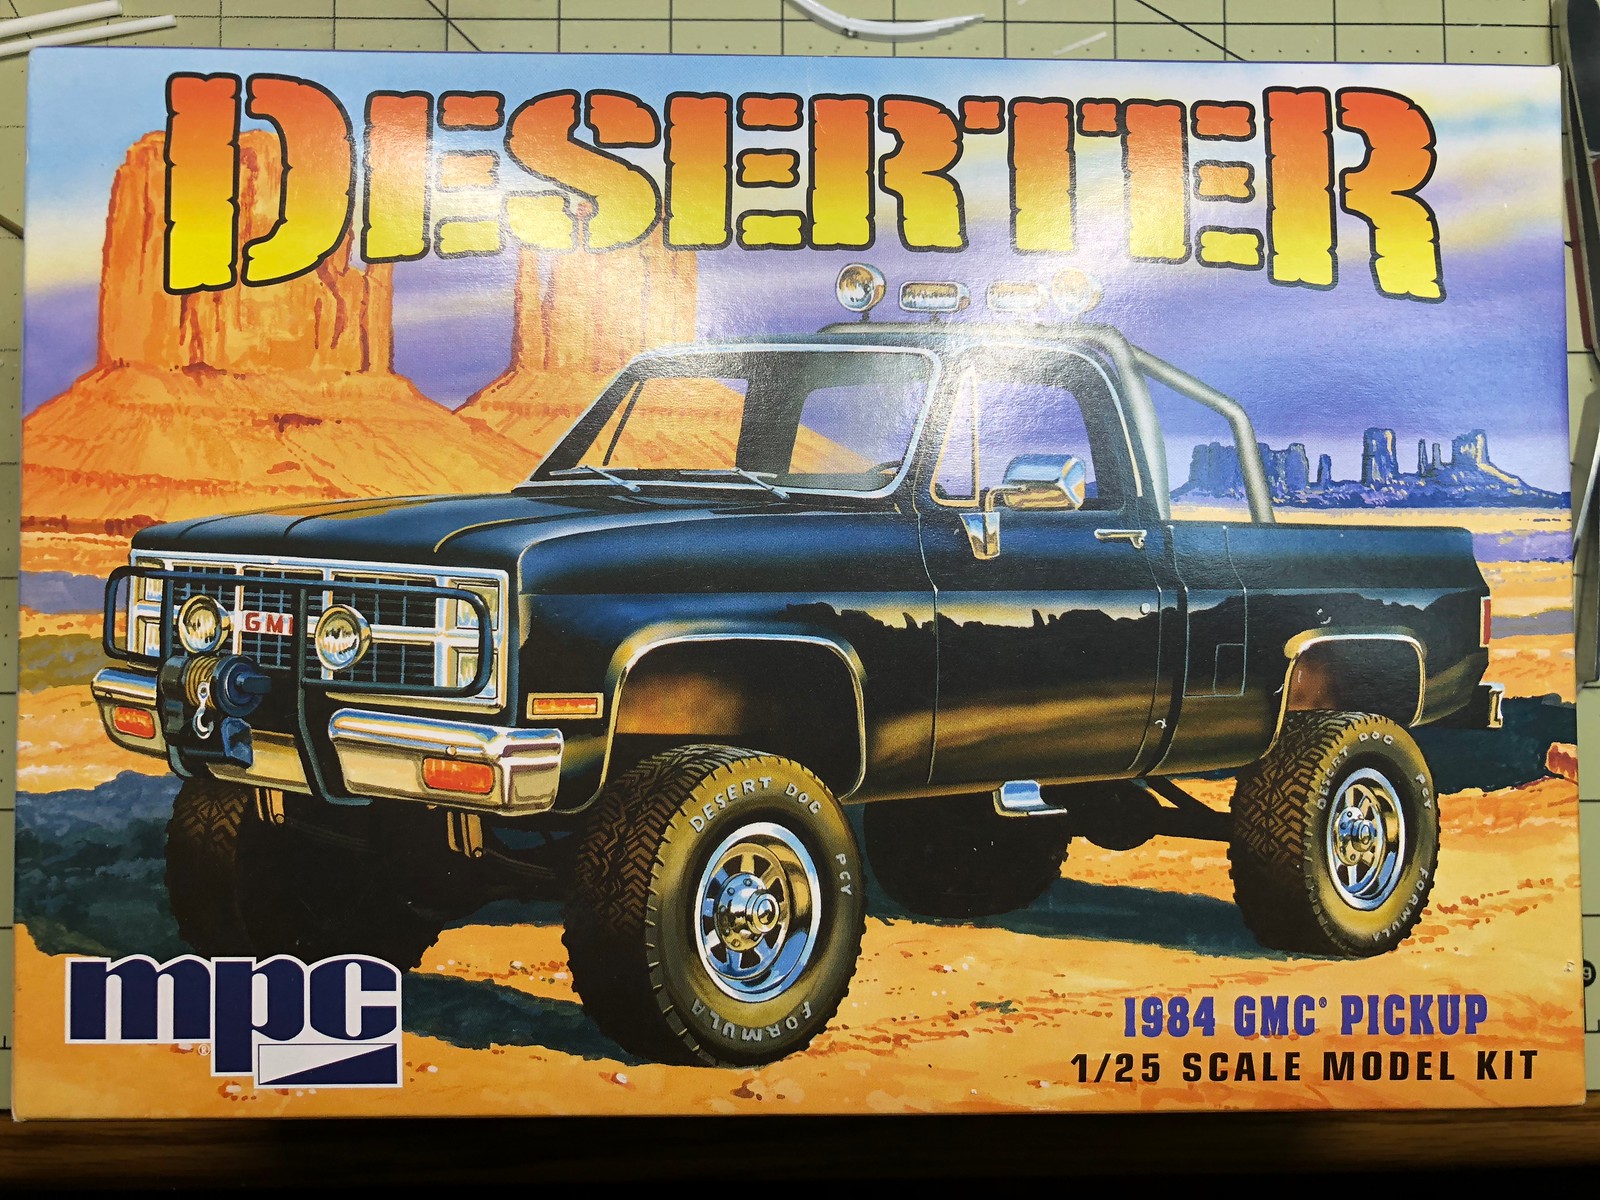
I wasn't planning on putting up a WIP on this kit, but since I started it two days ago I found that the kit is such dire need of help that a WIP might be fun to do. I haven't built a car or truck in 30+ years. I spend all my time on the Aircraft thread with WWII birds. Since I am finishing up some other builds I needed a bit of a change. This kit has been in the stash for a bit now as my son wanted to build it, but he has no desire to actually do it. Since I own one of these in real life I thought it would be fun to do.

I had hoped when I started the kit hat it would be a fun, quick little build. Not so fast !! The kit has so many glaring problems that "inaccuracies" would not suit the issues. The kit is loaded with TONS of just plane WRONG stuff. SO, this quick build suddenly turned into a mission to correct as much as I can and make it proper while not loosing my mind do so. I hope you all enjoy the ride, it's gonna be a bumpy one. Indifferent

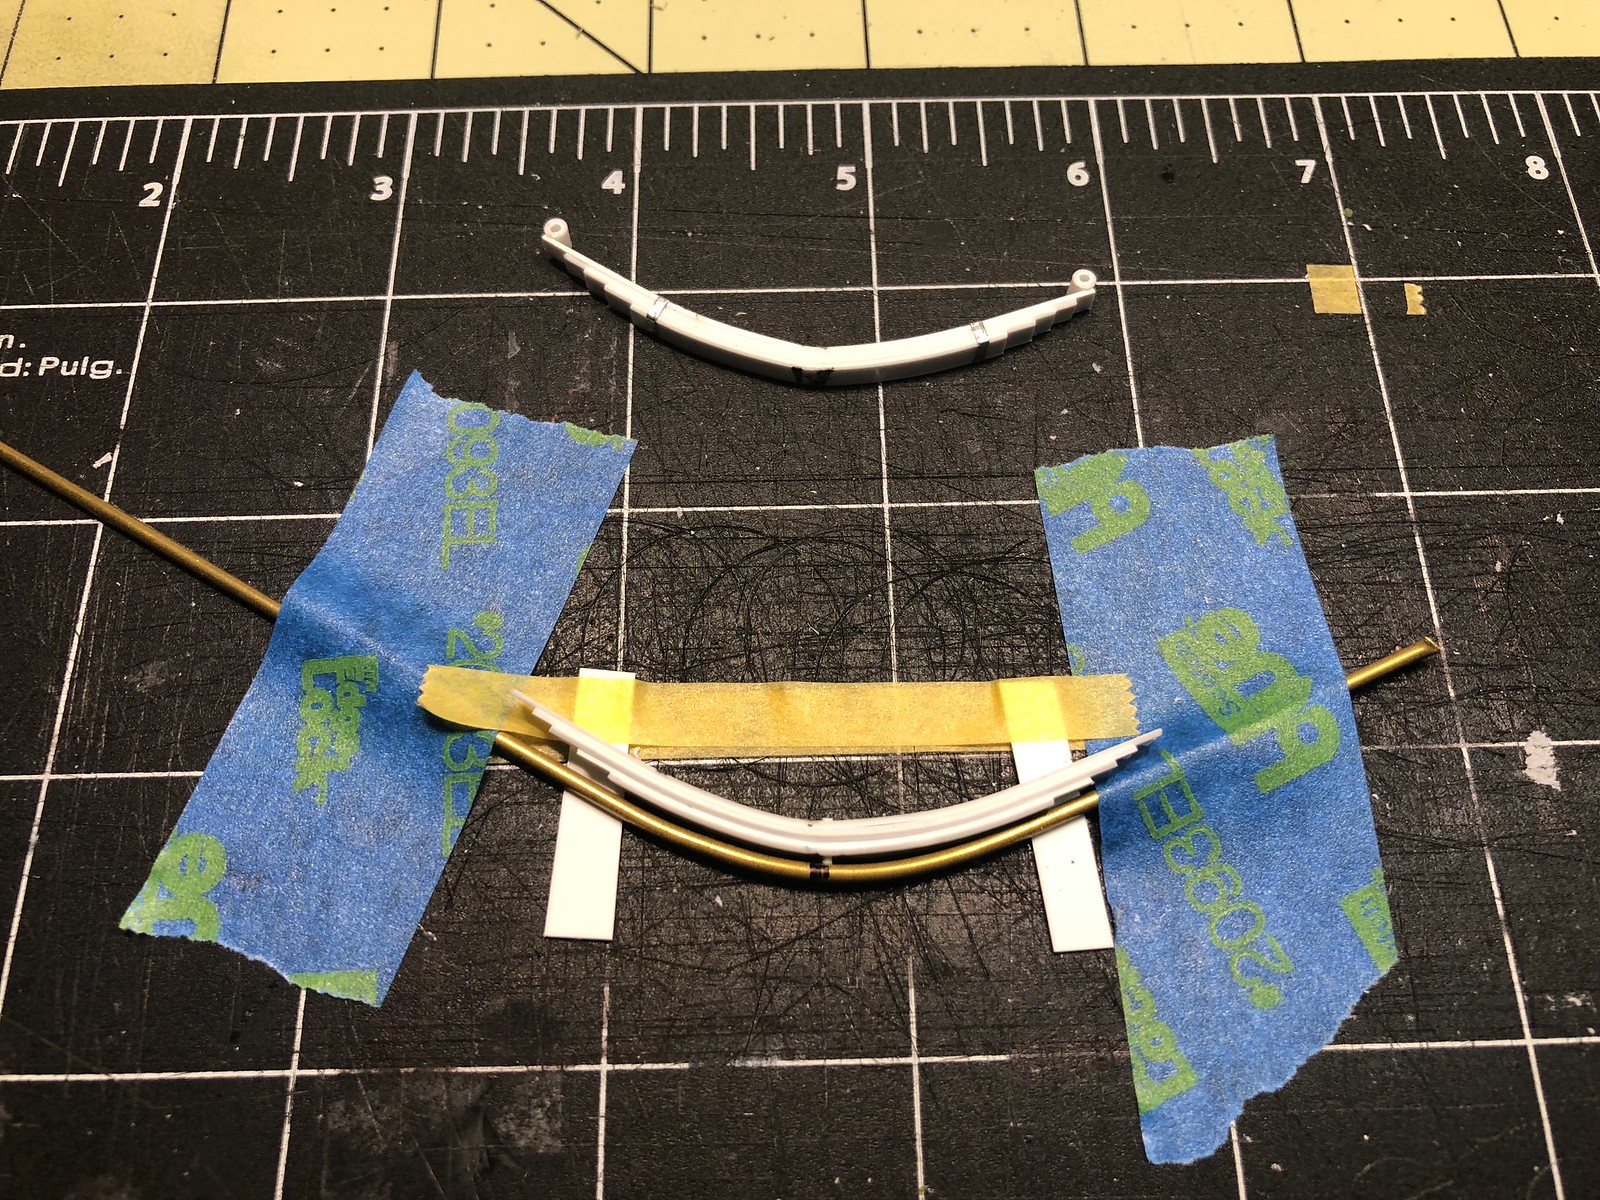
The first thing I noticed on the kit that got me worked up was the way they lifted the suspension on the kit. They litterly just added blocks to the end of each spring. This is never done in RL and is not only dangerous but mechanically not possible if the truck as to move it would fall apart. Even the box art has it wrong. Ugh.

That being said, I went about scratching up a whole new suspension system for all 4 corners. I began by shaping a brass rod to the proper arch and then measured spring length needed for the lift to occur properly without lift blocks on the rear axle, which wouild have bee far easier. I cut strips from sheet styrene and drilled the centers and then pinned them just like the real thing. I clamped them in the wire jig and glued them up and let them rest overnight. In the morning I have a corrected leaf spring set and I will work on getting the hangers added to the frame and the back will be done. The front set will get similar treatment but the front is handled a bit differently as the lift is obtained in some srping arch and also in longer rear shackles. The frame also has to be extended about 1/4" to make this correct.
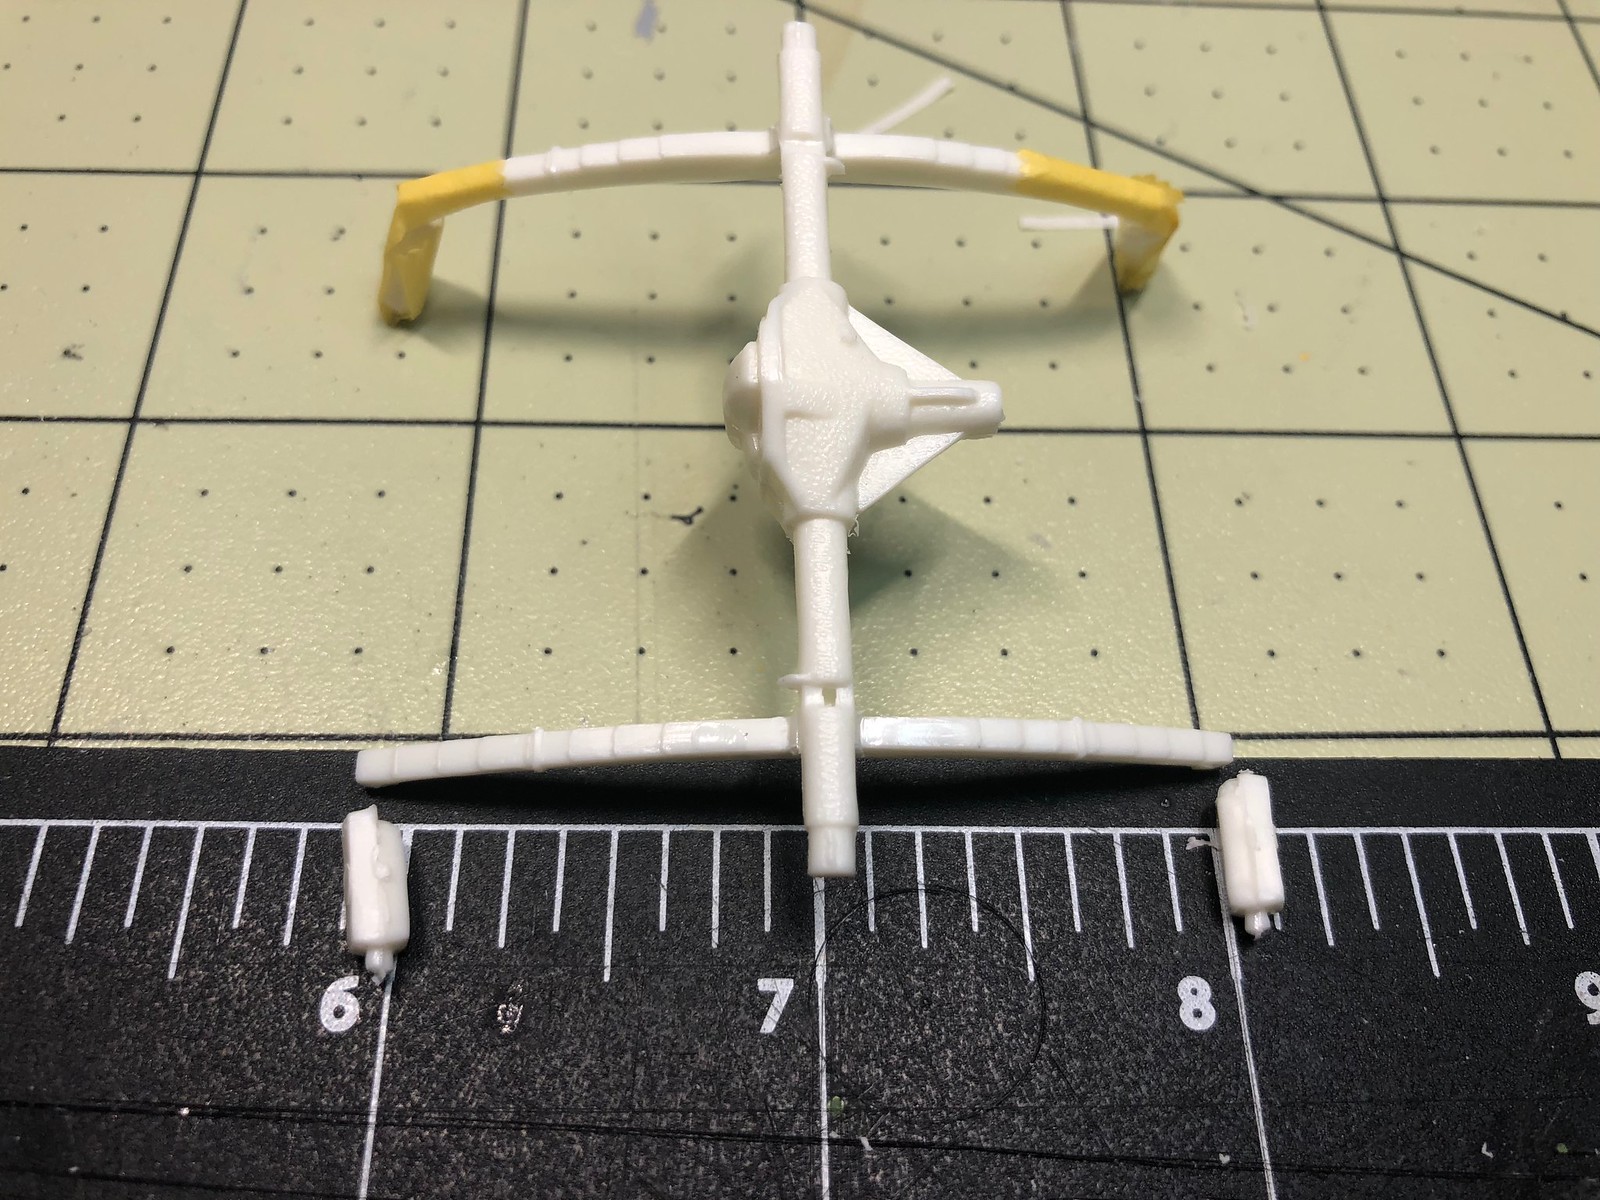
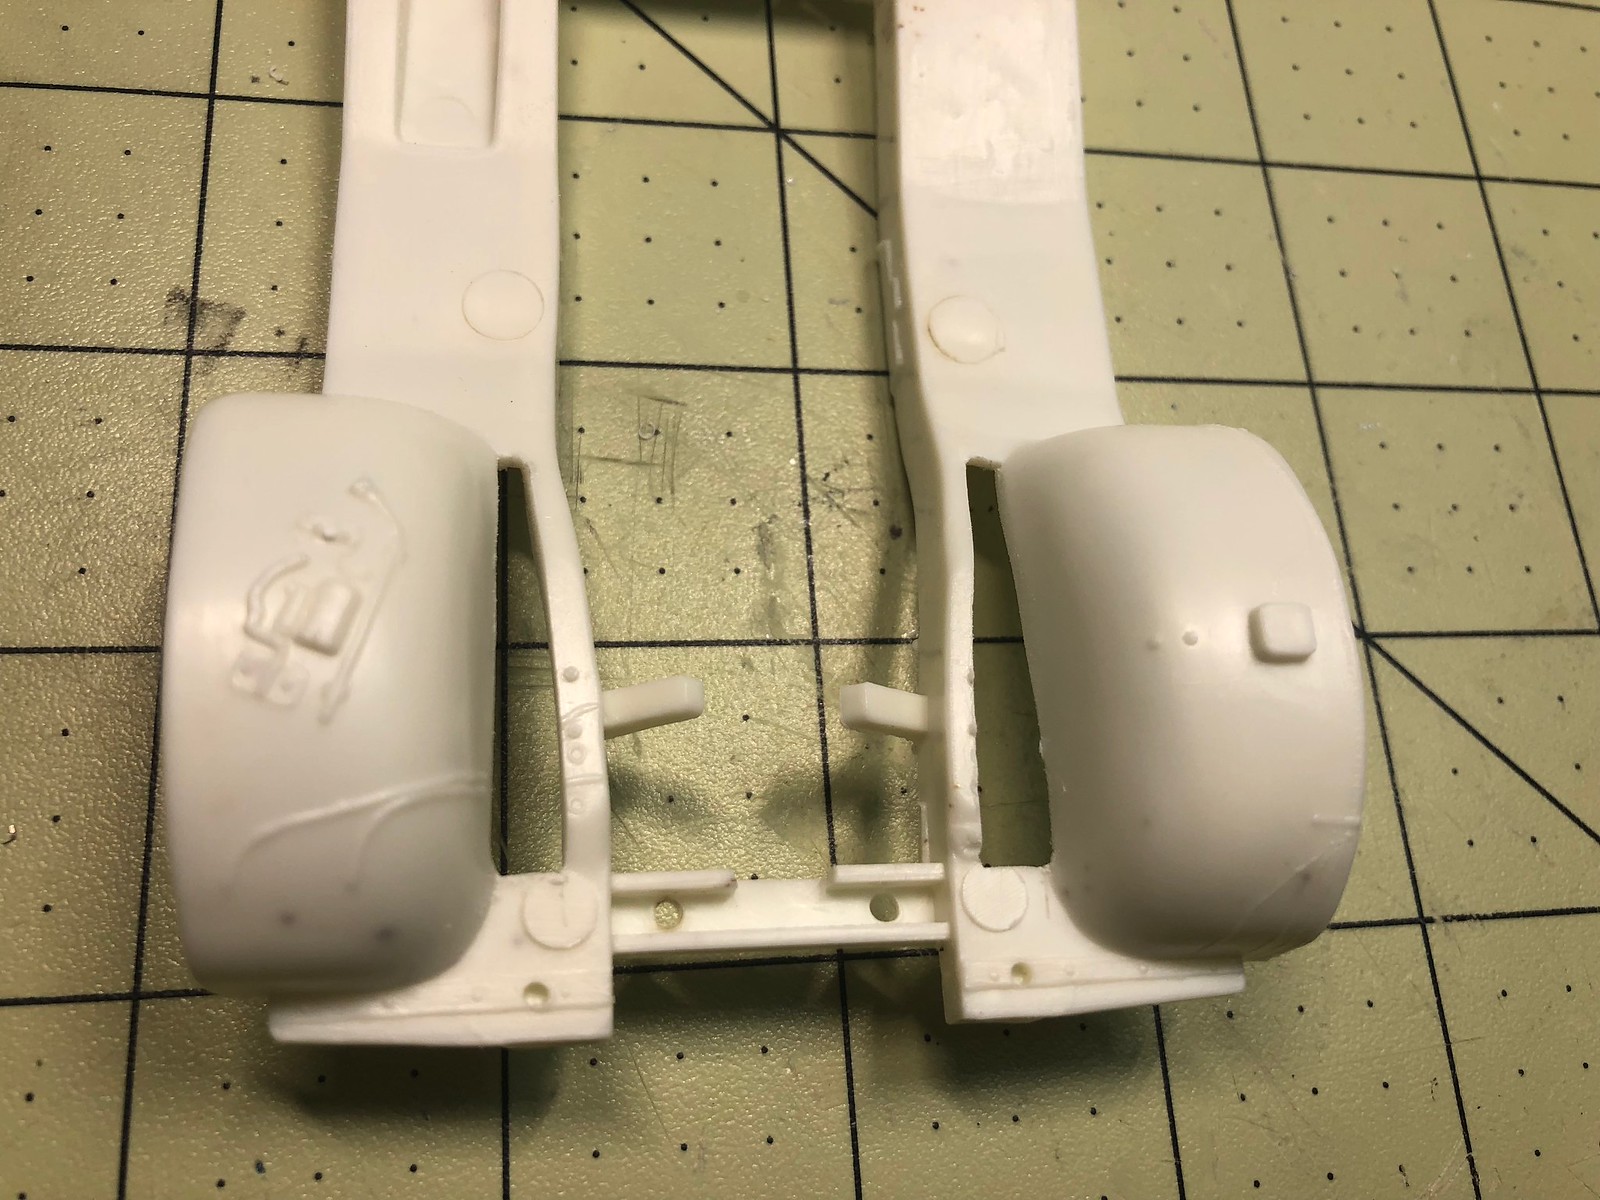
I also noticed that the kit part has the inner fender liners going all the way to the frame and making the area completely closed off. This too is wrong. The inner fenders do not attach to the frame and there is about a 3" gap, so I cut this area out to more accurately reflect the engine bay. It was at this time I also noticed that the cross member under the engine simply does not exist on the kit. I'm not sure how I will attack this but I will come up with something. I am planning on adding wiring and brake tubing, hose, ect to the extend I can stand to do it. Since I have one sitting in the driveway, reference is not an issue.
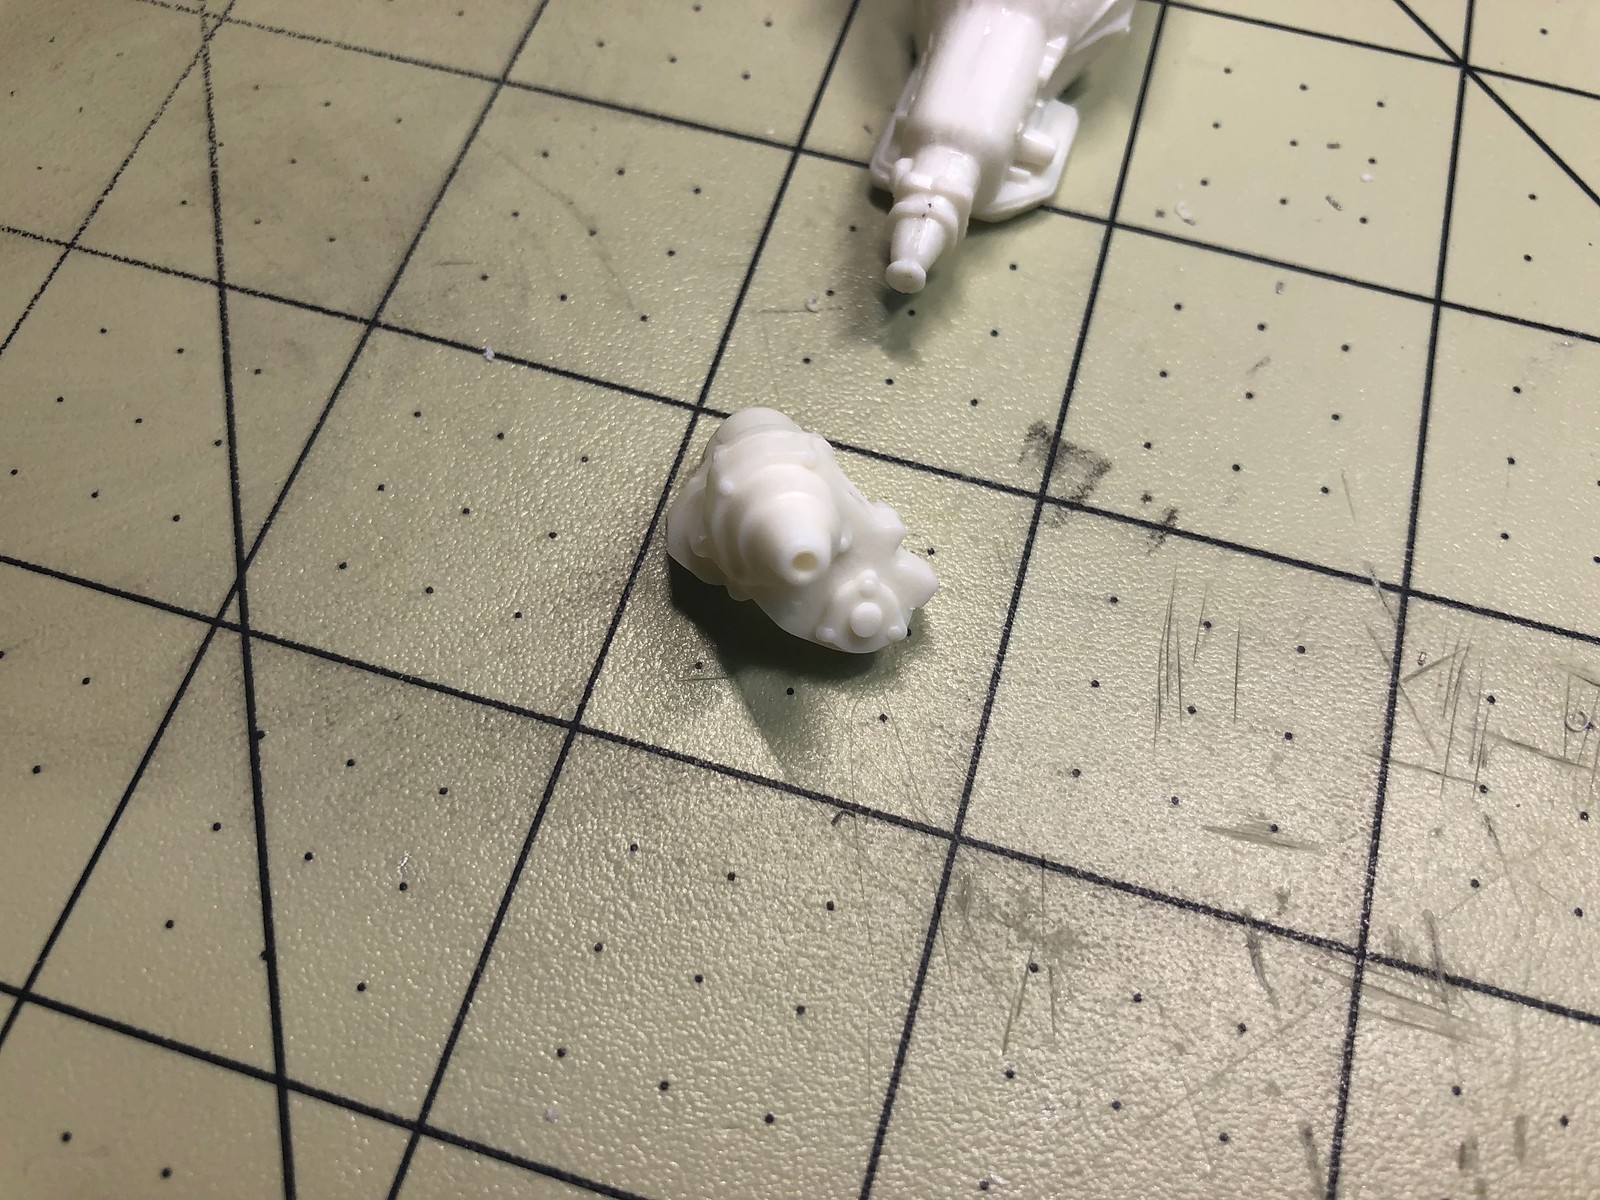
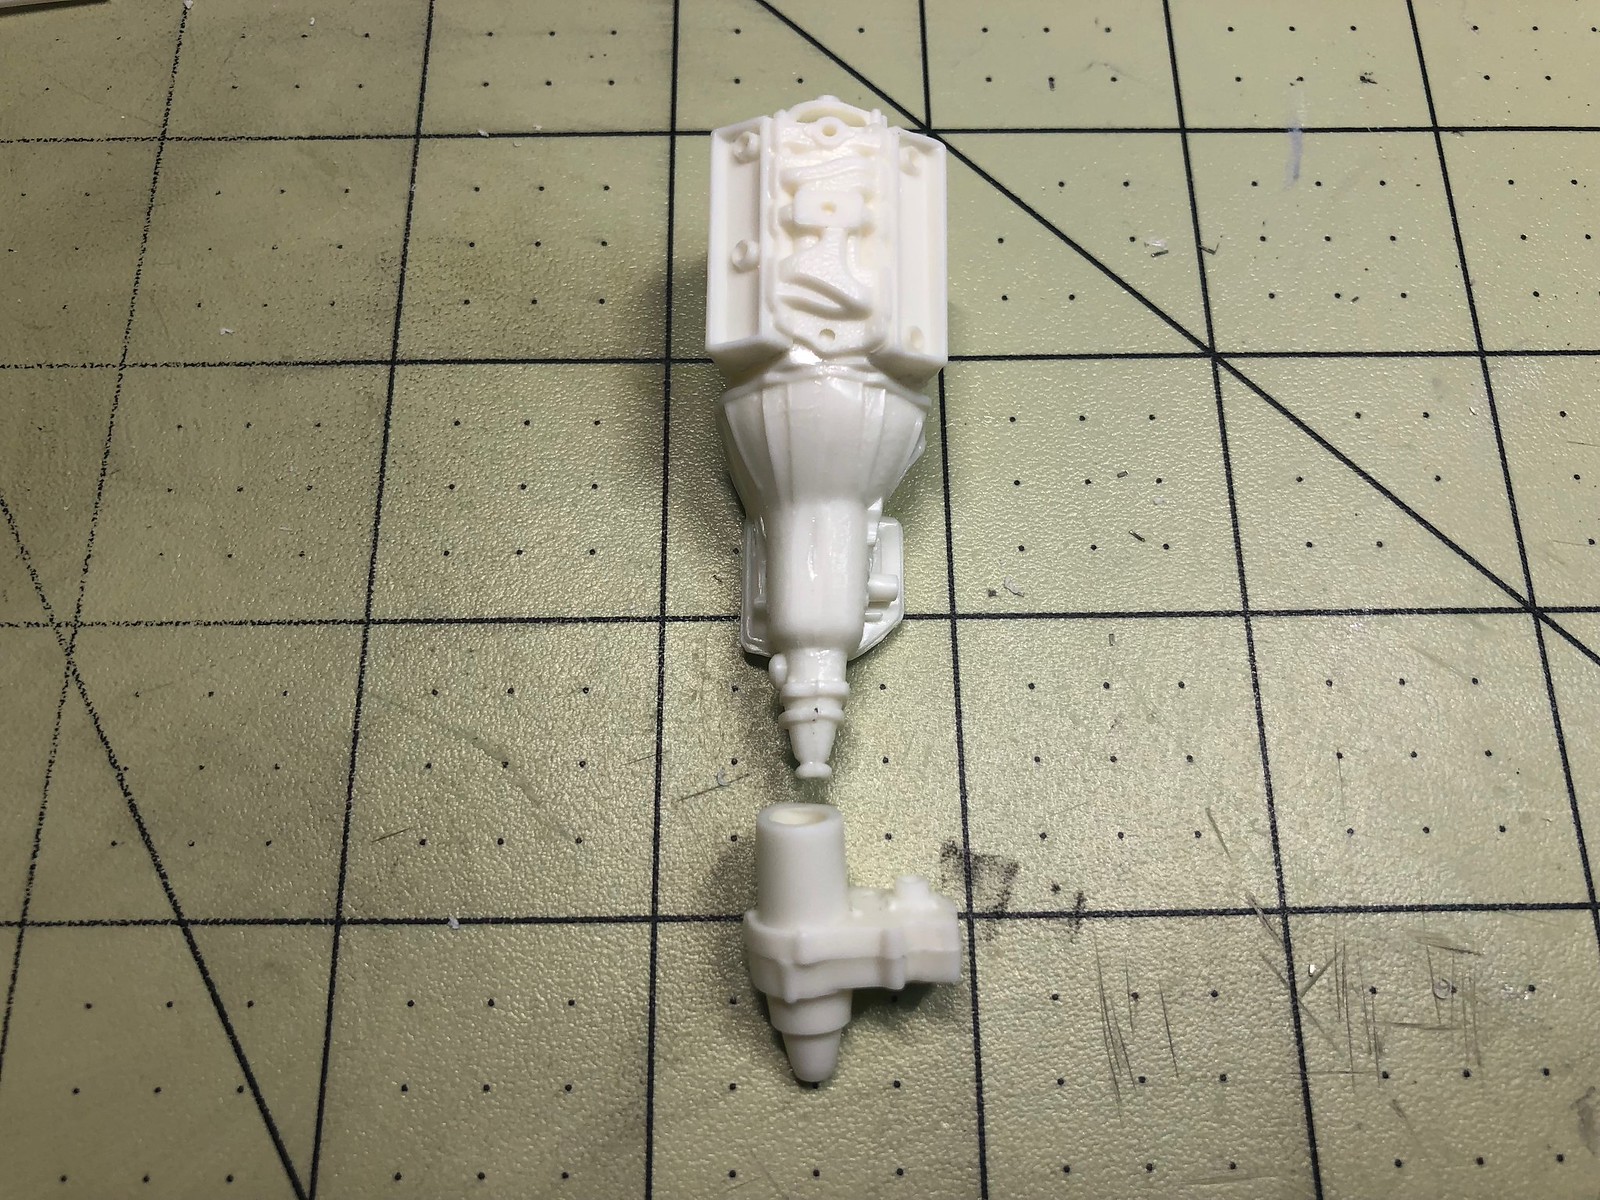
I also believe the transfer case is all wrong, mostly in scale. I may have to scratch one together to make it more accurate. The transmission is also for a 4x2 but that is easy to fix. The mounts it uses are for kit simplification and I will scratch those up to, easy peasy. 
The axle assemblies also do not have covers detailed out and I have no idea what to do about that. Since this is one of the most commonly seen areas of these truck I need to correct that to get the look correct. I wish I still had my spares that I had when I was in school, I know I would have axles that looked better.

Thanks for stopping in and looking. If you have any ideas for improving this kit let me know. 

BK

On the bench:

A lot !! And I mean A LOT!!

2024 Kits on deck / in process / completed   

                         14 / 5 / 2  

                              Tongue Tied

  • Member since
    June 2014
Posted by BrandonK on Friday, May 25, 2018 3:18 PM

I was finishing up on the rear springs when I turned my attention to how they mount to the frame, or rather, how they mount to the brackets that mount to the frame and I was trying to figure out how to make all this out of styrene. ????? Then I remembered I had a sheet of brass I've never used and it occured to me that was the perfect material to pull off the frame brackets.

Using the photos I took as a reference I set about fabbing up some mounts.

The first pic is the rear spring bracket followed by the front.

The springs sit just outside the frame with about an inch of overall clearance so I looked closely at the shape of the brackets and I used the brass sheet, some scissors and a PE bender to shape the rear and a bit more thought went into the front. Once I got them done I think it is a huge improvement over the kit set up. I'll take a break now, my brain hurts.

I'll add some small styrene bits to simulate bolt/rivit heads later.

BK

On the bench:

A lot !! And I mean A LOT!!

2024 Kits on deck / in process / completed   

                         14 / 5 / 2  

                              Tongue Tied

  • Member since
    May 2009
  • From: Poland
Posted by Pawel on Friday, May 25, 2018 3:20 PM

Hello Brandon!

You've got a very nice but also a very ambitious project here! I'll be watching!

As for ideas I'd like to help you a lot, but I don't know what you are aimin' for - so photos of the real thing (for example taken from the internet) would help a lot here.

Good luck with your build and have a nice day

Paweł

All comments and critique welcomed. Thanks for your honest opinions!

www.vietnam.net.pl

  • Member since
    June 2014
Posted by BrandonK on Friday, May 25, 2018 3:29 PM

Thanks Pawel,

This is the actual truck I own that I am using for my reference. I will not be coping the look of this.

 I haven't decided on what look to go with yet, but I am leaning toward "used, a tad dirty, some rust and grime". It won't be clean new truck, I own that one so I want something differnt. Mostly right now I am focused on correcting the horrible inaccuracies. Fortunately, the kit body is pretty spot on, so no work needed there.

Thanks for looking.

BK

I'm leaning kinda in this direction for the look.

On the bench:

A lot !! And I mean A LOT!!

2024 Kits on deck / in process / completed   

                         14 / 5 / 2  

                              Tongue Tied

  • Member since
    April 2003
  • From: USA
Posted by keavdog on Friday, May 25, 2018 3:49 PM

Cool project.  Nice brass work.  Sheet brass has always been one of my favorite scratch building materials - used for cowl flaps etc.

I'll be watching!

Thanks,

John

  • Member since
    June 2014
Posted by BrandonK on Thursday, May 31, 2018 9:36 AM

I racked my brain, but for the life of me I can't come up with an exceptable way to save the kit axles. I found a guy that makes a great deal of resin for 4x4 kits and have him making a set of Dana 60 axles, a NP205 t-case and I tossed in a 383 engine with full dress, including the power steering pump and correct accessory drives and a turbo 400 trans. That solves those issues nicely. I have fabbed up a steering gear and intermediate shaft. 

The suspension is most complete, but I'm waiting for the axles before I proceed any further there. In the meantime I will make up the steering knuckles and calipers for the front axle to complete the look. 

As soon as I have more to show I'll through up some more pics.

BK

On the bench:

A lot !! And I mean A LOT!!

2024 Kits on deck / in process / completed   

                         14 / 5 / 2  

                              Tongue Tied

  • Member since
    June 2014
Posted by BrandonK on Thursday, June 27, 2019 10:09 AM

Well folks, I've had this sitting on the shelf of doom for many months now. It's finally time to begin work again.

I have made progress on many things including a scratch built steering gear and battery. I have mounted the spring hangers to the frame and scratched up all the shackles so the springs are now ready to install on the axles and then the frame.

The axles that I ordered for this are a corporate 14 bolt GM rear axle and a Dana 60 for the front. Both pieces are very nice. However, the front axle is cast for a Dodge and Dodge puts the diff under the left side of the truck rather than the right side like GM did. I can't simply flip the axle as that would make it upside down. The only solution was to remove the axle tubes and slide the housing to the right side.

To do this I squared the housing back and then cut both axles at 90 deg to that and then used a brass rod the correct diameter and cut a channel in the housing and dropped it in, in the correct location and epoxied it in place. Now the axle is located correctly for a GM Dana 60. I can now mount it to the springs. 

I am still working on a solution to steering knuckles and rotors and calipers, which can be seen on the real trucks. This is a real challenge and may take some time to solve, but the look will be much better than axle tubes pressed into holes on the wheels. Hopefully, I'll come up with something.

Thanks for stopping by.

BK

This is the Dodge Dana 60 looking at the truck from the front.

On the bench:

A lot !! And I mean A LOT!!

2024 Kits on deck / in process / completed   

                         14 / 5 / 2  

                              Tongue Tied

  • Member since
    August 2014
  • From: Willamette Valley, Oregon
Posted by goldhammer on Thursday, June 27, 2019 10:45 AM

With your scratch abilities on the brackets, I can see you making brass knuckles, spindles and rotors.  No idea on the calipers.

Had a '75 K-10 long box.  Best wheeling rig I had up until the '81 Cherokee.  At least once I converted the POS NP203 to part time.  Only down side was running 35's with the 3.07 gears.

Your 1:1 is a beauty.

  • Member since
    March 2012
  • From: Corpus Christi, Tx
Posted by mustang1989 on Monday, July 1, 2019 7:46 AM

BrandonK

Thanks Pawel,

This is the actual truck I own that I am using for my reference. I will not be coping the look of this.

 I haven't decided on what look to go with yet, but I am leaning toward "used, a tad dirty, some rust and grime". It won't be clean new truck, I own that one so I want something differnt. Mostly right now I am focused on correcting the horrible inaccuracies. Fortunately, the kit body is pretty spot on, so no work needed there.

Thanks for looking.

BK

I'm leaning kinda in this direction for the look.


Dude!!! That is a COOL LOOKING TRUCK!!!


 Forum | Modelers Social Club Forum (proboards.com) 

  • Member since
    June 2014
Posted by BrandonK on Monday, July 1, 2019 9:48 AM

mustang1989
Dude!!! That is a COOL LOOKING TRUCK!!!

Thanks buddy. I appreciate the kind words.

I've made progress with the suspension; it is now attached to the frame. I also have the steering knuckles worked out and came up with a solution for the tie rod ends where they attach to the knuckles and a new drag link set up. I have to make the pitman arm yet. I will get some pics up later this week as time permits. I am pleased with my progress so far. 

BK

On the bench:

A lot !! And I mean A LOT!!

2024 Kits on deck / in process / completed   

                         14 / 5 / 2  

                              Tongue Tied

JOIN OUR COMMUNITY!

Our community is FREE to join. To participate you must either login or register for an account.

SEARCH FORUMS
FREE NEWSLETTER
By signing up you may also receive reader surveys and occasional special offers. We do not sell, rent or trade our email lists. View our Privacy Policy.