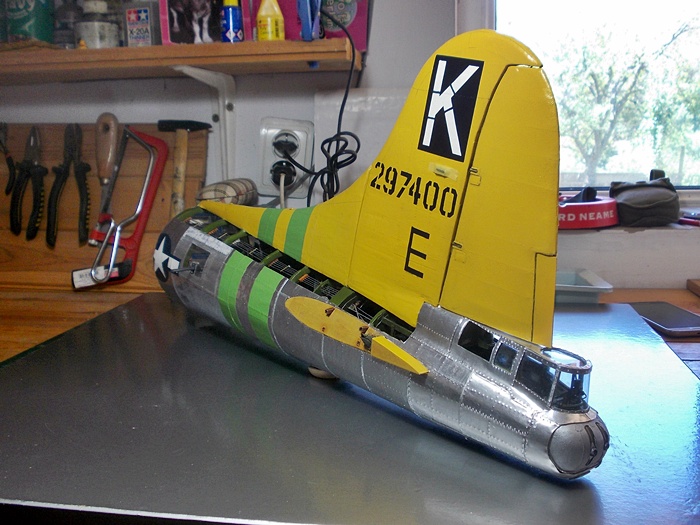
SEARCH FINESCALE.COM

Enter keywords or a search phrase below:

THE FINAL HURDLE!... 1:20 scale scratch built B17G

20293 views
68 replies
1 rating 2 rating 3 rating 4 rating 5 rating
Foz
  • Member since
    April 2011
  • From: S.E Bulgaria
Posted by Foz on Tuesday, November 2, 2021 8:50 AM

Back to the bench

Wow truly at a loss for words on this build. Just to have the stamina and determination for such a long project is impressive, but to execute at this level is really amazing! I actually learned a lot about the real aircraft looking at your build thread. Your photography is also amazingly well done and it allows us to appreciate the meticulous detail work even more. I will be looking back through this build thread again and again, both for pleasure and to learn scratch building techniques. Congratulations on completing such a daunting project and thank you for sharing your amazing work.


Thank you for your kind words!

When I started this project 10 years ago it was only going to be the nose section back to the top turret!....I made a display stand for it and put it to bed. I was then encouraged by other model makers that I should continue down the fuselage to the tail!....so what was to be maybe a 2 year project turned into 10 years!....it has been an enormous challenge for me as some of the areas of the B17 I wasn't sure if I could actually replicate! ....but.....All done now and I'm not sure if I would take on such a huge project again!....we shall see!Hmm

  • Member since
    July 2009
  • From: North Carolina
Posted by Back to the bench on Tuesday, November 2, 2021 8:31 AM

Wow truly at a loss for words on this build. Just to have the stamina and determination for such a long project is impressive, but to execute at this level is really amazing! I actually learned a lot about the real aircraft looking at your build thread. Your photography is also amazingly well done and it allows us to appreciate the meticulous detail work even more. I will be looking back through this build thread again and again, both for pleasure and to learn scratch building techniques. Congratulations on completing such a daunting project and thank you for sharing your amazing work.

Gil

Foz
  • Member since
    April 2011
  • From: S.E Bulgaria
Posted by Foz on Sunday, October 31, 2021 8:10 AM

Hi everyone


This is it!...............the absolute FINAL post I will make on this 10 year project! Big Smile


In my last post I was talking about the display aspect of this model and what was the best way to display this B17G  ....I gave it considerable thought and finally decided that the best way would be to make it as simple as possible.  I  came up with a simple idea of just placing the ball turret on a clear plastic stand (actually its a small plastic cup!)....it sort of gives it a floating kind of look!...ish!....I didn't place it underneath the fuselage because it just obscured the 9 months of work I did scratch building it! 

I wanted to place both bomb bay doors on so I had to be sure the fuselage sat high enough off the ground to clear the very large bomb bay doors!  So to that end I had to revamp the display stands. There are 4 in total...2 on the front section and 2 at the rear. The rear section stands had to be way higher as the tail lifts up towards the rear...I built these out of reinforced balsa wood (plastic covering) and cocktail sticks! 

I have left an 8 inch gap between the front and rear sections so that you can peer down into the fuselage both front and back and of course as you probably know the top half of the fuselage along its entire length has viewing points to see the interior.


So that is what I did......but first......something was really bothering me about the aluminum skin on the front section back to the radio room. It seemed to be a tad wrinkly here and there. I know exactly why...its because 10 years ago I constructed the front fuselage section completely in a different way to how I built the rear section 8 years down the line!......plus the joins on each section were showing through!.......no it was no good!.....I just had to re skin the front section. .............


Here are the display stands that I built.........


...and here is the finished display........


Cheers for looking in!.....I guess its time to move on now and start thinking of my next project!


Fozzy

Foz
  • Member since
    April 2011
  • From: S.E Bulgaria
Posted by Foz on Monday, August 30, 2021 2:25 PM


Hi guys 

Just a quick post showing the very last detail that I shall be doing on this B17.

Of course they is still a lot more thought and scratch building to be done to finally display the model but I am going to take a bit of time out whilst I think about it!

I have made a decision about the two halves of the fuselage (front section and rear section). Right from the start of this project it was important for me to show all the interior detail and the actual outer fuselage came second in the importance of this project and so to that end the two sections will be apart. I am thinking of a gap about 8 inches between the front and the rear.This will allow you peer down into the fuselage as well as seeing the detail from the missing panels in the top. I am also steering towards actually keeping the ball turret displayed on a little stand in the 8 inch gap between the two halves......I know it sounds crazy but I am also thinking of taking out the ball turret hanging frame which holds the ammo chutes from the fuselage and attaching it to the top of the turret as a complete unit.  I have seen a photo of this of a turret from a B24 and I think it might work for my display but as I said I am going to take time out and think about it!

In the mean time here is the last of the detail which I will do on the actual fuselage.... and that is the rear crew door.

Made in the same way I built the tail turret door....here it is before painting...


REAR_CREW_DOOR.jpg


REAR_CREW_DOOR_(1).jpg


...and here it is painted....


REAR_CREW_DOOR_(2).jpg


REAR_CREW_DOOR_(3).jpg


REAR_CREW_DOOR_(4).jpg


....here's a couple of photos of the door attached to the fuselage...


REAR_CREW_DOOR_(5).jpg


REAR_CREW_DOOR_(6).jpg


So that's all the internal and external scratch building done for this B17G.


Of course you won't get rid of me that easy after these past 10 years!Wink......I am going to try to photo the 2 fuselage sections before starting on the display work ,so I will be back soon!


Cheers as always for looking in and see you on the next post!


Fozzy

GAF
  • Member since
    June 2012
  • From: Anniston, AL
Posted by GAF on Monday, August 23, 2021 2:27 PM

Fair enough!  Smile

Gary

Foz
  • Member since
    April 2011
  • From: S.E Bulgaria
Posted by Foz on Sunday, August 22, 2021 4:14 PM

GAF

I'm impressed by your attention to detail, but one thing bothers me.  Wouldn't they have removed the guns and ammunition before stripping the aircraft down?  It looks incongruous with guns and ammo and no wings.  Still, nice work!

Gary


Thanks for your input Gary....

My intention right from the start was to make a study of the B17 fuselage as a cutaway showing as much of what there was internally...like a kind of anatomy of a B17G .This is why I have modeled the fuselage with most of the top section missing along the fuselage and so it isn't something you would see in a hangar for example....I hope that makes sense!...cheers! 

GAF
  • Member since
    June 2012
  • From: Anniston, AL
Posted by GAF on Sunday, August 22, 2021 10:00 AM

I'm impressed by your attention to detail, but one thing bothers me.  Wouldn't they have removed the guns and ammunition before stripping the aircraft down?  It looks incongruous with guns and ammo and no wings.  Still, nice work!

Gary

Foz
  • Member since
    April 2011
  • From: S.E Bulgaria
Posted by Foz on Sunday, August 22, 2021 3:58 AM

modelcrazy

I don't know why I haven't see this post before Surprise

Great work Foz!


Thanks a lot!Smile


Hi there


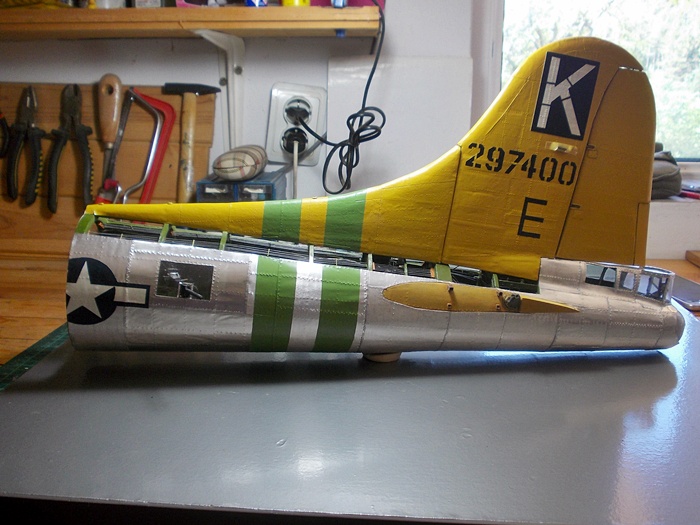
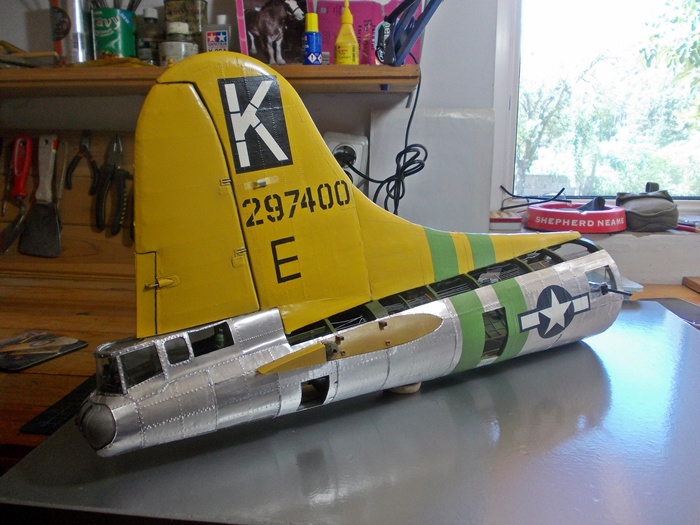
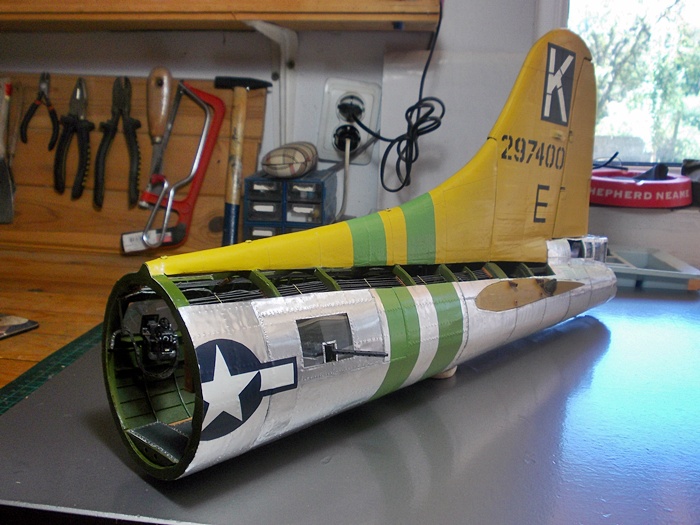
This post will be all about painting and adding the markings to the rear of this fuselage. I thought that this would be the last post before i actually finish all the work on the fuselage but then I remembered that I had to make the rear crew door!


I have made the rear gunners door that I will show you now. Because the door is the shape of the fuselage I had to use the bulk head formers as a template to get the shape right. I made it from plastic card and here is the inside of the door...
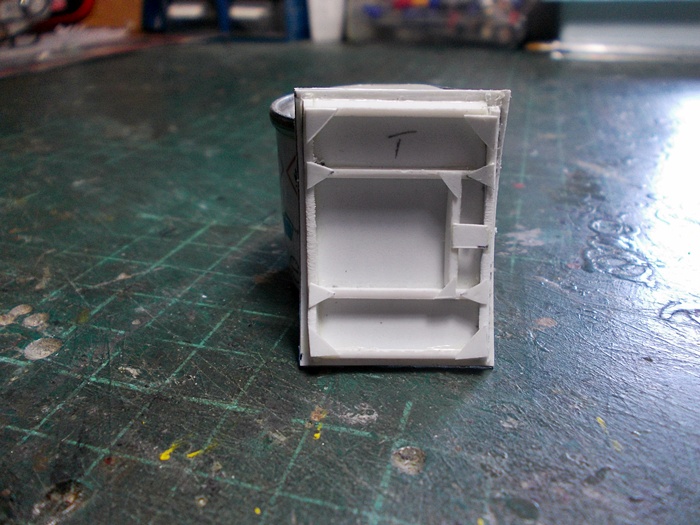
 

PAINTING_AND_MARKINGS.jpg


The out side was then covered in a sheet of aluminum and a handle was made from a piece of sanded plastic sprue...
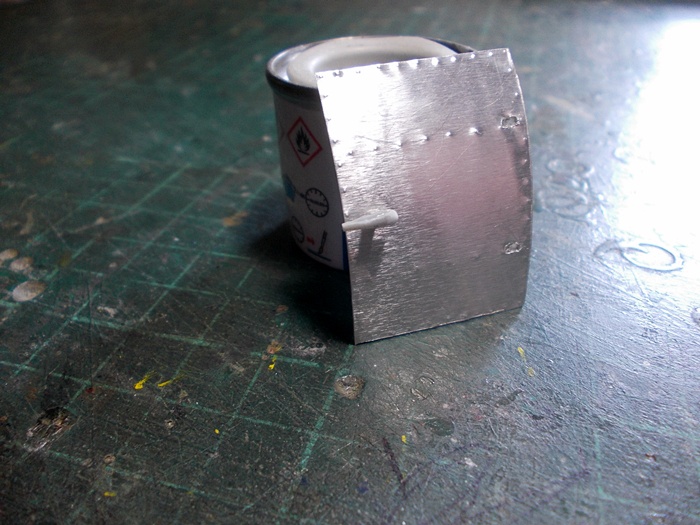
 

PAINTING_AND_MARKINGS_(1).jpg


Then I painted the inside of the door with interior green....
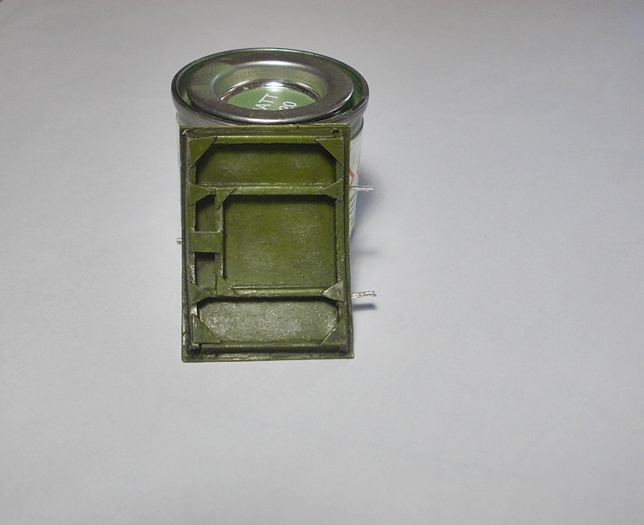
 

PAINTING_AND_MARKINGS_(2).jpg


PAINTING_AND_MARKINGS_(3).jpg


I made a couple of hinges from plastic, (covered in pieces of aluminum from a Coca Cola can to strengthen them)... and then dry fitted the completed door to the fuselage.
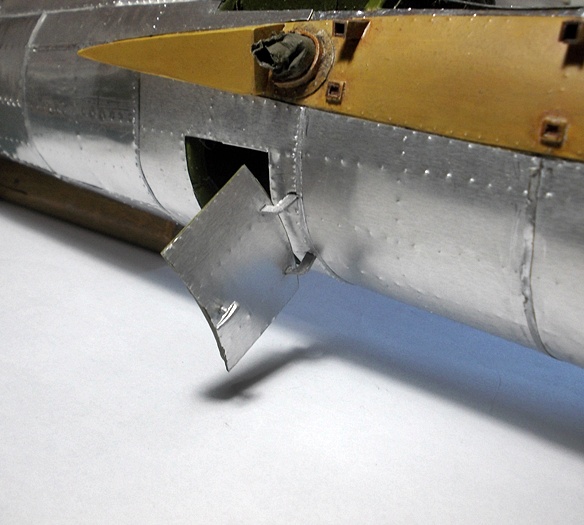
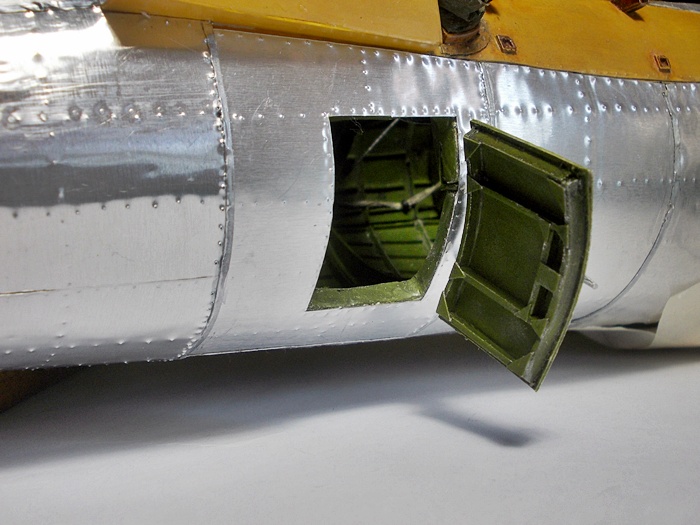
 

PAINTING_AND_MARKINGS_(4).jpg


PAINTING_AND_MARKINGS_(5).jpg


Its now time to paint the markings on the fuselage but first I had to mask up the areas I didn't want the airbrush to cover....for some reason I hate this job of masking ....you miss a bit and the blasted spray gets it!!
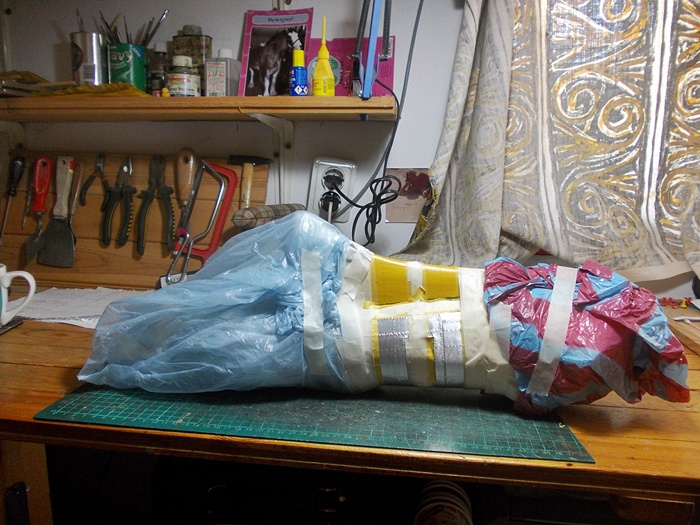
 

PAINTING_AND_MARKINGS_(6).jpg


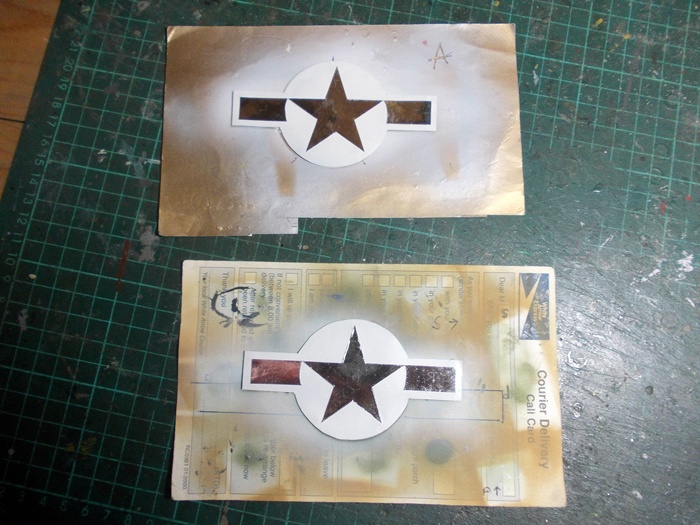
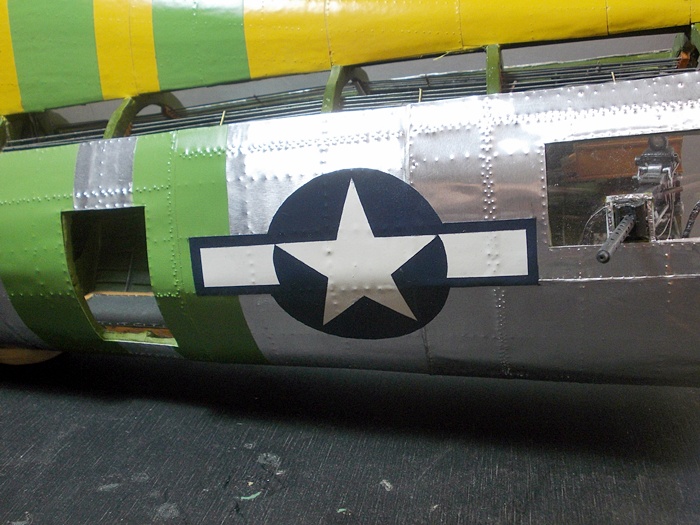
Before I fired up my Paasche....I spent a LOT of time marking out the USAF Insignia I needed for both sides of the fuselage. This wasn't as easy as I thought as not only did I have to get the scale correct but actually drawing out the insignia meant I had to dabble into geometry....which I totally ignored in my schooling years!....72 degrees spacing for each star point ...the bars are the radius x a half.... etc etc...luckily I found a great little page on the internet explaining how to actually draw the Insignia!

I drew the insignia onto some sticky back silver paper I have...which if all goes well I can literally just place them on the fuselage!  After drawing another extra insignia , I cut out the star and the bars.....sprayed the original white and then replaced the star and bars over the white as a mask for the dark blue paint!.....did you get all that??? !!!
 

PAINTING_AND_MARKINGS_(7).jpg


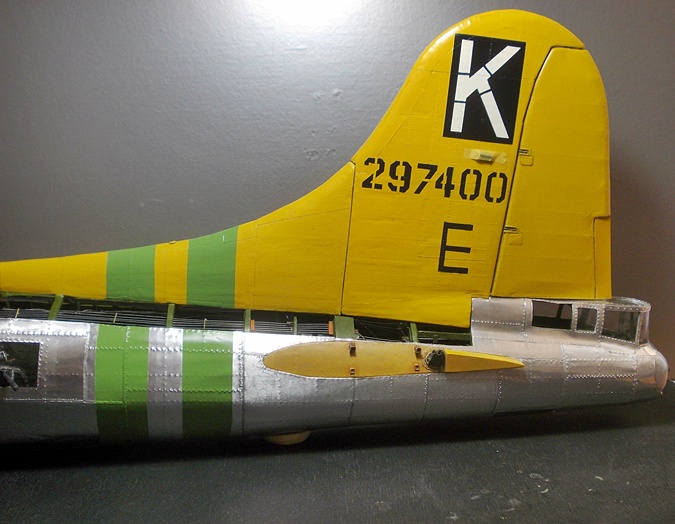
So first off....here are the green bands I sprayed that are on "Fuddy Duddy"...
 

PAINTING_AND_MARKINGS_(8).jpg


....and here is the USAF insignia on the starboard side....I have to say I am pleased in how they have turned out!....
 

PAINTING_AND_MARKINGS_(9).jpg


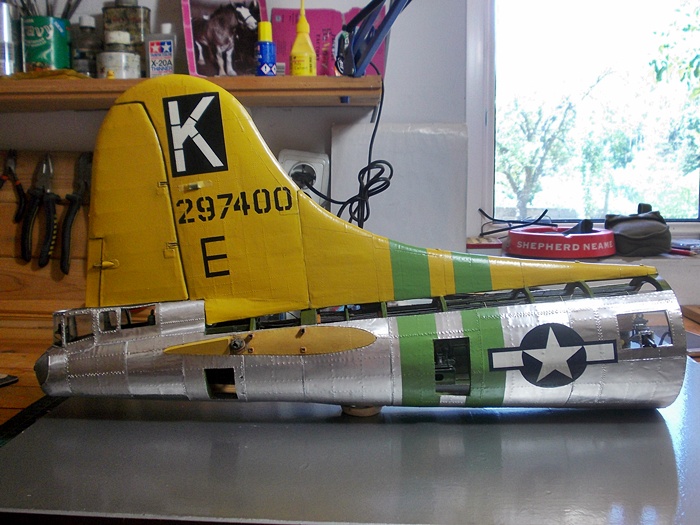
The next 6 photos show the overall completed paint scheme for the rear of this B17...
 

PAINTING_AND_MARKINGS_(10).jpg


PAINTING_AND_MARKINGS_(11).jpg


PAINTING_AND_MARKINGS_(12).jpg


PAINTING_AND_MARKINGS_(13).jpg


PAINTING_AND_MARKINGS_(14).jpg


PAINTING_AND_MARKINGS_(15).jpg


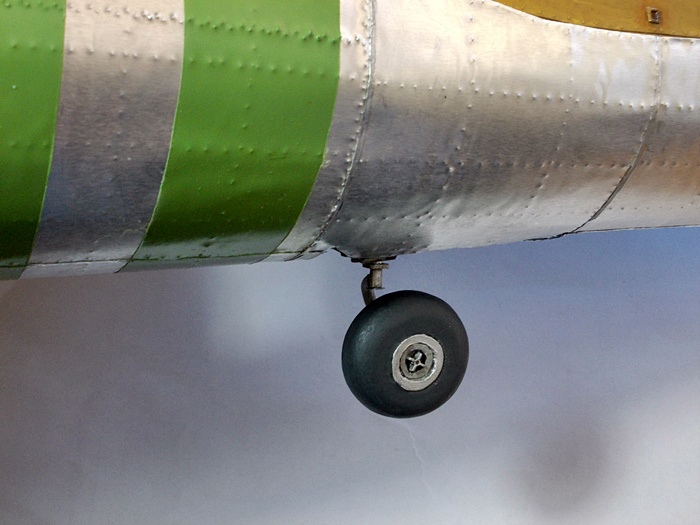
It seems such a long time ago that I had the tail wheel in place!... The reason it isn't fixed at the moment is the fact that this whole model has to be transported to USA at some point and the less sticky out bits for packing the better!!...but as a reminder for myself and you guys...here it is....
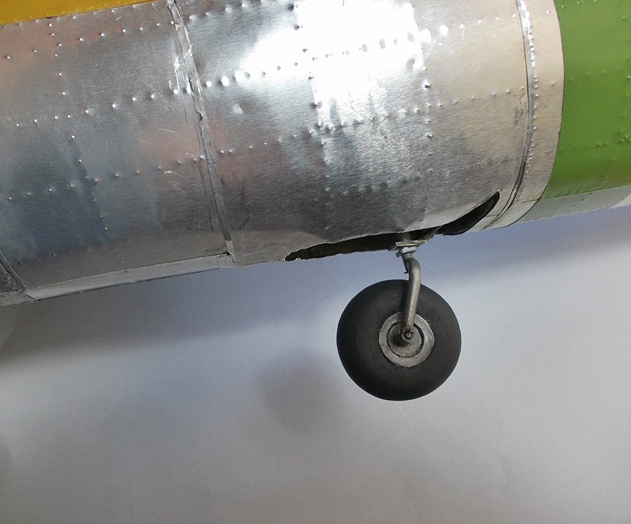
 

PAINTING_AND_MARKINGS_(16).jpg


PAINTING_AND_MARKINGS_(17).jpg


Well that's it for this week!


Next week some time will be the final post of this rear section showing the rear crew door that I have yet to build and a good few photos of the rear section completed!


Until then ....take care and thanks for looking in!


Cheers


Fozzy


  • Member since
    July 2014
Posted by modelcrazy on Sunday, August 8, 2021 11:51 AM

I don't know why I haven't see this post before Surprise

Great work Foz!

Steve

Building a kit from your stash is like cutting a head off a Hydra, two more take it's place.


http://www.spamodeler.com/forum/

Foz
  • Member since
    April 2011
  • From: S.E Bulgaria
Posted by Foz on Sunday, August 8, 2021 9:04 AM


Hi there to all!

OMG!Smile


I really can see the finishing post now!...In this last week I have been at this B17  every day trying to move it along!


Of course here in Bulgaria we are experiencing dangerous weather warnings of extreme high temperatures....like most of Europe I guess...most days 42C plus /107F...and so I had to vacate my workshop as it was far too hot in there and move into the bedroom as I have aircon there!...So I had to find an old table and take some tools from my workshop to the house (workshop is in another building from the house) and get on with the job at hand!


The end result being that I have completely finished all the internal detail , joined the top and bottom halves together and managed to skin the entire rear section!....so all in all I am really pleased!


Last post had me fitting the waist guns into the perspex windows but the very last detail after 10 years is to make the ammunition belts that feed the guns....so here are a few photos...


The ammo belts have to be able to twist and turn from the ammo boxes to the guns so I had to scrap the belt I had previously made as they wouldn't bend without snapping in half!.....so I decided to use slivers of aluminum from a Coca Cola can to make up the shape I needed to go from the ammo boxes to the guns!....you follow me?...probably not!....so here is a photo!......

In this way I have it bent to shape before I super glue all the hundreds of rounds...(cut pieces of wire...took all afternoon!!)

This next photo shows some of the rounds on the belt.

All I had to do then was enclose the rounds in the belts using strips of paper which when painted will hopefully look the part!

Here you see I have attached the belts to the ammo boxes and to the guns.....starting with the starboard MG

Here is the port MG

....and a couple of shots looking at both Waist guns from the rear....

Now came the part that I had been dreading for months and months and that was gluing the top and bottom halves together!

It had to be a strong setting glue that would be permanent and since the fuselage is constructed out of balsa wood I thought wood glue was the way to go....nope!...it's no good.....it will have to be super glue!....but I had to work fast and be accurate as if it didn't line up it would be impossible to take it apart without destroying the fuselage!.....so working from the rear to the front I super glued a few inches at a time....remembering to make sure all the internal detail was in line from the top to the bottom!

Finally after a few  nerve racking minutes it was complete!....all lined up and secure!...

That for me was a huge worrying part of this build.....it was as well  for the front section ,Bomb bay ,radio room!...still all done now!

Skinning!.......I kind of enjoy it!....very slow process but if I can get it right then worth the effort!

First of all I had to mark the entire fuselage  with a marker of where all the rivet lines go....that took a day!....and then all the separate panels had to be cut out of a sticky back aluminum sheet used on real aircraft kindly donated by my good modelling friend Finn and marked up for rivets and then placed onto the fuselage.....here are a couple of photos I took during the process...

So here we have in the next batch of photos the fuselage all skinned.

To finish off the rear section , all I have to do now is spray some markings including the USAF insignias.....and that will be that!

Of course  I say that will be that but then its buckle down to the display ideas I'm thinking of...which will involve more scratch building!

So until then....I will see you all on the next post  when she's all marked up and sprayed!

Cheers for looking in

Fozzy


Foz
  • Member since
    April 2011
  • From: S.E Bulgaria
Posted by Foz on Tuesday, July 27, 2021 1:54 AM

Kingslug

Beyond amazing.....


Thank you!Smile

  • Member since
    July 2021
Posted by Kingslug on Monday, July 26, 2021 8:51 AM

Beyond amazing.....

Foz
  • Member since
    April 2011
  • From: S.E Bulgaria
Posted by Foz on Monday, July 26, 2021 4:26 AM

Hi all!


Another few weeks have passed and time for another post!....done quite a bit so it will be a big post!


I have finished both waist guns except for the ammunition belt which I will have to think about as it won't be easy!


First off I had to make the swivel mechanism that holds the gun in the perspex....so this first photo shows the wooden stick I will use!....just thought you might like to see the stick!!!!


After sawing a piece off and drilling a hole and sanding....this is how it looked....

Next photo shows the 2 plates that the swivel mechanisms are bolted to...

here we have it glued to one of the window frames....

The next photo shows a dry run of the fitting of the MG....and looking at it I must remember to take the sight post off the end of the barrel as that's for the MGs without the compensating sights on!

I rummaged through my collection of clear plastic packaging and found a suitable piece to make the perspex for both windows apertures.

I already half built the guns a few weeks back and now it was time to finish them off....

....and here they are completed ....

I had to do a little research on the K-13 Sperry Compensating sights that I wanted to add to these guns....so after searching the internet and gathering the photos together I started out on the sights...


The sights took me a week to make as they are tiny and quite complicated but got there in the end....here are both the guns with the sights attached and all painted and ready to fit into the fuselage......

I glued both guns onto their mounts through the perspex and added a little more detail ..like the control cables (that I haven't a clue what they actually operate.....something to do with.... adjusting ...something!!) ....


Any how here they are in the fuselage......

Going to have to rack my brains now for a solution on how to make the ammunition belts bend and twist from the ammo boxes to the guns.....so see you next year!

All the best and thanks for looking in!


Fozzy


Foz
  • Member since
    April 2011
  • From: S.E Bulgaria
Posted by Foz on Friday, July 9, 2021 9:19 AM

Hi to all!


I have been busy in the last week or so trying to get this project moving on to completion...even though I have had a few distractions like mowing oceans of grass in my garden and keeping the Tax man off me!


However I did manage to start on what will be the very last of the interior detail of this fuselage.....and that is the waist gunners positions.


I haven't done a lot but every little helps to get me closer to the end!...as I believe Mr Tesco's would say!...although it has got absolutely nothing to do with him!


I started by cutting all the pieces of wire to represent the rounds that will go into the ammunition boxes (you can see the top layer in the box if you're wondering why I would do that!Confused)

The boxes were made out of plastic card and the rounds were placed in the top.....

After painting them this is what they look like....

After looking at a few hundred photos I checked to see what equipment was needed for both gunners . ...oxygen bottles....oxygen regulators and their indicators...flying suit heater units ...intercom boxes...bail out alarm bell  and a matchstick!!!Hmm


The bottles were made from Milliput...which I always find difficult to use for some reason!...the rest was made from plastic and wire.....just to let you know I didn't scratch build the matchstick!

The last 4 photos show the equipment in place....

That's all folks!


Next up will be plexiglass and guns!


Thanks for taking a peek


Cheers


Fozzy


Foz
  • Member since
    April 2011
  • From: S.E Bulgaria
Posted by Foz on Saturday, June 26, 2021 2:26 AM

.........And another bit done!


I have to say I am flagging a bit!...finding it difficult to continue with this project. I guess I have been slogging at it for years now and really can't wait until it's all done! I am trying to get it complete before October comes as I am off to the UK and would like to try and take it with me on that trip....I don't know...we shall see!.....talking to myself here!


OK ...so I managed to get the Tail plane connection area complete...difficult shapes as the fuselage is round of course!....but I also added a bit of detailing as you can see in this first photo......


So I made the simple cartridge shoot for the Cheyenne turret and cut a slice of Coca Cola can for where the barrels go into the turret.


Now onto the Tail plane connection.


This was all scratch built with plastic card. If the tail plane was off the fuselage this is what it would look like. The protruding sort of 4 bars you see would be connected to the horizontal stabilizer and in the D shape there was a cog that operated the elevators...........

After it all was painted and weathered a tad this is the end result!....I made little canvas bags out of tissue paper to go over the D shape....this was to protect dust and dirt from entering the fuselage ...and saved me making connection cogs!

....and here is the tail section so far!.......

Right then.......the next part is actually the last internal detail that I will ever have to do on this project!....HOORAY!!!

But that's the next post...


Thanks for taking a look


Cheers


Fozzy


Foz
  • Member since
    April 2011
  • From: S.E Bulgaria
Posted by Foz on Wednesday, June 16, 2021 7:23 AM

Hi everyone


Here then is the Cheyenne turret finished to the best of my abilities!


The canopy for the turret wasn't as simple as I thought it might have been! A few months back I had made the canopy to fit over the turret detail but when I looked at it more closely I noticed that the small window apertures behind the main front perspex were way to small!....and so started the re designing of the frame....after a few attempts of dry fitting to the fuselage I think I cracked it!


So the first 2 photos we have the modified canopy frame............


To make the perspex (glass) I raided my box of used food packaging and found a nice little piece that once covered a shaving stick package!.....it wasn't too thick luckily as I had to bend a piece around the front!....I cut them to the correct shape and then super glued the front wrap around piece first.


DISASTER!.....when the glue set I noticed it warped the frame!...aaaggghh!.....the plastic was too thick after all and so I had to take it off and find some thinner plastic that would do the job!....this time the thinner plastic worked and I placed the remaining pieces on the frame.


I then glued the entire frame over the turret and on to the fuselage. When it was set I placed a few of the aluminum pieces on parts of the frames as you can see in these next photos.....

All I had to do now ...(which normally takes a couple of days)... place the rest of the Aluminum around the frame. Of course I have to do the entire rear fuselage section but I have to wait until the top and bottom halves are on!


This now completes the Cheyenne turret at long last!


This is what she looks like at the blunt end of the fuselage!!!


I think my next task is to do the elevator connection detail....so that will be my next post!


I can now definitely see the light at the end of the tunnel ...after 10 long years!...you must all be sick of the the sight of it!! ...I know I'm beginning to!.. ha ha!


Thanks once again for looking in...


Cheers


Fozzy


Foz
  • Member since
    April 2011
  • From: S.E Bulgaria
Posted by Foz on Wednesday, June 2, 2021 3:18 AM
Cheers Pat!
  • Member since
    January 2021
Posted by PFJN2 on Tuesday, June 1, 2021 3:38 PM

Hi,

That looks great

Pat

Foz
  • Member since
    April 2011
  • From: S.E Bulgaria
Posted by Foz on Tuesday, June 1, 2021 10:11 AM
Foz
  • Member since
    April 2011
  • From: S.E Bulgaria
Posted by Foz on Friday, May 28, 2021 4:16 AM

Hi there every one 


Here is the next post on this 10 year post!.......nearly there now...he says!


This post is all about adding more detail to the Cheyenne turret......so here we go.......


These first 4 photos show pieces of wire I have added in and around the turret which is supposed to represent air ducts for de misting purposes....well at least that is what I am led to believe!...and I can't believe it took me all afternoon just to cut the wire into correct lengths and super glue them on...the glue just wouldn't set for some reason...mind you it is Bulgarian super glue!

Once the glue was set I then painted them....the second photo shows the excess wire sticking up that will eventually be set against the frame of the perspex enclosure....

Next up was to scratch all the equipment that will go in the turret.

I love doing this sort of thing!......

If someone can enlighten me on why the turret had 2 oxygen regulators I would be very pleased!...no end of research will tell me this reason!....oxygen outlets on either side of the gunner?....who knows!....I bet it's obvious and I just can't see it!

Any how...the next 6 photos show all the equipment placed into the turret. .....the gunner really didn't have a lot of room in there!

So I then replicated a portable oxygen bottle out of Milliput and plastic...made a little bracket for it and placed it in the turret for the gunner to bang his head on!Wink

So that's it for this post.

Next up will be trying to make the sight and then placing the "canopy" on the top of it all!....which will then free me up to do the last bit of detailing which is the waist gun positions....and then..........well lets not get ahead of ourselves Fozzy!

Until the next time ...

Thanks for looking in

Fozzy


Foz
  • Member since
    April 2011
  • From: S.E Bulgaria
Posted by Foz on Saturday, May 22, 2021 6:15 AM

Hi guys!


Time for another up date!...still battling on with the Cheyenne turret and this post is all about Ammo boxes ,rounds and seats!


So this first photo is of the two ammunition boxes I made from plastic card. I should point out at this stage that when I mounted them onto the Turret side walls I realized that they were far too long and had to cut them down to size!...1 step forward 2 steps back!.....

So here they are attached to the side walls....

It was time to put some music on and settle down for the afternoon to make the ammunition belts!....Of course I have done this for all the other guns on this project so far and knew it would be a rather a laborious task!


The belts are paper (so they can be flexible when placing them on the guns etc) and the rounds are hundreds of 4mm cut lengths of wire.


....more paper detail and by the end of the afternoon I had finished!

Time to put some paint on them!....

I then placed them onto the ammunition boxes....

I then turned my attention to the outside of the turret.


Most of the combat B17G Cheyenne turrets had the apertures where the barrels go through open...but the Warbirds have them closed off with zipped canvas as on "Fuddy Duddy" ....so this was replicated with the use of thin plastic.

Both the 50 cals were then glued to the internal frame minus the barrels which I will place on when the turret is complete....

....and the top plate was then glued into position over the guns.....

It was at this stage that I shortened the ammo boxes....what a drag!....my own fault ...I should have studied the reference photos more carefully!


It was now time to have a go at the old bicycle seat that the gunner sits on for hours on end!...I shaped a small block of balsa wood and covered it with thin plastic card and I also made the knee pads to go on either side of the seat.....

....and painted....

Looks bloody uncomfortable to say the least!


With the gunners seat in place ...the last 6 photos are what the turret looks like so far!

See you on the next post..


Thanks for taking a look!


Cheers


Fozzy


Foz
  • Member since
    April 2011
  • From: S.E Bulgaria
Posted by Foz on Thursday, May 6, 2021 3:06 PM

Tanker-Builder

Fozzy.

       I am still following ya. Now when you put the wingy thingies on her where ya gonna put her?


Cheers!

No wings I'm afraid!....Fuselage only and she is going to a forever home in The Miniature Engineering craftsmanship Museum in Carlsbad California.

  • Member since
    October 2019
  • From: New Braunfels, Texas
Posted by Tanker-Builder on Thursday, May 6, 2021 2:51 PM

Fozzy.

       I am still following ya. Now when you put the wingy thingies on her where ya gonna put her?

Foz
  • Member since
    April 2011
  • From: S.E Bulgaria
Posted by Foz on Thursday, May 6, 2021 8:47 AM

I completed the detail in the tail section right up to the Cheyenne rear turret ...so I guess it's time to have a crack at that!

First things first.....I made the support post and platform for the MGs...as you can see in this photo....

A plate made from plastic card was then built which will eventually sit in position above the guns....

I then painted the gun support.....

I decided that the best way to get the detail done in this Cheyenne turret was to get the 50 cals completed and placed on the support and then build all the other detail around them.

So .... because I have still got to do another two MGs for the waist guns later , I decided to build those along with the two that will go in the tail.....I cut some plastic pieces into blocks that will be the basic MG minus the barrels!

....and with the use of photos added the detail onto the blocks......

Plastic sprue came in handy now for the barrels.....luckily I had just the right size!

Pieces were cut to length and the barrel shroud was simulated by drilling holes along the length of the barrel.....

I placed flash suppressors, made from wire insulators onto the end of the barrels and then glued them onto the MGs ...and then painted them in Gun metal....

At this point I decided to place some detail onto the front end of the turret....I had done it months before but the detail somehow fell off!.....this time super glue was used!!

Adapter- gun mounts were made from plastic and wire and attached to the MGs.....fiddly as hell!!

That was then all painted.


The next 5 photos show the MGs all finished....

In the next post I will install the MGs onto the support frame but first I have to think about it as I somehow have to get the ammunition link to the guns!


It certainly is great to be back at the bench and tackling this monster of a build!.....So far it's taken me nearly 10 years to get this far....time flies when you're having fun!!


Until the next post....take care and thanks for looking in!

Fozzy


Foz
  • Member since
    April 2011
  • From: S.E Bulgaria
Posted by Foz on Thursday, May 6, 2021 8:39 AM

Good afternoon guys!


I do hope that you are all keeping well and safe since the last time I posted.


I just can't believe its been 5 months since I last posted on here!......and 5 months away from my B17G!


I went to UK at the beginning of last December for Xmas and was due to return to Bulgaria mid February but of course Covid put an end to that plan! So as we were all in lock down I decided to wait in UK to have both my vaccinations and I am pleased to say that I have now had both! Whilst I was there I decided to get a few modelling supplies to tie me over and I made a couple of small models.


But now it's time to get on with this B17G..........so where were we?...oh yes!.... working on the tail section.


Foz
  • Member since
    April 2011
  • From: S.E Bulgaria
Posted by Foz on Saturday, January 23, 2021 8:20 AM

Hi every one


Well first and foremost I want to wish everyone a Happy belated New Year!.......although it is difficult in these times!


Due to this blasted Covid-19 I am in lock down in UK and won't be returning to Bulgaria and my workshop  for ....who knows how long!Sad.....at least I am with my family but miss battling on with my B17G!


I haven't any modelling equipment here......nothing at all... but am thinking that Amazon might help with that situation!......I'll spend a few quid,... get some sort of starter pack tools and get myself a little 1:72 kit to tie me over!.....haven't done that for years so I am looking forward to it!Big Smile   


Meanwhile .....I haven't been idle ..... I decided to revamp my website and have got all my model photos in one place....so for those of you who want to take a look.........


                                         https://mfostermodels.wixsite.com/martin-foster-models


So until I return to my work bench and my B17 ......I wish you all the best and please stay safe!


Cheers


Fozzy

Foz
  • Member since
    April 2011
  • From: S.E Bulgaria
Posted by Foz on Sunday, December 6, 2020 8:37 AM

Hi guys


This will be my last post for this year as I am off to the UK in a couple of days time to see family and friends.


So another year is coming to an end (glad this one is nearly over!)...and this project still hasn't come to the end! I can't believe that I started this in 2011 with the nose section!....9 years later and I am still working on the tail end!......but realistically I think that I can get it all done next year!.....I do hope so as I really want to move on and build something else for a change!


Here is a photo of the all of the fuselage to date with my expert markings (not!!)....showing you that I am nearly at the tail end!


So this final post of this year is all about the elevator and rudder actuators......wasn't an easy task as I only had a few photos to go by kindly donated by Ol'scrapiron....but I got there in the end and this is how it all turned out.

To start with,  this is the elevator mechanism.The tube/bar was made from an old plastic sprue and the rest from cut pieces of plastic.....


You can see a few cables attached that operate the mechanism.

The next few photos show it all painted.......


Now I turned my attention to the rudder actuator.....which was difficult as I only had shots of a very small part of it. Not to worry as when in place under the rudder you can hardly see it!....so I was lucky!!

Here it is ........


The platform was then constructed out of plastic and the mechanism dry fitted in place.....


Finally I painted the rudder actuator before placing on the frame..


and then painted the frame and placed the actuator in position........


Photographing this area isn't very fulfilling as you can't get the camera in the right position to take the shot ......but hopefully you can see the progress that I've made! 


So when I return from my break in UK I will bash on with the "Cheyenne" tail turret!


I do hope you all have a wonderful Xmas even under all the restrictions we all have this year due to Covid....and I wish you all a much better New Year than this last one!


All the best ...see you on here next February!


Cheers


Fozzy 

Foz
  • Member since
    April 2011
  • From: S.E Bulgaria
Posted by Foz on Thursday, November 26, 2020 5:52 AM

So now to the correction of the detail in this area..............

From the new photos I noticed that there were not one but two C1 auto pilot units. In a sense I was pleased about this as the one I previously made seemed very long! After doing a bit of measuring I reckoned that if I cut the unit I made in half I could make the two I needed!...it would be just a case of adding some extra detail for the second unit and a bit of tidying up. So I carefully pulled the unit of its tray.....not easy as most of my detail I super glue in!...but never the less got it out without too much damage.It was then cut in half and made into two units........


...and then carefully glued back onto the shelf.....


OMG!.......The next correction was a lot more difficult!

One of the bulkheads at the rear of the tail wheel was in the wrong position by at least 5-7mm. Doesn't seem much in the scheme of things but it was throwing all the detail that I had to do out of scale! ....here is what I mean.....


It took me some time but adjusted it all in the end with pieces of plastic!


Now I was ready to detail the area with the use of the new photos. Between the two bulkheads past the tail wheel there is all the pulley system used to pass the control cables to the elevator and rudder....all very small and fiddly.......for example here is one of the many pulleys I had to make.......


So the next 6 photos show the re vamped bulkheads with all the pulleys attached .....


Here is that section painted........


Although it set me back a week or so I am pleased that I made the correction.....I have to say it was driving me mad as I knew it wasn't correct....at least now it looks a lot better!


Finally the photo shot that I like taking....I know you have seen it before but there are subtle differences!....well that's my excuse anyway!


Back to staring at photos before I attempt to continue to the rear of this B17!...Thanks a lot for looking at all this....appreciate it!


Cheers


Fozzy

Foz
  • Member since
    April 2011
  • From: S.E Bulgaria
Posted by Foz on Thursday, November 26, 2020 5:44 AM
JOIN OUR COMMUNITY!

Our community is FREE to join. To participate you must either login or register for an account.

SEARCH FORUMS
FREE NEWSLETTER
By signing up you may also receive reader surveys and occasional special offers. We do not sell, rent or trade our email lists. View our Privacy Policy.