Hi Everybody!
My name is Russ and let me start by saying that R&R Modelers is not a company; rather it is a friendship and collaboration between two modelers to make realistic small scale aircraft models. I “met” Ron through this very Finescale Modeler Forum, when he posted a response to a WIP I maintained on “A Career in Flight” display I made for my dad for Christmas. http://cs.finescale.com/fsm/modeling_subjects/f/2/t/157366.aspx
The display features 1/350 scale models of the planes my dad flew during his career in the USAF. I designed the models in AutoCad using plans (of varying quality) and had the models 3-D printed by Click2Detail (C2D). The images below show the display, first, as the concept I designed in AutoCad, then the final display that I gave to dad.
Ron, and a couple of others, asked if there was a possibility of buying one of the models. As fate would have it, C2D recently started a service in which designers can upload their CAD models and they print them, sell them and ship them and the designer gets a percentage of the sale. All of the models in the display are available at:
https://click2detail.com/browse_products.php?total=146&incrementBy=9&id=&pagename_session=browse_products.php&id=&startIndex=27
I have really gotten into designing models in this fashion, and Ron has provided many candidates for what aircraft to make. Being a pilot, he is also more knowledgeable about aircraft than I am and has offered numerous suggestions on how to improve the designs. In addition to the 1/350 scale planes in dad’s display, I have also designed the following models, all of which are available through C2D:
1/350 scale models
Cessna U-3A Blue Canoe (Cessna 310B) - Landing gear down
Northrup T-38 Talon
General Dynamic’s F-111A Aardvark -2 versions (wings forward and wings back)
General Dynamic’s F-111TACT - 2 versions (wings forward and wings back)
Douglas AC-47 Spooky - Gear Down
1/144 scale models
Cessna U-3A Blue Canoe (Cessna 310B) – 2 versions (landing gear up and landing gear down)
Douglas AD-5 Skyraider - 2 versions (landing gear up and landing gear down)
Douglas AD-5W Skyraiders - 2 versions (landing gear up and landing gear down)
North American FJ-4 Fury - 2 versions (landing gear up and landing gear down)
Luscombe 8A Silvaire
Luscombe 8E Silvaire
Spartan 7W Executive
North American FJ-4B Fury Deluxe Version
FJ-4B Armament Kit
EKTRO AP8850 SDA Aircraft Tow Tractor
USS Greenling - SSN-614
Ron has acquired several of the models, one being the 1/144 scale Luscombe 8A Silvaire, that I designed on his suggestion. The Luscombe 8 is a high wing, side-by-side seating, conventional geared monoplanes designed in 1937 and built by Luscombe Aircraft. Approximately 4,500 were sold and production continues to this day, although the aircraft has undergone numerous modifications.
To design the model, I started by importing plans downloaded from the internet into AutoCad and scaling them appropriately. I then traced the section outlines, copied them to the correct location on the center line of what will become the fuselage, rotated them 90 degrees and used the Loft and Extrude Commands to generate a “solid”. Similar steps were followed to create the wings, stabilizers and landing gear. The images below show the plans with my tracings before lofting. Note the magenta objects inside of the red fuselage sections. These were made to hollow out the interior of the cabin.
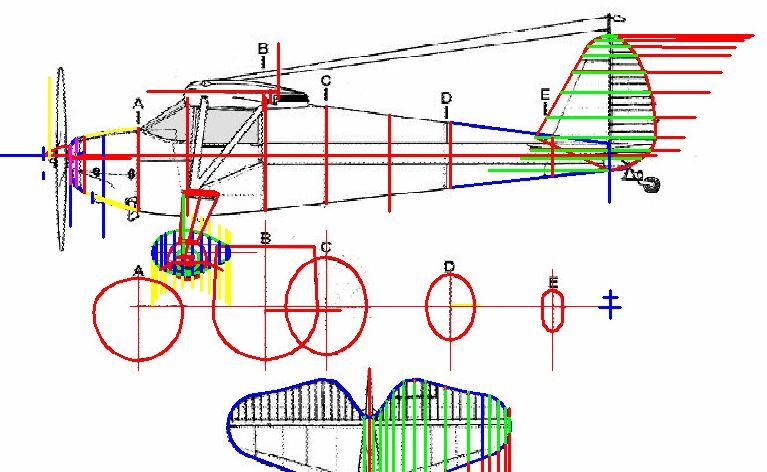

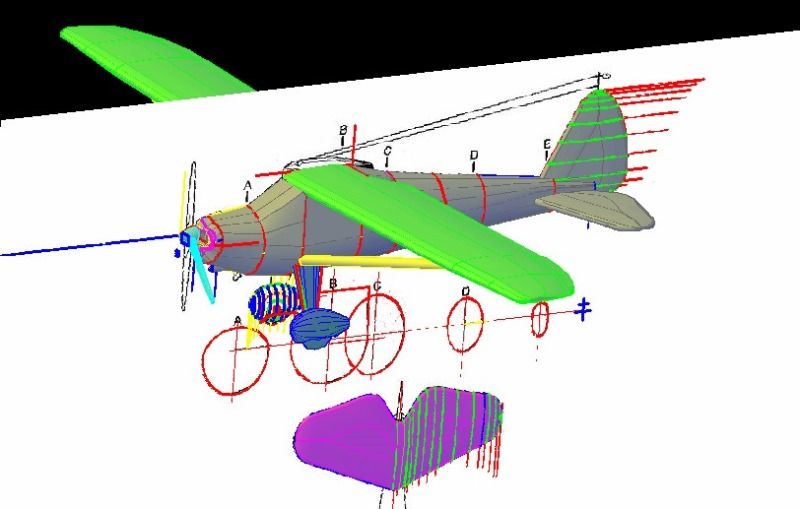
The images below show the result of lofting and putting all of the parts together as they were drawn on different parts of the plans. It is important when preparing the various parts to keep good reference lines for moving (or copying) and rotating accurately.
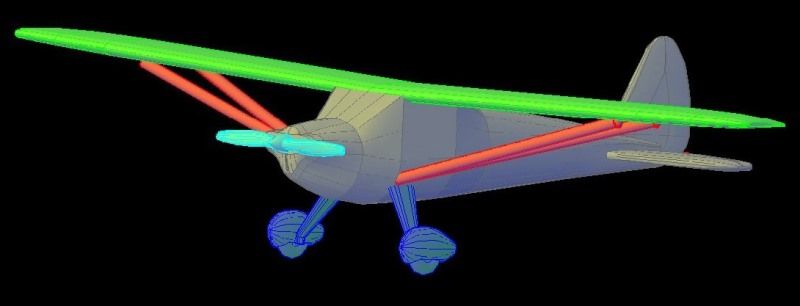
With the primary airframe completed and a propeller having been copied from a previous model, it was time to start detailing. To highlight the control surfaces and door I used the Project Geometry Command to project tracings of the outlines onto the surface of the model. I then extruded and lofted 0.01” diameter circles along these lines and subtracted the resulting cylinders from the model. In pictures I have seen of Luscombes, some have 4 struts, and some have 2. I at first was going to do 4, but then decided to go with just 2.
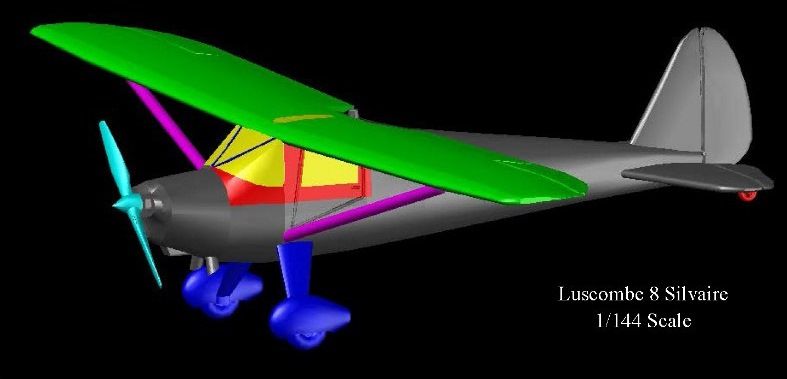
Since C2D offers the option to print in clear plastic, I decided to make the windshield, windows and skylight as separate parts. This required, what I call, dicing and slicing the fuselage to obtain the desired parts, resulting in a model containing 11 parts.
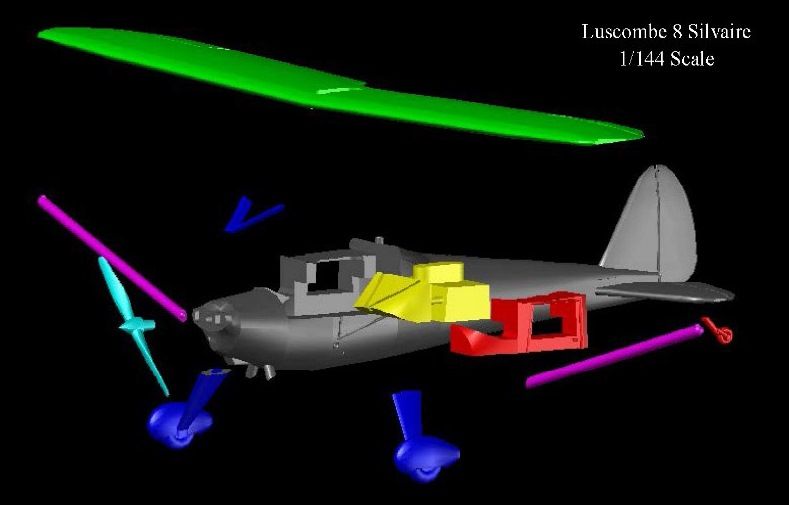
In addition to the strut differences, pictures also show that some Luscombes had covers on the forward landing gear wheels, and some did not. To provide potential modelers with multiple options, I decided to include both sets of landing gear and a spinning prop (also pilfered from a previous model), making the final part count for the model 14. I also drilled a hole in the underside of the fuselage for those who may wish to display the model in-flight like I did on dad’s display. The final step in making the CAD model was to put the smaller pieces on frets for better durability and ease of handling, as seen in the image below. The parts in cayan were printed in clear plastic.

With the CAD model completed, I uploaded it to C2D, having created what I told Ron I consider to be the canvas for people like him to create their remarkable works of art. If you haven’t seen Ron’s models, you are in for a treat, because he really is a master. Although it is true, that I make 20% on every model sold, I am not in it for the money, in fact I may have made myself an indentured servant, as I am spending more to have models printed for myself than I am making on them. Rather, I do it because I found that I really enjoy making them, and if others benefit, it’s win-win. And as you will see the reward comes from seeing the masterpieces that people like Ron can turn my canvas into.
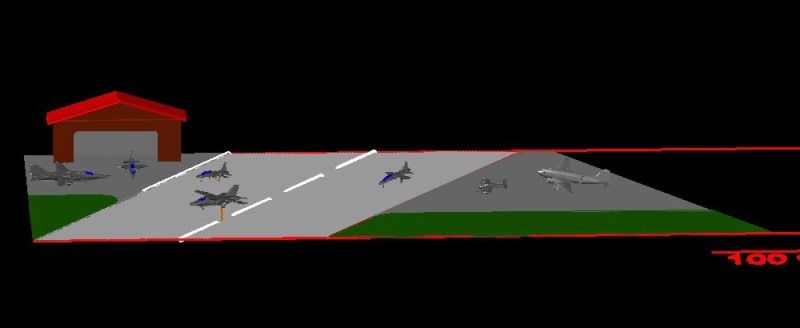
On another note, I have a cunning plan (man, I need to see if I can find the Old Black Adders on DVD) for a display I am going to make for myself using the 1/350 scale models I make. I have a 8” x 4’ shelf that needs to be filled and I was thinking I could make like a puzzle of various scenes. The image below shows an initial concept. In front of the hangar is an F-111A and F5A (in progress). On the runway is the F-111TACT taking off on its maiden test flight (which I attended) with two chase T-38’s on point. On the tarmac is the gear down versions of the U-3A and AC-47. Look for more on this as it progresses.