SEARCH FINESCALE.COM

Enter keywords or a search phrase below:

120mm Panzerfurher Completed

4315 views
24 replies
1 rating 2 rating 3 rating 4 rating 5 rating
  • Member since
    May 2010
Posted by plasticaddict on Tuesday, July 20, 2010 8:35 AM

Hi,

Silfor (or maybe Silflor) changed its name to Mininatur ... FYI ...

You can reach them here, they have unbelievable stuff.

Cem.

  • Member since
    April 2009
  • From: Carmel, IN
Posted by deafpanzer on Tuesday, July 20, 2010 8:08 AM

Thanks Marc!  I have to buy those... Big Smile

Andy

  • Member since
    April 2005
  • From: Piscataway, NJ!
Posted by wing_nut on Tuesday, July 20, 2010 6:38 AM

Thanks very much guys.

Andy, it is a product from Silfor.  Pre-made grass mats of all different kinds.

http://www.sceneryexpress.com/products.asp?dept=1054

Marc  

  • Member since
    October 2009
  • From: South Carolina
Posted by jetmodeler on Tuesday, July 20, 2010 6:25 AM

Looks good. Camo's look alot better with a dullcote.


  • Member since
    May 2009
  • From: Poland
Posted by Pawel on Tuesday, July 20, 2010 3:33 AM

Marc, congratulations on your build, I like it a lot - a very original idea, also the face and the camo came out just great. Keep 'em comin' and have a nice day

Pawel

All comments and critique welcomed. Thanks for your honest opinions!

www.vietnam.net.pl

  • Member since
    April 2009
  • From: Carmel, IN
Posted by deafpanzer on Monday, July 19, 2010 7:38 PM

WOW!  Very impressive. Yes Five stars for sure from me.  I like the grass... how did you do this or what product did you use if you don't mind telling us?

Andy

  • Member since
    April 2005
  • From: Piscataway, NJ!
Posted by wing_nut on Monday, July 19, 2010 2:23 PM

I posted this is the armor section too for the tread heads.


I think I will call this one, "For my son...If I make it home"

I thought the black on the nose was a shadow until I took a close up to see how the eyes look.  Must have touched it with the black from under the visor.  Just a little touch up.

Thanks for looking

Marc  

  • Member since
    April 2005
  • From: Piscataway, NJ!
Posted by wing_nut on Sunday, July 18, 2010 10:25 AM

Thanks guys.  Definitely way shinyIndifferent  I have to let the oil glaze dry before I can put the flat coat on.

"I hate waiting"  Inigo Montoya

Marc  

  • Member since
    February 2003
  • From: A Spartan in the Wolverine State
Posted by rjkplasticmod on Sunday, July 18, 2010 8:58 AM

Looks a tad glossy at this point, but other than that looks great.  Nice work on the camo & shading.

Regards,  Rick

RICK At My Age, I've Seen It All, Done It All, But I Don't Remember It All...
  • Member since
    October 2009
  • From: South Carolina
Posted by jetmodeler on Sunday, July 18, 2010 8:39 AM

Camo looks great.Toast


  • Member since
    April 2005
  • From: Piscataway, NJ!
Posted by wing_nut on Saturday, July 17, 2010 3:37 PM

Got the camo painted.   Trying to do the shadows with a darkened base and the highlights with a lightened base would have had to be done for all 3 different colors.  That's 9 colors patch by patch.Tongue Tied   I am using a technique described in another forum. Since it is painted with acrylics,  the whole thing was cover with burnt umber artist oil.  Then it is brushed with a stiff clean and most important, dry, brush.  This leaves a smooth even thin film of the burnt umber.  The high spots get wiped clean with a cloth.  After this has dried I will go back and go over the shadow to deepen them a little and then a dry brush of the base color for the highlights.

Marc  

  • Member since
    August 2008
  • From: S.W. Missouri
Posted by Pvt Mutt on Friday, July 16, 2010 8:58 AM

OH YEAHStarStarStarStarStar

Tony LeeSmile

Shoot Low Boys They're Ridin Ponys

  • Member since
    April 2005
  • From: Piscataway, NJ!
Posted by wing_nut on Friday, July 16, 2010 6:44 AM

Thanks Indy.  Appreciate you stopping by.

Marc  

  • Member since
    April 2008
  • From: Ventura (at the beach) in California
Posted by *INDY on Friday, July 16, 2010 2:59 AM

Great going on this so far Marc---I just picked-up on this

Your conversions look good manYes--luck with the rest

"Well...you gunna pull them pistols, or just whistle Dixie?"

  • Member since
    April 2005
  • From: Piscataway, NJ!
Posted by wing_nut on Thursday, July 15, 2010 7:09 AM

Thanks guys.

Marc  

  • Member since
    April 2009
  • From: Carmel, IN
Posted by deafpanzer on Wednesday, July 14, 2010 9:08 PM

Ditto  The face and eyes are spot on!  Looking forward to more pictures... Yes

Andy

  • Member since
    October 2009
  • From: South Carolina
Posted by jetmodeler on Wednesday, July 14, 2010 7:11 PM

Nice job with the tones on the face.Toast


  • Member since
    April 2005
  • From: Piscataway, NJ!
Posted by wing_nut on Wednesday, July 14, 2010 4:11 PM

The the signs says.. finally some paint.  Way harder than I expected.  A whole new technique to learn.  Seems it varies with scale.  Well maybe not the technique itself but certainly the finesse used.  Lots more to "see" in the scale than a 1/72 or 1/35 guy.  I need to lighten the uniform before I start the camo.

Marc  

  • Member since
    April 2005
  • From: Piscataway, NJ!
Posted by wing_nut on Saturday, July 3, 2010 9:56 AM

Thanks Mike.  yeah the heat and bend things did not work.  Cut and fill was the way to go.  Wasn't as hard as i thought.

Last thing to do before final assembly was to make some sleeves.  Gluing the hand on the flat end would have looked like crap.  Hollowed and thinned so when it is painted black hopefully it will look like an arm coming out.

The hands with the fig are holding a map in the left and a pipe in the right so both a re more or less in fists.  Got the left hand flattened out.  Waiting for the putty to dry on the right to sand it out.

Marc  

  • Member since
    April 2005
  • From: Piscataway, NJ!
Posted by wing_nut on Friday, July 2, 2010 12:09 PM

Thanks guys


Pawel you are correct.  I read that on the box.  I should have known betterSadWink

Marc  

  • Member since
    March 2008
  • From: The Bluegrass State
Posted by EasyMike on Friday, July 2, 2010 6:55 AM

wing_nut
...Can resin be softened to change shape?...

Not really.  You can sometimes warm thin resin parts (i.e., a sabre) in hot water and make very slight changes (straighten it out), but not thicker, bigger pieces.

...Are there AM hands in 120mm?...

Do a search.

... I may need to change the arms at the elbows too.  What is the best method?...


Cut, reposition, fill, and sand.  

Smile

  • Member since
    May 2009
  • From: Poland
Posted by Pawel on Friday, July 2, 2010 1:50 AM

Marc,

a really nice start on this one. The knots are cool. One thing - the title should read Panzerführer to be correct German. Just thought you would like to know. Good luck with your project, have a nice day

Pawel

All comments and critique welcomed. Thanks for your honest opinions!

www.vietnam.net.pl

  • Member since
    August 2008
  • From: S.W. Missouri
Posted by Pvt Mutt on Thursday, July 1, 2010 2:23 PM

Yeah me too. Neat tickYesStar

Tony LeeSmile

Shoot Low Boys They're Ridin Ponys

  • Member since
    October 2009
  • From: South Carolina
Posted by jetmodeler on Thursday, July 1, 2010 2:07 PM

Looks like your off to a good start.

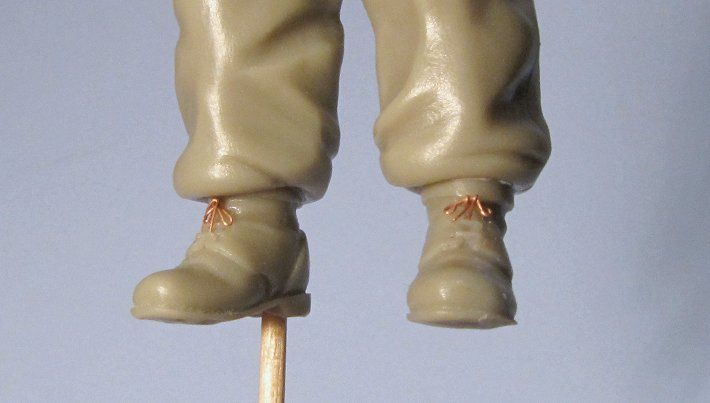
I like how you put shoe laces on him.Yes


  • Member since
    April 2005
  • From: Piscataway, NJ!
120mm Panzerfurher Completed
Posted by wing_nut on Thursday, July 1, 2010 10:33 AM

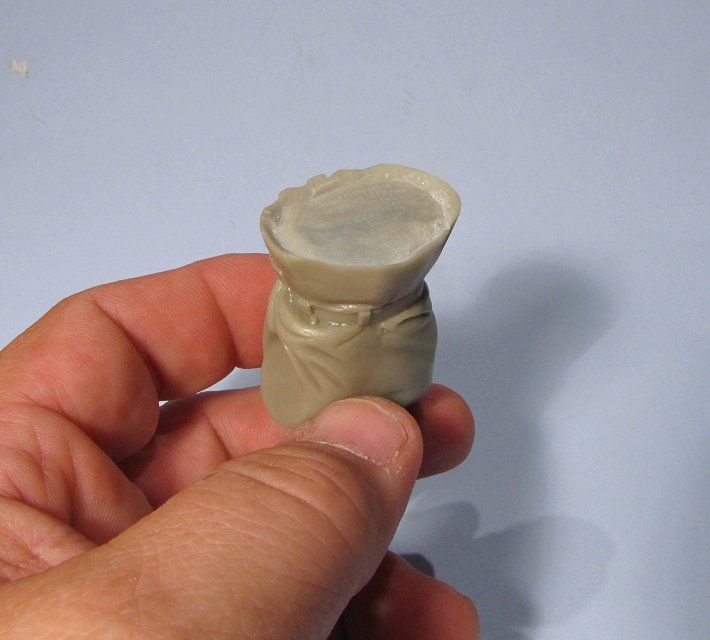
While this is not total uncharted waters for me... I am not going to go swimming alone.Wink  I just started a Verlinden figure and have a couple of questions.  The fig out of the box is posed with a map in the right hand and a pipe in the left but I need to make changes to hold something else.  I am going to remove pipe but I really need the palms of both hands more open/flat.  Can resin be softened to change shape?  Are there AM hands in 120mm?

 I may need to change the arms at the elbows too.  What is the best method?  Softening, if that can even be done, or cutting, change the angle as needed and fill the gap and redo the folds of the cloth?  Or something els entirely?

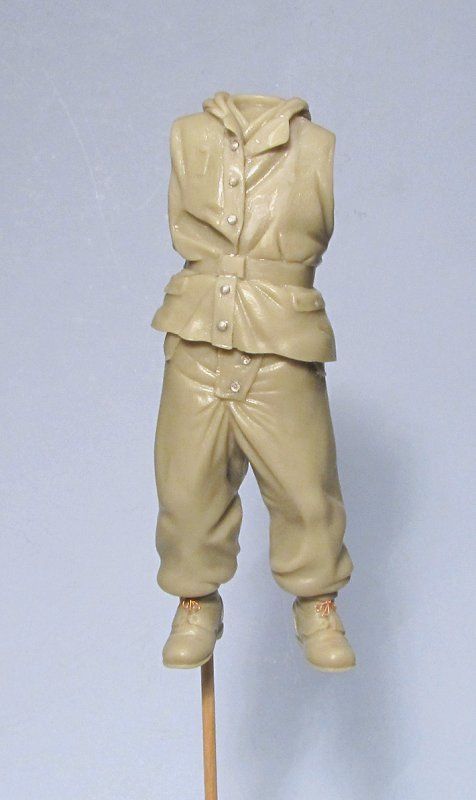
Here's what I've done so far.  Not much.  Hollowed the bottom of the tunic and thinned the edges to look liked draped cloth.  Made new buttons for pants and tunic.  And added knots for the shoe laces.
Marc  

JOIN OUR COMMUNITY!

Our community is FREE to join. To participate you must either login or register for an account.

SEARCH FORUMS
FREE NEWSLETTER
By signing up you may also receive reader surveys and occasional special offers. We do not sell, rent or trade our email lists. View our Privacy Policy.