SEARCH FINESCALE.COM

Enter keywords or a search phrase below:

hguc Powered GM work'n'progress

2559 views
8 replies
1 rating 2 rating 3 rating 4 rating 5 rating
  • Member since
    October 2008
  • From: italy
Posted by bsyamato on Friday, March 25, 2011 4:55 AM

Big Smile smeagol , this gm it's not perfect white, fortunately is light light light gray.

for cuts, it's just my mania, you can build and paint thr powered gm whitout these cuts, theres lots of masking solutions .

  • Member since
    April 2008
  • From: Philadelphia PA
Posted by smeagol the vile on Thursday, March 24, 2011 8:40 PM

Man, I really wana build a gundam kit but I dont wana deal with white, cable rings, or yellow... and that sort of cuts off most of them ugh


  • Member since
    October 2008
  • From: italy
Posted by bsyamato on Thursday, March 24, 2011 7:06 PM

dj898

with this type of kits you can use the c-joint modification for easy of seam line fix and painting.

the below is the parts breakdown of HGUC GM Light Armor Ver. Ka that I'm building...

hope this of some help.

thanx dj898 but:

1) In this kit , the elbow parts  includes the joint for the shield, that provide to work good as pin for the whole rotation joint. Smile

2) I had forgotten the c-joint modification ... Crying

i can try it with the elbow middle parts. 

  • Member since
    December 2005
  • From: Down Under
Posted by dj898 on Tuesday, March 22, 2011 9:42 PM

with this type of kits you can use the c-joint modification for easy of seam line fix and painting.

the below is the parts breakdown of HGUC GM Light Armor Ver. Ka that I'm building...

hope this of some help.

people living in glass colonies shouldn't throw nuclear stones.
  • Member since
    October 2008
  • From: italy
Posted by bsyamato on Sunday, March 20, 2011 1:44 PM

Watchmann


 bsyamato:


various pins prevent a good manipulation for painting, i'll build a pit to make pins unnecessary


That's a great idea!  Thanks for the tip. :)

m@

happy to know that it is useful Wink

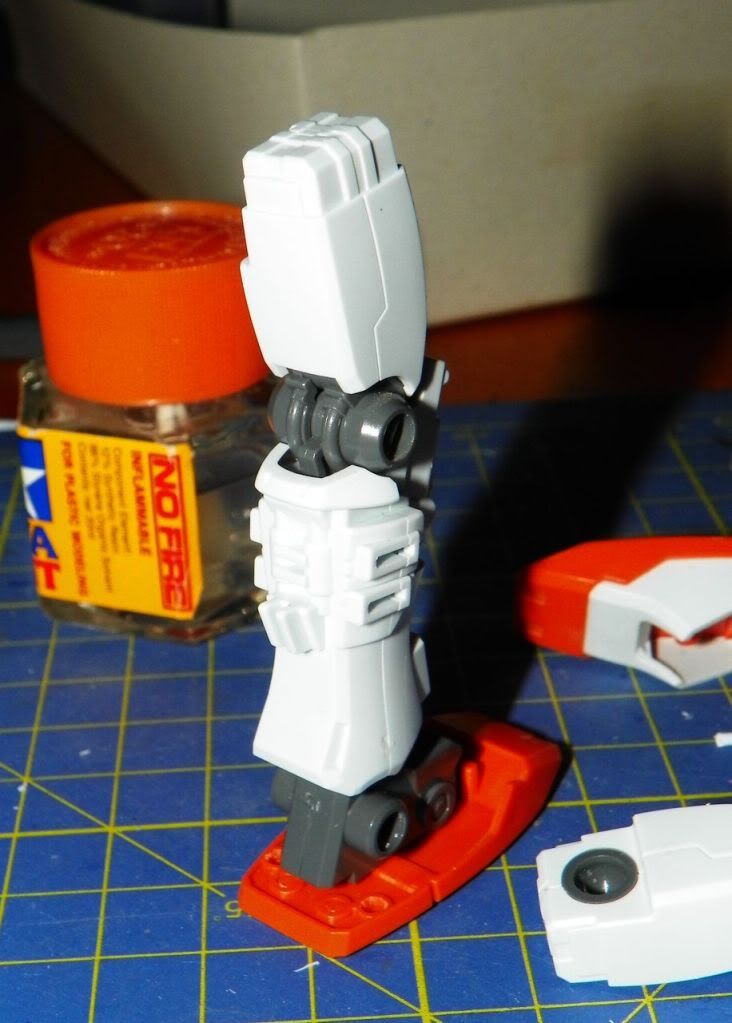
and... after gluing the lower legs i can say that it's work good! (first time i use this tip).

The blocked knee joint it's a problem that have even others hguc i will build in future (hazel and rx-79g sure)

the results: the fitting is good

Photobucket

Photobucket

the chest is glued, ready for the total sanding as i used to do and panel lines engraving

Photobucket

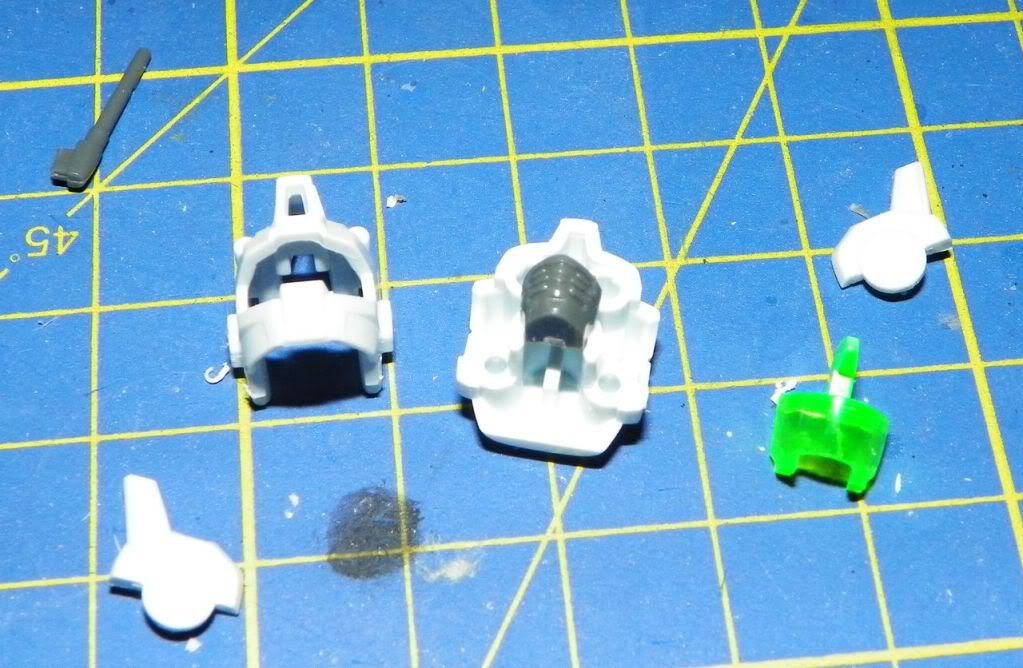
head star painting, inner parts painted with humbrol 144

Photobucket

that's all for today..

winds of war beginned in libya... i'm about 400 km from there Huh?

  • Member since
    January 2005
  • From: Cave City, KY
Posted by Watchmann on Thursday, March 17, 2011 6:23 PM

bsyamato

various pins prevent a good manipulation for painting, i'll build a pit to make pins unnecessary

That's a great idea!  Thanks for the tip. :)

m@

  • Member since
    October 2008
  • From: italy
Posted by bsyamato on Thursday, March 17, 2011 6:18 PM


Thanx Ron


Little update, advantage of Italy 150 unifycation years celebrations... Cake

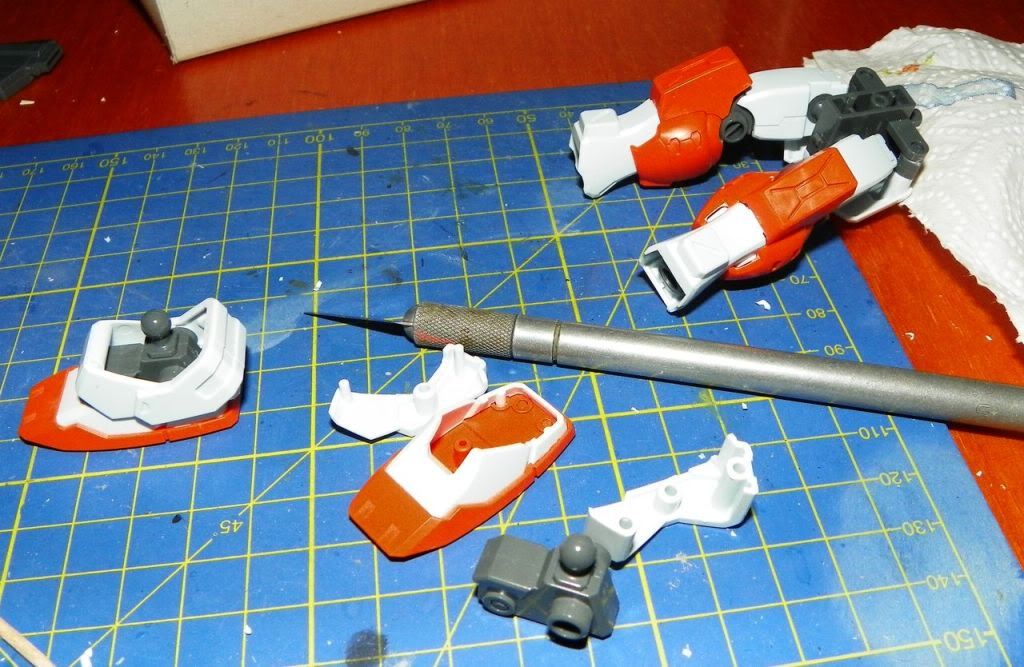
starting knee separation:

various pins prevent a good manipulation for painting, i'll build a pit to make pins unnecessary

Photobucket

placing various piece of plastic (tamiya glue used, CA glue will make a too rigid structure that can be break by legs movement)

Photobucket

Photobucket

Photobucket

lots of test fitting needed, the lower part is done, wating tomorrow for glue dry for finish.

The upper legs will be more difficult Sad .... soon updates


  • Member since
    April 2015
Posted by spadx111 on Thursday, March 17, 2011 2:09 PM

interesting build.

Ron

  • Member since
    October 2008
  • From: italy
hguc Powered GM work'n'progress
Posted by bsyamato on Wednesday, March 16, 2011 8:49 PM

mmh..

One of few exceptions between my zeon army

Ok this way i'll try to do no modding on this (only if indispensable) Super Angry

The mech come from 0083 oav .

The kit is pretty nice and have a great posability.

Unfortunately the parts division don't aid the painting for movable parts, so the only mods needes is focused on this.

Here the snapped and dusted kit (brought 2 or 3 years ago)
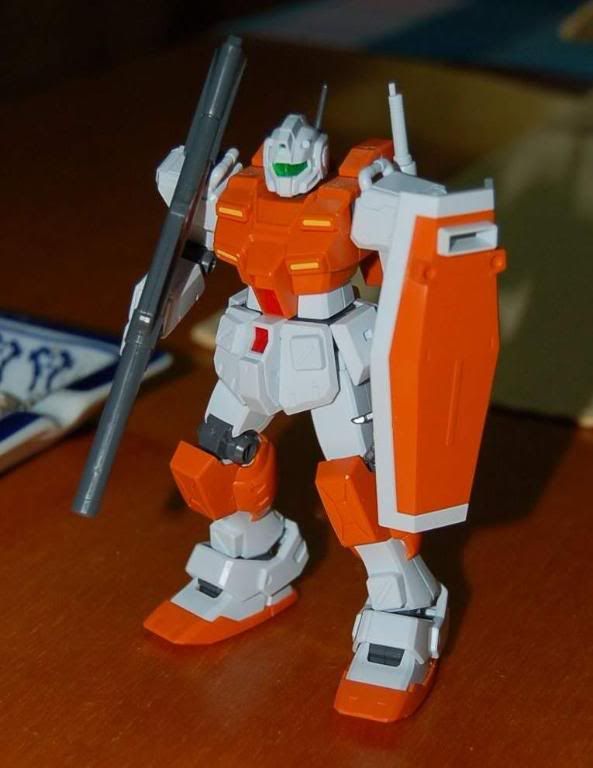
Photobucket

Starting the disassembling

Photobucket

Photobucket

The head is great:

Photobucket

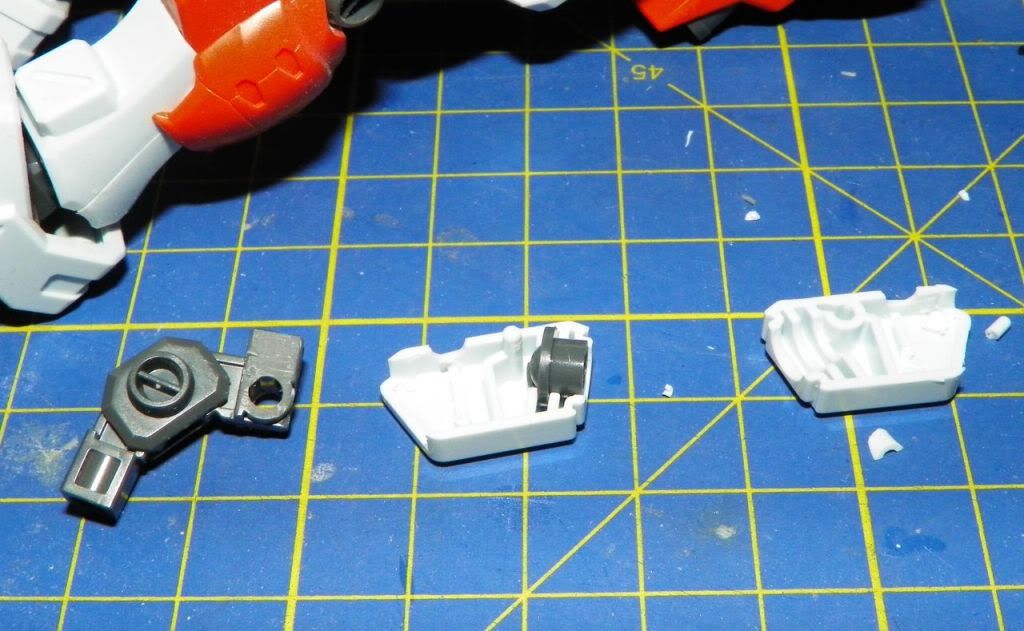
On the arms the first obstacle, the elbow is fixed between foearms by a ilynder pin:
Photobucket

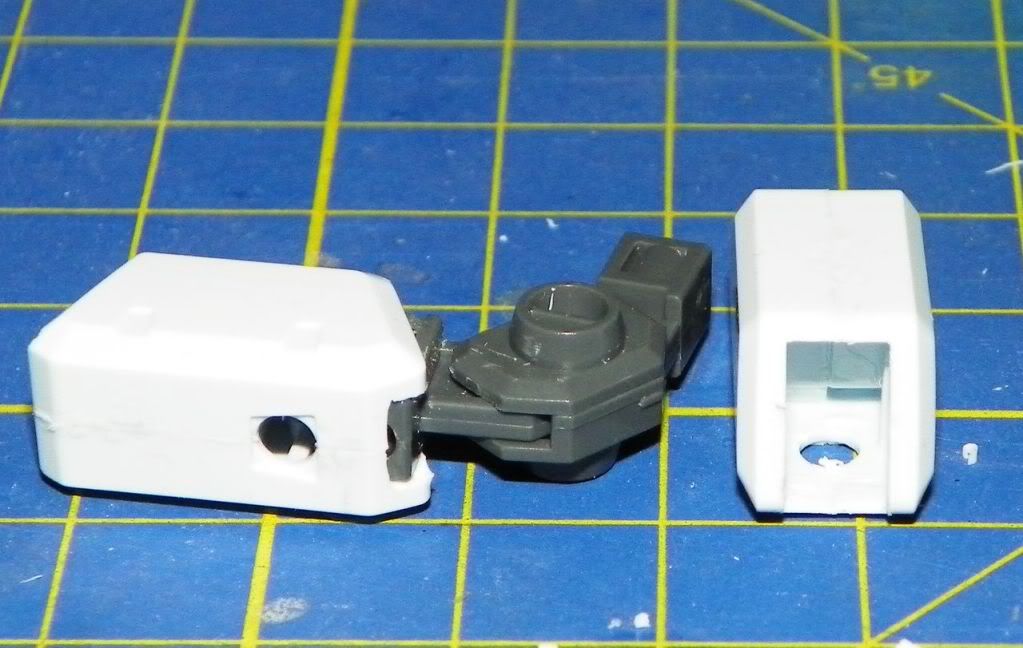
I semoved ll pins and blocks to allow a separate painting of differents pieces
Photobucket

the same elbow joint need some adjust, no pcb parts inside, the movement is done by the black abs plastic that rubs with other abs piece. i'll try to resolve this putting a little washes betwueen the pieces, this weekend..

At the next Black Eye


JOIN OUR COMMUNITY!

Our community is FREE to join. To participate you must either login or register for an account.

SEARCH FORUMS
FREE NEWSLETTER
By signing up you may also receive reader surveys and occasional special offers. We do not sell, rent or trade our email lists. View our Privacy Policy.