SEARCH FINESCALE.COM

Enter keywords or a search phrase below:

Revell 1/72 Schnellboot S-100 with Flak 38 WIP

8504 views
30 replies
1 rating 2 rating 3 rating 4 rating 5 rating
  • Member since
    July 2010
  • From: Tempe AZ
Revell 1/72 Schnellboot S-100 with Flak 38 WIP
Posted by docidle on Sunday, August 2, 2020 11:18 PM

Whilst and at the same time as I’m finishing the Elco PT Boat and the USS Arizona I’m adding the S-100 Schnellboot to my insanity.

I’m building the Revell 1/72 Schnellboot S-100 with Flak 38. I have both the Griffon PE set although not the top of the line one as well as the Eduard PE set. I’ll probably not use the ArtWok decking as it doesn‘t give any depth to the model deck. I have a boatload of 3D parts from Shapeways that cost a pretty penny to say the least and way over the cost of the model to say the most.

I’m posting my obligatory sprue shots first. I haven’t photographed all the extra 3D gear I’ve purchased over the years but I’ll get that done tomorrow along with a shot of the reference materials I’ll be using. I’m tempted to over gun this puppy although I’ve not found any references so far about the Kriegsmarine doing this with their boats, but what the heck! I’m thinking of using the Flak gun in the center position and using the 40mm on the stern. The mines will be used as well as depth charges, one rack of each.  I’ll also be mixing and matching decals just for grins and because I want to.

So without further ado, let’s do this thing,

Steve


  • Member since
    July 2013
Posted by steve5 on Monday, August 3, 2020 12:18 AM

definitely pulling up a chair for this one steve , your really going the whole hog on it !


  • Member since
    December 2002
  • From: Bury St Edmunds, Suffolk, England
Posted by Bish on Monday, August 3, 2020 2:46 AM

Watching. Looking forward to seeing what you do with it.

I am a Norfolk man and i glory in being so


On the bench: Airfix 1/72nd Harrier GR.3/Fujimi 1/72nd Ju 87D-3

  • Member since
    July 2010
  • From: Tempe AZ
Posted by docidle on Wednesday, August 5, 2020 4:13 PM

Bish and Steve,

Thanks for following along gentlemen. Hopefully I can do half as well you did on your S-Boat Bish.

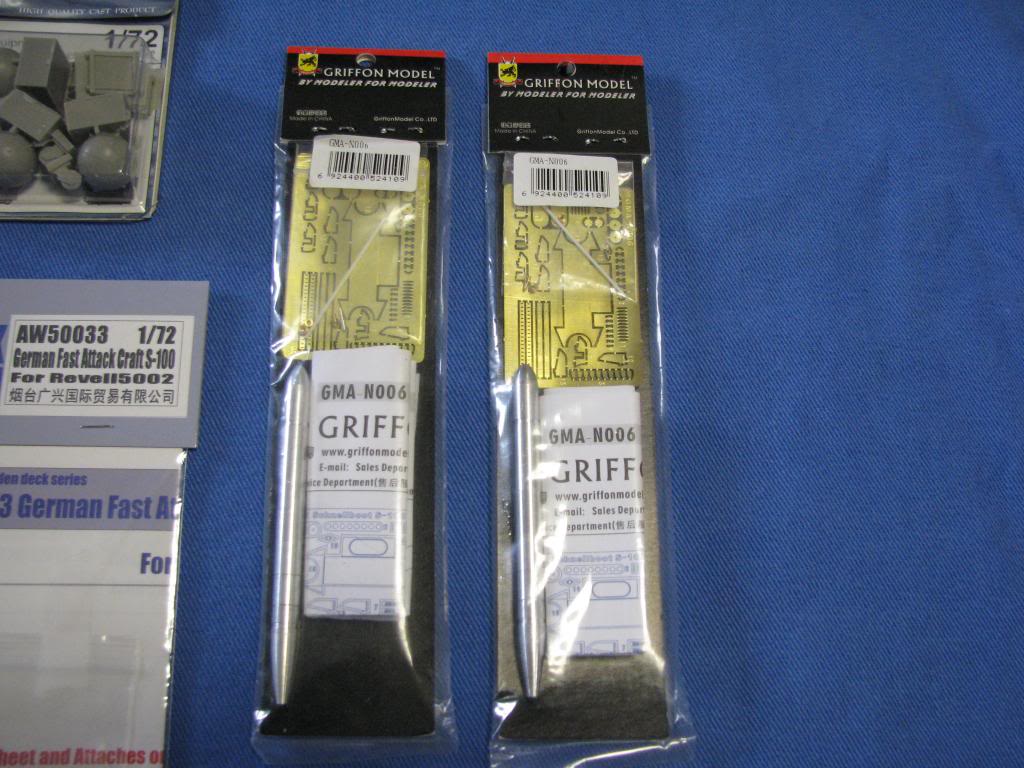
As promised, here is the reference materials I'm using as well as the 3D goodies. The PE and 3D gear cost WAY more than the kit itself, so if anyone is thinking of building this kit, it really does look nice right out the box. I really need to get my Advanced Modeler Syndrome under control.

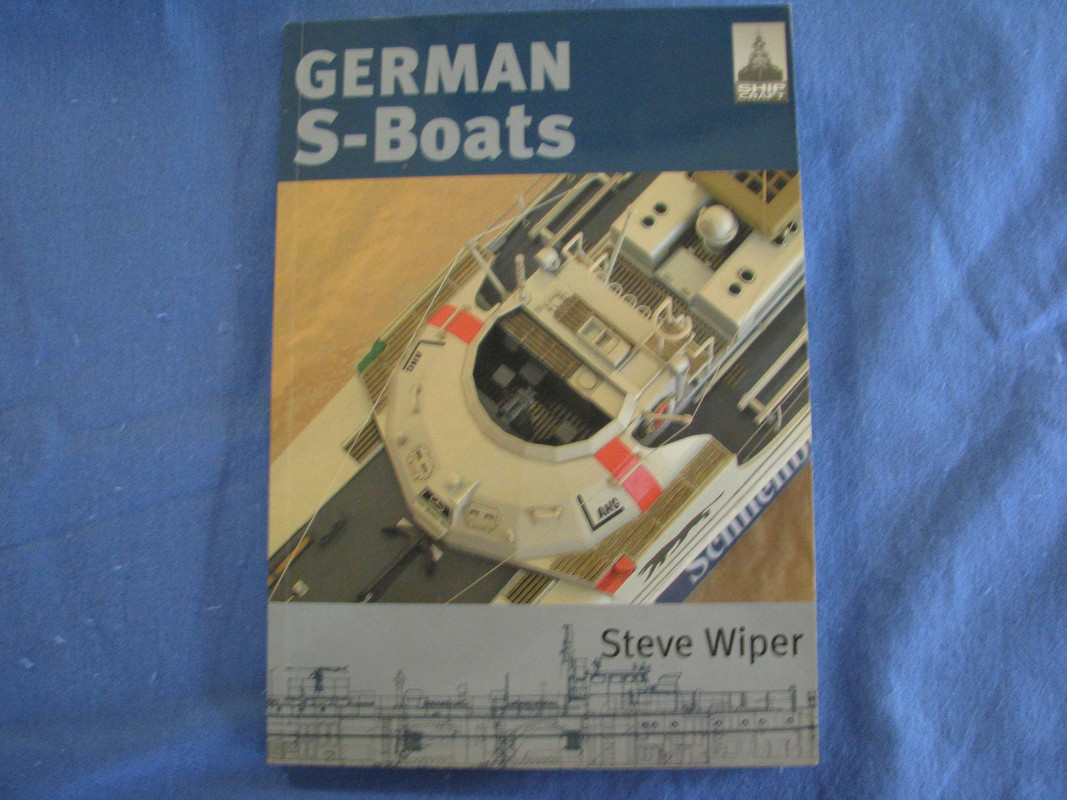
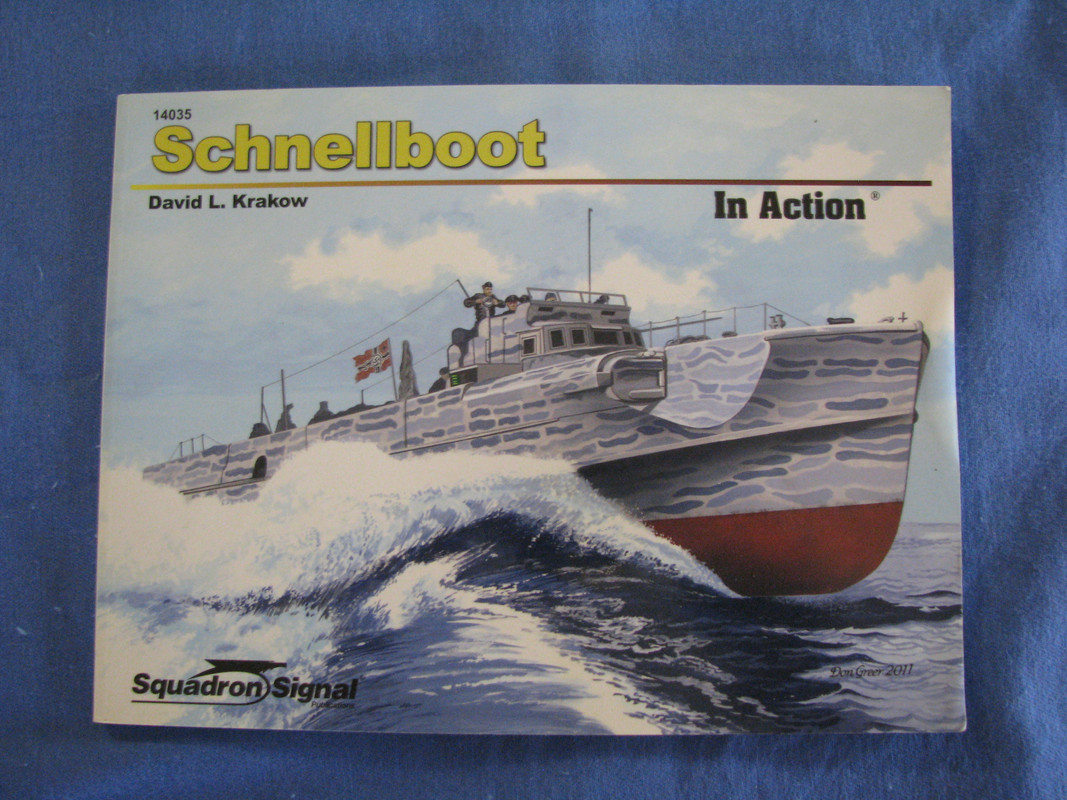
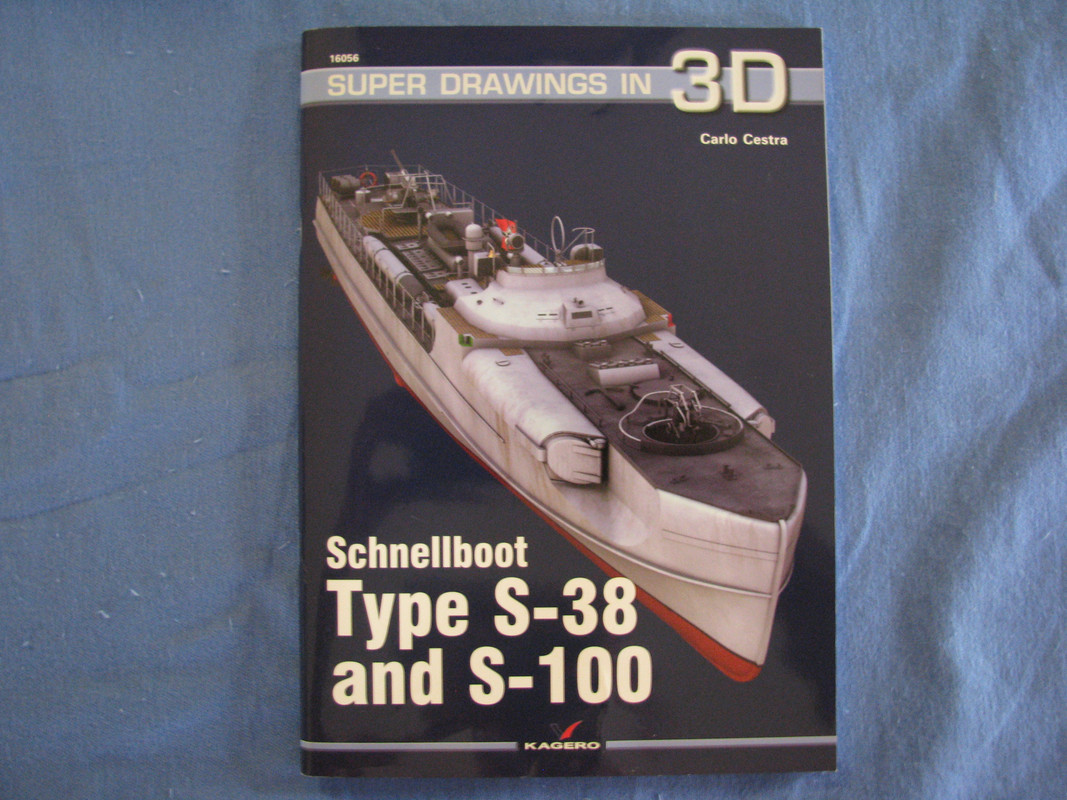
So, here are the reference books and there are numerous pictures on the net too.

Steve

All right, here are the 3D extras from Shapeways.com. They are from the designer IRON-Models. He has a great selection of 1/72 as well parts for the Italeria 1/35 monster.

https://www.shapeways.com/shops/iron-models 

"Ye have been warned, there be monsters lurking here."

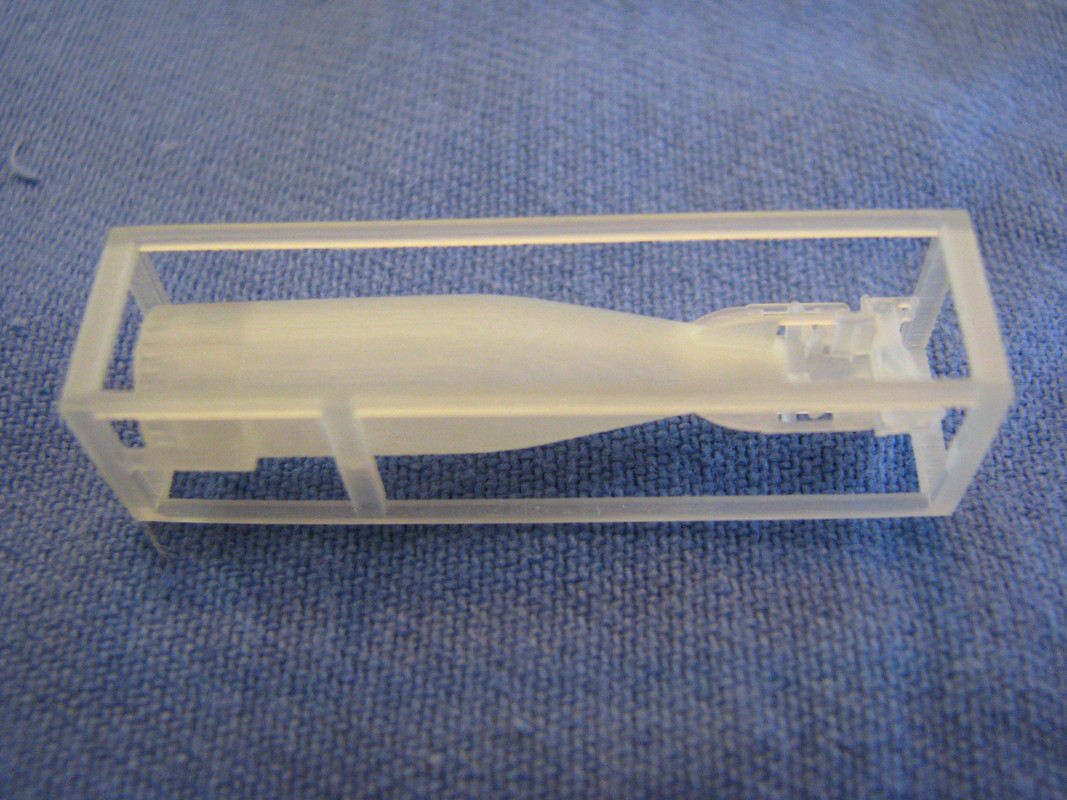
Here are the replacement torpedos. I bought these since later I'll show parts that I think will be a cool idea too. I originally purchased the Griffon metal torpedos which are beautiful but the propellers are really a bear to attach.

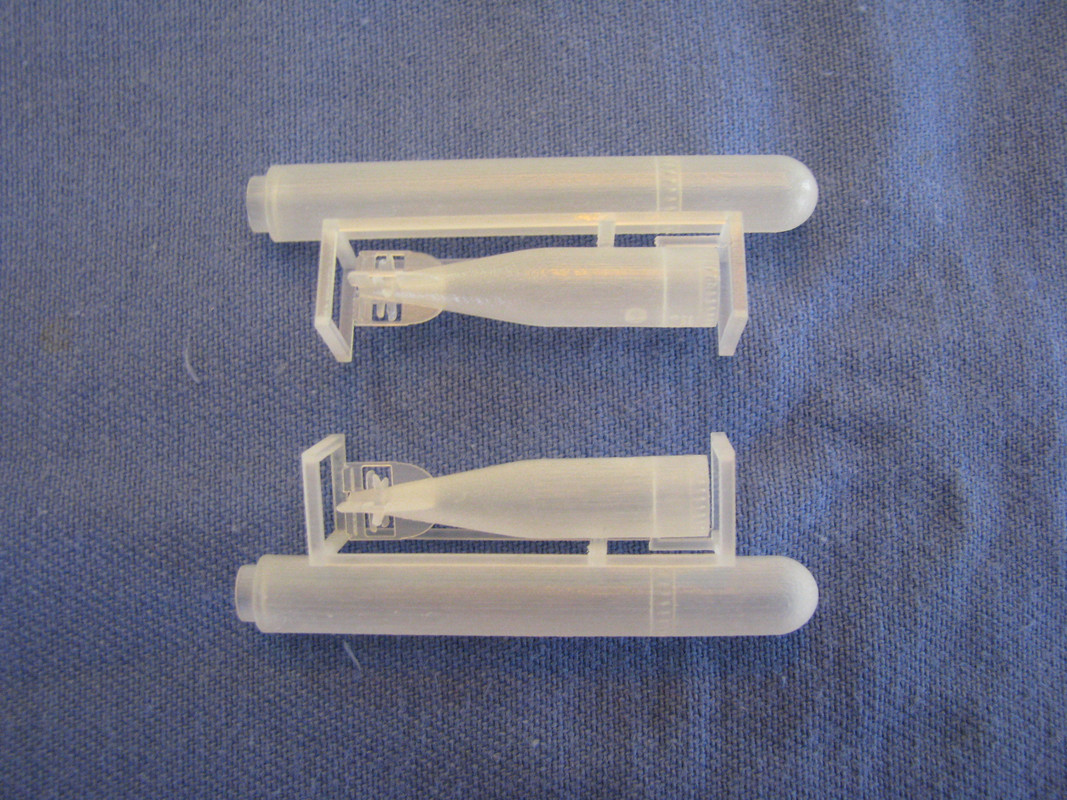
Next up are the torpedo tubes. It's difficult to see but the hatch to one is separate so that I can attach the rear end of one of the torpedos to it as if it is being loaded.

I'm planning on opening up the forward ends of the torpedo tubes so that you can see the last torpedo already loaded. Which will be one of the metal ones.

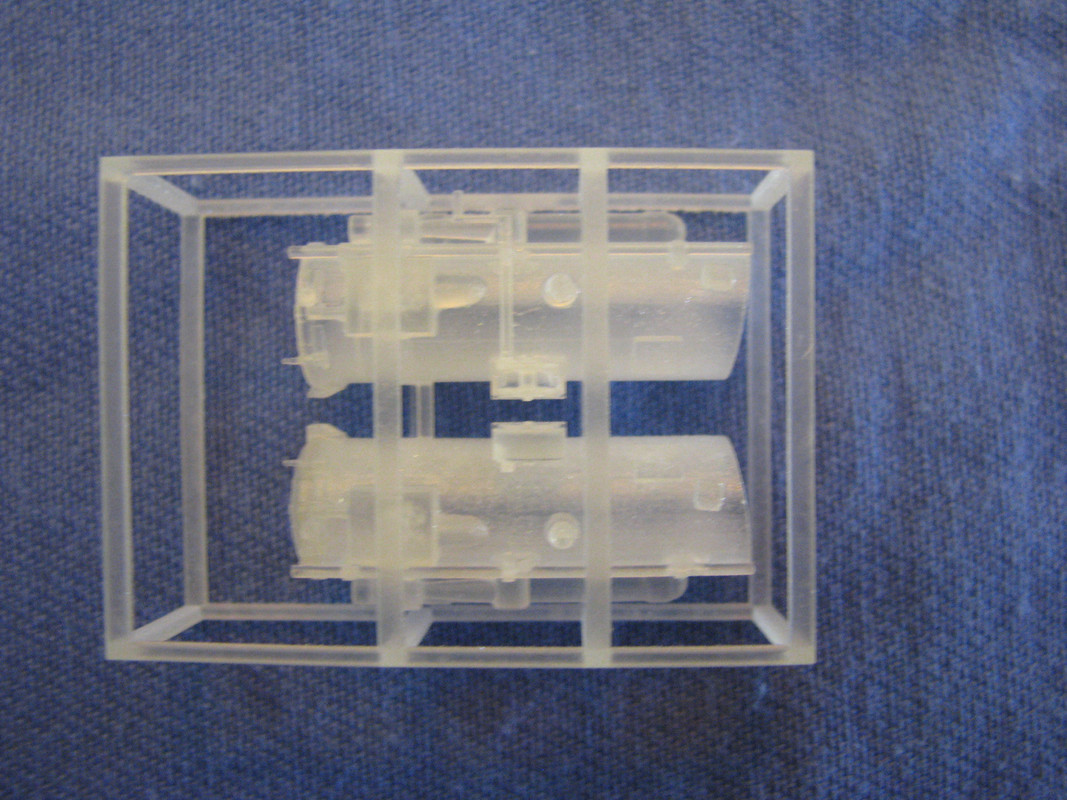
Next up are the smoke making cylinders. It's kinda hard to see but they are way more detailed than the kit parts.

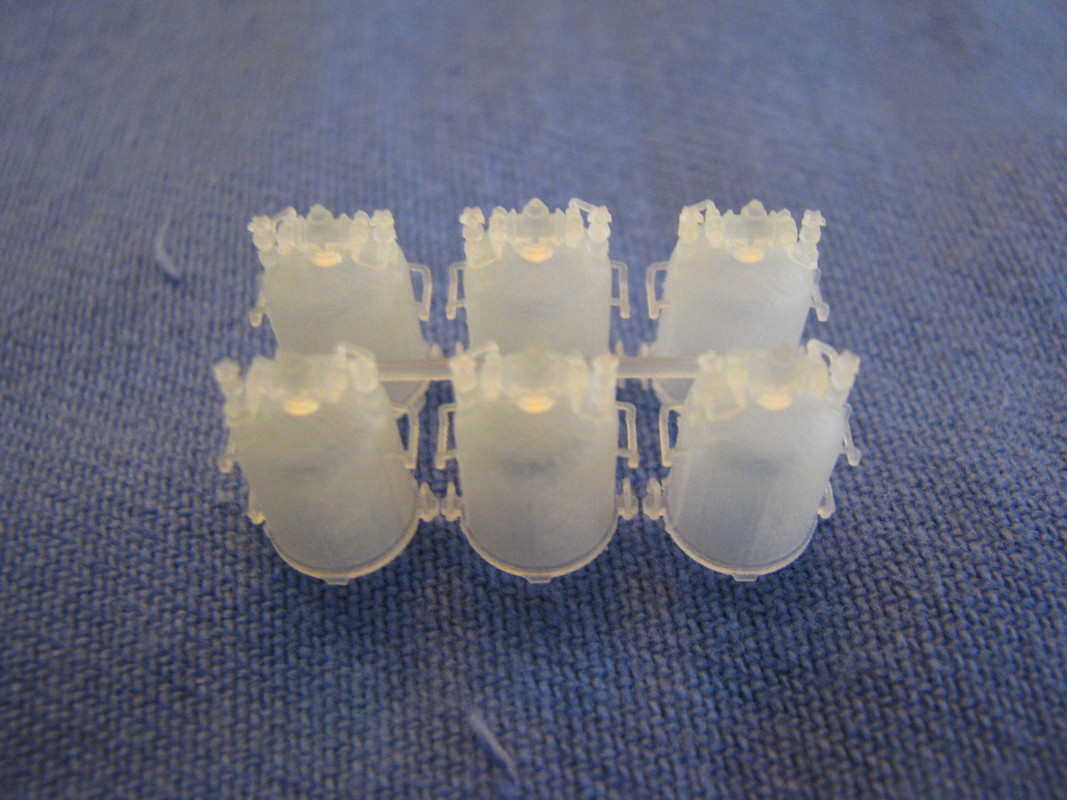
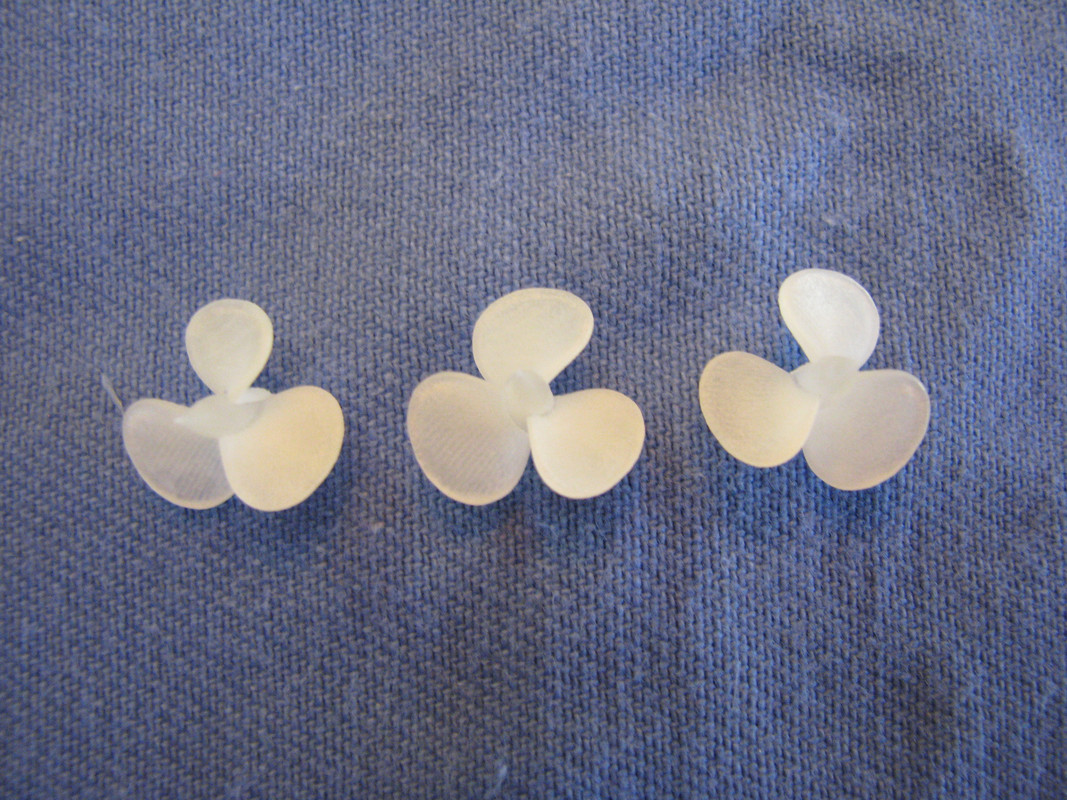
Here are the replacement propellers. If I was only going to change one thing on this model, it would be to change the kit propellers. They are really off. I'll show a comparison later when I get to that stage.

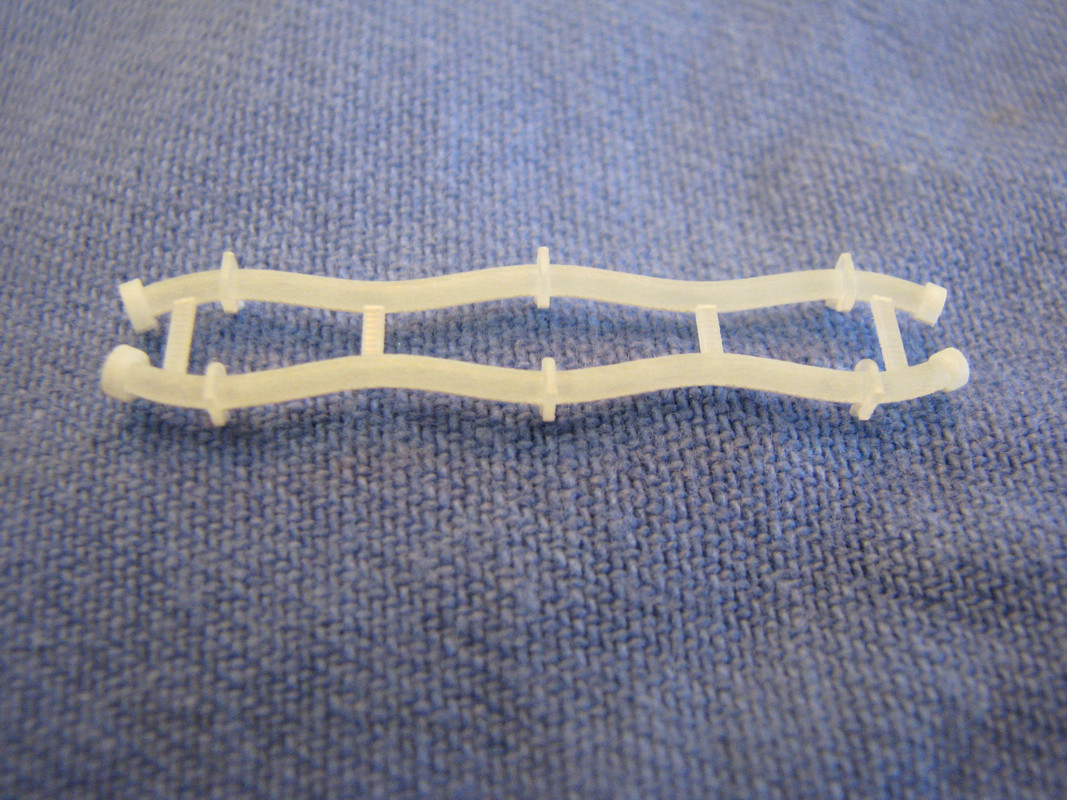
Here are the fuel hoses to replace the ones in the kit. A VERY minor detail but if you have Advanced Modeler Syndrome like I do,  then you'll understand. Hmm

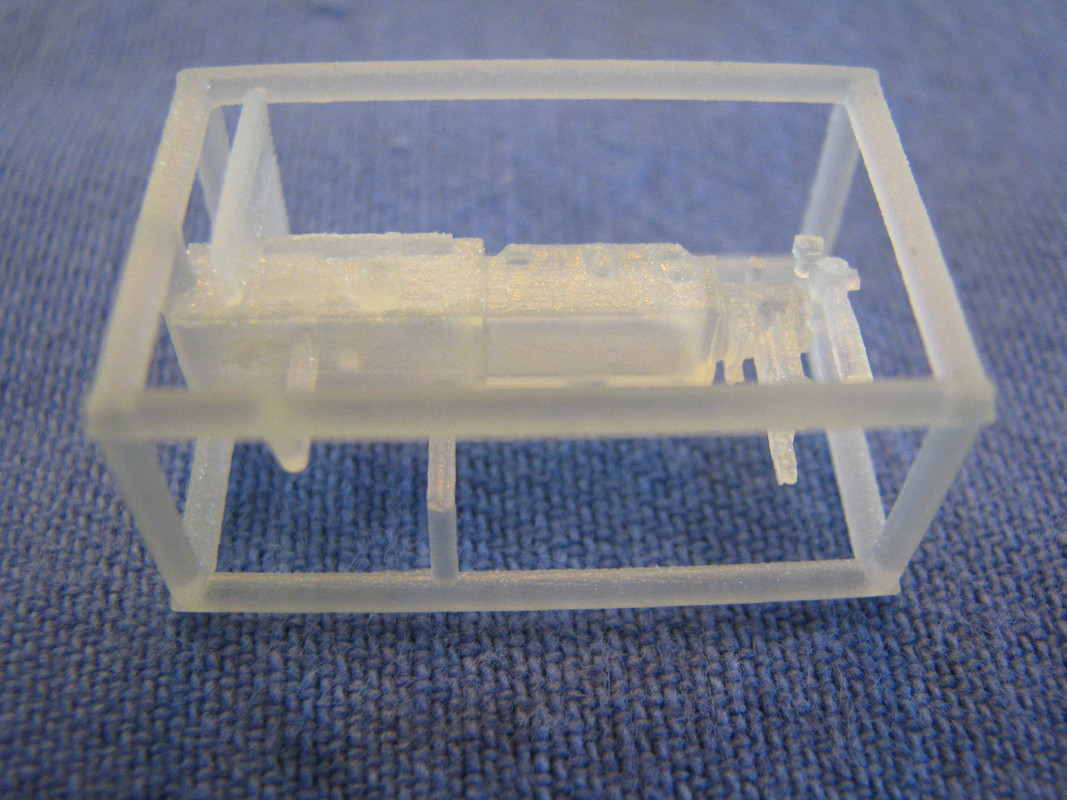
And finally we have the Targeting Computer. It's difficult to see the beautiful detailing but when it's painted up it will look fabulous.

As I said earlier, all these parts are not expensive by themselves but when you add them up... well you get it. Now let's see if I can justify all these goodies by building this into at least a passable model.


  • Member since
    July 2010
  • From: Tempe AZ
Posted by docidle on Saturday, August 8, 2020 10:12 PM

A bit of actual modeling update. The kit has bulges and such for induction and ejection ports. Some under the waterline and others above. There are two ports on both sides of the hull forward that are completely missing that I plan on creating.

I’ve finished drilling out the kit holes but need to do add the others. To give depth to the ports/holes I added tubing behind them and then painted the interiors Black.

I used Evergreen Tube #225 - 5/32“ (4.0 mm) for the smaller holes and #227 - 7/32“ (5.5mm) for the larger. The tiny holes were drilled but no tubing behind them. In the Kagero book on page 7 and on the drawings, there are two smaller holes just under the waterline forward on both sides. They look like they would use the #225 tubing.

Steve


  • Member since
    July 2010
  • From: Tempe AZ
Posted by docidle on Tuesday, August 18, 2020 5:11 PM

A small update but well worth the effort.

Using the fold out plans from the Kagero book, I was able to locate and drill out the last holes at the bow section needed on this boat. I then used my Chopper to slice little tiny frames and glue them on. I REALLY like the Chopper by the way, it has proven to be well worth the cost.

And finally I glued the hull halves together, although I am now wishing that I hadn't. I'm planning to drill out the forward part of the torpedo tube hatches and add tubing behind them to add depth and to locate one of the torpedos inside. It probably would have been immensely easier to drill these with the hull seperated...

Steve


  • Member since
    July 2010
  • From: Tempe AZ
Posted by docidle on Tuesday, August 25, 2020 5:06 PM

I've been working on the base so that I know how I'm going to mount this boat. I usually hate the pedestals supplied by the kit manufacturers so I mount my builds in various ways. If I'm spending time on building a kit I want to make sure the presentation is worth the time and effort. 

Anyway, the keel on this Schnellboot is thin and changes width from the stern to the bow, so regular pedestals wouldn't work. Neither would thin Brass rods with nuts and bolts to hold down the rig because I was afraid that I would split the keel if I tried to drill it. Therefore I bought a plank of Red Oak and routed the edges for the base. I then picked up some Basswood square dowels for supports. After measuring and remeasuring and squaring up the whole thing I came up with the amount dowels I would need on and started cutting and sanding. You'll note the lines I drew on the base and on each dowel.

After gluing all of the first course I let it dry overnight. The next day I laid the boat down and used rubber bands to position the keel over the centerline. This was "interesting" to say the least and a pain to say the most.

Again, because of the thinness of the keel I couldn't drill holes for nuts and bolts therefore I couldn't have just one course of support. I also purchased square dowels that were half the size of the first course and fitted the depth of the keel. Again these were measured and cut, sanded and then glued down like the first course.

Starting from the stern and then the bow, I glued them on one at a time, first port then starboard until they met in the middle. Why I did it this way is so that I could place the smaller dowels up against the keel and glue them down to secure the boat.

I'm sure there is a simpler way to do this so here are the pictures as a warning for anyone thinking of mounting this model in the same fashion. Enjoy.

Steve


  • Member since
    July 2013
Posted by steve5 on Tuesday, August 25, 2020 7:54 PM

gee I love watching you work steve , preparation is key . should look great when finished .


  • Member since
    February 2004
Posted by dhenning on Tuesday, August 25, 2020 7:56 PM

Very nice!  Much better time to make the fitting and modifications then when you are much further along.

  • Member since
    October 2019
  • From: New Braunfels, Texas
Posted by Tanker-Builder on Wednesday, August 26, 2020 8:55 AM

Hi Steve!

     Do you have a contour tool? You could put two solid wood bulkheads inside the vessel No higher than the waterline. 1/4 " thick and shaped to the inside of the hull. Epoxy in place. Drill Hole aproximately 1/8" all the way through. Drill through bottom of base.Put bolt through all and tighten nuts.

     That's one way. The other is do the same and Using an All thread rod the right size Thread into lamp finials and tighten nut inside vessel and mount deck. Done! I do like what you have done though. Age the wood and on the bottom piece age it to appear to be concrete for the drydock bottom. Don't forget to put Stabilizer wedges That would be about an 1/8" inward of the side of the boat. There would be at least eight. Mostly under the engine room and mid ship locations. and blocks under the hull outboard of the keel near the lower bilge curve. Four on each side.

  • Member since
    July 2010
  • From: Tempe AZ
Posted by docidle on Saturday, August 29, 2020 7:45 PM

Thanks guy, I appreciate the kudos. Now I have to figure out what color to stain it. I presently leaning towards Walnut to give the beams a creosote look.

Steve


  • Member since
    July 2010
  • From: Tempe AZ
Posted by docidle on Saturday, August 29, 2020 7:51 PM

Tanker-Builder

Hi Steve!

     Do you have a contour tool? You could put two solid wood bulkheads inside the vessel No higher than the waterline. 1/4 " thick and shaped to the inside of the hull. Epoxy in place. Drill Hole aproximately 1/8" all the way through. Drill through bottom of base.Put bolt through all and tighten nuts.

     That's one way. The other is do the same and Using an All thread rod the right size Thread into lamp finials and tighten nut inside vessel and mount deck. Done! I do like what you have done though. Age the wood and on the bottom piece age it to appear to be concrete for the drydock bottom. Don't forget to put Stabilizer wedges That would be about an 1/8" inward of the side of the boat. There would be at least eight. Mostly under the engine room and mid ship locations. and blocks under the hull outboard of the keel near the lower bilge curve. Four on each side.


Tanker,

I got the idea for getting a bolt through the hull but I still worried about cracking the keel itself. I've used plastic or wood blocks on the bottom of hulls before to give a better connection for the hardware but still wary about the keel.

Now on placing wedges, etc... I'm going to need a visual to figure out everything you said! I was just thinking of staining the wood and calling her done instead of really doing a diaroma of a dry dock, although it would look VERY cool.

Steve


  • Member since
    July 2010
  • From: Tempe AZ
Posted by docidle on Saturday, August 29, 2020 7:52 PM

Next up are the torpedo tubes. I'm planning on drilling out holes at the forward end of the boat and then adding Evergreen tubing to replicate the tubes. I'm also planning on placing a torpedo in one of the tubes and having one being loaded in the other(see 3D additions).

The drilling of the boat doesn't have me too worried but drilling or using PE for the tubes exterior end is making me nervous.

Here is as far I've gotten. The tubes were cut and angled to fit the forward end and dry fitted to see if this crazy idea will work. I used the kit hatches to mark off the size of the hole to be drilled. I'll post more shots as I progress but any and all input would be appreciated.

Steve


  • Member since
    July 2010
  • From: Tempe AZ
Posted by docidle on Sunday, September 6, 2020 8:49 PM

Continuing with the torpedo tubes, I started small by attaching PE to the lids first. Not a big deal but a step forward.

Steve

Next I marked off the size of the hole needed to be drilled. Then again starting small and working up to a point where I needed to measure again. It's always easier to take away tthan trying to replace plastic that you've removed...

To make sure that I had the angles right and to further hone the openings, I started drilling small holes on the exterior portions of the tubes which are kit parts.

As you can see, I was making small holes and then digging out portions. You can also see that I made a mistake and drilled way to close to the edge and had to fill in with Perfect Plastic Putty. Measure twice, cuss once or more...

And so on to this point.

Getting closer to where I want to be. I had to file at an angle so that the torpedo tubes would allign.

Then dry fitting to see how much more I needed to remove from the hull.

Now to dry fit all the components to see how they fit together. The PE is for the facing around the exterior tubes.

Note that the opening is completely round.

Everything lines up and now I need to clean up the openings to make them smoother.

Next up will be surgery on two of the smoke gererators stands and then onto the bridge and more major surgery.


  • Member since
    July 2010
  • From: Tempe AZ
Posted by docidle on Thursday, January 21, 2021 2:09 PM

Trying to pick up from my model disaster, here are some pics of the PE work I've been doing lately to try and get back into my modeling groove.

I had to shave off the hump around the forward gun enplacement. Then lay in the PE.


  • Member since
    July 2013
Posted by steve5 on Thursday, January 21, 2021 2:28 PM

good to see you back steve. was really enjoying your build . your attention to detail is something else .


  • Member since
    July 2010
  • From: Tempe AZ
Posted by docidle on Thursday, January 21, 2021 2:31 PM

Thanks bud, it really does help.

Steve


  • Member since
    July 2010
  • From: Tempe AZ
Posted by docidle on Friday, January 22, 2021 4:47 PM

More PE to show. This is starting to catch up with all the PE I've been doing on the 1/200 USS Arizona and a heck of lot smaller!

It's going to be a shame to paint over all this beautiful Brass.

Steve


  • Member since
    July 2010
  • From: Tempe AZ
Posted by docidle on Monday, January 25, 2021 2:37 PM

And more PE work...

Steve


  • Member since
    July 2014
  • From: Philadelphia Pa
Posted by Nino on Saturday, February 13, 2021 2:56 PM

Steve, I have the "regular" S-100 Schnellboot, still unbuilt.  I never considered getting the PE set for it but these brass pieces sure look good.  Watching your work has me reconsidering this PE option.

     Have you had any issues with the PE fitting?

       Jim.


  • Member since
    December 2002
  • From: Bury St Edmunds, Suffolk, England
Posted by Bish on Saturday, February 13, 2021 3:07 PM

Jim, while the kit itself is nice, personally i think the PE take it to anotehr level. I did the same kit you have last years and used the Griffon Premium set. I had a couple of issues, but nothing a little head scratching couldn't over come.

I am a Norfolk man and i glory in being so


On the bench: Airfix 1/72nd Harrier GR.3/Fujimi 1/72nd Ju 87D-3

  • Member since
    July 2014
  • From: Franklin Wi
Posted by Bakster on Sunday, February 14, 2021 2:37 PM

Hey Steve, I just came across this build. It is great to see you building and to see what you have done thus far. It looks great. Nice PE too.

My FSM email notification is still broken, going on over a year. Unfortunately, when you guys update I won't know about it. I will try to check from time to time.

Keep up the good work, sir.

  • Member since
    July 2010
  • From: Tempe AZ
Posted by docidle on Thursday, February 25, 2021 3:44 PM

Nino

Steve, I have the "regular" S-100 Schnellboot, still unbuilt.  I never considered getting the PE set for it but these brass pieces sure look good.  Watching your work has me reconsidering this PE option.

     Have you had any issues with the PE fitting?

       Jim.

 Jim,

Bish did a really great WIP on the regular S-100 boat. About the only difference between the two kits is the addition of the Quad 20mm Zwilling Flak aft instead of the 37mm Flak gun.

I'm using both the Eduard and Griffon regular PE sets. The difference between the super sized Griffon package and the regular sized set is mostly the Midship wooden section of the deck. I'm not using any of the PE wooden replacements becuse I'm not a big fan of them. Mainly they don't have enough 3d effect for me and i know i can pop them out with paint. 

The only real issues are that some of these pieces are REALLY small and it's been tough with my hands to get them bent and placed. So, not too many problems. It does seem a shame to cover all that beautiful brass! But i did...

Hopefully this helps,

Steve

Here's a link to Bish's WIP

http://cs.finescale.com/fsm/modeling_subjects/f/7/t/184299.aspx


  • Member since
    July 2010
  • From: Tempe AZ
Posted by docidle on Thursday, February 25, 2021 3:52 PM

Al, Steve, Francisco, Bakster

It's great to hear from you! How is the Icarus going? Last time I looked it was looking fantastic bud. Thanks for checking in.

It's been tough to get to the workbench but I'm trying to get there even to do just a little bit.

Steve


  • Member since
    July 2010
  • From: Tempe AZ
Posted by docidle on Thursday, February 25, 2021 8:15 PM

Alright, here's a small update as usual.

I finally got up the nerve to get the center prop installed. The replacement props are 3D printed and they look great. But know that for the center prop you're going to have to do some surgery and brother, they ain't cheap! The main thing to remember is measure, measure and then measure again before surgery. The old addage about measuring twice, cut once is great advice. I only ended up cussing about 40 times or so, so not bad.

The first picture shows the difference between the kit supplied props and the 3D props. The kit props on the top, are of the wrong shape big time.

And here's a side by side view with the kit props on the left.

The center prop needs to connect to the center rudder as shone here.


So it's time to break out the calipers. This is the measure twice and cuss multiple times. Because the 3D printed props are all have the tail. Also, it's important to note that one of the props is the reverse of the other two. This is the way it supposed to be, you just have to remember that the center and port prop are the same while the starboard prop is the different one. This picture also shows the suregery on the tail.

I cut the tail off a bit short so that I could file the difference as needed. It's always easier to remove than to add. In this case impossible except to buy a new set.

After numerous dry fittings and filing I got to here. As you can see, there is still clean up to do, but I think that it came out successfully.

After cleaning up the mess, I'll install the two outer rudders and maybe get some paint on the hull. Now it's back to the fore and aft decks and bridge.

Steve


fox
  • Member since
    January 2007
  • From: Narvon, Pa.
Posted by fox on Friday, February 26, 2021 3:47 PM

Looking good Steve!!!

Jim Captain

Stay Safe.

 Main WIP: 

   On the Bench: Artesania Latina  (aka) Artists in the Latrine 1/75 Bluenose II

I keep hitting "escape", but I'm still here.

  • Member since
    July 2014
  • From: Franklin Wi
Posted by Bakster on Sunday, February 28, 2021 2:08 PM

Hey Steve, Icarus is done. Just building the base now. 

As always Steve, I love your work.  Watching.

  • Member since
    July 2010
  • From: Tempe AZ
Posted by docidle on Thursday, March 25, 2021 5:25 PM

Thanks for checking in Jim and Steve!

Just a really small update. Haven't been at the bench lately, my hands are giving me fits again.

This just shows the clean up, putting and repriming on the center prop housing.

Enjoy,

Steve

Sorry, this one is a bit out of focus


  • Member since
    October 2019
  • From: New Braunfels, Texas
Posted by Tanker-Builder on Thursday, March 25, 2021 5:32 PM

Wait a Minute!

        Is that an Alien in the window from " War of The Worlds"? Sure looks like one to me. Except maybe he's Sick, The lobes are not the different colors that indicates a healthy Alien.

 Nah! Just kidding.That is some great P.E. work. Now, I would have used Heavy Sprue Glue as a filler on that center rudder bracing fitting.

  • Member since
    July 2010
  • From: Tempe AZ
Posted by docidle on Sunday, April 25, 2021 9:42 PM

TB,

These are not the aliens you’re looking for...Alien

Looks like I forgot to add the cleaned up and primed pictures.

I’ll add some this week. Haven’t been able to do much at the workbench, my hands are giving me fits.

Steve 


JOIN OUR COMMUNITY!

Our community is FREE to join. To participate you must either login or register for an account.

SEARCH FORUMS
FREE NEWSLETTER
By signing up you may also receive reader surveys and occasional special offers. We do not sell, rent or trade our email lists. View our Privacy Policy.